My friend’s five-year-old took one look at the cookie tray and whispered, “It’s a little black cat. Can I keep it forever?” I mean, that’s the reaction you hope for, right? Not a sugar-crazed grab, but a moment of pure, delighted recognition. That was the first Halloween I brought these adorable black cat sugar cookies to a party, and they nearly upstaged the costumes. I’d spent the week testing royal icing consistencies and trying to get the tail curve just right, and honestly, seeing that little kid’s face made every messy piping bag worth it. These cookies are more than just a sweet treat; they’re a tiny edible craft project that somehow makes everyone feel like a kid again. They started as a whim—I was looking for something cuter than a standard pumpkin cookie—and they’ve become my go-to Halloween contribution. There’s something about a cookie that looks back at you that makes the whole holiday feel a little more magical.
Why You’ll Love This Recipe
These aren’t just any sugar cookies. They’re the kind that makes you the favorite person at the party, the bake sale, or your own kitchen table. I’ve tested this recipe through several Halloweens, tweaking the bake time and the icing consistency until everything clicked. Here’s why they work so well.
- Simple Ingredients: You likely have most of the dry ingredients in your pantry right now. No weird extracts or specialty flours needed for the cookie base itself.
- Perfect for Halloween: These cookies look like they belong at a spooky celebration. They’re cute without being creepy, which is a hard balance to strike for a Halloween treat.
- Crowd-Pleaser: Kids and adults both go for these. Something about the cat shape is universally charming.
- Unbelievably Delicious: The cookie is a classic, soft-baked sugar cookie with a slight crisp edge. The royal icing hardens just enough to give a satisfying snap, but it’s not rock hard.
- Fun Activity: Decorating these is half the fun. It’s a perfect low-stress activity for a Halloween weekend afternoon.
What makes this version different? It’s the balance. The cookie isn’t too sweet, so the icing doesn’t push it over the top. I use a tiny bit of almond extract in the dough—it’s a secret weapon that makes the flavor feel more complex and “bakery-like.” And the icing technique? It’s designed to be forgiving. You don’t need a steady surgeon’s hand to make these cats look adorable. A little wobble in the line just adds character.
What Ingredients You Will Need
This recipe relies on a handful of core baking staples. The magic is in how they come together. Each ingredient has a job, from providing structure to adding that perfect tender crumb.
For the Sugar Cookie Dough
- Unsalted butter, softened: 1 cup (2 sticks or 226 grams). Softened to room temperature is key—it needs to be pliable but not melted. I like using a good quality European-style butter for extra richness, but standard unsalted works perfectly.
- Granulated sugar: 1 cup (200 grams). This gives the cookies structure and sweetness.
- Large egg: 1, at room temperature. A room-temperature egg emulsifies into the butter-sugar mixture much better than a cold one, creating a smoother dough.
- Vanilla extract: 1 teaspoon. Pure vanilla is best for flavor depth.
- Almond extract: ½ teaspoon. This is my little trick. It doesn’t taste like almonds; it just makes the cookie taste more… cookie-like. Trust me on this one.
- All-purpose flour: 2 ½ cups (312 grams). Spoon and level your flour—don’t scoop directly from the bag or you’ll end up with dense cookies.
- Baking powder: ½ teaspoon. This gives the cookies a slight lift so they aren’t flat and hard.
- Salt: ¼ teaspoon. Balances the sweetness and enhances the other flavors.
For the Royal Icing
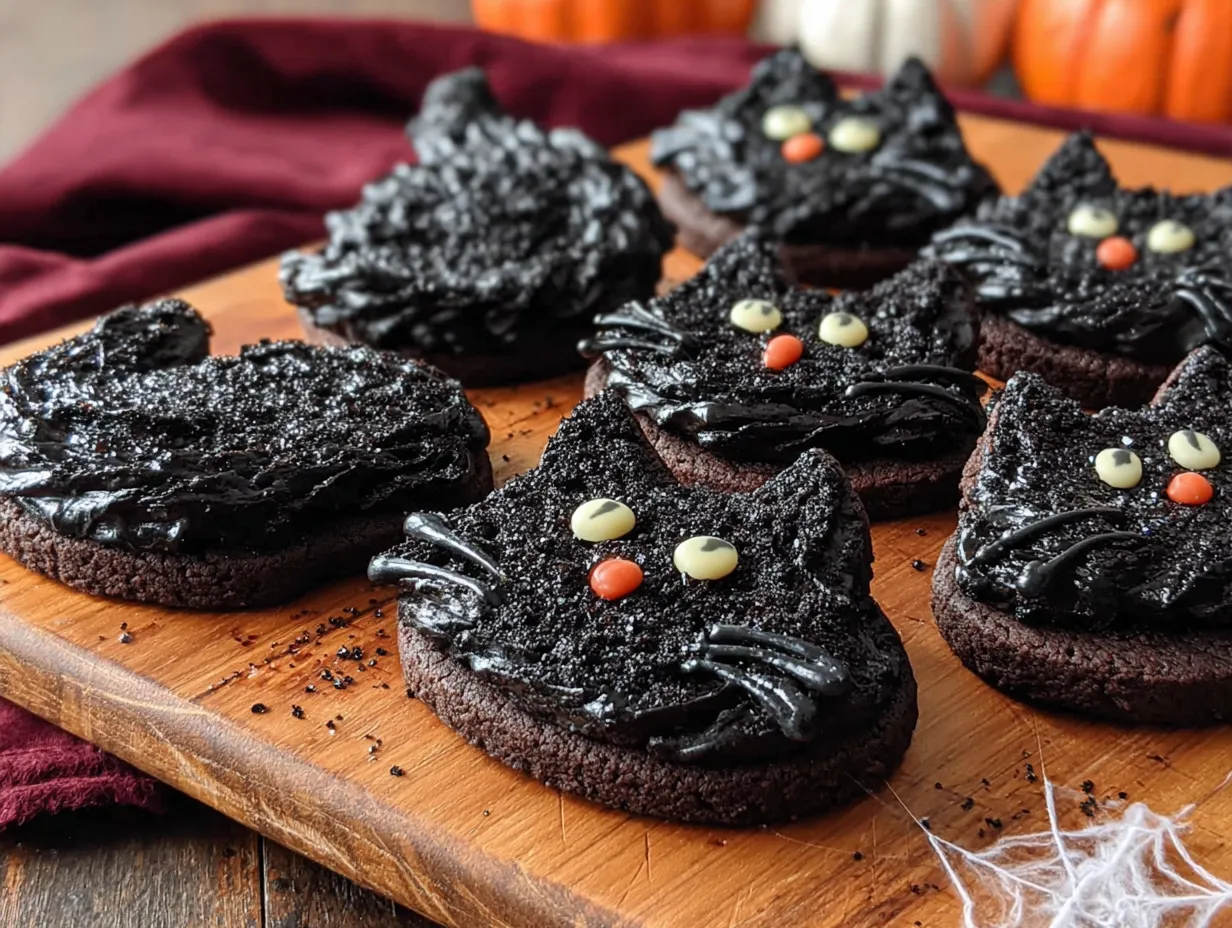
- Powdered sugar: 2 cups (240 grams). Sift it if you can—this prevents lumps in your icing.
- Meringue powder: 2 tablespoons. This is what gives royal icing its structure and hard finish. You can find it in most baking aisles or online. (I prefer the Wilton brand for consistency).
- Water: 3-4 tablespoons. You’ll add this slowly to get the right consistency.
- Black gel food coloring: 1-2 teaspoons. Liquid coloring will mess with the icing’s consistency, so stick with gel. You’ll need a good amount to get a true, deep black.
- Orange and white gel food coloring (optional): For decorating details like pumpkin faces or white accents.
Equipment Needed
You don’t need a professional bakery setup, but a few specific tools make the job much easier. I learned that the hard way after trying to freehand a cat face with a toothpick—it looked like a sad, blurry blob.
- Black cat cookie cutter: This is non-negotiable. You can find them online or at craft stores around Halloween. Get one that has a clear head, ears, and tail shape.
- Stand mixer or hand mixer: For creaming the butter and sugar. A hand mixer works fine, but a stand mixer makes the process more hands-free.
- Rolling pin: A standard rolling pin is fine. I prefer a French-style tapered pin for more control, but any kind works.
- Parchment paper or silicone baking mats: These prevent sticking and make clean-up a breeze.
- Baking sheets: Heavy-duty ones are best to prevent the bottoms from burning.
- Piping bags and small round tips (size 2 or 3): For outlining and flooding the cookies. You can also use squeeze bottles for the flooding step.
- Cooling rack: Essential for letting the cookies and icing set properly.
Preparation Method
Let’s get into the nitty-gritty. Take your time with the dough—chilling it is the most important step for clean shapes.
- Make the cookie dough: In a large bowl (or the bowl of your stand mixer), beat the softened butter and granulated sugar together on medium speed until light and fluffy, about 2-3 minutes. You want it to look pale and airy. Scrape down the sides of the bowl.
- Add the wet ingredients: Beat in the egg, vanilla extract, and almond extract until just combined. Don’t overmix here.
- Combine the dry ingredients: In a separate bowl, whisk together the flour, baking powder, and salt. With the mixer on low speed, gradually add the dry ingredients to the wet ingredients. Mix until a soft dough forms. It will look crumbly at first, then it will come together.
- Chill the dough: Divide the dough in half, flatten each half into a disc about 1-inch thick, wrap tightly in plastic wrap, and refrigerate for at least 1 hour. This is crucial—cold dough doesn’t spread in the oven, keeping your cat shapes sharp. You can chill it for up to 3 days.
- Preheat and prep: When you’re ready to bake, preheat your oven to 350°F (175°C). Line your baking sheets with parchment paper.
- Roll and cut: On a lightly floured surface, roll out one disc of dough to about ¼-inch thickness. Keep turning the dough as you roll to prevent it from sticking. Use your black cat cookie cutter to cut out shapes. Re-roll the scraps once, but try to handle the dough as little as possible.
- Bake: Place the cookies about 1 inch apart on the prepared baking sheets. Bake for 8-10 minutes. The edges should be just barely golden brown. The centers might look a little puffy and soft—that’s perfect. Let them cool on the baking sheet for 5 minutes before transferring them to a wire rack to cool completely. Do not ice warm cookies!
- Make the royal icing: In a clean bowl, combine the powdered sugar and meringue powder. Add 3 tablespoons of water and beat on low speed until combined. Then beat on medium-high for about 4-5 minutes, until the icing is thick, glossy, and forms stiff peaks. If it’s too thick, add water a teaspoon at a time.
- Color and thin the icing: Divide the icing. Color the majority of it black using the gel food coloring. Keep a small amount white for eyes and accents, and maybe a tiny bit orange for a pumpkin detail if you’re feeling fancy. For the black icing, you need two consistencies: a thicker one for outlining (it should hold a stiff peak) and a thinner one for flooding (it should drizzle like lava and disappear into itself within 10 seconds). To thin the flooding icing, add water a few drops at a time.
- Decorate the cookies: Fit a piping bag with a small round tip (size 2) and fill it with the thicker black icing. Outline each cat cookie. Let the outline set for 5-10 minutes. Then, use a separate bag (or a squeeze bottle) with the thinner black icing to “flood” the inside of the outline. Use a toothpick to guide the icing into the corners (like the ears and tail tip). Tap the cookie gently on the counter to settle the icing.
- Add the face details: While the black icing is still wet, use the white icing to pipe two small dots for eyes. Use the orange icing to pipe a tiny pumpkin or a little nose. Add a small white dot to the eyes to make them look alive. Let the cookies dry completely, uncovered, for at least 6 hours or overnight. The icing needs to be completely hard to the touch before stacking.
Cooking Tips & Techniques
I’ve made plenty of mistakes with these cookies so you don’t have to. Here are the hard-won lessons.
- Don’t skip the chill: I once tried to rush the process and skipped the dough-chilling step. My cats came out of the oven looking like blobs with ears. The cold butter is what prevents spreading.
- Flour your cutter: Dip your cookie cutter in flour between cuts. It prevents the dough from sticking and tearing the shape.
- Patience with black icing: Getting a true black color takes more gel than you think. Start with a teaspoon, mix, and add more until you’re happy. It will darken slightly as it dries.
- Consistency is queen: If your flooding icing is too thick, it won’t settle into a smooth surface. If it’s too thin, it will run off the cookie. Test it on the side of the bowl—it should drizzle down and smooth out in a few seconds.
- Use a scribe tool: A scribe tool (or a simple toothpick) is your best friend for popping air bubbles in the wet icing and guiding it into tricky spots like the ears.
Variations & Adaptations
Once you have the basic black cat down, the possibilities are endless. I love switching it up to keep things fresh.
- White Cat Version: Skip the black coloring. Use white icing and add a few black dots for a tuxedo cat or a calico pattern. It’s a great option if you’re making a whole colony of ghostly white cats.
- Gluten-Free Option: You can substitute the all-purpose flour with a 1:1 gluten-free baking flour blend (like King Arthur’s or Bob’s Red Mill). The texture will be slightly more tender, but they still taste fantastic. Add ¼ teaspoon of xanthan gum if your blend doesn’t already include it.
- Pumpkin Spice Cats: Add 1 teaspoon of pumpkin pie spice to the dry ingredients. The warm spice flavor pairs beautifully with the simple sugar cookie base and makes them feel even more autumnal.
- Chocolate Cats: Replace ¼ cup of the flour with ¼ cup of unsweetened cocoa powder. The cookies will be a dark chocolate base, which means you can use a bright white or orange icing for a stunning contrast. It’s a great way to use the same cutter for a completely different look.
Serving & Storage Suggestions
These cookies are best served at room temperature. The royal icing should be completely set—hard and shiny—which makes them easy to handle and stack.
- Serving: Arrange them on a platter with some orange and black sprinkles scattered around for a festive look. They’re perfect for a Halloween party, a school bake sale, or just a fun weekend project with the kids. They also make excellent, edible party favors if you wrap them in cellophane bags with a twist tie.
- Storage: Store the fully decorated cookies in an airtight container at room temperature. Place a sheet of parchment paper between layers to prevent the icing from scratching. They will stay fresh for up to 2 weeks—though they rarely last that long in my house.
- Freezing: You can freeze the undecorated, baked cookies for up to 3 months. Wrap them tightly in plastic wrap and then foil. Thaw them at room temperature before you start the icing process. Do not freeze decorated cookies, as the icing can get sticky and lose its shine.
- Flavor development: Honestly, these cookies taste even better the day after you bake them. The flavors meld, and the texture softens just a touch. So don’t stress about making them all in one day—bake them one day and decorate them the next.
Nutritional Information & Benefits
Let’s be real—these are a treat, not a health food. But knowing what’s in them can help you plan your day. Here’s an estimated breakdown per cookie (based on a standard 3-inch cat cookie with icing).
- Calories: ~180-200
- Fat: 9g
- Carbohydrates: 25g
- Sugar: 15g
- Protein: 2g
On the bright side, the butter provides a small amount of Vitamin A, and the egg adds a bit of protein. If you’re looking for a slightly lighter option, you could try a no-bake peanut butter chocolate energy ball for a healthier snack. But for a Halloween celebration, these cookies are all about joy and a little bit of sugar-spice fun.
Conclusion
These adorable black cat Halloween sugar cookies are more than just a recipe—they’re a little piece of edible art that brings a smile to everyone who sees them. They’re forgiving to make, fun to decorate, and absolutely delicious to eat. Whether you’re a seasoned cookie decorator or a total beginner, I promise you can make these. Don’t stress about perfection. A lopsided ear or a slightly smudged eye just gives your cat more personality. I’d love to see your creations! Snap a photo and share it in the comments below, or tag me on social media. Tell me about your decorating wins and your happy little accidents. Happy Halloween, and happy baking!
Frequently Asked Questions
Can I use a different cookie cutter?
Absolutely! This sugar cookie dough is a great all-purpose recipe. You can use any Halloween-themed cutter you like, such as a pumpkin, ghost, or bat. Just adjust the baking time if the cookies are much larger or smaller than a standard 3-inch cat shape.
My icing is too runny. How do I fix it?
Don’t panic. If your flooding icing is too runny (it runs right off the cookie), add a little more sifted powdered sugar, one tablespoon at a time, until it reaches the right consistency. You want it to drizzle like thick lava.
My cookies spread too much. What went wrong?
This almost always happens because the dough was too warm when it went into the oven. Make sure you chilled it for at least an hour. Also, check that your baking powder is fresh. If your dough is sticking to the rolling pin, chill it again for 10 minutes before cutting.
How far in advance can I make these?
You can bake the cookies up to a week in advance and store them in an airtight container at room temperature. You can also make the royal icing up to 3 days in advance and store it in the fridge in an airtight container. Just re-whip it before using to bring back the volume.
Can I use a different type of icing?
Yes! If royal icing isn’t your thing, you can use a simple powdered sugar glaze (powdered sugar + milk + vanilla). It won’t harden as firmly, so it’s best for cookies you plan to eat the same day. You can also use melted white chocolate or candy melts for a different look and flavor.
Pin This Recipe!
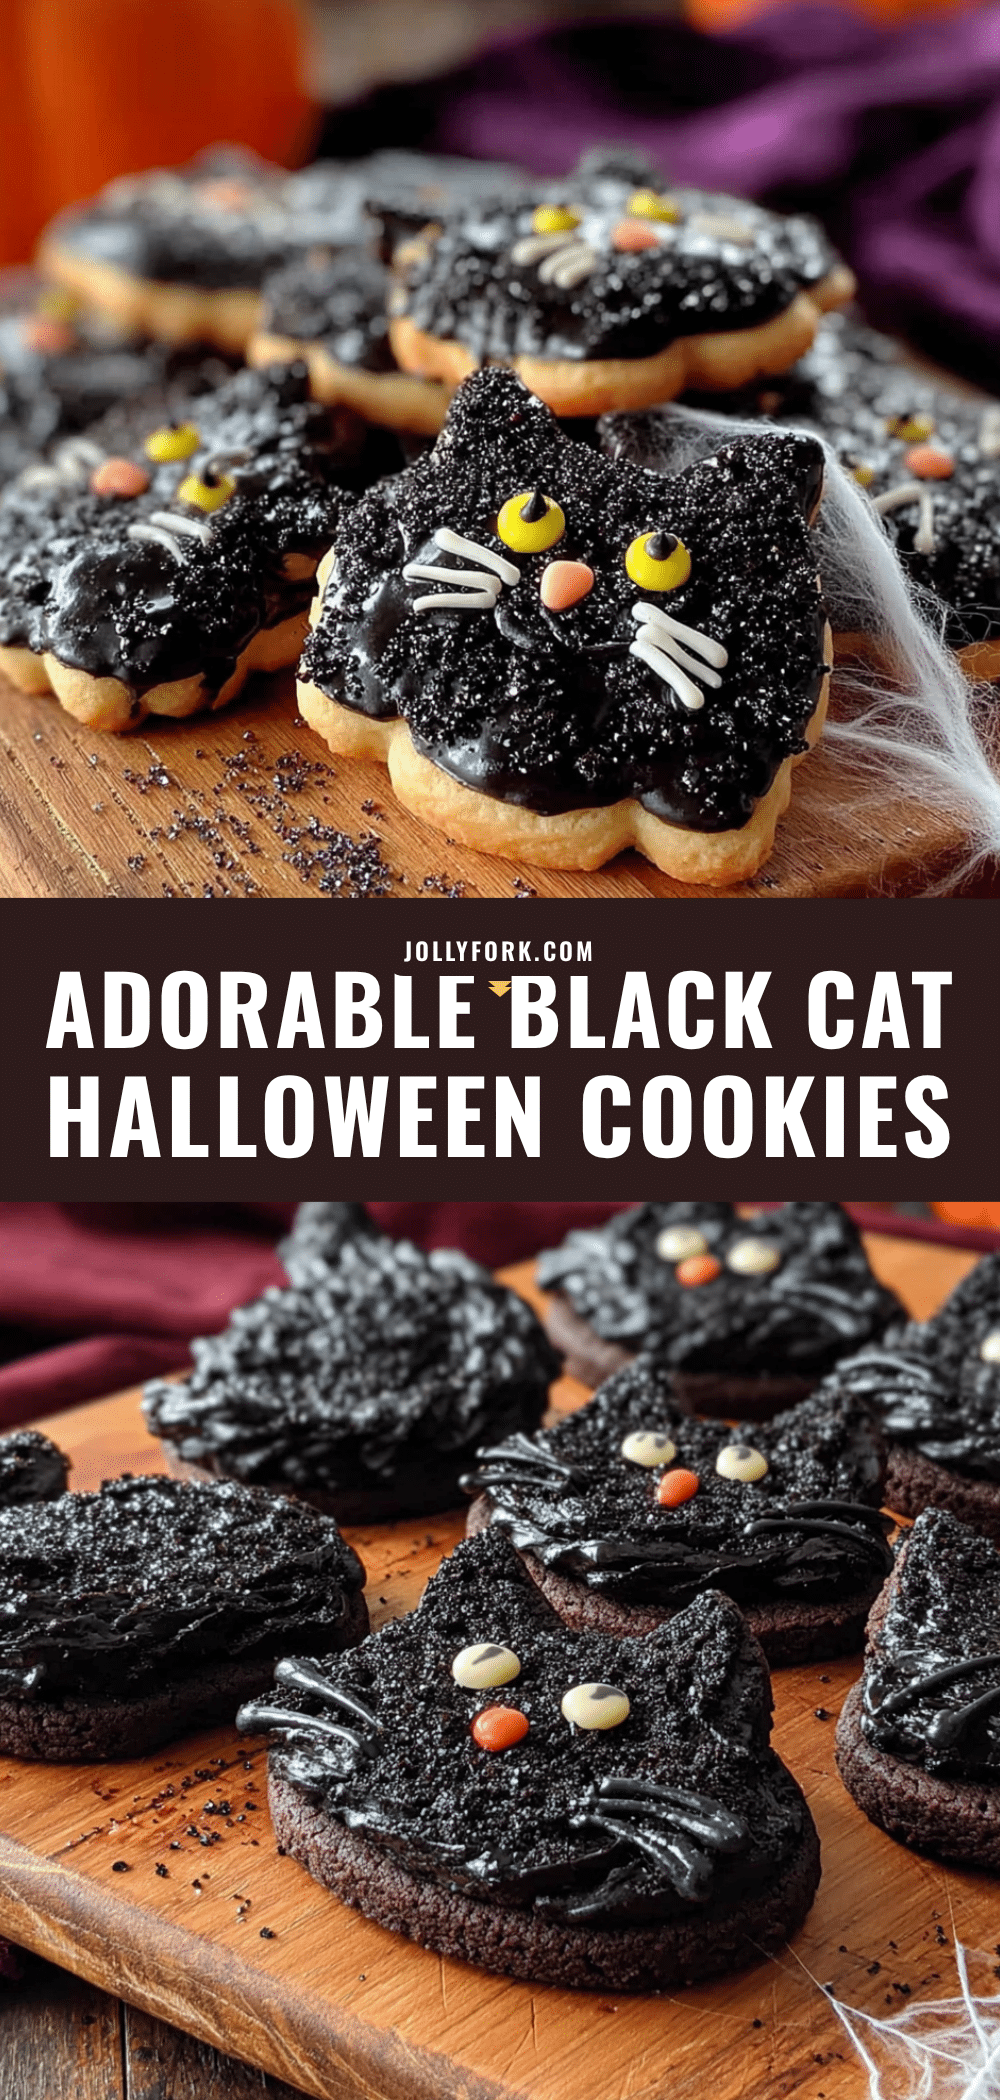
Perfect Black Cat Cookies: Easy Halloween Sugar Cookies

These adorable black cat sugar cookies are a fun and festive Halloween treat. With a soft-baked sugar cookie base and forgiving royal icing technique, they’re perfect for bakers of all skill levels.
- Prep Time: 1 hour 30 minutes
- Cook Time: 10 minutes
- Total Time: 2 hours (plus 6 hours drying time)
- Yield: 24 servings 1x
- Category: Dessert
- Cuisine: American
Ingredients
- 1 cup (2 sticks or 226 grams) unsalted butter, softened
- 1 cup (200 grams) granulated sugar
- 1 large egg, at room temperature
- 1 teaspoon vanilla extract
- ½ teaspoon almond extract
- 2 ½ cups (312 grams) all-purpose flour
- ½ teaspoon baking powder
- ¼ teaspoon salt
- 2 cups (240 grams) powdered sugar
- 2 tablespoons meringue powder
- 3–4 tablespoons water
- 1–2 teaspoons black gel food coloring
- Orange and white gel food coloring (optional)
Instructions
- Make the cookie dough: In a large bowl, beat the softened butter and granulated sugar together on medium speed until light and fluffy, about 2-3 minutes. Scrape down the sides of the bowl.
- Add the wet ingredients: Beat in the egg, vanilla extract, and almond extract until just combined. Don’t overmix.
- Combine the dry ingredients: In a separate bowl, whisk together the flour, baking powder, and salt. With the mixer on low speed, gradually add the dry ingredients to the wet ingredients. Mix until a soft dough forms.
- Chill the dough: Divide the dough in half, flatten each half into a disc about 1-inch thick, wrap tightly in plastic wrap, and refrigerate for at least 1 hour (up to 3 days).
- Preheat and prep: When ready to bake, preheat oven to 350°F (175°C). Line baking sheets with parchment paper.
- Roll and cut: On a lightly floured surface, roll out one disc of dough to about ¼-inch thickness. Use a black cat cookie cutter to cut out shapes. Re-roll scraps once, handling dough as little as possible.
- Bake: Place cookies about 1 inch apart on prepared baking sheets. Bake for 8-10 minutes, until edges are just barely golden brown. Let cool on baking sheet for 5 minutes, then transfer to a wire rack to cool completely.
- Make the royal icing: In a clean bowl, combine powdered sugar and meringue powder. Add 3 tablespoons of water and beat on low speed until combined. Then beat on medium-high for 4-5 minutes until thick, glossy, and forms stiff peaks. Add more water a teaspoon at a time if too thick.
- Color and thin the icing: Divide the icing. Color most of it black with gel food coloring. Keep small amounts white and orange for details. For black icing, keep a thicker consistency for outlining and thin a portion for flooding (should drizzle like lava and disappear into itself within 10 seconds).
- Decorate the cookies: Fit a piping bag with a small round tip (size 2) and fill with thicker black icing. Outline each cat cookie. Let outline set for 5-10 minutes. Then use a separate bag or squeeze bottle with thinner black icing to flood the inside. Use a toothpick to guide icing into corners.
- Add face details: While black icing is still wet, pipe two small white dots for eyes and orange details for a pumpkin or nose. Add a small white dot to eyes. Let cookies dry completely, uncovered, for at least 6 hours or overnight.
Notes
Chilling the dough is crucial to prevent spreading. For a true black color, use more gel food coloring than you think. The icing should be completely hard before stacking. Cookies taste even better the day after baking.
Nutrition
- Serving Size: 1 cookie
- Calories: 190
- Sugar: 15
- Sodium: 60
- Fat: 9
- Saturated Fat: 5
- Carbohydrates: 25
- Protein: 2
Keywords: Halloween cookies, sugar cookies, black cat cookies, royal icing, Halloween baking, decorated cookies


