I had this big plan for a dinner party. A proper sit-down meal with courses and candles and all that. The charcuterie board was supposed to be a quick little starter—something to keep people busy while I finished the main dish. But somewhere between burning the garlic bread and spilling red wine on my favorite white shirt, the grazing board became the whole dinner. And honestly? That was the best accident I’ve ever made in my kitchen.
It started with me just throwing things on a wooden cutting board. Some salami I’d bought on a whim, a wedge of brie that was sitting in the cheese drawer, a handful of olives from a jar. I wasn’t trying to be fancy. I was just trying to feed people without crying over a stove. But when I set that board down on the coffee table, everyone stopped talking. Not in a polite “oh how nice” way. In a genuine “woah, where did you get this” way. I had to admit it came from my sad little fridge, not a catering company.
That night taught me something about this whole charcuterie thing. It’s not about having expensive ingredients or knowing fancy French terms. It’s about the way people lean in when they see a beautiful spread. It’s about the quiet satisfaction of watching someone discover a combo you put together—a fig jam and a sharp cheddar, a honey drizzle over some goat cheese—and seeing their eyes go wide. My honey ricotta crostini with figs gets a similar reaction, but the grazing board is different. It’s communal. It’s messy. It’s exactly what a gathering should feel like.
So here’s the thing. You don’t need to be a chef to make a stunning charcuterie grazing board. You just need a few good ingredients, a little bit of confidence, and the willingness to let the food do the talking. This is the recipe that turned my kitchen disasters into my favorite hosting memories.
Why You’ll Love This Recipe
- No Cooking Required : Seriously. Zero heat. No oven, no stove, no microwave. Just assembly and arranging. Perfect for hot days when you don’t want to turn on the kitchen.
- Customizable for Any Occasion : Game day, book club, birthday party, or Tuesday night dinner. This board adapts to whatever you’re celebrating—or not celebrating.
- Impressive Without the Stress : People will think you spent hours on this. You won’t. The secret is in the arrangement, not the effort.
- Works for Any Diet : Gluten-free? Add more cheese and meat. Vegetarian? Load up on fruits, nuts, and dips. Dairy-free? There are amazing vegan cheeses now. Everyone finds something to love.
- Perfect for Pairing : This board goes beautifully with a crisp white wine, a bold red, or even a cold beer. It’s also amazing alongside a fresh Mediterranean chickpea and cucumber salad for a more substantial meal.
I’ve made this board for fancy dinner parties and lazy Sunday afternoons. It never fails. The key is variety—different textures, different flavors, different colors. When you get that balance right, the board becomes more than just food. It becomes an experience. And that’s what makes it special.
What Ingredients You Will Need
The beauty of a charcuterie grazing board is that there are no strict rules. But after making dozens of these boards, I’ve found that certain ingredients just work better together. Here’s what I recommend for a balanced, beautiful spread.
The Meats (Choose 2-4)
- Prosciutto : Thinly sliced, delicate, salty. I prefer the imported stuff when I can find it, but domestic works fine too. Look for slices that aren’t too dry.
- Salami : A classic. I like Genoa salami for its mild flavor and firm texture. Cut it into thin rounds or leave it in a whole piece for guests to slice themselves.
- Chorizo : Adds a spicy, smoky kick. Spanish chorizo is cured and ready to eat. Mexican chorizo is raw—don’t use that here.
- Capicola : Also called gabagool if you’re feeling fancy. It’s fatty, tender, and has a beautiful red color. A personal favorite.
The Cheeses (Choose 2-4)
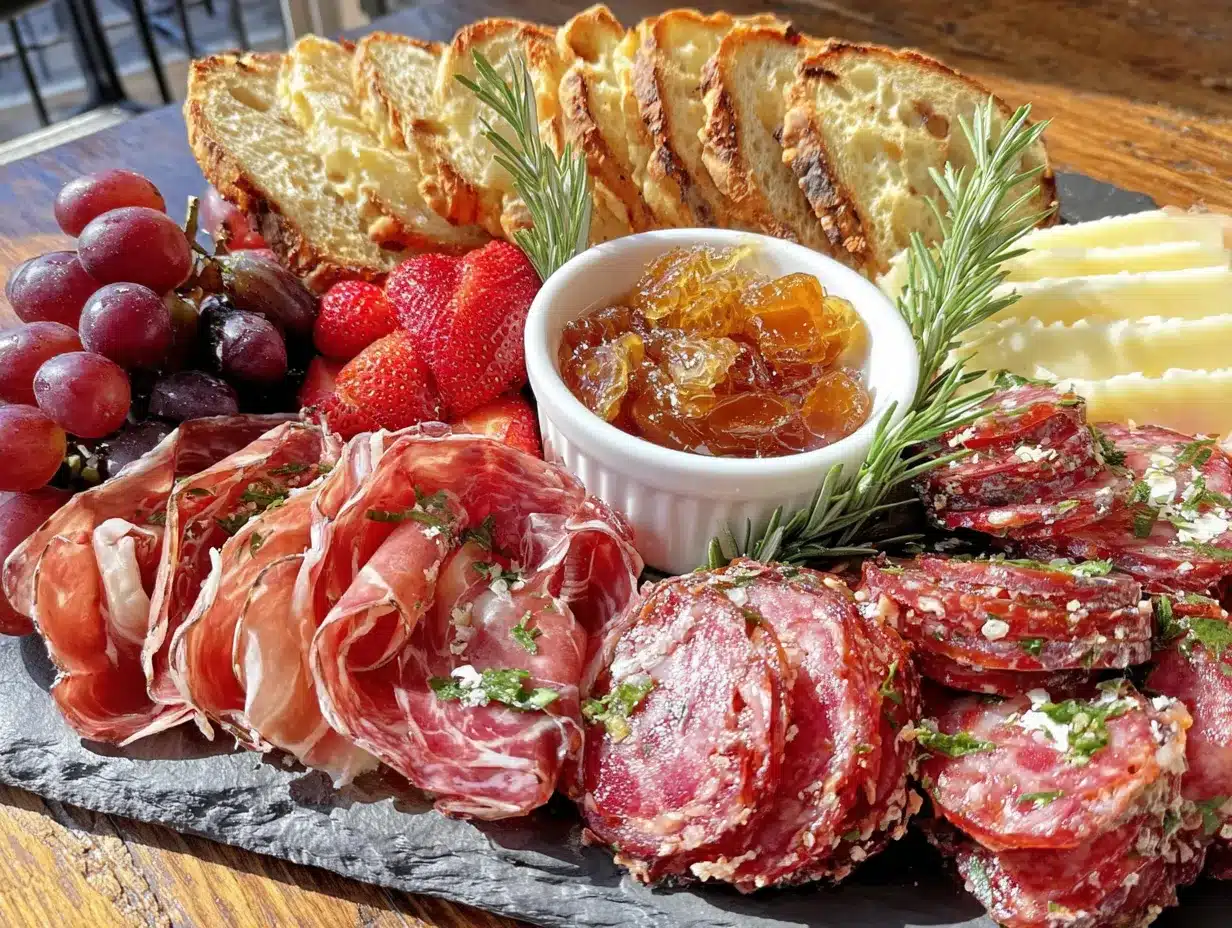
- Aged Cheddar : Sharp, crumbly, and bold. I recommend a 2-year aged cheddar for maximum flavor. It holds its own against salty meats.
- Brie : Soft, creamy, and mild. Let it come to room temperature before serving—it’s so much better that way. Triple cream brie is even more indulgent.
- Goat Cheese : Tangy and spreadable. A log of herbed goat cheese adds a lovely freshness to the board. I love it with honey drizzled on top.
- Manchego : A Spanish sheep’s milk cheese with a firm texture and nutty flavor. It pairs beautifully with quince paste (membrillo).
- Blue Cheese : For the adventurous. Gorgonzola or Roquefort adds a pungent, creamy element that contrasts nicely with sweet fruits.
The Fruits & Vegetables
- Grapes : Red or green, seedless. They add sweetness and a pop of color. Frozen grapes are actually amazing on a summer board.
- Dried Figs or Apricots : Chewy, sweet, and concentrated in flavor. They’re perfect with sharp cheeses.
- Fresh Berries : Strawberries, raspberries, or blackberries. They add brightness and acidity.
- Apple or Pear Slices : Toss them in a little lemon juice to prevent browning. They add crunch and freshness.
- Olives : Castelvetrano or Kalamata. I like a mix of green and black for color contrast. Drain them well so they don’t make the board soggy.
- Cherry Tomatoes : Halved or whole. They burst with sweetness and look beautiful scattered around.
The Crunchy Elements
- Crackers : A mix of plain water crackers, whole wheat, and something flavored like rosemary or sea salt. I love mini whole wheat pita pizzas cut into triangles as a heartier option.
- Bread : Baguette slices, crostini, or grissini (breadsticks). Toast the baguette slices lightly for extra crunch.
- Nuts : Almonds, walnuts, or pecans. Toasted and salted is best. Marcona almonds are a splurge but totally worth it.
- Pickles : Cornichons or pickled vegetables. They cut through the richness of the cheese and meat. My crispy garlic dill refrigerator pickles are perfect for this.
The Spreads & Dips
- Honey : A drizzle over cheese or nuts is heavenly. Look for local honey for the best flavor.
- Fig Jam or Quince Paste : Sweet, fruity, and perfect with aged cheeses. I’ve made a cozy spiced peach butter that works beautifully here too.
- Olive Tapenade : Salty, briny, and bold. A little goes a long way.
- Mustard : Whole grain or Dijon. Adds a tangy kick to meats and cheeses.
Equipment Needed
You don’t need much, but the right tools make a difference.
- A Large Board or Platter : Wooden cutting boards, marble slabs, or even a large baking sheet work. The bigger the better—you want room to spread everything out.
- Small Bowls or Ramekins : For dips, jams, olives, and nuts. They keep wet ingredients from making the board soggy.
- Cheese Knives : At least two—one for soft cheese, one for hard cheese. A small spreader for the goat cheese is nice too.
- Tongs or Small Spoons : For serving. Keeps things tidy and hygienic.
- Parchment Paper or Cheese Paper : Optional, but it makes cleanup easier and adds a rustic look.
I’ve used a $10 cutting board from IKEA and a fancy marble slab from a kitchen store. Honestly, the IKEA board worked just as well. Don’t overthink the equipment.
Preparation Method
- Start with the Cheese (5 minutes). Place your cheese wedges on the board first. Space them out evenly—you want guests to be able to reach each one without reaching over anything. Cut hard cheeses into slices or cubes so they’re easy to grab. Leave soft cheeses like brie whole, but score the top so people know where to cut.
- Add the Meats (5 minutes). Fold or roll your sliced meats and place them near the cheeses. For prosciutto, I like to drape it in loose ribbons. For salami, fold each slice in half and then in half again, creating a little triangle. Arrange them in small piles or fan them out. Don’t lay them flat—they look sad and flat.
- Place the Bowls (2 minutes). Set your small bowls for dips, jams, olives, and nuts. Distribute them around the board so there’s something interesting in every quadrant. This also helps break up the visual space.
- Fill in with Fruits (5 minutes). Scatter grapes, berries, and sliced apples or pears in the gaps. Use the natural colors to create visual contrast—red grapes next to green apples, dark berries near pale cheese. Don’t overcrowd, but don’t leave big empty spaces either.
- Add the Crunch (3 minutes). Arrange crackers and bread slices around the edges of the board. Fan them out in small clusters. Leave some whole and break others in half for variety. Place them near the cheeses and meats they pair best with.
- Finish with Garnishes (2 minutes). Sprinkle nuts and dried fruit over the board. Drizzle honey over the brie or goat cheese. Add fresh herbs like rosemary sprigs or thyme for a pop of green. A few edible flowers if you’re feeling extra fancy.
- Step Back and Adjust (2 minutes). Look at the board from a distance. Are there any empty spots? Fill them with extra crackers or nuts. Is everything accessible? Make sure no one has to reach across a bowl of olives to get to the cheddar. Adjust as needed.
Cooking Tips & Techniques
I’ve made my share of sad-looking boards. Here’s what I’ve learned the hard way.
Room temperature is your friend. Take your cheeses out of the fridge at least 30 minutes before serving. Cold cheese is flavorless cheese. The same goes for cured meats—they taste better when they’re not straight from the refrigerator.
Don’t overcrowd the board. It’s tempting to pile everything on, but a crowded board looks messy and makes it hard for guests to grab what they want. Leave a little breathing room between items. You can always refill as things get eaten.
Think about flow. Arrange the board so guests can move from one flavor to another naturally. Salty meats next to sweet fruit. Sharp cheese next to mild crackers. The journey around the board should be a flavor adventure, not a random scramble.
Prep everything before you start arranging. Slice the cheese, wash the fruit, toast the bread, open the jars. Once you start building the board, you don’t want to stop and wash a knife. Trust me on this one—I’ve been there with sticky hands and a half-finished board.
Use texture as a guide. A good board has crunchy, creamy, chewy, and crisp elements. If everything is soft, it feels mushy. If everything is hard, it feels like a chore to eat. Mix it up.
Variations & Adaptations
One of the best things about a charcuterie board is how flexible it is. Here are some ways to switch it up.
The Vegetarian Board
Skip the meat entirely and double up on cheeses, fruits, and vegetables. Add marinated artichoke hearts, roasted red peppers, and grilled zucchini slices. Hummus and baba ganoush make great dips. I made this for a vegetarian friend and she said it was the best board she’d ever had.
The Breakfast Board
Swap the dinner ingredients for breakfast favorites. Think smoked salmon, cream cheese, bagel chips, fresh berries, and small pancakes or waffles. Add a bowl of honey yogurt for dipping. It’s perfect for brunch or a lazy weekend morning.
The Holiday Board
Go all out with seasonal ingredients. In fall, add roasted pumpkin seeds, apple slices, and a cranberry relish. In winter, include stollen bites, dried cherries, and a spiced wine reduction. For spring, fresh peas, radishes, and edible flowers. The possibilities are endless.
The Low-Carb Board
Replace crackers and bread with cucumber slices, bell pepper strips, and celery sticks. Load up on cheese and meat. Add hard-boiled eggs and olives for extra fat and protein. It’s satisfying without the carbs.
Serving & Storage Suggestions
Serving Temperature : Serve the board at room temperature. Take everything out of the fridge about 20-30 minutes before guests arrive. The flavors are much more pronounced at room temp.
Presentation : Place the board in the center of the table so everyone can reach it. If you’re serving a crowd, consider making two smaller boards instead of one giant one—it’s easier for guests to access and looks more intentional.
Pairing Suggestions : A crisp Sauvignon Blanc or a fruity Pinot Noir pairs beautifully with most charcuterie boards. For beer lovers, a Belgian witbier or a pale ale works great. Non-alcoholic options like sparkling water with a splash of pomegranate juice are lovely too.
Storage : Leftovers can be stored separately in airtight containers. Cheese and meat should be wrapped in wax paper or cheese paper, not plastic wrap—it lets them breathe. Crackers and bread should be stored in a sealed container at room temperature. Most items will keep for 3-5 days.
Reheating : There’s no reheating needed, but if you have leftover toasted bread, you can crisp it up in a 350°F oven for a few minutes. Don’t microwave anything—it’ll ruin the texture.
Flavor Development : Some cheeses actually taste better the next day. Aged cheddar and manchego develop more complex flavors after being cut and exposed to air. Just let them come to room temperature before serving again.
Nutritional Information & Benefits
Estimated per serving (based on a board serving 6-8 people with a variety of ingredients):
| Nutrient | Amount per Serving |
|---|---|
| Calories | 350-450 |
| Protein | 15-20g |
| Fat | 25-30g |
| Carbohydrates | 20-25g |
| Fiber | 3-5g |
| Sugar | 10-15g |
| Sodium | 600-800mg |
Health Benefits : Cheese is a good source of calcium and protein. Cured meats provide iron and B vitamins. Fruits and nuts add fiber, antioxidants, and healthy fats. The variety of ingredients means you’re getting a wide range of nutrients in one meal.
Dietary Considerations : This board can be adapted for gluten-free, low-carb, or vegetarian diets. It’s naturally high in fat and sodium, so portion control is key if you’re watching those. The nuts and dried fruit add natural sweetness without processed sugar.
Potential Allergens : Dairy (cheese), gluten (crackers, bread), tree nuts (almonds, walnuts), and sulfites (dried fruit). Always check labels if serving guests with allergies.
Conclusion
Look, I know making a charcuterie board feels intimidating at first. All those ingredients, the pressure to make it look beautiful, the fear of getting it wrong. But here’s the truth—this is the most forgiving recipe you’ll ever make. There are no rules. No wrong answers. Just a board full of delicious things that people will love.
What I love most about this recipe is how it brings people together. There’s something about sharing food from a communal board that breaks down walls. Strangers become friends. Conversations flow. Laughter happens. And all you did was arrange some cheese and meat on a piece of wood.
So go ahead and make this your own. Swap out ingredients based on what you love. Experiment with new combinations. Don’t be afraid to mess up—I promise, even a “messy” board is still beautiful. And when you set it down on the table and watch everyone’s faces light up, you’ll know exactly why this is my favorite thing to make.
I’d love to hear about your board! What combinations did you try? What was the biggest hit? Drop a comment below or tag me in your photos. Happy grazing, friends.
Frequently Asked Questions
How far in advance can I make a charcuterie board?
You can prep most ingredients a day ahead—slice the cheese, wash the fruit, toast the bread. But I recommend assembling the board no more than 2 hours before serving. The crackers get stale, the fruit starts to weep, and the whole thing looks tired. Assemble it fresh for the best presentation.
How much food do I need per person for a grazing board?
A good rule of thumb is about 2-3 ounces of meat and 2-3 ounces of cheese per person. For crackers and bread, plan on about 1-2 ounces per person. Fruits, nuts, and dips should be about 1/2 cup total per person. If it’s the main meal, go heavier. If it’s just an appetizer, lighter is fine.
Can I make a charcuterie board for a large crowd?
Absolutely. For more than 10 people, I recommend making two smaller boards instead of one giant one. It’s easier for guests to reach everything, and it looks more intentional. Plus, you can theme each board differently—one Mediterranean, one classic French, for example.
What’s the best way to keep a charcuterie board fresh during a party?
Keep the board out of direct sunlight and away from heat sources. If you’re serving for more than 2 hours, consider bringing out a fresh board halfway through. For outdoor parties, cover the board with a clean cloth or plastic wrap when not in use to keep bugs away. And always have a backup stash of crackers and bread—they go fast.
Can I freeze leftover charcuterie ingredients?
Hard cheeses like cheddar and manchego freeze well for up to 3 months. Soft cheeses like brie don’t freeze well—they get grainy. Cured meats can be frozen, but the texture changes slightly. Fruits and nuts should not be frozen. Bread and crackers can be frozen in an airtight bag for up to 2 months.
Pin This Recipe!
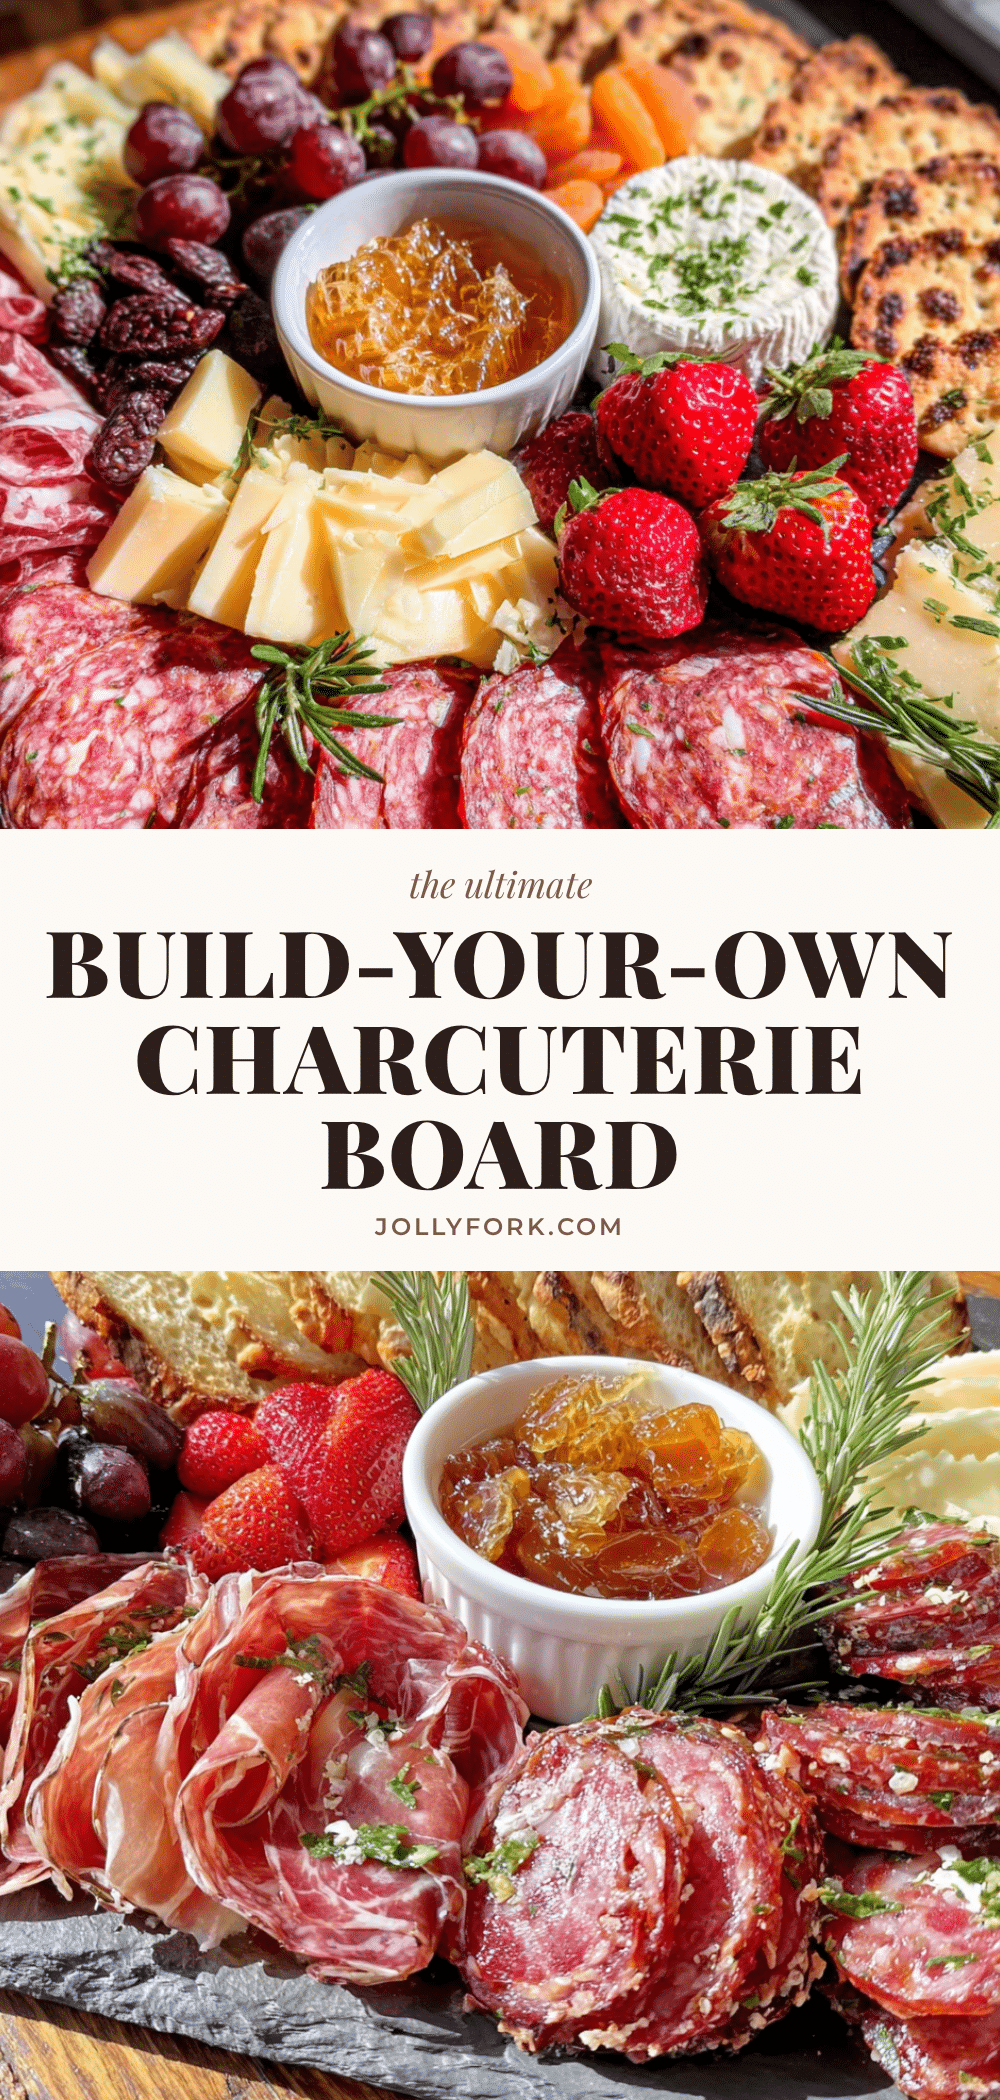
Perfect Build-Your-Own Charcuterie Grazing Board: Easy & Best Recipe

A stunning, no-cook charcuterie grazing board that’s perfect for any occasion. With a variety of meats, cheeses, fruits, and crunchy elements, this customizable board is impressive yet stress-free to assemble.
- Prep Time: 20 minutes
- Cook Time: 0 minutes
- Total Time: 20 minutes
- Yield: 6-8 servings 1x
- Category: Appetizer
- Cuisine: French
Ingredients
- 4 oz prosciutto, thinly sliced
- 4 oz salami (Genoa), thinly sliced
- 4 oz chorizo (Spanish, cured), thinly sliced
- 4 oz capicola, thinly sliced
- 4 oz aged cheddar, sliced or cubed
- 4 oz brie, whole wedge
- 4 oz goat cheese, log
- 4 oz manchego, sliced
- 4 oz blue cheese (Gorgonzola or Roquefort), crumbled
- 1 cup red or green seedless grapes
- 1/2 cup dried figs or apricots
- 1 cup fresh berries (strawberries, raspberries, or blackberries)
- 1 apple or pear, sliced and tossed with lemon juice
- 1/2 cup olives (Castelvetrano or Kalamata), drained
- 1/2 cup cherry tomatoes, halved
- 1 cup assorted crackers (water crackers, whole wheat, flavored)
- 1 baguette, sliced and lightly toasted
- 1/2 cup almonds, toasted and salted
- 1/2 cup walnuts or pecans
- 1/4 cup cornichons or pickled vegetables
- 2 tbsp honey
- 1/4 cup fig jam or quince paste
- 2 tbsp olive tapenade
- 1 tbsp whole grain or Dijon mustard
Instructions
- Start with the Cheese (5 minutes): Place cheese wedges on the board, spacing them evenly. Cut hard cheeses into slices or cubes; leave soft cheeses like brie whole but score the top.
- Add the Meats (5 minutes): Fold or roll sliced meats and place near cheeses. Drape prosciutto in loose ribbons; fold salami slices in half twice to form triangles. Arrange in small piles or fan them out.
- Place the Bowls (2 minutes): Set small bowls for dips, jams, olives, and nuts. Distribute them around the board so each quadrant has something interesting.
- Fill in with Fruits (5 minutes): Scatter grapes, berries, and sliced apples or pears in the gaps. Use natural colors for visual contrast.
- Add the Crunch (3 minutes): Arrange crackers and bread slices around the edges of the board in small clusters. Leave some whole and break others in half.
- Finish with Garnishes (2 minutes): Sprinkle nuts and dried fruit over the board. Drizzle honey over brie or goat cheese. Add fresh herbs like rosemary or thyme for a pop of green.
- Step Back and Adjust (2 minutes): Look at the board from a distance. Fill any empty spots with extra crackers or nuts. Ensure everything is accessible and adjust as needed.
Notes
Take cheeses out of the fridge 30 minutes before serving for best flavor. Don’t overcrowd the board; leave breathing room between items. Prep all ingredients before starting assembly. For a vegetarian board, skip the meat and double up on cheeses, fruits, and vegetables.
Nutrition
- Serving Size: 1 serving (based on
- Calories: 400
- Sugar: 12.5
- Sodium: 700
- Fat: 27.5
- Saturated Fat: 12
- Carbohydrates: 22.5
- Fiber: 4
- Protein: 17.5
Keywords: charcuterie board, grazing board, appetizer, party food, no-cook, cheese board, meat and cheese


