I burned the first three icebox cakes I ever made. Not the cake itself, you understand—I burned the concept into my brain that they had to be complicated to be good. Layers of homemade custard, hand-whipped cream from a carton I’d driven twenty minutes to find, berries macerated in some fancy liqueur. By the time I got to the fourth attempt, I was exhausted and the kitchen looked like a crime scene. That’s when I finally asked myself the obvious question: what if I just kept it simple? What if an icebox cake could actually be easy?
Turns out, it can. This easy no-bake berry icebox cake for Labor Day is the result of that moment of surrender. It’s the dessert I bring to every end-of-summer cookout now, and honestly, it’s the one people ask for by name. No oven required. No stress. Just layers of creamy filling, fresh berries, and graham crackers that soften into something that tastes like you spent hours on it. You didn’t. But nobody has to know that.
There’s something about the way the flavors settle overnight—the berries get jammy, the cream gets almost mousse-like, and the whole thing turns into this cool, sweet slice of summer. It’s the kind of dessert that makes you slow down, even on a busy holiday weekend. And that, to me, is the whole point.
Why You’ll Love This Recipe
This easy no-bake berry icebox cake for Labor Day has become my go-to for a reason. It checks every box without making you work for it.
- No oven required : The last thing you want on a hot holiday weekend is to turn on the oven. This comes together on the counter, no sweat.
- Simple ingredients : You probably have most of these in your kitchen right now. No weird extracts or specialty items.
- Make-ahead magic : It actually needs to sit overnight, which means you can prep it the day before and forget about it until dessert time.
- Crowd-pleaser : I’ve brought this to barbecues, picnics, and potlucks. It disappears every single time.
- Adaptable : Use whatever berries look best at the market. Mix and match. It’s forgiving.
What makes this version different from the rest? It’s the balance. Not too sweet. Not too heavy. The cream stays light because we’re not overcomplicating it, and the berries do the heavy lifting on flavor. It’s the kind of dessert that feels special without trying too hard—exactly what you want when you’re celebrating the last long weekend of summer with people you actually like.
I’ve tested this with different fillings, different crackers, different fruit combinations. This version is the one that worked every time. It’s the one I trust.
What Ingredients You Will Need
This recipe uses simple, straightforward ingredients to build something that feels surprisingly elegant. Here’s what you’ll need:
- Graham crackers – One standard box (about 14-16 full sheets). You’ll break them to fit your dish. Honey or cinnamon flavor both work fine.
- Heavy whipping cream – 2 cups (480 ml). Cold from the fridge. This is what gives the cake its light, mousse-like texture.
- Powdered sugar – 1/3 cup (40 g). Adds sweetness without graininess.
- Cream cheese – 8 ounces (226 g), softened to room temperature. This gives the filling structure and a slight tang that balances the sweetness.
- Vanilla extract – 1 teaspoon. Pure, not imitation, if you can swing it.
- Fresh strawberries – 1 pint (about 300 g), hulled and sliced. Look for berries that are deep red and fragrant.
- Fresh blueberries – 1 pint (about 170 g). Rinse and dry them well.
- Fresh raspberries – 6 ounces (170 g). Handle gently—they bruise easily.
- Lemon zest – From 1 lemon. This is optional but highly recommended. It brightens the whole thing.
A few notes on ingredient choices. I use Philadelphia cream cheese because it’s consistent and blends smoothly every time. For the graham crackers, Nabisco is my go-to, but store brands work perfectly well too. If you can find local berries at the farmers’ market, grab them—they’ll be sweeter and more flavorful than supermarket ones.
For substitutions, you can use full-fat Greek yogurt in place of half the cream cheese if you want a slightly tangier filling. If strawberries aren’t in season, frozen and thawed berries work in a pinch—just drain off the excess liquid before layering. And if you need a gluten-free option, there are excellent gluten-free graham crackers available now.
Equipment Needed
You don’t need much for this one, which is part of the beauty.
- 9×13-inch baking dish – Glass or ceramic works best. You can see the layers forming.
- Electric mixer – Hand mixer or stand mixer. You could whisk by hand, but your arm will hate you.
- Large mixing bowl – For the cream filling.
- Spatula – For spreading layers evenly.
- Sharp knife and cutting board – For prepping berries.
- Plastic wrap – To cover the dish while it chills.
If you don’t have a 9×13, you can use a 9×9 square dish—just adjust the layers and expect fewer total servings. I’ve also made this in a trifle dish for a prettier presentation. The key is having a container with sides tall enough to hold the layers as they set.
One tip: make sure your mixing bowl is completely clean and dry before whipping the cream. Any trace of grease can prevent it from whipping properly. I wipe mine down with a little lemon juice on a paper towel just to be safe.
Preparation Method
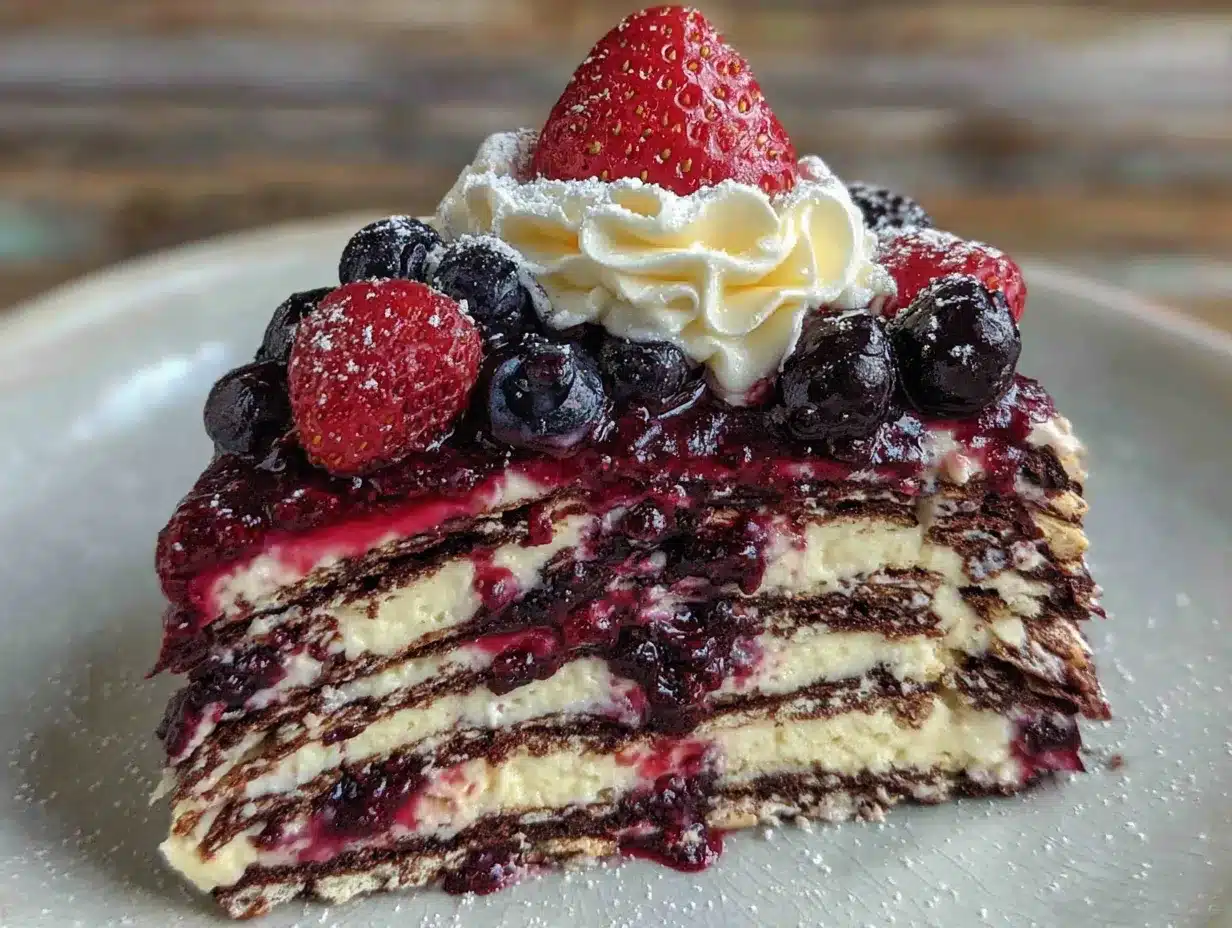
This comes together in about 20 minutes of active work. The rest is fridge time.
- Prep your berries. Wash and dry all the berries. Hull and slice the strawberries. Set aside about a cup of mixed berries for topping later. You want some pretty ones for the final look.
- Make the cream filling. In a large mixing bowl, beat the softened cream cheese with an electric mixer on medium speed until smooth and fluffy, about 2 minutes. Add the powdered sugar and vanilla extract, and beat until combined. Scrape down the sides of the bowl.
- Whip the cream. In a separate bowl, pour in the cold heavy cream. Using clean beaters, whip on medium-high speed until stiff peaks form. This takes about 3-4 minutes. You’re looking for peaks that hold their shape when you lift the beaters.
- Fold everything together. Gently fold the whipped cream into the cream cheese mixture. Use a spatula and a light hand—you want to keep as much air in the mixture as possible. Fold just until no white streaks remain. The mixture should be light, fluffy, and smooth.
- Start layering. Spread a thin layer of the cream mixture (about 1/2 cup) on the bottom of your 9×13 dish. This helps the first layer of graham crackers stick.
- First cracker layer. Arrange a single layer of graham crackers on top of the cream. Break them as needed to fit. Don’t overlap them too much, but gaps are fine—they’ll fill in as the cake sets.
- First berry layer. Scatter about a third of the sliced strawberries, blueberries, and raspberries over the crackers. Sprinkle a little lemon zest over the berries.
- First cream layer. Spread about a third of the remaining cream mixture over the berries. Use an offset spatula or the back of a spoon to spread it evenly. Don’t press too hard—you don’t want to squish the berries into the crackers.
- Repeat layers. Add another layer of graham crackers, followed by another third of the berries, and another third of the cream. Repeat one more time. You should end with a final layer of cream on top.
- Finish the top. Spread the remaining cream evenly over the top. Arrange the reserved berries on top in whatever pattern makes you happy. I like to do a row of sliced strawberries down the middle, with blueberries and raspberries scattered around.
- Cover and chill. Cover the dish tightly with plastic wrap. Refrigerate for at least 8 hours, but overnight is better. The graham crackers need time to soften completely.
A few things to watch for. If your cream cheese isn’t fully softened, you’ll get lumps in the filling. Let it sit out for about 30 minutes before you start. Also, don’t skip the overnight chill. I know it’s tempting to rush it, but at 4 hours, the crackers are still crunchy in spots. At 8 hours, they’re perfect. At 12 hours, it’s like a dream.
When you spread the cream layers, go gently. You want to keep the layers distinct, not push everything into one homogenous mess. Think of it like building a lasagna—each layer has its own job.
Cooking Tips & Techniques
I learned most of these the hard way, so you don’t have to.
Keep everything cold. The cream whips best when it’s straight from the fridge. If your kitchen is warm, chill the bowl and beaters too. I pop mine in the freezer for 10 minutes before I start.
Don’t overwhip the cream. Stiff peaks are perfect. If you go past that, you’ll get butter. And while homemade butter is lovely, it’s not what we’re going for here. Watch carefully in the last minute of whipping.
Let the cream cheese soften properly. Cold cream cheese will leave you with lumpy filling no matter how long you beat it. Set it out 30-40 minutes ahead. If you forget, microwave it in 10-second bursts on low power, checking between each.
Use a light hand when folding. The air you’ve whipped into the cream is what makes this cake light. Deflate it with aggressive stirring and you’ll end up with a dense, heavy dessert. Fold slowly, gently, and stop when it’s just combined.
Layer evenly. An uneven layer of cream means some crackers won’t soften properly. Take the extra 30 seconds to spread each layer all the way to the edges.
Trust the overnight rest. I once tried to speed this up by using a thinner dish and less chilling time. The center was still crunchy. The edges were perfect. Don’t be like me. Give it the full time.
One more thing: if you’re making this for a party, assemble it the day before. The flavors actually improve overnight, and you’ll be grateful not to have one more thing to do on the day of.
Variations & Adaptations
This recipe is wonderfully flexible. Here are some ways to change it up:
Berry swap. Use whatever berries look best. Blackberries, boysenberries, or sliced peaches all work beautifully. In late summer, I sometimes do a mix of peaches and raspberries that’s absolutely killer.
Citrus twist. Add a tablespoon of lemon or lime juice to the cream filling. It cuts the sweetness and adds a bright note that pairs perfectly with the berries.
Chocolate version. Swap the graham crackers for chocolate wafer cookies. Use chocolate shavings between layers. It’s a completely different dessert, but equally good.
Dairy-free adaptation. Use a plant-based cream cheese alternative and coconut cream (chilled, whipped) in place of heavy cream. The texture will be slightly different, but still delicious.
Individual servings. Layer everything in mason jars or small glass cups for a grab-and-go dessert. Perfect for picnics or barbecues where you don’t want to deal with serving dishes.
I once made a version with lemon curd swirled into the cream filling. It was a little extra work, but the tangy lemon against the sweet berries was incredible. If you have extra time and a lemon hanging around, give it a try.
Serving & Storage Suggestions
Serve this easy no-bake berry icebox cake for Labor Day straight from the fridge. It should be cold—not frozen, but definitely chilled. The texture is best when it’s had time to fully set.
For presentation, I like to run a knife under hot water, wipe it dry, then slice cleanly through the cake. Wipe the knife between cuts for the cleanest slices. Serve on chilled plates if you’re feeling fancy.
This pairs beautifully with a cup of coffee or iced tea. If you’re serving it after a heavy barbecue, the cool, light texture is a perfect palate cleanser. I’ve also served it alongside a grilled peach caprese salad for a summer dinner party—the flavors complement each other without competing.
For storage, cover the dish tightly with plastic wrap or transfer individual slices to an airtight container. It will keep in the refrigerator for up to 3 days. The texture is best on day 2, when the crackers have fully softened but the berries are still bright.
You can freeze this cake, but I don’t recommend it. The cream can separate when thawed, and the texture gets grainy. If you absolutely must freeze it, do so before adding the fresh berry topping, and add those after thawing.
Leftovers (if you have any) make a fantastic breakfast. Don’t judge me. It’s basically berries and cream with a little graham cracker. That’s practically a parfait.
Nutritional Information & Benefits
Per serving (based on 12 servings):
- Calories: 320
- Fat: 22g
- Carbohydrates: 28g
- Protein: 4g
- Fiber: 3g
- Sugar: 18g
This dessert offers some surprising nutritional perks. Berries are packed with antioxidants, vitamin C, and fiber. The cream cheese provides calcium and a small amount of protein. And since there’s no baking involved, none of those heat-sensitive nutrients are lost.
It’s not a health food, obviously. But compared to many holiday desserts—heavy pies, butter-laden cakes, sugar-loaded cobblers—this one feels lighter and more balanced. The berries do real work here, providing natural sweetness and color.
For those watching their sugar intake, you can reduce the powdered sugar to 1/4 cup. The berries will still provide plenty of sweetness. If you’re dairy-sensitive, the dairy-free version mentioned above works well.
I like that this dessert doesn’t pretend to be something it’s not. It’s a treat. A delicious, satisfying treat that happens to include some genuinely good ingredients. That’s a balance I can get behind.
Conclusion
This easy no-bake berry icebox cake for Labor Day has become my signature summer dessert, and for good reason. It’s simple enough to throw together without thinking, impressive enough to get compliments from people who don’t normally notice dessert, and flexible enough to adapt to whatever you have on hand.
What I love most about it is how it makes people slow down. There’s something about a cold, creamy slice of cake on a warm evening that encourages you to sit a little longer, talk a little more, enjoy the last golden moments of summer before the season turns.
Try it with your favorite berries. Add a twist if you’re feeling adventurous. Make it your own. And when someone asks for the recipe—because they will—tell them it’s the one that doesn’t need an oven, doesn’t need stress, and doesn’t need anything but a little patience overnight.
If you make this, I’d love to hear about it. Drop a comment below or tag me in your photos. Tell me what berries you used, what you served it with, who ate the last slice. That’s my favorite part—knowing this little recipe found its way into your kitchen.
Now go enjoy that last long weekend of summer. You’ve earned it.
Frequently Asked Questions
Can I use frozen berries instead of fresh?
Yes, but thaw them first and drain off any excess liquid. Frozen berries release more juice as they thaw, which can make the cake soggy if you don’t drain them well. Pat them dry gently with paper towels before layering.
How long does this cake need to chill?
At least 8 hours, but overnight is best. The graham crackers need time to absorb moisture from the cream and soften completely. At 4 hours, you’ll still have crunchy spots. Give it the full time for the best texture.
Can I use a different type of cracker?
Absolutely. Vanilla wafers, shortbread cookies, or chocolate wafer cookies all work. Keep in mind that different cookies absorb moisture at different rates, so you may need to adjust the chilling time. Thinner cookies soften faster.
How do I get clean slices?
Use a sharp knife and run it under hot water between cuts. Wipe the blade dry before each slice. This prevents the cream from sticking and gives you those beautiful, Instagram-worthy layers.
Can I make this gluten-free?
Yes. There are excellent gluten-free graham crackers available now. Schar and Kinnikinnick both make versions that work perfectly. The rest of the ingredients are naturally gluten-free, so that’s the only swap you need to make.
If you enjoyed this recipe, you might also like this creamy strawberry shortcake icebox cake for another no-bake option, or these chewy brown butter apple cider snickerdoodle cookies when you’re ready to turn the oven back on for fall.
Pin This Recipe!
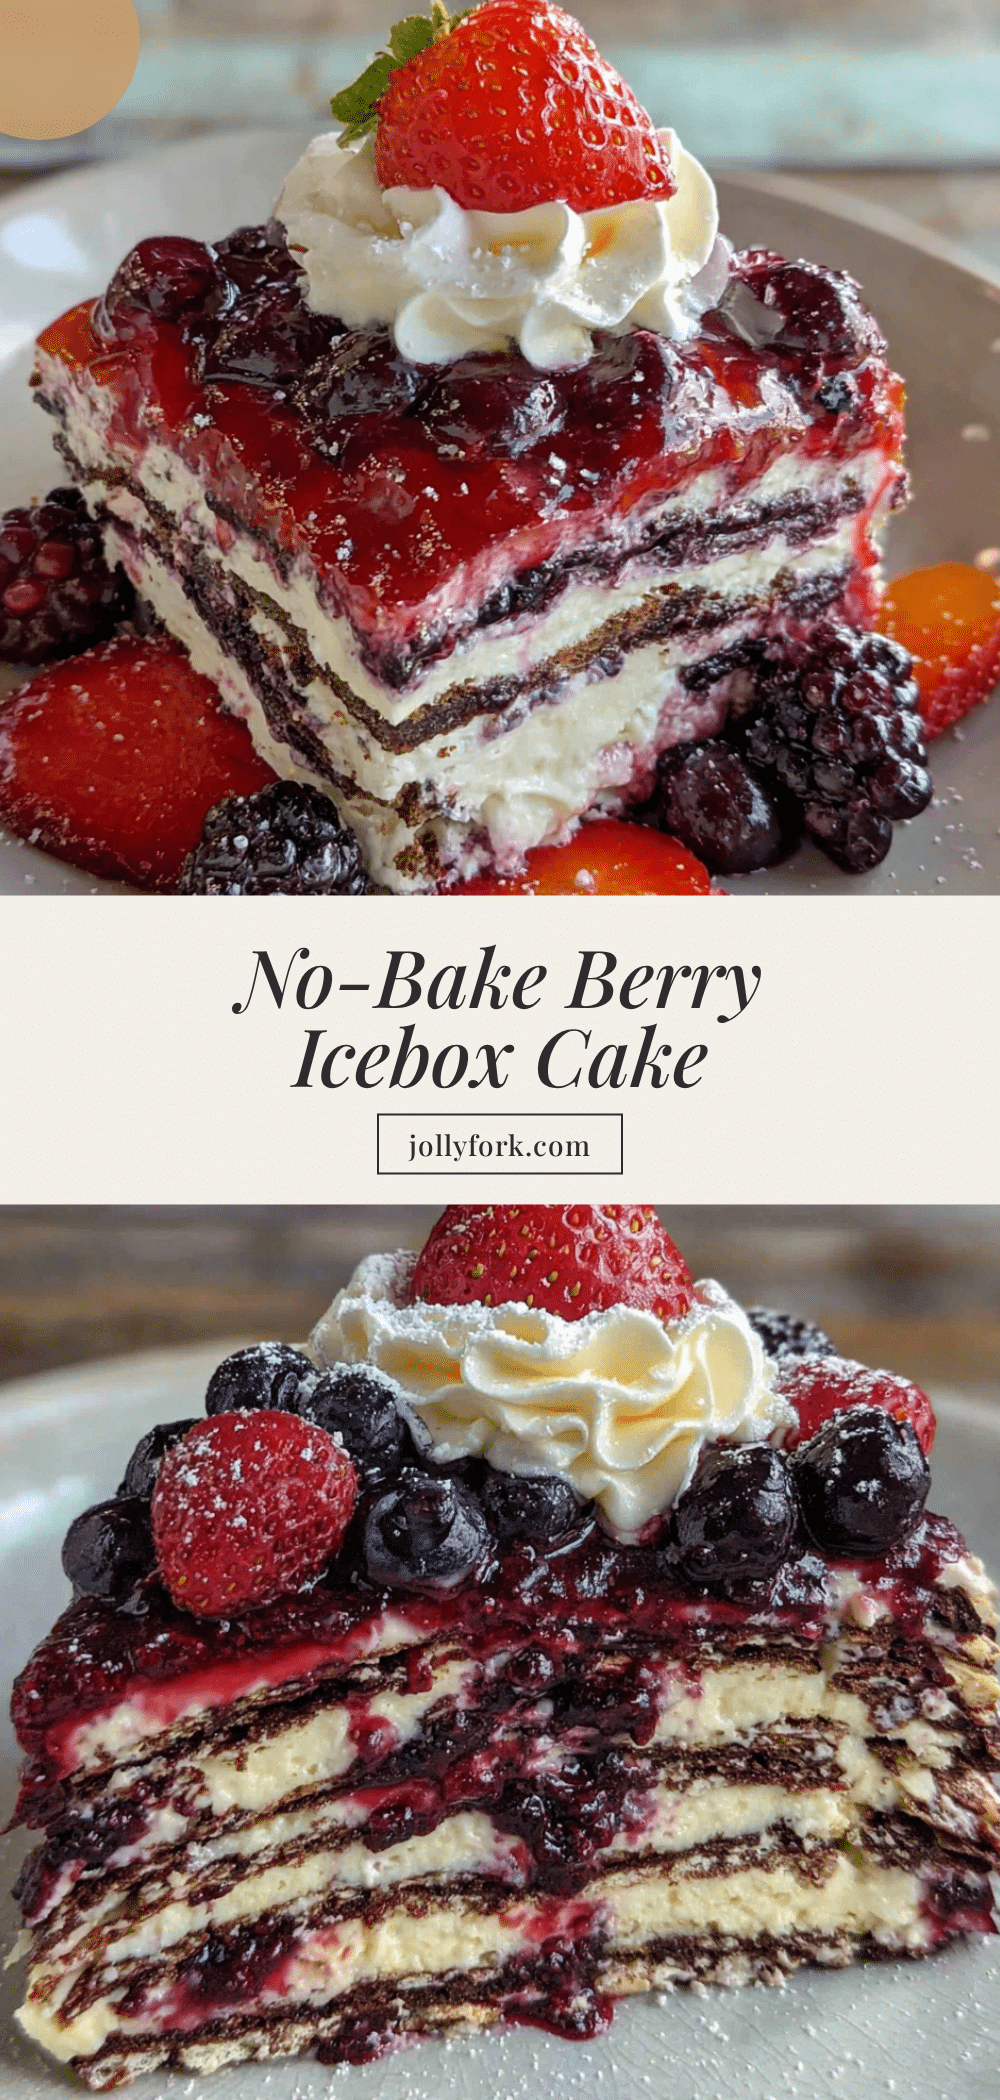
Easy No-Bake Berry Icebox Cake for Labor Day
This easy no-bake berry icebox cake for Labor Day is the perfect end-of-summer dessert. Layers of creamy filling, fresh berries, and graham crackers soften overnight into a cool, sweet slice of summer—no oven required.
- Prep Time: 20 minutes
- Cook Time: 0 minutes
- Total Time: 8 hours 20 minutes (includes chilling)
- Yield: 12 servings 1x
- Category: Dessert
- Cuisine: American
Ingredients
- 1 standard box (about 14–16 full sheets) graham crackers
- 2 cups (480 ml) heavy whipping cream, cold
- 1/3 cup (40 g) powdered sugar
- 8 ounces (226 g) cream cheese, softened to room temperature
- 1 teaspoon vanilla extract
- 1 pint (about 300 g) fresh strawberries, hulled and sliced
- 1 pint (about 170 g) fresh blueberries
- 6 ounces (170 g) fresh raspberries
- Zest of 1 lemon (optional)
Instructions
- Prep your berries. Wash and dry all the berries. Hull and slice the strawberries. Set aside about a cup of mixed berries for topping later.
- Make the cream filling. In a large mixing bowl, beat the softened cream cheese with an electric mixer on medium speed until smooth and fluffy, about 2 minutes. Add the powdered sugar and vanilla extract, and beat until combined. Scrape down the sides of the bowl.
- Whip the cream. In a separate bowl, pour in the cold heavy cream. Using clean beaters, whip on medium-high speed until stiff peaks form, about 3-4 minutes.
- Fold everything together. Gently fold the whipped cream into the cream cheese mixture using a spatula and a light hand. Fold just until no white streaks remain.
- Start layering. Spread a thin layer of the cream mixture (about 1/2 cup) on the bottom of a 9×13-inch baking dish.
- First cracker layer. Arrange a single layer of graham crackers on top of the cream, breaking them to fit as needed.
- First berry layer. Scatter about a third of the sliced strawberries, blueberries, and raspberries over the crackers. Sprinkle a little lemon zest over the berries.
- First cream layer. Spread about a third of the remaining cream mixture over the berries.
- Repeat layers. Add another layer of graham crackers, followed by another third of the berries, and another third of the cream. Repeat one more time, ending with a final layer of cream on top.
- Finish the top. Spread the remaining cream evenly over the top. Arrange the reserved berries on top.
- Cover and chill. Cover the dish tightly with plastic wrap. Refrigerate for at least 8 hours, but overnight is better.
Notes
For best results, let the cream cheese soften at room temperature for 30-40 minutes before starting. Keep the heavy cream cold for whipping. Do not overwhip the cream—stop at stiff peaks. The cake needs at least 8 hours to chill; overnight is ideal for the graham crackers to soften completely. Use a light hand when folding to keep the filling airy. For clean slices, run a knife under hot water and wipe dry between cuts.
Nutrition
- Serving Size: 1 slice (1/12 of cak
- Calories: 320
- Sugar: 18
- Sodium: 180
- Fat: 22
- Saturated Fat: 13
- Carbohydrates: 28
- Fiber: 3
- Protein: 4
Keywords: no-bake dessert, icebox cake, berry cake, Labor Day dessert, summer dessert, easy dessert, graham cracker cake


