Okay, I need to stop pretending I’m going to make a fancy three-course dinner for Halloween this year. The truth is, I want something that looks impressive, feeds a crowd, and doesn’t chain me to the stove while everyone else is having fun. That’s the exact moment this Easy Halloween Pumpkin Charcuterie Board idea hit me—right in the middle of the grocery store, staring at a sugar pumpkin. I wanted the visual drama of a carved pumpkin, but I didn’t want to deal with seeds and guts and all that mess. So here’s the thing: what if I just used the pumpkin as a bowl? A beautiful, edible-looking vessel for all the salty, sweet, and savory snacks that make a party feel like a party. This isn’t about complicated cooking. It’s about smart arranging, a little bit of creativity, and letting the food do the talking. Honestly, this board has saved me more times than I can count, from last-minute gatherings to planned Halloween bashes. It’s the kind of snack spread that makes people stop and take a picture before they even grab a cracker.
Why You’ll Love This Recipe
Let’s be real for a second. Most Halloween party food is either terrifyingly complicated or disappointingly basic. This Easy Halloween Pumpkin Charcuterie Board sits perfectly in the middle—it looks like you spent hours, but you really just assembled things beautifully. I’ve tested this setup at three different parties now, and it never fails to get the “wow” reaction.
- No Cooking Required: Seriously. The only thing you might need to do is toast some nuts or warm up a dip. Everything else comes from the store ready to go.
- Customizable for Any Crowd: Meat lovers, vegetarians, gluten-free friends—everyone finds something to eat. You control every component.
- Perfect for Halloween Parties: The pumpkin centerpiece is pure seasonal magic. It sets the theme without needing a single plastic spider or fake cobweb.
- Stress-Free Hosting: You can prep this board hours in advance. Just cover it with plastic wrap and pull it out when guests arrive. Zero last-minute panic.
- Visually Stunning: This is the kind of spread that gets photographed and shared. The contrast of the orange pumpkin against dark cheeses, green grapes, and brown crackers is pure art.
What makes this board different from just any cheese platter? It’s the pumpkin. Using a small sugar pumpkin or a decorative gourd as your base changes the entire presentation. It feels intentional and festive without being kitschy. And honestly, when you place this on the table, people gravitate toward it. It’s the centerpiece that also feeds everyone. That’s the kind of multitasking I can get behind.
What Ingredients You Will Need
This recipe uses simple, store-bought ingredients to deliver a beautiful and satisfying snack spread. The key is variety—you want a mix of textures, flavors, and colors. Here’s what I typically use for a crowd of 8-10 people, but feel free to adjust based on your guest list.
For the Pumpkin Centerpiece
- 1 small sugar pumpkin or decorative gourd (about 3-4 inches tall, firm and blemish-free)
- Knife and spoon for hollowing (you’ll cut off the top and scoop out the seeds)
Cheeses (Pick 3-4 varieties)
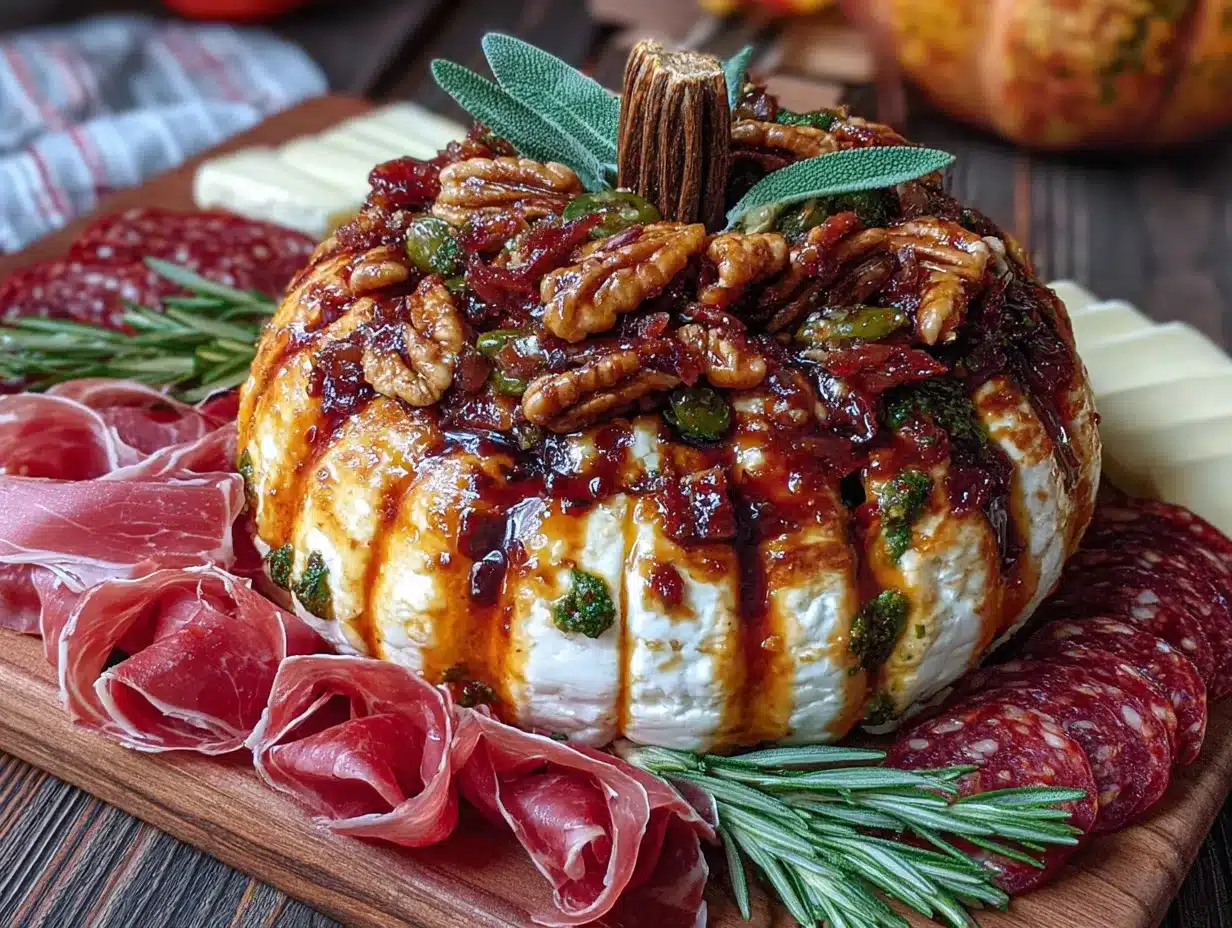
- Sharp cheddar (orange color fits the theme perfectly)
- Brie or camembert (soft and creamy, great for spreading)
- Aged gouda (nutty flavor, firm texture)
- Goat cheese log (tangy and easy to slice or crumble)
- Smoked gouda (adds a subtle smoky depth)
Meats (Pick 2-3 varieties)
- Prosciutto (thinly sliced, salty ribbons)
- Salami (sliced into thin rounds or quartered)
- Pepperoni (classic, kid-friendly option)
- Soppressata (spicy Italian, adds a kick)
Fruits (Fresh and Dried)
- Red and green grapes (washed and separated into small clusters)
- Dried apricots (chewy and sweet, like little orange gems)
- Dried figs (sweet and earthy, pairs beautifully with cheese)
- Apple slices (tossed in lemon juice to prevent browning)
- Pomegranate seeds (for a pop of jewel-like color)
Crunchy Elements
- Assorted crackers (water crackers, whole wheat, and rosemary-infused are my go-to choices)
- Breadsticks or grissini (for dipping and scooping)
- Pretzel sticks (adds a salty, crunchy element)
- Roasted and salted almonds (or pecans, cashews, or walnuts)
Dips and Spreads
- Honey (drizzle over brie or goat cheese for a sweet-savory combo)
- Fig jam or pumpkin butter (seasonal favorite, I love cozy spiced peach butter for a fall twist)
- Whole grain mustard (pairs well with salami and cheddar)
- Olives (a small bowl of mixed olives adds briny depth)
Garnish and Decoration
- Fresh rosemary sprigs (look like little pine trees)
- Fresh thyme (sprinkle over cheeses)
- Edible flowers (optional, but nasturtiums add a pop of color)
- Candy corn or candy pumpkins (for a sweet, whimsical touch)
Equipment Needed
You don’t need much for this board, which is part of the beauty. Here’s what I use:
- Large wooden cutting board or serving platter (at least 16 inches wide to fit everything comfortably)
- Small paring knife (for carving the pumpkin top)
- Metal spoon (for scooping out pumpkin seeds)
- Small bowls or ramekins (for dips, honey, and olives)
- Cheese knives (one for soft cheese, one for hard cheese)
- Small tongs (for meats and fruit, keeps things tidy)
If you don’t have a large wooden board, a baking sheet lined with parchment paper works perfectly. I’ve also used a large slate tile from the home improvement store—it’s cheap, looks great, and cleans up easily. Just make sure whatever you use is food-safe and large enough to hold everything without feeling cramped.
Preparation Method
This board comes together in about 20 minutes of active time. The key is to work in layers, starting with the largest elements and filling in the gaps.
- Prepare the Pumpkin (5 minutes): Wash and dry your sugar pumpkin. Using a sharp paring knife, cut off the top 1/4 of the pumpkin, just like you would for a jack-o-lantern. Scoop out all the seeds and stringy pulp with a metal spoon. Discard the seeds (or save them for roasting later). Place the hollowed pumpkin in the center of your board. It will act as a bowl for one of your dips or a pile of crackers.
- Arrange the Large Bowls (2 minutes): Place your small bowls or ramekins around the pumpkin. Fill one with honey, one with fig jam or pumpkin butter, and one with whole grain mustard. If you’re using olives, put them in a fourth bowl. Position these bowls so they’re evenly spaced around the board.
- Place the Cheeses (3 minutes): Unwrap your cheeses and place them at various points around the board. Cut the hard cheeses (cheddar, gouda) into cubes or thin slices before placing them. Leave the brie whole—guests can cut what they want. Position the goat cheese log near the honey bowl so people can easily pair them. Space the cheeses out so there’s a cheese option within reach no matter where someone is standing.
- Add the Meats (3 minutes): Fold or roll the sliced meats into attractive shapes. For prosciutto, I like to fold each slice into a loose ribbon. For salami, I stack a few slices and then quarter them. Arrange the meats in small piles near their complementary cheeses. The prosciutto goes near the brie, the salami near the cheddar.
- Fill in with Fruits (3 minutes): Scatter the grape clusters in the empty spaces between the cheeses and meats. Add small piles of dried apricots and figs. Place the apple slices in a fan pattern near the cheddar. Sprinkle pomegranate seeds over the board like little jewels—they add a pop of color that screams “special occasion.”
- Add the Crunchy Elements (3 minutes): Fill the hollowed pumpkin with a mix of crackers and pretzel sticks. Arrange additional crackers in small piles around the board. Place the breadsticks in a neat stack. Scatter the almonds in the remaining gaps. You want the board to look full and abundant, so don’t be shy with the crackers.
- Garnish and Finish (2 minutes): Tuck sprigs of fresh rosemary and thyme around the board. The rosemary looks like little trees and adds a wonderful aroma. If you’re using edible flowers, place them strategically for color. Finally, sprinkle a few candy corns or candy pumpkins around the edges for a playful Halloween touch. Step back and admire your work—then take a picture before anyone digs in!
A quick tip: if you’re prepping this board ahead of time, cover it loosely with plastic wrap and store it in the refrigerator. Take it out 30 minutes before serving to let the cheeses come to room temperature. That’s when they taste their best.
Cooking Tips & Techniques
I’ve made this board about a dozen times now, and I’ve learned a few things the hard way. Here’s what I wish I knew from the start.
Don’t overthink the pumpkin. The first time I tried this, I spent 20 minutes trying to carve a perfect design into the pumpkin. It looked terrible, and I wasted time I could have spent on the food. The pumpkin is just a vessel—a simple cut-off top is all you need. Let the food be the star.
Balance your flavors. A good charcuterie board has a mix of salty, sweet, tangy, and rich elements. If all your cheeses are sharp and aged, the board will feel one-note. Include something creamy (brie), something tangy (goat cheese), and something nutty (gouda). Same with the meats—mix a mild prosciutto with a spicy soppressata.
Think about color contrast. This board is already orange from the pumpkin, so you want to add contrasting colors. Green grapes, red pomegranate seeds, purple figs, and white crackers all pop against the orange background. If everything is the same color, the board looks flat and unappealing.
Don’t overcrowd the board. I know it’s tempting to pile everything on, but a crowded board is hard to navigate. Leave a little bit of space between the elements so people can easily grab what they want. If you have too much food, set up a second small board or plate nearby.
Temperature matters. Cheeses taste best at room temperature. Take the board out of the fridge 30 minutes before serving. If you’re serving outdoors on a cool fall evening, the cheese will stay at a good temperature longer. If it’s warm inside, consider keeping a small bowl of ice nearby for the grapes.
One mistake I made early on: I used a pumpkin that was too large. A big pumpkin looks impressive, but it takes up too much space on the board and leaves little room for the actual food. Stick with a small sugar pumpkin—it’s the perfect size.
Variations & Adaptations
This board is incredibly flexible. Here are some ways to change it up based on your crowd or what you have on hand.
Vegetarian Version: Skip the meats entirely and double up on the cheeses and dips. Add marinated artichoke hearts, roasted red peppers, and grilled vegetables. The board will still feel abundant and satisfying. I’ve served this version to a mixed crowd, and nobody missed the meat.
Spicy Halloween Twist: Add a bowl of pickled jalapeños or spicy pickled okra for a heat element. Swap the honey for a spicy honey (infuse regular honey with a sliced jalapeño for 24 hours). Include a spicy salami or chorizo. The heat pairs beautifully with the creamy cheeses and sweet fruits.
Kid-Friendly Version: Replace the fancy cheeses with cheddar cubes, string cheese, and cream cheese spread. Swap the prosciutto for ham or turkey slices. Add a bowl of candy corn and a pile of chocolate-covered pretzels. Kids love the interactive nature of a board, and this version is guaranteed to be a hit.
Sweet Dessert Board: Turn this into a dessert spread by using the pumpkin as a bowl for chocolate mousse or caramel dip. Fill the board with cookies, brownie bites, marshmallows, fresh berries, and chocolate-covered nuts. This version is perfect for a Halloween party where you want something sweet but not overly complicated.
Gluten-Free Adaptation: Use gluten-free crackers and pretzels. Check your meats and cheeses to make sure they’re gluten-free (most are, but some processed meats contain fillers). The board is naturally gluten-free aside from the crackers, so this swap is easy.
I once made a breakfast charcuterie board using a small pumpkin for a Halloween brunch. I filled it with mini donuts and used the board for bacon strips, sliced apples, yogurt dip, and cheese cubes. It was a huge hit and took almost no effort.
Serving & Storage Suggestions
This board is best served at room temperature, so plan to pull it out of the fridge about 30 minutes before guests arrive. Arrange everything on the board and let it sit on the counter while you finish last-minute prep.
Presentation Tips: Place the board on a large table where people can gather around it. Make sure there are small plates and napkins nearby. If you’re using cheese knives, place one next to each cheese. For the dips, provide small spoons or spreaders. I like to put a small sign next to the board that says “Dig In!”—it encourages people to start without waiting for a formal announcement.
Complementary Dishes: This board pairs beautifully with a warm soup or a hearty salad. I love serving it alongside a creamy roasted cherry tomato basil bisque for dipping. If you want something more substantial, savory giant skillet queso fundido with chorizo and hatch chiles is a warm, melty addition that guests will love.
Storage: If you have leftovers (unlikely, but possible), remove the pumpkin and store the components separately. Cheeses should be wrapped in wax paper or cheese paper and stored in the refrigerator. Meats can be wrapped in plastic wrap. Fruits and crackers should be stored in airtight containers. The pumpkin will last for a day or two in the refrigerator, but it’s best to use it within 24 hours.
Reheating: This board is served cold or at room temperature, so no reheating is needed. If you’re using a warm dip (like queso or a baked brie), reheat it separately and add it to the board just before serving.
How Flavors Develop: The flavors of the cheeses and meats actually improve after 30 minutes at room temperature. The cheese becomes creamier, the meats become more aromatic. If you’re making this board for a party that lasts several hours, the flavors will peak about an hour after serving.
Nutritional Information & Benefits
This board is more of a grazing experience than a structured meal, so nutritional values will vary based on what you choose and how much you eat. Here’s a rough estimate per serving (assuming the board serves 8-10 people):
- Calories: 350-450 per serving (depending on cheese and meat choices)
- Protein: 15-20 grams (from cheese and meats)
- Fat: 25-30 grams (mostly from cheese and nuts)
- Carbohydrates: 20-25 grams (from crackers, fruits, and honey)
- Fiber: 3-5 grams (from fruits and nuts)
- Sugar: 10-15 grams (natural sugars from fruit and honey)
Health Benefits: This board offers a surprising amount of nutritional value. Cheese is a good source of calcium and protein. Nuts provide healthy fats and vitamin E. Grapes and apples offer antioxidants and fiber. The variety means you’re getting a range of nutrients in one sitting. Plus, the act of grazing on a charcuterie board tends to lead to smaller, more mindful portions compared to a sit-down meal.
Dietary Considerations: This board can easily be adapted for gluten-free, low-carb, or vegetarian diets. For a low-carb version, skip the crackers and breadsticks and add extra vegetables like cucumber slices, bell pepper strips, and cherry tomatoes. For a dairy-free version, use vegan cheeses and skip the butter-based crackers.
Potential Allergens: This board contains dairy (cheese), gluten (crackers), and nuts (almonds). If you have guests with allergies, clearly label the components or set up a separate small board for them. I always keep a few dairy-free and gluten-free options on hand just in case.
From a wellness perspective, I love that this board encourages social eating. People stand around it, talk, and share food. It’s a communal experience that feels more relaxed than a formal dinner. And honestly, that’s good for the soul.
Conclusion
This Easy Halloween Pumpkin Charcuterie Board is the kind of recipe that makes you look like a hosting genius without actually doing much work. It’s visually stunning, endlessly customizable, and perfect for any Halloween gathering. Whether you’re throwing a big party or just having a few friends over, this board delivers every time.
I love that this board brings people together. There’s something about standing around a beautiful spread of food, picking and choosing, sharing bites, and talking that feels inherently festive. It’s not about the complexity of the cooking—it’s about the joy of sharing good food with good people. And this board captures that spirit perfectly.
Go ahead and make this your own. Swap in your favorite cheeses, add your go-to dips, and don’t be afraid to get creative with the garnishes. The pumpkin is your canvas, and the food is your paint. Have fun with it. And when you make it, come back and tell me how it went. I’d love to hear about your version of this board—what cheeses you used, what fruits you added, and whether anyone tried to steal the pumpkin as a souvenir.
Happy Halloween, and happy snacking!
Frequently Asked Questions
How far in advance can I make this charcuterie board?
You can assemble the entire board up to 4 hours in advance. Cover it loosely with plastic wrap and store it in the refrigerator. Take it out 30 minutes before serving to let the cheeses come to room temperature. The pumpkin will hold up well for a few hours, but if you’re making it more than 4 hours ahead, I’d recommend prepping the ingredients separately and assembling just before guests arrive.
Can I use a different type of pumpkin or squash?
Absolutely. Small sugar pumpkins are ideal because they’re firm and have a nice shape, but you can also use a decorative gourd, a small butternut squash, or even a bell pepper for a non-traditional look. Just make sure whatever you use is stable and can hold the weight of the crackers or dip you’re putting inside it.
What if I don’t have a large serving board?
No problem. You can use a baking sheet lined with parchment paper, a large cutting board, or even a clean, flat piece of wood from a craft store (just make sure it’s food-safe). If you’re serving a large crowd, consider using two smaller boards placed next to each other. The key is to have enough surface area to spread everything out without overcrowding.
How do I keep the pumpkin from rolling over?
If your pumpkin is wobbly, slice a thin piece off the bottom to create a flat surface. Use a sharp knife to carefully level the bottom without cutting into the hollowed cavity. This will keep the pumpkin stable and prevent it from tipping over when guests reach for crackers.
Can I use this board for a non-Halloween party?
Definitely. The pumpkin gives it a fall vibe, but you can adapt it for any season. Use a small watermelon in summer, a bell pepper for a fiesta theme, or a hollowed-out bread loaf for a rustic look. The concept is the same—use a vessel as a centerpiece and fill the board with complementary snacks. It’s a versatile idea that works year-round.
Pin This Recipe!
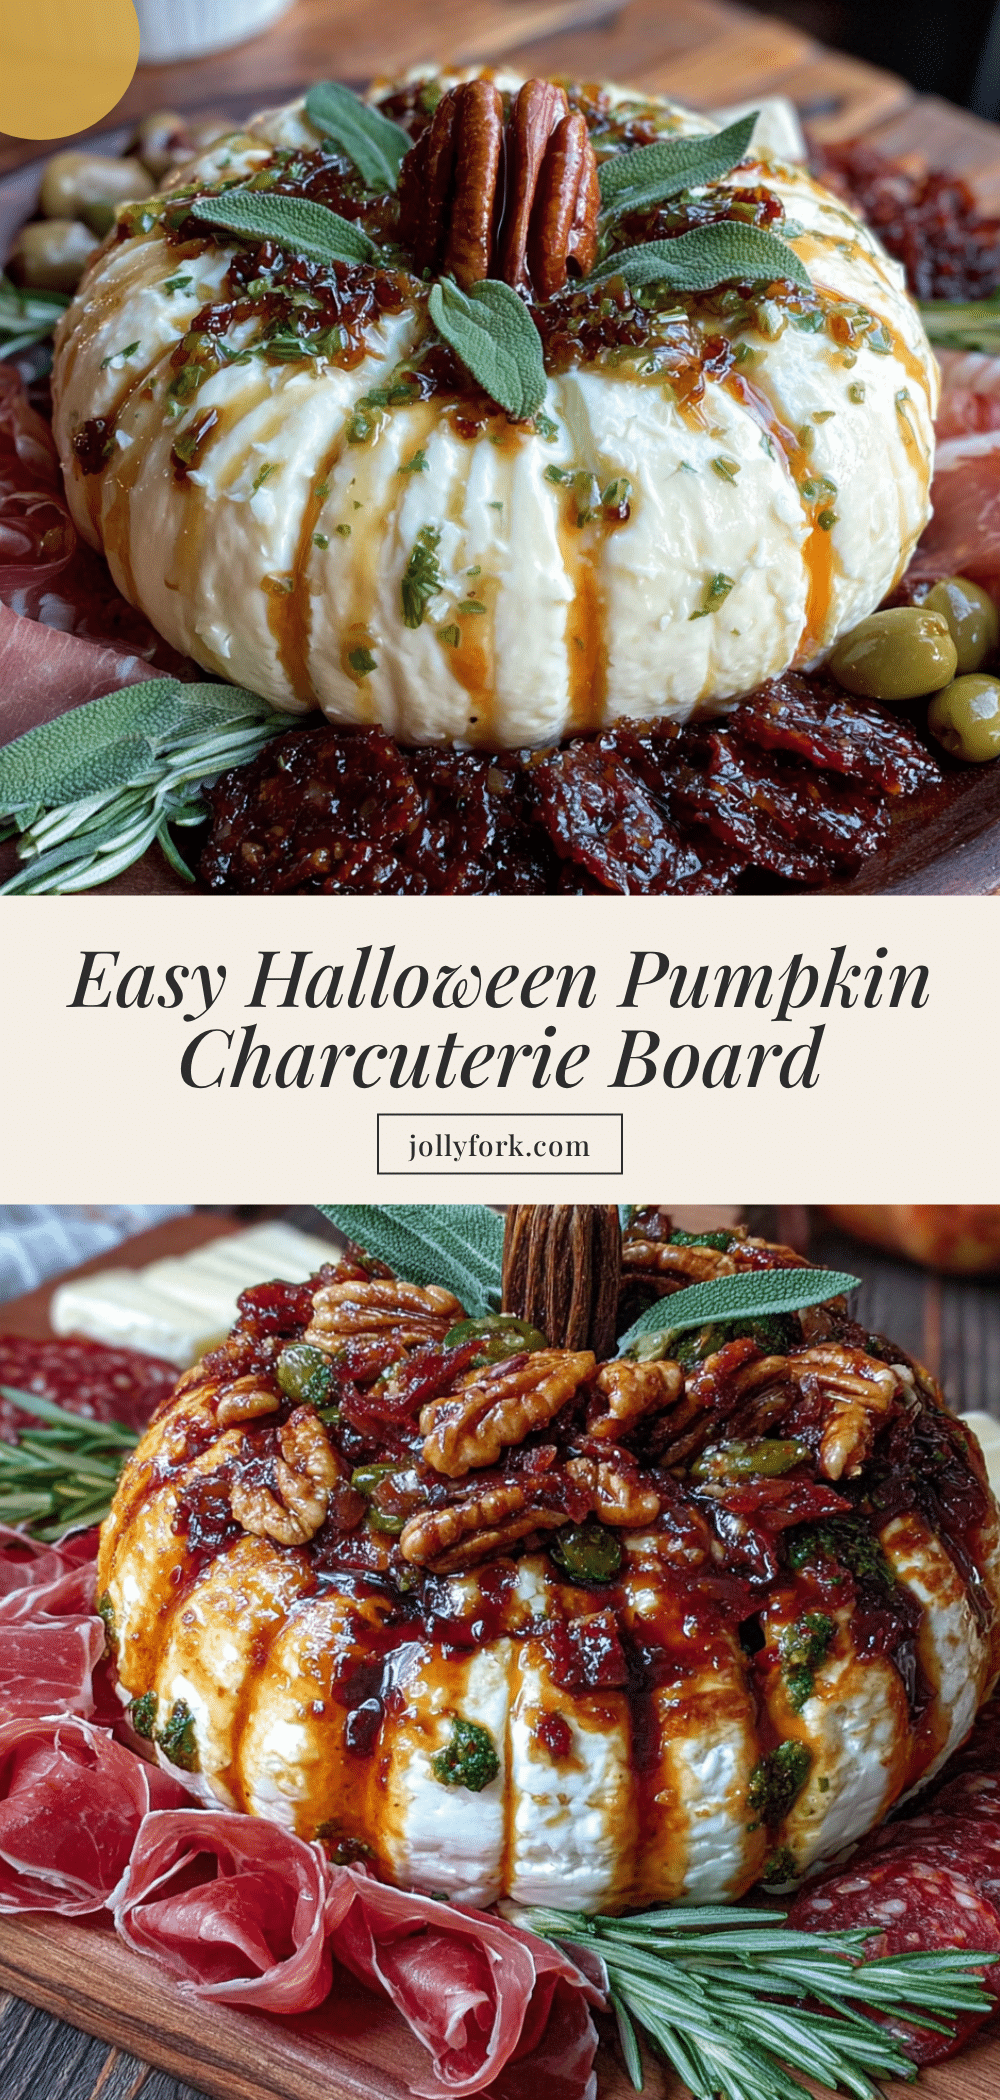
Easy Halloween Pumpkin Charcuterie Board (Best Snack Recipe)
A visually stunning and stress-free Halloween snack spread that uses a small sugar pumpkin as a centerpiece bowl. This no-cook charcuterie board is customizable for any crowd and perfect for parties.
- Prep Time: 20 minutes
- Cook Time: 0 minutes
- Total Time: 20 minutes
- Yield: 8-10 servings 1x
- Category: Appetizer
- Cuisine: American
Ingredients
- 1 small sugar pumpkin or decorative gourd (about 3–4 inches tall)
- Sharp cheddar (orange color fits the theme)
- Brie or camembert (soft and creamy)
- Aged gouda (nutty flavor)
- Goat cheese log (tangy)
- Smoked gouda (optional, adds smoky depth)
- Prosciutto (thinly sliced)
- Salami (sliced into thin rounds or quartered)
- Pepperoni (classic, kid-friendly)
- Soppressata (spicy Italian, optional)
- Red and green grapes (washed and separated into small clusters)
- Dried apricots
- Dried figs
- Apple slices (tossed in lemon juice to prevent browning)
- Pomegranate seeds
- Assorted crackers (water crackers, whole wheat, rosemary-infused)
- Breadsticks or grissini
- Pretzel sticks
- Roasted and salted almonds (or pecans, cashews, walnuts)
- Honey
- Fig jam or pumpkin butter
- Whole grain mustard
- Olives (mixed)
- Fresh rosemary sprigs
- Fresh thyme
- Edible flowers (optional, e.g., nasturtiums)
- Candy corn or candy pumpkins (for garnish)
Instructions
- Prepare the Pumpkin (5 minutes): Wash and dry the sugar pumpkin. Using a sharp paring knife, cut off the top 1/4 of the pumpkin. Scoop out all the seeds and stringy pulp with a metal spoon. Discard the seeds (or save for roasting). Place the hollowed pumpkin in the center of your board.
- Arrange the Large Bowls (2 minutes): Place small bowls or ramekins around the pumpkin. Fill one with honey, one with fig jam or pumpkin butter, and one with whole grain mustard. If using olives, put them in a fourth bowl. Position bowls evenly spaced around the board.
- Place the Cheeses (3 minutes): Unwrap cheeses and place at various points around the board. Cut hard cheeses (cheddar, gouda) into cubes or thin slices. Leave brie whole. Position goat cheese log near the honey bowl. Space cheeses out so there’s a cheese option within reach from any spot.
- Add the Meats (3 minutes): Fold or roll sliced meats into attractive shapes. For prosciutto, fold each slice into a loose ribbon. For salami, stack a few slices and quarter them. Arrange meats in small piles near complementary cheeses (prosciutto near brie, salami near cheddar).
- Fill in with Fruits (3 minutes): Scatter grape clusters in empty spaces between cheeses and meats. Add small piles of dried apricots and figs. Place apple slices in a fan pattern near the cheddar. Sprinkle pomegranate seeds over the board.
- Add the Crunchy Elements (3 minutes): Fill the hollowed pumpkin with a mix of crackers and pretzel sticks. Arrange additional crackers in small piles around the board. Place breadsticks in a neat stack. Scatter almonds in remaining gaps.
- Garnish and Finish (2 minutes): Tuck sprigs of fresh rosemary and thyme around the board. If using edible flowers, place them strategically for color. Sprinkle a few candy corns or candy pumpkins around the edges for a playful Halloween touch.
Notes
Prep the board up to 4 hours in advance; cover loosely with plastic wrap and refrigerate. Remove 30 minutes before serving to let cheeses come to room temperature. For a stable pumpkin, slice a thin piece off the bottom to create a flat surface. Customize with your favorite cheeses, meats, and dips.
Nutrition
- Serving Size: 1 serving (approxima
- Calories: 350450
- Sugar: 1015
- Sodium: 500700
- Fat: 2530
- Saturated Fat: 1015
- Carbohydrates: 2025
- Fiber: 35
- Protein: 1520
Keywords: Halloween charcuterie board, pumpkin charcuterie board, easy Halloween snack, no-cook appetizer, party platter, fall entertaining


