I kept scrolling past Halloween desserts that looked incredible but required turning on the oven. And honestly, after a full day of work and last-minute costume assembly, the last thing I wanted was to babysit a cheesecake in a water bath. For a while, I just accepted that October treats meant either store-bought candy or a sink full of baking dishes. Then I realized the problem wasn’t the craving—it was the approach. I wanted something that looked like it took hours but actually came together while I was already making dinner. These Easy No-Bake Spider Web Cheesecake Bites were born out of that specific, stubborn refusal to heat up the kitchen.
The first batch I made for a small Halloween gathering, and they disappeared before the punch bowl got touched. Nobody believed they were no-bake. That moment—watching someone take a bite and then check the kitchen for evidence of a mixer—is exactly why this recipe stuck. These little cheesecake bites aren’t pretending to be fancy. They’re just honest, creamy, and exactly what a Halloween dessert should be: fun without the fuss.
If you have a bowl and a fridge, you already have the only equipment you need. That’s the whole deal.
Why You’ll Love This Recipe
These spider web cheesecake bites solve a very specific October problem. You want something festive, but you also want to keep your sanity. Here is why this recipe works when others don’t.
- No Oven Required : The kitchen stays cool, which matters when you’re already running the oven for the main meal. This is a set-it-and-forget-it situation.
- Simple Ingredients : Cream cheese, heavy cream, powdered sugar, vanilla, and a few Oreos. No gelatin, no complicated custard steps.
- Perfect for Halloween Parties : These look like you piped webs for an hour, but the decoration takes about two minutes per batch. Great for mini corn dog muffins with sweet honey butter glaze as a savory counterpart.
- Crowd-Pleaser : Kids love the web design, adults love the light, creamy texture. Nobody feels like they’re eating a “healthy” compromise.
- Unbelievably Delicious : The Oreo crust gives that chocolate crunch, and the cheesecake filling is airy without being too rich. It’s the kind of bite that makes you close your eyes for a second.
What makes this version different? Most no-bake cheesecake recipes use gelatin or end up too dense. This one uses stabilized whipped cream folded into the cream cheese, so the texture stays light and sliceable. It is not just another Halloween dessert—it is the one you will make every year.
What Ingredients You Will Need
This recipe relies on a short list of pantry-friendly staples. The magic is in the technique, not a long grocery receipt.
For the Oreo Crust
- 20 Oreo cookies (regular, not double-stuffed)
- 4 tablespoons unsalted butter (melted)
For the Cheesecake Filling
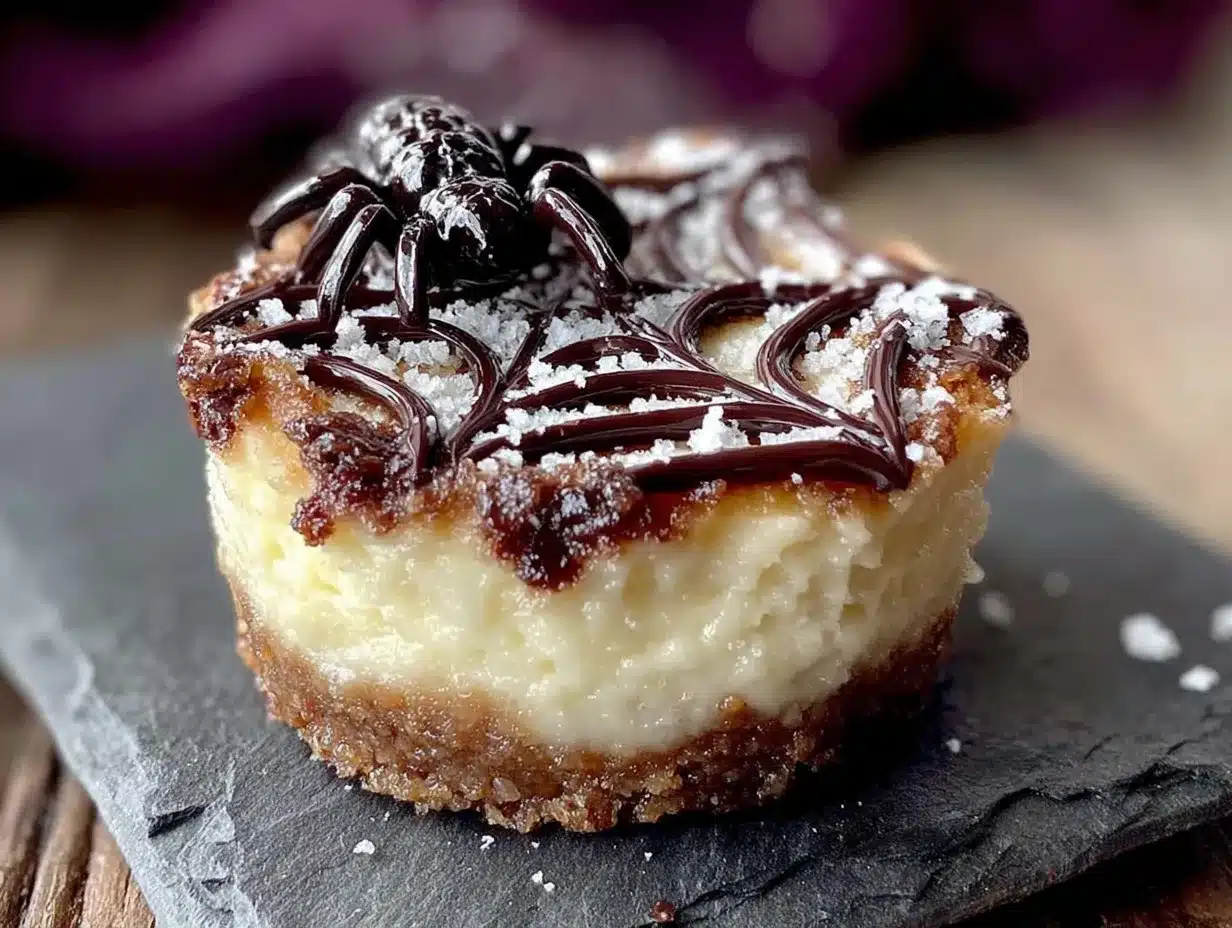
- 16 ounces cream cheese (softened to room temperature, full-fat recommended for best texture)
- 1/2 cup granulated sugar
- 1 teaspoon vanilla extract
- 1 cup heavy cream (cold)
- 1/4 cup powdered sugar
For the Spider Web Decoration
- 1/4 cup white chocolate chips or melting wafers
- 1 teaspoon coconut oil or vegetable shortening (helps with smooth melting)
- Black gel food coloring (optional, for a darker web contrast)
Ingredient Notes & Substitutions: Use a block-style cream cheese, not the spreadable tub variety—the texture difference matters. If you want a gluten-free option, swap the Oreos for a gluten-free chocolate sandwich cookie. The heavy cream is non-negotiable for that light, mousse-like texture; half-and-half will not whip properly. I prefer Ghirardelli white chocolate melting wafers for the web because they set firmly without blooming. For the black web lines, a tiny dab of black gel coloring works, but you can also use dark chocolate melted with a drop of black cocoa powder.
Equipment Needed
- Food processor or zip-top bag and rolling pin (for crushing Oreos)
- Medium mixing bowl (for crust)
- Large mixing bowl (for cheesecake filling)
- Electric hand mixer or stand mixer with whisk attachment
- Rubber spatula
- 24-count mini muffin tin (standard size, not silicone—metal helps the crust set)
- Piping bag or small zip-top bag (for the web)
- Toothpick or wooden skewer (for swirling the web design)
- Measuring cups and spoons
If you don’t have a mini muffin tin, you can use a standard 12-count muffin tin and make larger bites—just adjust the chilling time. A food processor makes quick work of the Oreo crumbs, but a zip-top bag and a rolling pin work fine if you enjoy the catharsis of crushing cookies manually. For the piping bag, a small zip-top bag with the corner snipped off works perfectly and saves cleanup.
Preparation Method
This recipe moves quickly once you start, so have your ingredients measured and ready. The total active time is about 20 minutes, but the chilling is where the magic happens.
- Make the crust. Place the Oreos (filling and all) in a food processor and pulse until you have fine crumbs. Transfer to a medium bowl, pour in the melted butter, and stir with a fork until every crumb is moistened. The mixture should hold together when you pinch it. If it seems dry, add another teaspoon of melted butter.
- Press the crust into the tin. Spoon about 1 tablespoon of the crust mixture into each mini muffin cup. Press it down firmly with the back of a small spoon or a shot glass. You want a compact, even layer. Place the tin in the freezer while you make the filling—about 10 minutes. This helps the crust set and keeps it from blending into the cheesecake layer.
- Whip the cream. In a large bowl, combine the cold heavy cream and powdered sugar. Beat with an electric mixer on medium-high speed until stiff peaks form. This takes about 2-3 minutes. Be careful not to over-whip, or you will end up with butter. Set the whipped cream aside.
- Beat the cream cheese. In a separate large bowl, beat the softened cream cheese, granulated sugar, and vanilla extract until smooth and creamy. Scrape down the sides and bottom of the bowl at least once. There should be no lumps. This takes about 2 minutes on medium speed.
- Fold it all together. Add about one-third of the whipped cream to the cream cheese mixture. Gently fold with a rubber spatula until just combined. Add the remaining whipped cream and fold until no white streaks remain. The mixture should be light, airy, and smooth. Do not stir vigorously—you want to keep the air in the whipped cream.
- Fill the cups. Remove the muffin tin from the freezer. Spoon or pipe the cheesecake filling into each cup, filling them almost to the top. Smooth the tops with the back of a spoon. Tap the tin gently on the counter to settle the filling and remove any air pockets.
- Chill. Place the tin in the refrigerator for at least 4 hours, or overnight. The bites need this time to firm up. Do not rush this step—if you try to remove them too early, they will be too soft to handle.
- Make the spider web topping. About 30 minutes before serving, melt the white chocolate chips with the coconut oil in a microwave-safe bowl. Microwave in 20-second intervals, stirring between each, until smooth. If using black food coloring, stir in a tiny drop until you reach your desired gray or black shade.
- Pipe the webs. Transfer the melted chocolate to a small piping bag or zip-top bag with a tiny corner snipped off. Pipe a small circle in the center of each cheesecake bite. Then pipe concentric circles around it, spaced about 1/4 inch apart. Working quickly, drag a toothpick from the center outward through all the circles. Repeat around the entire bite, spacing the drag marks evenly. This creates the classic spider web pattern.
- Final chill. Return the bites to the refrigerator for 15 minutes to set the chocolate webs. Then they are ready to serve.
Cooking Tips & Techniques
I have made these bites more times than I care to count, and I have definitely learned a few things the hard way. Here is what I wish I knew from the start.
Room temperature cream cheese is non-negotiable. Cold cream cheese will leave lumps in your filling no matter how long you beat it. Let it sit on the counter for at least 30 minutes before starting. If you forgot, cut it into small cubes and microwave on low power in 10-second bursts until softened but not warm.
Do not skip the freezer step for the crust. The cold butter in the crust needs to solidify again so it holds together when you bite into it. If you skip this, the crust will crumble and mix into the cheesecake filling. I learned this lesson when my first batch looked like muddy soup.
Use a toothpick, not a skewer, for the web. A toothpick is thin enough to drag through the chocolate without pulling too much. A wooden skewer creates lines that are too thick and can smear the design. I have ruined a whole tray of webs using a skewer in a hurry.
Work in small batches for the web. If you pipe the chocolate on all 24 bites before dragging the toothpick, the chocolate will start to set and the web lines will be messy. Pipe and drag one bite at a time. It takes the same total time but looks infinitely better.
Chill overnight for the best texture. Four hours works in a pinch, but overnight chilling gives the filling a firmer, creamier consistency that holds its shape better at room temperature. If you are serving these at a party, make them the day before.
Variations & Adaptations
This base recipe is flexible enough to handle all kinds of creative twists. Here are some of my favorite adaptations.
Pumpkin Spider Web Bites
Add 1/3 cup pumpkin puree and 1 teaspoon pumpkin pie spice to the cream cheese mixture before folding in the whipped cream. Reduce the granulated sugar to 1/3 cup. The pumpkin adds moisture, so these need a full overnight chill to set properly. These pair beautifully with brown butter pumpkin coffee cake with pecan streusel for a full fall dessert spread.
Peanut Butter Chocolate Version
Swap 4 ounces of the cream cheese for 4 ounces of creamy peanut butter. Reduce the sugar to 1/4 cup. Use chocolate cookie crumbs for the crust. The peanut butter adds a savory note that balances the sweetness. Top with a mini peanut butter cup instead of the white chocolate web for a quicker option.
Vegan Adaptation
Use a plant-based cream cheese block (I like Miyoko’s or Violife) and coconut cream instead of heavy cream. Chill the can of coconut cream overnight, then scoop only the solid part for whipping. The texture will be slightly less firm, but the flavor is still excellent. Use vegan chocolate sandwich cookies for the crust.
Mini Cheesecake Bites with Berry Swirl
Before chilling, drop small spoonfuls of seedless raspberry jam or strawberry preserves onto the filling. Swirl gently with a toothpick. The tart fruit cuts through the richness and adds a pop of color. This works well if you want a non-Halloween version for other occasions.
Serving & Storage Suggestions
These bites are best served cold, straight from the refrigerator. The texture is firm but creamy, and the chocolate web stays snappy. If you are bringing them to a party, transport them in the muffin tin and pop them out just before serving. They hold their shape at room temperature for about 30 minutes before starting to soften.
For presentation, arrange the bites on a dark platter or a black cake stand to make the white webs pop. Sprinkle a few edible glitter stars or a dusting of cocoa powder around the edges for a spooky vibe. They pair wonderfully with a warm drink like witches’ brew matcha cold foam for a complete Halloween treat experience.
Storage: Keep the bites in an airtight container in the refrigerator for up to 5 days. Do not freeze them, as the cream cheese filling can become grainy upon thawing. If you need to make them further ahead, prepare the crust and filling, chill for 4 hours, then add the web decoration just before serving. The webs are best fresh.
Reheating: These are served cold, so no reheating needed. If the bites seem too firm straight from the fridge, let them sit at room temperature for 5 minutes before serving.
Nutritional Information & Benefits
These are a treat, not a health food, but they do offer a few redeeming qualities. Each bite (based on 24 servings) contains approximately 165 calories, 12g fat, 14g carbohydrates, 3g protein, and 9g sugar. The cream cheese provides a modest amount of calcium and protein, while the Oreo crust adds a touch of fiber (about 1g per bite) from the whole wheat flour in the cookies.
For a lighter version, use reduced-fat cream cheese and swap the heavy cream for a stabilized whipped topping like Cool Whip. This reduces the calorie count to about 120 per bite and cuts the fat significantly. The texture will be slightly less rich but still satisfying.
These bites are naturally vegetarian and can be made gluten-free with a simple cookie swap. They contain dairy and wheat, so they are not suitable for vegan or gluten-free diets without modifications.
Conclusion
These Easy No-Bake Spider Web Cheesecake Bites are the Halloween dessert you have been looking for—simple enough for a weeknight, impressive enough for a party, and forgiving enough for a first-time baker. They do not require special skills, expensive equipment, or a clean kitchen. They just need a little patience for the chill time and a steady hand for the web.
I love this recipe because it proves that festive food doesn’t have to be complicated. The first time I served these, my niece asked if I bought them from a bakery. That kind of reaction never gets old. I hope you make these, customize them to your taste, and share them with people who appreciate a good bite-sized treat.
If you try this recipe, I would love to hear how it turned out. Drop a comment below with your favorite variation, or tag me in your spider web photos. Happy Halloween, and happy no-bake baking.
Frequently Asked Questions
Can I use a regular muffin tin instead of mini?
Yes. Use a standard 12-count muffin tin and double the crust and filling amounts per cup. Increase the chill time to at least 6 hours or overnight. The larger bites will need a slightly bigger web design, but the technique is the same.
How do I get the Oreo crust to stay together?
Make sure you use enough melted butter—4 tablespoons for 20 Oreos is the right ratio. Press the crust firmly into the cups using a flat-bottomed object like a shot glass. Freezing the crust for 10 minutes before adding the filling helps it set solidly.
Can I make these without a food processor?
Absolutely. Place the Oreos in a large zip-top bag, seal it, and crush them with a rolling pin or the bottom of a heavy pan. You want fine crumbs, so take your time. A few larger pieces are fine and add texture.
Why did my spider web chocolate crack when I tried to pipe it?
This usually happens if the chocolate is too thick or too cold. Add a teaspoon of coconut oil or shortening to the melted chocolate to thin it out. If the chocolate has started to set, microwave it for 10 seconds and stir until smooth again. Work quickly once the chocolate is warm.
Can I freeze these cheesecake bites?
I do not recommend freezing them. The cream cheese filling can become watery and grainy upon thawing. If you need to make them ahead, prepare the crust and filling, chill for 4 hours, then add the web decoration up to 1 day before serving. The webs are best fresh.
Pin This Recipe!
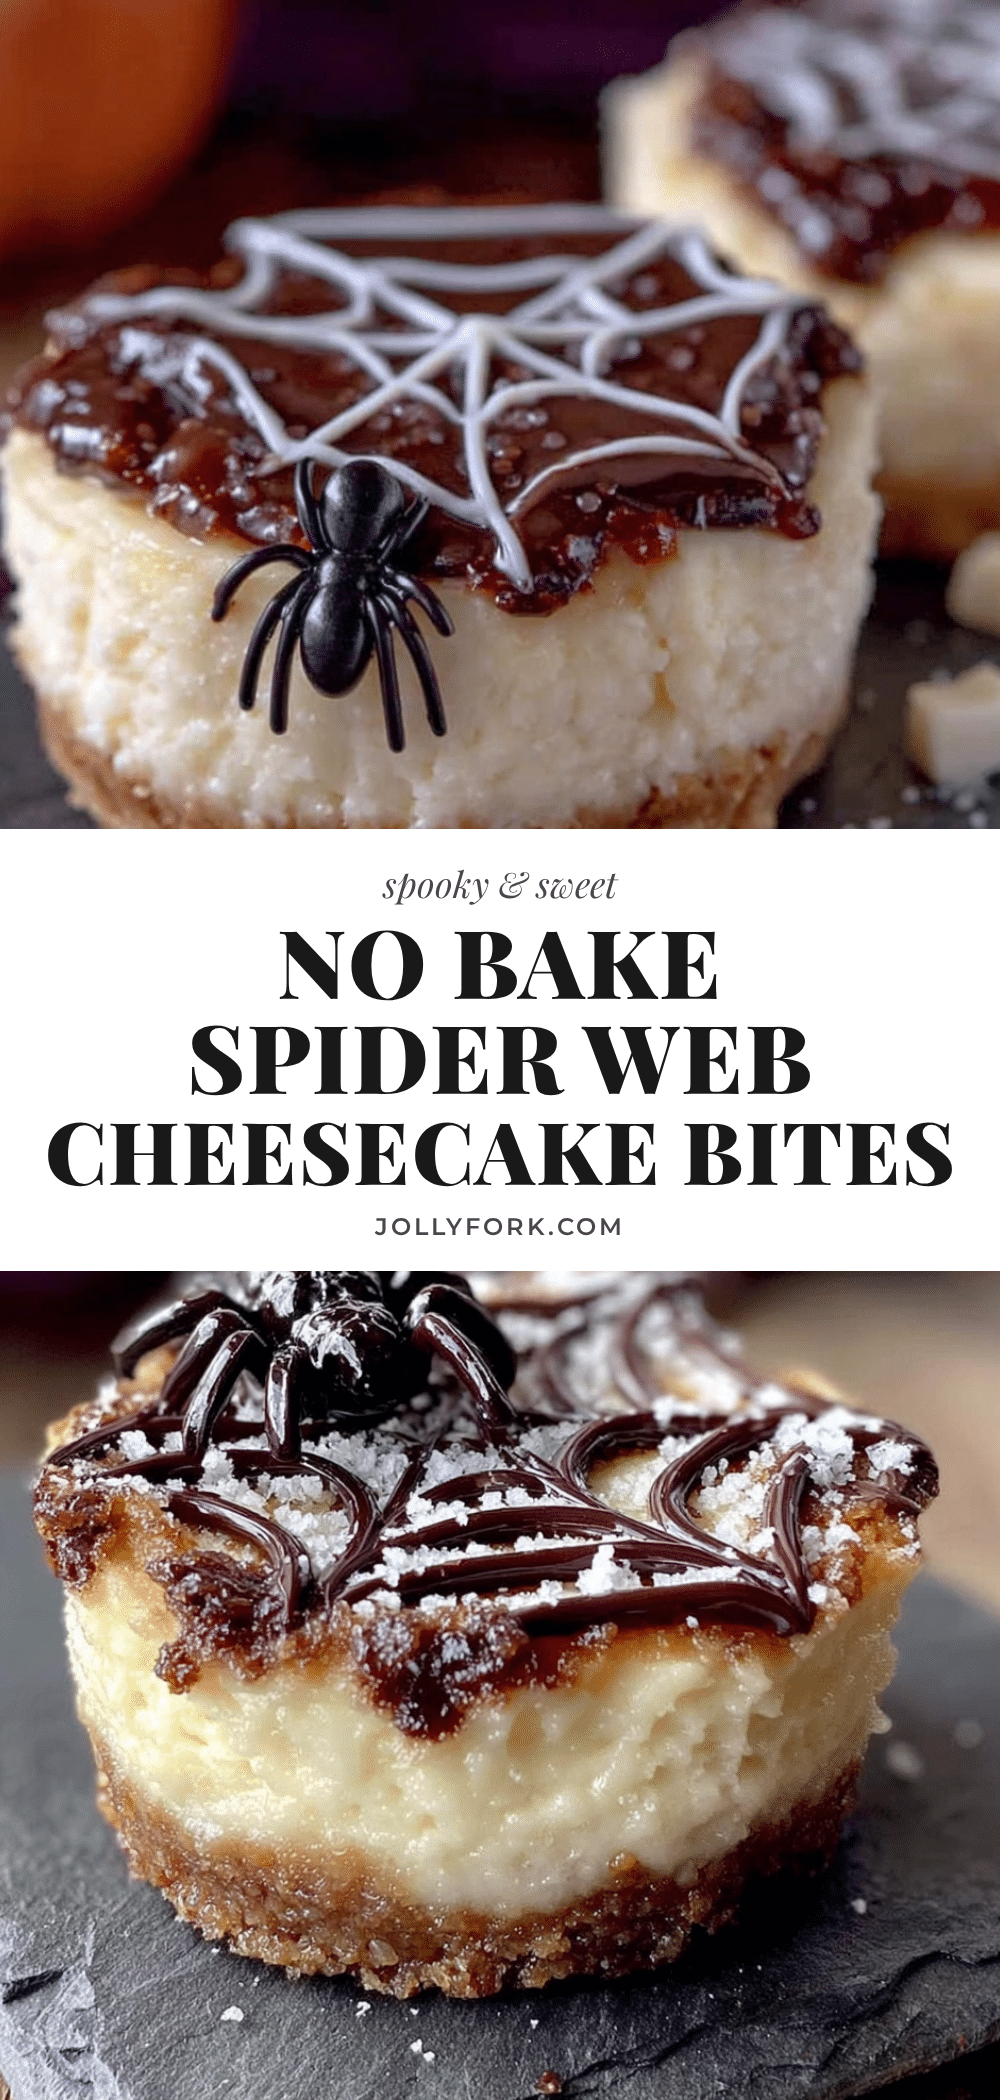
Easy No-Bake Spider Web Cheesecake Bites: Best Halloween Dessert
These no-bake spider web cheesecake bites are a creamy, festive Halloween dessert that comes together in just 20 minutes of active time. With an Oreo crust and a light, airy cheesecake filling topped with a chocolate spider web, they are perfect for parties and require no oven.
- Prep Time: 20 minutes
- Cook Time: 0 minutes
- Total Time: 4 hours 35 minutes (includes chilling)
- Yield: 24 servings 1x
- Category: Dessert
- Cuisine: American
Ingredients
- 20 Oreo cookies (regular, not double-stuffed)
- 4 tablespoons unsalted butter (melted)
- 16 ounces cream cheese (softened to room temperature, full-fat recommended)
- 1/2 cup granulated sugar
- 1 teaspoon vanilla extract
- 1 cup heavy cream (cold)
- 1/4 cup powdered sugar
- 1/4 cup white chocolate chips or melting wafers
- 1 teaspoon coconut oil or vegetable shortening
- Black gel food coloring (optional)
Instructions
- Make the crust: Place Oreos in a food processor and pulse until fine crumbs. Transfer to a bowl, add melted butter, and stir until moistened. The mixture should hold together when pinched.
- Press the crust into the tin: Spoon about 1 tablespoon of crust mixture into each mini muffin cup. Press down firmly with the back of a spoon or shot glass. Freeze for 10 minutes.
- Whip the cream: In a large bowl, beat cold heavy cream and powdered sugar with an electric mixer on medium-high until stiff peaks form, about 2-3 minutes. Set aside.
- Beat the cream cheese: In a separate bowl, beat softened cream cheese, granulated sugar, and vanilla until smooth and creamy, about 2 minutes. Scrape down sides.
- Fold it all together: Add one-third of the whipped cream to the cream cheese mixture and gently fold with a rubber spatula. Add remaining whipped cream and fold until no white streaks remain.
- Fill the cups: Remove muffin tin from freezer. Spoon or pipe cheesecake filling into each cup, filling almost to the top. Smooth tops and tap tin gently to settle.
- Chill: Refrigerate for at least 4 hours or overnight until firm.
- Make the spider web topping: About 30 minutes before serving, melt white chocolate chips with coconut oil in microwave in 20-second intervals, stirring until smooth. Add black food coloring if desired.
- Pipe the webs: Transfer melted chocolate to a piping bag or zip-top bag with a tiny corner snipped. Pipe a small circle in the center of each bite, then concentric circles around it. Drag a toothpick from center outward through all circles to create web pattern.
- Final chill: Return bites to refrigerator for 15 minutes to set chocolate webs. Serve cold.
Notes
Room temperature cream cheese is essential for a smooth filling. Do not skip freezing the crust to prevent it from mixing with the filling. Use a toothpick for the web design, not a skewer. Chill overnight for best texture. Store in an airtight container in the refrigerator for up to 5 days. Do not freeze.
Nutrition
- Serving Size: 1 bite
- Calories: 165
- Sugar: 9
- Sodium: 120
- Fat: 12
- Saturated Fat: 7
- Carbohydrates: 14
- Fiber: 1
- Protein: 3
Keywords: no-bake cheesecake, spider web, Halloween dessert, Oreo crust, mini cheesecake bites, easy Halloween treat


