The knuckles. That’s what I couldn’t stop staring at. Those tiny, deliberate creases I’d pressed into the dough with the back of a butter knife—they looked disturbingly real. I remember standing in my kitchen, flour dusted across my apron, a cookie sheet full of what looked like a dozen severed fingers in front of me. And I felt this weird, giddy thrill. Honestly, I wasn’t sure if I’d made a batch of Halloween treats or accidentally recreated a crime scene. But that’s the whole point of these Spooky Witch Finger Cookies with Almond Nails. They’re supposed to make you do a double-take.
I first made these years ago for a Halloween party my friends were throwing. I wanted something that wasn’t just another pumpkin-spiced thing or a bowl of candy corn. I wanted a reaction. And let me tell you, when I walked in with a platter of these creepy cookies, the room went quiet for a second. Then came the laughter, the shrieks, and everyone pulling them apart to examine the almond fingernails. It was pure chaos in the best way. These cookies aren’t just a recipe; they’re a conversation starter, a party trick, and honestly, one of the most fun things you can bake all October.
They’re simple sugar cookies at heart, but the shaping transforms them into something delightfully macabre. The almond sliver pressed into the tip becomes a perfectly gruesome nail, and a little red jam at the base makes it look like—well, you get the idea. Trust me, everyone will want to know how you made them. And I’m going to show you every step so your witch fingers look just as terrifyingly fantastic as mine.
Why You’ll Love This Recipe
Let’s be real—there are a million Halloween cookies out there. But these are different. They have a shock factor that’s hard to beat. I’ve tested this dough more times than I can count to make sure it holds its shape perfectly without puffing up and losing those creepy wrinkles. That’s the secret to a cookie that actually looks like a finger, not a stubby little biscuit.
- Easy & Fun to Make: The dough comes together in one bowl, and the shaping is the best part. Get your kids or friends involved—everyone loves molding a finger.
- Simple Pantry Ingredients: You probably have everything already. Butter, sugar, flour, eggs, and almonds. No fancy extracts or hard-to-find candy melts.
- Perfect for Halloween Parties: These aren’t just cookies; they’re the centerpiece of your dessert table. They pair hilariously well with a batch of our Witch’s Brew Matcha Cold Foam for a full spooky spread.
- Totally Customizable: Make them gluten-free, change the nail color, or add a little green food coloring to the dough. These are your witches, after all.
- Crowd-Pleaser Guaranteed: I’ve brought these to work parties, family gatherings, and neighborhood potlucks. They always get the biggest reaction. People take pictures before they take a bite.
What makes this recipe different from all the other witch finger cookies out there? It’s the texture. This dough is intentionally less sweet and a bit sturdier than a standard sugar cookie. It has to be, or your fingers will spread and look like sad little blobs. I’ve also added a touch of almond extract to the dough itself, which pairs beautifully with the almond nail on top. It’s a small detail, but it makes the flavor cohesive. This isn’t just a gimmick cookie—it actually tastes good.
What Ingredients You Will Need
This recipe uses simple, everyday ingredients to create something truly memorable. The key is in the technique, not a long shopping list. Every component plays a role in creating that realistic, creepy look and a buttery, crisp bite.
- Unsalted Butter (1 cup / 226g), softened: The foundation of our cookie. Using unsalted butter lets you control the salt level. Make sure it’s truly softened to room temperature, or your dough won’t cream properly.
- Granulated Sugar (1 cup / 200g): Provides sweetness and structure. Don’t substitute with brown sugar here, as it would change the color and texture of the “skin.”
- Large Egg (1): Binds the dough together. For the best texture, use a room-temperature egg. Just set it in a bowl of warm water for five minutes if you forgot to take it out.
- Vanilla Extract (1 teaspoon): Adds warmth and depth to the flavor. Pure vanilla is always better, but imitation will work in a pinch.
- Almond Extract (½ teaspoon): This is my secret ingredient. It gives the cookies a subtle, nutty undertone that echoes the almond fingernails. It makes the whole cookie taste intentional.
- All-Purpose Flour (2 ½ cups / 312g): The structure. For a gluten-free version, I’ve had good luck with a 1:1 gluten-free baking flour blend. Just note the dough will be a bit more fragile.
- Baking Powder (1 teaspoon): Gives the cookies just a tiny bit of lift so they aren’t rocks, but not so much that they lose their shape.
- Salt (½ teaspoon): Balances the sweetness and enhances all the other flavors. Don’t skip it.
- Whole Almonds (about 48): These become the fingernails. Look for raw or roasted, unsalted almonds. You want them to look natural. Sliced almonds can work in a pinch, but whole almonds give a much more realistic nail shape.
- Red Jam or Gel Food Coloring (for the “blood”): Strawberry or raspberry jam works perfectly. A little dab at the base of the almond creates the illusion of a cuticle. For a more dramatic effect, use red gel food coloring mixed with a drop of water.
I always recommend using a good quality butter like Kerrygold for the best flavor, but any standard stick will do. For the almonds, I prefer the look of Marcona almonds if I’m feeling fancy—they’re rounder and look more like a manicured nail. But regular whole almonds are perfect and way more affordable.
Equipment Needed
You don’t need any special tools for this recipe, which is part of why I love it. A few standard kitchen items and your own two hands are all it takes to create these creepy cookies.
- Electric Mixer (Hand or Stand): For creaming the butter and sugar. You can do it by hand with a wooden spoon, but it takes some elbow grease.
- Mixing Bowls: One large bowl for the dough, and maybe a small one for the flour mixture.
- Baking Sheets: Standard half-sheet pans work great. Line them with parchment paper for easy cleanup.
- Parchment Paper: Non-negotiable for these. It prevents sticking and helps the cookies bake evenly.
- Butter Knife or Bench Scraper: For creating those realistic knuckle creases in the dough.
- Cooling Rack: Essential for letting the cookies cool completely so the “nails” stay put.
- Small Offset Spatula (optional): Helpful for transferring the delicate shaped cookies to the baking sheet without smushing them.
If you don’t have a bench scraper, a regular butter knife works just fine. The key is to make the indentations deep enough that they survive the baking process. I learned the hard way that shallow lines just bake away into nothing. Press firmly!
Preparation Method
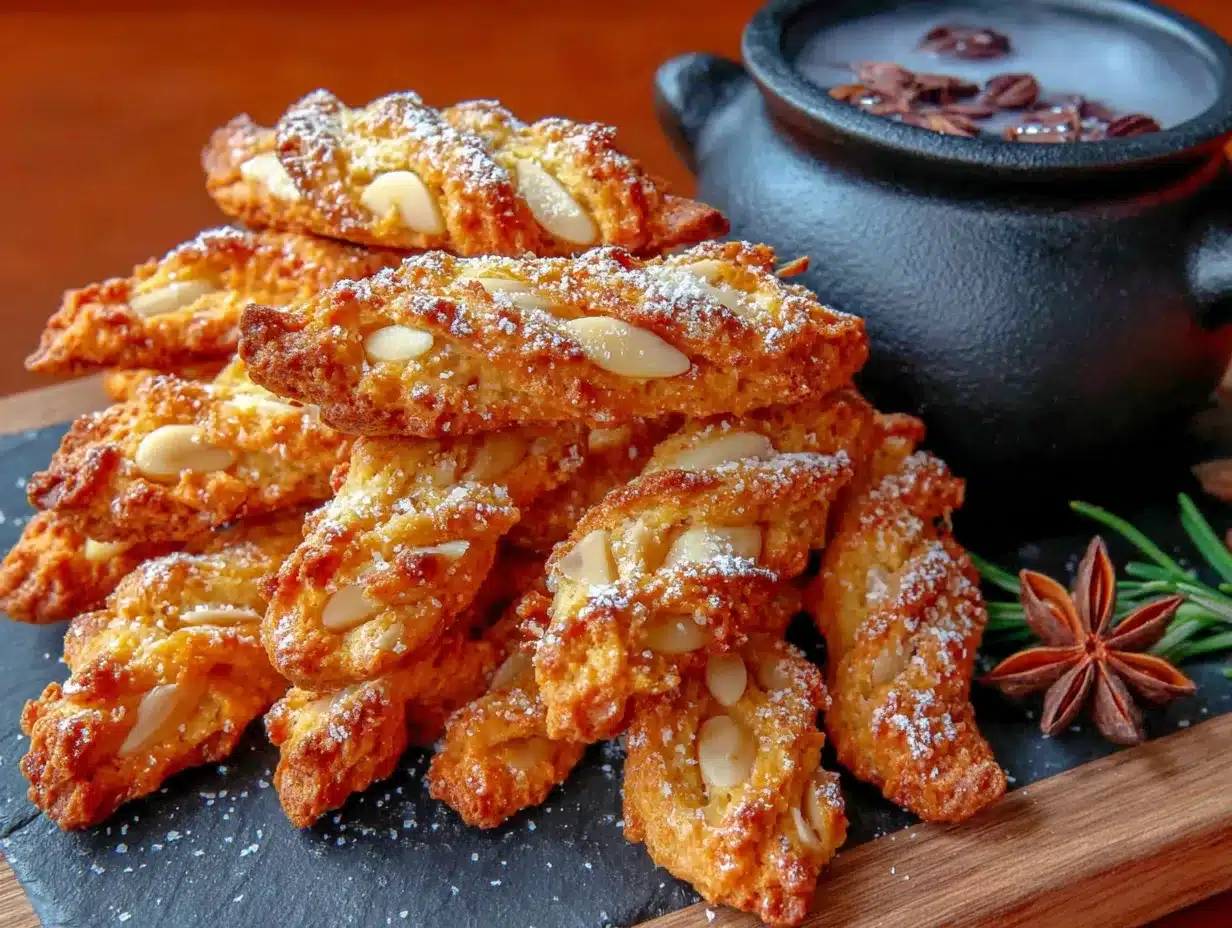
Alright, let’s get our hands dirty. This is where the magic—and the mayhem—happens. Follow these steps carefully, and you’ll have a cookie sheet full of the most disturbingly realistic witch fingers you’ve ever seen.
- Cream the Butter and Sugar (5 minutes): In your large mixing bowl, beat the softened butter and granulated sugar together on medium speed until it’s light, fluffy, and pale in color. This usually takes about 3-5 minutes. Scrape down the sides of the bowl once or twice. You want this mixture to be aerated; it’s the foundation of a tender cookie.
- Add the Wet Ingredients (2 minutes): Beat in the egg, vanilla extract, and almond extract until everything is fully combined. The mixture might look a little curdled at this point—that’s totally normal. Don’t panic.
- Mix the Dry Ingredients (1 minute): In a separate bowl, whisk together the all-purpose flour, baking powder, and salt. With the mixer on low speed, gradually add the dry ingredients to the wet ingredients. Mix just until a soft dough forms. Be careful not to overmix, or your cookies will be tough. The dough should be smooth and slightly sticky but hold together when pinched.
- Chill the Dough (30 minutes minimum): This step is critical. Wrap the dough in plastic wrap and flatten it into a disc. Refrigerate for at least 30 minutes, or up to 2 days. Chilling firms up the butter, which prevents the cookies from spreading too much in the oven. Your fingers will hold their shape much better. If you’re in a rush, you can pop it in the freezer for 15 minutes.
- Preheat and Prep (10 minutes): Preheat your oven to 325°F (165°C). Line two baking sheets with parchment paper. Take your chilled dough out of the fridge.
- Shape the Fingers (15 minutes): Pinch off a small piece of dough, about the size of a walnut. Roll it between your palms into a log shape, about 3-4 inches long and slightly thicker at one end (the base of the finger) and tapering to a slightly thinner tip. Place it on the prepared baking sheet. Repeat with the remaining dough, spacing the fingers about 2 inches apart.
- Create the Details (5 minutes): This is where they come to life. Using the back of a butter knife or your bench scraper, gently press 2-3 horizontal lines into each finger to create the knuckles. Don’t be shy—press firmly. Then, use your fingernail or the tip of a chopstick to make a small indent at the tip of each finger where the nail will go.
- Attach the Almond Nails (5 minutes): Press a whole almond firmly into the indent at the tip of each finger. Make sure it’s secure. The almond should look like a long, pointy fingernail. If the almond is too big, you can break it in half lengthwise.
- Add the “Blood” (2 minutes): For the full effect, use a toothpick to dab a tiny amount of red jam or thinned red food coloring right at the base of the almond, where the cuticle would be. This is optional, but it adds a fantastic, gruesome detail that really sells the illusion.
- Bake (12-15 minutes): Bake the cookies for 12-15 minutes, or until the edges are just barely starting to turn golden brown. The centers will look pale and slightly underdone—that’s what you want. They’ll continue to set as they cool. If you overbake them, they’ll be hard and crunchy instead of tender.
- Cool Completely (15 minutes): Let the cookies cool on the baking sheet for 5 minutes before carefully transferring them to a wire cooling rack to cool completely. The almonds will be hot, so be careful. Once they’re cool, the “nails” will be firmly attached.
A quick note on timing: the chilling step is non-negotiable. I once tried to skip it because I was in a hurry, and my fingers spread into fat little sausages that looked more like baby potatoes than witch hands. Learn from my mistakes! Give the dough time to rest.
Cooking Tips & Techniques
Over the years, I’ve made a few batches that were less “spooky” and more “sad.” Here are the lessons I learned the hard way so you don’t have to.
The Dough Temperature is Everything. If your dough gets too warm while you’re shaping the fingers, pop it back in the fridge for 10 minutes. Warm dough is sticky, difficult to shape, and will spread in the oven. Cold dough is your best friend. I like to keep the unused portion in the fridge while I’m working with a small piece at a time.
Press Those Knuckles Deep. I cannot stress this enough. The dough will puff up slightly in the oven, so those creases need to be deep. I use the edge of a bench scraper and press down until I feel the baking sheet underneath. It feels aggressive, but it’s the only way to get those realistic wrinkles.
Don’t Overbake for Better Texture. Pull them out when the bottoms are just lightly golden. The tops should look pale and almost underbaked. They will continue to cook from the residual heat of the pan. This is how you get a cookie that’s crisp on the outside and tender on the inside, just like a real sugar cookie should be.
Multitasking Tip: While the first batch is baking, shape the second batch. This keeps your workflow smooth and ensures all the cookies go into the oven at the same temperature. I also like to make a double batch and freeze the shaped, unbaked fingers on a parchment-lined tray. Once frozen solid, I pop them into a freezer bag. Then, I can bake off a few fresh witch fingers whenever a Halloween craving strikes, just adding a couple of extra minutes to the bake time.
Consistency is Key. Try to make all your fingers roughly the same size and thickness. This ensures they all bake evenly. If some are much thicker than others, the thin ones will burn before the thick ones are done. A little variation is fine—real fingers aren’t all the same size anyway—but try to keep it in the same ballpark.
Variations & Adaptations
One of the best things about this recipe is how easy it is to adapt. You can make these cookies fit any theme or dietary need without losing the creepy factor.
- Gluten-Free Witch Fingers: Substitute the all-purpose flour with a high-quality 1:1 gluten-free baking blend. I’ve tested this with Bob’s Red Mill and Cup4Cup, and both worked well. The dough will be a bit more crumbly, so be gentle when shaping. Chilling is even more important here.
- Vegan Version: Use vegan butter (like Miyoko’s) and a flax egg (1 tablespoon ground flaxseed mixed with 3 tablespoons water, let sit for 5 minutes). The texture will be slightly different—a bit more tender and fragile—but they still look fantastic. The almond nails are already vegan!
- Colorful Nails: Instead of natural almonds, use raw almonds and dye them! Soak the almonds in a mixture of water and green or purple food coloring for an hour before patting them dry. Green nails look incredibly witchy. You can also use candy melts or slivered almonds for a different nail shape.
- Chocolate Witch Fingers: Swap out ¼ cup of the flour for ¼ cup of unsweetened cocoa powder. This gives you a dark, chocolatey “skin” that looks even more sinister. The chocolate pairs beautifully with the almond flavor.
- Spider Web Fingers: After baking and cooling, drizzle a little melted white chocolate over the fingers to create a spider web effect. It adds a sweet contrast and makes them look even more like they belong in a haunted house. This pairs perfectly with our Black Sesame Shortbread Cookies for a full spooky cookie platter.
I once made a batch with green-tinted dough and black sesame seeds pressed into the “knuckles” for warts. They were disgusting in the best possible way. Don’t be afraid to experiment—Halloween is the one time of year when ugly food is actually a compliment.
Serving & Storage Suggestions
These cookies are best served at room temperature, arranged on a platter in a way that maximizes the creep factor. I like to pile them up haphazardly, as if a witch just dropped a handful. Sometimes I’ll tuck a few under a napkin or a small gourd so it looks like they’re reaching out. It always gets a scream.
Storage: Store your witch finger cookies in an airtight container at room temperature for up to 5 days. The texture will soften slightly over time, but they’ll still be delicious. I recommend placing a sheet of parchment paper between layers to prevent the almonds from scratching the surface of the cookies.
Freezing: You can freeze the baked cookies for up to 3 months. Place them in a single layer in a freezer-safe container with parchment between layers. To thaw, just let them sit at room temperature for about 30 minutes. The almonds might lose a tiny bit of their crunch, but they’ll still look amazing.
Reheating: If you want to restore a bit of crispness, pop them in a 300°F (150°C) oven for 3-4 minutes. Let them cool completely before serving again. I don’t recommend microwaving them, as it can make the texture rubbery and cause the almond nails to fall off.
What to Serve With Them: These cookies are the star of the show, but they love a good supporting cast. Serve them alongside a warm mug of our Brown Butter Pumpkin Coffee Cake for a cozy fall dessert table. Or, for a truly terrifying party spread, pair them with a bowl of our Savory Skillet Queso Fundido for a sweet and savory Halloween feast. The flavors develop beautifully over a day or two, so these are a perfect make-ahead treat for your Halloween party.
Nutritional Information & Benefits
Let’s be honest: these are a treat, not a health food. But knowing what’s in them is still helpful, especially if you’re serving a crowd with dietary concerns.
Estimated Nutritional Values (per cookie, based on 36 cookies):
- Calories: ~120
- Fat: 7g
- Carbohydrates: 14g
- Protein: 2g
- Sugar: 7g
Health Highlights: The almonds are a great source of healthy fats, vitamin E, and magnesium. They add a little bit of nutritional value to an otherwise indulgent treat. The butter provides a small amount of vitamin A. The recipe is relatively low in sugar compared to many frosted or decorated cookies, which is a nice bonus.
Dietary Considerations: This recipe contains dairy, eggs, gluten, and tree nuts (almonds). It is not suitable for those with allergies to these ingredients without significant substitution. For a nut-free version, you can use a candy corn or a sliced date as the “nail” instead of an almond.
My Personal Take: I believe in balance. These cookies are a celebration of fun and creativity. They’re not something you eat every day. They’re for a specific moment—a Halloween party, a spooky movie night, a moment of pure, joyful silliness. And in that moment, they’re perfect. Don’t stress about the nutritional numbers. Just enjoy the experience and the laughter they bring.
Conclusion
These Spooky Witch Finger Cookies with Almond Nails are more than just a recipe—they’re an experience. They’re the kind of thing that makes people stop, stare, and then laugh out loud. They’re proof that baking doesn’t have to be serious to be spectacular. Honestly, some of my favorite kitchen memories involve making these cookies with my nieces and nephews, watching their faces light up as they pressed the almonds into the dough and declared their fingers “the most disgusting ones.”
I hope you give them a try. Don’t worry if your first few fingers look a little wonky—that’s part of the charm. Real witches probably have crooked fingers anyway. The more you make, the better you’ll get at shaping them. And once you taste one, you’ll understand why they’ve become a staple in my Halloween rotation. They’re buttery, crisp, and just sweet enough, with that lovely hint of almond running through the whole cookie.
So grab your butter and your almonds, and get ready to make something truly unforgettable. When you do, I want to hear about it! Leave a comment below and tell me how your witch fingers turned out. Did you add green food coloring? Did you use strawberry jam for the blood? Share your photos and tag me—I love seeing your creepy creations. Happy Halloween, and happy baking!
Frequently Asked Questions
Can I make the dough ahead of time?
Absolutely! The dough can be made up to 3 days in advance and kept tightly wrapped in the refrigerator. You can also freeze the shaped, unbaked fingers on a baking sheet, then transfer them to a freezer bag for up to 3 months. Bake directly from frozen, adding 2-3 minutes to the baking time.
My cookies spread too much. What went wrong?
This is usually caused by dough that’s too warm. Make sure you chill the dough for at least 30 minutes before shaping and baking. Also, check that your butter was properly softened, not melted. If your kitchen is very warm, pop the shaped cookies back in the fridge for 10 minutes before they go into the oven.
Can I use a different nut for the fingernails?
Yes! Sliced almonds work well for a more delicate nail. You can also use peanuts, pistachios, or even candy corn for a sweeter, more colorful nail. Just make sure whatever you use is firmly pressed into the dough so it doesn’t fall off during baking.
How do I get the knuckles to look more realistic?
The key is to press firmly and deeply with a knife or bench scraper. Don’t be gentle! You want to create a distinct crease in the dough. Also, try making the fingers slightly uneven in thickness, with a little bulge at the knuckle area. Real fingers aren’t perfectly straight tubes.
Can I add food coloring to the dough?
Definitely! Green is the most popular choice for witch fingers. Add a few drops of green gel food coloring to the wet ingredients before adding the flour. You can also add a touch of yellow or brown to make a more sickly, undead-looking skin tone. Just knead the color in gently until it’s evenly distributed.
Pin This Recipe!
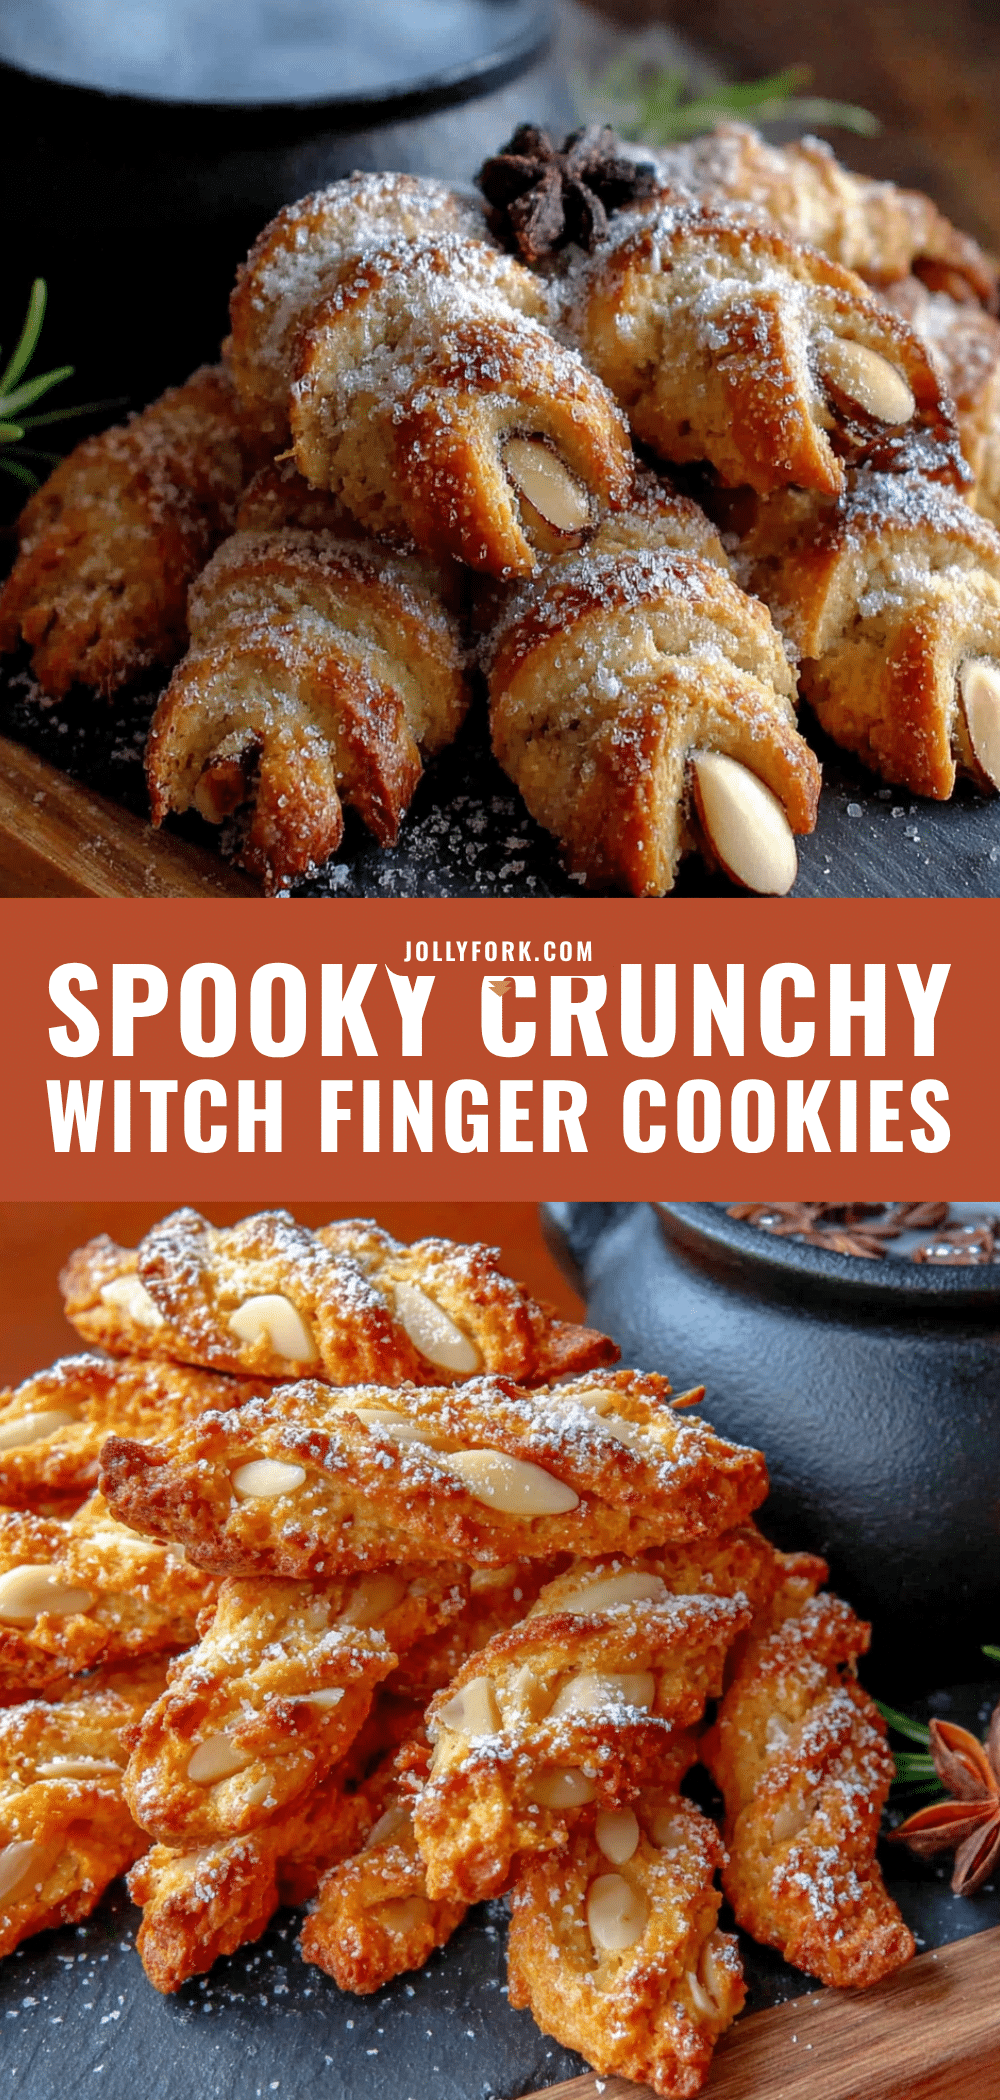
Spooky Witch Finger Cookies with Almond Nails: Easy Halloween Treat
These disturbingly realistic witch finger cookies are a fun and easy Halloween treat. Made with a simple sugar cookie dough and an almond fingernail, they’re a guaranteed conversation starter at any spooky gathering.
- Prep Time: 30 minutes
- Cook Time: 15 minutes
- Total Time: 1 hour 15 minutes
- Yield: 36 cookies 1x
- Category: Dessert
- Cuisine: American
Ingredients
- 1 cup (226g) unsalted butter, softened
- 1 cup (200g) granulated sugar
- 1 large egg, room temperature
- 1 teaspoon vanilla extract
- ½ teaspoon almond extract
- 2 ½ cups (312g) all-purpose flour
- 1 teaspoon baking powder
- ½ teaspoon salt
- About 48 whole almonds (raw or roasted, unsalted)
- Red jam or gel food coloring (for the ‘blood’)
Instructions
- Cream the butter and sugar: In a large mixing bowl, beat the softened butter and granulated sugar together on medium speed until light, fluffy, and pale in color, about 3-5 minutes. Scrape down the sides of the bowl once or twice.
- Add the wet ingredients: Beat in the egg, vanilla extract, and almond extract until fully combined. The mixture may look slightly curdled; that’s normal.
- Mix the dry ingredients: In a separate bowl, whisk together the all-purpose flour, baking powder, and salt. With the mixer on low speed, gradually add the dry ingredients to the wet ingredients. Mix just until a soft dough forms. Do not overmix.
- Chill the dough: Wrap the dough in plastic wrap and flatten into a disc. Refrigerate for at least 30 minutes, or up to 2 days.
- Preheat and prep: Preheat your oven to 325°F (165°C). Line two baking sheets with parchment paper.
- Shape the fingers: Pinch off a small piece of dough, about the size of a walnut. Roll it between your palms into a log shape, about 3-4 inches long and slightly thicker at one end (the base) and tapering to a slightly thinner tip. Place on the prepared baking sheet. Repeat with remaining dough, spacing fingers about 2 inches apart.
- Create the details: Using the back of a butter knife or a bench scraper, gently press 2-3 horizontal lines into each finger to create knuckles. Press firmly. Then, use your fingernail or the tip of a chopstick to make a small indent at the tip of each finger where the nail will go.
- Attach the almond nails: Press a whole almond firmly into the indent at the tip of each finger. Make sure it’s secure.
- Add the ‘blood’: Use a toothpick to dab a tiny amount of red jam or thinned red food coloring at the base of the almond, where the cuticle would be (optional).
- Bake: Bake for 12-15 minutes, or until the edges are just barely starting to turn golden brown. The centers will look pale and slightly underdone.
- Cool completely: Let the cookies cool on the baking sheet for 5 minutes before carefully transferring to a wire cooling rack to cool completely.
Notes
Chilling the dough is non-negotiable to prevent spreading. Press knuckle creases deeply. Do not overbake; cookies should be pale on top. For best results, keep unused dough in the fridge while shaping.
Nutrition
- Serving Size: 1 cookie
- Calories: 120
- Sugar: 7
- Sodium: 50
- Fat: 7
- Saturated Fat: 4
- Carbohydrates: 14
- Fiber: 1
- Protein: 2
Keywords: Halloween cookies, witch finger cookies, almond nails, spooky cookies, easy Halloween treat, sugar cookies


