I’ve burned my fair share of kid-friendly dinners. Not in the dramatic, smoke-alarm-blaring way—more like the sad, hockey-puck-on-a-plate way. So when my son asked for Halloween-themed pizza last October, I almost reached for the phone to order takeout. But I had a bag of pizza dough in the fridge and a bag of mozzarella that needed using. So I rolled the dough into little ovals, laid strips of cheese across them like bandages, and stuck two olive eyes on top. The kids went absolutely silent for a second. Then they started laughing. Then they ate three each. That’s the thing about this Easy Halloween Mummy Pizza for Kids—it started as a total fridge-dump experiment. But it turned into the recipe my kids request every single October, and honestly? I don’t even mind making it. It’s that simple, that forgiving, and that fun.
I’ve made these mummy pizzas at least a dozen times since that first night. I’ve learned which cheese strips stay put (low-moisture mozzarella, cut thin) and which olives work best for eyes (pitted black ones, sliced crosswise so you get those perfect little rings). I’ve also learned that you don’t need to be a Pinterest-perfect parent to pull these off. You just need some dough, some sauce, some cheese, and a willingness to let your kids help. Because honestly—the messy ones are the best ones. The ones where the cheese strips slide sideways and the olive eyes end up looking sleepy? Those get the biggest laughs. This is not a recipe for perfection. It’s a recipe for connection. For getting dinner on the table when you’re tired and the kids are buzzing with Halloween energy. And it works every single time.
Why You’ll Love This Recipe
This isn’t just another Halloween snack. This is the recipe that saves your evening. Here’s why it works:
- Ready in under 20 minutes—from fridge to table. No marathon cooking sessions, no complicated steps. Just dinner, fast.
- Made with real ingredients you already have—pizza dough, mozzarella, tomato sauce, olives. No special grocery trips, no weird Halloween-themed products that taste like cardboard.
- Perfect for Halloween parties, school lunches, or a cozy October dinner—I’ve packed these in lunchboxes (they hold up surprisingly well) and served them at our annual neighborhood Halloween gathering. Both times, they disappeared first.
- Kids actually eat them—and I mean eat, not just pick at. My son, who usually leaves half his dinner, finishes every single mummy. The cheese-to-crust ratio is just right for small appetites.
- So fun to make together—the assembly is simple enough for little hands. My four-year-old niece can place the cheese strips without help. It’s messy, it’s giggly, and it’s exactly what Halloween dinner should be.
What makes this version different from other mummy pizzas I’ve tried? It’s the balance. Most recipes either use too much cheese (so the “bandages” slide off in a greasy mess) or not enough sauce (so the pizza tastes dry). I’ve tested the ratios until they’re just right. The cheese strips stay put during baking, the edges get golden and crispy, and the olive eyes stay centered instead of wandering off to the side. Plus, I’ve included a trick for making the dough extra easy to work with—no fancy techniques required. This is the kind of recipe that makes you look like a Halloween hero without any of the stress.
What Ingredients You Will Need
This recipe uses simple, everyday ingredients to create something that feels special. No specialty items, no obscure cheeses—just the stuff you probably already have in your kitchen. Here’s what you’ll need:
For the Pizza Base
- 1 pound store-bought pizza dough (I prefer Trader Joe’s or Whole Foods refrigerated dough—it’s consistently reliable and easy to stretch. You can also use homemade dough if you have a favorite recipe.)
- ½ cup pizza sauce (I use Rao’s for its clean flavor, but any good-quality jarred sauce works. If you’re feeling ambitious, try this easy mini whole wheat pita pizza method for a lighter base.)
- 2 cups shredded low-moisture mozzarella cheese (Part-skim works best here—it melts without becoming greasy. Avoid fresh mozzarella; it releases too much water and makes the bandages slide.)
- 12-16 pitted black olives (For the eyes. Look for large, firm olives—they slice more cleanly. I like Lindsay or Mezzetta brands.)
- 1 tablespoon olive oil (For brushing the crust edges. Adds color and crispiness.)
- Optional: 2 tablespoons grated Parmesan (Sprinkle over the top before baking for extra flavor.)
For the Cheese “Bandages”
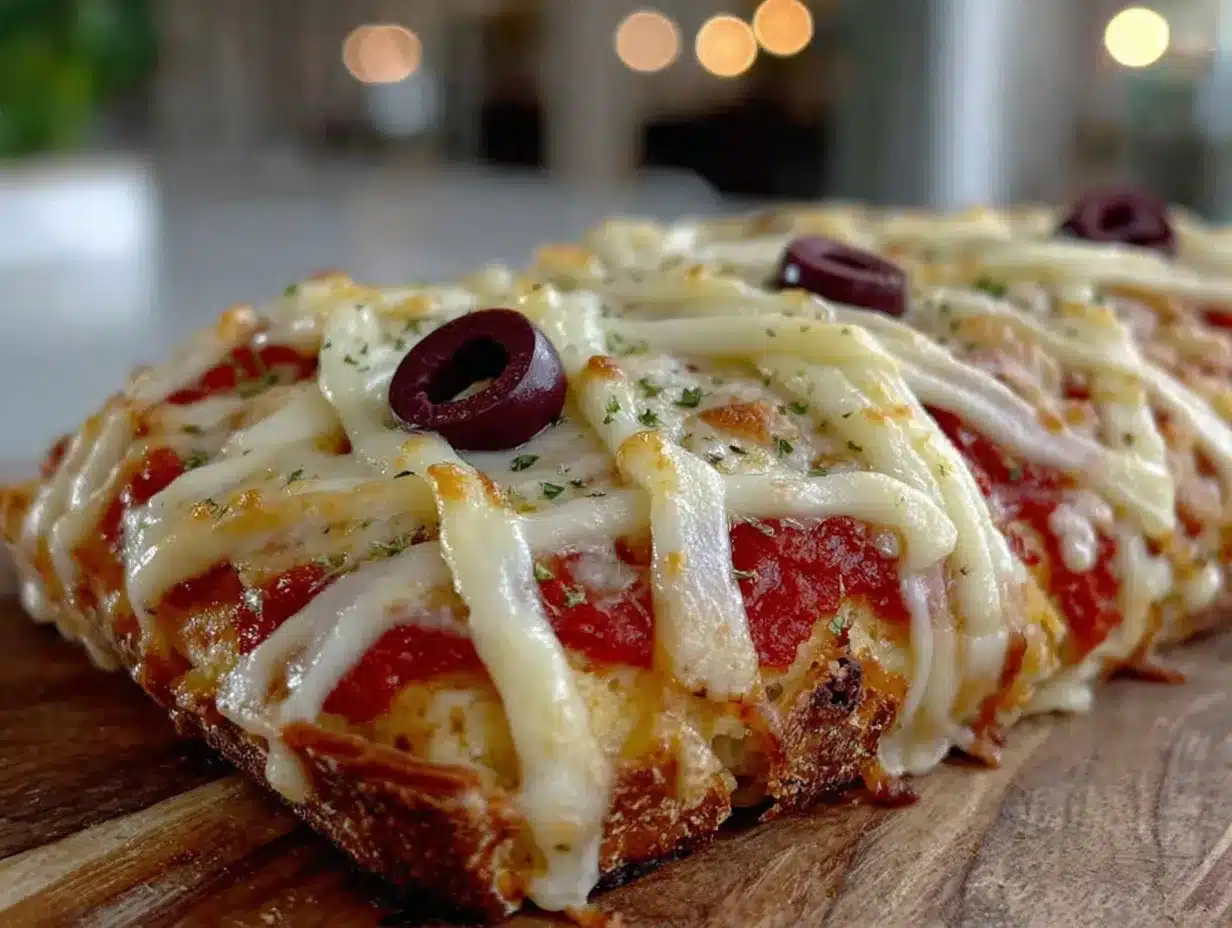
- 8 ounces part-skim mozzarella cheese, cut into thin strips (About ¼-inch thick and 2-3 inches long. You want them thin enough to look like bandages but thick enough to hold their shape during baking. If you’re short on time, you can use string cheese cut into thin strips—it works perfectly.)
Ingredient Notes and Substitutions
- Dough: Gluten-free pizza dough works well here. Just be sure to let it come to room temperature before stretching—gluten-free dough is more fragile and needs gentle handling.
- Sauce: You can use pesto or even a thin layer of cream cheese for a white pizza version. My kids love the cream cheese version—it’s like a bagel pizza, but spooky.
- Olives: If your kids aren’t olive fans, use small rounds of pepperoni for the eyes, or even dots of black bean paste. I’ve also used sliced grapes in a pinch—they look surprisingly convincing.
- Cheese: For a dairy-free option, use vegan mozzarella shreds. They melt differently, so expect a slightly less stretchy bandage look—but the taste is still great.
Equipment Needed
You don’t need a lot of fancy tools for this recipe. Here’s what you’ll need:
- Baking sheet or pizza stone—A standard half-sheet pan works perfectly. If using a pizza stone, preheat it in the oven for at least 30 minutes for the crispiest crust.
- Parchment paper—Essential for easy cleanup and preventing stuck-on cheese. I always line my pan.
- Rolling pin—Optional, but helpful if your dough is cold and needs gentle persuasion. I use a wine bottle in a pinch—classic home cook move.
- Sharp knife or pizza cutter—For cutting the cheese strips. A sharp knife gives you clean edges that look more like bandages.
- Small knife or kitchen shears—For slicing olives. Shears are actually easier for getting clean cross-sections.
- Pastry brush—For brushing olive oil on the crust. A silicone brush is easiest to clean.
- Cutting board—For assembling the pizzas before transferring them to the pan.
If you don’t have a rolling pin, just use your hands to stretch the dough. It’s actually more forgiving that way—you can feel when the dough is about to tear and stop. And if you don’t have a pastry brush, just drizzle the oil and spread it with your fingers. The kids think it’s hilarious when you get oil on your hands, and honestly, it works just as well.
Preparation Method
Let’s make some mummy pizzas. This process is straightforward, but I’ve included all the little details that make the difference between a good mummy and a great one.
Step 1: Preheat and Prep
Preheat your oven to 450°F (232°C). If using a pizza stone, place it on the middle rack while the oven heats. Line a baking sheet with parchment paper. Set aside.
Step 2: Prepare the Dough
Take your pizza dough out of the refrigerator. Let it sit at room temperature for about 20 minutes—this makes it easier to stretch without snapping back. On a lightly floured surface, divide the dough into 6 equal pieces (or 8 if you want smaller mummies). Roll each piece into a ball, then flatten it into an oval shape about ¼-inch thick. Don’t worry about perfect ovals—mummies are supposed to be lumpy. I’ve made some that looked more like potatoes than people, and the kids loved them anyway.
Step 3: Add the Sauce
Spread about 1 tablespoon of pizza sauce onto each dough oval, leaving a ½-inch border around the edges. Don’t oversauce—you want just enough to flavor the pizza without making the dough soggy. I use the back of a spoon to spread it evenly. If you’re making these with kids, let them do this step. It’s messy and fun, and they feel like they’re really cooking.
Step 4: Create the Bandages
Cut your mozzarella block into thin strips—about ¼-inch wide and 2-3 inches long. You want them to look like bandages, so don’t make them too thick. If using string cheese, pull it apart into thin strands. Place 3-4 strips across each pizza, leaving a gap in the center for the eyes. The strips should overlap slightly, like real bandages. Don’t worry if they look messy—they’ll settle during baking. I’ve learned that the messy ones actually look more authentic after they melt.
Step 5: Add the Eyes
Slice your black olives crosswise into rounds about ¼-inch thick. You’ll get 2-3 rounds per olive, depending on size. Place two olive rounds in the gap you left in the center of each pizza. Press them gently into the sauce so they stay put during baking. If the olives are too big, you can cut them in half. I prefer the look of whole rounds—they give the mummies that classic “I’ve seen things” expression.
Step 6: Brush and Bake
Brush the exposed edges of the dough with olive oil. This gives the crust that golden, bakery-style finish. If using Parmesan, sprinkle it over the top now. Transfer the assembled pizzas (on the parchment paper) to the preheated baking sheet or pizza stone. Bake for 10-12 minutes, until the crust is golden brown and the cheese is bubbly and slightly browned at the edges. The cheese strips should have melted together but still look like individual bandages. If they’ve completely merged into a single sheet, you’ve baked them a minute too long—but they’ll still taste great.
Step 7: Cool and Serve
Let the mummy pizzas cool on the baking sheet for 2-3 minutes before serving. This allows the cheese to set slightly so the bandages don’t slide off when you pick them up. Serve warm, with extra pizza sauce for dipping if you like. My kids dip them in ranch dressing, which I pretend to be horrified by—but secretly, it’s delicious.
Cooking Tips & Techniques
I’ve made these mummy pizzas more times than I can count, and I’ve learned a few things the hard way. Here’s what I wish someone had told me the first time:
Don’t overwork the dough. If your dough keeps snapping back when you try to stretch it, let it rest for 5 more minutes. Cold, overworked dough is the enemy of easy pizza-making. I’ve literally wrestled with dough for 10 minutes before realizing I just needed to walk away and let it relax. It’s humbling.
Use low-moisture mozzarella for the bandages. Fresh mozzarella releases too much water during baking, which makes the bandages slide off and the crust soggy. Low-moisture mozzarella holds its shape and browns beautifully. I learned this after making a batch of mummy pizzas that looked like they’d been through a car wash—the bandages had completely migrated to one side.
Slice olives with a sharp knife. Dull knives crush olives instead of cutting them cleanly. You want clean rounds that look like eyes, not squished blobs. I use my sharpest paring knife and slice in one smooth motion. If you’re making these with kids, pre-slice the olives yourself—olive pits are a choking hazard, and the slicing requires a steady hand.
Bake on the bottom rack for a crisper crust. If you like your pizza crust extra crispy, place the baking sheet on the bottom rack of the oven for the last 2 minutes of baking. Just watch it carefully—the bottoms can go from golden to burnt in under a minute. I’ve sacrificed a few mummies to this experiment.
Let the pizzas rest before serving. This is the hardest tip to follow when hungry kids are circling the kitchen, but it’s worth it. Those 2-3 minutes of resting time allow the cheese to set, which means the bandages stay in place when you pick up the pizza. Serve them straight from the oven, and you’ll have cheese sliding everywhere. Trust me—I’ve done both, and the rested version is infinitely more satisfying.
If you’re looking for another easy, crowd-pleasing snack for your Halloween gathering, these easy mini corn dog muffins are a perfect complement to the mummy pizzas.
Variations & Adaptations
Once you’ve mastered the basic mummy, the possibilities are endless. Here are some variations I’ve tried and loved:
Spider Web Mummies
Instead of olive eyes, use small rounds of pepperoni for a spooky, meaty twist. I’ve also used sliced grapes for a fruit-forward version that my toddler adores. The pepperoni version is especially good for older kids who want something a little more substantial.
Veggie Mummies
Add a layer of sautéed spinach or roasted red peppers under the cheese bandages before baking. The veggies stay hidden under the cheese, so picky eaters won’t even notice. I’ve snuck in finely chopped mushrooms this way—they blend right in with the sauce.
Dairy-Free Mummies
Use vegan mozzarella shreds and dairy-free pizza dough. The bandages won’t stretch the same way, but the look is still convincing. I’ve made these for a friend’s dairy-allergic child, and she ate three without complaint.
Breakfast Mummies
Use crescent roll dough instead of pizza dough, fill with scrambled eggs and cheese, and bake for a fun Halloween breakfast. The crescent roll version is lighter and flakier—perfect for a spooky morning before school.
Sweet Mummies
For dessert, use cookie dough as the base, pipe on white icing for bandages, and add chocolate chip eyes. I made these for a Halloween party, and they disappeared faster than the savory ones. The kids couldn’t stop giggling at the “sugar mummies.”
And if you’re hosting a full Halloween spread, these crispy spider web black sesame shortbread cookies make a perfect spooky dessert to serve alongside the mummy pizzas.
Serving & Storage Suggestions
These mummy pizzas are best served warm, right after they come out of the oven. The cheese is stretchy, the crust is crispy, and the olive eyes are perfectly centered. But they’re also surprisingly good at room temperature—I’ve packed them in lunchboxes and they hold up well for several hours.
For serving: Arrange the mummy pizzas on a platter with a small bowl of extra pizza sauce for dipping. If you’re serving them at a Halloween party, place them on a black platter or a sheet of orange construction paper for a festive presentation. My kids love it when I arrange the mummies in a “graveyard” pattern, with a few “tombstone” crackers on the side.
For storage: Leftover mummy pizzas can be stored in an airtight container in the refrigerator for up to 3 days. To reheat, place them on a baking sheet in a 350°F (177°C) oven for 5-7 minutes, or until the cheese is bubbly and the crust is crispy again. Avoid microwaving—it makes the crust soggy and the cheese rubbery. I’ve learned this the hard way, multiple times.
For freezing: You can freeze the assembled but unbaked mummy pizzas. Place them on a parchment-lined baking sheet and freeze until solid, then transfer to a freezer bag. Bake from frozen at 450°F (232°C) for 12-15 minutes. The texture won’t be quite as good as fresh, but it’s still delicious—and it’s a lifesaver on busy weeknights.
How flavors develop: These pizzas are best fresh, but the flavors actually meld nicely after a day in the fridge. The sauce soaks into the crust slightly, and the cheese firms up. My son actually prefers them cold, straight from the fridge—he calls them “mummy pizza bites” and eats them for breakfast.
If you’re looking for a cozy side dish to round out your Halloween dinner, this creamy roasted cherry tomato basil bisque pairs beautifully with the mummy pizzas.
Nutritional Information & Benefits
Here’s the estimated nutritional breakdown for one mummy pizza (based on 6 servings):
| Nutrient | Amount |
|---|---|
| Calories | 285 |
| Total Fat | 12g |
| Saturated Fat | 6g |
| Cholesterol | 30mg |
| Sodium | 620mg |
| Total Carbohydrates | 30g |
| Dietary Fiber | 2g |
| Sugars | 3g |
| Protein | 14g |
Health benefits: This recipe provides a good source of protein from the cheese, which helps keep kids full and satisfied. The tomatoes in the sauce are rich in lycopene, an antioxidant that supports heart health. And the olive oil adds healthy monounsaturated fats. It’s not a health food, but it’s a balanced meal that includes protein, carbs, and fat—perfect for growing bodies and active Halloween nights.
Dietary considerations: This recipe is vegetarian. For a gluten-free version, use gluten-free pizza dough. For a dairy-free version, use vegan mozzarella and dairy-free pizza dough. This recipe contains dairy and gluten (if using standard dough), and may contain traces of nuts depending on your dough brand.
Conclusion
This Easy Halloween Mummy Pizza for Kids is the kind of recipe that makes you feel like a superhero parent—without any of the stress. It’s quick, it’s fun, and it’s genuinely delicious. The kids get to help in the kitchen, the dinner table gets a little spooky, and you get to enjoy a meal that actually comes together in under 20 minutes. What’s not to love?
I’ve made this recipe for Halloween parties, school lunches, and quiet October dinners. Every time, the mummies disappear. Every time, the kids ask for more. And every time, I’m reminded that the best recipes aren’t the complicated ones—they’re the ones that bring people together. So go ahead, preheat that oven, roll out that dough, and make some mummies. And if your bandages slide sideways and your olives look sleepy? Perfect. That’s exactly how they should look.
I’d love to hear how your mummy pizzas turn out! Drop a comment below and tell me about your favorite Halloween dinner traditions. Do your kids help in the kitchen? What’s their favorite spooky shape? Share your photos and stories—I read every single one. And if you try a variation I haven’t thought of, please share it. I’m always looking for new ways to make these mummies even more fun.
Happy Halloween, and happy cooking!
Frequently Asked Questions
Can I make these mummy pizzas ahead of time?
Yes! You can assemble the mummy pizzas up to 24 hours in advance. Place them on a parchment-lined baking sheet, cover with plastic wrap, and refrigerate. When you’re ready to bake, just pop them in the oven straight from the fridge—you may need to add 1-2 minutes to the baking time.
Can I use homemade pizza dough?
Absolutely. Homemade dough works beautifully here. Just make sure it’s at room temperature before stretching, and don’t overwork it. If you have a favorite pizza dough recipe, use it. The mummies will taste even better.
What if my cheese bandages slide off during baking?
This usually happens if the cheese strips are too thick or the oven temperature is too low. Make sure your cheese strips are thin (about ¼-inch) and your oven is fully preheated to 450°F. Also, don’t oversauce the dough—too much moisture makes the cheese slide.
Can I freeze the baked mummy pizzas?
Yes, but they’re best eaten fresh. If you need to freeze them, let them cool completely, then wrap each one individually in plastic wrap and place in a freezer bag. Reheat in a 350°F oven for 5-7 minutes. The texture won’t be quite as crispy, but they’ll still be delicious.
What other toppings can I use for the eyes?
You can use small rounds of pepperoni, sliced grapes, black bean paste dots, or even small pieces of cooked bacon. For a sweeter version, use chocolate chips or small candies. Get creative—the kids will love coming up with their own mummy faces.
Pin This Recipe!
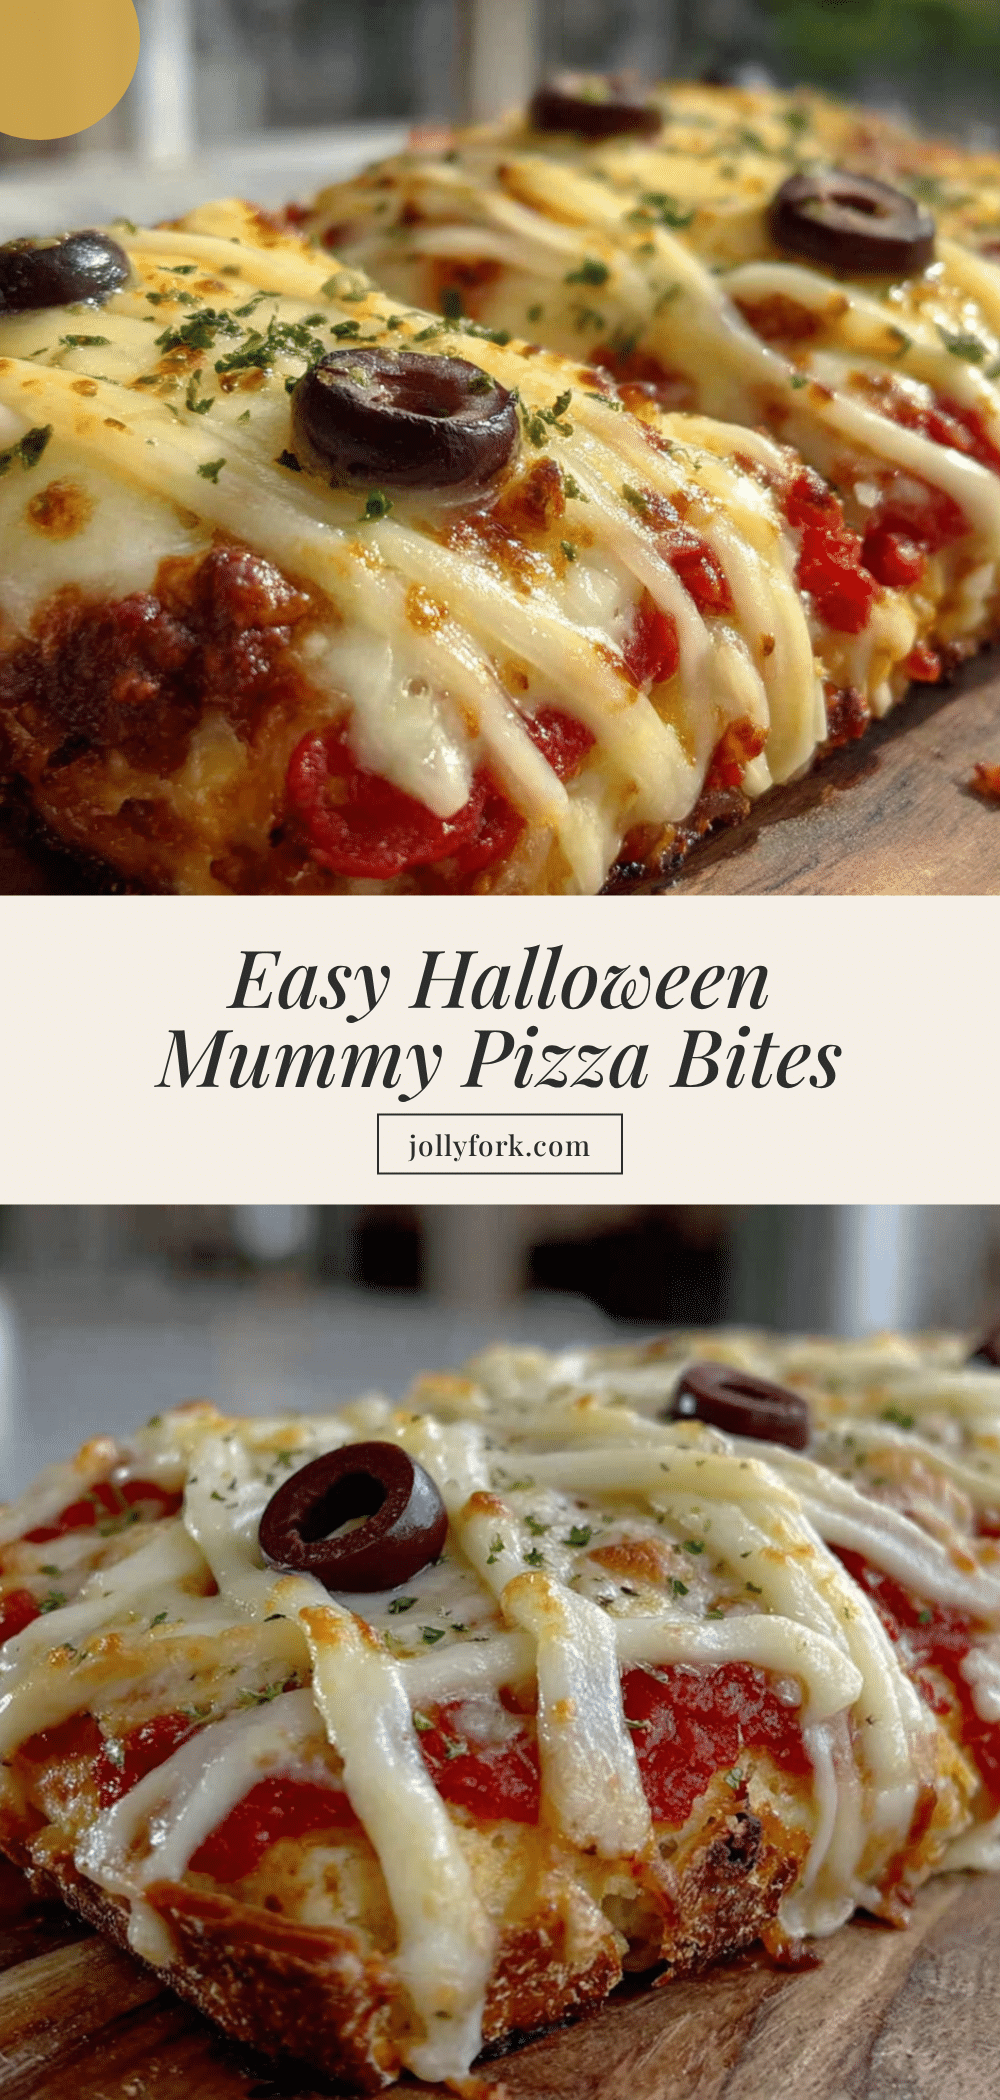
Easy Halloween Mummy Pizza: Perfect Kids Recipe
This Easy Halloween Mummy Pizza for Kids is a quick, fun, and delicious recipe that turns simple ingredients into spooky, kid-friendly pizzas. Ready in under 20 minutes, it’s perfect for Halloween parties, school lunches, or a cozy October dinner.
- Prep Time: 10 minutes
- Cook Time: 12 minutes
- Total Time: 22 minutes
- Yield: 6 servings 1x
- Category: Main Course
- Cuisine: American
Ingredients
- 1 pound store-bought pizza dough
- ½ cup pizza sauce
- 2 cups shredded low-moisture mozzarella cheese
- 12–16 pitted black olives
- 1 tablespoon olive oil
- Optional: 2 tablespoons grated Parmesan
- 8 ounces part-skim mozzarella cheese, cut into thin strips (about ¼-inch thick and 2–3 inches long)
Instructions
- Preheat your oven to 450°F (232°C). If using a pizza stone, place it on the middle rack while the oven heats. Line a baking sheet with parchment paper.
- Take your pizza dough out of the refrigerator. Let it sit at room temperature for about 20 minutes. On a lightly floured surface, divide the dough into 6 equal pieces. Roll each piece into a ball, then flatten it into an oval shape about ¼-inch thick.
- Spread about 1 tablespoon of pizza sauce onto each dough oval, leaving a ½-inch border around the edges.
- Cut your mozzarella block into thin strips—about ¼-inch wide and 2-3 inches long. Place 3-4 strips across each pizza, leaving a gap in the center for the eyes.
- Slice your black olives crosswise into rounds about ¼-inch thick. Place two olive rounds in the gap you left in the center of each pizza. Press them gently into the sauce.
- Brush the exposed edges of the dough with olive oil. If using Parmesan, sprinkle it over the top now. Transfer the assembled pizzas to the preheated baking sheet or pizza stone. Bake for 10-12 minutes, until the crust is golden brown and the cheese is bubbly and slightly browned at the edges.
- Let the mummy pizzas cool on the baking sheet for 2-3 minutes before serving. Serve warm, with extra pizza sauce for dipping if desired.
Notes
Don’t overwork the dough. Use low-moisture mozzarella for the bandages. Slice olives with a sharp knife. Bake on the bottom rack for a crisper crust. Let the pizzas rest before serving.
Nutrition
- Serving Size: 1 mummy pizza
- Calories: 285
- Sugar: 3
- Sodium: 620
- Fat: 12
- Saturated Fat: 6
- Carbohydrates: 30
- Fiber: 2
- Protein: 14
Keywords: Halloween pizza, mummy pizza, kid-friendly pizza, easy pizza recipe, Halloween dinner, spooky pizza


