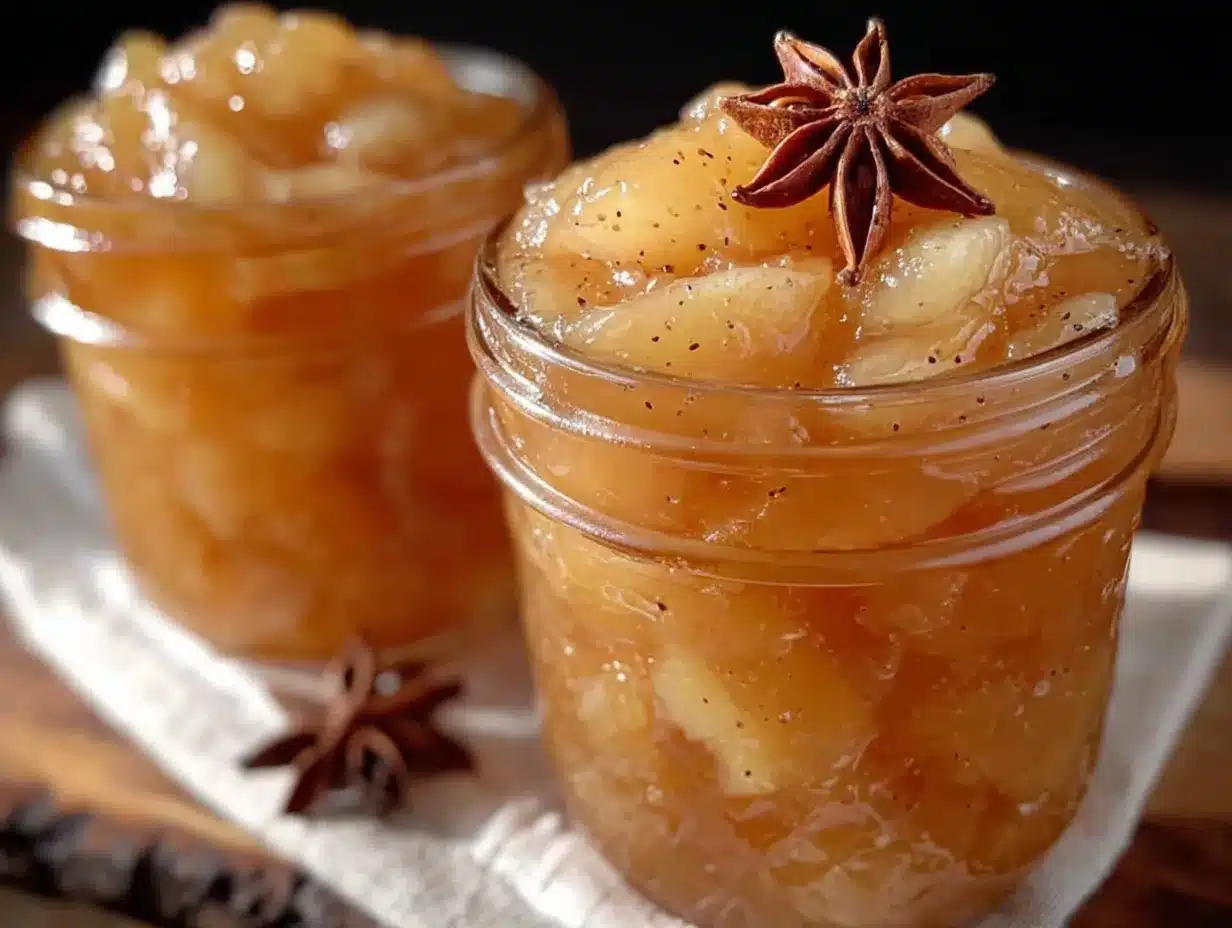
The third jar didn’t seal. I found it the next morning, the lid popped up and slightly domed, sitting on the counter like a tiny failure I had to confront before coffee. My mom had taught me better than that — you always check the seals before you walk away. But I’d been too excited, too busy texting my sister a picture of the deep amber glow inside those jars, the little vanilla bean specks suspended like gold dust. So there it was, unsealed and demanding to be eaten immediately. Honestly? Best mistake I made all autumn.
That unsealed jar ended up on a cheese board that night. I didn’t even bother refrigerating it. We just grabbed spoons and a wedge of sharp cheddar and sat there on the back porch, watching the light fade, scooping pear preserves onto crackers like it was the most natural thing in the world. My husband said, and I quote, “You’re not allowed to give these away.” That’s when I knew I had something worth writing down.
These homemade vanilla bean pear preserves are not your grandmother’s pear jam. They’re less sweet, more sophisticated, with that unmistakable vanilla warmth that makes you slow down with each bite. The pears stay suspended in a silky, not-too-thick syrup — think spreadable luxury, not jiggly jelly. It’s the kind of preserve that makes you suddenly understand why people go through the trouble of canning. Because this? This is worth the steam-faced hour over a boiling pot.
Why You’ll Love This Recipe
I’ve tested this recipe six times over two seasons. I’ve tried different pear varieties, different amounts of sugar, different ways of handling the vanilla. I’ve burned my wrist on a splattering pot and I’ve stayed up too late watching jars cool on the counter, listening for that satisfying pop. So when I tell you this is the version, I mean it. Here’s why this particular recipe works:
- Simple ingredients, extraordinary result — You only need five main ingredients (pears, sugar, lemon, vanilla beans, and water) to create something that tastes like it came from a $16 jar at a fancy market.
- Not overly sweet — Unlike many fruit preserves that rely on mountains of sugar, this recipe lets the pears and vanilla shine. The sweetness is balanced, sophisticated, and perfectly suited for both sweet and savory applications.
- Small-batch friendly — This recipe yields about 4-5 half-pint jars. It’s manageable for beginners and perfect for those who want to dip their toes into canning without committing to a bushel of fruit.
- Incredibly versatile — Spread it on morning toast, spoon it over vanilla ice cream, swirl it into yogurt, or serve it alongside a cheese board. I’ve even used it as a filling for thumbprint cookies. It’s a workhorse in disguise.
- Makes a memorable gift — Tie a ribbon around a jar and you’ve got a gift that actually means something. People remember the homemade stuff. Trust me.
What sets this recipe apart is the technique. Instead of cooking the pears down into complete mush, we treat them gently, letting them soften just enough while maintaining some texture. The vanilla bean isn’t an afterthought here — it’s infused into the syrup from the very beginning, giving the preserves a deep, aromatic warmth that extract just can’t replicate. It’s a small difference that makes a big one.
What Ingredients You Will Need
This recipe uses simple, wholesome ingredients to create preserves with deep flavor and beautiful texture. Most are pantry staples, but a few deserve a little extra attention when you’re shopping.
For the Preserves
- 3 pounds ripe but firm pears (about 6-7 medium pears) — I prefer Bartlett or Bosc for their natural sweetness and ability to hold shape during cooking. They should yield slightly to pressure at the stem but not be mushy. Underripe pears won’t break down enough, and overripe ones will turn to mush.
- 2 cups granulated sugar — This is the sweet spot for preservation and flavor. You can reduce it slightly (to 1 ¾ cups) if your pears are very sweet, but don’t go lower or the preserves won’t set properly.
- 2 tablespoons fresh lemon juice — Adds brightness, balances the sweetness, and helps with the set. Always use fresh — bottled lemon juice has a flat, metallic taste that you’ll notice in the final product.
- 2 whole vanilla beans — This is non-negotiable for the “vanilla bean” part of the name. Look for plump, moist beans, not dry and brittle ones. I buy mine in bulk from a reputable vanilla supplier and store them in an airtight container. Madagascar beans give the classic flavor, but Tahitian beans offer a more floral, delicate note if you want to experiment.
- ¼ cup water — Helps the sugar dissolve and prevents scorching in the early stages of cooking.
For Canning (Optional but Recommended)
- 4-5 half-pint canning jars with new lids and bands
- A water bath canner or a large, deep pot with a rack
Ingredient selection tip: When choosing pears, don’t buy the perfectly ripe ones at the store unless you plan to use them immediately. Pears ripen from the inside out, so a pear that feels soft on the outside is often overripe in the center. Instead, buy pears that are firm with just a little give near the stem, and let them ripen on your counter for a day or two. It makes a real difference in texture.
Substitution note: If you can’t find vanilla beans or they’re outside your budget, you can substitute 1 tablespoon of high-quality vanilla bean paste. It will give you the same beautiful specks and rich flavor. Avoid vanilla extract here — it’s too thin and the alcohol flavor doesn’t fully cook off in preserves the way it does in baked goods.
Equipment Needed
You don’t need a lot of fancy equipment to make these preserves, but having the right tools makes the process smoother and more enjoyable.
- A large, heavy-bottomed pot or Dutch oven — I use my 5.5-quart Le Creuset for this. The heavy bottom distributes heat evenly and prevents scorching, which is crucial when you’re cooking down fruit and sugar.
- A sharp chef’s knife and cutting board — Dull knives are dangerous when you’re cutting pears. A sharp one makes clean work of it.
- A vegetable peeler — A standard Y-peeler works best for pears.
- A wooden spoon or silicone spatula — For stirring. Metal spoons can react with the acid in the preserves.
- A small, sharp paring knife — For splitting and scraping vanilla beans.
- A kitchen scale — Optional but helpful for measuring pears. Three pounds is easier to weigh than to count.
- A ladle and a wide-mouth funnel — For filling jars without making a sticky mess.
- A jar lifter — If you’re water bath canning. Trust me, you don’t want to try fishing hot jars out of boiling water with tongs.
- A clean kitchen towel — For wiping jar rims and for setting hot jars on.
If you don’t have a water bath canner, you can use any large pot that’s deep enough to cover the jars by at least an inch of water. Just place a folded kitchen towel or a silicone trivet in the bottom to keep the jars from rattling against the metal.
Preparation Method
This process takes about 2 hours from start to finish, with about 30 minutes of active prep and 90 minutes of cooking and canning. Set aside a quiet afternoon — maybe put on a podcast or some music — and take your time. Rushing preserves never ends well.
Step 1: Prepare the Pears
Wash your pears thoroughly. Peel them with a vegetable peeler, then cut each pear in half lengthwise. Use a melon baller or a small spoon to scoop out the core and seeds — a melon baller works surprisingly well for this. Cut each half into ½-inch chunks. Try to keep the pieces relatively uniform so they cook evenly. You should have about 8 cups of chopped pears.
Personal tip: As you work, toss the pear pieces with about a tablespoon of the lemon juice to prevent browning. Pears oxidize quickly, and while it won’t affect the flavor, the preserves look prettier when the fruit stays light and golden.
Step 2: Prepare the Vanilla Beans
Lay each vanilla bean flat on your cutting board. Use a small, sharp paring knife to split it lengthwise from top to bottom, keeping the knife tip shallow so you don’t cut all the way through. Open the bean like a book and use the back of the knife to scrape out the tiny black seeds. Save both the seeds and the empty pods — you’ll use everything.
Step 3: Macerate the Pears
In your large pot, combine the chopped pears, sugar, lemon juice, vanilla bean seeds, and the empty vanilla pods. Add the water and stir everything together gently. Let this sit at room temperature for 30-45 minutes. The sugar will draw moisture out of the pears, creating a syrupy liquid that will help everything cook evenly. You’ll know it’s ready when the sugar looks wet and sandy and there’s a noticeable amount of liquid in the bottom of the pot.
Step 4: Cook the Preserves
Place the pot over medium heat and stir gently until the sugar is completely dissolved. This takes about 5-7 minutes. Don’t walk away — sugar can burn quickly if it’s not stirred. Once the sugar is dissolved, bring the mixture to a gentle boil. Reduce the heat to medium-low so it’s at a steady simmer, not a rolling boil.
Cook for 35-45 minutes, stirring occasionally at first and more frequently as the mixture thickens. The preserves are ready when they’ve reduced by about a third and the syrup coats the back of a spoon. You can also test by placing a small spoonful on a chilled plate and letting it sit for 30 seconds — if it wrinkles when you push it with your finger, it’s done.
Sensory cue: During cooking, the kitchen will smell like a pear orchard crossed with a vanilla farm. The color will deepen from pale gold to a warm amber. The pears will become translucent at the edges but still hold their shape in the center.
Step 5: Remove the Vanilla Pods
Fish out the empty vanilla pods with a fork or tongs. Rinse them off and let them dry — you can bury them in a jar of sugar to make vanilla sugar, which is a lovely bonus gift from this recipe.
Step 6: Prepare for Canning (Optional)
If you’re canning, now is the time to get your water bath ready. Fill your canner or large pot with enough water to cover the jars by at least an inch, and bring it to a boil. Wash your jars, lids, and bands in hot, soapy water, then keep the jars hot (in the canner or in a 200°F oven) until you’re ready to fill them.
Step 7: Fill the Jars
Using your ladle and funnel, fill each hot jar with preserves, leaving ¼ inch of headspace. Run a clean chopstick or bubble remover tool around the inside of each jar to release any trapped air bubbles. Wipe the rims with a clean, damp towel — any sugar residue on the rim can prevent a proper seal. Center the lids on the jars and screw on the bands until they’re fingertip-tight (tight but not cranked down).
Step 8: Process the Jars
Lower the filled jars into the boiling water bath using your jar lifter. Make sure they’re covered by at least an inch of water. Process for 10 minutes (adjust for altitude if needed — add 5 minutes for every 1,000 feet above sea level). When the time is up, turn off the heat and let the jars sit in the water for 5 minutes before removing them to a towel-lined counter.
Let the jars cool completely, undisturbed, for 12-24 hours. You’ll hear the satisfying pop of the lids sealing as they cool. Any jars that don’t seal should be refrigerated and used within 3 weeks.
Cooking Tips & Techniques
I’ve made this recipe enough times to know where things can go wrong. Here’s what I’ve learned the hard way so you don’t have to.
Don’t rush the maceration step. I know it’s tempting to skip the 30-minute rest and just start cooking, but that resting period is crucial. It draws out the pears’ natural pectin and creates a better set. I skipped it once when I was in a hurry, and the preserves were runny and thin. Never again.
Watch your heat. Preserves can go from perfectly set to scorched in about 90 seconds. Keep the heat at a gentle simmer, not a vigorous boil. If you see the mixture starting to stick to the bottom of the pot, reduce the heat immediately and stir more frequently. That burnt sugar taste will ruin the whole batch.
Use a thermometer for precision. If you have a candy or instant-read thermometer, the preserves are ready when they reach 220°F at sea level. This takes the guesswork out of the process. Just make sure you’re testing the temperature of the preserves, not the bottom of the pot.
Skim the foam. As the preserves cook, a pinkish foam will rise to the surface. This is just air bubbles and impurities — skim it off with a spoon for a clearer, more attractive final product. Don’t throw it away, though! Spoon it over ice cream or swirl it into yogurt. It’s too delicious to waste.
Double-check your seals. After the jars have cooled, press down on the center of each lid. If it doesn’t flex or pop, it’s sealed. If it pops up and down, refrigerate that jar and use it first. I always label my sealed jars with the date and store them in a cool, dark place. They’ll keep for up to a year, but in my experience, they never last that long.
Variations & Adaptations
This recipe is a beautiful canvas for experimentation. Here are some variations I’ve tried and loved:
Spiced Pear Preserves
Add 1 cinnamon stick, 2 star anise pods, and a 1-inch piece of fresh ginger (peeled and sliced) to the pot during the maceration step. Remove the spices before canning. The warm, aromatic notes pair beautifully with the vanilla and pears. This version is especially lovely around the holidays and makes a fantastic gift alongside a batch of chewy brown butter apple cider snickerdoodle cookies.
Pear and Fig Preserves
Replace 1 cup of the chopped pears with 1 cup of chopped fresh or dried figs. The figs add a honeyed sweetness and a slightly different texture. If using dried figs, soak them in warm water for 15 minutes before chopping. This version is absolutely stunning on a cheese board alongside aged gouda.
Low-Sugar Version
Reduce the sugar to 1 cup and add 1 tablespoon of Pomona’s Universal Pectin (which requires calcium water, included in the box). Follow the pectin package instructions for timing. The preserves will be less shelf-stable, so refrigerate after opening and use within 3 months. The flavor is more fruit-forward and less sweet — perfect for those who prefer their preserves on the tart side.
Bourbon Vanilla Pear Preserves
Add 2 tablespoons of good-quality bourbon during the last 5 minutes of cooking. The alcohol cooks off, leaving behind a warm, oaky depth that complements the vanilla beautifully. This version is my personal favorite for spooning over vanilla ice cream or using as a filling for tender homemade soft pretzel bites for a sweet-savory twist.
Serving & Storage Suggestions
These preserves are at their best when served at room temperature. Cold preserves lose some of their aromatic complexity, so let them sit out for about 20 minutes before serving.
For breakfast: Spread generously over warm buttered toast, English muffins, or scones. It’s also incredible swirled into oatmeal or spooned over Greek yogurt with a sprinkle of granola. I’ve been known to eat it straight from the jar with a spoon on busy mornings — no judgment.
For cheese boards: This preserve is a cheese’s best friend. It pairs beautifully with sharp cheddar, aged gouda, creamy brie, and tangy goat cheese. Spoon it into a small dish and serve alongside crackers, nuts, and dried fruit. It’s a showstopper every time.
For desserts: Warm a few spoonfuls and drizzle over vanilla ice cream, pound cake, or cheesecake. Use it as a filling for thumbprint cookies, layer it in a trifle, or swirl it into a huckleberry galette for a mixed-berry effect.
Storage: Sealed jars can be stored in a cool, dark place for up to 1 year. Once opened, refrigerate and use within 3 weeks. If you’re not canning, the preserves will keep in the refrigerator for up to 3 months in a tightly sealed container.
Freezing option: You can freeze these preserves in freezer-safe containers for up to 6 months. Leave about ½ inch of headspace for expansion. Thaw in the refrigerator overnight before using.
Nutritional Information & Benefits
While preserves are a treat rather than a health food, they do offer some nutritional benefits worth noting.
| Nutrient | Amount per 1 tbsp serving |
|---|---|
| Calories | 45 |
| Total Fat | 0g |
| Sodium | 0mg |
| Total Carbohydrates | 12g |
| Sugars | 11g |
| Fiber | 1g |
| Vitamin C | 2% DV |
Pears are a good source of dietary fiber, particularly when the skins are included (though we peel them here for texture). They also contain vitamin C, vitamin K, and copper. Vanilla beans contain small amounts of B vitamins and minerals, though the amounts in a serving of preserves are negligible. The real benefit of the vanilla is its antioxidant content and its ability to reduce the amount of sugar needed by adding perceived sweetness through aroma.
Dietary considerations: This recipe is naturally gluten-free, dairy-free, and vegan. It’s also nut-free and egg-free, making it safe for most common allergies. The only allergen concern is the pears themselves, which are not a common allergen. If you’re reducing sugar for dietary reasons, try the low-sugar variation above.
Conclusion
There’s something deeply satisfying about opening a jar of homemade preserves in the middle of winter, when fresh pears are a distant memory, and tasting that burst of late-summer sweetness. It’s like capturing a moment in time and saving it for later. And these vanilla bean pear preserves? They capture the best moment — that perfect window when pears are at their peak and the air is just starting to turn crisp.
I hope you’ll try this recipe. I hope you’ll make a mess of your kitchen, get steam-faced over a boiling pot, and fill your pantry with jars of golden goodness. I hope you’ll give some away and keep some for yourself. And I hope that when you open that first jar, you close your eyes for a second and appreciate what you made.
If you make these preserves, I’d love to hear about it. Drop a comment below and tell me what you paired them with, or tag me in your photos. Did you try a variation? Did you give them as gifts? Did you eat half the batch with a spoon before they even made it to the pantry? (No judgment there, trust me.) Your stories and photos make this community what it is, and I read every single comment.
Happy preserving, friends. Your kitchen is about to smell incredible.
Frequently Asked Questions
Can I use vanilla extract instead of vanilla beans?
You can, but the flavor won’t be as rich or complex, and you’ll miss out on those beautiful vanilla bean specks. If you’re in a pinch, use 1 tablespoon of vanilla bean paste instead. Avoid standard vanilla extract — the alcohol flavor doesn’t cook off well in preserves and can leave a bitter aftertaste.
Why didn’t my preserves set?
There are a few common reasons: the pears were too ripe (which reduces their natural pectin), you didn’t cook them long enough, or you used too much water. Next time, try adding a tablespoon of fresh lemon juice (the acid helps with setting) and cook until the mixture reaches 220°F on a thermometer. You can also add a small amount of commercial pectin if you’re struggling with set.
Do I have to peel the pears?
I recommend it for this recipe. Pear skins are tough and don’t break down during cooking, leaving you with chewy bits in your preserves. If you’re feeling adventurous, you can leave the skins on for a more rustic texture and deeper color, but know that the texture will be noticeably different.
How long do these preserves last?
Sealed, properly canned jars will keep for up to 1 year in a cool, dark place. Once opened, refrigerate and use within 3 weeks. If you’re not canning, the preserves will keep in the refrigerator for up to 3 months. Always check for signs of spoilage (mold, off-odors, or bulging lids) before using.
Can I use this recipe for other fruits?
Absolutely! The technique works beautifully with apples, quince, peaches, nectarines, and plums. Adjust the sugar based on the sweetness of the fruit and the cooking time based on how firm the fruit is. Apples and quince will need a longer cooking time, while peaches and plums will cook faster. The vanilla bean pairs especially well with stone fruits — try it with peaches in the summer for a real treat.
Pin This Recipe!
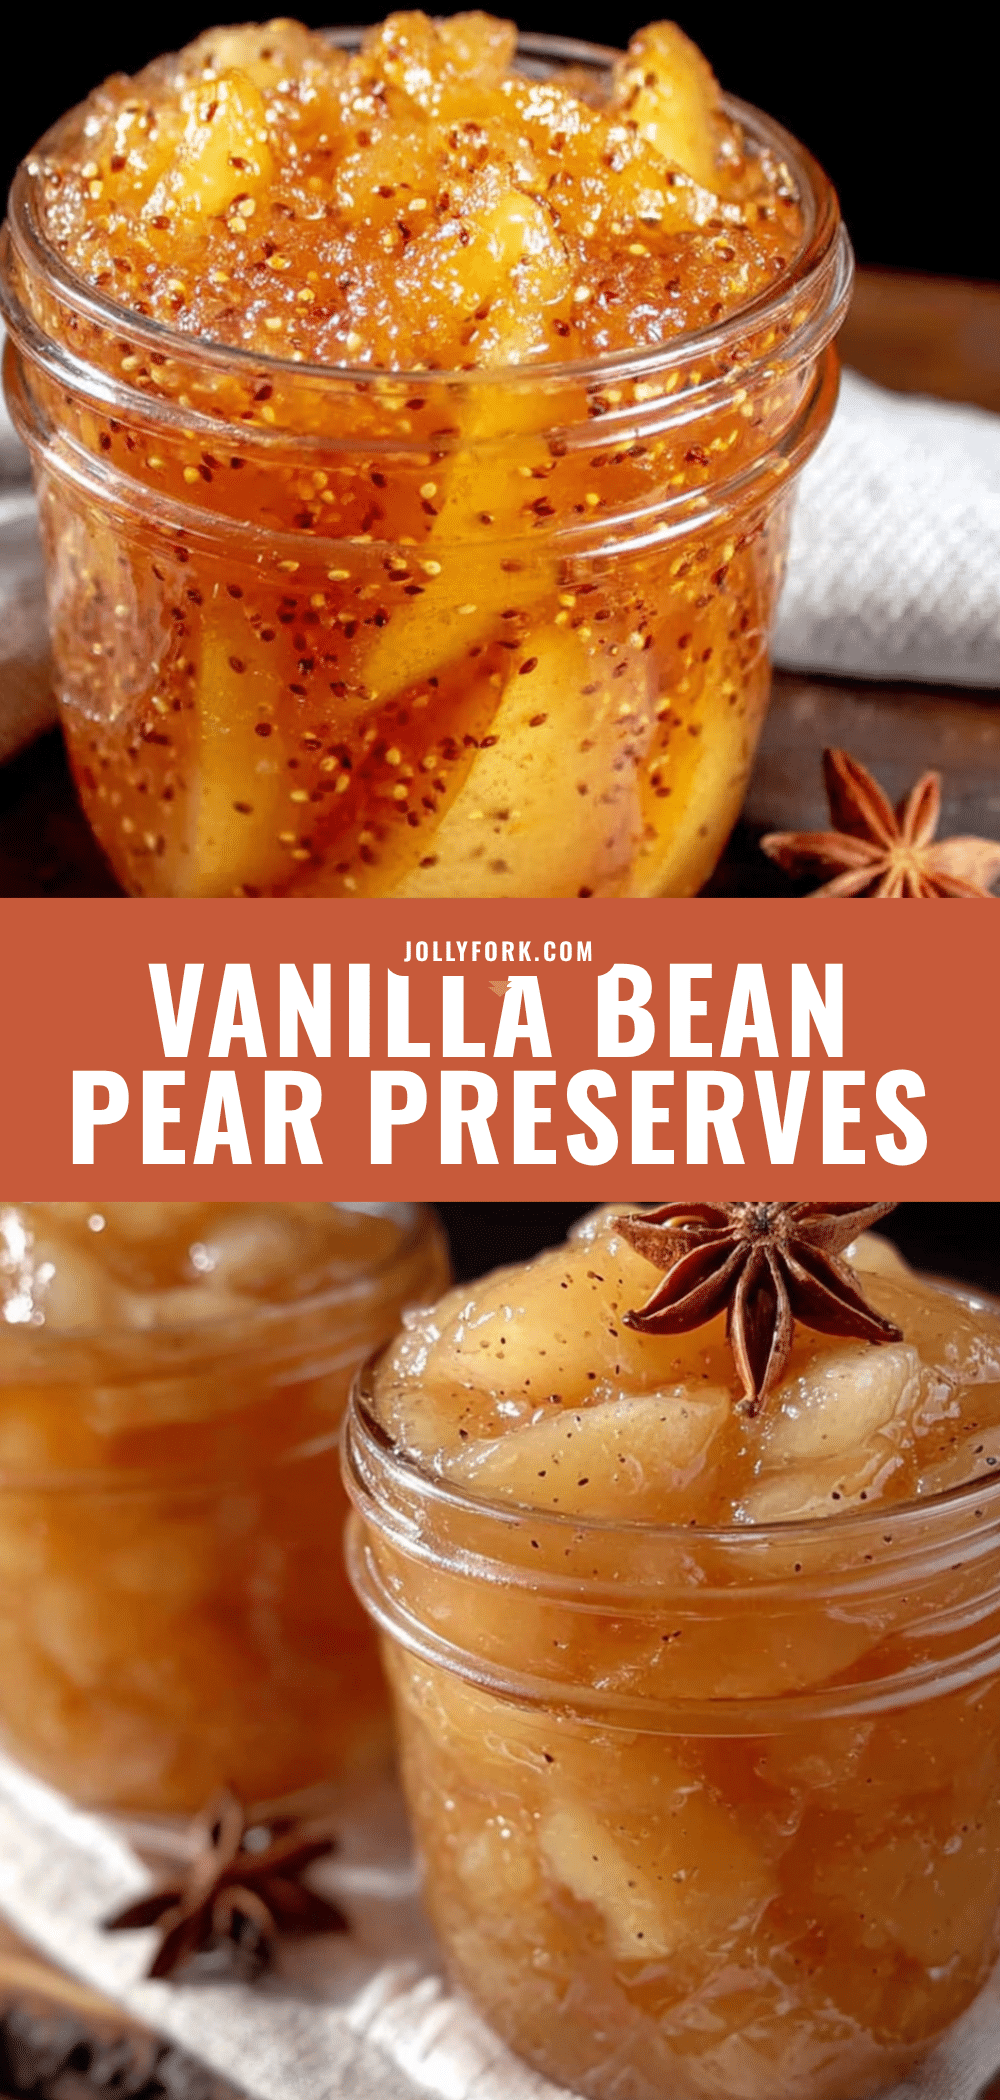
Homemade Vanilla Bean Pear Preserves: Easy Canning Recipe
These homemade vanilla bean pear preserves are less sweet, more sophisticated, with vanilla warmth that makes you slow down with each bite. The pears stay suspended in a silky, not-too-thick syrup — spreadable luxury that’s perfect for cheese boards, breakfast, or gifts.
- Prep Time: 30 minutes
- Cook Time: 45 minutes
- Total Time: 2 hours
- Yield: 4-5 half-pint jars 1x
- Category: Preserves
- Cuisine: American
Ingredients
- 3 pounds ripe but firm pears (about 6–7 medium pears), peeled and chopped into ½-inch chunks
- 2 cups granulated sugar
- 2 tablespoons fresh lemon juice
- 2 whole vanilla beans, split and seeds scraped
- ¼ cup water
Instructions
- Wash, peel, and core the pears. Cut into ½-inch chunks. Toss with 1 tablespoon of lemon juice to prevent browning.
- Split vanilla beans lengthwise and scrape out seeds. Reserve both seeds and pods.
- In a large pot, combine pears, sugar, lemon juice, vanilla bean seeds, and empty pods. Add water and stir. Let sit at room temperature for 30-45 minutes until sugar draws out moisture.
- Place pot over medium heat and stir until sugar dissolves (5-7 minutes). Bring to a gentle boil, then reduce heat to medium-low for a steady simmer.
- Cook for 35-45 minutes, stirring occasionally, until mixture reduces by about a third and syrup coats the back of a spoon. Test by placing a small spoonful on a chilled plate; if it wrinkles when pushed, it’s done.
- Remove vanilla pods with a fork or tongs. Rinse and dry pods for making vanilla sugar.
- If canning, prepare water bath canner. Wash jars, lids, and bands. Keep jars hot.
- Ladle hot preserves into hot jars, leaving ¼ inch headspace. Remove air bubbles, wipe rims, center lids, and screw bands fingertip-tight.
- Process jars in boiling water bath for 10 minutes (adjust for altitude). Turn off heat, let jars sit 5 minutes, then remove to towel-lined counter.
- Cool completely, undisturbed, for 12-24 hours. Check seals; refrigerate any unsealed jars and use within 3 weeks.
Notes
Don’t rush the maceration step; it draws out natural pectin. Watch heat to prevent scorching. Use a thermometer for precision (220°F at sea level). Skim foam for clearer preserves. Double-check seals after cooling. Sealed jars keep up to 1 year in cool, dark place; opened jars refrigerate and use within 3 weeks. For low-sugar version, reduce sugar to 1 cup and add Pomona’s Universal Pectin.
Nutrition
- Serving Size: 1 tablespoon
- Calories: 45
- Sugar: 11
- Carbohydrates: 12
- Fiber: 1
Keywords: vanilla bean pear preserves, homemade preserves, easy canning recipe, pear jam, small-batch canning, vanilla pear preserves, homemade gifts, pear preserves recipe


