I had just about accepted that slow cooker chicken breast was going to be dry. Every recipe I tried promised juicy results, and every single time I ended up shredding meat that felt more like packing material than dinner. For a while, I just figured that was the trade-off—convenience for texture. You get the ease of dumping everything in a pot, and in return, you eat chicken that needs a gallon of sauce to go down. Honestly, I stopped using my slow cooker for chicken altogether. I switched to thighs, which are more forgiving, but I missed the lean, clean taste of a good chicken breast. It felt like a small defeat every time I opened that lid and saw pale, stringy meat staring back at me.
Then I got stubborn about it. I started paying attention to what actually happened inside that ceramic pot. It’s not magic, it’s just temperature and timing—two things we tend to ignore when we set it and forget it. I tested different liquid levels, different cook times, different ways of arranging the meat. I ruined a lot of perfectly good chicken along the way. But somewhere around attempt number seven, I opened the lid and saw something different. The meat was plump. It pulled apart with a fork and actually glistened. No dry shreds, no chalky texture. Just tender, juicy slow cooker chicken breast that tasted like it had been babied all day—because it had been.
That version has never let me down since. It’s not flashy and it doesn’t require any special equipment or hard-to-find ingredients. It just works, every single time. I think that’s why it stuck. Not because it’s the most exciting recipe on the block, but because it solved a problem I’d been quietly frustrated about for years. And now, when I open that lid, I don’t hold my breath anymore. I already know what’s waiting inside.
Why You’ll Love This Recipe
This isn’t just another slow cooker chicken recipe. It’s the one that finally delivers on the promise of juicy, shreddable meat without a single dry patch. I’ve tested this method more times than I care to count, and it works because it respects the chicken rather than ignoring it.
- Foolproof Results : No more guessing games. This method uses a specific liquid-to-meat ratio and a low, steady temperature that keeps the chicken tender without overcooking. It’s practically impossible to mess up.
- Simple Pantry Ingredients : You don’t need broth, fancy marinades, or obscure spices. Just salt, a little fat, and water. That’s it. The chicken stays moist because of how it cooks, not because of what it swims in.
- Perfect for Meal Prep : Make a batch on Sunday and you’ve got protein ready for salads, sandwiches, tacos, and bowls all week. It reheats beautifully without turning into cardboard.
- Budget-Friendly : Boneless, skinless chicken breasts are affordable, especially when bought in bulk. This recipe makes the most of an economical cut without sacrificing texture.
- Endlessly Versatile : Keep it plain or add seasonings—either way, the base is so good that you can dress it up for any cuisine. Mexican, Italian, Asian, American—it all works.
What makes this recipe different is the technique. Most slow cooker recipes drown the chicken in liquid, thinking that will keep it moist. It doesn’t. It actually leaches flavor and breaks down the fibers unevenly. Here, we use just enough liquid to create steam, and we cook the chicken in a single layer so every piece gets even heat. It sounds simple because it is. But it took me a while to stop overcomplicating it.
This is the kind of recipe that makes you feel like you’ve finally cracked the code. It’s comfort in the form of reliable, no-drama cooking. When you take that first bite and the meat practically melts, you’ll wonder why you ever settled for dry chicken in the first place.
What Ingredients You Will Need
This recipe uses a short list of ingredients to deliver big results. Each one plays a specific role in keeping the chicken tender and flavorful without any fuss.
- Boneless, Skinless Chicken Breasts (2 lbs / about 900g) : Look for breasts that are similar in size so they cook evenly. If some are much thicker than others, pound them to an even thickness or slice them in half horizontally. I prefer organic chicken when I can find it, but conventional works just fine.
- Salt (1 ½ teaspoons kosher salt) : Salt is non-negotiable here. It seasons the meat from the outside in and helps the chicken retain moisture. I use kosher salt because it dissolves evenly. If you’re using table salt, reduce to 1 teaspoon.
- Olive Oil or Butter (2 tablespoons) : A little fat adds richness and helps the surface of the chicken stay tender. Olive oil works well for a neutral flavor, while butter adds a subtle creaminess. Both are great.
- Water or Low-Sodium Chicken Broth (¼ cup / 60ml) : This is the steam source. You don’t need much. Water works perfectly fine, but broth adds a whisper of savory depth. I’ve used both and honestly can’t tell a huge difference in the final meat, but the broth makes the juices at the bottom tastier if you plan to use them for sauce.
- Optional Seasonings : Garlic powder, onion powder, black pepper, or dried herbs (thyme, rosemary, oregano). Add about ½ teaspoon of each if you want a more flavorful result. I usually keep it plain and season the shredded meat later depending on what I’m making.
A quick note on ingredient sourcing: I’ve tried this with both air-chilled and water-chilled chicken breasts. Air-chilled tends to have a better texture and less water retention, which means it seasons more effectively. But honestly, whatever you have on hand will work. Just pat the chicken dry with paper towels before seasoning—that step makes a bigger difference than the brand.
For substitutions, this recipe is very forgiving. You can use chicken thighs instead of breasts, though the cook time will be slightly longer and the texture will be richer. You can also use coconut oil or avocado oil instead of olive oil. If you’re watching sodium, use unsalted butter and reduce the added salt. The method itself is the star, not the specific brand or type of fat.
Equipment Needed
You don’t need a fancy kitchen to make this work. Here’s what you’ll actually use:
- Slow Cooker (6-quart or larger) : A larger slow cooker allows you to arrange the chicken in a single layer without crowding. If your slow cooker is smaller, cook the chicken in batches or use fewer breasts. Crowding leads to uneven cooking and more liquid pooling.
- Instant-Read Thermometer : This is the single most important tool for ensuring juicy chicken. Don’t rely on the slow cooker’s timer alone. A thermometer takes the guesswork out completely. I use a simple digital one that costs about $12.
- Tongs : For placing and removing the chicken without tearing it. Silicone-tipped tongs are gentle on the meat.
- Cutting Board and Fork : For shredding. Two forks work, but I actually prefer one fork and a sturdy spatula for larger batches.
- Measuring Spoons and Liquid Measuring Cup : Precision matters here, even though the ingredient list is short. Use proper measuring tools, not eyeballed estimates.
If you don’t have a slow cooker, you can adapt this method to a Dutch oven in a low oven (300°F / 150°C) with the lid on. The cook time will be shorter, around 45 minutes to 1 hour depending on thickness. I’ve done it both ways, and the slow cooker is definitely more hands-off, but the oven method works in a pinch.
One tip: clean your slow cooker lid thoroughly after each use. Residue from previous cooks can affect heat distribution. It sounds minor, but a clean lid seals better and keeps steam where it belongs.
Preparation Method
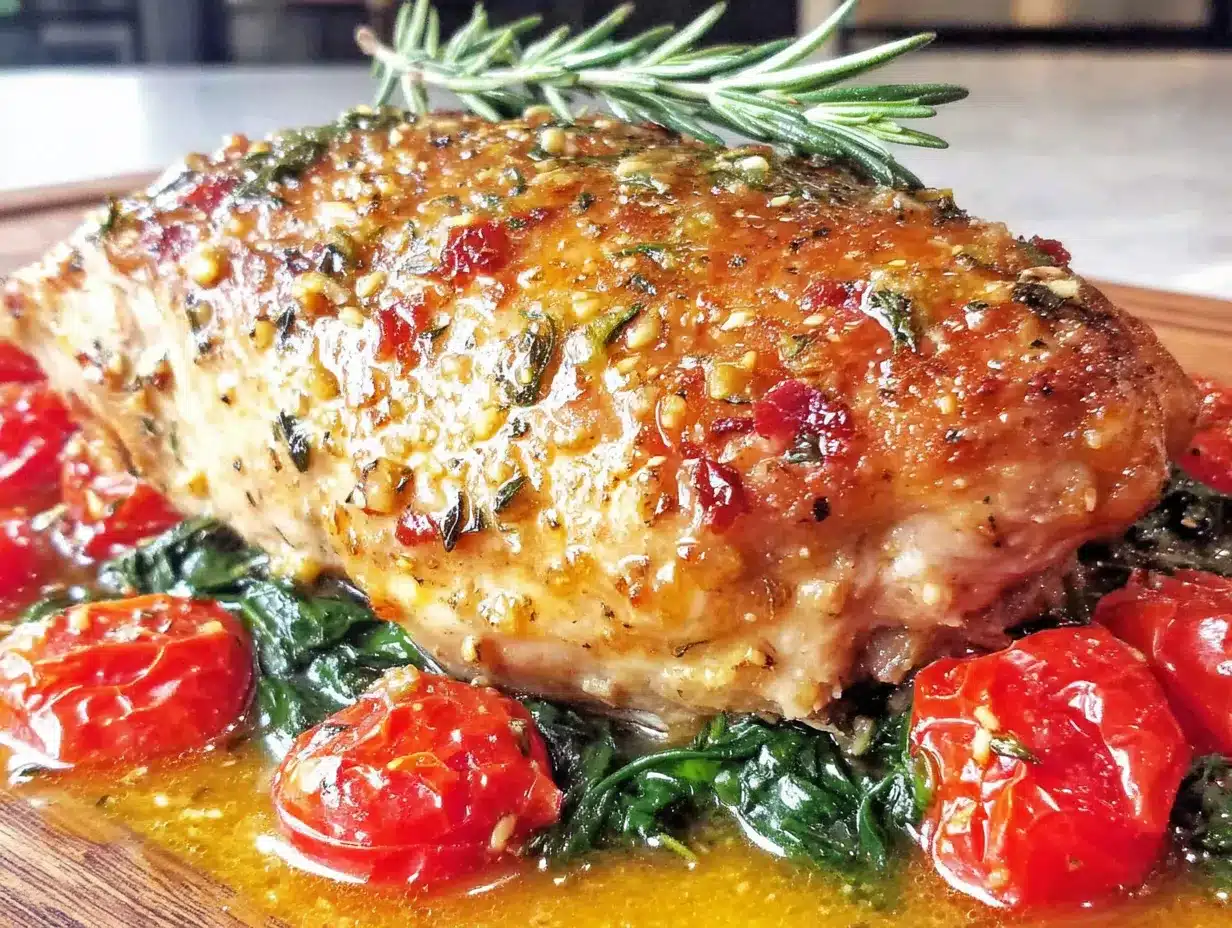
This method is straightforward, but each step matters. Follow them in order and you’ll get consistently juicy results.
- Pat the chicken dry. Remove the chicken breasts from their packaging and pat them thoroughly dry with paper towels. This removes excess moisture that would otherwise steam the surface rather than sear it. Don’t skip this—it’s the first step to avoiding rubbery texture.
- Season generously. Sprinkle the kosher salt evenly over all sides of the chicken breasts. If you’re using additional seasonings like garlic powder or pepper, add them now. Let the seasoned chicken rest at room temperature for 15 minutes. This gives the salt time to start penetrating the meat rather than just sitting on top.
- Add the liquid and fat to the slow cooker. Pour the ¼ cup of water (or broth) into the bottom of the slow cooker. Add the olive oil or butter. Don’t stir—just let the fat float on top. It will melt and mix during cooking.
- Arrange the chicken in a single layer. Place the chicken breasts in the slow cooker in a single layer. They should not overlap. If they’re stacked, the ones on top will cook faster and the ones on bottom will steam unevenly. If you have more chicken than fits in one layer, cook in two batches or use a larger slow cooker.
- Cook on LOW for 2 to 3 hours. Set the slow cooker to LOW. Do not use HIGH for this recipe—it will cook the outside too quickly while the inside lags behind, leading to dry edges and undercooked centers. Start checking at 2 hours. Thinner breasts (about 1 inch thick) will be done closer to 2 hours. Thicker breasts (1.5 to 2 inches) may need up to 3 hours.
- Check internal temperature. Insert an instant-read thermometer into the thickest part of the largest breast. You’re looking for 160°F (71°C). The temperature will rise another 5 degrees during resting, so pulling at 160°F ensures you hit 165°F without overcooking. If any piece reads below 155°F, give it another 15-20 minutes and check again.
- Remove immediately. As soon as the chicken hits 160°F, take it out of the slow cooker. Use tongs to transfer it to a cutting board. Do not let it sit in the hot liquid—it will continue cooking and dry out.
- Rest for 5 minutes. Let the chicken rest on the cutting board, uncovered, for 5 minutes. This allows the juices to redistribute throughout the meat rather than spilling out when you cut into it.
- Shred or slice. Use two forks to shred the chicken, or slice it against the grain for a more structured texture. If shredding, pull gently—the meat should separate easily. If it resists, it needs a few more minutes of cooking.
- Add back a little juice (optional). If you’re serving the chicken immediately, drizzle a tablespoon or two of the cooking liquid over the shredded meat. This adds moisture back without making it soggy. Store any remaining liquid separately for soups or sauces.
A few sensory cues to watch for: when the chicken is done, it should feel firm but springy when pressed. The surface will look moist but not wet. If you see white, stringy fibers pulling away from each other, it’s overcooked. Aim for that moment where the meat holds together but yields easily to a fork.
Cooking Tips & Techniques
After more failed batches than I’d like to admit, I’ve learned a few things that make all the difference.
Don’t lift the lid. Every time you open the slow cooker, you release heat and steam, which adds 15-20 minutes to the cook time. Resist the urge to peek. Trust the thermometer at the end instead of checking visually halfway through.
Size matters more than weight. Two pounds of chicken can look very different depending on the size of each breast. If you have one massive breast and two small ones, the small ones will be done much faster. Either buy similar-sized breasts or cut the large one in half so everything cooks at the same rate.
Low and slow is not a suggestion. I know it’s tempting to crank it to HIGH and get dinner done in an hour. Don’t. HIGH setting cooks chicken breast unevenly and dries out the exterior long before the center reaches a safe temperature. LOW is non-negotiable here.
The liquid trap. One of my early disasters came from adding too much broth. I thought more liquid meant more moisture. It actually meant the chicken boiled in its own juices, which broke down the proteins too aggressively and left the meat stringy. A quarter cup is plenty. Trust it.
Timing strategy. If you’re meal prepping, cook the chicken while you do other things. I often start it in the morning, let it cook while I work, and pull it out right before lunch. It takes 5 minutes of active prep and then you’re free. Just set a timer for 2 hours so you don’t forget about it.
The resting step is not optional. I skipped resting the first few times because I was impatient. Every time, the chicken released a puddle of juice as soon as I cut into it. That juice should have stayed in the meat. Resting fixes that. Five minutes is all it takes.
Variations & Adaptations
This base recipe is a blank canvas. Here are a few ways I’ve adapted it depending on the week and what’s in my fridge.
Mexican-Style Shredded Chicken : Add 1 teaspoon cumin, 1 teaspoon chili powder, and ½ teaspoon smoked paprika to the seasoning. Use a splash of lime juice in the cooking liquid instead of water. Shred and use for tacos, burrito bowls, or enchiladas. I’ve made this version for taco night more times than I can count, and it pairs beautifully with a side of savory giant skillet queso fundido with chorizo and hatch chiles for a full spread.
Italian-Inspired Chicken : Season with 1 teaspoon dried oregano, 1 teaspoon garlic powder, and ½ teaspoon black pepper. Replace water with a splash of white wine or lemon juice. This version is perfect for salads, sandwiches, or tossing with pasta and a light marinara. I’ve used it in a quick creamy lemon garlic butter shrimp pasta situation by mixing the shredded chicken in at the end—works great.
Asian-Style Shredded Chicken : Add 1 tablespoon soy sauce, 1 teaspoon ginger powder, and a drizzle of sesame oil to the cooking liquid. Skip the olive oil. This version is fantastic in rice bowls, lettuce wraps, or tossed with cold sesame noodles. I’ve even used it as a topping for a quick miso glazed salmon rice bowl when I wanted extra protein without extra effort.
Dietary Adaptations : This recipe is naturally gluten-free and dairy-free if you use olive oil instead of butter. For a lower-sodium version, reduce the salt to 1 teaspoon and use unsalted butter or oil. For a Whole30-compliant version, use ghee or avocado oil and skip any sugar-containing seasonings.
Different Cooking Methods : If you don’t have a slow cooker, use a Dutch oven in a 300°F oven with the lid on. Cook for 45 minutes to 1 hour, checking temperature at 45 minutes. The results are similar but the oven method requires more attention. I’ve also tested this in an Instant Pot using the pressure cook setting for 10 minutes with natural release, but the texture is slightly different—firmer, less shreddable. The slow cooker version remains my favorite for texture.
Serving & Storage Suggestions
This chicken is incredibly versatile when it comes to serving. Here’s how I use it throughout the week.
Serving Temperature : Serve warm, straight from the slow cooker. If you’re using it cold in salads, let it cool completely before refrigerating. The texture holds up well even when chilled.
Presentation Ideas : Pile the shredded chicken on a platter with fresh herbs (parsley or cilantro) and a squeeze of lemon. For tacos, serve with warm corn tortillas, diced onion, and a drizzle of crema. For salads, toss with mixed greens, cherry tomatoes, cucumber, and a simple vinaigrette. For sandwiches, pile it high on toasted bread with lettuce and tomato. I’ve even used it as a topping for a quick sheet pan caprese chicken delight when I wanted to stretch leftovers into a new meal.
Storage Instructions : Store shredded chicken in an airtight container in the refrigerator for up to 4 days. Keep a little of the cooking liquid in a separate container and add a splash when reheating to restore moisture. For longer storage, freeze the shredded chicken in a freezer-safe bag or container for up to 3 months. Press out as much air as possible before sealing to prevent freezer burn.
Reheating Methods : The best way to reheat is in a skillet over medium heat with a tablespoon of water or broth. Cover and cook for 2-3 minutes, stirring once. You can also microwave it in 30-second bursts with a damp paper towel on top. Avoid reheating in the slow cooker—it will dry out the meat again. If reheating from frozen, thaw in the refrigerator overnight first.
Flavor Development : The chicken actually tastes better on day two. The seasonings have more time to meld, and the texture stays tender. I often make this recipe specifically for meal prep because it improves overnight. If you’re serving it the same day, it’s still excellent—just know that leftovers are a gift.
Nutritional Information & Benefits
This recipe is a lean protein powerhouse. Here’s a rough estimate per serving (based on 4 servings, using 2 lbs of chicken breast, olive oil, and salt only):
- Calories : Approximately 280-320 per serving
- Protein : 45-50g
- Fat : 8-10g
- Carbohydrates : 0g
- Sodium : 400-500mg (varies with salt amount)
Chicken breast is one of the leanest sources of animal protein available. It’s rich in B vitamins, particularly B6 and B12, which support energy metabolism and brain function. It also provides selenium, a mineral that plays a role in thyroid health and antioxidant defense. The olive oil adds healthy monounsaturated fats, which are beneficial for heart health.
This recipe is naturally low-carb, keto-friendly, and gluten-free. It’s also suitable for most elimination diets as long as you adjust the fat source. If you’re watching your sodium, simply reduce the salt and use unsalted butter or oil. The recipe is free of common allergens like dairy (if using oil), soy, nuts, and eggs.
From a wellness perspective, having a reliable source of cooked protein on hand makes it easier to build balanced meals throughout the week. I’ve found that when I have this chicken in the fridge, I’m far less likely to reach for processed snacks or order takeout. It’s a small habit that pays off in consistency.
Conclusion
This slow cooker chicken breast recipe isn’t fancy, and that’s exactly why it works. It strips away the guesswork and the gimmicks and focuses on what actually matters: temperature, timing, and a little patience. If you’ve been burned by dry chicken before, I get it. I was there too. But this method has never let me down, and I think it will do the same for you.
I’d love to hear how it goes. Try it plain first, then play around with the seasonings. Add it to your favorite soups, salads, or tacos. Make a double batch and freeze half for busy weeks. The recipe is a starting point, not a rulebook. Customize it until it feels like yours.
Drop a comment below and let me know what you made with yours. Did you go Mexican-style? Keep it simple? Toss it in a pasta dish? I read every single one, and your ideas often inspire my next test batch. Until then, happy cooking—and may your chicken always be juicy.
Frequently Asked Questions
Can I use frozen chicken breasts in the slow cooker?
I don’t recommend it. Frozen chicken releases a lot of water as it thaws, which dilutes the seasoning and creates uneven cooking. It also spends too long in the danger zone temperature-wise. Thaw the chicken completely in the refrigerator first, then pat it dry and proceed with the recipe.
Why did my chicken come out dry even though I followed the recipe?
The most common culprit is overcooking. Check your slow cooker’s actual temperature—some run hotter than others. If your chicken was dry at 2 hours, try checking at 1 hour 45 minutes next time. Also, make sure you’re using LOW heat, not HIGH, and that the chicken was in a single layer.
Can I add vegetables to the slow cooker with the chicken?
Yes, but be careful. Vegetables like onions, carrots, and celery release water as they cook, which can increase the liquid level and affect the chicken’s texture. If you want to cook them together, add the vegetables to the bottom of the slow cooker and place the chicken on top. Check the chicken’s temperature earlier than usual.
How do I keep shredded chicken moist for meal prep?
Store the shredded chicken with a tablespoon or two of the cooking liquid in the container. When reheating, add a splash of water or broth before microwaving. Avoid reheating in the slow cooker, as that will dry it out again. The chicken stays moist for up to 4 days in the fridge.
Can I double this recipe?
You can, but only if your slow cooker is large enough to hold all the chicken in a single layer. If the pieces overlap, they won’t cook evenly. Use a 6-quart or larger slow cooker for up to 3 lbs of chicken. For larger batches, cook in two separate batches or use multiple slow cookers.
Pin This Recipe!
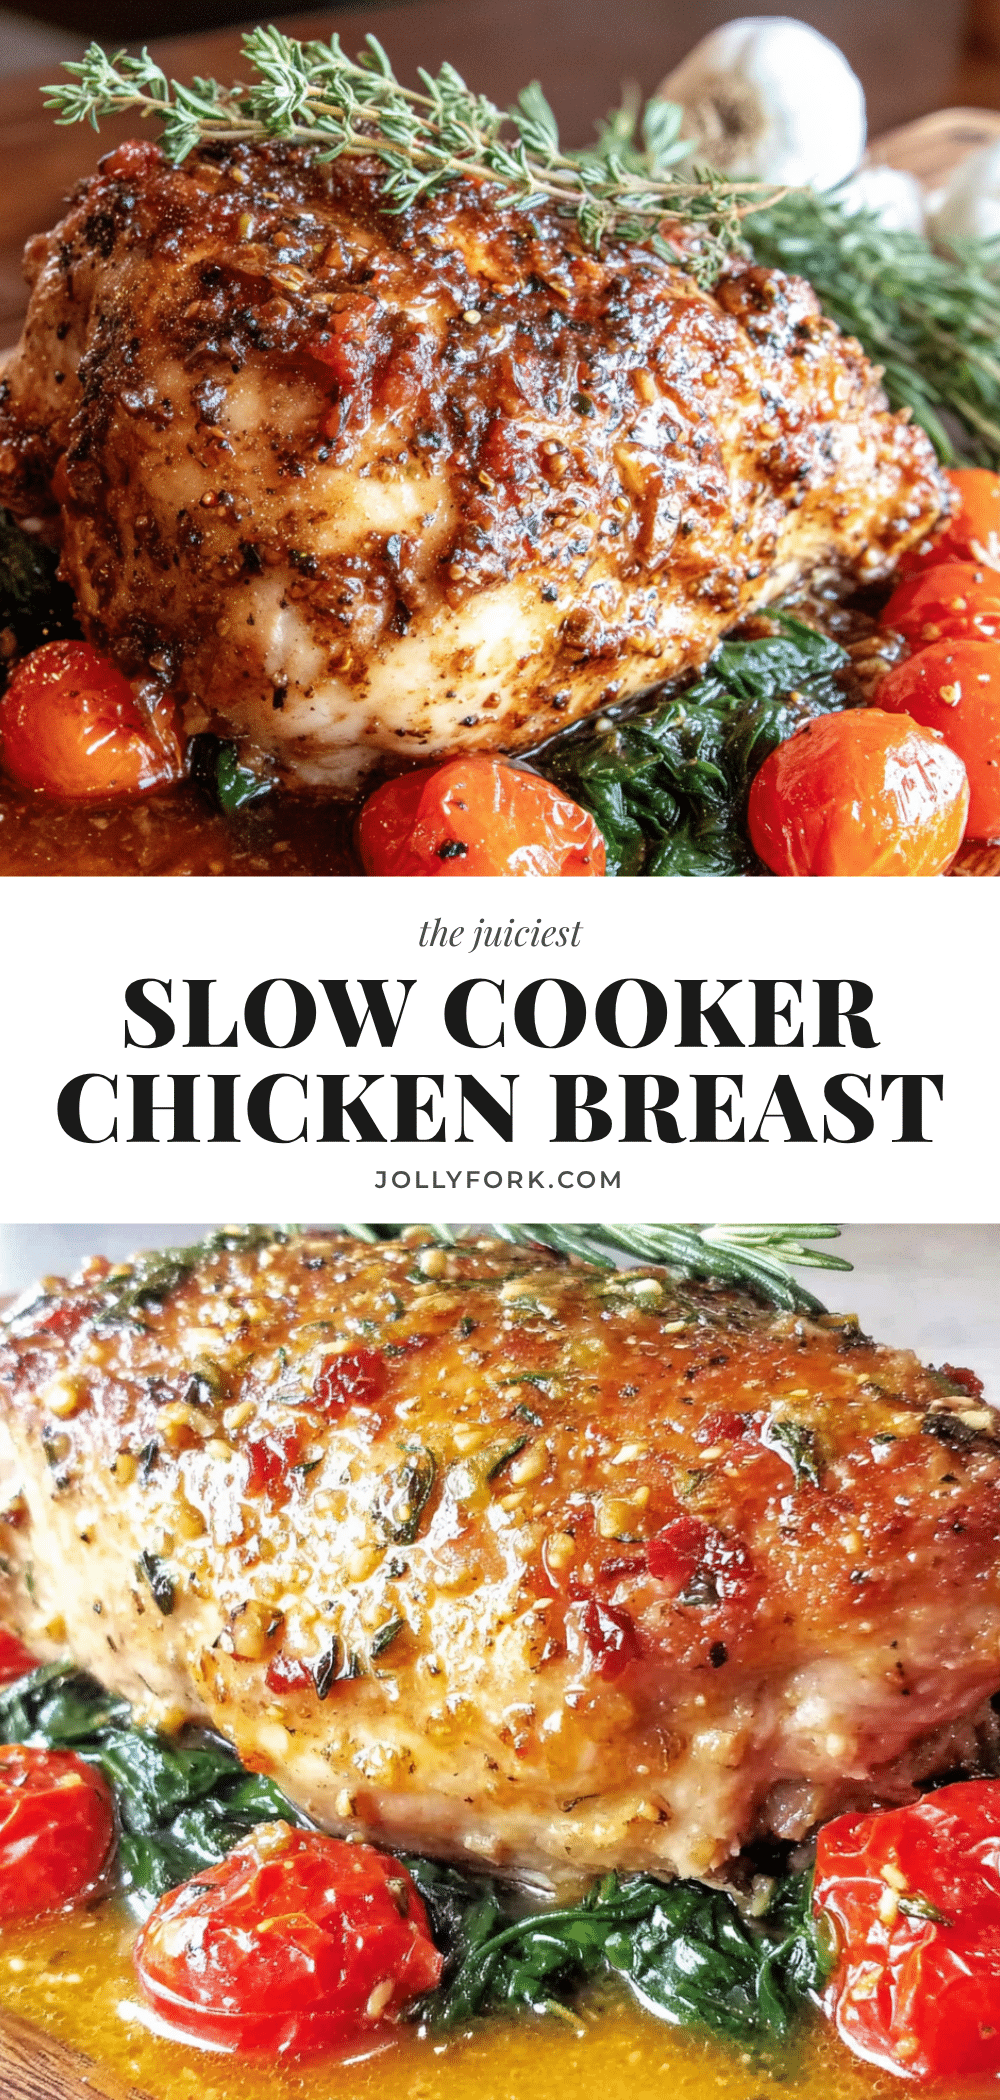
Juicy Slow Cooker Chicken Breast That Never Dries Out
This foolproof slow cooker chicken breast recipe delivers tender, juicy meat every time using a simple liquid-to-meat ratio and low, steady heat. Perfect for meal prep, it’s endlessly versatile and never dries out.
- Prep Time: 15 minutes
- Cook Time: 2 to 3 hours
- Total Time: 2 hours 15 minutes to 3 hours 15 minutes
- Yield: 4 servings 1x
- Category: Main Course
- Cuisine: American
Ingredients
- 2 lbs (about 900g) boneless, skinless chicken breasts
- 1 ½ teaspoons kosher salt (or 1 teaspoon table salt)
- 2 tablespoons olive oil or butter
- ¼ cup (60ml) water or low-sodium chicken broth
- Optional: ½ teaspoon each garlic powder, onion powder, black pepper, or dried herbs (thyme, rosemary, oregano)
Instructions
- Pat the chicken dry with paper towels.
- Season generously with kosher salt (and optional seasonings) on all sides. Let rest at room temperature for 15 minutes.
- Pour ¼ cup water or broth into the slow cooker. Add olive oil or butter. Do not stir.
- Arrange chicken in a single layer in the slow cooker. Do not overlap.
- Cook on LOW for 2 to 3 hours. Start checking at 2 hours.
- Check internal temperature with an instant-read thermometer; target 160°F (71°C) in the thickest part.
- Remove chicken immediately from the slow cooker using tongs.
- Rest on a cutting board, uncovered, for 5 minutes.
- Shred with two forks or slice against the grain.
- Optional: Drizzle a tablespoon or two of cooking liquid over shredded chicken before serving.
Notes
Do not lift the lid during cooking. Use LOW heat only. Chicken size matters more than weight; buy similar-sized breasts or cut large ones in half. Resting is essential for moisture retention. Store shredded chicken with a little cooking liquid for up to 4 days in the fridge or freeze for up to 3 months.
Nutrition
- Serving Size: 1 serving (about 6 o
- Calories: 280320
- Sodium: 400500
- Fat: 810
- Saturated Fat: 23
- Protein: 4550
Keywords: slow cooker chicken, juicy chicken breast, shredded chicken, meal prep chicken, healthy chicken recipe


