Third time this week, and I finally stopped scraping the pan clean with a piece of bread before my husband could even grab one. That’s the thing about these sticky honey garlic baked chicken wings — they have this magnetic pull that makes you forget about sharing. I started making them on a random Tuesday when I had a half-empty bottle of honey and some chicken wings I’d defrosted without a plan. The first batch was good. The second batch was better — I’d figured out the sauce-to-wing ratio and learned that patience with the oven temperature matters more than you’d think. By the third batch, I was taking notes like a mad scientist, adjusting the garlic-to-honey balance, testing different baking times, and honestly, I still tweak it every time I make them. There’s no perfect formula, just a really good one that keeps pulling me back to the kitchen.
These wings aren’t fussy. They don’t need a deep fryer or a complicated marinade. You just need a bowl, a whisk, and a baking sheet. The sauce does the heavy lifting — sticky, sweet, savory, with just enough garlic to make you reach for another wing. I’ve brought them to game days and casual dinners, and they disappear faster than anything else on the table. It’s the kind of recipe that makes you look like you tried harder than you actually did. And honestly, that’s my favorite kind of cooking.
Why You’ll Love This Recipe
I’ve tested these wings more times than I care to admit, and here’s what I’ve learned: they hit every single note you want from a baked wing recipe. No deep frying, no mess, and they come out sticky and caramelized every single time.
- Quick & Easy: Ready in about 45 minutes, with only 10 minutes of active prep. Perfect for weeknight dinners or last-minute game day snacks.
- Simple Ingredients: You probably have honey, garlic, soy sauce, and chicken wings in your kitchen right now. No fancy grocery trips required.
- Perfect for Game Day: These wings are a crowd favorite. I’ve served them alongside my easy crockpot buffalo chicken sliders and they were gone before halftime.
- Crowd-Pleaser: Kids love the sweetness, adults love the garlic kick. It’s a rare recipe that makes everyone happy.
- Unbelievably Delicious: The sauce caramelizes into this glossy, sticky coating that clings to every wing. It’s the kind of food that makes you close your eyes after the first bite.
What makes these wings different? It’s the double-bake method. You bake them first to render the fat and get the skin crispy, then you toss them in the sauce and bake again. That extra step makes all the difference — you get sticky, saucy wings with actual crispy edges, not soggy ones. I’ve tried skipping it (because who has time?), and it’s just not the same. Trust me on this one.
What Ingredients You Will Need
This recipe uses simple, pantry-friendly ingredients that come together to create something truly special. The beauty is in the balance — sweet honey, savory soy sauce, and punchy garlic all working together.
- Chicken wings (2 lbs / about 900g) — separated into drumettes and flats. I prefer buying whole wings and cutting them myself. It’s cheaper and you get better control over the size. Pat them completely dry with paper towels before baking — this is the secret to crispy skin.
- Honey (1/3 cup / 110g) — use a good quality honey, not the stuff in the plastic bear. I like local honey for its floral notes, but any pure honey works. Do not substitute with agave or maple syrup; the texture and sweetness won’t be the same.
- Soy sauce (1/4 cup / 60ml) — use low-sodium soy sauce so you can control the saltiness. Tamari works great for a gluten-free option.
- Garlic (4 cloves, minced) — fresh garlic is non-negotiable here. I’ve tried jarred minced garlic and it just doesn’t have the same punch. Take the extra 30 seconds to mince fresh cloves.
- Rice vinegar (2 tablespoons / 30ml) — adds a subtle tang that cuts through the sweetness. Apple cider vinegar works in a pinch.
- Sesame oil (1 tablespoon / 15ml) — this is the secret ingredient. It adds a nutty depth that makes the sauce taste complex. Don’t skip it.
- Cornstarch (1 tablespoon) — helps thicken the sauce so it clings to the wings. You can use arrowroot powder as a substitute.
- Baking powder (1 teaspoon) — this is my trick for extra crispy baked wings. It helps dry out the skin during baking. Make sure it’s aluminum-free so there’s no metallic aftertaste.
- Salt and pepper — to taste. Go easy on the salt since the soy sauce adds plenty.
- Sesame seeds and green onions — for garnish. Optional but highly recommended. They make the wings look restaurant-quality.
Equipment Needed
You don’t need much for this recipe, which is part of why I love it. Here’s what you’ll need:
- Baking sheet (half-sheet pan, about 18×13 inches) — rimmed is important so the juices don’t spill over. I use a heavy-duty aluminum sheet pan for even heat distribution.
- Wire rack — fits inside the baking sheet. This is key for crispy wings. It lets air circulate underneath so the wings don’t sit in their own fat. If you don’t have one, you can flip the wings halfway through baking.
- Mixing bowls — one large for the wings, one medium for the sauce.
- Whisk — for combining the sauce ingredients smoothly.
- Tongs — for flipping and tossing the wings without burning your fingers.
- Pastry brush (optional) — for brushing the sauce on during the final bake. I usually just toss them in a bowl, but brushing gives a more even coating.
- Knife and cutting board — for separating the wings if you bought whole ones.
If you don’t have a wire rack, don’t worry. Just line your baking sheet with parchment paper and flip the wings halfway through. They won’t be quite as crispy, but they’ll still be delicious. I’ve made them both ways and honestly, the wire rack method is worth the extra effort if you’re serving them to guests.
Preparation Method
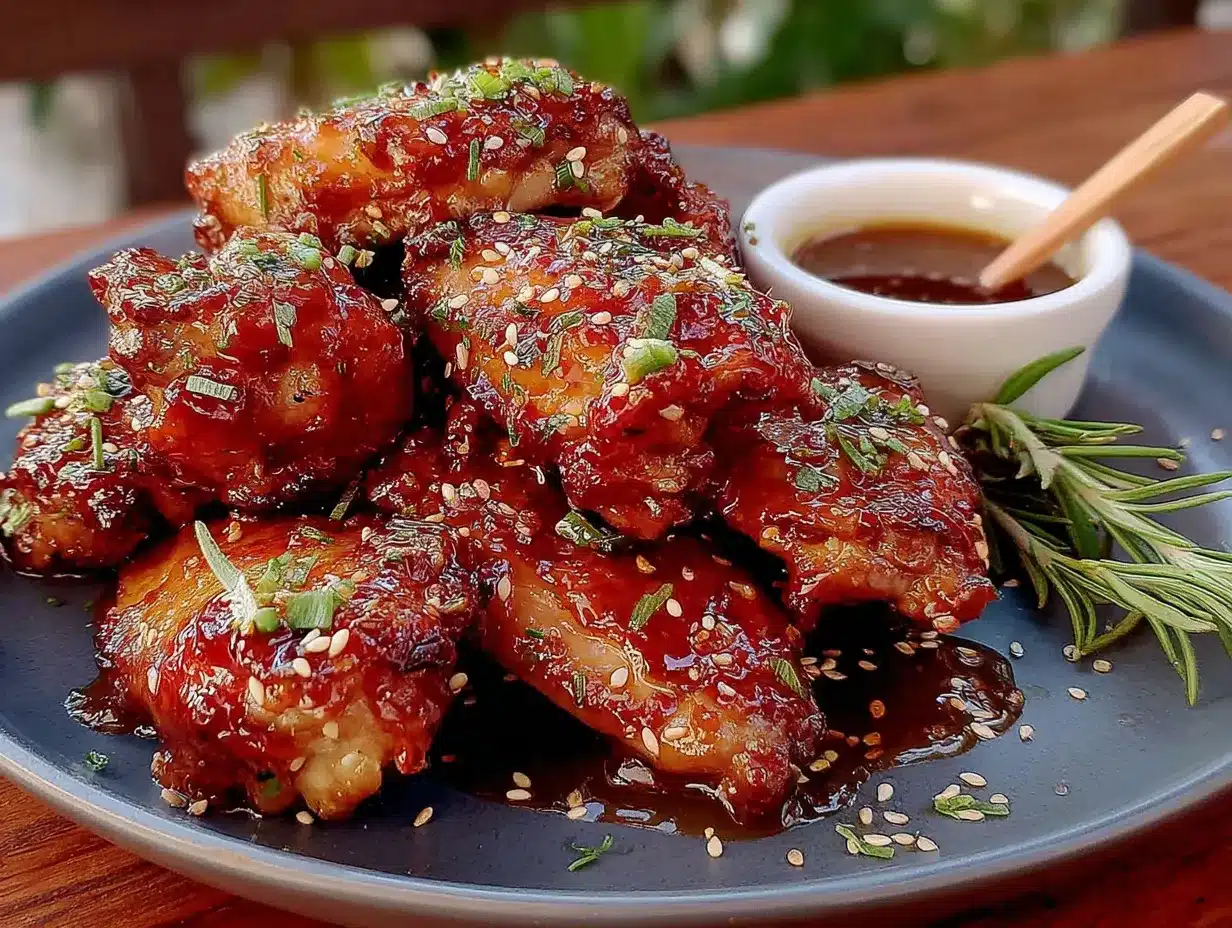
Let’s get these wings in the oven. Trust the process — the double-bake method is what makes these wings unforgettable.
- Preheat your oven to 400°F (200°C). Place a wire rack inside a rimmed baking sheet. Line the bottom of the sheet with foil for easy cleanup — trust me, the sticky sauce is a pain to scrub off.
- Pat the chicken wings completely dry with paper towels. This is the most important step for crispy skin. If they’re even slightly damp, they’ll steam instead of crisp. Toss them in a large bowl with 1 teaspoon baking powder, 1/2 teaspoon salt, and 1/4 teaspoon black pepper. Make sure every wing is coated evenly.
- Arrange the wings in a single layer on the wire rack, skin side up. Don’t crowd them — leave a little space between each wing so the hot air can circulate. Bake for 25 minutes.
- While the wings bake, make the sauce. In a medium bowl, whisk together 1/3 cup honey, 1/4 cup low-sodium soy sauce, 4 minced garlic cloves, 2 tablespoons rice vinegar, 1 tablespoon sesame oil, and 1 tablespoon cornstarch. Set aside. The cornstarch will thicken the sauce as it bakes.
- After 25 minutes, remove the wings from the oven. They should be golden and the skin should look dry and shrunken. Using tongs, transfer the wings to a large bowl. Pour the sauce over them and toss gently until every wing is coated. Don’t be shy — really get that sauce into every crevice.
- Return the wings to the wire rack in a single layer. Pour any remaining sauce from the bowl over the wings. Bake for another 15-20 minutes, until the sauce is bubbling and caramelized. The wings should look sticky and glossy, with some dark spots from the caramelized honey.
- Remove from the oven and let rest for 5 minutes. This lets the sauce set so it doesn’t slide off. Sprinkle with toasted sesame seeds and sliced green onions. Serve hot.
A note on timing: If you’re making these for a party, you can bake the wings through the first 25-minute stage, then refrigerate them. When you’re ready to serve, toss with the sauce and do the final bake. This makes them perfect for entertaining — you do the hard part ahead of time and just finish them off while your guests are arriving.
Cooking Tips & Techniques
I’ve made these wings at least a dozen times, and I’ve made every mistake in the book so you don’t have to. Here’s what I’ve learned:
- Dry the wings thoroughly. I cannot stress this enough. Wet skin = soggy wings. Use paper towels and really press them dry. Some people even leave the wings uncovered in the fridge for an hour to dry out the skin further. It works, but it’s not necessary if you’re patient with the paper towels.
- Don’t skip the baking powder. It’s not just for fluffiness. Baking powder raises the pH of the skin, which helps it brown and crisp faster. Make sure it’s aluminum-free so there’s no weird aftertaste.
- Watch the sauce during the final bake. Honey burns quickly because of its high sugar content. If you notice the sauce getting too dark or smoking, reduce the oven temperature to 375°F (190°C) for the last 10 minutes. Every oven runs differently, so check at the 10-minute mark.
- Use a rimmed baking sheet. The sauce will bubble and drip during the final bake. A rimmed sheet catches all that goodness and prevents a sticky mess in your oven. I learned this the hard way — cleaning burnt honey off the bottom of the oven is not fun.
- Let them rest. I know it’s hard to wait, but those 5 minutes of resting time allow the sauce to set into a sticky glaze. If you serve them immediately, the sauce will slide right off. Patience pays off here.
One time, I forgot to add the cornstarch to the sauce and ended up with a runny mess. The wings were still tasty, but they weren’t sticky like they should be. The cornstarch is what gives the sauce that glossy, clingy texture. Don’t skip it.
Variations & Adaptations
This recipe is incredibly flexible. Here are a few ways to change it up depending on your mood or dietary needs:
- Spicy Honey Garlic Wings: Add 1-2 teaspoons of sriracha or red pepper flakes to the sauce. The heat cuts through the sweetness beautifully. I’ve also tried it with gochujang (Korean chili paste) and it was incredible — just use 1 tablespoon and reduce the honey slightly.
- Gluten-Free Option: Use tamari or coconut aminos instead of soy sauce. The rest of the ingredients are naturally gluten-free. Double-check your baking powder label — some brands contain wheat starch.
- Air Fryer Method: Cook the wings in the air fryer at 380°F (190°C) for 12 minutes, shake the basket, then cook another 10 minutes. Toss with the sauce and air fry for another 3-4 minutes until sticky. This method is faster and gives you incredibly crispy skin.
- Lemon Garlic Variation: Replace the rice vinegar with fresh lemon juice and add the zest of one lemon. It brightens up the sauce and makes it feel lighter — perfect for summer cookouts.
- Low-Sugar Option: Use a sugar-free honey substitute or reduce the honey to 1/4 cup and add an extra tablespoon of soy sauce. The wings won’t be as sticky, but they’ll still be delicious.
My personal favorite variation is the spicy one. I add a teaspoon of gochujang and a splash of fish sauce — it gives the wings this umami depth that makes them absolutely addictive. I served them at a party last month and someone asked for the recipe before they even finished their first wing.
Serving & Storage Suggestions
These wings are best served hot, straight from the oven. The sticky sauce is at its peak when it’s warm and glossy. Here’s how to serve and store them:
- Serving temperature: Serve immediately after the 5-minute rest. If you’re making them for a party, keep them warm in a low oven (200°F / 95°C) on a wire rack for up to 30 minutes. Don’t cover them with foil or they’ll get steamy and lose their crispiness.
- Presentation: Arrange the wings on a platter and sprinkle with toasted sesame seeds and sliced green onions. Serve with extra sauce on the side for dipping. I like to add a few lemon wedges for color and a squeeze of fresh citrus.
- What to serve with them: These wings pair perfectly with a fresh salad, like my fresh grilled corn and black bean salad, or some crunchy vegetable sticks with ranch dressing. For a heartier meal, serve them over steamed rice with a side of steamed broccoli.
- Storage: Store leftover wings in an airtight container in the refrigerator for up to 4 days. The sauce will harden slightly as it cools, but that’s normal. Reheat them in the oven at 350°F (175°C) for 10 minutes to restore the crispiness. The microwave works in a pinch, but the skin will be soft.
- Freezing: You can freeze the baked wings (before adding the sauce) for up to 3 months. Thaw overnight in the refrigerator, then toss with the sauce and bake as directed. The sauce itself doesn’t freeze well, so make it fresh when you’re ready to serve.
The flavors actually develop overnight. I’ve eaten these cold from the fridge the next day and they’re still amazing — the sauce has fully set into a sticky, chewy coating that’s almost like candy. Don’t judge me.
Nutritional Information & Benefits
Here’s a rough estimate per serving (about 4-5 wings, based on 4 servings total):
- Calories: 380-420
- Protein: 28g
- Fat: 22g (mostly from the skin, which you can remove if you want)
- Carbohydrates: 20g (from the honey)
- Sugar: 18g
- Sodium: 680mg (can be reduced with low-sodium soy sauce)
These wings are a good source of protein and contain some iron and zinc from the chicken. The garlic has anti-inflammatory properties, and honey contains antioxidants. That said, this is definitely a treat — it’s not health food. But if you’re going to indulge, these wings are a delicious way to do it.
If you’re watching your sugar intake, you can reduce the honey to 1/4 cup and add a splash of water to keep the sauce consistency. The wings won’t be as sticky, but they’ll still be flavorful.
Conclusion
These sticky honey garlic baked chicken wings are the kind of recipe that becomes a staple. They’re easy enough for a Tuesday night dinner but impressive enough for a game day spread or a casual get-together. The double-bake method gives you that perfect balance of crispy skin and sticky, caramelized sauce — no deep frying required.
What I love most about this recipe is how forgiving it is. You can adjust the garlic, add some heat, or swap the honey for something else. It’s a blank canvas that always delivers. I’ve made these wings for friends who claimed they didn’t like chicken wings, and they changed their minds after one bite. That’s the power of a good sauce.
I’d love to hear how these turn out for you. Did you add any twists? Did you serve them with something unexpected? Drop a comment below and let me know. And if you’re looking for another game day favorite, try my best buffalo chicken dip stuffed bread bowl — it’s the perfect partner for these wings. Happy cooking!
Frequently Asked Questions
Can I use frozen chicken wings for this recipe?
Yes, but you need to thaw them completely first. Pat them very dry with paper towels — frozen wings release a lot of moisture as they thaw, so take extra care. If you bake them from frozen, they’ll steam instead of crisp and the sauce won’t stick properly.
How do I prevent the honey sauce from burning in the oven?
Keep an eye on the wings during the final bake. Honey burns quickly because of its high sugar content. If you notice the sauce getting too dark, reduce the oven temperature to 375°F (190°C) for the last 10 minutes. Using a rimmed baking sheet also helps catch any drips before they burn.
Can I make these wings in advance for a party?
Absolutely. Bake the wings through the first 25-minute stage, then refrigerate them uncovered for up to 24 hours. When you’re ready to serve, toss them with the sauce and do the final bake. This is my go-to method for parties — it makes the whole process stress-free.
What’s the best way to reheat leftover wings?
The oven is your best bet. Reheat them at 350°F (175°C) for 10 minutes on a wire rack. This restores the crispiness without drying them out. The microwave works in a pinch, but the skin will be soft. If you’re in a hurry, the air fryer at 350°F for 3-4 minutes works great.
Can I use chicken thighs or drumsticks instead of wings?
Yes, but adjust the cooking time. Chicken thighs and drumsticks are thicker and take longer to cook through. Bake them at 400°F (200°C) for 30 minutes, then toss with the sauce and bake another 20-25 minutes. Always check that the internal temperature reaches 165°F (74°C).
Pin This Recipe!
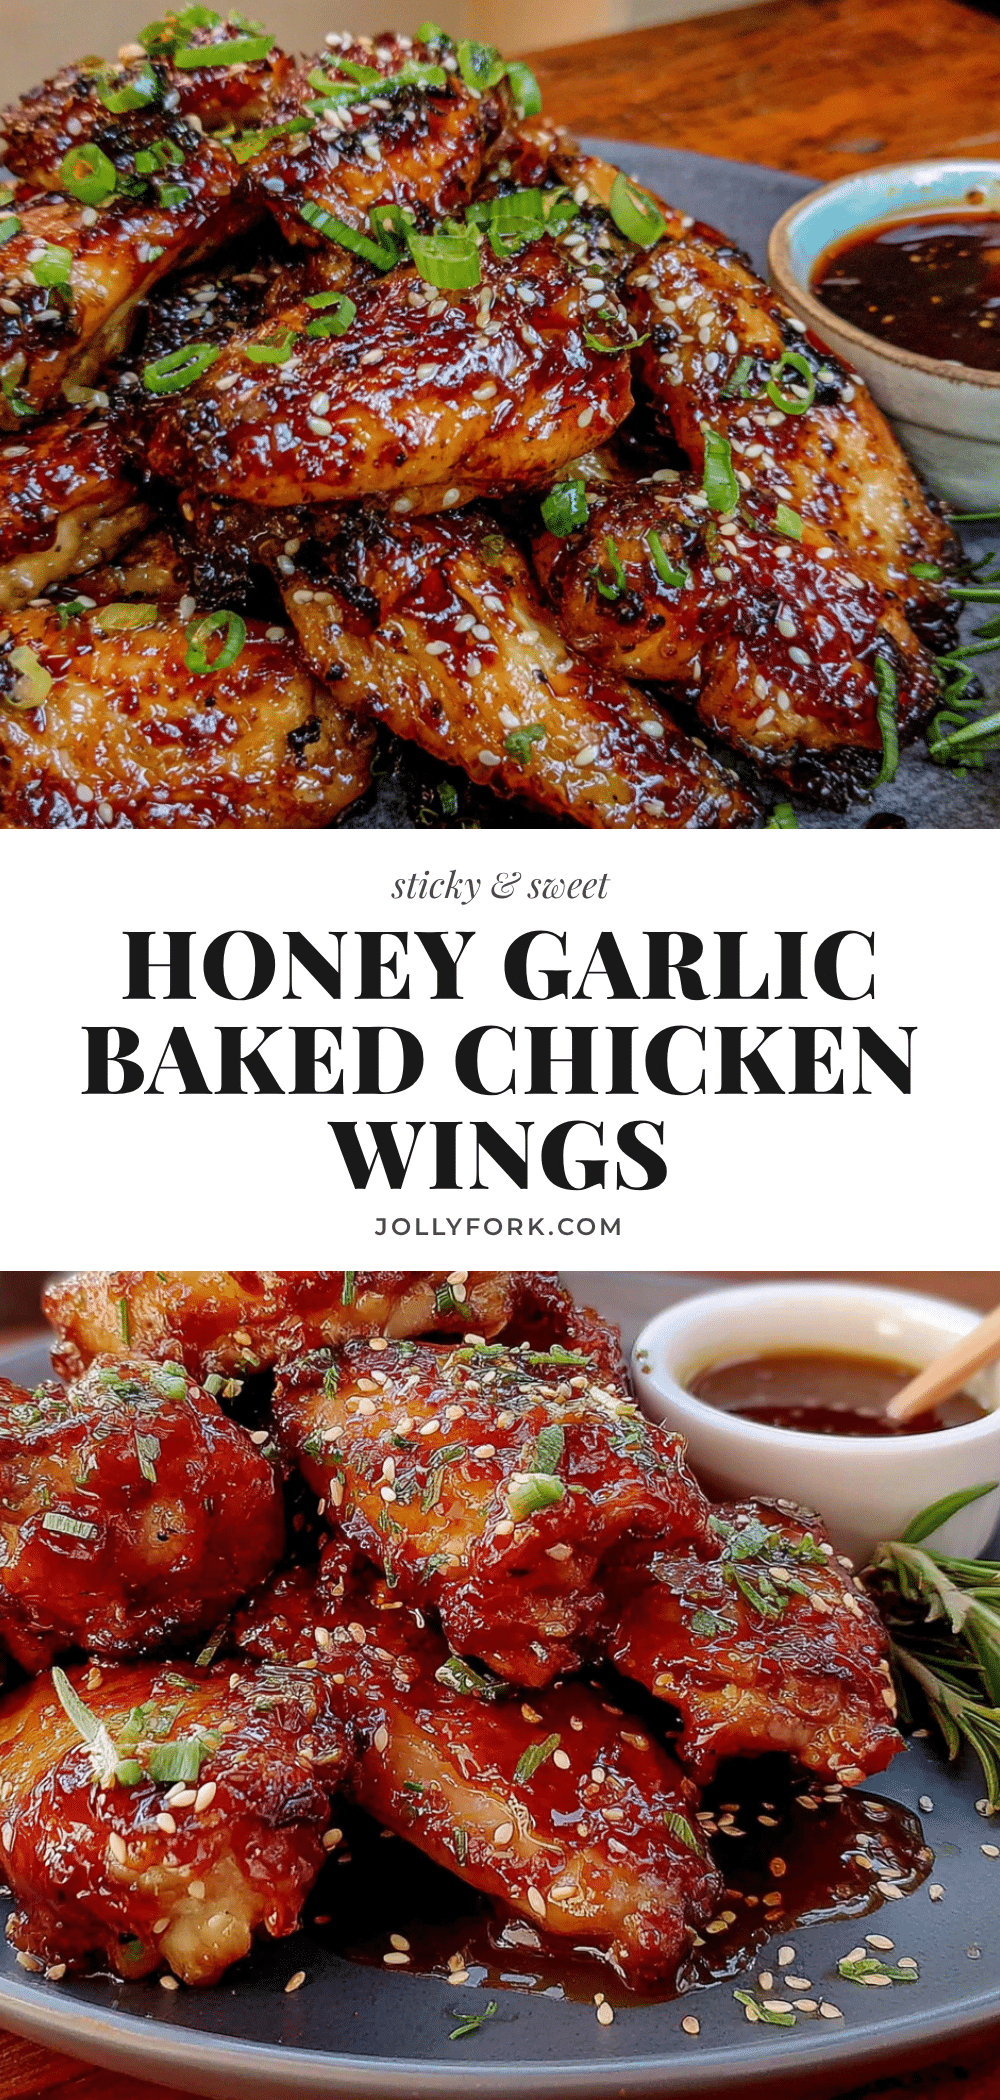
Best Sticky Honey Garlic Baked Chicken Wings
These sticky honey garlic baked chicken wings are easy to make with simple ingredients and a double-bake method that yields crispy, caramelized wings without deep frying. Perfect for game days or weeknight dinners.
- Prep Time: 10 minutes
- Cook Time: 40-45 minutes
- Total Time: 50-55 minutes
- Yield: 4 servings 1x
- Category: Appetizer
- Cuisine: American
Ingredients
- 2 lbs (about 900g) chicken wings, separated into drumettes and flats
- 1/3 cup (110g) honey
- 1/4 cup (60ml) low-sodium soy sauce
- 4 cloves garlic, minced
- 2 tablespoons (30ml) rice vinegar
- 1 tablespoon (15ml) sesame oil
- 1 tablespoon cornstarch
- 1 teaspoon baking powder (aluminum-free)
- 1/2 teaspoon salt
- 1/4 teaspoon black pepper
- Sesame seeds and green onions for garnish (optional)
Instructions
- Preheat your oven to 400°F (200°C). Place a wire rack inside a rimmed baking sheet. Line the bottom of the sheet with foil for easy cleanup.
- Pat the chicken wings completely dry with paper towels. Toss them in a large bowl with 1 teaspoon baking powder, 1/2 teaspoon salt, and 1/4 teaspoon black pepper until evenly coated.
- Arrange the wings in a single layer on the wire rack, skin side up. Leave space between each wing. Bake for 25 minutes.
- While the wings bake, make the sauce: In a medium bowl, whisk together 1/3 cup honey, 1/4 cup low-sodium soy sauce, 4 minced garlic cloves, 2 tablespoons rice vinegar, 1 tablespoon sesame oil, and 1 tablespoon cornstarch. Set aside.
- After 25 minutes, remove the wings from the oven. Using tongs, transfer them to a large bowl. Pour the sauce over and toss gently until every wing is coated.
- Return the wings to the wire rack in a single layer. Pour any remaining sauce from the bowl over the wings. Bake for another 15-20 minutes, until the sauce is bubbling and caramelized.
- Remove from the oven and let rest for 5 minutes. Sprinkle with toasted sesame seeds and sliced green onions. Serve hot.
Notes
Pat the wings completely dry for crispy skin. Don’t skip the baking powder—it helps the skin brown and crisp. Watch the sauce during the final bake to prevent burning; reduce oven temperature to 375°F if needed. Let the wings rest for 5 minutes after baking so the sauce sets. For a party, bake through the first 25-minute stage, refrigerate, then finish with sauce and final bake when ready to serve.
Nutrition
- Serving Size: 4-5 wings
- Calories: 380420
- Sugar: 18
- Sodium: 680
- Fat: 22
- Saturated Fat: 6
- Carbohydrates: 20
- Protein: 28
Keywords: sticky honey garlic chicken wings, baked chicken wings, honey garlic wings, game day wings, crispy baked wings


