Black food coloring smeared across my fingers, cocoa powder dusting the counter like a light snowfall in a graveyard, and the mixer whirring away at full speed. That was the scene in my kitchen last October when I realized I had exactly forty-five minutes before the neighborhood kids started showing up for our annual Halloween block party. I had promised “something spectacular” for the dessert table, and here I was, elbow-deep in black batter, questioning every life choice that led me to volunteer for this.
The funny thing is, these Best Spooky Black Velvet Cupcakes with Cream Cheese Frosting almost didn’t happen. I’d been scrolling through Pinterest at midnight the night before—you know how it goes—and got completely sucked into the rabbit hole of Halloween baking. Every recipe I found either required a trip to three different stores for specialty ingredients or looked like it belonged on the cover of a magazine I’d never be featured in. I needed something that looked impressive but actually came together without a culinary degree or a stress-induced meltdown.
So I did what any reasonable person would do at 1 AM. I grabbed my favorite chocolate cake recipe, a bottle of black food coloring, and started experimenting. The first batch came out looking more like charcoal briquettes than cupcakes. The second batch? Gray. Sad, lifeless gray. But the third batch? That was the one. Deep, dramatic black velvet cake with that perfect tender crumb, topped with tangy cream cheese frosting that made the whole thing taste like a dream. The kids at the party devoured them before I could even set out the candy corn fudge bars I’d also brought.
Honestly, these cupcakes have become my Halloween tradition now. They’re the thing people ask me to bring, the recipe that gets texted around to other parents, the dessert that makes people say “wait, you made these?” with genuine surprise. And the best part? They’re way easier than they look.
Why You’ll Love These Cupcakes
Let me tell you why these Best Spooky Black Velvet Cupcakes with Cream Cheese Frosting have earned a permanent spot in my Halloween rotation. I’ve tested this recipe more times than I care to admit—through burnt batches, frosting disasters, and one memorable incident where I accidentally used baking soda instead of powder. (Don’t ask. It was a long night.)
- Dramatically Dark Without Artificial Taste: The secret is combining black cocoa powder with just enough food coloring to get that deep, gothic black color. No weird aftertaste, promise.
- Perfectly Moist Every Time: Buttermilk and oil keep these cupcakes tender for days. I’ve had people ask if I used a box mix because they’re that soft.
- That Cream Cheese Frosting, Though: It’s not too sweet, not too tangy—just perfectly balanced to complement the rich chocolate cake. I’ve been making this frosting for years, and it never fails.
- No Fancy Equipment Needed: You don’t need a stand mixer or special piping tips. A hand mixer and a zip-top bag with the corner snipped off works beautifully.
- Halloween Showstopper: These look incredible on any dessert table. I’ve served them alongside my witch finger cookies and they always steal the show.
- Kid-Approved and Adult-Worthy: My niece calls them “vampire cupcakes” and demands them every year. But I’ve also served them at grown-up Halloween parties where people went back for seconds.
What makes this recipe different from all the other black velvet recipes out there? It’s the texture. Most black velvet cupcakes turn out dry because the cocoa powder absorbs so much moisture. I spent weeks tweaking the ratios to get that perfect balance between rich chocolate flavor and melt-in-your-mouth tenderness. Plus, the cream cheese frosting recipe has been in my family for years—my grandmother used it on her famous red velvet cake, and I’ve adapted it here with a few tweaks of my own.
These cupcakes aren’t just about looking spooky. They’re about that moment when you take a bite and the cake practically dissolves on your tongue, followed by that cool, creamy frosting that makes you close your eyes and forget you’re at a party surrounded by people in questionable costumes. It’s comfort food with a dark side, and honestly, isn’t that what Halloween is all about?
What Ingredients You Will Need
Before we get into the nitty-gritty, let me walk you through the ingredients. Most of these are pantry staples, which is exactly what you want when you’re baking at 10 PM the night before a party. (Not that I’ve done that. Multiple times.)
For the Cupcakes:
- All-purpose flour (1 ½ cups / 188g): Standard all-purpose flour gives these cupcakes the perfect structure. Don’t substitute cake flour here—we need the protein content for the right crumb.
- Black cocoa powder (½ cup / 50g): This is the secret ingredient. Black cocoa powder is Dutch-processed cocoa that’s been heavily alkalized, giving it that dark color and mild Oreo-like flavor. I use the King Arthur Flour brand, but any black cocoa works. Regular cocoa powder won’t give you that dramatic dark color.
- Granulated sugar (1 cup / 200g): Standard white sugar. Nothing fancy.
- Light brown sugar (¼ cup / 50g, packed): Adds moisture and a subtle depth of flavor. Don’t skip this—it makes a difference in texture.
- Baking soda (1 teaspoon): Helps the cupcakes rise and gives them that tender crumb.
- Salt (½ teaspoon): Balances the sweetness and enhances the chocolate flavor.
- Buttermilk (¾ cup / 180ml, room temperature): The acid in buttermilk reacts with the baking soda to create lift. It also keeps the cupcakes incredibly moist. No buttermilk? Add 1 tablespoon of lemon juice or white vinegar to regular milk and let it sit for 5 minutes.
- Vegetable oil (½ cup / 120ml): Oil keeps these cupcakes moist longer than butter would. I use canola or avocado oil—anything neutral-flavored works.
- Eggs (2 large, room temperature): Room temperature eggs incorporate better into the batter. Take them out of the fridge about 30 minutes before you start.
- Vanilla extract (2 teaspoons): Pure vanilla extract, not imitation. It really does make a difference in the final flavor.
- Black gel food coloring (2-3 teaspoons): Gel food coloring is much more concentrated than liquid drops. I use the Americolor brand Super Black—it’s worth the investment if you bake Halloween treats regularly. You’ll need more or less depending on how dark you want your cupcakes.
- Hot water (½ cup / 120ml): This helps bloom the cocoa powder and creates a smoother batter.
For the Cream Cheese Frosting:
- Cream cheese (8 oz / 226g, softened): Full-fat block cream cheese is non-negotiable here. Don’t use the spreadable kind in a tub—it has too much water and will make your frosting runny. Let it sit on the counter for at least an hour before you start.
- Unsalted butter (½ cup / 113g, softened): Use good quality butter. I prefer Kerrygold or Plugrà for the best flavor.
- Powdered sugar (3 cups / 360g, sifted): Sifting prevents lumps. I know it’s an extra step, but trust me, biting into a lump of powdered sugar is not the experience we’re going for here.
- Vanilla extract (1 teaspoon): Again, pure vanilla extract.
- Pinch of salt: Just a tiny pinch to balance all that sweetness.
One thing I’ve learned the hard way: temperature matters with cream cheese frosting. If your butter or cream cheese is too cold, you’ll get lumps. Too warm, and the frosting will be too soft to pipe. Aim for that Goldilocks zone where both are softened but still cool to the touch.
Equipment Needed
You don’t need a professional bakery setup for these Best Spooky Black Velvet Cupcakes with Cream Cheese Frosting, but having the right tools makes everything easier. Here’s what I use:
- Standard 12-cup muffin tin: I prefer a light-colored metal pan—dark pans can cause the edges to brown too quickly. If you only have dark pans, reduce your baking temperature by 25°F.
- Paper cupcake liners: Black or orange liners add to the spooky vibe. I’ve also used white liners and they look great too—the contrast with the black cake is striking.
- Mixing bowls (medium and large): Glass or metal bowls work best. Avoid plastic—it can absorb food coloring stains.
- Whisk and rubber spatula: For mixing the dry ingredients and folding everything together.
- Hand mixer or stand mixer: Either works. I use my KitchenAid stand mixer for the frosting, but a hand mixer does the job perfectly fine.
- Cooling rack: Essential for letting the cupcakes cool completely before frosting. Frosting warm cupcakes is a recipe for disaster—trust me, I’ve learned the hard way.
- Piping bag with star tip (or zip-top bag): I use a Wilton 1M tip for that classic rosette look, but you can also just snip the corner off a zip-top bag. The frosting will still look gorgeous.
- Sifter or fine-mesh strainer: For sifting the powdered sugar and cocoa powder. This prevents lumps and ensures a smooth batter.
If you don’t have a piping bag, don’t stress. I’ve frosted these cupcakes with a butter knife and they looked beautiful in a rustic, homemade way. The flavor is what matters, and this recipe delivers on that front.
Preparation Method
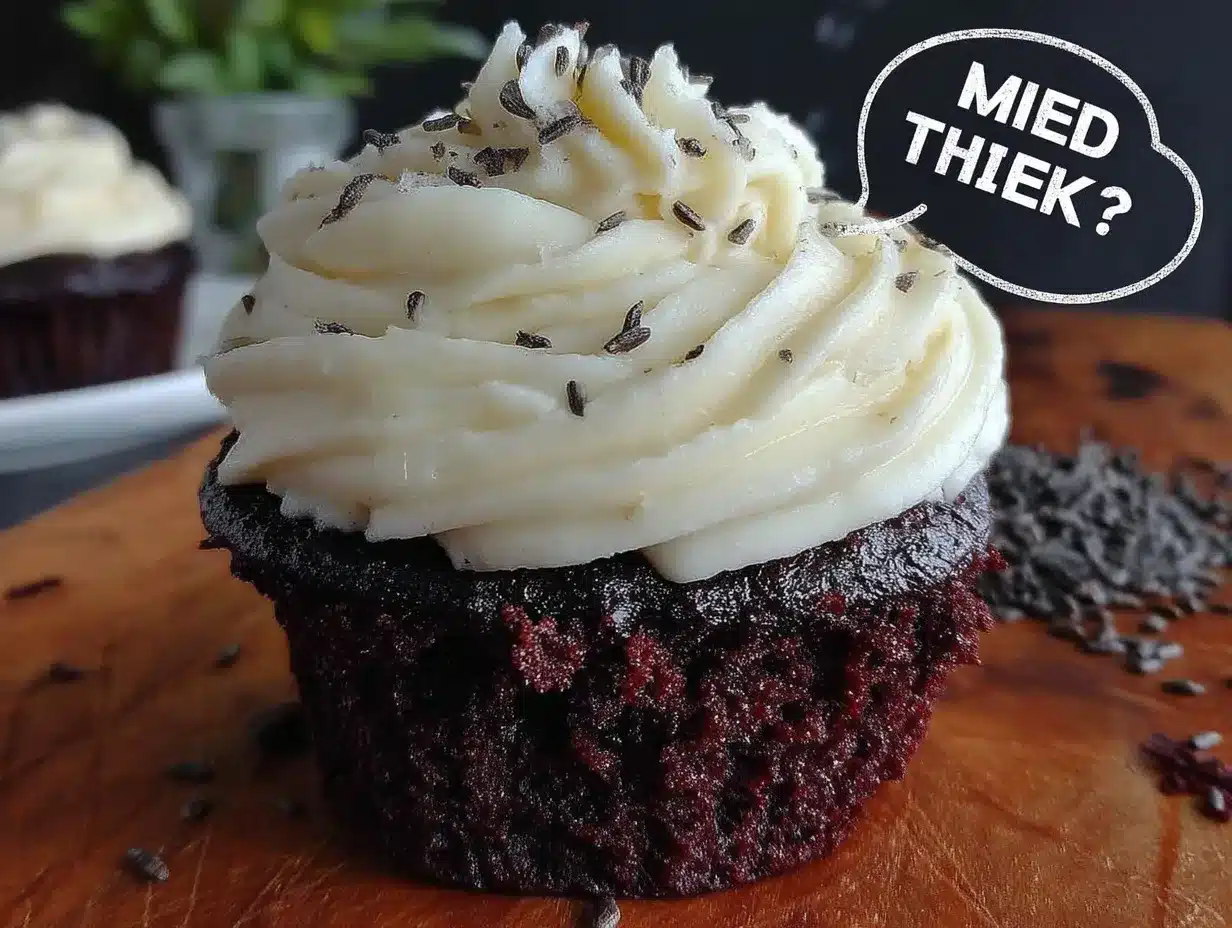
Alright, let’s get to the good stuff. Here’s how to make these Best Spooky Black Velvet Cupcakes with Cream Cheese Frosting from start to finish. I’ll walk you through every step, including the little tricks I’ve picked up along the way.
Step 1: Preheat and Prep (5 minutes)
Preheat your oven to 350°F (175°C). Line your muffin tin with paper liners and set aside. I like to give my liners a quick spritz of non-stick spray—just a light mist—to make sure the cupcakes release cleanly. This is optional, but I’ve had liners stick before and it’s heartbreaking.
Step 2: Mix the Dry Ingredients (5 minutes)
In a medium bowl, whisk together the all-purpose flour, black cocoa powder, baking soda, and salt. Make sure there are no lumps in the cocoa powder—black cocoa tends to clump more than regular cocoa. If you see clumps, sift the mixture through a fine-mesh strainer. Your future self will thank you.
Step 3: Combine the Wet Ingredients (5 minutes)
In a large bowl, whisk together the granulated sugar, brown sugar, buttermilk, vegetable oil, eggs, and vanilla extract. Whisk until everything is well combined and smooth. The mixture will look a bit thin—that’s normal. Now add the black gel food coloring. Start with 2 teaspoons and whisk it in. The batter will look gray at this point. Don’t panic. Add more food coloring a half teaspoon at a time until you reach your desired darkness. I usually use about 3 teaspoons total. The color will deepen slightly as the cupcakes bake, so aim for a shade darker than you want the final result.
Step 4: Combine Wet and Dry (5 minutes)
Add the dry ingredients to the wet ingredients in two additions, mixing gently after each. Use a rubber spatula or mix on low speed—you don’t want to overmix. Overmixing develops gluten and makes the cupcakes tough. Mix just until you see the last streaks of flour disappear. Now add the hot water and mix until the batter is smooth and glossy. The batter will be very thin—almost like a milkshake. That’s exactly what we want. Scrape down the sides and bottom of the bowl to make sure everything is incorporated.
Step 6: Fill and Bake (18-22 minutes)
Divide the batter evenly among the 12 cupcake liners. I use a cookie scoop for this—it’s messy-free and ensures even portions. Fill each liner about two-thirds full. Don’t overfill, or the cupcakes will mushroom over the tops. Bake for 18-22 minutes, or until a toothpick inserted into the center comes out with just a few moist crumbs. The tops should spring back when lightly pressed. My oven runs hot, so I start checking at 18 minutes. Every oven is different, so trust your instincts and the toothpick test.
Step 7: Cool Completely (30-45 minutes)
Let the cupcakes cool in the pan for 5 minutes, then transfer them to a wire rack to cool completely. This is crucial—if you try to frost them while they’re still warm, the frosting will melt into a sad, soupy mess. I’ve made this mistake more times than I care to admit. Let them cool for at least 30 minutes, preferably 45. Patience, my friend.
Step 8: Make the Cream Cheese Frosting (10 minutes)
While the cupcakes cool, make the frosting. In a large bowl, beat the softened cream cheese and butter together until smooth and creamy—about 2-3 minutes. Scrape down the sides of the bowl. Add the sifted powdered sugar one cup at a time, beating on low speed after each addition. Add the vanilla extract and pinch of salt, then increase the speed to medium-high and beat for 2-3 minutes until the frosting is light, fluffy, and spreadable. Don’t overbeat, or the frosting can become too soft. If it’s too soft to pipe, pop it in the fridge for 15 minutes to firm up.
Step 9: Frost and Decorate (10-15 minutes)
Once the cupcakes are completely cool, it’s time to frost. Fit your piping bag with a star tip and fill it with the cream cheese frosting. Pipe a generous swirl onto each cupcake. I start from the outside and work my way inward in a spiral, finishing with a small peak in the center. If you don’t have a piping bag, you can spread the frosting with a knife or offset spatula. For extra spooky vibes, I like to add a few sprinkles on top—bat-shaped sprinkles, orange jimmies, or even a dusting of black glitter sprinkles. I’ve also topped them with smoked paprika roasted pumpkin seeds for a sweet-and-savory twist that always surprises people.
Cooking Tips & Techniques
After making these Best Spooky Black Velvet Cupcakes with Cream Cheese Frosting roughly twenty-seven times (yes, I counted), I’ve collected some wisdom worth sharing. Let me save you from my mistakes.
The Black Cocoa Situation: Black cocoa powder is the key to that dramatic color, but it behaves differently than regular cocoa. It’s less bitter and more alkaline, which means it doesn’t react with baking soda the same way. That’s why we use buttermilk—the acid in the buttermilk provides the reaction we need for the cupcakes to rise properly. If you can’t find black cocoa, you can use regular Dutch-process cocoa and increase the black food coloring. The flavor will be slightly different, but still delicious.
The Food Coloring Dance: Gel food coloring is your best friend here. Liquid food coloring will thin out your batter and give you a washed-out gray color instead of deep black. Start with less than you think you need—you can always add more. I learned this the hard way when I dumped in an entire bottle of liquid black food coloring and ended up with cupcakes that tasted like chemicals. Not my finest moment.
Room Temperature Ingredients Matter: I know it’s tempting to use cold eggs and cold buttermilk straight from the fridge, but room temperature ingredients emulsify better and create a more even crumb. Set everything out 30 minutes before you start. If you forget (and I forget all the time), place the eggs in a bowl of warm water for 5 minutes and gently warm the buttermilk in the microwave for 10-15 seconds.
The Toothpick Test: Don’t rely solely on baking time. Ovens vary wildly—my friend’s oven runs 25 degrees hotter than mine. Start checking at 18 minutes by inserting a toothpick into the center of a cupcake. If it comes out with wet batter, give it 2 more minutes. If it comes out with a few moist crumbs, they’re done. If it comes out clean, you’ve overbaked them slightly. Still delicious, just a bit drier.
Frosting Temperature Troubleshooting: Cream cheese frosting is temperamental. If it’s too warm, it will slide off your cupcakes. If it’s too cold, it will be difficult to pipe. The sweet spot is when the frosting is cool to the touch but still soft enough to pipe smoothly. If your kitchen is warm (like mine in summer), pop the frosting in the fridge for 10-15 minutes before piping. If it gets too firm, let it sit at room temperature for a few minutes and re-beat it.
Variations & Adaptations
One of the things I love about this recipe is how versatile it is. Here are some variations I’ve tried and loved:
Gluten-Free Version: Substitute the all-purpose flour with a good quality 1:1 gluten-free flour blend. I’ve had great results with King Arthur Flour’s Measure for Measure blend. Add 1 teaspoon of xanthan gum if your blend doesn’t already include it. The texture will be slightly more delicate, but still delicious.
Dairy-Free Version: Use a plant-based buttermilk alternative—mix 1 tablespoon of lemon juice with enough unsweetened almond or oat milk to make ¾ cup. For the frosting, use dairy-free cream cheese (I like the Kite Hill brand) and vegan butter. The frosting won’t be as firm, so you might want to chill it longer before piping.
Blood-Red Velvet Twist: Instead of black food coloring, use red gel food coloring to make traditional red velvet cupcakes. The recipe works exactly the same way—just swap the colors. I’ve made both versions for Halloween parties and they look amazing together on a platter.
Spooky Spiderweb Design: After frosting the cupcakes, pipe a small dollop of black frosting in the center. Use a toothpick to drag lines outward from the center to create a spiderweb pattern. It takes an extra 30 seconds per cupcake and looks incredibly impressive.
Mini Cupcake Version: Use a mini muffin tin and bake for 10-12 minutes instead of 18-22. This recipe makes about 36 mini cupcakes. They’re perfect for parties where people want to try multiple desserts without committing to a full-sized cupcake.
Chocolate Ganache Drip: For an extra decadent touch, let the cream cheese frosting set in the fridge for 15 minutes, then drizzle a warm chocolate ganache over the top. The contrast between the black cake, white frosting, and dark chocolate ganache is stunning.
Serving & Storage Suggestions
These Best Spooky Black Velvet Cupcakes with Cream Cheese Frosting are best served at room temperature, which brings out the full flavor of both the cake and the frosting. If you’ve refrigerated them, let them sit on the counter for about 30 minutes before serving.
For a Halloween party spread, I like to arrange them on a black cake stand or a wooden board with some fake spiderwebs and plastic spiders scattered around. They pair beautifully with a hot cup of coffee or a glass of cold milk. If you’re serving them alongside other treats, they go great with pumpkin charcuterie board for a full Halloween spread.
Storage Instructions:
- Room Temperature: If you’re serving them within a few hours, they can sit at room temperature. The cream cheese frosting is fine for up to 4 hours at room temperature.
- Refrigerator: Store frosted cupcakes in an airtight container in the refrigerator for up to 5 days. The cake stays moist, and the frosting firms up nicely.
- Freezer: Unfrosted cupcakes freeze beautifully for up to 3 months. Wrap them individually in plastic wrap, then place them in a freezer-safe bag. Thaw at room temperature before frosting. Frosted cupcakes can also be frozen, but the texture of the cream cheese frosting changes slightly after thawing.
Reheating Tips: If you prefer your cupcakes slightly warm (I do, especially on a cold October evening), pop an unfrosted cupcake in the microwave for 10-15 seconds. Add the frosting after warming—warm frosting is a sad, melty mess.
One thing I’ve noticed: these cupcakes actually taste better the next day. The flavors meld together overnight, and the cake becomes even more moist. So if you’re planning a party, bake them a day ahead and frost them the morning of the event. Your future self will thank you.
Nutritional Information & Benefits
Let’s be real—these are cupcakes, not health food. But here’s the breakdown if you’re curious:
Per cupcake (with frosting, approximate values):
- Calories: 380-420
- Fat: 22g
- Saturated Fat: 12g
- Carbohydrates: 48g
- Sugar: 36g
- Protein: 5g
- Sodium: 280mg
Health Highlights:
- Black cocoa powder contains antioxidants called flavonoids, which can help reduce inflammation and support heart health. It’s still chocolate, but at least it’s chocolate with some redeeming qualities.
- Buttermilk is a good source of calcium, vitamin B12, and probiotics (if you use cultured buttermilk). It also makes the cupcakes tender without adding as much fat as heavy cream.
- Cream cheese provides protein and calcium, though it’s also high in saturated fat. Everything in moderation, right?
Dietary Considerations:
- Contains gluten, dairy, and eggs
- Can be made gluten-free with appropriate flour substitute
- Can be made dairy-free with plant-based alternatives
- Not suitable for vegan diets without significant modifications
I’m not a nutritionist, and I don’t pretend to be one. These cupcakes are a treat, meant for special occasions and celebrations. Life is short—eat the cupcake.
Conclusion
These Best Spooky Black Velvet Cupcakes with Cream Cheese Frosting have become my signature Halloween contribution for a reason. They’re dramatic enough to impress, simple enough to make on a weeknight, and delicious enough that people forget they’re supposed to be scary. The first time I brought them to a party, someone asked if I’d bought them from a bakery. I may have let them believe that for a minute before admitting I made them myself. (The look on their face was priceless.)
What I love most about this recipe is how it brings people together. There’s something about black cupcakes topped with creamy white frosting that makes everyone smile—kids, adults, even that one person who claims they “don’t really like sweets.” I’ve seen grown adults fight over the last one on the plate. No judgment here.
I’d love to hear how yours turn out! Did you add any spooky decorations? Did you try a flavor variation? Drop a comment below and let me know—I read every single one and I love seeing your creations. And if you’re looking for more Halloween baking inspiration, check out my mummy pizza recipe for a savory option that’s perfect for Halloween night.
Happy Halloween, and happy baking! May your cupcakes be dark, your frosting be creamy, and your kitchen stay (mostly) clean.
Frequently Asked Questions
Can I make these cupcakes ahead of time?
Absolutely! Bake the cupcakes up to 2 days ahead and store them unfrosted in an airtight container at room temperature. Make the frosting up to 3 days ahead and keep it refrigerated. Frost the cupcakes the day you plan to serve them for the best presentation.
Why did my cupcakes turn out gray instead of black?
This usually happens when you don’t use enough food coloring or when you use liquid food coloring instead of gel. Black cocoa powder helps, but you still need gel food coloring to achieve that deep, dramatic black color. Start with 2 teaspoons and add more until the batter looks darker than you want the final result to be.
Can I use regular cocoa powder instead of black cocoa?
You can, but the cupcakes won’t be as dark and the flavor will be different. Regular cocoa powder gives a more traditional chocolate flavor, while black cocoa has that mild, Oreo-like taste. If you use regular cocoa, you’ll need to add more black food coloring to compensate for the lighter color.
My cream cheese frosting is too runny. What went wrong?
The most common culprit is using cream cheese that’s too warm or using the spreadable kind from a tub. Always use block cream cheese and let it soften at room temperature for about an hour—no longer. If your frosting is still runny, pop it in the fridge for 15-20 minutes to firm up before piping.
How do I get that perfect swirl on top?
Use a piping bag fitted with a star tip (Wilton 1M is my go-to). Start piping from the outside edge of the cupcake and work your way inward in a spiral motion, applying even pressure. When you reach the center, lift the bag straight up to create a small peak. Practice makes perfect—my first few swirls were definitely wonky!
Pin This Recipe!
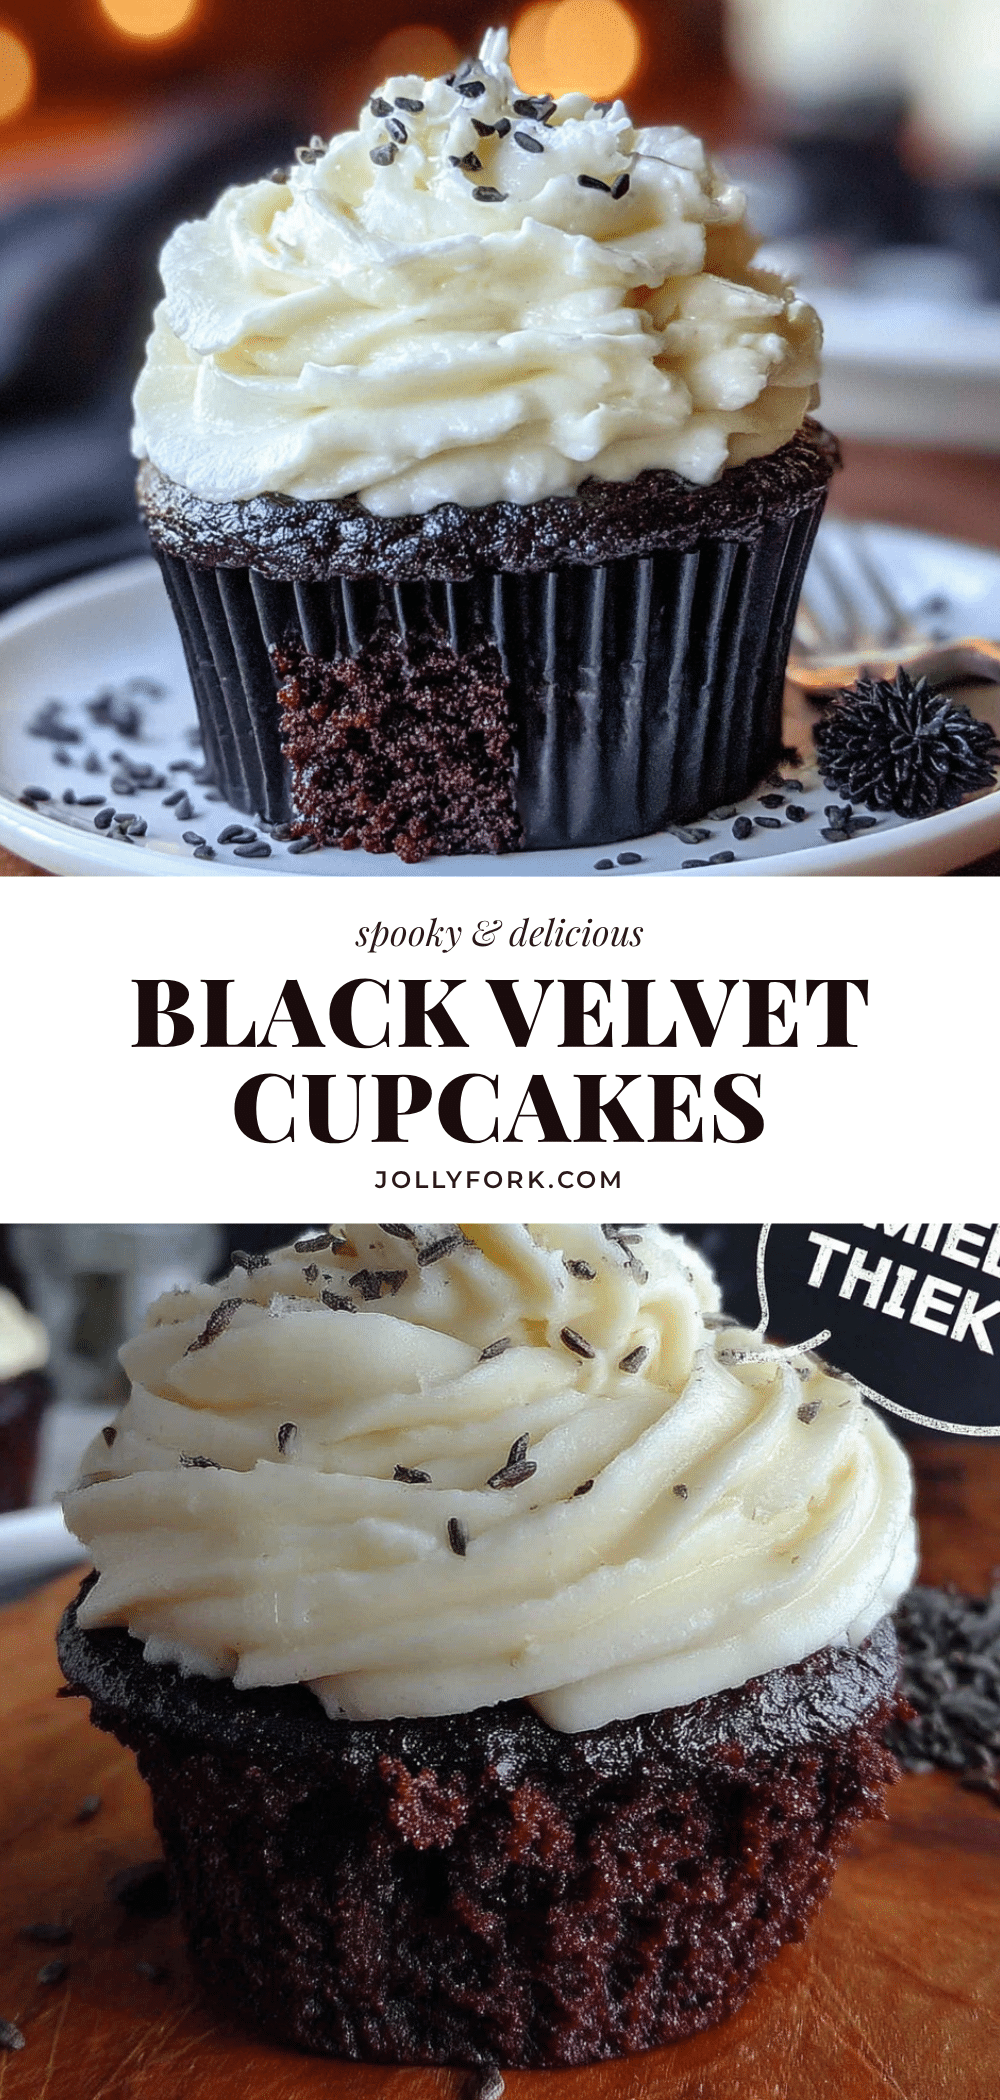
Best Spooky Black Velvet Cupcakes: Easy Cream Cheese Frosting
Deep, dramatic black velvet cake with a tender crumb, topped with tangy cream cheese frosting. These spooky cupcakes are perfect for Halloween parties and are surprisingly easy to make.
- Prep Time: 15 minutes
- Cook Time: 20 minutes
- Total Time: 1 hour 10 minutes
- Yield: 12 servings 1x
- Category: Dessert
- Cuisine: American
Ingredients
- 1 ½ cups (188g) all-purpose flour
- ½ cup (50g) black cocoa powder
- 1 cup (200g) granulated sugar
- ¼ cup (50g) light brown sugar, packed
- 1 teaspoon baking soda
- ½ teaspoon salt
- ¾ cup (180ml) buttermilk, room temperature
- ½ cup (120ml) vegetable oil
- 2 large eggs, room temperature
- 2 teaspoons vanilla extract
- 2–3 teaspoons black gel food coloring
- ½ cup (120ml) hot water
- 8 oz (226g) cream cheese, softened
- ½ cup (113g) unsalted butter, softened
- 3 cups (360g) powdered sugar, sifted
- 1 teaspoon vanilla extract
- Pinch of salt
Instructions
- Preheat oven to 350°F (175°C). Line a 12-cup muffin tin with paper liners.
- In a medium bowl, whisk together flour, black cocoa powder, baking soda, and salt. Sift if cocoa is clumpy.
- In a large bowl, whisk together granulated sugar, brown sugar, buttermilk, oil, eggs, and vanilla until smooth. Add black gel food coloring (start with 2 teaspoons, add more for desired darkness).
- Add dry ingredients to wet in two additions, mixing gently until just combined. Add hot water and mix until batter is smooth and glossy (batter will be thin).
- Divide batter evenly among liners, filling each about two-thirds full.
- Bake for 18-22 minutes, until a toothpick inserted in center comes out with a few moist crumbs. Cool in pan 5 minutes, then transfer to a wire rack to cool completely (30-45 minutes).
- For frosting: Beat softened cream cheese and butter together until smooth (2-3 minutes). Add sifted powdered sugar one cup at a time, beating on low. Add vanilla and salt, then beat on medium-high 2-3 minutes until light and fluffy.
- Once cupcakes are cool, pipe or spread frosting onto each cupcake. Decorate as desired.
Notes
Black cocoa powder is key for the dark color and Oreo-like flavor. Use gel food coloring, not liquid. Room temperature ingredients are important for best texture. Cupcakes taste even better the next day. Store frosted cupcakes in refrigerator up to 5 days; unfrosted freeze up to 3 months.
Nutrition
- Serving Size: 1 cupcake
- Calories: 400
- Sugar: 36
- Sodium: 280
- Fat: 22
- Saturated Fat: 12
- Carbohydrates: 48
- Fiber: 2
- Protein: 5
Keywords: black velvet cupcakes, Halloween cupcakes, cream cheese frosting, spooky cupcakes, black cocoa cupcakes


