For a while, I just accepted that banana bread meant a sticky counter, a flour-dusted shirt, and that slightly frantic feeling of trying to get a batter into the oven before the overripe bananas turned into a science experiment. I had been looking for a banana bread that actually let me sleep in on a Saturday morning instead of waking up to preheat and mix. The kind of recipe that worked with my schedule, not against it. Most quick breads demand immediate attention—mixing, pouring, baking—all in one go. But what if the hardest part could happen the night before, while you’re winding down?
That’s where this Easy No-Knead Overnight Banana Bread comes in. It’s not a flashy recipe. There’s no stand mixer involved, no complicated folding technique, and definitely no kneading. You stir it together in one bowl—honestly, you can even use a fork—cover it, and let it sit on the counter overnight. The next morning, you pour the batter into a pan and bake. That’s it. The long rest does something magical to the texture, too. The crumb turns out tender, almost velvety, with a concentrated banana flavor that tastes like you spent hours developing it. (Spoiler: you didn’t.)
The first time I tried this method, I was skeptical. Could a batter that sat out for twelve hours really produce a better loaf than one baked immediately? I pulled it out of the oven, let it cool just enough to slice, and took a bite while standing over the kitchen counter. It was quiet. I just stood there, chewing, thinking about how something so simple could taste so complete. This recipe stuck because it solved a real problem—mornings that don’t have time for fuss—without sacrificing a single bit of flavor. If you’ve ever wanted banana bread that feels like a warm hug but requires almost no effort, this one’s for you.
Why You’ll Love This Recipe
Let’s be real—banana bread recipes are a dime a dozen. What makes this one different? It’s not just another version; it’s the kind that makes you wonder why you ever bothered with the old way. Here’s why this Easy No-Knead Overnight Banana Bread deserves a permanent spot in your rotation:
- No Kneading, No Stand Mixer, No Fuss: You don’t need any special equipment. A bowl, a spoon, and a loaf pan are all it takes. The dough (well, batter) does all the work while you sleep.
- Incredibly Moist Texture: The overnight rest allows the flour to fully hydrate and the flavors to meld. The result is a loaf that’s tender, moist, and stays that way for days—if it lasts that long.
- Simple, Pantry-Friendly Ingredients: You probably have everything you need right now. Overripe bananas, flour, sugar, butter, eggs—nothing fancy required.
- Perfect for Busy Mornings or Brunch: Mix it up before bed, bake it when you wake up. Your house will smell amazing, and you’ll have fresh banana bread ready before noon. It’s a lifesaver for lazy weekends or unexpected guests.
- Consistently Perfect Results: I’ve tested this recipe more times than I can count. The overnight method removes the guesswork. No more dry edges or gummy centers—just a perfectly domed, golden loaf every single time.
This isn’t just good banana bread. It’s the kind that makes you close your eyes after the first bite—the kind that feels like comfort food reimagined for real life. It’s healthier than a coffee shop muffin, faster than a complicated pastry, and somehow more satisfying than both.
What Ingredients You Will Need
This recipe relies on simple, wholesome ingredients to deliver big flavor without any fuss. Most of these are pantry staples, so you can probably whip this up without a special trip to the store. Here’s what you’ll need and why each one matters:
For the Banana Bread Batter
- 3 large ripe bananas, mashed (about 1 ½ cups or 340g): The riper, the better. Look for bananas with plenty of brown spots—they’re sweeter and easier to mash. If your bananas aren’t quite ready, you can roast them in a 300°F oven for 15-20 minutes to speed things up.
- ½ cup (113g) unsalted butter, melted and slightly cooled: Butter adds richness and that classic banana bread flavor. I prefer unsalted so I can control the salt level, but salted butter works fine too—just reduce the added salt by ¼ teaspoon.
- ¾ cup (150g) granulated sugar: White sugar gives the bread a tender crumb and helps with browning. You can substitute up to half with light brown sugar for a deeper, molasses-like flavor.
- 2 large eggs, room temperature: Eggs provide structure and moisture. Room temperature eggs mix more evenly into the batter, so try to take them out of the fridge about 30 minutes before you start.
- 1 teaspoon vanilla extract: Pure vanilla enhances the banana flavor without overpowering it. Imitation vanilla works in a pinch, but pure is worth the splurge here.
- 1 ½ cups (190g) all-purpose flour: Standard all-purpose flour gives the bread a soft, tender structure. Spoon and level your flour into the measuring cup—scooping directly can pack it down and make the bread dense.
- 1 teaspoon baking soda: This is the primary leavening agent. It reacts with the acidity in the bananas and any buttermilk or yogurt you might add. Make sure it’s fresh—expired baking soda won’t give you a good rise.
- ½ teaspoon salt: Salt balances the sweetness and enhances all the flavors. Don’t skip it, even if you’re using salted butter.
- ½ teaspoon ground cinnamon (optional): Cinnamon and banana are a classic pairing. It adds warmth without stealing the show. You can also add a pinch of nutmeg or cardamom for a different twist.
Optional Mix-Ins
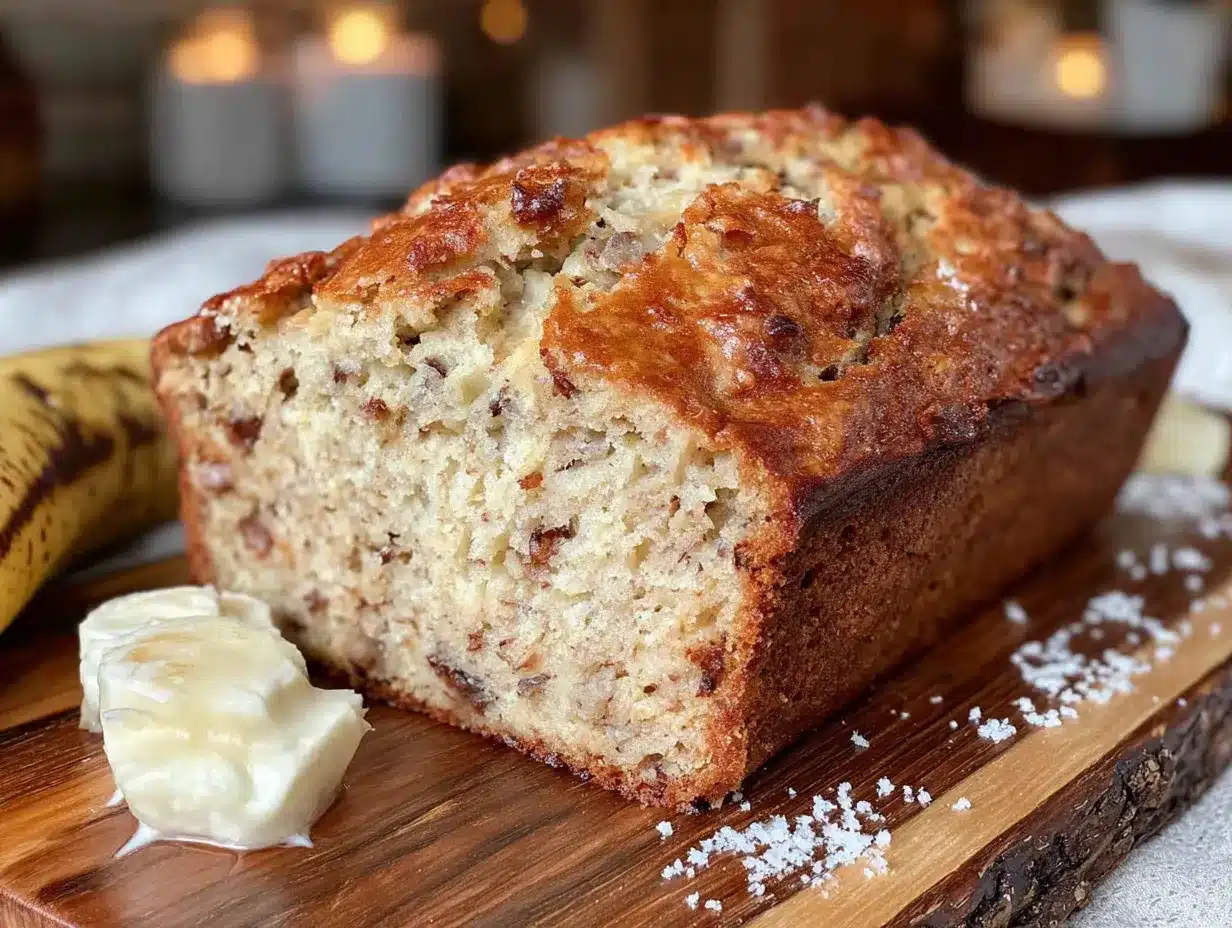
- ½ cup (60g) chopped walnuts or pecans: For crunch. Toast them lightly in a dry pan before adding for extra flavor.
- ½ cup (90g) semi-sweet chocolate chips: Because chocolate makes everything better. Dark chocolate chips are my personal favorite.
- ¼ cup (60ml) plain yogurt or buttermilk: Adding a little yogurt or buttermilk increases moisture and tenderness. If you’re using it, reduce the butter to ⅓ cup (75g) to keep the batter balanced. I recommend Fage or Stonyfield for yogurt, and if you don’t have buttermilk, you can make a quick substitute by adding 1 tablespoon of lemon juice to ¼ cup of milk and letting it sit for 5 minutes.
Equipment Needed
One of the best things about this recipe is how little equipment it requires. You probably already have everything you need:
- Large mixing bowl: Any bowl will do, but a wide one makes mashing and stirring easier.
- Fork or potato masher: For mashing the bananas. A fork works perfectly, but a potato masher speeds things up.
- Wooden spoon or rubber spatula: For mixing the batter. A spatula is great for scraping down the sides.
- 9×5-inch loaf pan: The standard size for banana bread. If you use an 8×4-inch pan, your loaf will be taller and may need an extra 5-10 minutes of baking time. Glass or metal both work—just note that glass pans can cause the edges to brown faster.
- Parchment paper (optional but helpful): Lining the pan makes lifting the loaf out a breeze. You can also grease the pan generously with butter or non-stick spray.
- Plastic wrap or a clean kitchen towel: To cover the bowl during the overnight rest. Plastic wrap is best for creating a tight seal.
- Cooling rack: For cooling the bread after baking. This prevents the bottom from getting soggy. If you don’t have one, you can use the inverted loaf pan or a wire trivet.
I’ve made this recipe with a cheap dollar-store loaf pan and a fancy ceramic one—both worked fine. Don’t overthink the tools. If you have a bowl and an oven, you’re good to go.
Preparation Method
This is where the magic happens. The process is broken into two parts: the overnight rest and the morning bake. Follow these steps carefully, and you’ll be rewarded with the best banana bread of your life.
Step 1: Mash the Bananas (5 minutes)
In a large mixing bowl, add your three ripe bananas. Mash them thoroughly with a fork or potato masher until they’re mostly smooth with just a few small lumps. Over-mashing is fine—you want a uniform base. You should have about 1 ½ cups of mashed banana. If your bananas are smaller, use four instead.
Step 2: Add the Wet Ingredients (5 minutes)
Pour the melted and slightly cooled butter over the mashed bananas. Add the granulated sugar, room temperature eggs, and vanilla extract. Stir everything together with your wooden spoon or spatula until it’s well combined. The mixture will look a little grainy from the sugar—that’s totally normal. Don’t worry if it seems thin; the flour will thicken it up.
Step 3: Combine the Dry Ingredients (3 minutes)
In a separate small bowl (or just on top of the wet mixture if you’re feeling bold), whisk together the all-purpose flour, baking soda, salt, and cinnamon if using. If you’re adding mix-ins like nuts or chocolate chips, toss them in the flour mixture now. This helps prevent them from sinking to the bottom of the loaf later.
Step 4: Mix the Batter (2 minutes)
Add the dry ingredients to the wet ingredients. Stir gently with your spatula or spoon until just combined. A few streaks of flour are okay—over-mixing will develop gluten and make the bread tough. Stop as soon as you don’t see any more dry flour. If you’re using yogurt or buttermilk, stir it in at this point along with the flour.
Step 5: The Overnight Rest (8-12 hours)
Cover the bowl tightly with plastic wrap or a clean kitchen towel. Place it on your counter at room temperature—not in the fridge. The batter needs to rest at a consistent room temperature for the flour to fully hydrate and the flavors to develop. Let it sit for at least 8 hours and up to 12 hours. I usually mix it around 9 PM and bake it at 7 AM the next morning. You’ll notice the batter might look slightly thicker and smell more fragrant in the morning. That’s the magic working.
Note: If your kitchen is very warm (above 75°F), you can refrigerate the batter after 8 hours to prevent over-fermentation. If your kitchen is cold (below 65°F), let it rest for the full 12 hours or even a bit longer.
Step 6: Preheat and Prepare the Pan (10 minutes)
When you’re ready to bake, preheat your oven to 350°F (175°C). While it’s heating, grease your 9×5-inch loaf pan with butter or non-stick spray. For extra insurance, line the pan with a strip of parchment paper that hangs over the two long sides—this creates a handy sling for lifting the finished bread out.
Step 7: Pour and Bake (55-65 minutes)
Give the rested batter a gentle stir—just a few turns to reincorporate any liquid that may have separated. Pour it into the prepared loaf pan and spread it evenly with your spatula. Place the pan on the middle rack of your preheated oven. Bake for 55 to 65 minutes, or until a toothpick inserted into the center comes out clean or with just a few moist crumbs attached. The top should be deep golden brown and cracked beautifully.
Tip: If the top is browning too quickly after 40 minutes, loosely tent the pan with aluminum foil to prevent burning while the center finishes baking.
Step 8: Cool and Serve (1 hour)
Remove the pan from the oven and let it cool in the pan for 10 minutes. Then, use the parchment sling to lift the loaf out and transfer it to a cooling rack. Let it cool completely before slicing—at least 1 hour. I know it’s tempting to cut into it warm, but the crumb needs time to set. Slicing too early can result in a gummy texture. Trust me, I’ve learned this the hard way more than once.
Cooking Tips & Techniques
Over the years, I’ve made every mistake you can imagine with banana bread. I’ve had loaves that were dry as sawdust, gummy in the middle, or so dense they could double as doorstops. Here’s what I’ve learned so you don’t have to repeat my failures:
- Don’t Over-Mix the Batter: This is the number one mistake. Stir just until the flour disappears. Over-mixing activates gluten, which gives you a tough, rubbery loaf instead of a tender one. A few lumps are your friend.
- Use a Kitchen Scale for Accuracy: If you have one, weigh your flour. Scooping flour with a measuring cup can pack in up to 50% more flour than intended, leading to a dry bread. One cup of all-purpose flour should weigh 125 grams. It’s a small step that makes a big difference.
- Check Your Baking Soda’s Freshness: Baking soda loses potency over time. To test it, drop a teaspoon into a small bowl of vinegar. If it fizzes vigorously, it’s good. If it barely bubbles, buy a new box.
- Let It Cool Completely: I know I said this already, but it bears repeating. Cutting into warm banana bread releases steam and can make the interior gummy. Patience pays off here.
- Room Temperature Ingredients Matter: Cold eggs and cold butter can seize up the batter, making it harder to mix evenly. Let your eggs sit out for 30 minutes and let your melted butter cool slightly before adding it. This ensures a smooth, homogenous batter.
- Bake on the Middle Rack: The middle rack provides the most even heat distribution. Baking too close to the bottom can burn the crust before the center is done, while the top rack can cause the top to brown too quickly.
Variations & Adaptations
One of the best things about this Easy No-Knead Overnight Banana Bread is how adaptable it is. Here are some of my favorite ways to switch it up:
- Gluten-Free Version: Substitute the all-purpose flour with a 1:1 gluten-free baking flour blend that contains xanthan gum. I’ve had great results with Bob’s Red Mill Gluten-Free 1-to-1 Baking Flour. The texture will be slightly more tender, but it’s still delicious. For more gluten-free baking inspiration, check out this Fluffy Gluten-Free Pumpkin Banana Bread with Pecans—it uses a similar technique.
- Vegan Option: Replace the eggs with two flax eggs (2 tablespoons ground flaxseed mixed with 6 tablespoons water, let sit for 5 minutes) and use melted coconut oil or vegan butter instead of dairy butter. The texture will be a bit more dense, but the flavor is still fantastic.
- Chocolate Swirl: After pouring the batter into the pan, dollop 2-3 tablespoons of Nutella or melted chocolate on top. Use a knife to gently swirl it through the batter. It creates a beautiful marbled effect and adds a rich chocolatey surprise in every slice.
- Spiced Variation: Add ½ teaspoon of ground ginger, ¼ teaspoon of nutmeg, and a pinch of cloves along with the cinnamon. This gives the bread a warm, holiday-inspired flavor that’s perfect for fall mornings. Pair it with a Cozy Slow Cooker Apple Cider for the ultimate cozy breakfast.
- Add a Crunchy Topping: Before baking, sprinkle the top of the batter with a mixture of 2 tablespoons of coarse sugar (turbinado or demerara) and ¼ cup of chopped nuts. This creates a crackly, crunchy crust that contrasts beautifully with the soft interior.
Serving & Storage Suggestions
This banana bread is incredibly versatile when it comes to serving. Here’s how to make the most of it:
- Serving Temperature: Serve it at room temperature for the best texture. If you want a warm slice, pop it in the microwave for 10-15 seconds or toast it lightly in a skillet with a pat of butter. The butter will melt into the warm bread—pure heaven.
- Presentation Ideas: Slice the loaf into thick, even pieces. Arrange them on a wooden board or a simple white plate. Dust with a little powdered sugar or drizzle with a simple glaze made from ½ cup powdered sugar and 1-2 tablespoons of milk. Add a few fresh banana slices on the side for a pretty touch.
- Complementary Dishes: This banana bread is fantastic on its own, but it also pairs beautifully with a hot cup of coffee, a tall glass of cold milk, or a dollop of Greek yogurt. For a heartier breakfast, serve it alongside scrambled eggs and fresh fruit. If you’re hosting a brunch, it goes perfectly with a Perfect Fall Harvest Charcuterie Board with Easy Apple Butter for a sweet and savory spread.
- Storage Instructions: Store leftover banana bread in an airtight container at room temperature for up to 4 days. The moisture actually improves over the first 24 hours—the flavors meld and the crumb becomes even more tender. Do not refrigerate it, as the cold air will dry it out faster.
- Freezing Instructions: This bread freezes beautifully. Wrap the fully cooled loaf (or individual slices) tightly in plastic wrap, then place it in a freezer-safe bag or container. It will keep for up to 3 months. To thaw, leave it at room temperature for a few hours or microwave a slice for 30-40 seconds.
- How Flavors Develop: The flavor of this banana bread actually deepens after a day or two. The banana flavor becomes more pronounced and the sweetness mellows out. If you can resist eating it all immediately, you’ll be rewarded with an even better loaf on day two.
Nutritional Information & Benefits
While banana bread is definitely a treat, it does offer some nutritional perks thanks to its star ingredient. Here’s a rough estimate per slice (based on 10 slices per loaf, without mix-ins):
- Calories: Approximately 260-290 kcal
- Carbohydrates: 38-42g
- Protein: 4-5g
- Fat: 11-13g
- Fiber: 1-2g
- Sugar: 18-22g
Note: These values are estimates and can vary based on specific ingredients and portion sizes. Adding nuts, chocolate chips, or a glaze will increase the calorie and fat content.
- Health Benefits of Bananas: Bananas are a great source of potassium, which is essential for heart health and muscle function. They also contain vitamin B6, vitamin C, and dietary fiber, which aids digestion and helps you feel full longer.
- Dietary Considerations: This recipe can be adapted for gluten-free (as mentioned above) and lower-sugar diets by reducing the sugar to ½ cup or using a sugar substitute like monk fruit. For a lower-fat version, you can substitute the butter with an equal amount of unsweetened applesauce, though the texture will be slightly less rich.
- Potential Allergens: This recipe contains wheat (gluten), dairy (butter), and eggs. For a dairy-free version, use melted coconut oil or a plant-based butter. For an egg-free version, use flax eggs as described in the variations section. Always check labels on mix-ins like chocolate chips for potential allergens.
Conclusion
This Easy No-Knead Overnight Banana Bread is proof that the best things in life don’t have to be complicated. It’s a recipe that works with your schedule, not against it—giving you a tender, flavorful loaf with almost zero effort. Whether you’re a seasoned baker or someone who’s never made bread before, this recipe is forgiving, adaptable, and consistently delicious.
I love this recipe because it feels like a secret weapon. It’s the kind of thing you can throw together after dinner, forget about, and wake up to a house that smells like a bakery. It’s perfect for busy mornings, lazy weekends, or anytime you need a little comfort without the stress. And honestly? It’s just really, really good banana bread.
Now I want to hear from you! Have you tried the overnight method before? Did you add any fun mix-ins or make any substitutions? Drop a comment below and let me know how it turned out. And if you loved this recipe, don’t forget to share it with a friend who needs a little more banana bread in their life. Happy baking!
Frequently Asked Questions
Can I use frozen bananas for this recipe?
Absolutely! Frozen bananas are perfect for banana bread. Thaw them completely at room temperature or in the microwave, then drain off any excess liquid before mashing. The thawed bananas will be very soft and almost syrupy, which adds even more moisture and sweetness to the batter.
What if I don’t have a 9×5-inch loaf pan?
No problem! You can use an 8×4-inch pan, but the bread will be taller and may need an extra 5-10 minutes of baking time. You can also bake the batter in a 9-inch square pan for a thinner, bar-style bread—reduce the baking time to 30-35 minutes. Muffin tins work too; fill them ¾ full and bake for 18-22 minutes.
Can I skip the overnight rest and bake it immediately?
Technically, yes. But the overnight rest is what makes this recipe special. It allows the flour to fully hydrate, which creates a more tender crumb, and gives the flavors time to meld and deepen. If you bake it immediately, the bread will still be good, but it won’t have the same moist, velvety texture or the concentrated banana flavor.
Why is my banana bread dense or gummy?
Dense or gummy banana bread is usually the result of over-mixing the batter, using too much flour, or not letting it cool completely before slicing. Make sure you stir the batter just until combined, spoon and level your flour (or weigh it), and resist the urge to cut into the loaf until it’s fully cooled. Also, check that your baking soda is fresh—expired leavening agent won’t give you a good rise.
Can I add other fruits or vegetables to this recipe?
Sure! You can swap out half of the mashed banana for an equal amount of mashed ripe pumpkin, sweet potato, or even applesauce. For a fun twist, try folding in ½ cup of fresh or frozen blueberries (toss them in flour first to prevent sinking) or ½ cup of shredded zucchini (squeeze out the excess moisture first). Each variation will give you a slightly different flavor and texture, but all are delicious.
Pin This Recipe!
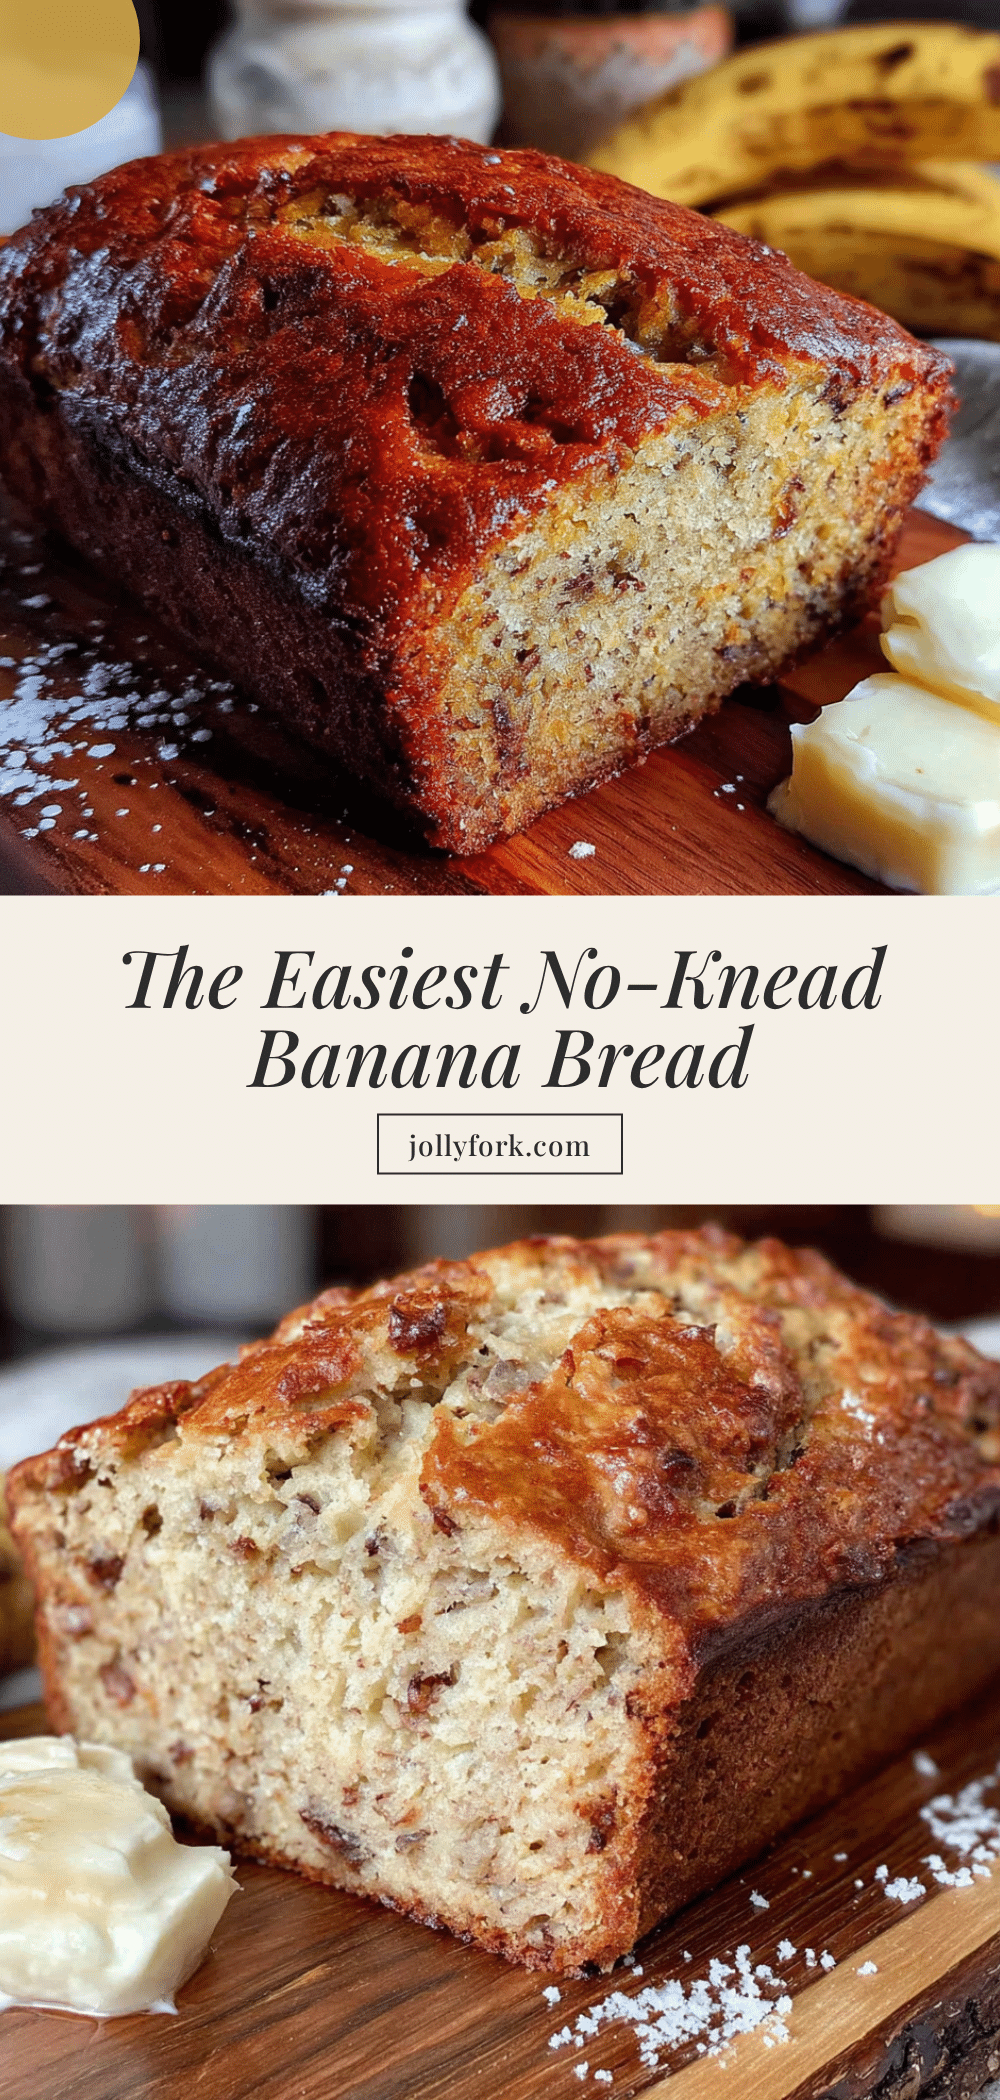
Easy No-Knead Overnight Banana Bread Recipe (Perfect & Moist)
This easy no-knead overnight banana bread is incredibly moist and flavorful, requiring minimal effort. Mix the batter the night before, let it rest overnight, and bake it in the morning for a perfect, tender loaf.
- Prep Time: 15 minutes
- Cook Time: 60 minutes
- Total Time: 8 hours 15 minutes (including overnight rest)
- Yield: 10 servings 1x
- Category: Dessert
- Cuisine: American
Ingredients
- 3 large ripe bananas, mashed (about 1 ½ cups or 340g)
- ½ cup (113g) unsalted butter, melted and slightly cooled
- ¾ cup (150g) granulated sugar
- 2 large eggs, room temperature
- 1 teaspoon vanilla extract
- 1 ½ cups (190g) all-purpose flour
- 1 teaspoon baking soda
- ½ teaspoon salt
- ½ teaspoon ground cinnamon (optional)
- ½ cup (60g) chopped walnuts or pecans (optional)
- ½ cup (90g) semi-sweet chocolate chips (optional)
- ¼ cup (60ml) plain yogurt or buttermilk (optional)
Instructions
- In a large mixing bowl, mash the bananas with a fork or potato masher until mostly smooth with a few small lumps.
- Add the melted butter, sugar, eggs, and vanilla extract to the mashed bananas. Stir until well combined.
- In a separate bowl, whisk together the flour, baking soda, salt, and cinnamon (if using). If adding mix-ins like nuts or chocolate chips, toss them in the flour mixture.
- Add the dry ingredients to the wet ingredients. Stir gently until just combined. Do not over-mix.
- Cover the bowl tightly with plastic wrap or a clean kitchen towel. Let it rest at room temperature for 8-12 hours (overnight).
- Preheat the oven to 350°F (175°C). Grease a 9×5-inch loaf pan or line it with parchment paper.
- Give the rested batter a gentle stir. Pour it into the prepared loaf pan and spread evenly.
- Bake for 55-65 minutes, or until a toothpick inserted into the center comes out clean or with a few moist crumbs. If the top browns too quickly, tent with foil after 40 minutes.
- Let the bread cool in the pan for 10 minutes, then transfer to a cooling rack. Cool completely before slicing (at least 1 hour).
Notes
For best results, use very ripe bananas with brown spots. Room temperature ingredients ensure a smooth batter. Do not over-mix to avoid a tough loaf. The overnight rest is essential for the best texture and flavor. If your kitchen is very warm, refrigerate the batter after 8 hours. If cold, let it rest up to 12 hours.
Nutrition
- Serving Size: 1 slice
- Calories: 275
- Sugar: 20
- Sodium: 220
- Fat: 12
- Saturated Fat: 7
- Carbohydrates: 40
- Fiber: 2
- Protein: 4
Keywords: banana bread, no-knead, overnight, easy, moist, quick bread


