The office holiday cookie swap was in three hours and I’d completely forgotten. Everyone else would be bringing their grandmother’s legendary seven-layer bars or those perfectly piped French macarons that look like they belong in a patisserie window. I had a half-empty bag of chocolate chips, some butter that was finally softening on the counter, and honestly, a mild sense of panic settling in my chest.
I remember staring into my pantry, willing a ready-made solution to appear. It didn’t. So I did what any reasonable, slightly frantic person would do—I grabbed the most basic cookie recipe I knew and started tweaking it frantically. The goal was simple: I needed something that looked like I’d actually tried. Something thick. Something chewy. Something that could hold its own against those fancy macarons.
What came out of my oven that afternoon was, let me tell you, a total accident. I was rushing so much I forgot to chill the dough (who has time for that in a three-hour window?). I ran out of brown sugar and had to improvise. I even dropped a spatula on the floor mid-mix. But those cookies? They were thick, they were chewy, and they had that bakery-style look that makes people think you spent all day on them.
The best part? I won the cookie swap. Not the macarons. Not the seven-layer bars. My slightly frantic, thrown-together chocolate chip cookies took the prize. My coworker Mark actually asked if I’d bought them from a bakery downtown. I just smiled and said nothing. Maybe you’ve been there—that moment when a kitchen disaster turns into a happy little victory. That’s exactly what these Quick Thick and Chewy Bakery-Style Chocolate Chip Cookies are all about.
Why You’ll Love This Recipe
Let’s be real for a second. There are a million chocolate chip cookie recipes out there. Some are thin and crispy. Some are puffy and cakey. Some require you to chill the dough for 24 hours (who has that kind of patience on a Tuesday night?). This one is different. This one gives you that bakery-style thickness and chewiness without the wait or the fuss.
- Quick & Easy: From start to finish, you’re looking at about 30 minutes. No chilling required. No complicated techniques. Just mix, scoop, and bake.
- Simple Ingredients: You probably have everything in your kitchen right now. Butter, sugar, eggs, flour, chocolate chips—the usual suspects. No weird specialty ingredients here.
- Perfect for Last-Minute Cravings: Whether it’s a sudden cookie emergency at 9 PM or a potluck you forgot about (been there), these cookies have your back.
- Crowd-Pleaser: Kids love them. Adults love them. Even my picky neighbor who claims she doesn’t like sweets ate three in one sitting.
- Unbelievably Delicious: The texture is the real star here. Crispy edges, soft and chewy centers, and that satisfying thickness that makes every bite feel substantial.
What makes these cookies different from the rest? It’s all in the technique. We’re using melted butter instead of softened butter, which creates that dense, chewy texture without any extra effort. We’re also using a higher ratio of brown sugar to white sugar, which adds moisture and that deep caramel flavor you get from bakery cookies. Honestly, it’s not rocket science—it’s just smart baking.
This recipe isn’t just good. It’s the kind of cookie that makes you close your eyes after the first bite. It’s comfort food at its finest—faster, easier, but with the same soul-soothing satisfaction that makes you reach for a second one before you’ve even finished the first.
What Ingredients You Will Need
This recipe uses simple, everyday ingredients to deliver that thick, chewy, bakery-style texture without any fuss. Most of these are pantry staples you probably already have on hand.
- Unsalted butter – 1 cup (2 sticks), melted and slightly cooled. I prefer using unsalted so I can control the salt level. Let it cool for about 5 minutes after melting so it doesn’t cook the eggs.
- Brown sugar – 1 cup, packed. Light or dark brown sugar both work, but dark brown sugar gives a deeper, more caramel-like flavor. This is the secret to the chewiness.
- Granulated sugar – ½ cup. This adds the slight crispness on the edges while the brown sugar keeps the center soft.
- Large eggs – 2, at room temperature. Cold eggs can seize the melted butter, so let them sit out for 15 minutes or place them in a bowl of warm water for 5 minutes.
- Vanilla extract – 2 teaspoons. Pure vanilla extract makes a difference here. I’ve tried imitation vanilla and honestly, the cookies just don’t taste as rich.
- All-purpose flour – 2 ¼ cups. Spoon and level your flour—don’t scoop directly from the bag or you’ll end up with too much and dry cookies.
- Baking soda – 1 teaspoon. This helps the cookies spread just enough without becoming flat.
- Salt – ½ teaspoon. Don’t skip this. Salt balances the sweetness and enhances the chocolate flavor.
- Cornstarch – 1 tablespoon. This is my secret weapon for extra thickness and a tender texture. It’s a game-changer.
- Semi-sweet chocolate chips – 2 cups. I recommend Ghirardelli or Guittard for the best flavor and melt quality. You can also chop up a chocolate bar for those fancy bakery-style pools of chocolate.
Ingredient Tips: If you only have salted butter, reduce the added salt to ¼ teaspoon. For a richer flavor, try browning the butter first—just cook it over medium heat until it turns golden brown and smells nutty, then let it cool before using. If you’re out of cornstarch, you can skip it, but the cookies won’t be quite as thick.
Substitution Guidance: Need a dairy-free option? Use vegan butter sticks (not margarine) and dairy-free chocolate chips. For a gluten-free version, swap the all-purpose flour with a 1:1 gluten-free baking flour blend. The texture will be slightly different but still delicious.
Equipment Needed
You don’t need a fancy kitchen to make these cookies. Here’s what you’ll need:
- Large mixing bowl – Any big bowl will do. I use a glass one because I can see if the butter and sugar are properly combined.
- Whisk – For mixing the wet ingredients. A wooden spoon works too, but a whisk makes it easier to incorporate the melted butter smoothly.
- Rubber spatula – For folding in the chocolate chips without overmixing the dough.
- Baking sheets – Two standard half-sheet pans work perfectly. Line them with parchment paper for easy cleanup.
- Cookie scoop – A 3-tablespoon scoop (about #20 size) gives you those big, bakery-style cookies. If you don’t have one, use a ¼ cup measure and slightly underfill it.
- Cooling rack – Letting the cookies cool on a rack prevents soggy bottoms.
- Parchment paper – Non-stick and makes cleanup a breeze. Silicone baking mats work too, but I find parchment gives slightly crisper edges.
Budget-Friendly Tip: If you don’t have a cookie scoop, just use two spoons to portion the dough. Your cookies won’t be perfectly round, but they’ll taste just as good. I actually prefer the rustic look sometimes.
Preparation Method
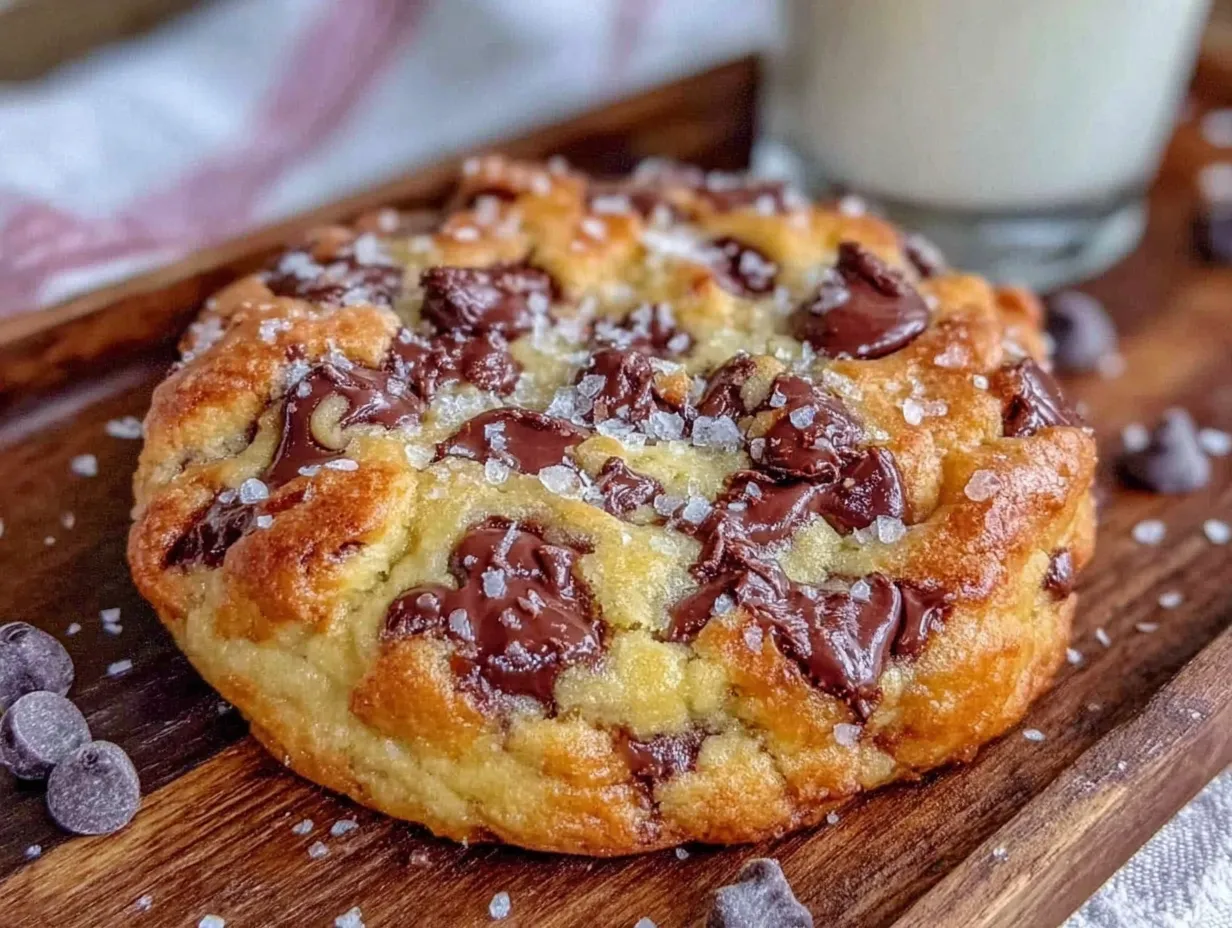
- Preheat your oven to 375°F (190°C). Line two baking sheets with parchment paper. This temperature is key—too low and the cookies will spread too much, too high and they’ll burn before the centers are done.
- Melt the butter. In a microwave-safe bowl, melt 1 cup of butter in 30-second intervals until fully melted. Let it cool for 5 minutes. You want it warm, not hot—if it’s too hot, it will cook the eggs and ruin the texture.
- Mix the sugars and butter. In a large bowl, whisk together the melted butter, 1 cup packed brown sugar, and ½ cup granulated sugar. Whisk until smooth and no lumps remain. The mixture should look like wet sand.
- Add the eggs and vanilla. Whisk in 2 large eggs and 2 teaspoons of vanilla extract. Whisk vigorously for about 30 seconds until the mixture becomes pale and slightly thickened. This step helps create that crackly top.
- Combine the dry ingredients. In a separate bowl, whisk together 2 ¼ cups all-purpose flour, 1 teaspoon baking soda, ½ teaspoon salt, and 1 tablespoon cornstarch. Yes, the cornstarch goes here.
- Mix wet and dry ingredients. Gradually add the flour mixture to the wet mixture, stirring with a rubber spatula until just combined. Do not overmix! Stop when you no longer see streaks of flour. Overmixing develops gluten and makes tough cookies.
- Fold in the chocolate chips. Gently fold in 2 cups of semi-sweet chocolate chips. Make sure they’re evenly distributed throughout the dough. If you want extra chocolate on top (who doesn’t?), press a few extra chips onto the tops of the dough balls after scooping.
- Scoop the dough. Use a 3-tablespoon cookie scoop to portion the dough. Place the dough balls about 3 inches apart on the prepared baking sheets. You should get about 14-16 large cookies. Pro tip: For that bakery-style look, pull each dough ball slightly apart into two halves and place them back together with the torn side up. This creates those beautiful craggy tops.
- Bake one sheet at a time. Bake for 10-12 minutes, rotating the pan halfway through. The edges should be golden brown and set, but the centers will still look slightly underdone and puffy. That’s exactly what you want. They will continue to bake on the hot pan.
- Cool on the baking sheet. Let the cookies rest on the baking sheet for 5-10 minutes. This is crucial—moving them too early will cause them to fall apart. After that, transfer them to a wire rack to cool completely. Or eat them warm. I won’t judge.
Sensory Cues: When you pull the cookies out of the oven, they should look golden around the edges with slightly puffed, pale centers. The kitchen should smell like warm butter and vanilla. If you tap the edge of a cookie gently, it should feel set but still soft. That’s how you know they’re perfect.
Cooking Tips & Techniques
I’ve made these cookies more times than I can count, and I’ve learned a few things along the way. Here are my best tips for getting it right every time.
Don’t overmix the dough. This is probably the most common mistake. Once you add the flour, mix only until it disappears. Overmixing develops gluten, and too much gluten makes cookies tough and cakey instead of chewy. I learned this the hard way when I made a batch that could have doubled as hockey pucks.
Use a cookie scoop for even sizes. Uniform cookies bake evenly. If some are bigger than others, you’ll end up with burnt edges on the small ones and raw centers on the big ones. A simple scoop fixes this problem instantly.
Don’t skip the cornstarch. I know it seems like an odd ingredient, but cornstarch is what gives these cookies their thick, tender texture. It inhibits gluten formation and adds a softness that makes bakery cookies so irresistible. Trust me on this one.
Bake one sheet at a time. I know it’s tempting to throw both pans in the oven to save time, but the heat doesn’t circulate evenly. You’ll get better results baking one sheet at a time in the center of the oven. While one batch bakes, you can scoop the next one.
Let them cool on the pan. This is where the magic happens. The residual heat from the baking sheet finishes cooking the centers while the edges stay crisp. If you move them too soon, the centers will collapse and you’ll lose that perfect thickness.
My biggest failure: I once tried to double the batch and forgot to adjust the baking soda. The cookies spread into one giant cookie mess. It was delicious, honestly, but not what I was going for. So measure carefully, even when you’re in a rush.
Variations & Adaptations
One of the best things about this recipe is how easy it is to customize. Here are some of my favorite variations:
- Double Chocolate Chip: Replace ¼ cup of the flour with ¼ cup of unsweetened cocoa powder. Use dark chocolate chips for an intense chocolate experience. My kids beg for this version.
- Nutty Delight: Fold in 1 cup of chopped toasted walnuts or pecans along with the chocolate chips. Toast the nuts first at 350°F for 5-7 minutes for maximum flavor. The crunch is incredible.
- Sea Salt Finish: Sprinkle a few flakes of flaky sea salt on top of each cookie right after they come out of the oven. The salty-sweet combination is absolutely addictive. This is my go-to for impressing guests.
- White Chocolate Macadamia: Swap the semi-sweet chips for 1 ½ cups white chocolate chips and 1 cup chopped macadamia nuts. It’s a completely different cookie but just as delicious.
- Gluten-Free Option: Use a 1:1 gluten-free baking flour blend. I’ve tested this with King Arthur’s Measure for Measure flour and the texture was surprisingly close to the original. Just make sure your blend contains xanthan gum.
Seasonal Twist: In the fall, I like to add 1 teaspoon of cinnamon and ¼ teaspoon of nutmeg to the dry ingredients. It gives the cookies a cozy, spiced flavor that pairs perfectly with a hot cup of apple cider.
Serving & Storage Suggestions
These cookies are best served warm, when the chocolate chips are still melty and the edges are perfectly crisp. Let them cool for about 10 minutes on the baking sheet, then serve immediately. They’re amazing with a cold glass of milk, a hot cup of coffee, or even a scoop of vanilla ice cream sandwiched between two cookies.
Storage Instructions: Store leftover cookies in an airtight container at room temperature for up to 5 days. Place a slice of bread in the container to keep them soft—the cookies will absorb the moisture from the bread. Replace the bread slice every couple of days if needed.
Freezer Instructions: These cookies freeze beautifully. You can freeze the baked cookies for up to 3 months in a freezer-safe bag. To reheat, pop them in a 300°F oven for 5-7 minutes, or microwave for 15 seconds for that just-baked softness.
Freeze the Dough: For ultimate convenience, scoop the dough into balls and freeze them on a baking sheet. Once frozen solid, transfer them to a freezer bag. You can bake them straight from frozen—just add 2-3 minutes to the baking time. This is perfect for those sudden cookie emergencies.
Flavor Development: Honestly, these cookies taste even better the next day. The flavors meld together and the texture becomes even more chewy. If you can resist eating them all on day one (I rarely can), you’re in for a treat on day two.
Nutritional Information & Benefits
Let’s be honest—these are cookies, not health food. But knowing what’s in them can help you enjoy them mindfully. Here’s the estimated nutritional breakdown per cookie (based on 16 cookies):
| Nutrient | Amount per Cookie |
|---|---|
| Calories | 285 |
| Total Fat | 14g |
| Saturated Fat | 8g |
| Cholesterol | 45mg |
| Sodium | 180mg |
| Total Carbohydrates | 38g |
| Dietary Fiber | 2g |
| Sugars | 24g |
| Protein | 3g |
Health Benefits: Dark chocolate contains antioxidants called flavonoids, which can support heart health. The butter provides vitamin A, and the eggs offer high-quality protein and choline. Cornstarch, interestingly, provides a small amount of resistant starch, which can support gut health when consumed in moderation.
Dietary Considerations: This recipe contains gluten, dairy, and eggs. For a dairy-free version, use vegan butter and dairy-free chocolate chips. For a gluten-free version, use a 1:1 gluten-free flour blend. These cookies are not low-carb or keto-friendly due to the sugar content, but they are perfect for an occasional treat.
Conclusion
These Quick Thick and Chewy Bakery-Style Chocolate Chip Cookies are proof that you don’t need fancy techniques or hours of chilling to create something truly special. They came from a moment of panic and turned into my most-requested recipe. That’s the beauty of simple, honest baking—sometimes the best things happen when you’re just trying to get by.
I hope you give these cookies a try. Don’t be afraid to make them your own—add your favorite mix-ins, adjust the sweetness, or experiment with different chocolate chips. Baking should be fun, not stressful. And if you forget an ingredient or two? Well, now you know that sometimes those accidents turn into victories.
I’d love to hear how your cookies turn out! Drop a comment below and let me know if you tried any variations or if these became your new go-to recipe. Share a photo on Pinterest and tag me—I can’t wait to see your beautiful, thick, chewy creations. Happy baking, friends!
Frequently Asked Questions
Can I make these cookies without cornstarch?
Yes, you can leave out the cornstarch if you don’t have it. The cookies will still be delicious, but they won’t be quite as thick and tender. The cornstarch really does make a noticeable difference in texture.
Why did my cookies spread too much?
This usually happens for a few reasons. Your butter might have been too hot when you mixed it, or you might have used too much sugar. Make sure your melted butter has cooled for at least 5 minutes, and measure your ingredients accurately. Chilling the dough for 30 minutes can also help if spreading is a recurring issue.
Can I use margarine instead of butter?
I don’t recommend it. Margarine has a higher water content than butter, which can lead to flat, greasy cookies. Stick with real butter for the best texture and flavor. If you need a dairy-free option, use vegan butter sticks specifically designed for baking.
How do I get that bakery-style cracked top?
The cracked top comes from the high ratio of brown sugar to white sugar and the melted butter. Whisking the eggs and vanilla into the butter-sugar mixture for a full 30 seconds also helps create that signature crackly surface. And don’t forget to pull the dough balls apart slightly before baking—that rough surface creates beautiful cracks.
Can I halve this recipe?
Absolutely! Simply cut all the ingredients in half. Use 1 egg instead of 2 (beat it first and use half if you want to be precise, but honestly, a whole egg works fine). The baking time should remain the same. You’ll get about 7-8 cookies from a half batch.
Pin This Recipe!
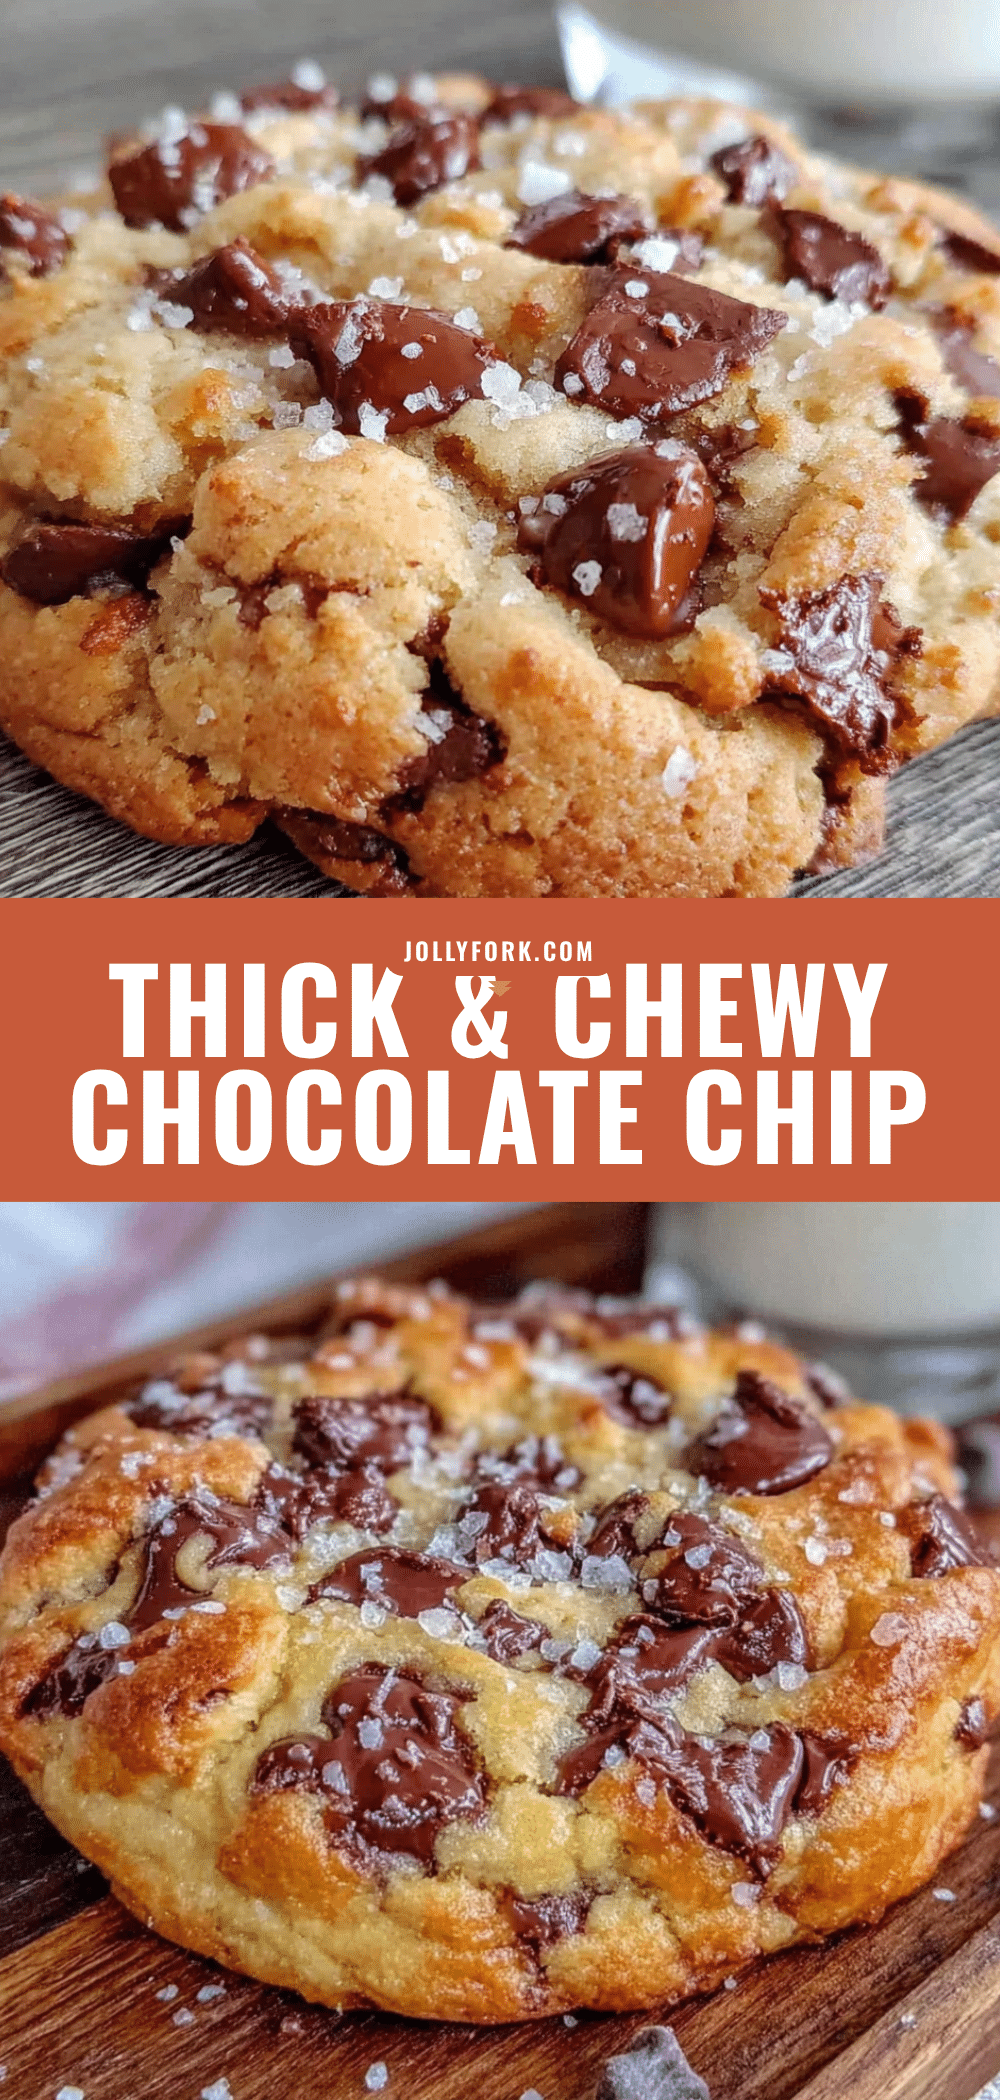
Quick Thick and Chewy Bakery-Style Chocolate Chip Cookies
These thick, chewy, bakery-style chocolate chip cookies come together in about 30 minutes with no chilling required. Made with simple pantry ingredients, they have crispy edges, soft centers, and a deep caramel flavor from brown sugar and melted butter.
- Prep Time: 15 minutes
- Cook Time: 12 minutes
- Total Time: 27 minutes
- Yield: 14-16 cookies 1x
- Category: Dessert
- Cuisine: American
Ingredients
- 1 cup (2 sticks) unsalted butter, melted and slightly cooled
- 1 cup packed brown sugar (light or dark)
- ½ cup granulated sugar
- 2 large eggs, at room temperature
- 2 teaspoons vanilla extract
- 2 ¼ cups all-purpose flour, spooned and leveled
- 1 teaspoon baking soda
- ½ teaspoon salt
- 1 tablespoon cornstarch
- 2 cups semi-sweet chocolate chips
Instructions
- Preheat your oven to 375°F (190°C). Line two baking sheets with parchment paper.
- Melt the butter in a microwave-safe bowl in 30-second intervals until fully melted. Let it cool for 5 minutes.
- In a large bowl, whisk together the melted butter, brown sugar, and granulated sugar until smooth and no lumps remain.
- Whisk in the eggs and vanilla extract vigorously for about 30 seconds until the mixture becomes pale and slightly thickened.
- In a separate bowl, whisk together the flour, baking soda, salt, and cornstarch.
- Gradually add the flour mixture to the wet mixture, stirring with a rubber spatula until just combined. Do not overmix.
- Gently fold in the chocolate chips until evenly distributed.
- Use a 3-tablespoon cookie scoop to portion the dough. Place dough balls about 3 inches apart on the prepared baking sheets. For a bakery-style look, pull each dough ball slightly apart into two halves and place them back together with the torn side up.
- Bake one sheet at a time for 10-12 minutes, rotating the pan halfway through. The edges should be golden brown and set, but the centers will still look slightly underdone and puffy.
- Let the cookies rest on the baking sheet for 5-10 minutes, then transfer to a wire rack to cool completely.
Notes
For a richer flavor, brown the butter first. If using salted butter, reduce added salt to ¼ teaspoon. For dairy-free, use vegan butter sticks and dairy-free chocolate chips. For gluten-free, use a 1:1 gluten-free baking flour blend. Store in an airtight container at room temperature for up to 5 days; place a slice of bread in the container to keep them soft. Freeze baked cookies for up to 3 months or freeze dough balls for up to 3 months (bake from frozen, adding 2-3 minutes).
Nutrition
- Serving Size: 1 cookie
- Calories: 285
- Sugar: 24
- Sodium: 180
- Fat: 14
- Saturated Fat: 8
- Carbohydrates: 38
- Fiber: 2
- Protein: 3
Keywords: chocolate chip cookies, thick cookies, chewy cookies, bakery-style cookies, easy cookie recipe, no chill cookies, quick cookies


