My mother-in-law swore she hated stuffing. For twenty-seven years. She’d push the bowl away at Thanksgiving, muttering something about “soggy bread mess” and “why ruin a perfectly good turkey.” I believed her, honestly. I’d nod along, secretly relieved because that meant more roasted potatoes for me. Then last November, I made this version—a quick gluten-free thing, just for myself, because I was tired of missing out. I caught her standing over the stove, picking at the crispy bits from the pan with her fingers. She didn’t even try to hide it. “This,” she said, pointing with a crumb-covered finger, “doesn’t taste like stuffing.” And she meant it as the highest possible compliment.
That’s the thing about this recipe. It doesn’t taste like compromise. It doesn’t taste like you’re missing out because of a dietary restriction. It tastes like Thursday night comfort that happens to be on the table in forty-five minutes flat. I’m not here to sell you on a gluten-free life—you probably already know why you need it. What I am here to do is give you a quick gluten-free Thanksgiving stuffing with herbs that actually tastes like the real deal. The kind where you close your eyes after the first bite, not because you’re being dramatic, but because it’s just that good.
Let me tell you how we got here. It was a Tuesday afternoon, I was out of regular bread, and I had a bag of decent gluten-free sourdough that was two days past its prime. Desperation, honestly, is the mother of invention. I threw it in the oven to dry out, chopped some celery that was wilting in the crisper drawer, and prayed. An hour later, I had a pan of stuffing that made me forget I was even testing a recipe. That’s the moment I knew I had something worth sharing. Maybe you’ve been there—staring at a bag of gluten-free bread, wondering if it will ever taste like the stuff you grew up eating. I promise you, this is the one.
Why You’ll Love This Recipe
This isn’t just another gluten-free stuffing recipe you find online and forget about. This is the one you’ll bookmark, screenshot, and text to your cousin who just went gluten-free. Here’s why it works so hard for you:
- Quick & Easy: From start to finish, this stuffing comes together in under 45 minutes. No overnight soaking, no complicated steps. You can make it while the turkey rests, and nobody will know you didn’t slave over it all day.
- Simple Ingredients: You probably already have most of this in your pantry. Onion, celery, garlic, herbs, broth—the usual suspects. No weird gluten-free flours or specialty mixes that require a trip to three different stores.
- Perfect for Busy Weeknights or Holiday Feasts: Look, I get it. The holidays are already stressful enough without adding a complicated side dish to the list. This stuffing works for a quiet Thursday dinner, but it also holds its own on the Thanksgiving table next to the turkey and gravy.
- Crowd-Pleaser: I’ve served this to gluten-eaters who had no idea it was gluten-free. They went back for seconds, then thirds. It’s that good. Nobody will miss the wheat, I promise.
- Unbelievably Delicious: The texture is the real win here. Crispy on top, soft and tender underneath, with that perfect herb-forward flavor that makes stuffing feel like a hug on a plate. The secret is toasting the bread just right and using a good mix of fresh and dried herbs.
What makes this recipe different from the rest? It’s the technique, honestly. Most gluten-free stuffing recipes end up either mushy or dry because gluten-free bread behaves differently than regular bread. It absorbs liquid faster and releases it differently. I figured out the exact ratio of broth to bread, and the perfect toasting time, so you don’t have to experiment on your own. This is the version I’ve tested seven times across three different brands of gluten-free bread. It works every single time.
What Ingredients You Will Need
This quick gluten-free Thanksgiving stuffing with herbs uses simple, wholesome ingredients to deliver that classic, soul-warming flavor without the fuss. Most of these are pantry staples, which means you can practically make this on a whim.
For the Bread Base:
- 10 cups (about 450g) gluten-free bread, cut into 1-inch cubes – I prefer a sturdy gluten-free sourdough or a multigrain loaf. Avoid anything too soft or airy; it will turn to mush. My go-to brand is Canyon Bakehouse for their Hearty White or Schär for their Artisan Baker White Bread. Both toast up beautifully.
- 3 tablespoons olive oil or melted butter (use dairy-free butter if needed) – for toasting the bread cubes. This step is non-negotiable for getting that crispy edge.
For the Aromatics & Vegetables:
- 1 large yellow onion, finely chopped (about 2 cups) – adds sweetness and depth.
- 3 celery stalks, finely chopped (about 1.5 cups) – that classic stuffing crunch and flavor.
- 4 cloves garlic, minced – because garlic makes everything better.
For the Herbs & Seasoning:
- 2 teaspoons dried sage – this is the backbone of any good stuffing. Don’t skip it.
- 1 teaspoon dried thyme – adds an earthy, slightly floral note.
- 1 teaspoon dried rosemary, crushed – a little goes a long way, but it’s essential.
- 1/2 teaspoon dried marjoram (optional, but highly recommended) – it adds a subtle sweetness that rounds everything out.
- 1/2 teaspoon salt (plus more to taste) – I use fine sea salt.
- 1/4 teaspoon black pepper – freshly ground is best.
- 2 tablespoons fresh parsley, chopped – for a pop of color and freshness at the end.
For the Liquid & Binding:
- 1.5 to 2 cups (360-480ml) low-sodium chicken or vegetable broth – start with 1.5 cups and add more as needed. The exact amount depends on how dry your bread is. I recommend Swanson chicken broth or Pacific Foods vegetable broth for consistent results.
- 1 large egg, lightly beaten – this helps bind the stuffing together so it holds its shape when you serve it. For a vegan option, you can use a flax egg (1 tablespoon ground flaxseed mixed with 3 tablespoons water, let sit for 5 minutes).
Optional Add-ins:
- 1/2 cup dried cranberries – for a touch of sweetness.
- 1/2 cup chopped pecans or walnuts – for extra crunch.
- 1 cup cooked and crumbled gluten-free sausage (like Applegate or Jones Dairy Farm) – for a heartier, main-dish style stuffing.
Ingredient Selection Tips: When choosing your gluten-free bread, look for one that has a decent crumb structure and isn’t too gummy. If you can, leave the bread out on the counter for a day or two to stale it slightly. This helps it absorb the broth without turning into paste. If you don’t have time, toasting it in the oven works perfectly.
Equipment Needed
You don’t need a fancy kitchen to make this quick gluten-free Thanksgiving stuffing with herbs. Here’s what you’ll need:
- Large baking sheet – for toasting the bread cubes. A rimmed sheet pan is ideal so nothing rolls off.
- Large skillet or sauté pan – for cooking the onions, celery, and garlic. A 12-inch pan gives you plenty of room.
- 9×13-inch baking dish – this is the perfect size for this recipe. A 2-quart casserole dish also works.
- Large mixing bowl – for combining everything. I use my grandmother’s old ceramic bowl, but any large bowl will do.
- Wooden spoon or silicone spatula – for stirring.
- Chef’s knife and cutting board – for chopping vegetables.
- Measuring cups and spoons – for accuracy.
Budget-Friendly Options: If you don’t have a baking sheet, you can toast the bread cubes in the skillet over medium heat, stirring frequently. It takes a bit longer, but it works in a pinch. No 9×13 baking dish? Use a cast-iron skillet or even a foil pan. The stuffing will still turn out great. I once made this in a disposable aluminum pan during a power outage, cooking it on a camp stove. It was the best stuffing I’d ever made. Necessity is the mother of invention, right?
Preparation Method
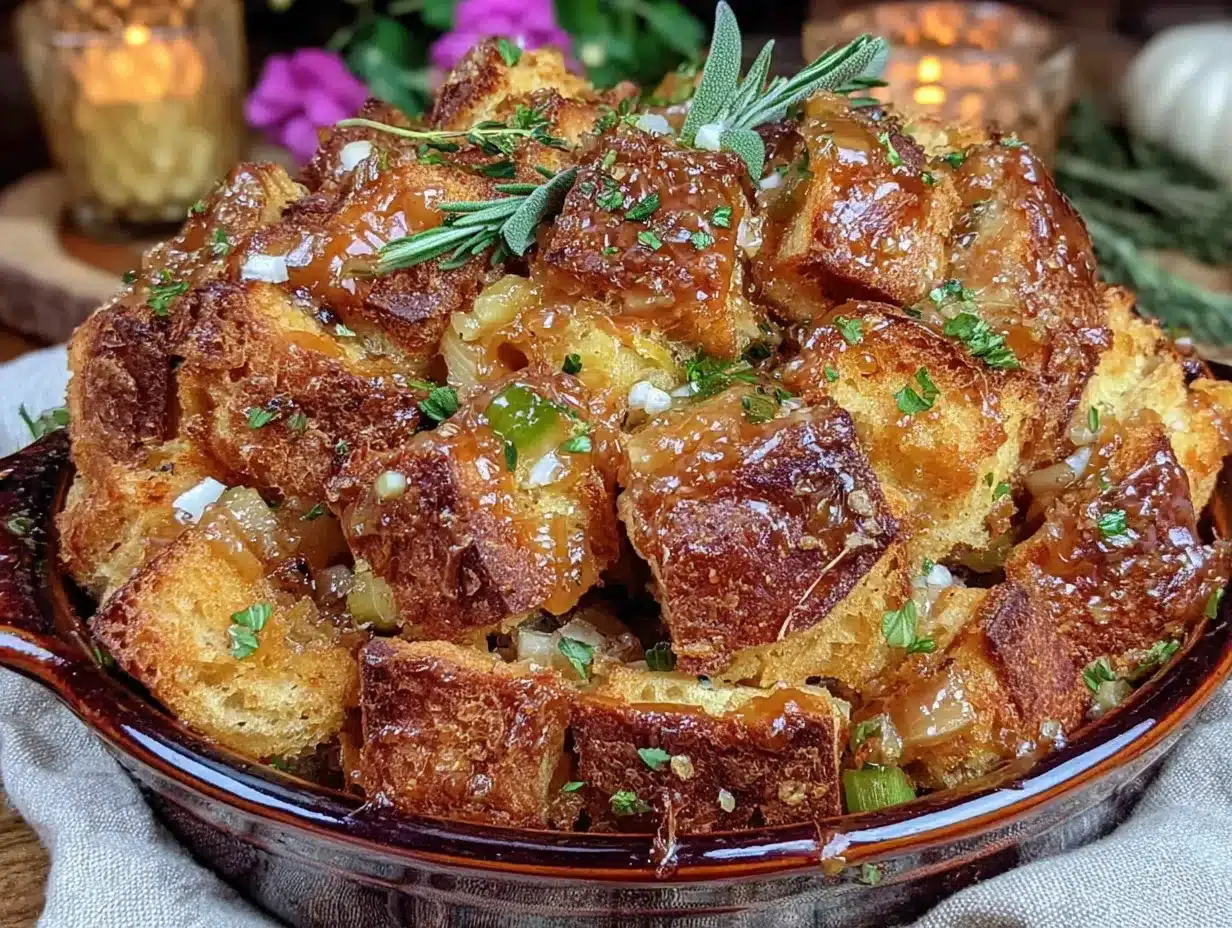
Alright, let’s get cooking. This quick gluten-free Thanksgiving stuffing with herbs comes together in about 45 minutes, and most of that is hands-off oven time. Here’s how to do it:
- Preheat your oven to 375°F (190°C). While it’s heating up, spread your gluten-free bread cubes on a large baking sheet in a single layer. Drizzle with 2 tablespoons of the olive oil or melted butter and toss gently to coat. Bake for 10-12 minutes, stirring halfway through, until the cubes are golden and dry to the touch. They should feel crisp on the outside but still have a little give in the center. This step is crucial—under-toasted bread will turn into glue when you add the broth. I learned this the hard way during my second test, and let me tell you, a glue-like stuffing is not a good look on Thanksgiving.
- While the bread toasts, prep your vegetables. Finely chop the onion and celery. Mince the garlic. The smaller you chop them, the more evenly they’ll cook and distribute throughout the stuffing. I like my pieces to be about the size of a pea. It takes a few extra minutes, but it’s worth it for that perfect bite.
- Heat the remaining 1 tablespoon of olive oil or butter in a large skillet over medium heat. Add the chopped onion and celery. Cook for 6-8 minutes, stirring occasionally, until the vegetables are soft and translucent. The onion should look glassy, and the celery should have lost its raw crunch. Add the minced garlic and cook for one more minute, until fragrant. You should be able to smell it across the kitchen. That’s your cue.
- In a small bowl, whisk together the broth and the beaten egg. Set it aside for a moment. This mixture is going to bring everything together.
- Transfer the toasted bread cubes to a large mixing bowl. Add the cooked vegetables, dried sage, thyme, rosemary, marjoram (if using), salt, and pepper. Toss everything together gently with your hands or a spatula. Make sure the herbs are evenly distributed—nobody wants a bite with no seasoning.
- Pour the broth and egg mixture over the bread mixture. Use a spatula to fold everything together gently. Don’t stir too vigorously, or you’ll break up the bread cubes. You want the liquid to be evenly absorbed, but the bread should still hold its shape. Let the mixture sit for 5 minutes. This resting period allows the bread to soak up the liquid properly. If the mixture looks dry after 5 minutes, add a little more broth, a tablespoon at a time. If it looks soupy, don’t worry—the bread will absorb more as it bakes.
- Transfer the mixture to your greased 9×13-inch baking dish. Spread it out in an even layer. Don’t press it down too firmly; you want some air pockets for texture. Bake for 25-30 minutes, until the top is golden brown and crispy. The edges should look slightly caramelized, and the center should be set but still soft. If you like a crunchier top, broil for the last 2-3 minutes, but watch it carefully—gluten-free bread can burn quickly under the broiler.
- Remove from the oven and let it rest for 5 minutes. Sprinkle with fresh parsley before serving. This rest time lets the stuffing set up so it holds its shape when you scoop it out. I know it’s hard to wait, but trust me on this one.
Cooking Tips & Techniques
I’ve made this quick gluten-free Thanksgiving stuffing with herbs more times than I can count, and I’ve learned a few things along the way. Here are my best tips to make sure yours turns out perfect every time.
Toast the bread properly. This is the number one mistake people make with gluten-free stuffing. If your bread isn’t dry enough, it will absorb the broth too quickly and turn into a dense, soggy mess. You want the cubes to be dry and crisp, like a crouton, but not hard all the way through. The center should still have a tiny bit of give. If you’re short on time, you can spread the cubes on a baking sheet and leave them out overnight to stale. That works beautifully.
Don’t skip the egg. I know it seems like a small thing, but the egg is what gives this stuffing structure. Without it, the stuffing will be more like a bread pudding—delicious, but loose and crumbly. The egg helps it hold together so you can scoop it neatly onto your plate. If you’re making this vegan, a flax egg works, but the texture will be slightly more delicate.
Season generously. Gluten-free bread tends to be a little bland on its own, so don’t be shy with the herbs and salt. Taste the mixture before you add the egg and broth. It should taste well-seasoned, even a little salty, because the bread will absorb some of that saltiness as it bakes. I once under-seasoned a batch, and it was the most disappointing stuffing of my life. Learn from my mistakes.
Use low-sodium broth. This gives you control over the salt level. Different brands of gluten-free bread have different sodium contents, so it’s better to start with low-sodium broth and add salt to taste. You can always add more salt at the end, but you can’t take it out.
Make it ahead of time. You can assemble this stuffing up to the baking step, cover it, and refrigerate it for up to 24 hours. When you’re ready to bake, add about 10 minutes to the baking time to account for the cold dish. This is a lifesaver on Thanksgiving day when the oven is a battlefield.
Variations & Adaptations
One of the best things about this quick gluten-free Thanksgiving stuffing with herbs is how adaptable it is. Here are a few ways to make it your own:
Herb Variations: Not a fan of sage? Swap it out for more thyme and rosemary. Love a little heat? Add 1/2 teaspoon of red pepper flakes along with the dried herbs. I once made this with fresh dill and lemon zest in the spring, and it was a revelation. Fresh herbs work beautifully—just use three times the amount of dried herbs called for, since fresh herbs are less concentrated.
Add Some Protein: Make this a main dish by adding 1 cup of cooked, crumbled gluten-free sausage, shredded rotisserie chicken, or even cooked bacon. Brown the sausage in the skillet before cooking the vegetables, and use the rendered fat instead of oil for extra flavor. My husband requests this version every time I make it.
Vegan Option: Use vegetable broth, a flax egg, and dairy-free butter or olive oil. The stuffing will still be delicious and satisfying. I’ve tested this version for a vegan friend, and she said it was the best stuffing she’d had in years.
Nut-Free & Allergy-Friendly: Skip the optional nuts and use a certified gluten-free bread if you have celiac disease or a severe gluten intolerance. All the other ingredients are naturally nut-free and dairy-free if you use the appropriate substitutions.
Slow Cooker Method: If your oven is full, you can cook this stuffing in a slow cooker. Prepare the recipe as directed up to step 6, then transfer the mixture to a greased slow cooker. Cook on low for 2-3 hours, or on high for 1-1.5 hours. The top won’t get crispy, so you can transfer it to a baking sheet and broil for a few minutes at the end if you want that crunch.
Serving & Storage Suggestions
This quick gluten-free Thanksgiving stuffing with herbs is best served warm, straight from the oven, with the top still crispy and the center soft and tender. I like to scoop it into a warm serving bowl and sprinkle with a little extra fresh parsley for color. It pairs beautifully with roasted turkey, mashed potatoes, and a tangy cranberry sauce to cut through the richness.
Storage: Leftover stuffing keeps well in an airtight container in the refrigerator for up to 4 days. The flavors actually meld and deepen overnight, so leftovers are often even better the next day. I’ve been known to eat it cold, straight from the fridge, at 11 PM. No judgment here.
Reheating: To reheat, place the stuffing in a 350°F (175°C) oven for 10-15 minutes, until warmed through. You can also reheat it in a skillet over medium heat, stirring occasionally, for about 5-7 minutes. Add a splash of broth if it seems dry. The microwave works in a pinch, but it will make the stuffing softer and less crispy. If you’re reheating a large batch, the oven is your best bet.
Freezing: This stuffing freezes beautifully. Allow it to cool completely, then transfer it to a freezer-safe container or zip-top bag. It will keep for up to 3 months. To serve, thaw overnight in the refrigerator and reheat in a 350°F oven until warmed through. I like to freeze individual portions for quick weeknight sides.
Nutritional Information & Benefits
Here are the approximate nutritional values for one serving (about 1 cup) of this quick gluten-free Thanksgiving stuffing with herbs, made with olive oil and chicken broth:
| Nutrient | Amount |
|---|---|
| Calories | 220 |
| Total Fat | 9g |
| Saturated Fat | 2g |
| Cholesterol | 35mg |
| Sodium | 480mg |
| Total Carbohydrates | 30g |
| Dietary Fiber | 3g |
| Sugars | 4g |
| Protein | 6g |
This stuffing is a good source of fiber from the vegetables and gluten-free bread, which supports healthy digestion. The herbs—sage, thyme, and rosemary—are rich in antioxidants and have anti-inflammatory properties. Celery provides vitamin K and potassium, while onions and garlic offer prebiotic fibers that support gut health. If you use a multigrain gluten-free bread, you’ll get additional fiber and nutrients. This recipe is naturally dairy-free if you use olive oil, and it can be made vegan with simple substitutions. It contains gluten-free grains, so it’s suitable for those with celiac disease or gluten sensitivity when made with certified gluten-free bread.
Conclusion
This quick gluten-free Thanksgiving stuffing with herbs is more than just a recipe—it’s proof that you don’t have to sacrifice flavor for dietary needs. It’s the stuffing that converted my mother-in-law, the one that makes gluten-eaters ask for the recipe, and the one that saves me on busy weeknights when I need comfort food fast. It’s forgiving, adaptable, and deeply satisfying in a way that only good stuffing can be.
I hope you make this your own. Add your favorite herbs, throw in some dried fruit or nuts, or keep it simple and classic. The beauty of this recipe is that it works with whatever you have on hand. And if you make it, I’d love to hear how it turned out. Drop a comment below, tag me in your photos, or send me a message. There’s nothing I love more than hearing about a recipe that found its way into someone’s heart (and stomach). Now go make some stuffing. You deserve it.
Frequently Asked Questions
Can I use any type of gluten-free bread?
Yes, but avoid very soft or airy breads like gluten-free white sandwich bread that falls apart easily. Sturdy breads like gluten-free sourdough, multigrain, or artisan loaves work best. They hold their shape better during toasting and baking, giving you that perfect texture.
Can I make this stuffing ahead of time?
Absolutely! Assemble the stuffing up to the baking step, cover it tightly, and refrigerate for up to 24 hours. When you’re ready to bake, add about 10 minutes to the baking time. You can also bake it completely, then reheat it in a 350°F oven for 15 minutes before serving.
How do I prevent the stuffing from becoming soggy?
The key is to toast the bread cubes until they are dry and crisp before adding any liquid. Also, let the mixture sit for 5 minutes after adding the broth so the bread can absorb it evenly. If it looks too wet, add a little more bread or bake it uncovered for a few extra minutes.
Can I freeze leftover stuffing?
Yes! Let the stuffing cool completely, then transfer it to a freezer-safe container or zip-top bag. It will keep for up to 3 months. Thaw overnight in the refrigerator and reheat in a 350°F oven until warmed through. The texture will be slightly softer, but the flavor will still be fantastic.
Is this recipe suitable for a vegan diet?
Yes, with a few simple swaps. Use vegetable broth instead of chicken broth, a flax egg (1 tablespoon ground flaxseed mixed with 3 tablespoons water) instead of a regular egg, and olive oil or dairy-free butter. The stuffing will still be delicious and satisfying.
Pin This Recipe!
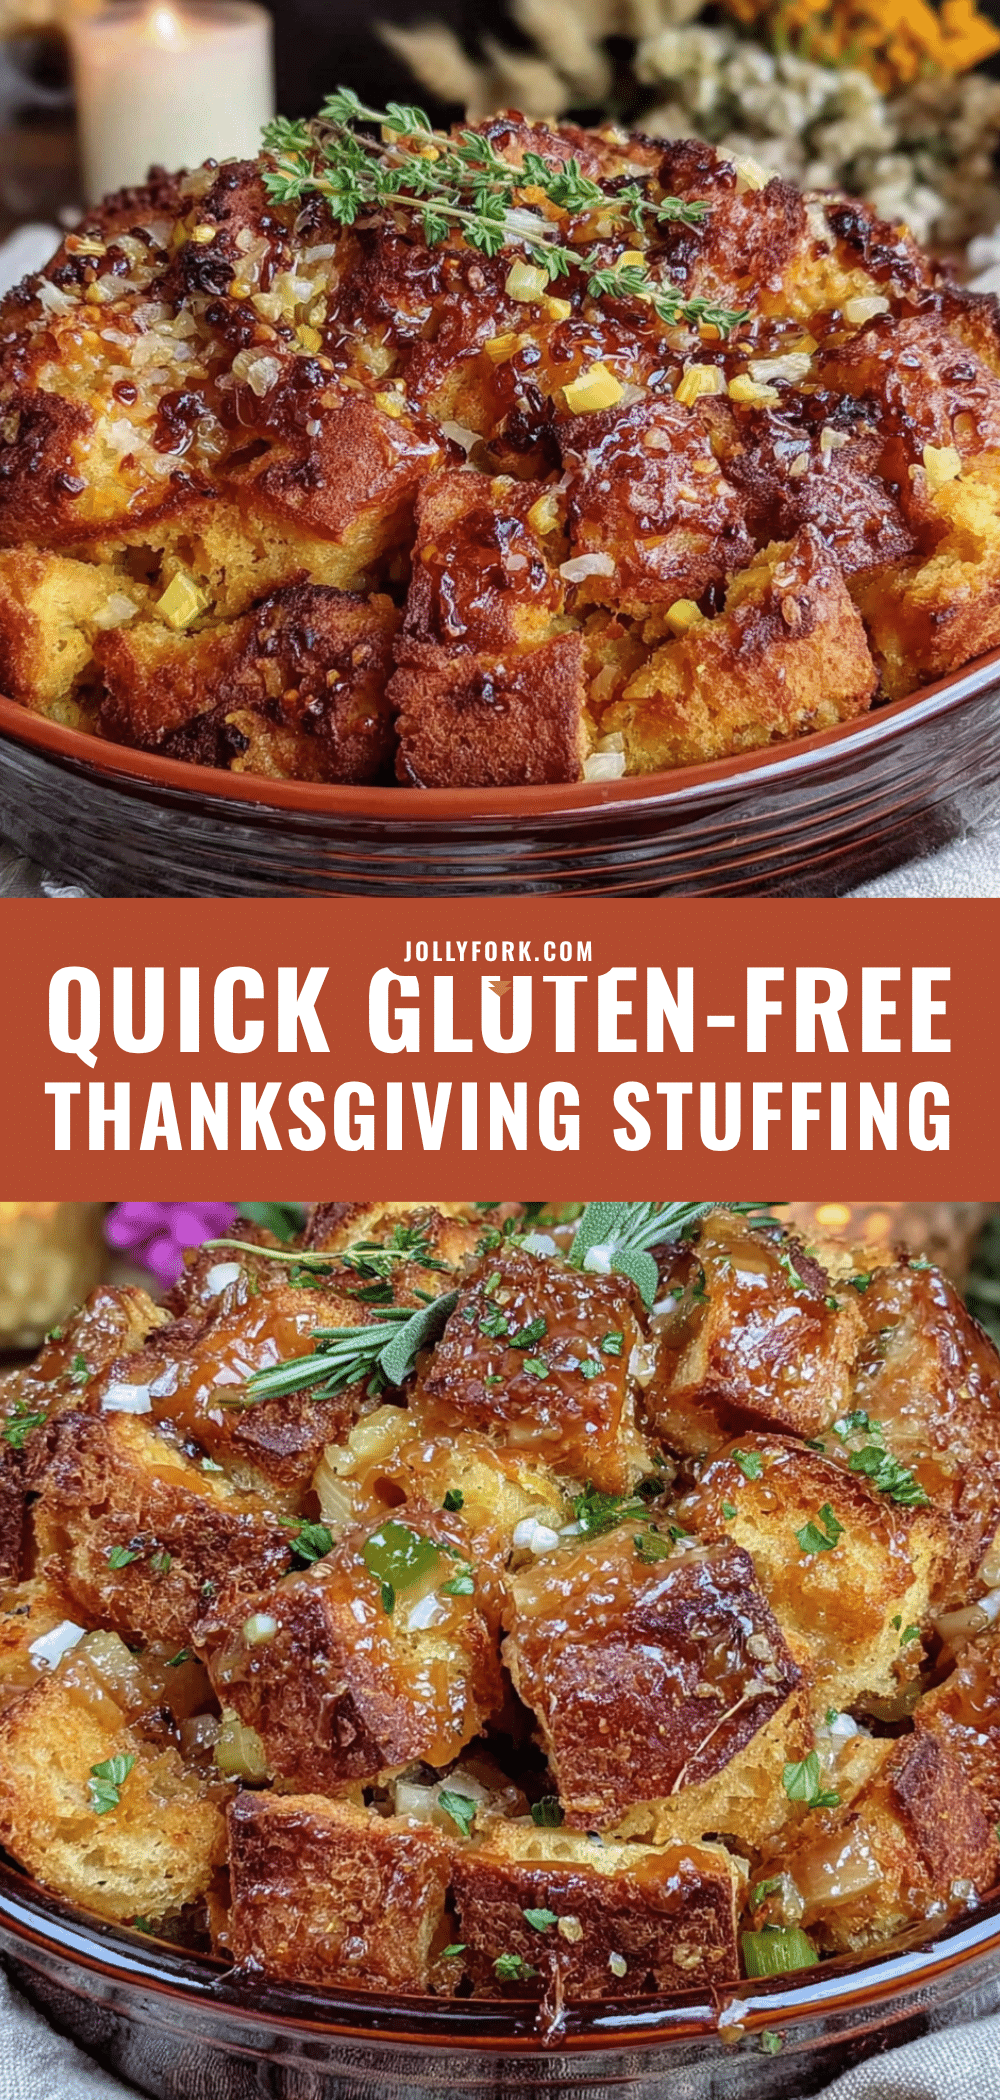
Quick Gluten-Free Thanksgiving Stuffing with Herb

A quick and easy gluten-free stuffing that tastes like the real deal, with crispy edges and a tender center, perfect for Thanksgiving or any weeknight dinner.
- Prep Time: 15 minutes
- Cook Time: 30 minutes
- Total Time: 45 minutes
- Yield: 8 servings 1x
- Category: Side Dish
- Cuisine: American
Ingredients
- 10 cups (about 450g) gluten-free bread, cut into 1-inch cubes
- 3 tablespoons olive oil or melted butter (use dairy-free butter if needed)
- 1 large yellow onion, finely chopped (about 2 cups)
- 3 celery stalks, finely chopped (about 1.5 cups)
- 4 cloves garlic, minced
- 2 teaspoons dried sage
- 1 teaspoon dried thyme
- 1 teaspoon dried rosemary, crushed
- 1/2 teaspoon dried marjoram (optional)
- 1/2 teaspoon salt (plus more to taste)
- 1/4 teaspoon black pepper
- 2 tablespoons fresh parsley, chopped
- 1.5 to 2 cups (360-480ml) low-sodium chicken or vegetable broth
- 1 large egg, lightly beaten
- 1/2 cup dried cranberries (optional)
- 1/2 cup chopped pecans or walnuts (optional)
- 1 cup cooked and crumbled gluten-free sausage (optional)
Instructions
- Preheat your oven to 375°F (190°C). Spread gluten-free bread cubes on a large baking sheet in a single layer. Drizzle with 2 tablespoons of olive oil or melted butter and toss gently to coat. Bake for 10-12 minutes, stirring halfway through, until golden and dry.
- While the bread toasts, finely chop the onion and celery. Mince the garlic.
- Heat the remaining 1 tablespoon of olive oil or butter in a large skillet over medium heat. Add the chopped onion and celery. Cook for 6-8 minutes, stirring occasionally, until soft and translucent. Add the minced garlic and cook for one more minute, until fragrant.
- In a small bowl, whisk together the broth and the beaten egg. Set aside.
- Transfer the toasted bread cubes to a large mixing bowl. Add the cooked vegetables, dried sage, thyme, rosemary, marjoram (if using), salt, and pepper. Toss gently to combine.
- Pour the broth and egg mixture over the bread mixture. Fold gently until evenly absorbed. Let the mixture sit for 5 minutes. If it looks dry, add more broth a tablespoon at a time.
- Transfer the mixture to a greased 9×13-inch baking dish. Spread in an even layer. Bake for 25-30 minutes, until the top is golden brown and crispy. For a crunchier top, broil for the last 2-3 minutes.
- Remove from the oven and let rest for 5 minutes. Sprinkle with fresh parsley before serving.
Notes
Toast the bread properly to avoid sogginess. Don’t skip the egg for structure. Season generously. Use low-sodium broth for salt control. Can be assembled ahead and refrigerated for up to 24 hours before baking.
Nutrition
- Serving Size: 1 cup
- Calories: 220
- Sugar: 4
- Sodium: 480
- Fat: 9
- Saturated Fat: 2
- Carbohydrates: 30
- Fiber: 3
- Protein: 6
Keywords: gluten-free stuffing, Thanksgiving stuffing, herb stuffing, quick stuffing, gluten-free side dish