My niece Lily asked why I couldn’t just toss the pumpkin seeds straight into the oven with sugar and cinnamon instead of boiling them first. I started to explain why that wouldn’t work — something about moisture and texture and how you have to do it the “right” way. Then I stopped.
Honestly, I was mid-explanation with a wooden spoon in one hand and a colander full of rinsed seeds in the other when I realized I had no good reason. I mean, I’d been making spiced pumpkin seeds for years, always following that same boil-first method because that’s what the recipe said. But standing there on a chilly October Saturday, with flour on my apron and pumpkin guts under my fingernails, I thought — what if she’s onto something?
I pulled up a stool for her and said, “Alright, show me what you’re thinking.” She grabbed a baking sheet, dumped the wet seeds on it, and sprinkled cinnamon sugar right over the top like she’d been doing this her whole life. I bit my tongue and let her go. Twenty minutes later, that kitchen smelled like a bakery and a fall festival had a baby. And when we pulled those seeds out — golden, crackly, coated in that sweet cinnamon shell — I took one bite and just looked at her. She shrugged and said, “Told you.”
That’s the thing about cooking, you know? Sometimes the person you’re trying to teach ends up teaching you. These baked cinnamon sugar pumpkin seeds are proof that the simplest path is often the best one. No boiling, no fuss, no complicated steps — just pure, crunchy, sweet perfection that tastes like autumn in every bite. Maybe you’ve had that moment where someone questioned your method and you got defensive, only to realize they were right all along. That’s this recipe for me.
Why You’ll Love This Recipe
If you’ve ever carved a pumpkin and wondered what to do with all those slippery seeds, this is your answer. But honestly, even if you buy pre-hulled seeds from the store, this recipe will change how you think about pumpkin seeds forever. Here’s why this one stands out from every other recipe you’ll find:
- No Boiling Required: Most recipes make you boil seeds in salted water first. Not this one. You save 20 minutes and a whole pot to wash.
- Pantry Ingredients: Sugar, cinnamon, butter, salt — that’s it. You probably have everything right now.
- Perfect for Hosting: Set out a bowl of these at your next fall gathering and watch them disappear. They’re the snack nobody knew they needed.
- Crowd-Pleaser: Kids love the sweet crunch, adults love the nostalgic flavor. It’s the rare snack that bridges generations.
- Incredibly Addictive: I’m not exaggerating when I say you’ll struggle to stop eating them. The cinnamon sugar coating gets perfectly crispy and shatters when you bite down.
What makes this recipe different from the rest is the texture. Because you’re not boiling the seeds first, they retain more of their natural nuttiness while developing this incredible crunchy shell from the butter and sugar caramelizing together. It’s not just another pumpkin seed recipe — it’s the one I bring to every Friendsgiving, every Halloween party, every cozy movie night. And every single time, someone asks for the recipe.
This is the kind of snack that makes you close your eyes after the first bite. It’s fall in a bowl — sweet, warm, and completely irresistible.
What Ingredients You Will Need
This recipe uses the simplest ingredients to create something truly special. You don’t need any fancy baking supplies or hard-to-find spices. Just honest, pantry-friendly staples that come together in the most delicious way.
- Fresh pumpkin seeds — about 1 ½ cups, scooped straight from your carving pumpkin (or 2 cups if you’re using store-bought raw pepitas). If you’re carving a pumpkin, try to separate the seeds from the stringy pulp as best you can. A little pulp stuck on is fine — it’ll come off during rinsing.
- Unsalted butter — 3 tablespoons, melted. I use unsalted so I can control the salt level myself. If you only have salted butter, just skip the added salt in the recipe. Kerrygold is my go-to for the richest flavor, but any brand works beautifully.
- Granulated sugar — ¼ cup. Regular white sugar gives the best crunch. I’ve tried coconut sugar and brown sugar, and while they’re tasty, they don’t create that same shatteringly crisp coating. Stick with white sugar for the texture we’re after.
- Ground cinnamon — 1 ½ teaspoons. Get the good stuff here. Old, dusty cinnamon from the back of your cabinet won’t give you that warm, punchy flavor. I love Simply Organic or McCormick Gourmet for consistent quality. If you’re feeling fancy, try Vietnamese cinnamon — it’s stronger and sweeter.
- Salt — ½ teaspoon fine sea salt. This is crucial. The salt balances the sweetness and keeps these from tasting like candy. I use fine sea salt because it dissolves evenly. Kosher salt works too, but use a full teaspoon since the crystals are bigger.
- Vanilla extract — ½ teaspoon (optional but recommended). This adds a warmth that makes the cinnamon shine. Pure vanilla extract is worth the splurge here, but imitation is fine in a pinch.
Ingredient Selection Tips: When you’re scooping seeds from a fresh pumpkin, look for the larger, plumper seeds — they’ll give you the best crunch. Smaller seeds tend to burn faster. If you’re buying pre-hulled seeds from the store, look for raw, unsalted pepitas. Don’t use roasted salted seeds — they’ll end up way too salty and won’t absorb the butter properly.
Substitution Guidance: For a dairy-free version, swap the butter with coconut oil or a plant-based butter. The flavor changes slightly — coconut oil adds a subtle tropical note that’s surprisingly good with cinnamon. For a lower-sugar option, try monk fruit sweetener or erythritol, though the texture won’t be quite as crunchy. And if you’re out of cinnamon? Pumpkin pie spice works beautifully — just use 2 teaspoons since it’s less concentrated.
Equipment Needed
You don’t need much for this recipe, which is part of the beauty. Here’s what you’ll want to have on hand:
- Baking sheet: A standard half-sheet pan (18×13 inches) works perfectly. Line it with parchment paper for the easiest cleanup — trust me on this one. I learned the hard way that caramelized sugar on a bare pan is a nightmare to scrub.
- Large bowl: For tossing the seeds with butter and cinnamon sugar. Any mixing bowl works, but a wider bowl makes it easier to coat everything evenly.
- Colander: For rinsing the seeds if you’re using fresh pumpkin seeds. A fine-mesh strainer is even better — it catches the tiny seeds that slip through regular colander holes.
- Measuring spoons: Precise measurements matter here, especially for the cinnamon and salt. Eyeballing it can lead to bland or overly salty seeds.
- Spatula or wooden spoon: For stirring and spreading the seeds on the baking sheet. A silicone spatula is great for scraping every last bit of buttery cinnamon goodness.
- Kitchen towel or paper towels: For drying the seeds after rinsing. Pat them as dry as you can — excess water will steam the seeds instead of roasting them.
Budget-Friendly Tip: If you don’t have parchment paper, you can grease the baking sheet directly with butter or nonstick spray. Just keep an eye on the seeds toward the end — they might stick a little, but a quick scrape with a metal spatula usually frees them.
Preparation Method
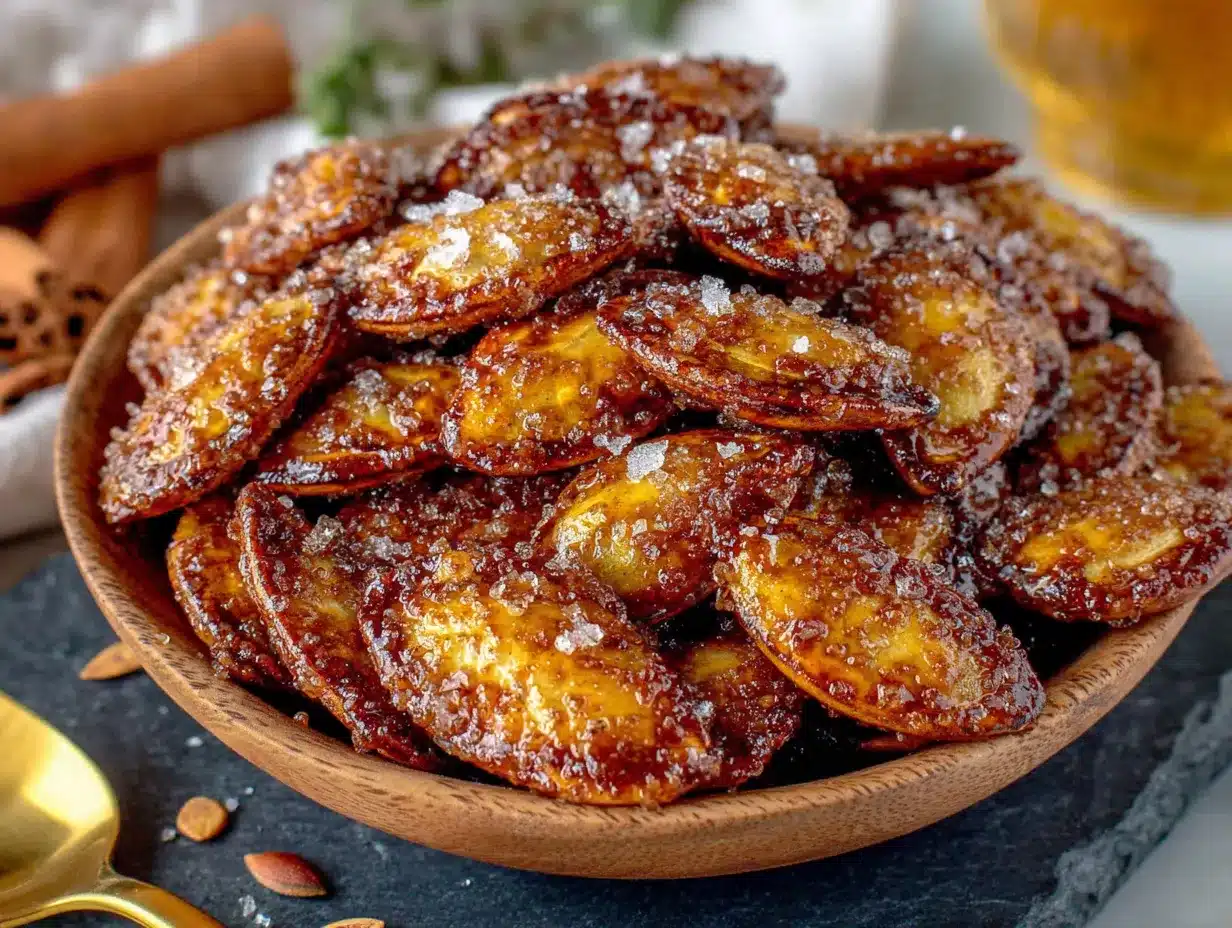
Alright, let’s get to the good part. This method is straightforward, but I’ll walk you through every step so you get perfect results your first time.
- Preheat your oven to 300°F (150°C). This lower temperature is key — it lets the seeds dry out and crisp up without burning the sugar. I’ve tried higher temps and ended up with burnt sugar and raw centers. 300°F is the sweet spot.
- Prepare your pumpkin seeds. If you’re using fresh seeds from a carving pumpkin, place them in a colander and rinse under cool water, using your fingers to separate any clinging pumpkin pulp. Don’t stress about getting every last bit of pulp off — a little adds flavor. Spread the rinsed seeds on a clean kitchen towel or paper towels and pat them very dry. This step matters more than you think. Wet seeds won’t crisp up properly.
- Mix the coating. In a small bowl, combine ¼ cup granulated sugar, 1 ½ teaspoons ground cinnamon, and ½ teaspoon fine sea salt. Stir with a fork until evenly mixed. The cinnamon should be distributed throughout the sugar — no streaks of brown.
- Butter the seeds. Place your dried pumpkin seeds in a large bowl. Pour 3 tablespoons of melted unsalted butter over them and toss until every seed is coated. Take your time here — unbuttered seeds will end up dry and bland. If you’re using the vanilla extract, add it to the butter before pouring.
- Add the cinnamon sugar. Sprinkle the cinnamon sugar mixture over the buttered seeds. Toss and stir until every seed is evenly coated. You should see a thick, sandy coating clinging to each seed. If it looks patchy, keep tossing.
- Spread on the baking sheet. Line your baking sheet with parchment paper. Spread the coated seeds in a single, even layer. Try not to overlap them too much — overlapping leads to steaming instead of roasting. If you have a lot of seeds, use two baking sheets.
- Bake for 25-30 minutes. Place the baking sheet on the center rack. Bake for 15 minutes, then pull the sheet out and stir the seeds with a spatula. This ensures even cooking. Return to the oven for another 10-15 minutes. The seeds are done when they’re golden brown and the kitchen smells like a cinnamon-scented dream. Keep a close eye during the last 5 minutes — sugar can go from golden to burnt very quickly.
- Cool completely. This is the hardest part. Let the seeds cool on the baking sheet for at least 20 minutes without touching them. As they cool, the sugar coating hardens into that signature crunch. If you try to eat them warm, the coating will be soft and sticky. Patience pays off here.
- Break apart and serve. Once completely cool, break apart any clusters that have formed. Some clumping is totally normal — and honestly, those little clusters are the best part. Transfer to a serving bowl and try not to eat them all before anyone else gets a chance.
Sensory Cues: At the 15-minute mark, the seeds should look damp and smell intensely of cinnamon. At 25 minutes, they should be dry to the touch and sound slightly hollow when you stir them. The color should be a warm, toasted gold — not dark brown. If you see wisps of smoke, pull them out immediately.
Cooking Tips & Techniques
I’ve made this recipe more times than I can count, and I’ve learned a few things the hard way. Let me save you from my mistakes.
The Biggest Mistake I Made: The first time I tried this, I cranked the oven to 375°F because I was impatient. Big mistake. The sugar burned on the outside while the seeds stayed soft inside. Low and slow is the way to go. I ruined a whole batch and had to start over — and let me tell you, scraping burnt sugar off a baking sheet is not my idea of a good time.
Drying is Everything: I cannot stress this enough. If your seeds are even slightly damp when they go into the oven, they’ll steam instead of roast. You’ll end up with chewy, sad seeds. Pat them dry with a towel, then let them air-dry for 10 minutes if you have the time. I once skipped this step in a rush and ended up with seeds that had the texture of wet cardboard. Never again.
Stirring is Non-Negotiable: Set a timer for 15 minutes and don’t skip the stir. The edges of the pan cook faster than the center, and stirring redistributes everything. I’ve forgotten this step more than once and ended up with half-burnt, half-raw seeds. A quick stir halfway through fixes everything.
Timing Strategy: While the seeds are baking, clean up your workspace. The butter and sugar mixture can get sticky, so washing your bowl and utensils while the seeds roast makes post-cooking cleanup much easier. Plus, you won’t have hardened sugar crystals to scrub off later.
Consistency Tip: For the most even coating, toss the seeds in the butter first, let them sit for a minute, then toss again before adding the sugar. The butter has a chance to absorb slightly into the seeds, creating a better surface for the sugar to stick to.
Variations & Adaptations
Once you’ve mastered the basic recipe, here are some fun ways to switch things up:
- Spicy-Sweet Version: Add ¼ teaspoon cayenne pepper and ¼ teaspoon smoked paprika to the cinnamon sugar mixture. The heat sneaks up on you and plays beautifully with the sweet coating. I made this for a Halloween party and people couldn’t stop eating them.
- Pumpkin Pie Spice Version: Replace the cinnamon with 2 teaspoons pumpkin pie spice. Add a pinch of nutmeg and ginger for extra warmth. This version tastes exactly like pumpkin pie filling — in seed form.
- Maple-Brown Sugar Version: Swap the granulated sugar for ⅓ cup packed brown sugar and replace the vanilla extract with 1 tablespoon maple syrup. Reduce the butter to 2 tablespoons since the syrup adds moisture. This version has a deeper, almost caramel-like flavor that’s incredible.
- Dairy-Free Adaptation: Use melted coconut oil or vegan butter instead of regular butter. Coconut oil adds a subtle tropical note that pairs surprisingly well with cinnamon. Just make sure your coconut oil is melted and slightly cooled before tossing.
- Gluten-Free Note: This recipe is naturally gluten-free as written. Just double-check your cinnamon and vanilla extract labels if you’re highly sensitive — some brands use additives that contain gluten.
I’ve personally tried the spicy-sweet version three times now, and it’s become my secret weapon for football watch parties. Something about that heat-and-sweet combo keeps people coming back for handful after handful.
Serving & Storage Suggestions
These seeds are best served at room temperature, straight from the cooling sheet or a beautiful bowl. They’re perfect as a pre-dinner snack while guests arrive, a topping for fall salads, or even sprinkled over vanilla ice cream for a crunchy dessert.
Presentation Tips for Hosting: Serve them in a wooden bowl or a rustic ceramic dish. Sprinkle a little extra cinnamon on top for visual appeal. If you’re feeling fancy, layer them with dried cranberries and roasted almonds for a gorgeous fall snack mix. Your guests will pick at them all night.
Storage Instructions: Store completely cooled seeds in an airtight container at room temperature. They’ll stay fresh and crunchy for up to 2 weeks. Do NOT refrigerate them — the moisture in the fridge will soften the coating. I learned this the hard way when I stored a batch in the fridge and ended up with soggy seeds the next day.
Freezer Option: You can freeze these seeds for up to 3 months. Place them in a freezer-safe bag or container, squeeze out as much air as possible, and freeze. To refresh, spread them on a baking sheet and warm in a 300°F oven for 5 minutes. They’ll crisp right back up.
Reheating Tip: If your seeds lose their crunch after a few days, spread them on a baking sheet and bake at 300°F for 5 minutes. Let them cool completely before storing again. This trick works like magic — I’ve revived many a slightly soft batch this way.
Flavor Development: Interestingly, the cinnamon flavor actually deepens after a day or two. I’ve found that day-old seeds taste even more aromatic and well-rounded. So don’t worry if you make them ahead — they might actually be better the next day.
Nutritional Information & Benefits
Pumpkin seeds are a nutritional powerhouse, and this recipe keeps them relatively healthy despite the sweet coating. Here’s the breakdown per ¼-cup serving (about one handful):
| Nutrient | Amount |
|---|---|
| Calories | 185 |
| Protein | 7g |
| Fat | 14g |
| Carbohydrates | 12g |
| Fiber | 2g |
| Sugar | 8g |
| Iron | 15% DV |
| Magnesium | 20% DV |
Pin This Recipe!
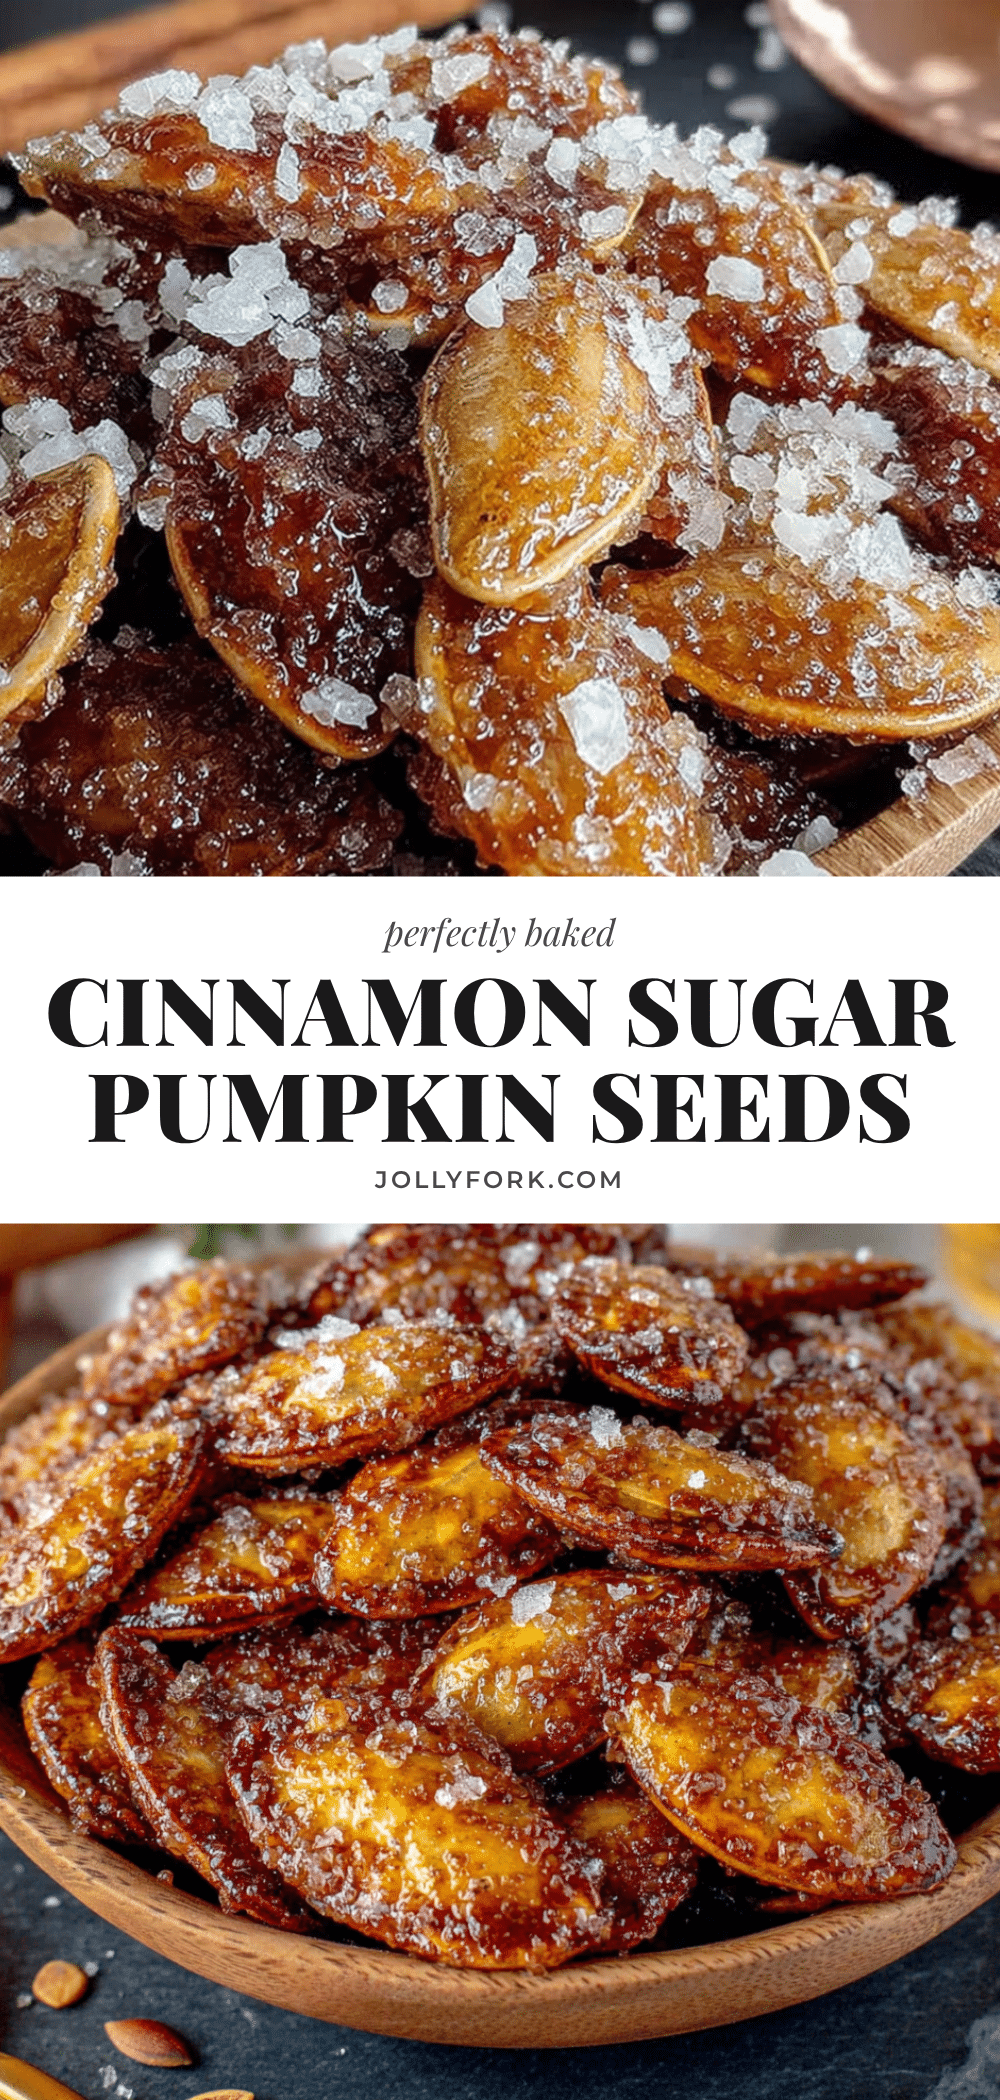
Baked Cinnamon Sugar Pumpkin Seeds: Easy Fall Recipe
These baked cinnamon sugar pumpkin seeds are a simple, no-boil fall snack that delivers a perfect crunchy, sweet coating. Made with pantry staples, they’re a crowd-pleasing treat that tastes like autumn in every bite.
- Prep Time: 10 minutes
- Cook Time: 30 minutes
- Total Time: 40 minutes
- Yield: 4 servings 1x
- Category: Snack
- Cuisine: American
Ingredients
- 1 ½ cups fresh pumpkin seeds (or 2 cups raw pepitas)
- 3 tablespoons unsalted butter, melted
- ¼ cup granulated sugar
- 1 ½ teaspoons ground cinnamon
- ½ teaspoon fine sea salt
- ½ teaspoon vanilla extract (optional)
Instructions
- Preheat your oven to 300°F (150°C).
- If using fresh pumpkin seeds, rinse them in a colander under cool water, removing any pulp. Pat very dry with a kitchen towel or paper towels.
- In a small bowl, combine ¼ cup granulated sugar, 1 ½ teaspoons ground cinnamon, and ½ teaspoon fine sea salt. Stir until evenly mixed.
- Place the dried pumpkin seeds in a large bowl. Pour 3 tablespoons melted unsalted butter over them and toss until every seed is coated. If using, add ½ teaspoon vanilla extract to the butter before pouring.
- Sprinkle the cinnamon sugar mixture over the buttered seeds and toss until every seed is evenly coated.
- Line a baking sheet with parchment paper. Spread the coated seeds in a single, even layer.
- Bake for 25-30 minutes, stirring at the 15-minute mark. The seeds are done when golden brown and the kitchen smells like cinnamon.
- Let the seeds cool completely on the baking sheet for at least 20 minutes without touching them.
- Once cool, break apart any clusters and serve.
Notes
Pat seeds very dry before baking to ensure crunchiness. Stir halfway through for even cooking. Cool completely before serving to allow the sugar coating to harden. Store in an airtight container at room temperature for up to 2 weeks. For a dairy-free version, substitute butter with coconut oil or vegan butter. For a lower-sugar option, use monk fruit sweetener or erythritol (texture may vary).
Nutrition
- Serving Size: ¼ cup
- Calories: 185
- Sugar: 8
- Sodium: 150
- Fat: 14
- Saturated Fat: 5
- Carbohydrates: 12
- Fiber: 2
- Protein: 7
Keywords: pumpkin seeds, cinnamon sugar, fall recipe, easy snack, baked pumpkin seeds, no boil


