The neighborhood Day of the Dead potluck was in twelve hours and I’d completely forgotten. Everyone else would be bringing their grandmother’s secret recipes—mole that had been simmering for days, tamales wrapped with decades of tradition, sugar skulls decorated like tiny masterpieces. I had a bag of flour, some yeast that was probably still alive, and an orange that was starting to look a little sad. Honestly, I wanted to cancel. But then I remembered this pan de muerto recipe I’d been tinkering with, the one that had never actually seen the light of day. Let me tell you, there was flour absolutely everywhere. On the counter, on my shirt, in my hair. I mean, I looked like I’d lost a fight with a pastry bag. But somehow, when that bread came out of the oven, golden and fragrant and impossibly soft, the whole kitchen went quiet. My neighbor Maria, who had been making pan de muerto for forty years, took one bite and just closed her eyes. That’s when I knew this was the one. Maybe you’ve been there—that moment when something you threw together under pressure turns out to be the thing everyone remembers.
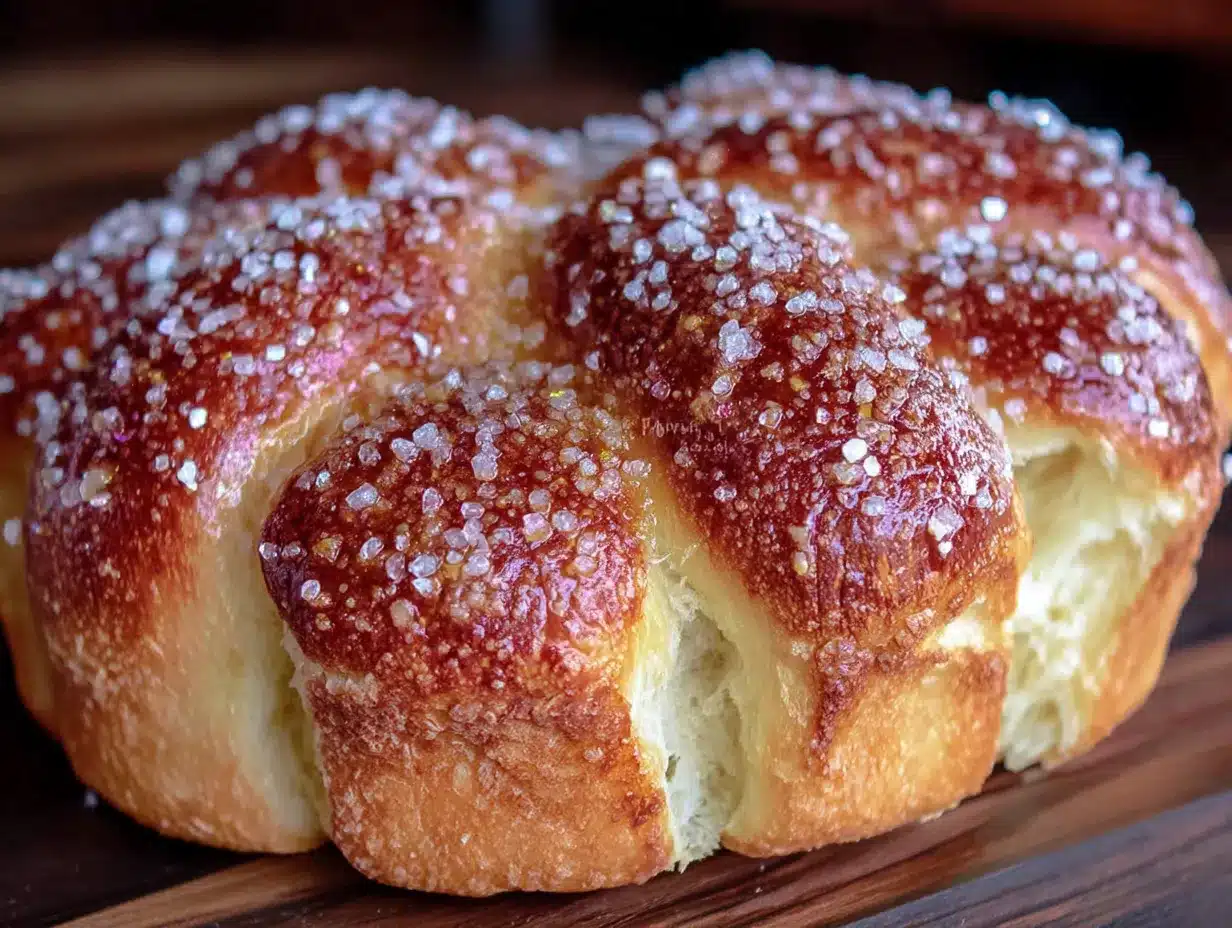
This perfect pan de muerto isn’t just another bread recipe. It’s the result of countless trials, a few spectacular failures, and one very memorable evening when I learned that patience and a little bit of panic can work wonders together. The texture is what gets me every time—pillowy soft, with that subtle orange blossom fragrance that just feels like celebration. And the best part? It’s actually forgiving. Even when you’re racing against the clock, this dough wants to cooperate.
Why You’ll Love This Recipe
Look, I’ve tested this pan de muerto recipe more times than I care to admit. Some batches were dense enough to double as doorstops. Others were dry and crumbly—the kind of bread that makes you reach for a glass of water after every bite. But this version? This is the one I’d serve to my abuela without flinching. Here’s why this recipe works for hosts who want to impress without the stress:
- Perfect for Crowds: This recipe scales beautifully. You can easily double or triple it for a big gathering without losing any of that soft, fluffy texture.
- Simple Ingredients: No hunting down obscure items. Flour, butter, eggs, yeast, orange—things you probably already have or can grab in one quick store run.
- Make-Ahead Friendly: The dough can be prepared the night before, which is a lifesaver when you’re juggling a dozen other dishes for your gathering.
- Visually Stunning: That classic bone-shaped decoration isn’t just traditional—it’s a conversation starter. Your guests will think you spent hours on the presentation.
- Unbelievably Soft: The texture is what sets this apart. It’s not cakey or bready—it’s that perfect in-between that makes people reach for seconds.
What makes this recipe different from all the others? It’s the technique. Most recipes rush the proofing or skip the orange blossom water altogether. But I’ve found that taking your time with the sponge and using the right amount of citrus makes all the difference. This isn’t just another version—it’s the version that won over a room full of people who grew up eating the real thing. And honestly, that’s the highest compliment I can give.
This pan de muerto is the kind of bread that makes you close your eyes after the first bite. It’s comfort food with a story—traditional, celebratory, but approachable enough for a Tuesday afternoon. Perfect for impressing guests at your ofrenda gathering, or for turning a simple dinner party into something memorable.
What Ingredients You Will Need
This recipe uses simple, wholesome ingredients that come together to create that signature soft, fragrant bread. Most of these are pantry staples, which means you’re probably closer to baking than you think. The key is using fresh, high-quality ingredients—especially when it comes to the yeast and the citrus.
For the Sponge (Starter)
- 1/2 cup warm water (about 110°F—warm to the touch, not hot)
- 2 1/4 teaspoons active dry yeast (one packet; I prefer Red Star or SAF for consistent results)
- 1 tablespoon all-purpose flour (helps feed the yeast and get it bubbly)
- 1 tablespoon granulated sugar (wakes up the yeast and gets it active)
For the Dough
- 3 1/2 cups all-purpose flour (plus extra for dusting; King Arthur Flour is my go-to for consistent protein content)
- 1/2 cup granulated sugar
- 1 teaspoon salt (fine sea salt works best)
- 1 tablespoon orange zest (from about 1 large orange—make sure it’s organic if you can)
- 1/2 cup unsalted butter, softened (European-style butter like Plugrà adds extra richness)
- 3 large eggs, room temperature (this is important—cold eggs will shock the dough)
- 1/4 cup orange juice (fresh squeezed is non-negotiable here; bottled juice just doesn’t have the same brightness)
- 2 tablespoons orange blossom water (look for Cortas or Mymouné brands for authentic flavor)
- 1 teaspoon vanilla extract (pure, not imitation)
For the Glaze and Decoration
- 1/4 cup unsalted butter, melted (for brushing after baking)
- 1/4 cup granulated sugar (for coating the baked bread)
- 1 tablespoon orange zest (mixed with the sugar for a citrusy finish)
- Additional flour for dusting work surface
Ingredient Selection Tips: When choosing your orange, look for one that feels heavy for its size—that means it’s juicy. If you can’t find orange blossom water, you can substitute with additional orange juice and a teaspoon of orange extract, though the floral note won’t be quite the same. For a dairy-free version, use plant-based butter that’s specifically formulated for baking. And here’s a tip I learned the hard way: don’t skip the room temperature eggs. Cold eggs can slow down the proofing process significantly, and nobody wants to wait an extra hour for their dough to rise.
Equipment Needed
You don’t need a professional bakery setup to make this pan de muerto, but having the right tools makes the process smoother. Here’s what you’ll need:
- Stand mixer with dough hook attachment (a KitchenAid is ideal, but a hand mixer with dough hooks works too—or just use your hands if you’re feeling strong)
- Large mixing bowl (glass or stainless steel works best; avoid plastic as it can retain odors)
- Measuring cups and spoons (for accuracy—baking is a science, after all)
- Kitchen scale (optional but recommended for consistent results; I use my Escali all the time)
- Rolling pin (for shaping the bone decorations)
- Baking sheets (two if you’re making multiple loaves)
- Parchment paper (prevents sticking and makes cleanup a breeze)
- Pastry brush (for applying the butter glaze)
- Sharp knife or bench scraper (for cutting the dough into bone shapes)
- Clean kitchen towel (for covering the dough while it rises)
- Cooling rack (essential for proper cooling—don’t skip this)
Budget-Friendly Options: If you don’t have a stand mixer, you can absolutely knead this dough by hand. It takes about 10-12 minutes of active kneading, but there’s something meditative about working the dough with your hands. Just make sure you’re using a sturdy surface and a bit of patience. Also, a clean plastic grocery bag can substitute for a proofing cover in a pinch—just spray it lightly with cooking spray so it doesn’t stick to the dough.
Preparation Method
Making pan de muerto is a labor of love, but I promise the process is worth every minute. Let me walk you through it step by step, with all the little tricks I’ve picked up along the way.
- Make the sponge: In a small bowl, combine the warm water, yeast, 1 tablespoon flour, and 1 tablespoon sugar. Stir gently and let it sit for 5-10 minutes until it becomes frothy and bubbly. If it doesn’t foam up, your yeast might be dead—start over with fresh yeast. This is the moment where you’ll know if the bread gods are on your side.
- Mix the dry ingredients: In the bowl of your stand mixer, whisk together 3 1/2 cups flour, 1/2 cup sugar, salt, and orange zest. Make a well in the center—this is where the wet ingredients will go.
- Combine wet ingredients: In a separate bowl, whisk together the sponge mixture, softened butter, eggs, orange juice, orange blossom water, and vanilla extract. Don’t worry if the butter doesn’t fully incorporate—it will come together in the mixing process.
- Form the dough: Pour the wet mixture into the well of dry ingredients. Using the dough hook attachment, mix on low speed until the dough starts coming together. Increase to medium speed and knead for 8-10 minutes. The dough should be smooth, elastic, and slightly tacky—if it’s sticking excessively to the bowl, add flour one tablespoon at a time. You’re looking for that perfect balance where the dough is soft but not sticky.
- First proof: Shape the dough into a ball and place it in a lightly greased bowl, turning once to coat. Cover with a clean kitchen towel and let it rise in a warm, draft-free spot for about 1 1/2 to 2 hours, or until doubled in size. I like to put mine in the oven with the light on—it creates the perfect warm environment.
- Shape the loaves: Punch down the dough gently and turn it out onto a lightly floured surface. Divide it into two equal portions for two loaves. Take one portion and cut off about 1/4 of it to use for the bone decorations. Shape the remaining dough into a smooth round ball and place it on a parchment-lined baking sheet.
- Create the decorations: Roll the reserved dough into a long rope, about 12 inches long. Cut it into 4 equal pieces. Roll each piece into a smaller rope, about 4-5 inches long. Flatten each rope slightly with your fingers. These will become the “bones” that decorate the top of the bread. Position two ropes on top of each loaf in a cross pattern, pressing gently to adhere. The ends should extend slightly over the edges of the bread—this is what gives it that classic pan de muerto look.
- Second proof: Cover the shaped loaves again and let them rise for another 45-60 minutes, until puffy and nearly doubled. The dough should spring back slowly when you poke it gently.
- Bake: Preheat your oven to 350°F (175°C). Bake the loaves for 20-25 minutes, until they’re golden brown and sound hollow when tapped on the bottom. The internal temperature should reach about 190°F. If the tops are browning too quickly, tent them loosely with foil after 15 minutes.
- Finish: Let the loaves cool on the baking sheet for 5 minutes, then transfer to a cooling rack. While still warm, brush generously with melted butter, then roll in the orange-scented sugar mixture. The butter helps the sugar stick and adds that beautiful sheen.
Sensory Cues: When the dough is properly kneaded, it should feel like a baby’s bottom—smooth, soft, and slightly springy. During proofing, you’ll know it’s ready when you poke it gently and the indentation remains, slowly springing back halfway. The baked bread should be fragrant with orange and vanilla, with a deep golden crust that crackles slightly when you press it.
Cooking Tips & Techniques
I’ve made this pan de muerto more times than I can count, and I’ve learned a few things the hard way. Let me save you some trouble.
Temperature is everything. Your ingredients need to be at room temperature—especially the eggs and butter. I once tried to rush the process with cold eggs, and the dough took forever to come together. The butter was lumpy, the yeast struggled, and the final bread was dense and sad. Now I set my eggs out an hour before I start baking, and I cut the butter into small cubes to help it soften faster.
Don’t over-flour your surface. When shaping the dough, use just enough flour to prevent sticking. Too much flour will dry out the dough and make the bread tough. If the dough is sticking, try using a bench scraper to lift and fold it instead of adding more flour. Your hands should be lightly oiled, not floured, for the best results.
Watch the proofing time carefully. Pan de muerto should be soft and fluffy, not dense and heavy. Under-proofed dough will be tight and won’t rise properly in the oven. Over-proofed dough will collapse and have a yeasty, sour flavor. The sweet spot is when the dough has doubled in size and feels airy and pillowy when you touch it. In a warm kitchen, this might take less time than the recipe says—trust your eyes and your fingers more than the clock.
Master the bone decorations. This is where most people get frustrated. The key is to roll the ropes evenly and not too thin. If they’re too thin, they’ll bake into hard, brittle sticks instead of soft bread. Aim for ropes that are about 1/2 inch thick. When you place them on the loaf, press gently but firmly—you want them to adhere during baking, not slide off.
One more thing: If you’re making this for a gathering, bake the loaves the day before and store them in an airtight container. The flavors actually develop and deepen overnight, and the bread stays beautifully soft. Just warm it in a 300°F oven for 5 minutes before serving, and brush with a little extra butter to refresh the crust.
Variations & Adaptations
One of the things I love about this pan de muerto recipe is how adaptable it is. Here are some variations I’ve tried and loved:
Chocolate Pan de Muerto
Replace 1/4 cup of the flour with unsweetened cocoa powder, and add 1/2 cup of dark chocolate chips to the dough during the last minute of kneading. The chocolate pairs beautifully with the orange blossom water—it’s like a Mexican hot chocolate in bread form. I made this version for a friend’s birthday party, and it disappeared faster than the traditional one.
Vegan Version
Substitute the butter with vegan butter (I like Miyoko’s for its rich flavor), use flax eggs (1 tablespoon ground flaxseed + 3 tablespoons water per egg), and replace the orange blossom water with additional orange juice and a splash of rose water. The texture will be slightly denser, but the flavor is still incredible. Just be aware that vegan doughs often need a little extra kneading time to develop gluten.
Gluten-Free Adaptation
Use a high-quality gluten-free all-purpose flour blend that includes xanthan gum (King Arthur’s Measure for Measure works well). The dough will be stickier and more fragile, so handle it gently. You might need to reduce the liquid slightly—start with 1/4 cup less orange juice and add more if needed. The bone decorations are trickier with gluten-free dough, so consider using a simple scoring pattern instead.
Spiced Version
Add 1 teaspoon of ground cinnamon, 1/2 teaspoon of ground anise, and a pinch of ground cloves to the dry ingredients. This gives the bread a warm, aromatic flavor that’s perfect for fall gatherings. I tried this variation for an autumn potluck, and it paired beautifully with hot apple cider.
Serving & Storage Suggestions
This pan de muerto is best served warm, but it’s still incredible at room temperature. Here’s how to make the most of it for your gathering:
Serving Temperature: If you’re serving it at a party, warm the bread in a 300°F oven for 5-7 minutes before bringing it to the table. Brush it with a little melted butter right before serving to revive that golden sheen. Serve it on a beautiful platter with a dusting of extra orange sugar—it makes for a stunning presentation.
What to Serve Alongside: This bread is wonderful on its own, but it’s even better with a cup of Mexican hot chocolate or a strong café de olla. For a savory contrast, serve it with a side of black bean soup or a simple chicken tinga. The sweetness of the bread balances beautifully with spicy, savory dishes.
Storage: Store leftover pan de muerto in an airtight container at room temperature for up to 3 days. Do not refrigerate—it will dry out the bread and make it stale. If you need to keep it longer, wrap it tightly in plastic wrap and then in foil, and freeze for up to 2 months. Thaw at room temperature and reheat in a 300°F oven for 5-7 minutes.
Flavor Development: Here’s a secret: this bread actually tastes better on the second day. The orange and floral flavors meld together overnight, creating a more complex, harmonious taste. So don’t stress about baking it the day of your event—make it a day ahead and let the flavors develop. Your guests won’t know the difference, and you’ll have one less thing to worry about.
Nutritional Information & Benefits
While pan de muerto is definitely a treat, it does have some redeeming qualities. Here’s a rough breakdown per serving (1/12 of a loaf):
- Calories: Approximately 280-320
- Fat: 12-14g (mostly from butter)
- Carbohydrates: 38-42g
- Protein: 5-7g
- Fiber: 1-2g
- Sugar: 14-16g (including added sugar and natural sugars from orange juice)
Health Benefits: The oranges provide a good dose of vitamin C and antioxidants, while the eggs add high-quality protein. The orange blossom water has been used in traditional medicine for its calming properties—so this bread might actually help you relax during your gathering! Plus, the act of baking itself can be therapeutic. There’s something deeply satisfying about working dough with your hands and watching it transform.
Dietary Considerations: This recipe contains gluten, dairy, and eggs. For those with allergies, see the variations section above. It’s not low-carb or keto-friendly, but it is a wonderful occasional indulgence that connects you to a rich cultural tradition.
Conclusion
This pan de muerto recipe has become my go-to for every Day of the Dead celebration, and honestly, for any occasion where I want to share something special with the people I love. It’s the bread that won over Maria, the bread that made my kitchen smell like a Mexican bakery, and the bread that taught me that sometimes the best things come from moments of panic and improvisation.
I hope you’ll give this recipe a try—not just for the Day of the Dead, but for any gathering where you want to share a piece of tradition and a whole lot of flavor. Customize it with your favorite variations, make it your own, and don’t be afraid to get a little flour on your shirt. That’s where the magic happens.
Have you made pan de muerto before? I’d love to hear about your experience! Drop a comment below and let me know how it turned out, or share your own twist on this classic bread. And if you’re looking for more authentic Mexican baking recipes, be sure to check out my Mexican sweet bread collection for more ideas. Happy baking, and remember—the best bread is the one you share with others.
Frequently Asked Questions
Can I make pan de muerto without a stand mixer?
Absolutely! You can knead this dough by hand. It will take about 10-12 minutes of active kneading, but the process is rewarding. Just make sure to use a sturdy surface and keep your hands lightly oiled to prevent sticking.
Why didn’t my dough rise?
This usually happens for one of three reasons: your yeast was expired or killed by water that was too hot, your kitchen was too cold for proofing, or your dough was over-floured. Always check your yeast expiration date and use a thermometer to ensure your water is around 110°F.
Can I freeze pan de muerto?
Yes! Wrap the cooled bread tightly in plastic wrap, then in foil, and freeze for up to 2 months. Thaw at room temperature and reheat in a 300°F oven for 5-7 minutes. I recommend freezing without the butter and sugar coating, then adding it fresh after reheating.
What can I use instead of orange blossom water?
If you can’t find orange blossom water, you can substitute with additional orange juice and a teaspoon of orange extract. The floral note won’t be as pronounced, but the bread will still be delicious. Some bakers also use a splash of rose water for a different but lovely floral flavor.
How do I know when the bread is fully baked?
The bread should be golden brown on top and sound hollow when you tap the bottom. For the most accurate result, use an instant-read thermometer—the internal temperature should reach 190°F. If the top is browning too quickly, tent the loaf with foil for the last 5-10 minutes of baking.
Pin This Recipe!

Perfect Pan de Muerto: Easy Soft & Fluffy Day of the Dead Bread
This perfect pan de muerto is the result of countless trials, a few spectacular failures, and one very memorable evening. The texture is pillowy soft, with subtle orange blossom fragrance, and it’s surprisingly forgiving even when you’re racing against the clock.
- Prep Time: 30 minutes
- Cook Time: 25 minutes
- Total Time: 3 hours 25 minutes (including proofing)
- Yield: 2 loaves (12 servings) 1x
- Category: Bread
- Cuisine: Mexican
Ingredients
- 1/2 cup warm water (about 110°F)
- 2 1/4 teaspoons active dry yeast (one packet)
- 1 tablespoon all-purpose flour
- 1 tablespoon granulated sugar
- 3 1/2 cups all-purpose flour (plus extra for dusting)
- 1/2 cup granulated sugar
- 1 teaspoon fine sea salt
- 1 tablespoon orange zest (from about 1 large orange)
- 1/2 cup unsalted butter, softened (European-style recommended)
- 3 large eggs, room temperature
- 1/4 cup fresh squeezed orange juice
- 2 tablespoons orange blossom water
- 1 teaspoon pure vanilla extract
- 1/4 cup unsalted butter, melted (for glaze)
- 1/4 cup granulated sugar (for coating)
- 1 tablespoon orange zest (for coating)
Instructions
- Make the sponge: In a small bowl, combine warm water, yeast, 1 tablespoon flour, and 1 tablespoon sugar. Stir gently and let sit for 5-10 minutes until frothy and bubbly.
- Mix dry ingredients: In the bowl of a stand mixer, whisk together 3 1/2 cups flour, 1/2 cup sugar, salt, and orange zest. Make a well in the center.
- Combine wet ingredients: In a separate bowl, whisk together the sponge mixture, softened butter, eggs, orange juice, orange blossom water, and vanilla extract.
- Form the dough: Pour wet mixture into the well of dry ingredients. Using dough hook, mix on low speed until dough comes together, then increase to medium and knead for 8-10 minutes until smooth, elastic, and slightly tacky.
- First proof: Shape dough into a ball and place in a lightly greased bowl, turning once to coat. Cover with a clean kitchen towel and let rise in a warm, draft-free spot for 1 1/2 to 2 hours, or until doubled in size.
- Shape the loaves: Punch down dough and turn onto a lightly floured surface. Divide into two equal portions. From each portion, cut off about 1/4 for bone decorations. Shape remaining dough into a smooth round ball and place on a parchment-lined baking sheet.
- Create decorations: Roll reserved dough into a long rope about 12 inches long. Cut into 4 equal pieces. Roll each into a smaller rope about 4-5 inches long. Flatten slightly. Position two ropes on top of each loaf in a cross pattern, pressing gently to adhere.
- Second proof: Cover shaped loaves and let rise for 45-60 minutes until puffy and nearly doubled.
- Bake: Preheat oven to 350°F (175°C). Bake loaves for 20-25 minutes until golden brown and hollow-sounding when tapped. Internal temperature should reach about 190°F.
- Finish: Let loaves cool on baking sheet for 5 minutes, then transfer to a cooling rack. While still warm, brush generously with melted butter, then roll in orange-scented sugar mixture.
Notes
Temperature is everything – ingredients should be at room temperature. Don’t over-flour your surface. Watch proofing time carefully. For best results, bake the day before serving as flavors develop overnight. Store in airtight container at room temperature for up to 3 days, or freeze for up to 2 months.
Nutrition
- Serving Size: 1/12 of a loaf
- Calories: 300
- Sugar: 15
- Sodium: 200
- Fat: 13
- Saturated Fat: 8
- Carbohydrates: 40
- Fiber: 1.5
- Protein: 6
Keywords: pan de muerto, Day of the Dead bread, Mexican sweet bread, orange blossom bread, soft bread recipe, traditional Mexican bread


