I was standing in line at the hardware store last October, holding a bag of lightbulbs I definitely didn’t need, when the woman in front of me turned around and started talking about Rice Krispie treats. Not just any Rice Krispie treats—she was describing how she makes them every Halloween, shaping them into little pumpkins with her grandkids. Her name was Carol, and she had this way of talking with her hands that made me forget I was holding a receipt for three hours of my life I’d never get back. She told me about the orange food coloring, the mini chocolate chips for faces, and how the whole thing takes maybe fifteen minutes from start to finish. I was hooked.
Honestly, I’d been dreading the idea of complicated Halloween desserts. You know the ones—the elaborate cakes that require piping bags and a steady hand, or those creepy cookies that look amazing on Pinterest but fall apart the second you try to move them. I wanted something my kids could actually help with without me losing my mind. Carol’s no-bake Rice Krispie Jack-O-Lantern treats sounded too good to be true. But let me tell you, she was right. These are the kind of Halloween treats that make you look like a hero without actually doing much work.
I’ve made them every year since that chance encounter at the hardware store. The first batch I made, I accidentally used green food coloring instead of orange—my kitchen looked like a science experiment gone wrong. But we laughed, started over, and the second batch turned out perfect. That’s the thing about these easy Halloween treats: they forgive your mistakes. They’re simple enough for a five-year-old to help shape, and they’re the first thing to disappear at any Halloween party. So if you’re looking for a fun Halloween activity that doesn’t require baking skills or a ton of patience, this is it.
Why You’ll Love This Recipe
These Easy No-Bake Rice Krispie Jack-O-Lantern Treats have become my go-to Halloween dessert for so many reasons. I’ve tested this recipe more times than I can count, tweaking the color and consistency until it was just right. Here’s why I think you’ll fall for them too:
- Quick & Easy: From start to finish, you’re looking at about 20 minutes of active time. No oven, no complicated steps, no stress.
- Simple Ingredients: You probably already have everything in your pantry. Rice Krispies cereal, marshmallows, butter, orange food coloring, and some chocolate chips for the face.
- Perfect for Halloween: These little pumpkin treats are the star of any Halloween party, classroom celebration, or spooky movie night.
- Crowd-Pleaser: Kids and adults both go crazy for them. They’re nostalgic, adorable, and taste exactly like the Rice Krispie treats you remember from childhood.
- Unbelievably Delicious: The marshmallow-cereal combo is already perfect, but shaping them into Jack-O-Lanterns makes them even more fun to eat.
What sets this recipe apart is the technique. Instead of just making regular Rice Krispie treats and cutting them into shapes, you mold them by hand into little pumpkin balls. This gives them that perfect, round Jack-O-Lantern shape that looks so festive. Plus, you can customize each one with different facial expressions—some happy, some silly, some spooky. It’s the kind of recipe that makes you feel like a creative genius, even if you’re just following along.
I’ve brought these to Halloween potlucks and watched adults light up like kids when they see them. There’s something about a homemade treat that feels so much more special than store-bought candy. And knowing you made it yourself—with your own hands—makes every bite taste better. Trust me, once you make these, you’ll understand why I keep coming back to them year after year.
What Ingredients You Will Need
This recipe uses simple, everyday ingredients to create something truly festive. Most of these are pantry staples, so you probably won’t need a special trip to the grocery store—though you might want to grab extra bags of marshmallows, because they have a way of disappearing.
- 6 cups Rice Krispies cereal (or any crispy rice cereal; I prefer the name brand for the best crunch)
- 4 cups mini marshmallows (about one standard bag; the mini ones melt more evenly than large marshmallows)
- 3 tablespoons unsalted butter (salted butter works too, just skip the extra salt if you’re adding any)
- Orange gel food coloring (gel works much better than liquid—it gives you a vibrant color without making the mixture too sticky)
- 1/2 cup mini chocolate chips (for the faces; you can also use candy eyes or black frosting in a piping bag)
- Green candy melts or green frosting (for the stems; pretzel sticks also work in a pinch)
- 1/2 teaspoon vanilla extract (optional, but adds a lovely warmth to the marshmallow flavor)
- Pinch of salt (helps balance the sweetness)
For the orange color, I’ve learned the hard way that gel food coloring is the way to go. Liquid food coloring can make the mixture too wet and sticky, and you end up with pale orange treats that don’t look like pumpkins at all. Wilton brand gel colors work great, and you can find them at most craft stores or online. Start with a small amount and add more until you get the shade you want—you can always deepen the color, but you can’t take it back.
If you want to make these treats a little healthier, you can use a brown rice cereal instead of Rice Krispies. The texture will be slightly different—a bit more crunchy and less airy—but they still taste delicious. For a dairy-free version, swap the butter for coconut oil or a plant-based butter alternative. Just keep in mind that coconut oil can make the treats slightly greasier, so you might need to let them set a little longer in the fridge.
I also recommend using mini chocolate chips for the faces rather than regular-sized ones. They look more proportional on the small pumpkin shapes, and they stick better to the marshmallow mixture. If you only have regular chocolate chips, you can chop them into smaller pieces using a sharp knife—though honestly, it’s worth picking up a bag of minis for this recipe.
Equipment Needed
You don’t need any fancy equipment for these treats, which is part of what makes them so great. Here’s what you’ll need:
- Large microwave-safe bowl (at least 4-cup capacity; glass or ceramic works best)
- Wooden spoon or silicone spatula (for stirring the marshmallow mixture; a metal spoon can scratch your bowl)
- 9×13-inch baking dish or large sheet pan (lined with parchment paper or greased with butter)
- Measuring cups and spoons
- Small microwave-safe bowl (for melting chocolate chips if needed)
- Piping bag or small zip-top bag (for applying the chocolate faces neatly; optional but helpful)
- Wax paper or parchment paper (for shaping the treats without sticking)
If you don’t have a microwave, you can melt the marshmallows and butter in a large pot on the stovetop over low heat. Just stir constantly so nothing burns. I’ve done it both ways, and honestly, the microwave method is faster and requires less cleanup. But if you’re making a double batch, the stovetop might be easier because you can use a bigger pot.
For shaping the pumpkin balls, I like to lightly grease my hands with butter or cooking spray. This keeps the marshmallow mixture from sticking to your fingers and makes the whole process much smoother. Keep a small bowl of water nearby too—dipping your fingers in water between shaping helps even more than butter alone.
Preparation Method
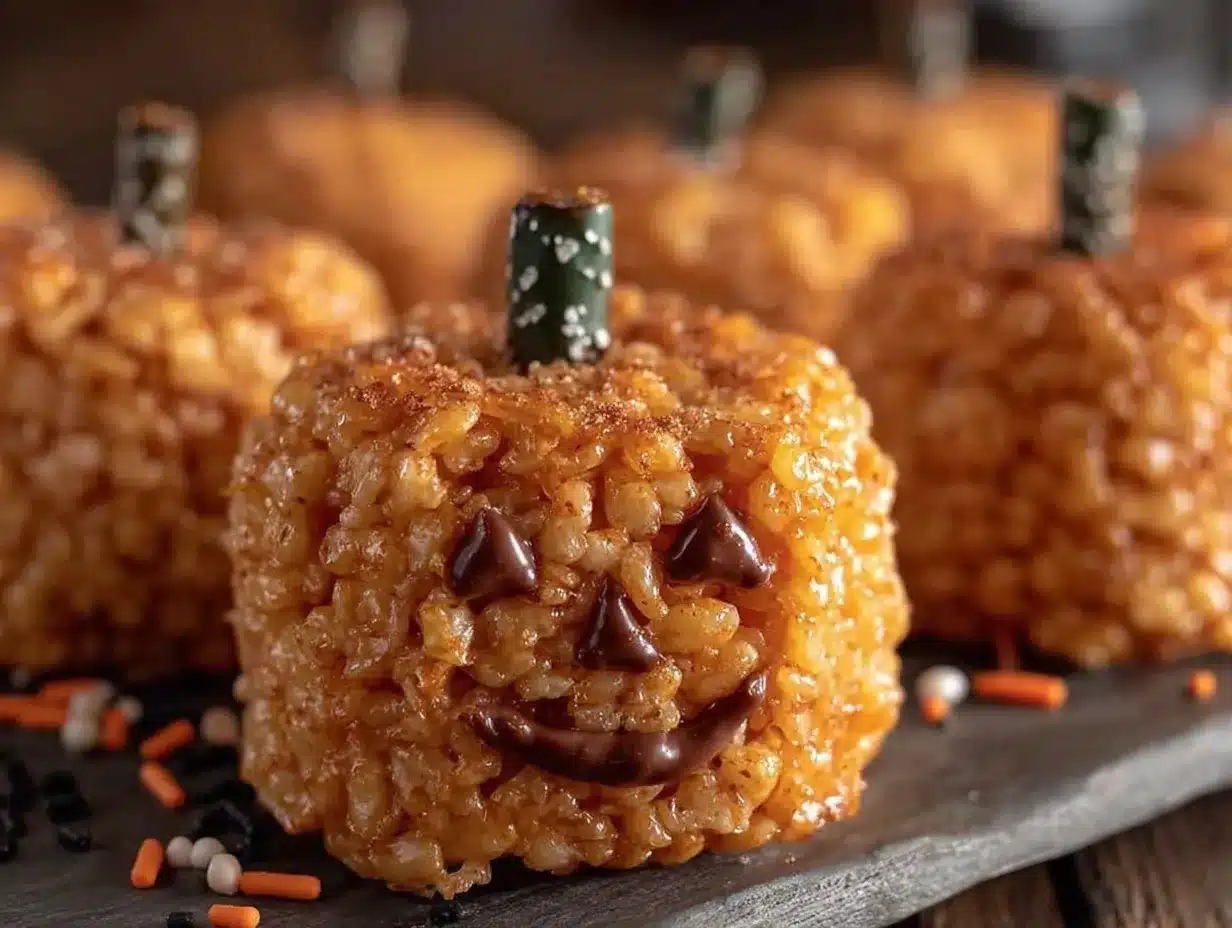
Making these Jack-O-Lantern treats is surprisingly simple. Follow these steps, and you’ll have a batch of adorable pumpkin treats in no time.
- Prepare your workspace. Line a large baking sheet or 9×13-inch dish with parchment paper. Lightly grease the paper with butter or cooking spray. Set aside.
- Melt the butter and marshmallows. In a large microwave-safe bowl, combine the 3 tablespoons of butter and 4 cups of mini marshmallows. Microwave in 30-second intervals, stirring after each, until the mixture is completely smooth and melted. This usually takes about 1.5 to 2 minutes total. Be careful not to overheat—marshmallows can burn quickly if left too long.
- Add the color and flavor. Stir in a few drops of orange gel food coloring until you reach your desired shade. Add the vanilla extract and a pinch of salt if using. Mix well. The color should be evenly distributed throughout the marshmallow mixture.
- Combine with cereal. Pour the 6 cups of Rice Krispies cereal into the marshmallow mixture. Fold gently with a wooden spoon or silicone spatula until all the cereal is coated. Work quickly here—the mixture firms up as it cools.
- Let it cool slightly. Spread the mixture onto the prepared baking sheet or dish. Let it cool for about 5 minutes, or until it’s cool enough to handle but still warm and pliable. If it gets too cold, it will be difficult to shape.
- Shape the pumpkins. Lightly grease your hands with butter or cooking spray. Take a small handful of the mixture (about the size of a golf ball) and roll it into a smooth ball. Place it on the parchment paper. Repeat with the remaining mixture. You should get about 12 to 15 pumpkin balls, depending on size.
- Add the stems. While the balls are still slightly warm, press a small piece of green candy melt or a small dab of green frosting onto the top of each ball to create a stem. Alternatively, you can insert a small piece of pretzel stick into the top for a crunchy stem.
- Create the faces. Once the pumpkin balls have cooled completely (about 15 minutes), it’s time to add the Jack-O-Lantern faces. Melt the mini chocolate chips in a small microwave-safe bowl in 20-second intervals, stirring in between. Transfer the melted chocolate to a small piping bag or a zip-top bag with the corner snipped off. Pipe on eyes, noses, and mouths to create your Jack-O-Lantern expressions. Get creative—some can be happy, some spooky, some silly.
- Let the chocolate set. Place the treats in the refrigerator for about 10 minutes to let the chocolate harden. This helps the faces stay in place when you handle them.
A few notes from my own experience: if the mixture becomes too stiff to shape while you’re working, you can pop it back in the microwave for 10 to 15 seconds to soften it. Also, don’t worry if your pumpkin balls aren’t perfectly round—imperfections give them character and make them look more like real pumpkins. The first time I made these, some of mine looked more like lopsided potatoes, but my kids loved them anyway.
Cooking Tips & Techniques
After making these treats more times than I can count, I’ve picked up a few tricks that make the process even smoother. Here are my best tips for perfect Rice Krispie Jack-O-Lantern treats every time.
Use gel food coloring. I cannot stress this enough. Liquid food coloring will make your marshmallow mixture sticky and wet, and the color will be pale and uneven. Gel food coloring gives you a vibrant orange with just a few drops and doesn’t affect the texture. I learned this the hard way when my first batch turned out a sad, pastel peach color.
Work quickly but carefully. The marshmallow mixture starts to set as soon as it cools, so you want to shape your pumpkin balls while it’s still warm and pliable. If you’re making a large batch, consider working with half the mixture at a time, keeping the other half covered in the bowl to stay warm.
Keep your hands greased. This is probably the most important tip. Lightly coat your hands with butter or cooking spray before shaping each ball. Reapply as needed. If the mixture starts sticking, dip your fingers in a small bowl of water—the moisture helps prevent sticking even better than butter alone.
Let the treats cool completely before adding faces. If you try to pipe chocolate onto warm pumpkin balls, the chocolate will melt and slide right off. Be patient and wait until they’re fully cool to the touch. I usually let mine sit at room temperature for about 15 to 20 minutes, then pop them in the fridge for 5 minutes before decorating.
Make extra faces. Kids love decorating these, so I always melt a little extra chocolate and set out some candy eyes or sprinkles so they can customize their own. It turns the whole process into a fun Halloween activity rather than just a recipe.
One mistake I made early on was overmixing the cereal into the marshmallow mixture. You want to fold gently until just combined—overmixing crushes the cereal and gives you dense, hard treats instead of light and crispy ones. A gentle hand makes all the difference.
Variations & Adaptations
One of the best things about this recipe is how easy it is to adapt. Here are some of my favorite variations:
- Chocolate Pumpkin Treats: Add 1/4 cup of cocoa powder to the marshmallow mixture along with the orange food coloring. This gives you chocolate-flavored pumpkins with a dark orange hue—perfect for a richer taste.
- Peanut Butter Pumpkins: Stir in 2 tablespoons of peanut butter along with the vanilla extract. The peanut butter adds a savory note that balances the sweetness beautifully. Use crunchy peanut butter for extra texture.
- Vegan Version: Use vegan marshmallows (Dandies brand works great), coconut oil instead of butter, and a plant-based chocolate for the faces. The texture will be slightly different, but they’re still delicious.
- Spider Treats: Instead of Jack-O-Lantern faces, shape the mixture into balls and add eight chocolate legs using melted chocolate or pretzel sticks. These are a huge hit with kids who love creepy-crawly things.
- Ghost Treats: Skip the orange food coloring and shape the mixture into ghost-like mounds. Use mini chocolate chips for eyes and a mouth, and you’ve got a whole Halloween spread.
I once tried adding pumpkin pie spice to the marshmallow mixture for extra fall flavor. It was good, but the spice overwhelmed the simple marshmallow taste. If you want to try it, start with just 1/4 teaspoon and go from there. Sometimes the simplest version really is the best.
Serving & Storage Suggestions
These treats are best served at room temperature, which lets the marshmallow texture stay soft and chewy. Arrange them on a platter or cake stand for a festive Halloween display. I like to place them on a bed of green lettuce or fake autumn leaves to mimic a pumpkin patch.
For a Halloween party, set up a decorating station where guests can add their own faces. Provide bowls of mini chocolate chips, candy eyes, sprinkles, and different colored frostings. It’s a fun interactive activity that gets everyone involved, and kids especially love it.
Storage: Store leftover treats in an airtight container at room temperature for up to 3 days. If you stack them, place a sheet of wax paper between layers to prevent sticking. Do not refrigerate them—the fridge makes the marshmallows hard and the treats lose their soft, chewy texture.
Freezing: You can freeze these treats for up to 2 months. Place them in a single layer on a baking sheet and freeze until solid, then transfer to a freezer-safe bag or container. To thaw, leave them at room temperature for about 30 minutes. The chocolate faces might get a little cloudy from condensation, but they’ll still taste great.
One thing I’ve noticed: these treats actually taste even better the next day. The flavors meld together, and the marshmallow softens the cereal just a little bit more. So if you’re planning ahead for a Halloween party, making them a day in advance is a smart move.
Nutritional Information & Benefits
Let’s be honest—these are a treat, not a health food. But here’s the estimated nutritional breakdown for one Jack-O-Lantern treat (based on 12 servings):
| Nutrient | Amount per serving |
|---|---|
| Calories | 185 |
| Total Fat | 6g |
| Saturated Fat | 3.5g |
| Cholesterol | 10mg |
| Sodium | 135mg |
| Total Carbohydrates | 32g |
| Dietary Fiber | 0g |
| Sugars | 18g |
| Protein | 2g |
While these treats are definitely on the sweeter side, they do offer a small amount of iron from the fortified cereal. The butter adds a bit of vitamin A, and the chocolate chips provide a touch of antioxidants (hey, it’s something). For a slightly healthier version, you can use a brown rice cereal with more fiber and reduce the marshmallows by half a cup.
If you’re watching your sugar intake, these are best enjoyed as an occasional holiday treat rather than an everyday snack. But honestly, Halloween comes once a year, and sometimes you just need a little fun in the kitchen. Balance is everything.
Conclusion
These Easy No-Bake Rice Krispie Jack-O-Lantern Treats are everything I want in a Halloween dessert—simple, adorable, and absolutely delicious. They come together in minutes with ingredients you probably already have, and they’re so fun to make with kids or friends. The best part? You don’t need any baking skills to pull them off. If you can melt marshmallows and roll them into balls, you’ve got this handled.
I love that this recipe lets you get creative with the faces. Some years I make them all silly and smiling; other years I go for spooky expressions with jagged mouths. Every batch feels different, and every batch brings smiles. That’s the magic of homemade treats—they carry a little bit of your personality in every bite.
So grab your ingredients, put on your favorite Halloween playlist, and get ready to make something that will disappear faster than you can say “trick or treat.” I’d love to hear how yours turn out—leave a comment below and tell me what faces you created. And if you added your own twist to the recipe, share that too. Happy Halloween, friends!
Frequently Asked Questions
Can I use regular food coloring instead of gel?
You can, but I don’t recommend it. Liquid food coloring adds extra moisture to the marshmallow mixture, making it sticky and harder to shape. It also gives a paler, less vibrant orange color. Gel food coloring is much more concentrated and gives you that perfect pumpkin hue without changing the texture.
How do I keep the treats from sticking to my hands?
Lightly grease your hands with butter or cooking spray before shaping each ball. You can also dip your fingers in a small bowl of water between shaping—the moisture creates a barrier that prevents sticking. Reapply as needed throughout the process.
Can I make these treats ahead of time?
Absolutely! These treats actually taste even better the next day. Store them in an airtight container at room temperature for up to 3 days. If you’re making them for a party, I recommend decorating them the day before and storing them in a single layer to keep the faces intact.
My mixture got too hard to shape. What do I do?
Don’t panic! Pop the mixture back in the microwave for 10 to 15 seconds to soften it. Stir gently, and it should become pliable again. Just be careful not to overheat it, or the marshmallows will become too soft and sticky.
Can I use a different cereal instead of Rice Krispies?
Yes, you can substitute with any crispy rice cereal. Brown rice cereal works well for a slightly healthier option, though the texture will be a bit crunchier and less airy. You can also try using cornflakes or puffed rice cereal for a different texture, but keep in mind that the flavor and crunch will vary.
Pin This Recipe!
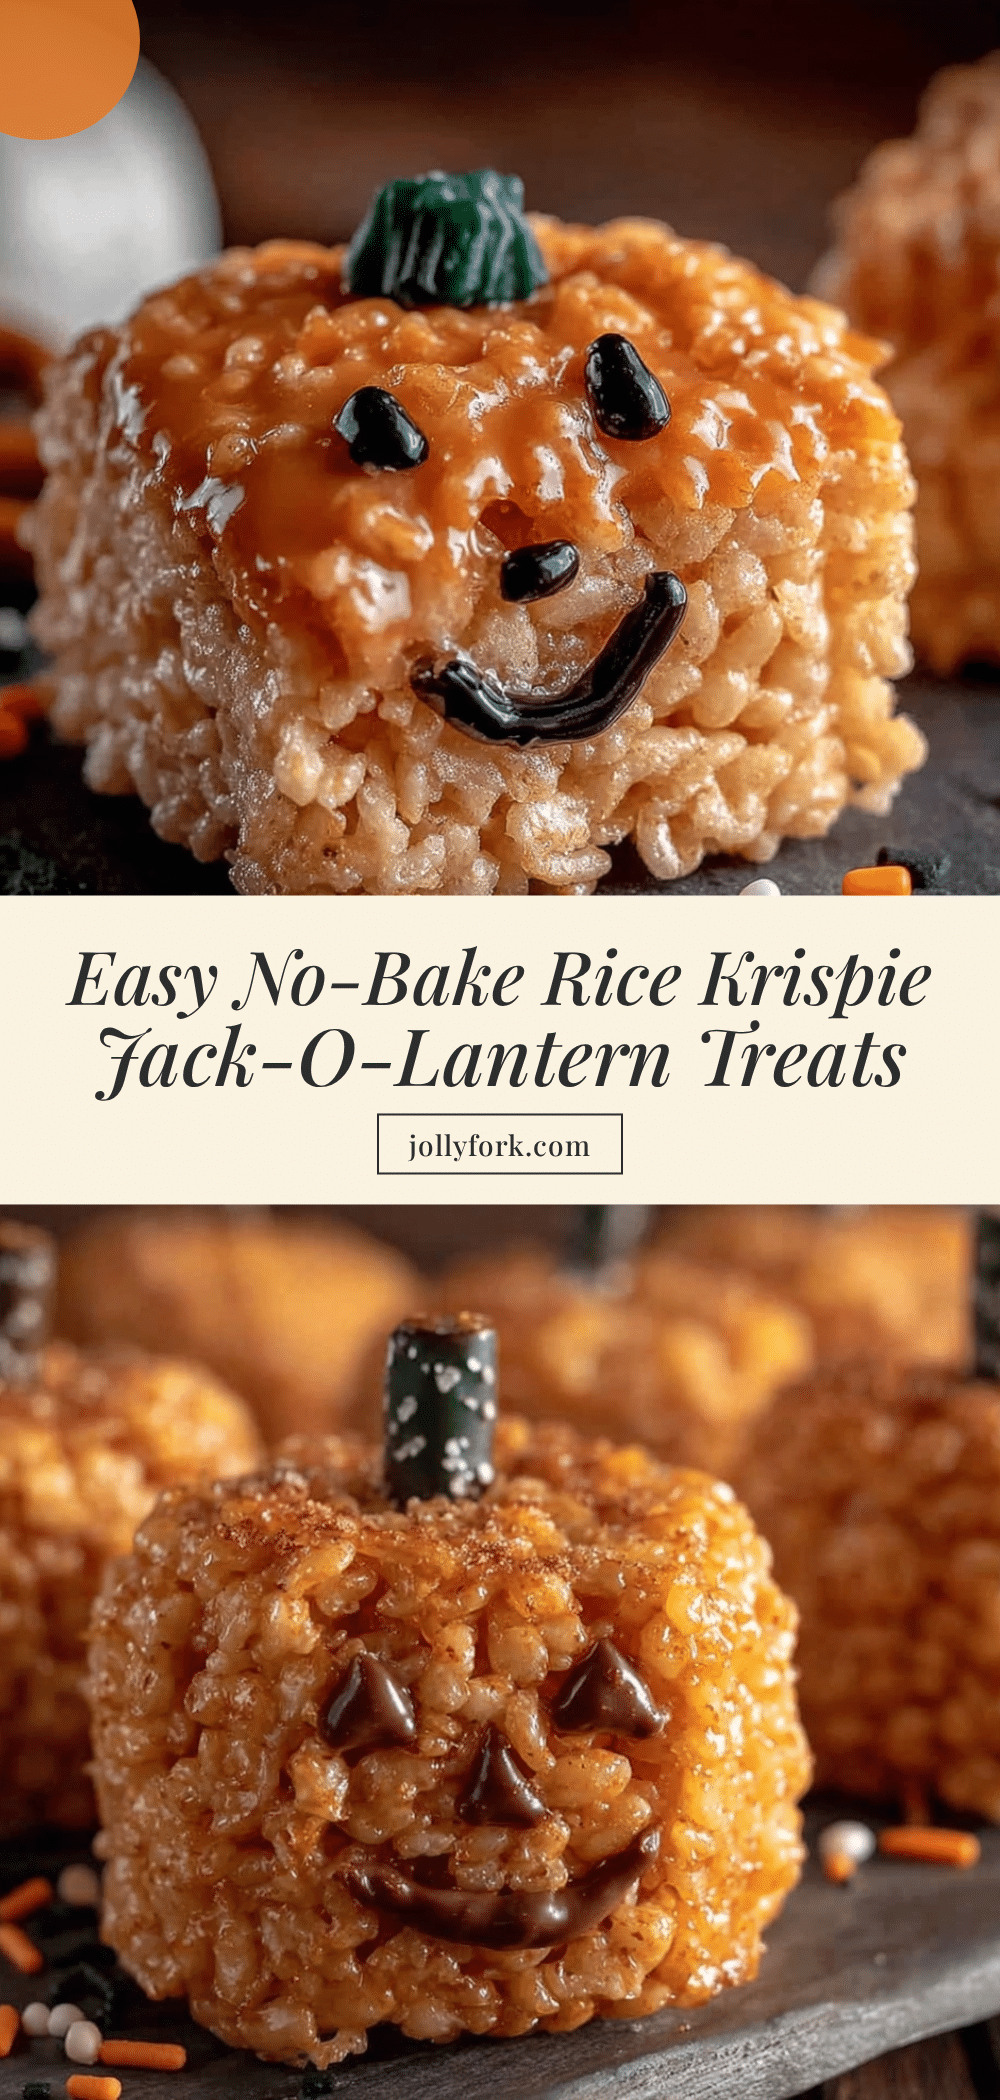
Easy No-Bake Rice Krispie Jack-O-Lantern Treats: Best Halloween Dessert
These no-bake Rice Krispie Jack-O-Lantern treats are a quick and easy Halloween dessert that kids and adults love. Shaped into adorable pumpkin balls with chocolate faces, they’re perfect for parties, classroom celebrations, or spooky movie nights.
- Prep Time: 20 minutes
- Cook Time: 5 minutes
- Total Time: 25 minutes
- Yield: 12 servings 1x
- Category: Dessert
- Cuisine: American
Ingredients
- 6 cups Rice Krispies cereal
- 4 cups mini marshmallows
- 3 tablespoons unsalted butter
- Orange gel food coloring
- 1/2 cup mini chocolate chips
- Green candy melts or green frosting
- 1/2 teaspoon vanilla extract (optional)
- Pinch of salt
Instructions
- Line a large baking sheet or 9×13-inch dish with parchment paper. Lightly grease the paper with butter or cooking spray. Set aside.
- In a large microwave-safe bowl, combine the 3 tablespoons of butter and 4 cups of mini marshmallows. Microwave in 30-second intervals, stirring after each, until the mixture is completely smooth and melted (about 1.5 to 2 minutes total).
- Stir in a few drops of orange gel food coloring until you reach your desired shade. Add the vanilla extract and a pinch of salt if using. Mix well.
- Pour the 6 cups of Rice Krispies cereal into the marshmallow mixture. Fold gently with a wooden spoon or silicone spatula until all the cereal is coated.
- Spread the mixture onto the prepared baking sheet or dish. Let it cool for about 5 minutes, or until it’s cool enough to handle but still warm and pliable.
- Lightly grease your hands with butter or cooking spray. Take a small handful of the mixture (about the size of a golf ball) and roll it into a smooth ball. Place it on the parchment paper. Repeat with the remaining mixture to make about 12 to 15 pumpkin balls.
- While the balls are still slightly warm, press a small piece of green candy melt or a small dab of green frosting onto the top of each ball to create a stem.
- Once the pumpkin balls have cooled completely (about 15 minutes), melt the mini chocolate chips in a small microwave-safe bowl in 20-second intervals, stirring in between. Transfer the melted chocolate to a small piping bag or a zip-top bag with the corner snipped off. Pipe on eyes, noses, and mouths to create Jack-O-Lantern expressions.
- Place the treats in the refrigerator for about 10 minutes to let the chocolate harden.
Notes
Use gel food coloring for best results. Work quickly as the mixture sets fast. Keep hands greased with butter or water to prevent sticking. Let treats cool completely before adding chocolate faces. Store in an airtight container at room temperature for up to 3 days. Do not refrigerate.
Nutrition
- Serving Size: 1 Jack-O-Lantern tre
- Calories: 185
- Sugar: 18
- Sodium: 135
- Fat: 6
- Saturated Fat: 3.5
- Carbohydrates: 32
- Protein: 2
Keywords: Halloween treats, Rice Krispie treats, no-bake dessert, Jack-O-Lantern, pumpkin treats, easy Halloween dessert, kid-friendly


