This was supposed to be a batch of perfectly round, classic chocolate chip cookies for my neighbor’s Halloween block party. I had it all planned out—double the recipe, chilled dough, the works. But then my three-year-old decided to “help” by dumping an entire bottle of black food coloring onto the counter, and in the chaos of cleaning it up, I grabbed the wrong piping tip. I was already running late, the kids were sugared up on candy corn, and I was this close to just buying a bag of store-bought cookies. What came out of that oven was nothing like the plan—and honestly, it was way better. Those first few cookies looked like a happy accident, with little web-like streaks of white icing spiderwebbing across the dark chocolate surface. I mean, I almost cried with relief when I saw them. My neighbor took one bite and asked if I could make them for the party every year. That moment of panic turned into my most requested recipe, and let me tell you, it’s the kind of thing that makes you look like a baking genius without actually trying that hard.
I have made these cookies for every Halloween gathering since, and they never fail to steal the show. The cookie itself is chewy, rich, and loaded with chocolate chips—the perfect canvas for that spooky spider web design. It is the dessert that gets people talking, the one that disappears first from the dessert table, and the one that makes you feel like you pulled off something magic. Maybe you have been there—staring at a Pinterest-perfect idea and wondering how to pull it off without losing your mind. Trust me, this is your shortcut to looking like a pro.
Why You Will Love This Recipe
These spider web chocolate chip cookies are not just another Halloween treat. They are the kind of cookie that makes everyone stop and say, “Wait, you made those?” I have tested this recipe over a dozen times to get the perfect balance of a soft, chewy cookie and a crisp, clean spider web design. Here is why this recipe is a total game-changer for your next party:
- Quick and Easy: The cookie dough comes together in under 15 minutes, and the decorating takes just 5 minutes per batch. Perfect for last-minute party prep.
- Simple Ingredients: You probably have everything in your pantry right now—flour, butter, sugar, chocolate chips. No weird extracts or specialty baking mixes.
- Perfect for Halloween Parties: These cookies are designed to impress a crowd. They look like they came from a fancy bakery but are secretly super simple to make.
- Crowd-Pleaser: Kids and adults both go crazy for them. The chocolate chip cookie base is a universal favorite, and the spider web design adds that wow factor.
- Unbelievably Delicious: The cookie itself is the star—soft in the center, slightly crispy on the edges, and packed with melty chocolate chips. The white icing adds just the right amount of sweetness.
What makes this recipe different from every other Halloween cookie out there is the technique. Instead of trying to pipe intricate designs on a baked cookie, you pipe the icing onto the dough before baking. This creates a beautiful, natural spider web effect that bakes right into the cookie. No smudging, no messy icing bags, no stress. It is the kind of recipe that makes you close your eyes after the first bite—comfort food reimagined for spooky season, with the same soul-soothing satisfaction but a whole lot more fun.
What Ingredients You Will Need
This recipe uses simple, wholesome ingredients to deliver that classic chocolate chip cookie flavor with a spooky twist. Most of these are pantry staples, so you probably do not need a special trip to the store.
- Unsalted butter, softened (1 cup, 2 sticks) – I always use unsalted so I can control the salt level. Let it sit out for 30 minutes before starting.
- Granulated sugar (3/4 cup) – Adds sweetness and helps create those crispy edges.
- Light brown sugar, packed (3/4 cup) – This is the secret to a chewy cookie. The molasses in brown sugar keeps the center soft.
- Large eggs (2, room temperature) – Room temperature eggs mix in more evenly, creating a smoother dough.
- Vanilla extract (2 teaspoons) – Pure vanilla makes a big difference here. I recommend Nielsen-Massey for the best flavor.
- All-purpose flour (2 1/4 cups) – Spoon and level your flour—do not scoop directly from the bag or you will end up with dry cookies.
- Baking soda (1 teaspoon) – Helps the cookies spread just the right amount.
- Salt (1/2 teaspoon) – Balances the sweetness and enhances the chocolate flavor.
- Semi-sweet chocolate chips (2 cups) – I prefer Ghirardelli for their rich flavor and nice melt. You can use milk or dark chocolate if you prefer.
- Black gel food coloring (1 teaspoon) – This is key for the dark cookie base. Americolor brand works great and does not change the taste.
- White icing or royal icing (1/2 cup, store-bought or homemade) – For the spider web design. Wilton white icing in a tube is super easy for beginners.
Ingredient Selection Tips: For the best texture, use fresh baking soda—check the expiration date. If your brown sugar feels hard, microwave it for 10 seconds with a damp paper towel to soften it up. For a dairy-free option, swap the butter with a high-quality vegan butter stick (not the spreadable kind).
Equipment Needed
You do not need a fancy kitchen to pull these off. Here is what you will need:
- Electric mixer (hand or stand) – A hand mixer works perfectly fine. I have used both, and honestly, the hand mixer is easier to clean.
- Large mixing bowl – Any big bowl will do.
- Baking sheets (2) – Light-colored metal sheets work best for even baking. Dark sheets can make the bottoms burn.
- Parchment paper or silicone baking mat – Non-negotiable for easy cleanup and perfect cookie bottoms.
- Piping bag or zip-top bag – For the spider web design. A small zip-top bag with a tiny corner snipped off works great if you do not have a piping bag.
- Cooling rack – Lets the cookies cool evenly so the icing sets properly.
- Measuring cups and spoons – Accurate measurements matter here.
Budget-Friendly Tip: Do not buy a fancy piping set. A zip-top bag with a tiny hole cut in the corner works just as well and costs pennies. I have made these cookies with that method more times than I can count.
Preparation Method

Follow these steps carefully, and you will have the most impressive cookies at the party. I have included timing and sensory cues so you know exactly what to look for at each stage.
- Preheat your oven to 375°F (190°C). Line two baking sheets with parchment paper. This is your insurance policy against sticking.
- Cream the butter and sugars together. In a large bowl, beat the softened butter, granulated sugar, and brown sugar together on medium speed for about 2-3 minutes. You want it light and fluffy—it should look pale and feel airy when you scrape the bowl. Do not skip this step; it is what gives the cookies their tender texture.
- Add the eggs and vanilla. Beat in the eggs one at a time, mixing well after each addition. Then add the vanilla extract. The mixture might look a little curdled at this point—do not panic, that is normal.
- Mix in the black food coloring. Add the black gel food coloring and beat until the dough is a uniform dark gray color. It will darken slightly as it bakes. If you want a deeper black, add a tiny bit more coloring, but go slow—a little goes a long way.
- Combine the dry ingredients. In a separate bowl, whisk together the flour, baking soda, and salt. This ensures the baking soda is evenly distributed so your cookies rise evenly.
- Add the dry ingredients to the wet mixture. Gradually add the flour mixture to the butter mixture, mixing on low speed until just combined. Do not overmix—stop as soon as you no longer see streaks of flour. Overmixing makes tough cookies.
- Fold in the chocolate chips. Use a spatula to gently fold in the chocolate chips. The dough will be thick and slightly sticky—that is perfect.
- Scoop the dough. Use a 2-tablespoon cookie scoop (about the size of a golf ball) to portion the dough onto the prepared baking sheets. Space them about 2 inches apart—they will spread a bit.
- Create the spider web design. This is the fun part. Fill a small piping bag or zip-top bag with the white icing. Snip off a tiny corner (about 1/8 inch). Starting from the center of each cookie dough ball, pipe a small circle. Then pipe 3-4 concentric circles around it, getting larger with each one. Finally, drag a toothpick from the center circle outward through all the rings to create the web effect. Do this 4-5 times around the cookie. The icing should look like a delicate web sitting on top of the dough.
- Bake the cookies. Bake for 9-11 minutes, or until the edges are set and the centers look slightly underdone. The cookies will continue to bake on the hot sheet after you pull them out. The spider web design will bake into the cookie and turn a beautiful golden white.
- Cool on the baking sheet. Let the cookies rest on the baking sheet for 5 minutes. This is critical—if you move them too soon, they will fall apart. Then transfer to a cooling rack to cool completely.
Personal Tip: I always bake just one test cookie first to check the spread and baking time. Every oven runs a little differently, and this saves you from ruining a whole batch.
Cooking Tips and Techniques
I have learned a few things the hard way so you do not have to. Here are my best tips for perfect spider web chocolate chip cookies every time.
Chill the dough if it feels too soft. If your kitchen is warm or your butter was too soft, the dough might spread too much in the oven. Pop the scooped dough balls in the fridge for 15-20 minutes before adding the spider web design. This keeps the cookies thick and chewy.
Do not overbake. I cannot stress this enough. The cookies will look underdone when you pull them out—that is exactly what you want. They will set up perfectly as they cool. Overbaked cookies are dry and crumbly, and the spider web design will crack.
Use a light hand with the toothpick. When dragging the toothpick through the icing to create the web, do not press too hard. You want to gently pull the icing outward, not cut through the dough. A light touch creates those delicate, wispy web lines.
Work in batches. Only decorate as many cookies as will fit on one baking sheet at a time. If the icing sits on the dough too long before baking, it can sink in and lose its definition. I like to scoop and decorate one sheet, bake it, then move on to the next.
Keep the icing thick. If you are using store-bought icing, do not thin it out. Thick icing holds its shape better during baking. If it is too runny, it will just melt into the dough and you will lose the web effect.
Variations and Adaptations
One of the best things about this recipe is how easy it is to customize. Here are a few ways I have switched it up over the years.
Dietary Variations: For a gluten-free version, swap the all-purpose flour with a 1:1 gluten-free baking flour blend. I have used Bob’s Red Mill with great results—just add an extra tablespoon of milk to the dough to keep it from drying out. For a dairy-free option, use vegan butter and dairy-free chocolate chips. The texture will be slightly different, but the spider web design still works beautifully.
Flavor Twists: Add 1/2 teaspoon of peppermint extract along with the vanilla for a mint-chocolate version that screams Halloween. Or swap the semi-sweet chips for white chocolate chips and add orange food coloring to the dough for a pumpkin-spiced look. I once made a batch with cinnamon and nutmeg mixed into the dough, and they tasted like autumn in cookie form.
Spider Web Variations: Instead of white icing, try using orange or green icing for a different spooky look. You can also add a small candy spider (like a black licorice spider or a chocolate-dipped pretzel spider) in the center of each web after baking for an extra creepy touch. I did this for a party last year, and the kids absolutely lost their minds.
Different Cooking Methods: If you are short on oven space, you can make these as cookie bars. Press the dough into a greased 9×13-inch pan, pipe the spider web design across the top, and bake for 20-25 minutes. Cut into squares once cooled. It is a great time-saver for big parties.
Serving and Storage Suggestions
These cookies are best served at room temperature, right after the icing has set. The contrast between the soft, chewy cookie and the slightly firm icing is pure magic. I love arranging them on a black or orange platter with a few fake spider webs draped around for that extra spooky vibe.
What to Serve Alongside: These cookies pair perfectly with a cold glass of milk, a warm apple cider, or even a scoop of vanilla ice cream for a decadent dessert. If you are hosting a party, set them out next to a bowl of candy corn or caramel apples for a full Halloween spread. They also look amazing on a dessert table next to this pumpkin spice bundt cake—the colors complement each other beautifully.
Storage Instructions: Store the cookies in an airtight container at room temperature for up to 5 days. Layer them with parchment paper between each layer to prevent the spider web designs from sticking together. Do not refrigerate them—the fridge dries out cookies and makes them hard.
Freezing Instructions: You can freeze the baked cookies for up to 3 months. Place them in a single layer on a baking sheet and freeze for 1 hour, then transfer to a freezer-safe bag. Thaw at room temperature for 30 minutes before serving. The spider web design holds up perfectly after freezing.
Reheating Tips: If you like your cookies warm, pop one in the microwave for 10-15 seconds. The chocolate chips will get all melty and gooey again. Just do not overheat, or the icing will melt.
Nutritional Information and Benefits
While these are definitely a treat, here is a rough idea of what you are working with per cookie (based on a 2-tablespoon scoop, making about 36 cookies):
- Calories: 180
- Fat: 9g
- Carbohydrates: 24g
- Protein: 2g
- Sugar: 16g
Health Benefits of Key Ingredients: Dark chocolate chips contain antioxidants called flavonoids, which can support heart health. The butter and eggs provide vitamin A and protein, while the small amount of salt helps with electrolyte balance. Of course, these are still a dessert, so enjoy them in moderation—especially around the holidays.
Dietary Considerations: This recipe contains gluten, dairy, and eggs. For those with allergies, the gluten-free and dairy-free variations listed above work wonderfully. Always check your ingredient labels for hidden allergens.
I love that these cookies let me indulge without guilt. One cookie with a cup of tea is the perfect little moment of sweetness on a crisp autumn evening.
Conclusion
These spider web chocolate chip cookies are more than just a Halloween treat—they are the kind of recipe that makes you feel like a baking rockstar without the stress. The happy accident that created them taught me that sometimes the best things in the kitchen come from chaos. That first batch, with its imperfect webs and slightly uneven cookies, was the most loved dessert at that party. And every year since, they have been the first thing to disappear from the table.
I hope you give these a try and make them your own. Add extra chocolate chips, switch up the icing color, or throw a candy spider on top—whatever feels fun to you. The web design is forgiving, the dough is foolproof, and the result is always a showstopper. I would love to hear how yours turn out. Drop a comment below and let me know if your family went as crazy for them as mine did. And if you are looking for more easy Halloween ideas, this no-bake pumpkin cheesecake is another crowd favorite that requires zero oven time. Happy baking, and may your spider webs be perfectly imperfect!
Frequently Asked Questions
Can I make the dough ahead of time?
Absolutely. You can prepare the dough up to 48 hours in advance and keep it covered in the refrigerator. Just let it sit at room temperature for 10 minutes before scooping and decorating, as cold dough is harder to pipe on.
Why did my spider web design disappear during baking?
This usually happens if the icing is too thin or if you piped it too early and it sat too long before baking. Make sure your icing is thick and pipe the design right before the cookies go into the oven.
Can I use regular food coloring instead of gel?
I do not recommend it. Liquid food coloring will thin out the dough and can change the texture. Gel food coloring gives you that deep black color without adding extra liquid.
How do I get the cookies to stay thick and not spread too much?
Chill the scooped dough balls for 15-20 minutes before baking. Also, make sure your butter is softened but not melted. If the dough feels greasy, it is too warm.
Can I use a different icing for the spider web?
Yes! Royal icing works beautifully and dries with a nice firm finish. You can also use melted white chocolate thinned with a tiny bit of coconut oil, but it will be sweeter and set harder.
Pin This Recipe!
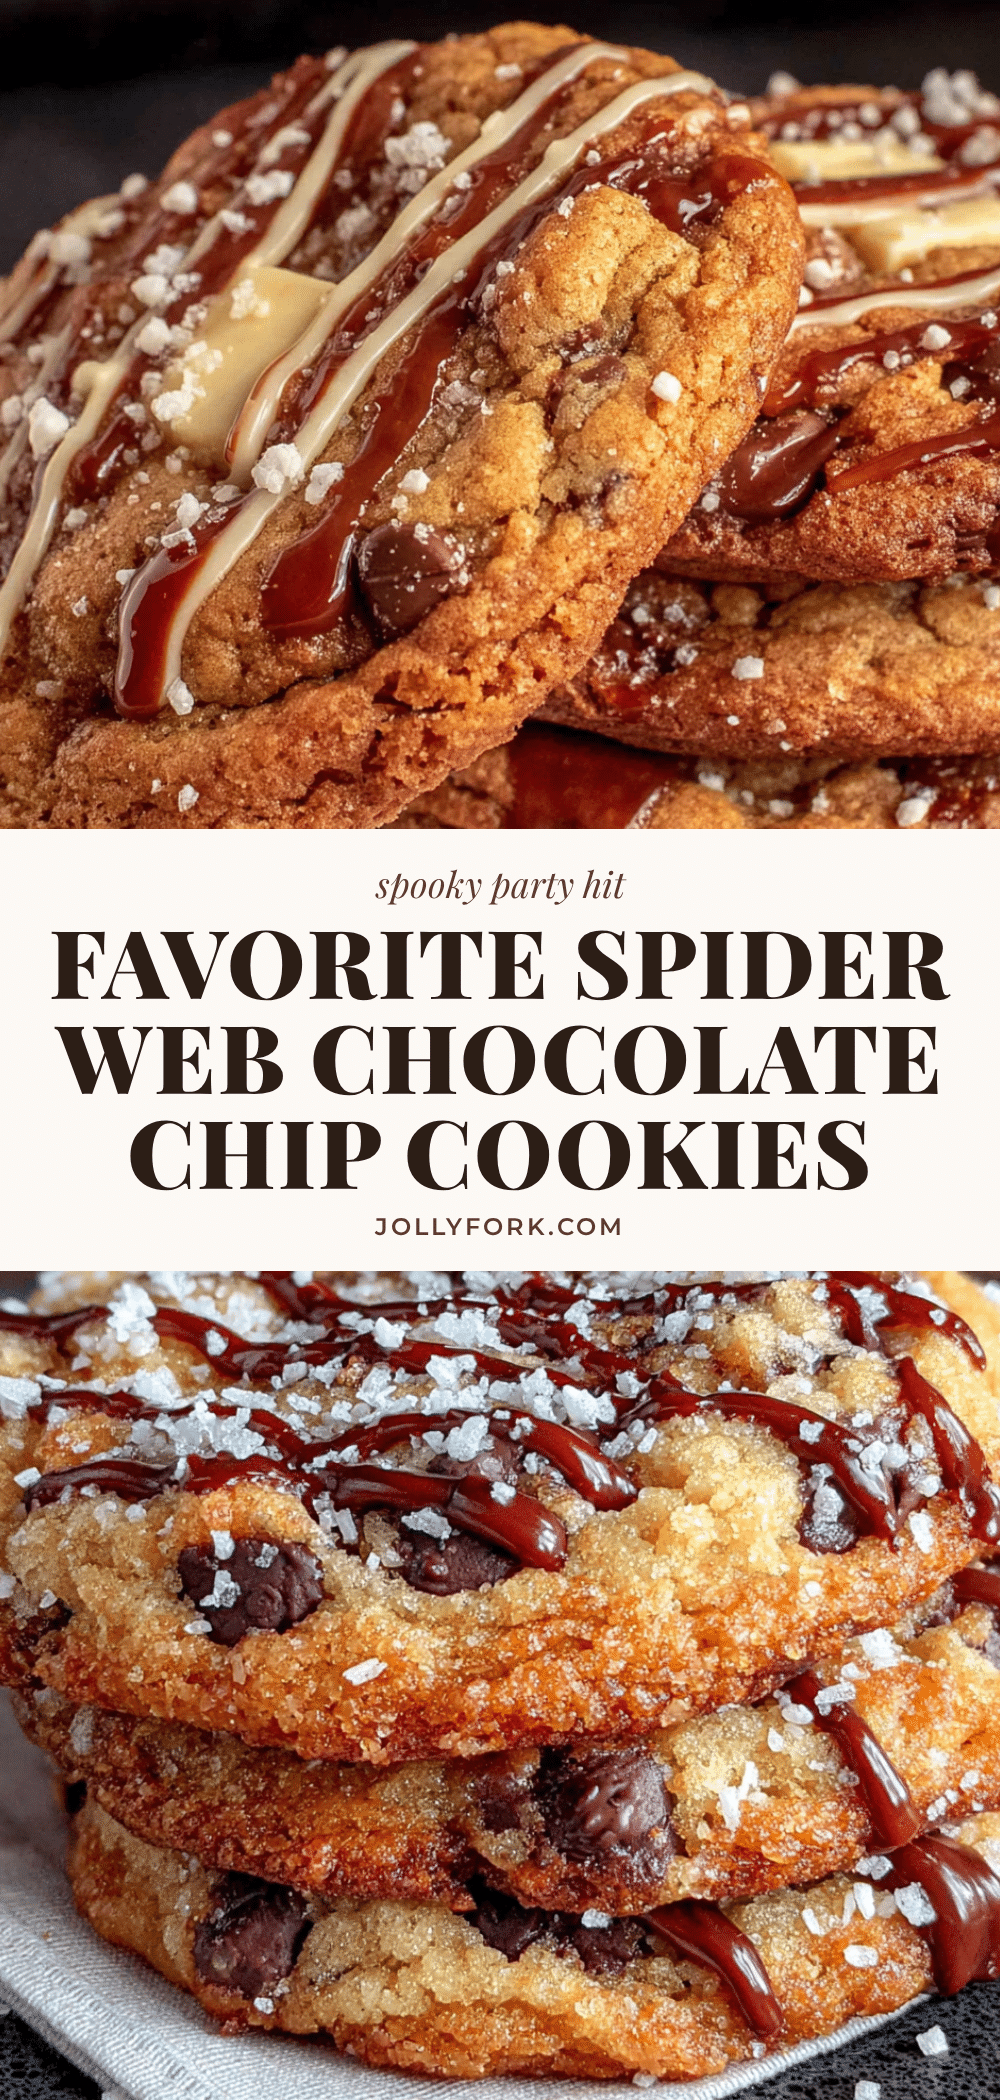
Best Spider Web Chocolate Chip Cookies Recipe – Easy & Fun

These spider web chocolate chip cookies are a fun and easy Halloween treat. The cookie is chewy, rich, and loaded with chocolate chips, topped with a beautiful spider web design that bakes right in.
- Prep Time: 15 minutes
- Cook Time: 10 minutes
- Total Time: 25 minutes
- Yield: 36 cookies 1x
- Category: Dessert
- Cuisine: American
Ingredients
- 1 cup unsalted butter, softened (2 sticks)
- 3/4 cup granulated sugar
- 3/4 cup light brown sugar, packed
- 2 large eggs, room temperature
- 2 teaspoons vanilla extract
- 2 1/4 cups all-purpose flour
- 1 teaspoon baking soda
- 1/2 teaspoon salt
- 2 cups semi-sweet chocolate chips
- 1 teaspoon black gel food coloring
- 1/2 cup white icing or royal icing (store-bought or homemade)
Instructions
- Preheat your oven to 375°F (190°C). Line two baking sheets with parchment paper.
- In a large bowl, beat the softened butter, granulated sugar, and brown sugar together on medium speed for 2-3 minutes until light and fluffy.
- Beat in the eggs one at a time, mixing well after each addition. Add the vanilla extract and mix until combined.
- Add the black gel food coloring and beat until the dough is a uniform dark gray color.
- In a separate bowl, whisk together the flour, baking soda, and salt.
- Gradually add the flour mixture to the butter mixture, mixing on low speed until just combined. Do not overmix.
- Fold in the chocolate chips with a spatula.
- Scoop the dough using a 2-tablespoon cookie scoop and place on the prepared baking sheets, spacing them about 2 inches apart.
- Fill a small piping bag or zip-top bag with the white icing. Snip off a tiny corner. Starting from the center of each cookie dough ball, pipe a small circle, then pipe 3-4 concentric circles around it. Drag a toothpick from the center outward through all the rings to create the web effect. Repeat 4-5 times around the cookie.
- Bake for 9-11 minutes, until the edges are set and the centers look slightly underdone.
- Let the cookies rest on the baking sheet for 5 minutes, then transfer to a cooling rack to cool completely.
Notes
Chill the dough if it feels too soft. Do not overbake. Use a light hand with the toothpick when creating the web. Work in batches to prevent the icing from sinking in. Keep the icing thick.
Nutrition
- Serving Size: 1 cookie
- Calories: 180
- Sugar: 16
- Sodium: 85
- Fat: 9
- Saturated Fat: 5
- Carbohydrates: 24
- Fiber: 1
- Protein: 2
Keywords: spider web cookies, Halloween cookies, chocolate chip cookies, easy Halloween dessert, spooky cookies


