The year I turned thirty, my niece Lucy looked me dead in the eye and said, “Auntie, Thanksgiving is boring.” She was seven, and she wasn’t wrong. The adults were all hunched over their plates, talking about mortgages, while the kids poked at mashed potatoes like they were being asked to eat a science experiment. I wanted to fix it. I wanted something that made them feel like the holiday was actually for them, too. So I grabbed a box of cake mix, some candy corn, and a bag of pretzel sticks, and I started messing around in the kitchen. Honestly, I had no idea what I was doing. I just knew I needed a centerpiece that would make Lucy smile.
What came out of that messy afternoon was a batch of cake pops that looked like tiny turkeys. They were a little lopsided. Some of the candy eyes slid off. One of them looked more like a duck with a bad attitude. But when I set them on the dessert table, the kids went absolutely silent for a second. Then they cheered. And that, let me tell you, was a better feeling than any perfectly roasted bird could ever give me. These Kid-Approved Thanksgiving Turkey Cake Pops became my secret weapon for keeping the little ones happy while the grown-ups do their thing.
Maybe you’ve been there—trying to find a treat that actually gets kids excited about a holiday that can feel pretty adult-heavy. These cake pops are the answer. They are fun to make, even more fun to eat, and they let you turn a simple dessert into a craft project the whole family can enjoy. I’ve made them every year since that first experiment, and they never fail to bring a little chaos and a lot of joy to the table.
Why You’ll Love This Recipe
Let’s face it: most Thanksgiving desserts are for grown-ups. Pumpkin pie, pecan tart, maybe a fancy cheesecake. Kids look at that spread and think, “Where’s the chocolate?” These Turkey Cake Pops are the perfect solution because they are designed with tiny taste buds in mind. I’ve tested this recipe on my own picky eaters, and I can tell you with confidence—it works.
- Kid-Friendly Fun: This isn’t just a dessert; it’s an activity. Kids can help roll the balls, stick on the candy, and arrange the feathers. It keeps little hands busy while you handle the turkey.
- Simple Ingredients: You probably have most of these things in your pantry right now. A box of cake mix, some frosting, and a bag of candy corn. No special trips to a fancy baking store required.
- Perfect for Thanksgiving Day: These little turkeys make the best centerpiece for the kids’ table. They look impressive but take way less effort than a full pie.
- Crowd-Pleaser: I have never, not once, seen a kid turn these down. The adults sneak them too, honestly. They are just that good.
- Unbelievably Delicious: The combination of moist cake, creamy frosting, and crunchy candy coating is pure comfort food magic. It’s like a birthday cake and a candy bar had a baby.
What makes this recipe different from all the other cake pop tutorials out there? It’s the method. I use a little trick to keep the pops from falling off the sticks—a common nightmare that has ruined many a baker’s afternoon. I also use a specific type of candy coating that sets up hard and shiny, so your turkeys look professional without any stress. This isn’t just another version of a cake pop. It’s the version that works, every single time.
These cake pops are the kind of treat that makes you close your eyes after the first bite. They are comfort food reimagined for the younger crowd—faster, sweeter, and with the same soul-soothing satisfaction as a slice of grandma’s pie. Perfect for impressing the little guests without making yourself crazy.
What Ingredients You Will Need
This recipe uses simple, everyday ingredients to create something that feels special. You don’t need to hunt down anything exotic—just grab these items on your next grocery run.
For the Cake Pops
- 1 box chocolate or vanilla cake mix (I prefer Duncan Hines for its moist texture; any brand works fine)
- Ingredients called for on the cake mix box (usually eggs, oil, and water)
- 1/2 cup prepared chocolate or vanilla frosting (store-bought is fine; I use Pillsbury for consistency)
For the Coating & Decoration
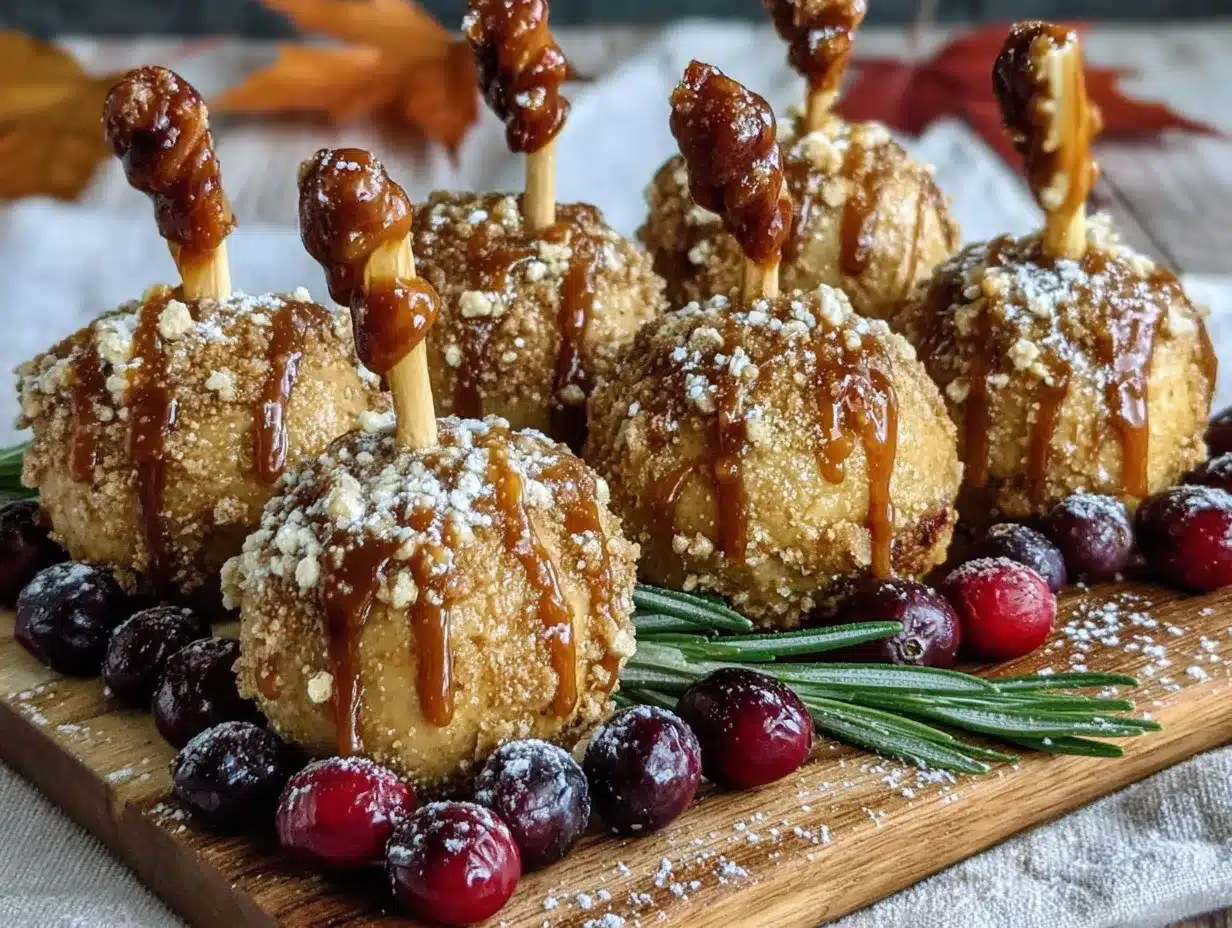
- 12 oz (340g) orange candy melting wafers (Wilton brand melts smoothly; look for them in the baking aisle)
- 1 tablespoon coconut oil or vegetable shortening (this thins the coating and makes it easier to dip)
- 1/2 cup candy corn (for the feathers; use the classic autumn mix)
- 1/4 cup candy eyes (available at craft stores; or use small white chocolate chips with a dot of black icing)
- 1/4 cup small candy corn pieces (for the beak; cut the white tip off each piece)
- Red decorating gel (for the wattle; a tiny squirt is all you need)
- Brown candy melting wafers (optional, for the turkey body; you can also use orange for a simpler look)
For Assembly
- 20 lollipop sticks (6-inch size works best)
- 1 block styrofoam (to hold the pops upright while they set)
Ingredient Tips: Look for candy melting wafers that are specifically labeled for dipping. They set up harder than regular chocolate chips and won’t bloom or get streaky. If you can’t find orange wafers, you can use white wafers and add orange food coloring, but be careful—oil-based coloring works best. For the cake, I recommend using a box mix because it stays moist longer than homemade cake, which is important for cake pops. If you want to make it from scratch, use a recipe with a high fat content.
Substitution Guidance: For a gluten-free version, use a gluten-free cake mix and check that your candy wafers are certified gluten-free. You can swap the chocolate cake for a yellow or funfetti mix—kids love the sprinkles inside. If you don’t have candy corn, use small pieces of dried apricot or orange jelly beans cut in half. The look will be different, but the taste will still be great.
Equipment Needed
You don’t need a professional bakery setup to make these. Here is what you will need:
- Large baking sheet (to freeze the cake balls on)
- Parchment paper (to line the baking sheet; prevents sticking)
- Large microwave-safe bowl (for melting the candy coating)
- Lollipop sticks (available at craft stores or online; don’t use wooden skewers—they are too thin)
- Styrofoam block (to hold pops upright; a flower arranging block works perfectly)
- Small cookie scoop (for uniform cake balls; I use a 1-tablespoon scoop)
- Piping bag or small zip-top bag (for applying the decorating gel)
- Toothpicks (for placing small candies; tweezers also work in a pinch)
I learned the hard way that a good styrofoam block is non-negotiable. The first time I made these, I tried to balance the pops on a wire rack, and they all slid off and made a huge mess. Spend the two dollars on a block—it saves your sanity. Also, if you don’t have a cookie scoop, just use a tablespoon measure and roll the balls by hand. They won’t be perfectly uniform, but that adds to the homemade charm.
Preparation Method
This method is broken down into simple steps. Take your time, especially with the dipping part—it’s the trickiest bit, but I have tips to make it easy.
- Bake the cake. Prepare the cake mix according to the package directions. Bake it in a 9×13 inch pan. Let it cool completely. This is crucial—warm cake will crumble and make a dense, sticky mess. I usually bake it the night before and let it sit on the counter overnight.
- Crumble the cake. Once the cake is cool, use your hands to crumble it into a large bowl. Break it up until there are no big chunks left. It should look like coarse sand. This step is oddly satisfying—let the kids help if they want.
- Add the frosting. Add 1/2 cup of frosting to the crumbled cake. Use a spatula or your hands to mix it together. The mixture should hold together when you squeeze it. If it’s too dry, add a tablespoon more frosting. If it’s too wet, add a little more cake crumb. I always start with less frosting—you can add more, but you can’t take it out.
- Roll the balls. Scoop out portions of the mixture and roll them into 1-inch balls. Place them on a parchment-lined baking sheet. You should get about 20 balls. Pop the sheet into the freezer for 15 minutes. This firms them up so they don’t fall apart when you dip them.
- Melt the coating. Place the orange candy wafers in a microwave-safe bowl. Add 1 tablespoon of coconut oil. Microwave in 30-second bursts, stirring each time, until smooth. Don’t overheat—candy coating burns easily and gets lumpy.
- Insert the sticks. Take the cake balls out of the freezer. Dip the tip of a lollipop stick into the melted coating, then insert it about halfway into a cake ball. This acts like glue and keeps the ball from sliding off. Repeat for all the balls, then return them to the freezer for another 10 minutes.
- Dip the pops. Hold a cake pop by the stick and dip it into the melted coating. Gently tap the stick on the edge of the bowl to let excess coating drip off. Don’t swirl it—that can break the ball off the stick. Lift it out and let the excess drip for a few seconds.
- Add the decorations immediately. While the coating is still wet, stick on the candy corn feathers. Place three pieces of candy corn in a fan shape on the back of the pop. Then add two candy eyes and a small piece of candy corn for the beak. Use a toothpick to add a tiny dot of red gel for the wattle. Work fast—the coating sets in about 30 seconds.
- Let them set. Stick the finished pops into the styrofoam block. Let them sit at room temperature until the coating is completely hard, about 30 minutes. Don’t put them in the fridge—condensation will make the coating sticky and dull.
Troubleshooting Tip: If a cake ball falls off the stick while dipping, don’t panic. Just scoop it out of the coating, re-roll it, and freeze it again. It happens to everyone. I’ve lost count of how many I’ve fished out of the bowl over the years.
Cooking Tips & Techniques
I have made more mistakes with cake pops than I care to admit. Here is what I learned so you don’t have to repeat my failures.
The Freezer is Your Best Friend. Cold cake balls are sturdy cake balls. Never skip the freezing step. If the balls are even slightly warm, they will crumble the moment you try to dip them. I once tried to rush this step, and I ended up with a bowl of orange-coated crumbs. It was not pretty.
The Glue Stick Trick. Dipping the stick in coating before inserting it into the ball is the single most important tip I can give you. It creates a bond that keeps the pop from sliding off. I learned this after my first batch of pops slid right off the sticks and landed in the coating bowl like sad little swimmers.
Thin the Coating. Candy wafers straight out of the bag are often too thick for dipping. Adding a little coconut oil or shortening thins them out, which means the coating will be lighter and less likely to crack. It also makes the dipping process faster and smoother.
Work in Small Batches. Don’t try to dip all 20 pops at once. Take out 5 cake balls from the freezer at a time. Keep the rest cold. This prevents them from warming up and falling apart. It also gives you time to decorate each one before the coating sets.
The Tap, Don’t Swirl Rule. When you lift a dipped pop out of the coating, tap the stick gently on the edge of the bowl. Do not swirl it around. Swirling creates a weak point where the stick meets the ball, and that is exactly where it will break. Tap, tap, tap—that’s the rhythm.
Variations & Adaptations
One of the best things about this recipe is how easy it is to change up. Here are a few ways I have adapted it over the years.
Chocolate Turkey Pops: Use a chocolate cake mix and chocolate frosting. Coat the pops in brown candy wafers instead of orange. Use candy corn for the feathers, but use white chocolate chips for the eyes and a small piece of red licorice for the wattle. These look more like real turkeys and taste like a fudge brownie.
Pumpkin Spice Version: Swap the cake mix for a pumpkin spice cake mix. Use cream cheese frosting instead of regular frosting. The orange coating already matches the pumpkin theme. Add a tiny leaf-shaped candy on top for extra fall flair. This version is always a hit at my friend Sarah’s annual Thanksgiving brunch.
Gluten-Free Option: Use a gluten-free yellow cake mix and gluten-free frosting. Check that your candy wafers are labeled gluten-free. The texture will be slightly more crumbly, so be extra careful with the freezing step. I’ve made these for my neighbor who has celiac disease, and she said they were the first gluten-free cake pops she actually enjoyed.
Mini Turkey Bites: Instead of lollipop sticks, roll the cake mixture into 1/2-inch balls. Dip them in the coating and place them on parchment paper. Decorate them the same way, but use mini candy corn pieces. These are perfect for toddlers who might choke on a stick, and they make great lunchbox surprises.
Serving & Storage Suggestions
These cake pops are best served at room temperature. Take them out of the styrofoam block and arrange them on a platter. I like to place them around a small bowl of cranberry sauce or a little pumpkin—it makes the table look festive without any extra effort.
Presentation Idea: For the kids’ table, stick the pops into a small pumpkin that has been hollowed out and filled with styrofoam. It looks adorable and keeps the pops upright. Just make sure the pumpkin is stable so it doesn’t tip over.
Storage: Store leftover cake pops in an airtight container at room temperature for up to 3 days. Do not refrigerate them—the coating will sweat and become sticky. If you need to store them longer, freeze them in a single layer on a baking sheet, then transfer them to a freezer bag. They will keep for up to 2 months. Thaw them at room temperature for about 30 minutes before serving.
Reheating: You don’t need to reheat these, but if they have been frozen, let them come to room temperature slowly. Don’t microwave them—the coating will melt and the cake will get mushy. Just be patient.
Flavor Development: These cake pops actually taste better the next day. The flavors meld together overnight, and the cake gets even more moist. I always try to make them a day ahead if I can. It saves me stress on Thanksgiving morning, and the pops are at their peak.
Nutritional Information & Benefits
Let’s be real: these are a treat, not a health food. But here is the estimated nutritional breakdown for one cake pop (based on using chocolate cake and standard ingredients):
- Calories: 180
- Total Fat: 8g
- Saturated Fat: 4g
- Carbohydrates: 26g
- Sugar: 18g
- Protein: 2g
Health Benefits: The cake provides a small amount of iron and B vitamins from the enriched flour. The candy coating contains a little bit of antioxidants from the cocoa if you use chocolate wafers. Honestly, the biggest benefit here is the joy factor. Sharing these with kids creates a positive memory around food, and that has real emotional value.
Dietary Considerations: These cake pops contain gluten, dairy, and eggs. For a dairy-free version, use a dairy-free cake mix, vegan frosting, and dairy-free candy wafers. For an egg-free version, use an egg replacer in the cake mix. Always check labels if you are cooking for someone with allergies.
Personal Perspective: I believe in balance. We eat salads and roasted vegetables most of the time, but on Thanksgiving, I let the kids have something purely fun. These cake pops are part of that philosophy. They are not nutritious in the traditional sense, but they nourish the spirit of the holiday. That counts for something.
Conclusion
These Kid-Approved Thanksgiving Turkey Cake Pops are more than just a dessert. They are a way to include the little ones in the celebration, to give them something that feels like it was made just for them. I love watching the kids’ faces light up when they see the turkey pops on the table. It reminds me why I started making them in the first place.
I encourage you to make these your own. Use your kids’ favorite cake flavor. Let them decorate the pops however they want. Maybe one turkey ends up with three eyes and a crooked beak—that’s perfect. That is the memory you will laugh about for years. The recipe is just a starting point. The magic is in the mess you make together.
If you try these, I would love to hear how they turned out. Drop a comment below and tell me about your turkey pop adventures. Did your kids help? Did anyone’s pop fall off the stick? Share your stories—I promise I have been there too. And if you have a favorite variation, let me know. I am always looking for new ideas to try next Thanksgiving.
Happy Thanksgiving, friends. May your table be full, your turkey be golden, and your cake pops stay on their sticks.
Frequently Asked Questions
Can I use homemade cake instead of a box mix?
Yes, you can. Just make sure the cake is very moist. Dry cake will crumble too much and won’t hold together well. I recommend using a recipe with a high fat content, like a sour cream pound cake. Let it cool completely before crumbling.
Why did my cake pops fall off the sticks?
This usually happens for two reasons. First, the cake balls were too warm when you dipped them. Make sure they are frozen solid. Second, you might not have dipped the stick in coating before inserting it. That little bit of “glue” is essential for keeping the ball on the stick.
Can I make these ahead of time?
Absolutely. You can make the cake balls and freeze them on the baking sheet. Once frozen, transfer them to a freezer bag. When you are ready to dip, just take out what you need and let them sit at room temperature for 5 minutes before dipping. You can also make the fully decorated pops up to 3 days ahead and store them in an airtight container at room temperature.
What if I can’t find orange candy wafers?
No problem. Use white candy wafers and add orange oil-based food coloring. Regular water-based coloring will seize the coating and make it lumpy. You can also use yellow wafers and mix in a little red coloring to make orange. Or just use brown wafers and call them chocolate turkeys—they taste just as good.
How do I keep the candy eyes from sliding off?
Press the eyes into the coating while it is still wet. If the coating has already set, dip the back of the eye in a tiny bit of melted coating and then press it onto the pop. It will act like glue. I keep a small bowl of melted coating handy just for this purpose.
Pin This Recipe!
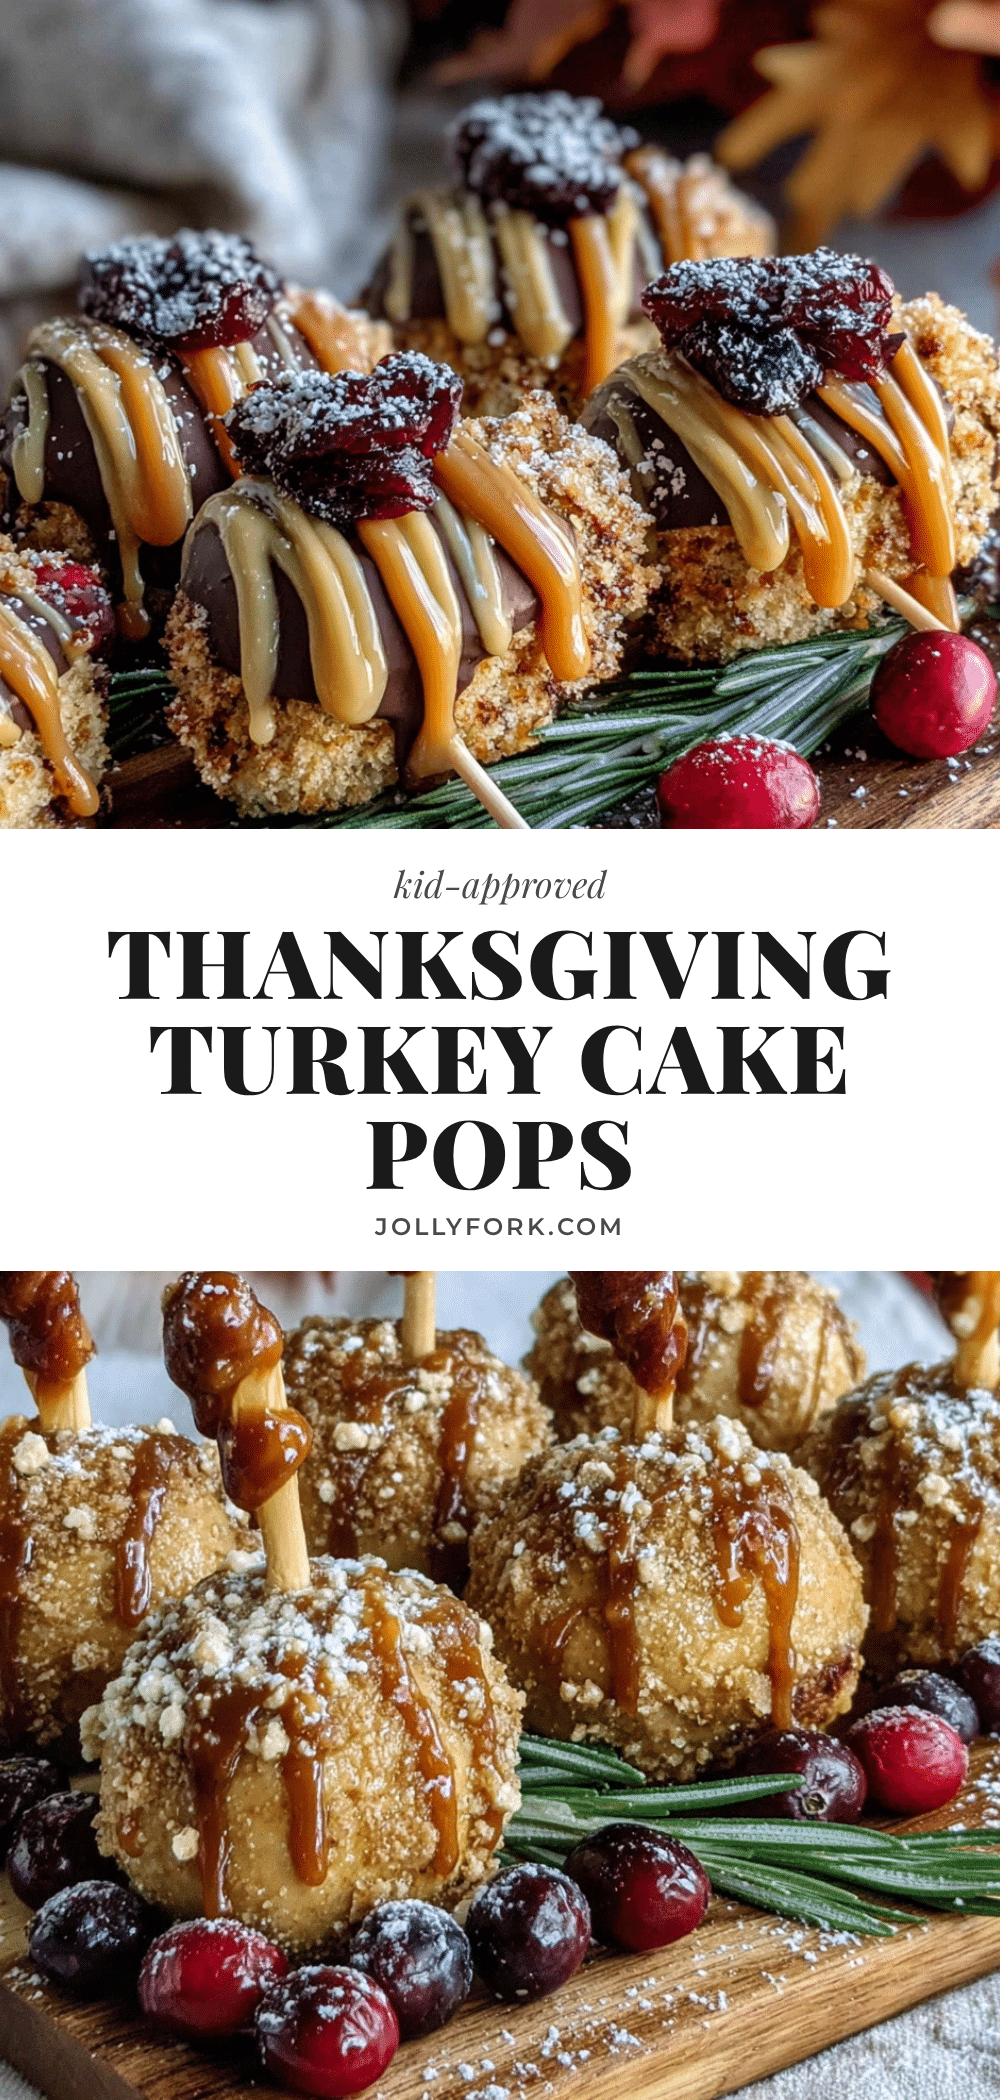
Kid-Approved Thanksgiving Turkey Cake Pops: Easy Holiday Treat

These adorable turkey cake pops are the perfect kid-friendly Thanksgiving dessert. Made with simple ingredients like cake mix, frosting, and candy corn, they’re fun to make and even more fun to eat, guaranteed to bring joy to the kids’ table.
- Prep Time: 30 minutes
- Cook Time: 30 minutes
- Total Time: 1 hour 30 minutes
- Yield: 20 servings 1x
- Category: Dessert
- Cuisine: American
Ingredients
- 1 box chocolate or vanilla cake mix (Duncan Hines recommended)
- Ingredients called for on the cake mix box (usually eggs, oil, and water)
- 1/2 cup prepared chocolate or vanilla frosting (Pillsbury recommended)
- 12 oz (340g) orange candy melting wafers (Wilton brand recommended)
- 1 tablespoon coconut oil or vegetable shortening
- 1/2 cup candy corn (classic autumn mix)
- 1/4 cup candy eyes (or small white chocolate chips with black icing)
- 1/4 cup small candy corn pieces (for beak, white tip cut off)
- Red decorating gel (for wattle)
- Brown candy melting wafers (optional, for turkey body)
- 20 lollipop sticks (6-inch size)
- 1 block styrofoam (to hold pops upright)
Instructions
- Bake the cake according to package directions in a 9×13 inch pan. Let cool completely.
- Crumble the cooled cake into a large bowl until it resembles coarse sand.
- Add 1/2 cup frosting to the crumbled cake and mix until it holds together when squeezed. Add more frosting if too dry, or more cake if too wet.
- Roll the mixture into 1-inch balls and place on a parchment-lined baking sheet. Freeze for 15 minutes.
- Melt orange candy wafers with 1 tablespoon coconut oil in a microwave-safe bowl in 30-second bursts, stirring until smooth.
- Remove cake balls from freezer. Dip the tip of a lollipop stick into the melted coating, then insert it halfway into a cake ball. Repeat for all balls, then freeze for another 10 minutes.
- Hold a cake pop by the stick and dip it into the melted coating. Gently tap the stick on the bowl edge to remove excess. Do not swirl.
- Immediately decorate while coating is wet: press 3 candy corn pieces in a fan shape on the back for feathers, add 2 candy eyes, a small candy corn piece for the beak, and a dot of red gel for the wattle.
- Place finished pops into a styrofoam block and let set at room temperature for about 30 minutes until coating is hard.
Notes
Freeze cake balls thoroughly before dipping to prevent crumbling. Dip the stick in coating before inserting into the ball to keep it from sliding off. Work in small batches to keep cake balls cold. Tap, don’t swirl, when dipping to avoid breaking the pop off the stick. Store in an airtight container at room temperature for up to 3 days; do not refrigerate as coating will sweat.
Nutrition
- Serving Size: 1 cake pop
- Calories: 180
- Sugar: 18
- Sodium: 150
- Fat: 8
- Saturated Fat: 4
- Carbohydrates: 26
- Protein: 2
Keywords: Thanksgiving, turkey cake pops, kid-friendly, holiday treat, easy dessert, cake pops, candy corn


