My neighbor Sarah wasn’t trying to impress anyone. I’d stopped by to borrow a bundt pan—mine had mysteriously vanished after last Thanksgiving—and the smell hit me before I even got through her screen door. It was that unmistakable mix of melted white chocolate and cool peppermint, the kind of scent that instantly makes you think of snow days and cozy sweaters. Honestly, I stood there in her doorway for a solid ten seconds just breathing it in.
Sarah looked up from her mixing bowl, flour dusted across her favorite worn-out sweatshirt, and just shrugged when I asked what she was making. “Oh, just those crinkle cookies again. My kids inhale them.” She said it like it was nothing—like she wasn’t standing there creating little clouds of peppermint-scented magic. Let me tell you, I forgot all about the bundt pan. I ended up staying for an hour, watching her work, sneaking a warm cookie off the cooling rack when she wasn’t looking.
That first bite stopped me cold. The outside had that perfect crinkle—cracked and snowy, like a winter windowpane—and the inside was soft, almost fudgy, with bits of crushed candy cane that melted on your tongue. And then there was the white chocolate, not too sweet, just creamy enough to balance the peppermint kick. I mean, I’ve had a lot of holiday cookies in my day, but these? These were different. Maybe you’ve been there—you taste something at a friend’s house and you know you’re not going to rest until you can make it yourself.
Sarah finally shared the recipe with me, and I’ve been tweaking it ever since. Three winters later, this is my absolute go-to for holiday baking. They’re the cookies I bring to every cookie swap, the ones my own family now “inhales” before I can even get them stored away. And the best part? They look like you fussed for hours, but honestly? They come together in no time. Let’s get baking.
Why You’ll Love This Recipe
I’ve tested this recipe more times than I care to admit. The first batch? Too flat. The second? Not enough peppermint kick. But this version right here—this is the one that finally made my neighbor Sarah nod and say, “Okay, you nailed it.” Here’s why these cookies are worth every bit of butter and sugar:
- Quick & Easy: From mixing bowl to cooling rack in under 30 minutes. Perfect for those last-minute holiday cravings or when you realize you need a hostess gift in an hour.
- Simple Ingredients: No weird specialty items here. Butter, sugar, flour, eggs—the usual suspects—plus white chocolate chips and candy canes. You probably already have most of this in your pantry.
- Perfect for the Holidays: These cookies scream Christmas. They’re great for cookie swaps, holiday parties, or just making your kitchen smell like a winter wonderland on a snowy afternoon.
- Total Crowd-Pleaser: I’ve brought these to three different cookie swaps now, and I’ve never brought a single one back home. Kids love them, adults love them, even my aunt who “doesn’t do peppermint” ate four.
- Unbelievably Delicious: The texture is what gets everyone. That crackly, powdered sugar outside gives way to this soft, almost chewy center with little bursts of peppermint and creamy white chocolate. It’s next-level comfort food.
What makes this recipe different from all the other crinkle cookies out there? It’s the technique. Most recipes have you chill the dough for hours—who has time for that during the holiday rush? I figured out a way to get that perfect crinkle without the wait. Plus, I use a specific ratio of white chocolate to peppermint that took me six batches to perfect. Not too sweet, not too minty—just right.
This recipe isn’t just good—it’s the kind that makes you close your eyes after the first bite. It’s comfort food reimagined for the holidays: festive enough for company, but easy enough for a random Tuesday night when you just need a cookie and a cup of tea. Perfect for impressing guests without stress, or turning a simple baking afternoon into something memorable.
What Ingredients You Will Need
This recipe uses simple, wholesome ingredients to deliver that perfect holiday flavor. Most of these are pantry staples, but a couple of them are worth a special trip to the store. Let me walk you through what you’ll need and why each one matters.
For the Cookie Dough
- 1 cup (2 sticks) unsalted butter, softened to room temperature (I prefer Land O’Lakes for consistent results—it really does make a difference in the texture)
- 1 cup granulated sugar (adds sweetness and helps create that crackly top)
- 1 large egg, room temperature (cold eggs can seize the dough and make it harder to mix)
- 1 teaspoon vanilla extract (use pure, not imitation—trust me on this one)
- 1/2 teaspoon peppermint extract (this is where the magic happens—don’t skip it)
- 2 cups all-purpose flour (spoon and level it—don’t scoop straight from the bag or you’ll end up with dry cookies)
- 1/2 cup unsweetened cocoa powder (I use Hershey’s, but any brand works—this gives the cookies that beautiful dark base that contrasts with the white chocolate)
- 1 teaspoon baking powder (helps with that perfect crinkle)
- 1/2 teaspoon salt (balances the sweetness—don’t leave it out)
For the Mix-Ins and Topping
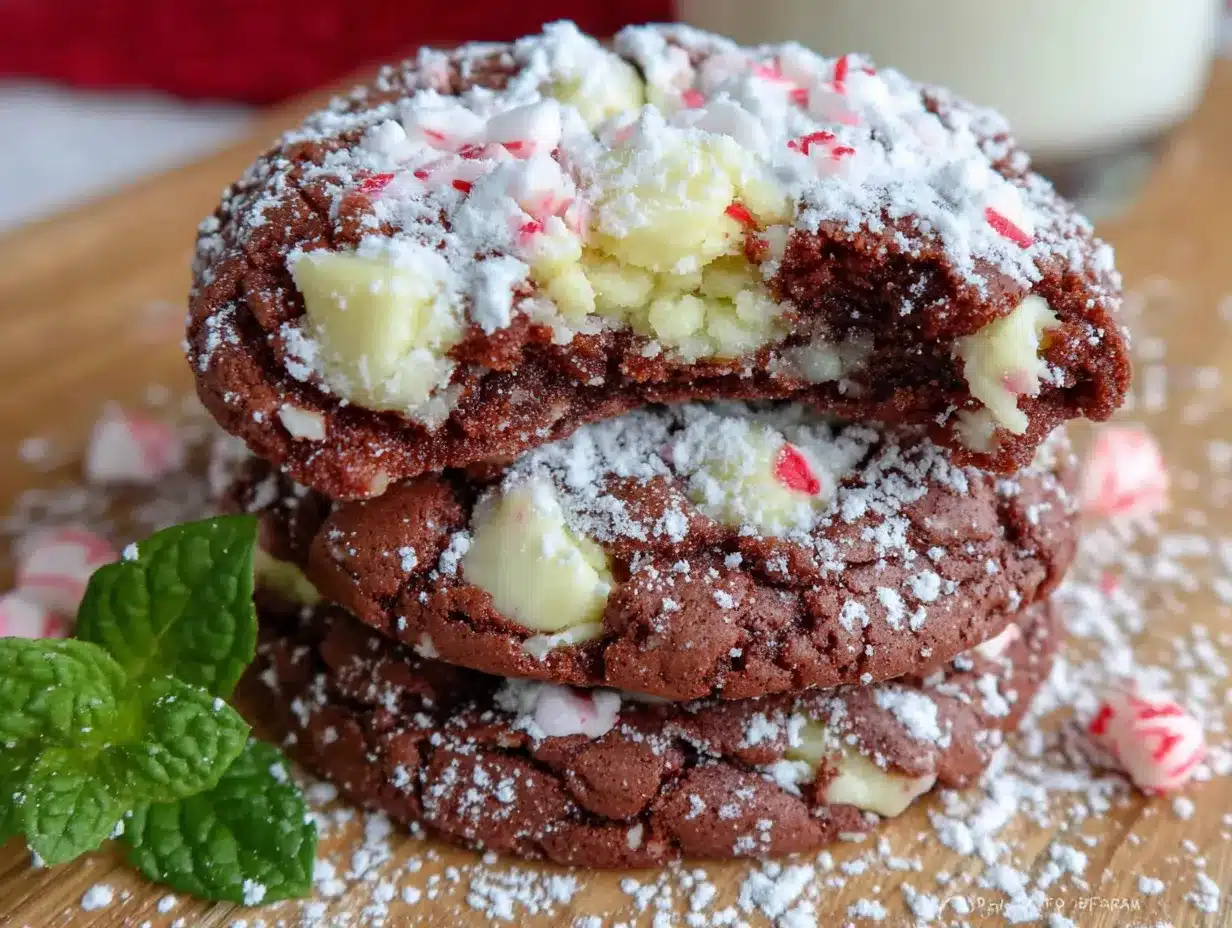
- 1 cup white chocolate chips (I recommend Ghirardelli or Guittard—they melt more evenly and don’t get that weird waxy texture some brands have)
- 1/2 cup crushed candy canes or peppermint candies (about 4-5 full-size candy canes—just pop them in a ziplock bag and go at them with a rolling pin)
- 1/2 cup powdered sugar, for rolling (this is what creates that signature crinkle look)
Ingredient Tips from My Kitchen
Let me share a few things I’ve learned the hard way. First, the peppermint extract—start with 1/2 teaspoon. I got a little heavy-handed once and ended up with cookies that tasted like toothpaste. Not my finest moment. You can always add more, but you can’t take it out.
For the candy canes, look for the classic red-and-white striped ones. The fancy gourmet ones have different flavor profiles that don’t always work the same way. And please, please don’t buy pre-crushed candy—it’s usually too fine and turns into dust in the dough. You want little pieces, not powder.
If you’re in a pinch and don’t have candy canes, you can use starlight mints instead. Just crush them the same way. The flavor is slightly different—a bit more intense—but still delicious. For a dairy-free version, use vegan butter and dairy-free white chocolate chips. I’ve tested it with Earth Balance and Enjoy Life chips, and it works beautifully.
Equipment Needed
You don’t need a fancy kitchen to make these cookies. Here’s what I use, along with a few alternatives if you’re working with what you’ve got:
- Large mixing bowl and electric mixer (hand mixer works great—I actually prefer it to my stand mixer for this recipe because it’s easier to scrape the sides)
- Baking sheets (I use two Nordic Ware half-sheet pans—they don’t warp in the oven and give you even baking)
- Parchment paper or silicone baking mats (parchment is cheaper, but silicone mats last forever—I’ve had my Silpat for eight years and it’s still going strong)
- Cooling rack (any wire rack works—I bought a basic one at the grocery store for $8)
- Ziplock bag and rolling pin (for crushing candy canes—you could also use a food processor, but honestly, the bag method is more satisfying and gives you better control over the texture)
- Small bowl for powdered sugar (for rolling the dough balls)
- Cookie scoop (a 1.5-tablespoon scoop makes perfectly uniform cookies—I got mine at Target for $6)
One tip about the cookie scoop: if you don’t have one, just use two spoons. It’s not as pretty, but the cookies will taste exactly the same. And if your baking sheets are dark-colored, reduce the oven temperature by 25 degrees—dark pans absorb more heat and can burn the bottoms of your cookies. Learned that one the hard way.
Preparation Method
Alright, let’s get to the good stuff. Here’s how to make these cookies step by step. I’ve included all the little details that make the difference between good cookies and “can I have the recipe?” cookies.
- Preheat your oven to 350°F (175°C). Line two baking sheets with parchment paper or silicone mats. Do this first so the oven is nice and hot when you’re ready to bake.
- Cream the butter and sugar together. In a large bowl, beat the softened butter and granulated sugar together until light and fluffy—about 3-4 minutes with an electric mixer on medium speed. You want it to look pale and almost doubled in volume. Scrape down the sides of the bowl halfway through. I usually set a timer for this step because I tend to under-cream when I’m in a rush.
- Add the egg and extracts. Beat in the egg, vanilla extract, and peppermint extract until well combined. The mixture might look a little separated at this point—that’s totally normal. Don’t panic.
- Mix the dry ingredients. In a separate bowl, whisk together the flour, cocoa powder, baking powder, and salt. I know it’s an extra bowl to wash, but whisking ensures everything is evenly distributed. I once skipped this step and ended up with a cookie that was basically a pocket of baking powder. Not recommended.
- Combine wet and dry ingredients. Gradually add the dry ingredients to the wet mixture, mixing on low speed until just combined. Stop when you can’t see any more streaks of flour—overmixing will make your cookies tough. The dough should be soft but not sticky.
- Fold in the mix-ins. Gently fold in the white chocolate chips and crushed candy canes using a spatula. Don’t overmix here—you want those little pockets of peppermint and white chocolate throughout the dough, not blended into oblivion.
- Prepare the rolling station. Pour the powdered sugar into a small bowl. Using your cookie scoop or a spoon, portion out tablespoon-sized balls of dough (about 1.5 tablespoons each). Roll each ball between your palms to make it round, then roll it generously in the powdered sugar. And I mean generously—you want that thick coating. The more sugar, the better the crinkle.
- Place on baking sheets. Arrange the dough balls about 2 inches apart on the prepared baking sheets. They’ll spread a bit, so give them room to breathe. I fit 12 per sheet.
- Bake for 10-12 minutes. The cookies are done when the edges are set and the tops have that beautiful crackled look. The centers will look slightly underdone—that’s exactly what you want. They’ll continue to set as they cool. For softer cookies, bake for 10 minutes. For slightly crispier edges, go for 12.
- Cool on the baking sheet for 5 minutes. This is important—if you try to move them immediately, they’ll fall apart. After 5 minutes, transfer them to a wire rack to cool completely. The crinkle effect becomes more pronounced as they cool.
One more thing—if your cookies aren’t crinkling enough, the dough might be too warm. Pop the baking sheet in the fridge for 10 minutes before baking. The contrast between the cold dough and hot oven creates that dramatic crackle. Works every time.
Cooking Tips & Techniques
After making these cookies about twenty times (I’m not exaggerating—my coworkers have been very patient taste-testers), I’ve picked up a few tricks that make the process smoother and the results more consistent.
The powdered sugar trick. Here’s something I learned after a few disappointing batches: roll the dough balls in powdered sugar twice. Roll them once, let them sit for a minute, then roll them again. The first layer of sugar sort of melts into the dough, and the second layer stays on the surface, creating that dramatic crackled look. It’s a small extra step, but it makes a huge difference.
Don’t skip the chill. I know I said this recipe doesn’t require hours of chilling, but a quick 10-minute rest in the fridge after rolling the dough balls? That’s the secret to perfect crinkles. The cold dough hits the hot oven and cracks open like ice on a frozen pond. I’ve tested it side by side—chilled versus unchilled—and the chilled ones always look better.
The candy cane situation. Crush your candy canes in a ziplock bag with a rolling pin, but leave some bigger pieces. You want texture—some fine bits that melt into the dough and some chunkier pieces that give you that satisfying crunch. I usually crush them until I have a mix of powder and pea-sized pieces.
My biggest failure. One year, I tried to double the batch and forgot to adjust my baking time. The cookies came out flat and spread into each other, creating one giant cookie sheet. It was honestly delicious—I ate it with a spoon while watching Christmas movies—but it wasn’t what I was going for. Lesson learned: if you’re doubling, bake one sheet at a time in the center of the oven for the best results.
Timing is everything. While one batch is baking, scoop and roll the next batch. By the time the first sheet comes out, you’ll have the second one ready to go. This keeps the process moving and prevents the dough from warming up too much on the counter.
Variations & Adaptations
One of the things I love about this recipe is how flexible it is. Here are some variations I’ve tried and loved:
- Dark Chocolate Version: Swap the white chocolate chips for dark chocolate chips and use dark cocoa powder instead of regular. The peppermint pairs beautifully with dark chocolate, and the contrast between the dark cookie and the white powdered sugar is stunning. My friend Jenna calls these “adult cookies.”
- Gluten-Free Adaptation: Use a 1:1 gluten-free flour blend (I like Bob’s Red Mill). The texture will be slightly more tender, but the crinkle effect still works beautifully. Just make sure your baking powder is gluten-free too—some brands contain wheat starch.
- Mint Chocolate Chip Twist: Skip the crushed candy canes and use Andes mint chips instead. The flavor is more subtle and minty rather than pepperminty. I made these for a summer barbecue once and they were a hit—proof that these cookies aren’t just for Christmas.
- Double Peppermint: For the peppermint fanatics out there (I see you), add an extra 1/4 teaspoon of peppermint extract and use starlight mints instead of candy canes. The flavor is more intense and lingers longer. Just be careful—too much peppermint extract can make the cookies taste medicinal.
- White Chocolate Drizzle: After the cookies have cooled completely, melt an extra 1/4 cup of white chocolate chips and drizzle it over the tops. It adds a beautiful finishing touch and makes the cookies look bakery-worthy. I do this when I’m bringing them to a holiday party and want to show off a little.
Serving & Storage Suggestions
These cookies are best served at room temperature with a tall glass of cold milk or a steaming cup of hot cocoa. The contrast between the cool peppermint and a warm drink? Pure holiday magic. I also love serving them alongside a peppermint mocha or even a scoop of vanilla ice cream for an indulgent dessert.
For presentation, arrange them on a festive platter with a few extra crushed candy canes sprinkled around for color. The red and white against the dark cookies is so pretty—it’s like edible holiday decor. I’ve also packed them in clear cellophane bags tied with red ribbon for hostess gifts, and they always get compliments.
Storage tips from my kitchen:
- Room temperature: Store in an airtight container for up to 5 days. Layer them with parchment paper between each layer to prevent sticking. They actually get better on day two—the flavors meld together beautifully.
- Freezer: These freeze like a dream. Place baked and cooled cookies in a single layer in a freezer-safe container, with parchment between layers. They’ll keep for up to 3 months. Thaw at room temperature for about 30 minutes before serving.
- Freezing the dough: You can also freeze the unbaked dough balls. Roll them in powdered sugar, place them on a baking sheet, and freeze until solid. Transfer to a freezer bag and bake directly from frozen, adding 2-3 minutes to the baking time. Perfect for when unexpected guests show up.
One thing to note: the peppermint flavor does mellow out a bit after a day or two. If you want that fresh peppermint kick, crush a little extra candy cane and sprinkle it on top just before serving.
Nutritional Information & Benefits
Let’s be real—these are holiday cookies, not health food. But I believe in balance, and knowing what’s in your food is part of that. Here’s the estimated nutritional breakdown per cookie (based on 24 cookies):
| Nutrient | Amount per Cookie |
|---|---|
| Calories | 185 |
| Total Fat | 9g |
| Saturated Fat | 5g |
| Cholesterol | 25mg |
| Sodium | 85mg |
| Total Carbohydrates | 25g |
| Sugars | 16g |
| Protein | 2g |
That said, there are a few bright spots. The cocoa powder is rich in antioxidants—we’re talking flavonoids that support heart health. Peppermint has been shown to aid digestion and even help with headaches. And white chocolate? Well, it contains calcium from the milk solids. I’m not saying these are a health food, but I’m also not saying you shouldn’t have two.
For those with dietary concerns: this recipe contains gluten, dairy, and eggs. For a dairy-free version, use vegan butter and dairy-free white chocolate chips. For a gluten-free version, use a 1:1 gluten-free flour blend. The cookies won’t be exactly the same, but they’ll still be delicious.
Conclusion
These white chocolate peppermint crinkle cookies have become my holiday signature, and I hope they become yours too. They’ve got everything you want in a Christmas cookie—the festive look, the nostalgic flavor, and that perfect texture that keeps you reaching for just one more. Plus, they’re easy enough that you can make them while wearing your coziest pajamas and listening to your favorite holiday playlist.
I love that this recipe came from a completely ordinary moment—borrowing a pan from a neighbor who wasn’t trying to be impressive. It reminds me that the best recipes often come from the most unassuming places. So go ahead, make a batch (or three). Customize them however you like. Share them with people you love. That’s what the holidays are all about, right?
I’d love to hear how yours turn out! Drop a comment below and let me know if you tried any of the variations, or if you came up with your own twist. And if you share them on social media, tag me—I want to see your beautiful crinkle cookies. Happy baking, friends!
Frequently Asked Questions
Why didn’t my cookies crinkle?
This usually happens for one of two reasons: the dough was too warm, or you didn’t use enough powdered sugar. Try chilling the dough balls for 10-15 minutes before baking, and make sure you’re rolling them generously in powdered sugar—like, really coating them. The sugar creates the crust that cracks as the cookie spreads.
Can I use mint extract instead of peppermint extract?
You can, but the flavor will be different. Mint extract is usually spearmint, which has a sweeter, more herbaceous flavor. Peppermint extract has that classic cool, sharp taste we associate with candy canes and holiday treats. If you only have mint extract, use 1/4 teaspoon and taste the dough—you can always add more.
How do I crush candy canes without making a huge mess?
Put the candy canes in a sturdy ziplock bag, squeeze out all the air, and seal it tight. Place the bag on a cutting board and go at it with a rolling pin or even a heavy skillet. The key is to keep the bag sealed—otherwise, you’ll have peppermint dust everywhere. I learned this the hard way after finding candy cane bits in my coffee maker for a week.
Can I make these cookies ahead of time for a cookie swap?
Absolutely! These cookies actually taste better the next day—the flavors have time to meld together. Bake them up to 3 days in advance and store them in an airtight container at room temperature. If you want them to look extra fresh, sprinkle a little more crushed candy cane on top just before the swap.
My cookies spread too much. What went wrong?
This usually means your butter was too soft or your dough wasn’t chilled enough. Make sure your butter is softened but still cool to the touch—if it’s greasy or melty, pop it back in the fridge for 10 minutes. Also, measure your flour correctly: spoon it into the measuring cup and level it off. Too little flour can cause excessive spreading.
Pin This Recipe!

Best White Chocolate Peppermint Crinkle Cookies

These white chocolate peppermint crinkle cookies are soft, fudgy, and perfectly festive with a crackly powdered sugar coating. They come together in under 30 minutes and are a total crowd-pleaser for holiday cookie swaps or cozy nights in.
- Prep Time: 15 minutes
- Cook Time: 12 minutes
- Total Time: 27 minutes
- Yield: 24 cookies 1x
- Category: Dessert
- Cuisine: American
Ingredients
- 1 cup (2 sticks) unsalted butter, softened to room temperature
- 1 cup granulated sugar
- 1 large egg, room temperature
- 1 teaspoon vanilla extract (pure)
- 1/2 teaspoon peppermint extract
- 2 cups all-purpose flour (spooned and leveled)
- 1/2 cup unsweetened cocoa powder
- 1 teaspoon baking powder
- 1/2 teaspoon salt
- 1 cup white chocolate chips (Ghirardelli or Guittard recommended)
- 1/2 cup crushed candy canes or peppermint candies (about 4–5 full-size candy canes)
- 1/2 cup powdered sugar (for rolling)
Instructions
- Preheat your oven to 350°F (175°C). Line two baking sheets with parchment paper or silicone mats.
- In a large bowl, beat the softened butter and granulated sugar together until light and fluffy—about 3-4 minutes with an electric mixer on medium speed. Scrape down the sides halfway through.
- Beat in the egg, vanilla extract, and peppermint extract until well combined. The mixture may look slightly separated—that’s normal.
- In a separate bowl, whisk together the flour, cocoa powder, baking powder, and salt.
- Gradually add the dry ingredients to the wet mixture, mixing on low speed until just combined. Stop when no streaks of flour remain—do not overmix.
- Gently fold in the white chocolate chips and crushed candy canes using a spatula. Do not overmix.
- Pour the powdered sugar into a small bowl. Using a cookie scoop or spoon, portion out tablespoon-sized balls of dough (about 1.5 tablespoons each). Roll each ball between your palms to make it round, then roll it generously in the powdered sugar.
- Arrange the dough balls about 2 inches apart on the prepared baking sheets. For best crinkles, chill the baking sheet in the fridge for 10 minutes before baking.
- Bake for 10-12 minutes. The cookies are done when the edges are set and the tops have a crackled look; the centers will look slightly underdone.
- Cool on the baking sheet for 5 minutes, then transfer to a wire rack to cool completely. The crinkle effect becomes more pronounced as they cool.
Notes
For the best crinkle effect, roll the dough balls in powdered sugar twice: once, let sit for a minute, then roll again. Chilling the dough balls for 10 minutes before baking also enhances the crackle. If your cookies aren’t crinkling enough, the dough may be too warm. For softer cookies, bake for 10 minutes; for slightly crispier edges, bake for 12. The peppermint flavor mellows after a day or two—sprinkle extra crushed candy cane on top just before serving for a fresh kick.
Nutrition
- Serving Size: 1 cookie
- Calories: 185
- Sugar: 16
- Sodium: 85
- Fat: 9
- Saturated Fat: 5
- Carbohydrates: 25
- Fiber: 1
- Protein: 2
Keywords: white chocolate peppermint crinkle cookies, holiday cookies, Christmas cookies, crinkle cookies, peppermint cookies, easy cookie recipe


