This was supposed to be a classic vanilla sheet cake. I had the butter softening on the counter, the buttermilk measured out, and my grandmother’s old hand mixer ready to go. But somewhere between answering a text from my sister and trying to find the vanilla extract I’d sworn I just bought, I grabbed the wrong bottle. A glug of something dark and vinegary went into the bowl before I even realized what I’d done. The color was all wrong. The batter looked like a science experiment gone sideways. I stood there staring at it, already imagining the dry, crumbly disaster I’d have to explain to my dinner guests arriving in two hours. Honestly, I almost poured the whole thing down the sink.
But I didn’t. I figured, what’s the worst that could happen? I’d already messed it up. So I added a bit more cocoa powder to mask the taste, threw in an extra splash of buttermilk to loosen the batter, and baked it anyway. When I pulled those trays out of the oven, the smell hit me first—something warm, slightly tangy, and deeply chocolatey. The crumb was tender, the color a deep crimson that looked almost intentional. My neighbor, who’d popped over to borrow sugar, took one bite and asked for the recipe before I could even explain it was a total accident. I mean, talk about a plot twist. Maybe you’ve been there—that moment when you think you’ve ruined dinner only to stumble onto something way better than the original plan. That’s exactly how these red velvet heart-shaped cupcakes were born.
Now I keep making them because they’ve become the thing people ask for. Not the fancy layered cakes I spend hours on. Not the complicated French pastries I attempted during that one phase. These little hearts, born from a distracted moment and a wrong bottle, steal the show every single time. They’re what I bring to potlucks, what I bake for Valentine’s Day parties, and what I whip up when I need to impress without the stress. There’s something quietly satisfying about serving a plate of these and knowing the story behind them—that happy little kitchen mistake that turned into a guest-favorite recipe.
Why You’ll Love This Recipe
Let me tell you why these cupcakes are about to become your go-to for every gathering, from casual dinner parties to festive holiday get-togethers. I’ve tested this recipe more times than I can count, tweaking the balance of cocoa and buttermilk until it was just right. The result is a cupcake that’s moist, tender, and has that signature red velvet tang without being overly sweet. Here’s what makes them special:
- Quick & Easy: From start to finish, these come together in about 45 minutes. The batter takes just 15 minutes to mix by hand—no stand mixer required. Perfect for those “I need to bring something tonight” moments.
- Simple Ingredients: You likely have most of these in your pantry right now. No fancy extracts or hard-to-find specialty flours. Just good old-fashioned baking staples with one secret twist that makes all the difference.
- Perfect for Hosting: These are made to impress a crowd. The heart shape adds that extra touch that says you put thought into it, but the process is so straightforward you can whip up a batch while chatting with guests.
- Crowd-Pleaser: I’ve served these at birthday parties, book club meetings, and holiday dinners. Kids love the color and shape. Adults appreciate the balanced flavor. They disappear fast, every single time.
- Unbelievably Delicious: The texture is what gets people. That ultra-moist crumb with a slight density that feels substantial but never heavy. The cream cheese frosting is the perfect tangy counterpart to the deep chocolate notes.
What makes this version different from every other red velvet recipe out there? It’s the technique. I blend a tiny bit of instant espresso powder with the cocoa—don’t skip this. It doesn’t make them taste like coffee. It deepens the chocolate flavor so the red velvet tastes complex, not just sweet. Plus, I’ve nailed the exact ratio of vinegar and buttermilk that gives you that tender, melt-in-your-mouth crumb without any weird aftertaste. This isn’t just another red velvet recipe. It’s the one that makes people close their eyes after the first bite and say, “Okay, what’s your secret?”
What Ingredients You Will Need
This recipe uses simple, wholesome ingredients that work together to create that signature red velvet flavor and texture. Most of these are pantry staples, so you can probably get started without a special trip to the store. I’ve tested several brands over the years, and I’ll share my preferences where they matter most.
For the Cupcakes
- 2 ½ cups (310g) all-purpose flour – I prefer Gold Medal or King Arthur for consistent results. Spoon and level your flour for the most accurate measurement; scooping directly can pack it down and make your cupcakes dry.
- 1 ½ cups (300g) granulated sugar – Regular white sugar works perfectly. No need for superfine or caster sugar here.
- 1 teaspoon baking soda – Make sure it’s fresh. A quick test: drop a pinch into vinegar—if it fizzes vigorously, you’re good to go.
- 1 teaspoon salt – Fine sea salt or table salt both work. Salt balances the sweetness and enhances the chocolate flavor.
- 2 tablespoons (10g) unsweetened cocoa powder – I use Hershey’s natural cocoa powder. Do NOT use Dutch-processed here; the natural cocoa reacts with the vinegar and buttermilk to create that tender crumb.
- 1 teaspoon instant espresso powder – This is my little secret. It doesn’t make the cupcakes taste like coffee at all—it just deepens and rounds out the chocolate flavor. You can skip it, but I wouldn’t.
- 1 cup (240ml) buttermilk – Full-fat buttermilk gives the best texture. If you don’t have buttermilk, make a quick substitute: add 1 tablespoon of lemon juice or white vinegar to 1 cup of whole milk, let it sit for 5 minutes until it curdles slightly.
- 1 cup (240ml) vegetable oil – Canola or any neutral oil works. Oil keeps these cupcakes incredibly moist for days. Do not substitute melted butter here—it changes the texture completely.
- 2 large eggs, room temperature – Room temperature eggs emulsify better into the batter. If you forgot to take them out, place them in a bowl of warm water for 5 minutes.
- 2 teaspoons vanilla extract – Pure vanilla extract is worth it here. Imitation works in a pinch, but the real thing adds warmth and depth.
- 1 tablespoon white vinegar – This reacts with the baking soda to give red velvet its characteristic lift and tender crumb. Don’t skip it.
- 1 tablespoon red gel food coloring – I recommend Americolor Super Red or Wilton’s Red-Red gel. Liquid food coloring won’t give you that vibrant red color; you’d need way too much and it would thin out the batter. Gel is concentrated and gives you that gorgeous crimson hue without affecting the texture.
For the Cream Cheese Frosting
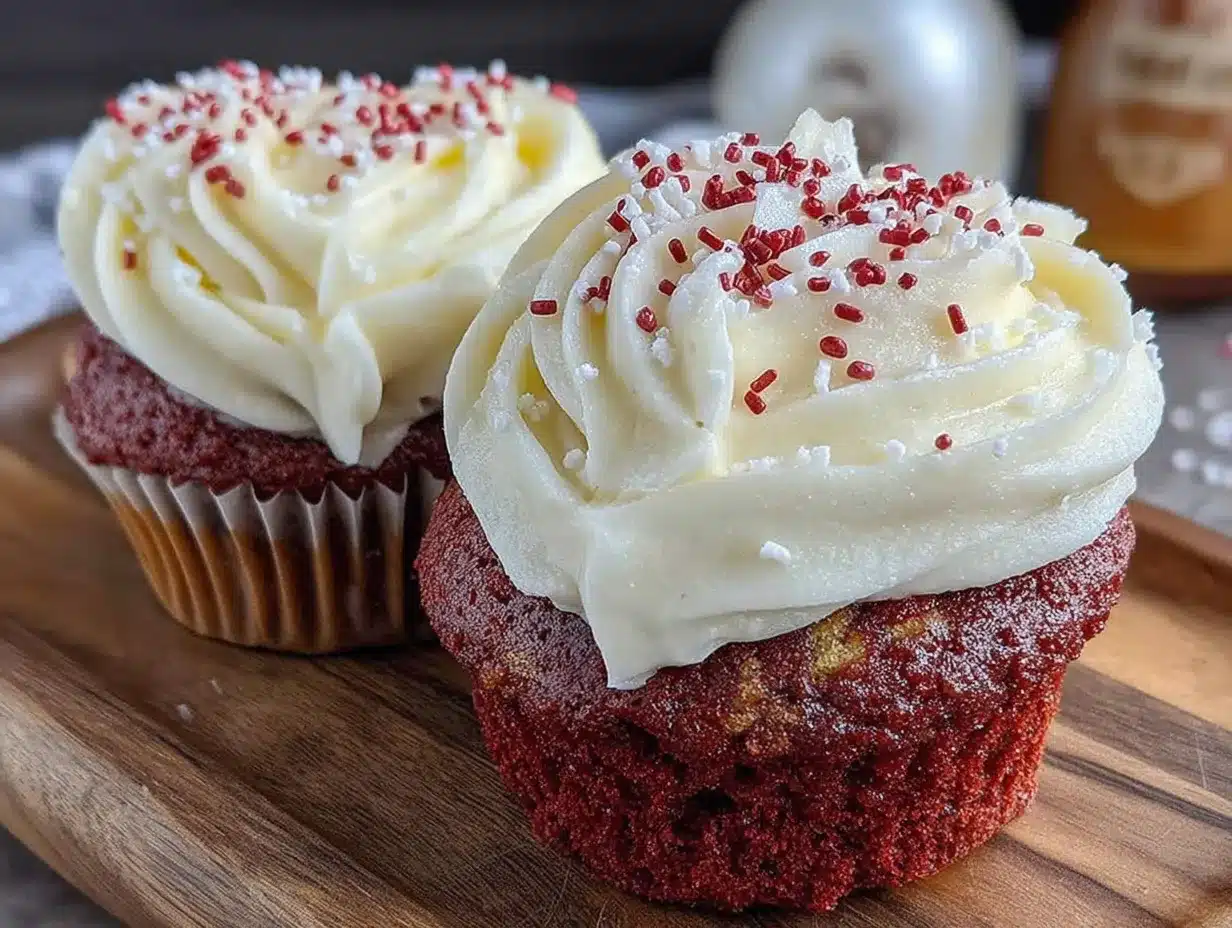
- 8 oz (226g) cream cheese, softened – Use full-fat block cream cheese, not the spreadable kind in a tub. Philadelphia is my go-to. Make sure it’s truly softened to room temperature, or your frosting will be lumpy.
- ½ cup (113g) unsalted butter, softened – Let it sit out for at least 30 minutes. It should be soft but not melty.
- 4 cups (480g) powdered sugar, sifted – Sifting is non-negotiable here, unless you enjoy lumps in your frosting. I’ve learned this the hard way more times than I’d like to admit.
- 1 teaspoon vanilla extract – Again, pure vanilla makes a difference.
- Pinch of salt – This balances the sweetness and enhances the tanginess of the cream cheese.
For Decoration (Optional but Impressive)
- Heart-shaped sprinkles – I find these at my local baking supply store or online. They add that extra festive touch.
- Red sanding sugar – For a little sparkle on the frosting edges.
Equipment Needed
Before you start, make sure you have these tools on hand. Nothing too fancy here—I’ve made these in multiple kitchens with varying levels of equipment, and they always turn out great.
- Heart-shaped cupcake pan – This is the key to the shape. I use a Wilton heart-shaped pan that makes 6 cupcakes per batch. You can find them at most craft stores or online. If you don’t have one, a standard 12-cup muffin tin works too—they’ll just be round hearts in spirit.
- Heart-shaped cupcake liners – These aren’t strictly necessary, but they make the hearts pop even more. I’ve found them at specialty baking shops. If you can’t find them, use white or red standard liners.
- Large mixing bowls – You’ll need two: one for dry ingredients, one for wet ingredients.
- Whisk – For mixing dry ingredients and smoothing out the batter.
- Hand mixer or stand mixer – A hand mixer works perfectly for the frosting. For the batter, you can mix by hand with a whisk—it’s actually better that way to avoid overmixing.
- Rubber spatula – For scraping down the sides of the bowl and folding in ingredients.
- Cooling rack – Letting cupcakes cool completely before frosting is crucial. A wire rack allows air to circulate so they don’t get soggy on the bottom.
- Piping bag with star tip – For that bakery-style frosting look. A Wilton 1M tip is my favorite. If you don’t have a piping bag, a zip-top bag with the corner snipped off works in a pinch.
- Offset spatula – For smoothing frosting if you’re not piping. A butter knife works too, but an offset spatula gives you more control.
Budget-friendly tip: Check your local dollar store for mixing bowls and a cooling rack. They won’t last forever, but they’ll get you through many batches of these cupcakes.
Preparation Method
Let’s get baking. I’ve broken this down into clear steps with all the little details I’ve learned from making these dozens of times. Trust me, following these exactly will give you the best results.
- Preheat your oven to 350°F (175°C). Place your heart-shaped cupcake pan on the middle rack. If you’re using liners, place them in the pan now. If you’re not using liners, lightly grease the pan with butter or non-stick spray. I’ve found that even non-stick pans benefit from a light greasing when making heart shapes—the corners can be tricky.
- Mix the dry ingredients. In a large bowl, whisk together the 2 ½ cups all-purpose flour, 1 ½ cups granulated sugar, 1 teaspoon baking soda, 1 teaspoon salt, 2 tablespoons cocoa powder, and 1 teaspoon instant espresso powder. Whisk for about 30 seconds to evenly distribute everything. This aerates the flour and ensures there are no lumps of cocoa or baking soda.
- Mix the wet ingredients. In a separate medium bowl, whisk together 1 cup buttermilk, 1 cup vegetable oil, 2 large eggs, 2 teaspoons vanilla extract, 1 tablespoon white vinegar, and 1 tablespoon red gel food coloring. Whisk until the color is uniform and the eggs are fully incorporated. The mixture will look a little thick from the buttermilk—that’s normal.
- Combine wet and dry ingredients. Pour the wet ingredients into the bowl with the dry ingredients. Use a rubber spatula or wooden spoon to fold everything together. Mix just until you no longer see streaks of flour—about 15 to 20 strokes. A few small lumps are totally fine. Overmixing at this stage will develop the gluten and make your cupcakes tough. I’ve made that mistake before, and the result was dense, rubbery cupcakes that nobody wanted seconds of.
- Fill the cupcake pan. Divide the batter evenly among the heart-shaped cups, filling each about ⅔ to ¾ full. I use a ¼-cup measuring cup or a large cookie scoop for even portions. This batter is thin enough to pour, so it spreads easily into the heart corners. Don’t overfill—these cupcakes rise nicely, and you want that domed top to stay within the liner.
- Bake for 18 to 22 minutes. Start checking at the 18-minute mark. Insert a toothpick into the center of a cupcake—if it comes out with a few moist crumbs (not wet batter), they’re done. The tops should spring back when lightly touched. Every oven runs a little differently, so trust the toothpick test over the timer. My old oven used to take exactly 20 minutes; my new one is closer to 19. Get to know your oven.
- Cool completely. Let the cupcakes sit in the pan for 5 minutes. Then transfer them to a wire rack to cool completely. This is crucial—if you try to frost them while they’re still warm, the cream cheese frosting will melt into a sad, runny mess. I’ve done this before a dinner party, and let me tell you, there’s nothing worse than watching beautiful frosting slide off your cupcakes. Give them at least 1 hour to cool fully.
- Make the cream cheese frosting. While the cupcakes cool, make your frosting. In a large bowl using a hand mixer or stand mixer with the paddle attachment, beat 8 oz softened cream cheese and ½ cup softened unsalted butter together on medium speed until smooth and creamy—about 2 minutes. There should be no lumps. Add 1 teaspoon vanilla extract and a pinch of salt, then beat again. Gradually add the 4 cups sifted powdered sugar, one cup at a time, mixing on low speed at first to avoid a sugar cloud. Once all the sugar is incorporated, increase speed to medium-high and beat for 2 to 3 minutes until the frosting is light, fluffy, and spreadable. Don’t overbeat, or the frosting can become too soft.
- Frost the cupcakes. Fit a piping bag with a star tip (I use Wilton 1M) and fill it with the cream cheese frosting. Pipe a swirl onto each cooled cupcake, starting from the outside edge and working inward. If you don’t have a piping bag, use an offset spatula or butter knife to spread the frosting in a thick layer. I like to leave a little edge of red cupcake showing around the frosting for contrast.
- Decorate. Top with heart-shaped sprinkles or a light dusting of red sanding sugar. If you’re feeling extra fancy, you can place a single fresh raspberry on top for a pop of color and a tiny burst of tartness that complements the sweet frosting beautifully.
Cooking Tips & Techniques
After countless batches of these red velvet heart cupcakes, I’ve collected a few tricks that make the process smoother and the results more consistent. Some of these I learned from failures—like the time I forgot the vinegar and ended up with flat, dense cupcakes that tasted more like chocolate than red velvet. Here’s what I wish someone had told me from the start.
Room temperature ingredients matter more than you think. I know, I know, it’s tempting to use cold eggs straight from the fridge. But room temperature eggs and buttermilk emulsify into the batter much more smoothly, giving you a uniform texture. Cold ingredients can cause the batter to separate or create a dense crumb. Set everything out on the counter 30 minutes before you start mixing.
Don’t overmix the batter. This is the number one mistake I see home bakers make. Red velvet batter is relatively thin, which makes it easy to overmix. Once the flour is incorporated, stop. A few small lumps are your friend. Overmixing develops gluten, which gives you tough, rubbery cupcakes instead of the tender, melt-in-your-mouth texture we’re after.
Use gel food coloring, not liquid. I cannot stress this enough. Liquid food coloring will thin out your batter and require way too much to achieve a true red color. Gel coloring is concentrated, so a tablespoon is plenty for that deep, vibrant crimson. If you’re worried about artificial colors, there are natural red velvet options using beet powder, but the color won’t be as bright. I’ve tried both, and for special occasions where presentation matters, I stick with gel.
Let the cupcakes cool completely before frosting. This is non-negotiable. I once rushed this step because guests were arriving in 20 minutes. I frosted slightly warm cupcakes, and the cream cheese frosting slid right off into a puddle on the plate. It was a mess. Now I always build in at least an hour of cooling time. If you’re in a hurry, you can pop the cupcakes in the fridge for 20 minutes to speed things up, but make sure they’re at room temperature before frosting to avoid condensation.
Toast the cream cheese frosting lightly. This is a weird tip, but hear me out. If you want the frosting to hold its shape better at room temperature (say, for a buffet table), you can add 1 to 2 tablespoons of heavy cream to the frosting and beat it for an extra minute. It stabilizes the cream cheese without changing the flavor. I learned this from a pastry chef friend, and it’s been a game-changer for parties.
Variations & Adaptations
One of the best things about this recipe is how flexible it is. Over the years, I’ve played around with different flavors and dietary needs, and these variations have all been hits with my guests. Feel free to adapt based on what you have on hand or who you’re serving.
Gluten-Free Red Velvet Heart Cupcakes: Substitute the all-purpose flour with a 1:1 gluten-free baking flour blend that contains xanthan gum. I’ve had great results with King Arthur’s Measure for Measure flour. The texture will be slightly more delicate, so handle the cupcakes gently when removing them from the pan. Everything else stays the same.
Dairy-Free Version: Replace the buttermilk with 1 cup of unsweetened almond milk mixed with 1 tablespoon of lemon juice. Let it sit for 5 minutes to curdle. For the frosting, use a dairy-free cream cheese alternative like Tofutti or Kite Hill, and substitute the butter with a high-quality vegan butter stick (not the spreadable kind in a tub). The flavor will be slightly different, but still delicious. I made these for a friend with a dairy allergy, and she couldn’t tell the difference.
Chocolate-Red Velvet Hybrid: If you want an even more intense chocolate flavor, increase the cocoa powder to ¼ cup (20g). This will darken the color slightly—it’ll be more of a deep burgundy than bright red—but the chocolate flavor will be rich and satisfying. I sometimes do this when I’m serving them alongside a lighter dessert, like a lemon tart.
Mini Heart Cupcakes: Use a mini heart-shaped pan and reduce the baking time to 10 to 12 minutes. These are perfect for parties where guests might want to try multiple desserts. They’re also adorable on a dessert table. Just be careful not to overbake them—mini cupcakes dry out quickly.
Spiced Red Velvet: Add 1 teaspoon of cinnamon and ½ teaspoon of nutmeg to the dry ingredients. This gives the cupcakes a warm, holiday-inspired flavor that pairs beautifully with the cream cheese frosting. I made these for a Christmas party last year, and they were gone before the main course was even served.
Serving & Storage Suggestions
These red velvet heart cupcakes are designed to impress, so how you serve them matters almost as much as how they taste. Here’s my advice for making them the star of your table.
Serving Temperature: Serve these at room temperature for the best flavor and texture. The cream cheese frosting softens slightly, the cake is tender, and the flavors are at their peak. If you’ve stored them in the fridge, take them out about 30 minutes before serving. I’ve made the mistake of serving cold cupcakes before, and the frosting was stiff and the cake felt dense. Room temperature is the way to go.
Presentation Ideas: Arrange the cupcakes on a white cake stand or a wooden board for contrast. If you’re serving them for Valentine’s Day, scatter a few fresh raspberries or rose petals around the base of the stand. For a dinner party, place each cupcake on a small dessert plate with a dollop of whipped cream and a drizzle of chocolate sauce on the side. It looks fancy but takes almost no extra effort.
What to Serve Alongside: These cupcakes are rich, so pair them with something light. A glass of cold milk is classic. For adults, a cup of black coffee or espresso cuts through the sweetness beautifully. If you’re serving a full dessert spread, balance them with something fruity like a fresh berry salad or a light lemon sorbet.
Storage Instructions: Store unfrosted cupcakes in an airtight container at room temperature for up to 3 days. Frosted cupcakes should be stored in the refrigerator, also in an airtight container, for up to 5 days. The cream cheese frosting needs to be kept cold to stay safe. Just remember to let them come to room temperature before serving.
Freezing: These cupcakes freeze beautifully. Freeze unfrosted cupcakes in a single layer on a baking sheet, then transfer to a freezer-safe bag or container for up to 3 months. Frosted cupcakes can also be frozen, but place them in the freezer uncovered for 1 hour first to firm up the frosting, then wrap individually in plastic wrap and store in a freezer bag. Thaw in the refrigerator overnight before bringing to room temperature. I always keep a batch in the freezer for unexpected guests or last-minute cravings.
Flavor Development: Interestingly, these cupcakes taste even better the next day. The flavors meld together overnight, and the cake becomes even more moist. If you can resist eating them right away, make them a day ahead and store them unfrosted. Frost them the day you plan to serve for the best presentation.
Nutritional Information & Benefits
Let’s be real—these are a treat, not a health food. But knowing what’s in them helps you enjoy them mindfully. Here’s the estimated nutritional breakdown for one cupcake with frosting (based on 12 servings):
- Calories: 450-500
- Fat: 24g (saturated: 10g)
- Carbohydrates: 58g
- Sugar: 42g
- Protein: 5g
- Fiber: 1g
- Sodium: 320mg
Health Highlights: The cocoa powder in these cupcakes contains flavanols, which are antioxidants that support heart health. Cream cheese provides calcium and protein, though it’s also high in fat and sodium. The buttermilk adds a small amount of probiotics (if using cultured buttermilk), which can aid digestion. Of course, these benefits are minimal given the sugar and fat content—this is a dessert through and through.
Dietary Considerations: This recipe contains gluten, dairy, and eggs. For gluten-free or dairy-free adaptations, see the variations section above. The cupcakes are nut-free as written, making them safe for most school or party settings. If you need to avoid artificial colors, you can use natural red food coloring made from beet juice or turmeric, but the color will be more muted.
My Perspective: I believe in balance. These cupcakes are meant to be enjoyed on special occasions, not as an everyday snack. When I serve them at parties, I make sure there are lighter options available too—a veggie platter, a fruit salad, something that rounds out the spread. That way, everyone can indulge in a cupcake without feeling like they’ve overdone it. Life’s too short to skip dessert, but it’s also too short to eat dessert for breakfast every day.
Conclusion
These red velvet heart-shaped cupcakes have become my signature dish for a reason. They’re beautiful enough to impress at a Valentine’s Day party or a fancy dinner, yet simple enough to whip up on a random Tuesday when you just need something sweet. The story behind them—that happy accident that turned a vanilla sheet cake into something so much better—reminds me that sometimes the best things in life come from plans gone wrong.
I love that this recipe is forgiving. You can make it ahead, freeze it, tweak the flavors, or double it for a crowd. It’s the kind of recipe that makes you look like a hero in the kitchen without spending hours slaving over a stove. And honestly, isn’t that what we all want? To serve something that makes people smile, that makes them ask for the recipe, that makes them remember the meal long after the plates are cleared.
So go ahead—make these for your next gathering. Customize them with your favorite sprinkles or a different frosting color. Share them with the people you love. And when someone asks how you got the idea, you can tell them the truth: it started with a mistake, a wrong bottle, and a decision to roll with it. Sometimes that’s all it takes to create something unforgettable.
I’d love to hear how yours turn out. Drop a comment below and let me know if you tried any variations, or tag me in your photos on social media. Happy baking, and remember—the best recipes often start with a little chaos.
Frequently Asked Questions
Can I make these cupcakes without a heart-shaped pan?
Absolutely. A standard 12-cup muffin tin works perfectly. They’ll be round, but you can still decorate them with heart-shaped sprinkles or cut the frosting into heart shapes using a stencil. The taste is exactly the same.
Why did my red velvet cupcakes turn out brown instead of red?
This usually happens for one of three reasons: you used liquid food coloring instead of gel, you added too much cocoa powder, or you overbaked them. Stick with gel coloring and natural cocoa powder, and check for doneness at the 18-minute mark. The natural cocoa reacts with the vinegar and buttermilk to create that red hue, but too much cocoa will overpower the color.
Can I use a different frosting?
Yes! Cream cheese frosting is traditional, but these cupcakes are also fantastic with a classic buttercream, a chocolate ganache, or even a whipped cream topping. For a lighter option, try a mascarpone frosting. Just keep in mind that the tanginess of cream cheese balances the sweetness of the cake beautifully.
How do I prevent my cream cheese frosting from being runny?
Make sure your cream cheese and butter are both softened to room temperature, not melted. If the frosting seems too soft, refrigerate it for 15 to 20 minutes before piping. Also, be sure to sift your powdered sugar—lumps can prevent the frosting from coming together properly. If all else fails, add a tablespoon of cornstarch to stabilize it.
Can I double this recipe for a larger crowd?
Definitely. This recipe doubles beautifully. Just make sure you have enough pans to bake all the batter at once, or bake in batches. If you’re baking in batches, keep the remaining batter at room temperature—don’t refrigerate it, as the vinegar and buttermilk reaction will continue and the batter might deflate. Also, don’t overcrowd your oven; bake one batch at a time for even results.
Pin This Recipe!
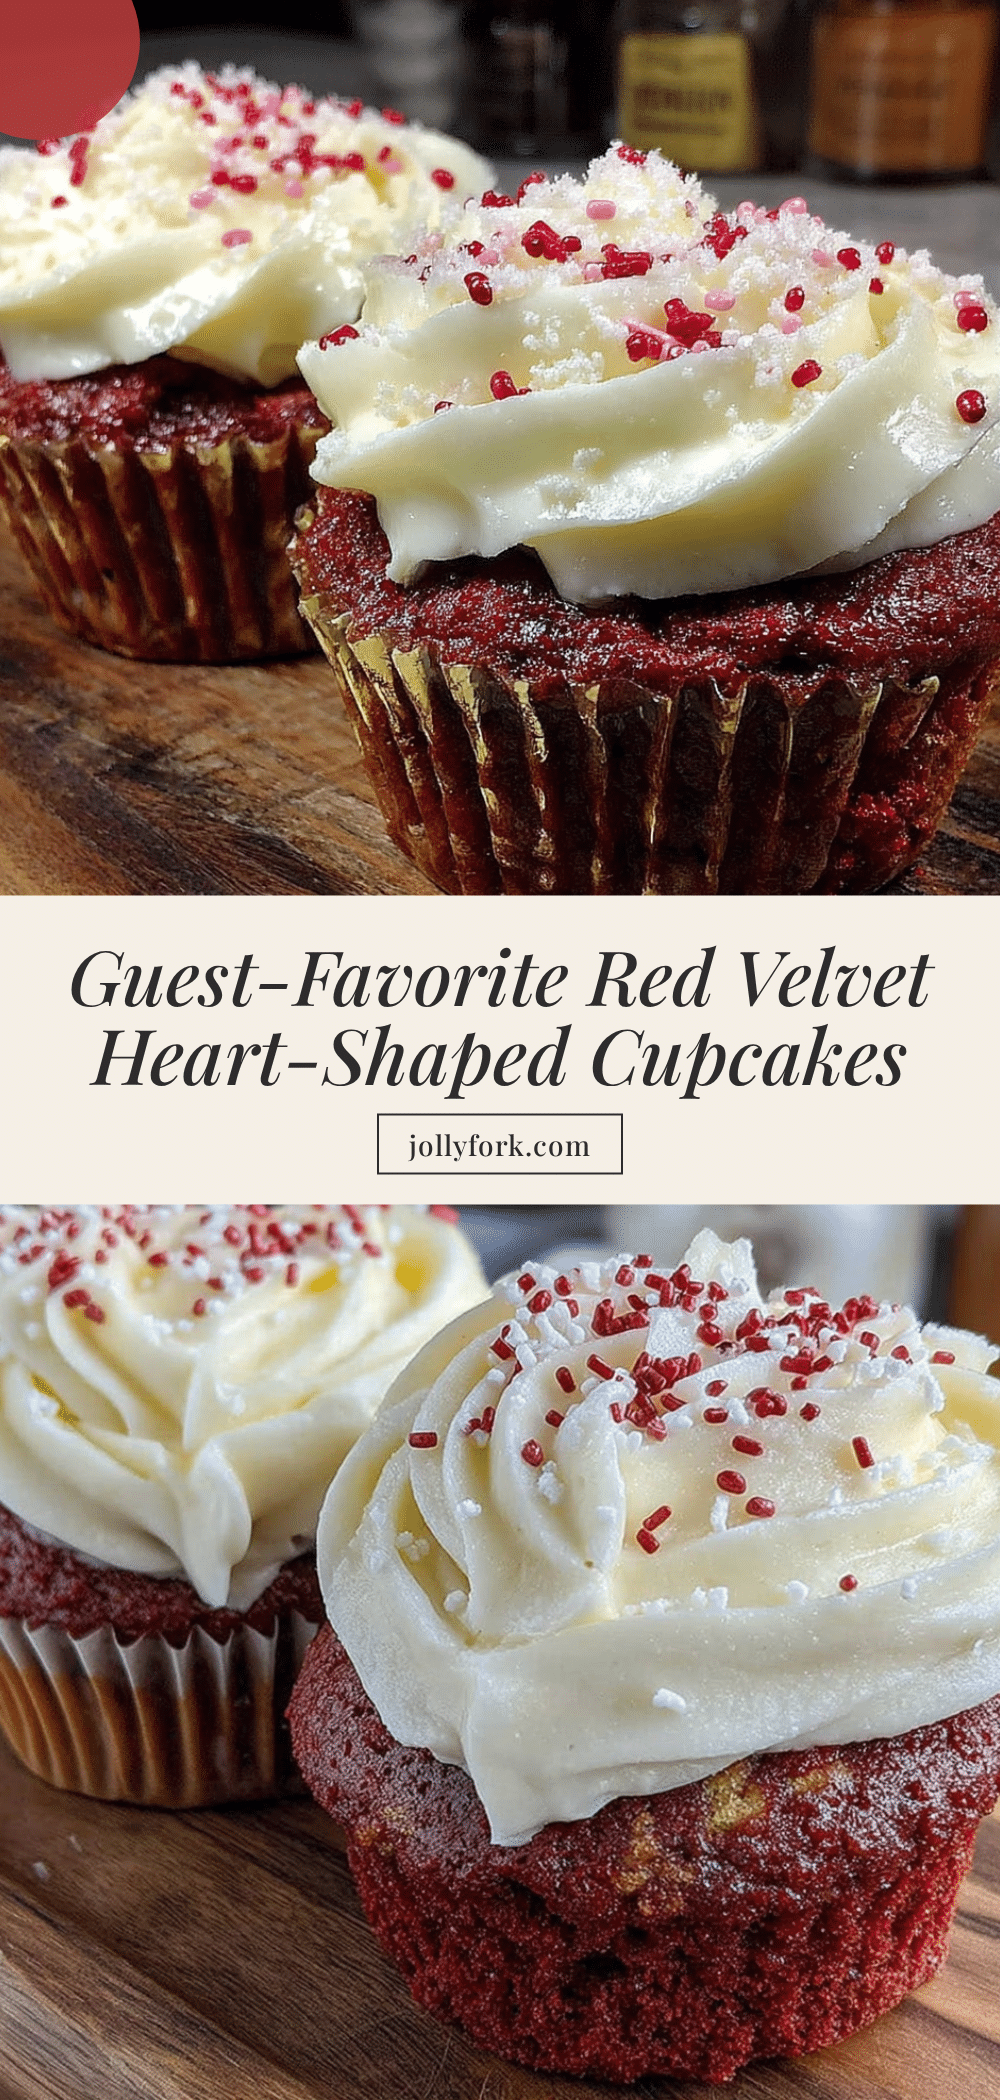
Best Homemade Red Velvet Heart Cupcakes
These red velvet heart-shaped cupcakes are moist, tender, and have that signature red velvet tang without being overly sweet. Born from a happy kitchen accident, they’ve become a guest-favorite recipe perfect for any gathering.
- Prep Time: 15 minutes
- Cook Time: 20 minutes
- Total Time: 45 minutes
- Yield: 12 servings 1x
- Category: Dessert
- Cuisine: American
Ingredients
- 2 ½ cups (310g) all-purpose flour
- 1 ½ cups (300g) granulated sugar
- 1 teaspoon baking soda
- 1 teaspoon salt
- 2 tablespoons (10g) unsweetened cocoa powder
- 1 teaspoon instant espresso powder
- 1 cup (240ml) buttermilk
- 1 cup (240ml) vegetable oil
- 2 large eggs, room temperature
- 2 teaspoons vanilla extract
- 1 tablespoon white vinegar
- 1 tablespoon red gel food coloring
- 8 oz (226g) cream cheese, softened
- ½ cup (113g) unsalted butter, softened
- 4 cups (480g) powdered sugar, sifted
- 1 teaspoon vanilla extract
- Pinch of salt
- Heart-shaped sprinkles (optional)
- Red sanding sugar (optional)
Instructions
- Preheat your oven to 350°F (175°C). Place heart-shaped cupcake liners in a heart-shaped cupcake pan or lightly grease the pan.
- In a large bowl, whisk together the flour, sugar, baking soda, salt, cocoa powder, and instant espresso powder for about 30 seconds.
- In a separate medium bowl, whisk together the buttermilk, vegetable oil, eggs, vanilla extract, vinegar, and red gel food coloring until uniform.
- Pour the wet ingredients into the dry ingredients and fold with a rubber spatula just until no streaks of flour remain (about 15-20 strokes). Do not overmix.
- Divide the batter evenly among the cupcake cups, filling each about ⅔ to ¾ full.
- Bake for 18 to 22 minutes, until a toothpick inserted into the center comes out with a few moist crumbs. Cool in the pan for 5 minutes, then transfer to a wire rack to cool completely (at least 1 hour).
- For the frosting: In a large bowl, beat the softened cream cheese and butter together on medium speed until smooth and creamy, about 2 minutes. Add vanilla and salt, then beat again. Gradually add the sifted powdered sugar, one cup at a time, mixing on low speed. Once incorporated, increase speed to medium-high and beat for 2-3 minutes until light and fluffy.
- Fit a piping bag with a star tip (e.g., Wilton 1M) and fill with frosting. Pipe a swirl onto each cooled cupcake, starting from the outside edge and working inward. Alternatively, spread with an offset spatula.
- Decorate with heart-shaped sprinkles or red sanding sugar, if desired.
Notes
Room temperature ingredients are crucial for best texture. Do not overmix the batter. Use gel food coloring for vibrant red color. Cool cupcakes completely before frosting to prevent melting. For a gluten-free version, use a 1:1 gluten-free flour blend. For dairy-free, use almond milk with lemon juice and dairy-free cream cheese and butter.
Nutrition
- Serving Size: 1 cupcake with frost
- Calories: 475
- Sugar: 42
- Sodium: 320
- Fat: 24
- Saturated Fat: 10
- Carbohydrates: 58
- Fiber: 1
- Protein: 5
Keywords: red velvet, cupcakes, heart-shaped, Valentine's Day, cream cheese frosting, homemade, easy, moist


