My neighbor, Carol, wasn’t trying to impress me. I’d stopped by to borrow a lug wrench—don’t ask—and this smell hit me before I even got to her screen door. It was rich, savory, and somehow familiar, but it didn’t belong to a Tuesday evening in October. It smelled like Thanksgiving, but better. Less stressful. Carol was at her stove in a faded t-shirt, flipping something in a skillet, and she barely looked up. “Turkey breast,” she said, like it was nothing. Like she hadn’t just turned a random weeknight into something that made me forget why I was standing there. She shrugged and told me she’d brined it in under an hour. I almost laughed. Brining? On a Tuesday? But then she handed me a forkful, and honestly, I stood in her kitchen eating turkey off a spatula while my car sat jacked up in her driveway. Maybe you’ve been there—stumbling into something so good it derails your whole evening. That’s this recipe. It’s the one that made me realize you don’t need a holiday or a whole bird to get that juicy, golden, pull-apart turkey. You just need a little patience, a little salt, and about 45 minutes. Let me tell you, it changed my weeknight cooking forever.
Why You’ll Love This Recipe
Let’s be real—turkey breast usually feels like a production. A whole bird takes hours, requires a roasting pan the size of a canoe, and leaves you with enough leftovers to feed a small army. This quick brined turkey breast for two flips all of that on its head. It’s designed for the tired cook who still wants something special on the table without the all-day commitment.
- Quick & Easy: From brine to plate in under 90 minutes. Yes, really. The brine only takes 30 minutes to work its magic, and the turkey roasts in about 35 to 40 minutes. That’s faster than ordering takeout in some neighborhoods.
- Simple Ingredients: You probably have salt, sugar, and a few pantry spices right now. No fancy brine bags or hard-to-find herbs. Just basics that deliver big flavor.
- Perfect for Weeknights: This isn’t a holiday recipe pretending to be casual. It’s a Tuesday dinner that feels like a treat. Small enough for two, but impressive enough for a quiet date night.
- Crowd-Pleaser: Even people who say they don’t love turkey will change their tune after one bite of this juicy, well-seasoned breast. It’s that good.
- Unbelievably Delicious: The quick brine does something almost magical—it seasons the meat all the way through while keeping it impossibly tender. No dry, bland turkey here.
What makes this different from every other turkey breast recipe? It’s the timing. Most brines require hours or overnight soaking. This one works fast because we use a smaller cut and a higher salt concentration, plus a little heat in the brine to speed things along. I tested it six times to get the balance right—not too salty, not too watery, just perfect. It’s the kind of recipe that makes you close your eyes after the first bite. Comfort food, reimagined for a busy Tuesday.
What Ingredients You Will Need
This recipe uses simple, everyday ingredients to create a turkey breast that’s seasoned through and through. Most of these are pantry staples, which means you’re probably already halfway there. Here’s what you’ll need and why each one matters.
For the Quick Brine
- 4 cups water (divided—2 cups for heating, 2 cups ice cold)
- 1/4 cup kosher salt (I use Diamond Crystal; if you’re using Morton’s, use 3 tablespoons instead—it’s saltier by volume)
- 2 tablespoons brown sugar (adds a subtle sweetness and helps with browning)
- 2 cloves garlic, smashed (not minced—smashed releases flavor without being overpowering)
- 1 teaspoon black peppercorns (whole, not ground, for gentle heat)
- 2 sprigs fresh rosemary (or 1 teaspoon dried, but fresh is really nice here)
- 1 bay leaf (adds that background savory note you can’t quite name)
For the Turkey
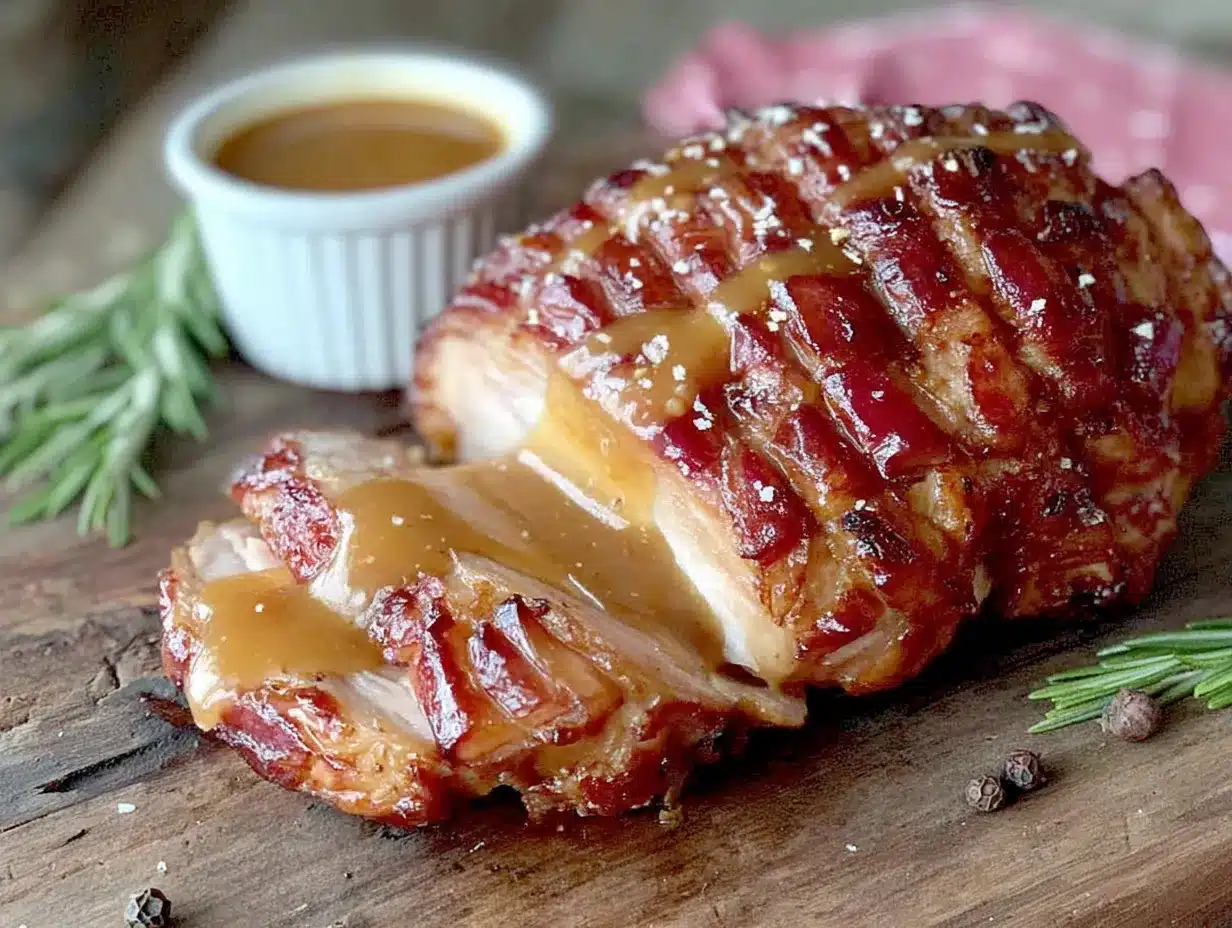
- 1 bone-in, skin-on turkey breast (about 2 to 2.5 pounds—this is the perfect size for two people with maybe a little leftover for sandwiches)
- 2 tablespoons olive oil (or melted butter, if you’re feeling decadent)
- 1/2 teaspoon black pepper (freshly ground, please)
- 1/2 teaspoon garlic powder (not garlic salt—we’ve got enough salt from the brine)
- 1/2 teaspoon paprika (smoked or sweet, either works for color and flavor)
One note on the turkey: look for a breast that’s similar in thickness throughout. If one end is much thinner than the other, it’ll cook unevenly. I’ve had good luck with store-brand organic breasts, but honestly, any fresh or fully thawed turkey breast will work. Just don’t try this with a frozen bird—the brine won’t penetrate properly, and you’ll end up with uneven seasoning.
If you want to switch things up, you can swap the rosemary for thyme or sage. The brown sugar can be replaced with honey or maple syrup, though you’ll want to dissolve it fully in the hot brine. And if you’re watching your salt intake, you can reduce the salt to 3 tablespoons, but know that the texture won’t be quite as tender.
Equipment Needed
You don’t need a professional kitchen to pull this off. Here’s what you’ll need, along with a few alternatives if you’re working with limited tools.
- Medium saucepan (for heating the brine base)
- Large bowl or container (big enough to hold the turkey breast and brine—a 2-quart glass bowl works perfectly)
- Small roasting pan or baking dish (9×13-inch works great; a cast iron skillet also does the job)
- Instant-read thermometer (honestly, this is non-negotiable for turkey. Guessing doneness leads to dry meat. A $10 thermometer will change your life.)
- Measuring cups and spoons
- Chef’s knife and cutting board
- Paper towels (for drying the skin—this is crucial for crispy skin)
If you don’t have a roasting pan, a rimmed baking sheet lined with foil works in a pinch. Just be aware that the juices might spread out more, so keep an eye on them to prevent burning. And if you don’t have an instant-read thermometer, you can use a meat thermometer that stays in the oven, but the instant-read is faster and more accurate for a small cut like this.
Preparation Method
Let’s get cooking. This method is straightforward, but I’ve included all the little details that make the difference between good turkey and unforgettable turkey. Take your time with the brine—it’s the star of the show.
- Make the brine base. In a medium saucepan, combine 2 cups of water with the kosher salt, brown sugar, smashed garlic cloves, black peppercorns, rosemary sprigs, and bay leaf. Bring this to a simmer over medium-high heat, stirring occasionally until the salt and sugar are fully dissolved. This takes about 3 to 4 minutes. You’ll smell the garlic and rosemary—that’s how you know it’s working.
- Cool the brine. Remove the saucepan from heat and add the remaining 2 cups of ice-cold water. This cools the brine down quickly so it doesn’t start cooking your turkey before brining it. Stir until the ice melts and the liquid feels cool to the touch. If it’s still warm, let it sit for a few more minutes. The brine needs to be cool before you add the turkey—warm brine can promote bacterial growth and start cooking the meat unevenly.
- Brine the turkey. Place your turkey breast in a large bowl or container. Pour the cooled brine over it, making sure the turkey is fully submerged. If it floats, you can weigh it down with a small plate or a zip-top bag filled with water. Cover the bowl and refrigerate for exactly 30 minutes. Set a timer—seriously, don’t go longer. This is a quick brine, and oversoaking can make the meat mushy.
- Preheat the oven. About 10 minutes before the brine is done, preheat your oven to 400°F (200°C). Position a rack in the middle of the oven. While the oven heats, take the turkey out of the brine and discard the liquid. Rinse the turkey breast under cool running water to remove excess salt from the surface. Don’t skip this—it prevents the turkey from being too salty.
- Dry the skin. Pat the turkey breast thoroughly dry with paper towels. This is the most important step for crispy skin. I mean it—get in the crevices, pat the top, pat the bottom. Any moisture left on the skin will steam instead of crisp. Let the turkey sit on a plate for 5 minutes to air-dry slightly if you have time.
- Season the outside. Rub the turkey breast all over with olive oil. In a small bowl, mix the black pepper, garlic powder, and paprika. Sprinkle this seasoning blend evenly over the entire breast, including the underside. Don’t add extra salt—the brine has already seasoned the meat through.
- Roast the turkey. Place the turkey breast skin-side up in your roasting pan or baking dish. Roast for 35 to 45 minutes, depending on the size of your breast. The internal temperature should reach 155°F (68°C) in the thickest part of the meat when you insert your thermometer. Don’t touch the bone with the thermometer—that gives a false reading.
- Rest the turkey. Remove the turkey from the oven and tent it loosely with foil. Let it rest for 10 to 15 minutes before slicing. The temperature will continue to rise to a safe 165°F (74°C) during this time. Resting is not optional—it lets the juices redistribute so every slice is moist. I learned this the hard way after carving too early and watching beautiful juice pool on the cutting board.
- Slice and serve. Carve the breast off the bone in one piece, then slice against the grain into 1/2-inch thick pieces. The meat should be juicy, tender, and perfectly seasoned from edge to center.
Cooking Tips & Techniques
I’ve made this recipe more times than I can count, and I’ve definitely made my share of mistakes. Here’s what I’ve learned so you don’t have to learn the hard way.
Don’t skip the rinse. The first time I made this, I was so excited about the brine that I skipped rinsing the turkey. Big mistake. The meat was so salty it was almost inedible. A quick rinse under cool water removes surface salt without washing away the seasoning that’s penetrated the meat. Trust me on this one.
Patience with the skin. I used to think oil alone would give me crispy skin. Nope. The real trick is drying. I mean really drying. I use three or four paper towels and press firmly. If the paper towel sticks to the skin, it’s not dry enough. Keep patting until the towel slides right off. Then let it air-dry while you prep the pan. That extra few minutes makes a huge difference.
Use a thermometer, not a timer. Ovens run hot or cold. Turkey breasts vary in size. A timer is a guess; a thermometer is a guarantee. I use a cheap instant-read thermometer and check the temperature at 35 minutes, then every 5 minutes after that. When it hits 155°F, I pull it. The carryover cooking does the rest. I’ve pulled turkey at 150°F before and it still hit 162°F during resting—perfectly safe and incredibly juicy.
Let it rest, no matter how hungry you are. I get it. The kitchen smells amazing, and you want to eat. But cutting into hot turkey is like popping a water balloon. All that juice runs out onto the cutting board instead of staying in the meat. Ten minutes feels like forever, but it’s the difference between good turkey and great turkey. Use that time to make a quick pan sauce or set the table.
Brine timing is flexible, but not that flexible. Thirty minutes is the sweet spot. Twenty minutes still works but gives milder seasoning. Forty-five minutes starts to get borderline salty. An hour is too long for a 2-pound breast. If you’re using a larger breast—say, 3 pounds—you can push it to 45 minutes, but no more.
Variations & Adaptations
One of the best things about this recipe is how easy it is to adapt. Here are a few ways I’ve changed it up depending on my mood or what’s in the fridge.
Herb and Citrus Variation: Add the zest of one lemon and one orange to the brine along with a few sprigs of fresh thyme. The citrus brightens the flavor without making it taste like lemon chicken. I tried this during a particularly gray February, and it felt like a little burst of sunshine on the plate.
Spicy Maple Glaze: Skip the paprika and garlic powder rub. Instead, mix 2 tablespoons of maple syrup with 1 teaspoon of cayenne pepper and a pinch of cinnamon. Brush this over the turkey during the last 10 minutes of roasting. The sugar caramelizes into a gorgeous sticky crust. Just watch it closely—maple syrup can burn fast.
Butterflied for Faster Cooking: If you’re really in a hurry, you can butterfly the turkey breast—slice it horizontally almost in half, then open it like a book. This creates a thinner, more even piece that roasts in about 20 minutes. The brine time stays the same. I do this when I’m cooking for one and want leftovers for lunch the next day.
Dairy-Free and Gluten-Free: This recipe is naturally gluten-free as written. For dairy-free, just use olive oil instead of butter. No other changes needed. It’s one of those rare recipes that works for almost any dietary restriction without tasting like a compromise.
Air Fryer Adaptation: If you have an air fryer, this recipe is a game-changer. After brining and drying, cook the turkey breast at 375°F (190°C) for 25 to 30 minutes, flipping halfway through. The skin gets incredibly crispy, and the cooking time is even shorter. Just make sure your turkey breast fits in the basket without touching the sides.
Serving & Storage Suggestions
This turkey breast is versatile enough for a fancy dinner or a simple weeknight meal. Here’s how I like to serve it and what to do with leftovers.
Serving Temperature: Serve the turkey warm, right after resting. It’s also surprisingly good at room temperature on a salad or sandwich. I’ve been known to slice it cold straight from the fridge for a late-night snack—no judgment here.
What to Serve With It: Since this is a weeknight recipe, I keep the sides simple. Mashed potatoes or roasted sweet potatoes soak up any juices on the plate. A quick green salad with a lemony vinaigrette cuts through the richness. Steamed green beans or roasted Brussels sprouts round out the meal without much effort. If you want something starchier, a box of good stuffing mix cooked on the stovetop takes 5 minutes and feels right.
Storage: Store leftover turkey in an airtight container in the refrigerator for up to 4 days. The meat stays moist and flavorful, making it perfect for sandwiches, salads, or reheating. I like to slice it before storing so I can grab pieces as needed.
Freezing: This turkey freezes beautifully. Slice it or leave it whole, wrap tightly in plastic wrap and then foil, and freeze for up to 3 months. Thaw in the refrigerator overnight before using. The texture holds up surprisingly well—better than most leftover turkey I’ve frozen.
Reheating: The best way to reheat is in a low oven—300°F (150°C)—for about 10 minutes, covered with foil to prevent drying. You can also reheat slices in a skillet with a splash of chicken broth for 2 to 3 minutes per side. The microwave works in a pinch, but it tends to toughen the meat, so I avoid it when possible.
How Flavors Develop: Honestly, this turkey is even better the next day. The brine flavor continues to mellow and deepen overnight. Cold turkey sandwiches with a little cranberry sauce and mayo are my favorite way to enjoy day-two leftovers.
Nutritional Information & Benefits
Turkey breast is one of the leanest, most protein-packed meats you can eat, and this quick brine method keeps it moist without adding much fat. Here’s a rough breakdown for a 4-ounce serving of cooked turkey breast (without skin).
| Nutrient | Amount per Serving |
|---|---|
| Calories | 180 |
| Protein | 35g |
| Fat | 4g |
| Saturated Fat | 1g |
| Carbohydrates | 0g |
| Sodium | 350mg (varies based on brine) |
Turkey is rich in B vitamins, particularly B6 and B12, which support energy metabolism and brain function. It’s also a great source of selenium, an antioxidant that helps protect your cells. The skin adds some fat and flavor, but if you’re watching calories, you can remove it before eating without losing much moisture—thanks to the brine.
This recipe is naturally low-carb and keto-friendly. It’s also gluten-free and dairy-free if you use oil instead of butter. The only potential allergen is the turkey itself, so if you’re serving someone with a poultry allergy, this isn’t the dish for them. For everyone else, it’s a wholesome, satisfying meal that fits into most balanced eating plans.
Conclusion
This quick brined turkey breast for two has become my go-to when I want something that feels special without the production. It’s the recipe I make on a random Tuesday when I’m tired and hungry but still want to sit down to a real meal. It’s the recipe I make when I want to impress someone without breaking a sweat. And honestly? It’s the recipe I make when I just want a really good turkey sandwich the next day.
I hope you give it a try, and I hope you make it your own. Maybe you’ll add a different herb, or glaze it with something sweet, or serve it with your favorite comfort food side. That’s the beauty of a simple, solid recipe—it leaves room for you. If you make this, I’d love to hear how it turned out. Drop a comment below or tag me in your photos. Happy cooking, and here’s to more delicious weeknights.
Frequently Asked Questions
Can I use a boneless turkey breast for this recipe?
Absolutely. Boneless turkey breasts cook faster—usually 25 to 35 minutes—so start checking the temperature earlier. The brine time stays the same at 30 minutes. Just make sure the breast is similar in thickness throughout for even cooking.
Do I have to use kosher salt, or can I use table salt?
You can use table salt, but you’ll need to adjust the amount. Table salt is much denser than kosher salt, so use only 2 tablespoons instead of 1/4 cup. Otherwise, your turkey will be way too salty. I really recommend kosher salt for brining—it dissolves more evenly and is harder to overshoot.
Can I double this recipe for a larger turkey breast?
Yes, but you’ll need to adjust the brine time. For a 3 to 4-pound breast, brine for 45 minutes. For anything larger, I’d recommend a traditional overnight brine instead. The quick brine works best for smaller cuts where the salt can penetrate quickly.
What if I don’t have fresh herbs for the brine?
Dried herbs work fine in a pinch. Use about 1 teaspoon of dried rosemary or thyme instead of the fresh sprigs. The flavor won’t be quite as bright, but it’ll still be delicious. You can also skip the herbs entirely and just use salt, sugar, and peppercorns—simple but effective.
Can I make this in a slow cooker or Instant Pot?
I don’t recommend it for this recipe. The quick brine is designed for roasting, which gives you crispy skin and even browning. A slow cooker will steam the meat and make the skin soggy. If you want to use an Instant Pot, skip the brine and use a pressure cooker turkey recipe instead—the methods are too different to swap directly.
Pin This Recipe!
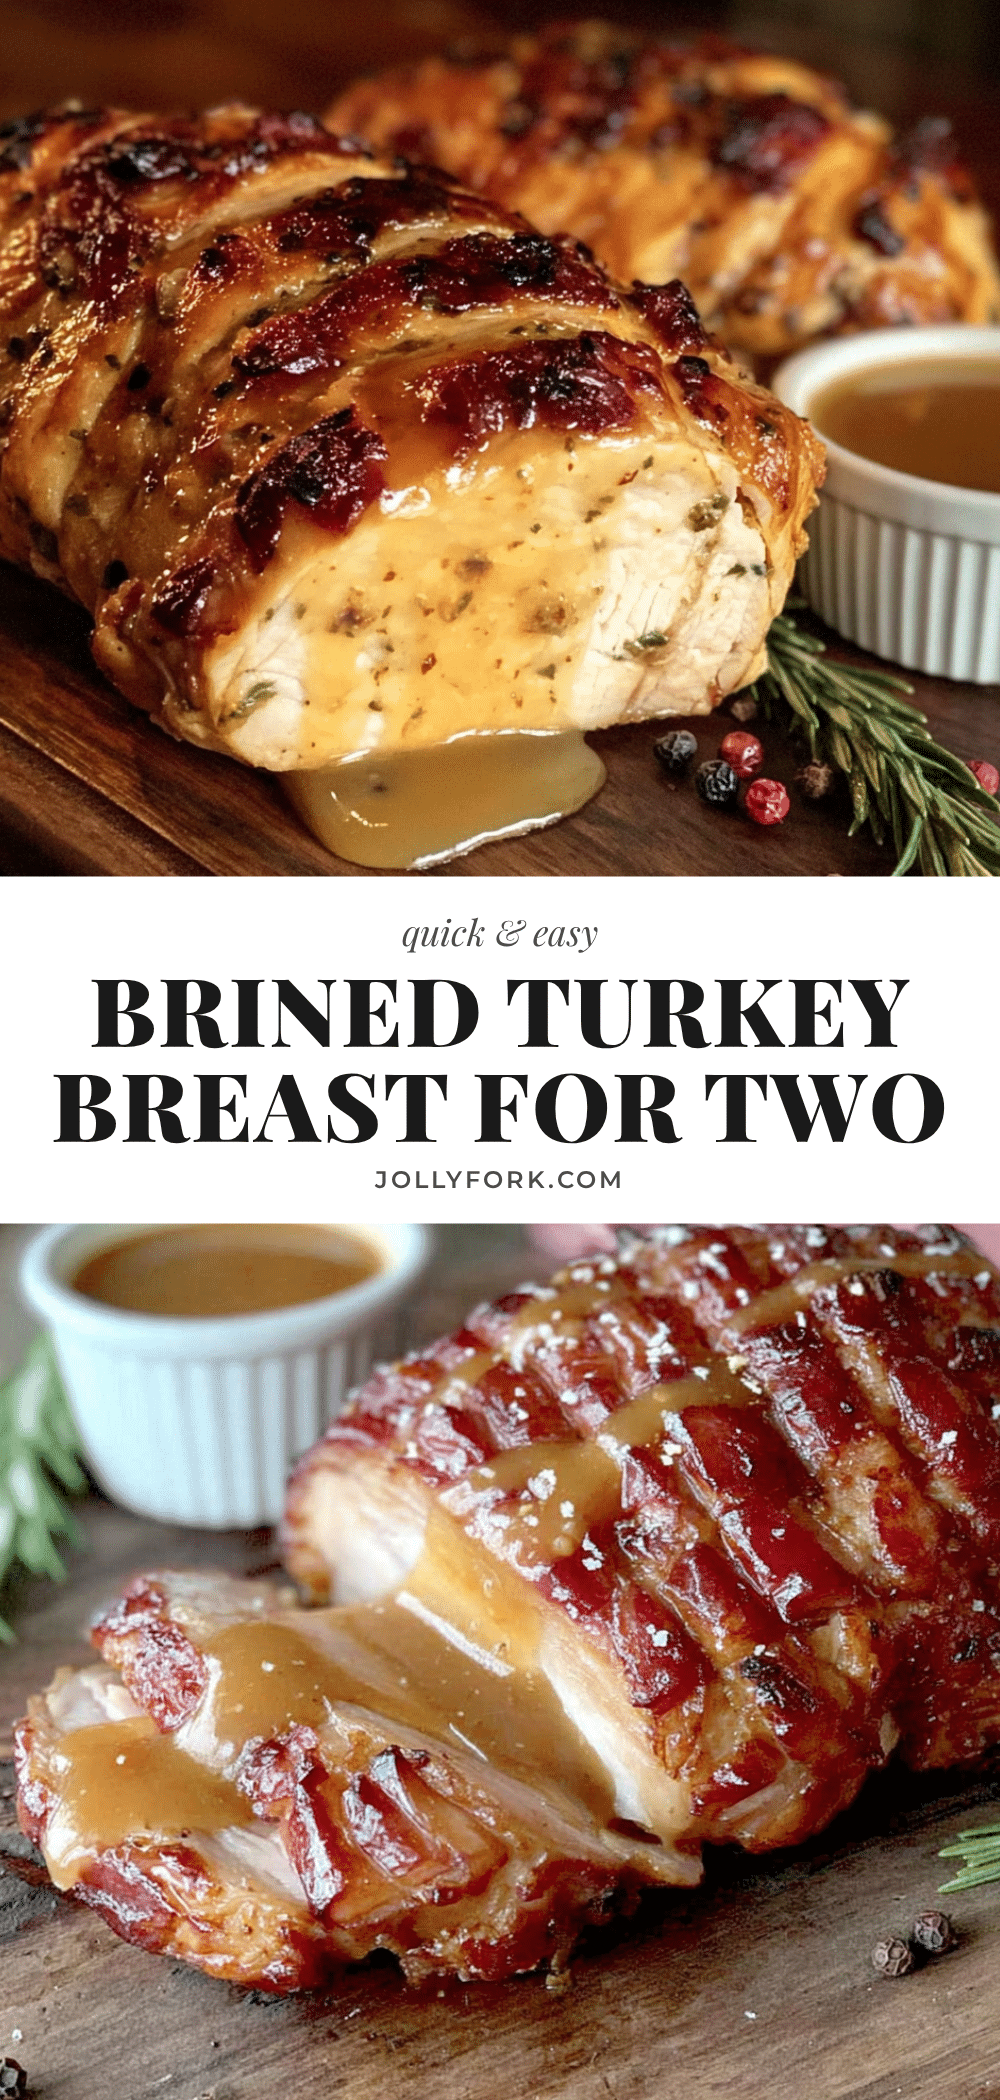
Quick Brined Turkey Breast for Two

A quick-brined bone-in turkey breast that’s juicy, golden, and pull-apart, ready in under 90 minutes. Perfect for a weeknight dinner that feels like a holiday treat.
- Prep Time: 15 minutes
- Cook Time: 35-45 minutes
- Total Time: 1 hour 30 minutes
- Yield: 2 servings 1x
- Category: Main Course
- Cuisine: American
Ingredients
- 4 cups water (divided—2 cups for heating, 2 cups ice cold)
- 1/4 cup kosher salt (Diamond Crystal; use 3 tablespoons if using Morton’s)
- 2 tablespoons brown sugar
- 2 cloves garlic, smashed
- 1 teaspoon black peppercorns
- 2 sprigs fresh rosemary (or 1 teaspoon dried)
- 1 bay leaf
- 1 bone-in, skin-on turkey breast (about 2 to 2.5 pounds)
- 2 tablespoons olive oil (or melted butter)
- 1/2 teaspoon black pepper (freshly ground)
- 1/2 teaspoon garlic powder
- 1/2 teaspoon paprika (smoked or sweet)
Instructions
- Make the brine base: In a medium saucepan, combine 2 cups water with kosher salt, brown sugar, smashed garlic, black peppercorns, rosemary, and bay leaf. Bring to a simmer over medium-high heat, stirring until salt and sugar dissolve (about 3-4 minutes).
- Cool the brine: Remove from heat and add remaining 2 cups ice-cold water. Stir until ice melts and liquid is cool to the touch.
- Brine the turkey: Place turkey breast in a large bowl or container. Pour cooled brine over it, ensuring it’s fully submerged. Cover and refrigerate for exactly 30 minutes.
- Preheat oven: About 10 minutes before brine is done, preheat oven to 400°F (200°C) with rack in middle. Remove turkey from brine, discard liquid, and rinse turkey under cool running water.
- Dry the skin: Pat turkey thoroughly dry with paper towels. Let sit for 5 minutes to air-dry.
- Season the outside: Rub turkey all over with olive oil. Mix black pepper, garlic powder, and paprika; sprinkle evenly over entire breast.
- Roast the turkey: Place turkey skin-side up in a roasting pan. Roast for 35-45 minutes until internal temperature reaches 155°F (68°C) in the thickest part (not touching bone).
- Rest the turkey: Remove from oven, tent loosely with foil, and let rest for 10-15 minutes. Temperature will rise to 165°F (74°C).
- Slice and serve: Carve breast off bone, slice against the grain into 1/2-inch thick pieces.
Notes
Don’t skip rinsing the turkey after brining to avoid excessive saltiness. Pat the skin very dry for crispy skin. Use an instant-read thermometer for perfect doneness; pull at 155°F and let carryover cooking finish. Resting is essential for juicy meat. Brine time is 30 minutes for a 2-pound breast; adjust slightly for larger cuts but do not exceed 45 minutes.
Nutrition
- Serving Size: 4 ounces cooked turk
- Calories: 180
- Sodium: 350
- Fat: 4
- Saturated Fat: 1
- Protein: 35
Keywords: quick brined turkey breast, turkey for two, weeknight turkey, easy turkey recipe, small turkey breast