My accountant, Mr. Henderson, is the last person I’d expect to talk food. For ten years, our conversations never strayed beyond deductions and depreciation. But last November, right in the middle of reviewing my quarterly expenses, he just looked up and said, “You know, the secret to a good pumpkin bar isn’t the filling. It’s the crust.” I was holding a receipt for printer ink, completely thrown off. He then proceeded to describe, with surprising passion, a gingersnap crust that he claimed made his wife’s pumpkin cheesecake bars the most requested item at their church potlucks.
Honestly, I thought I had misheard him. But there he was, this quiet numbers guy, telling me about crushing cookies in a Ziploc bag with a rolling pin because he couldn’t find his food processor. He even admitted to burning the first batch because he got distracted by a football game. I mean, if an accountant can nail a dessert while multitasking, it’s a recipe worth paying attention to. I scribbled his instructions on a sticky note, which sat on my desk for weeks.
When I finally made them for a Friendsgiving dinner, they disappeared in minutes. Someone actually asked me if I bought them from a bakery. That sticky note is now laminated and stuck to my fridge. These pumpkin cheesecake bars with gingersnap crust have that effect on people. Maybe you’ve been there—you bring a dessert to a party, and suddenly you’re the hero of the evening. That’s exactly what these bars do. They make you look like a rockstar with very little effort.
Why You’ll Love This Recipe
Let’s be real for a second. Hosting a dinner party is stressful enough without spending three hours on a complicated dessert. That’s where these pumpkin cheesecake bars come in. They give you that “wow” factor without the kitchen meltdown. I’ve tested this recipe six times—yes, six—to make sure it works perfectly for a crowd. Here is why I keep coming back to it:
- Quick & Easy: You can prep these in about 20 minutes. The oven does the heavy lifting while you focus on your main course or, you know, greeting your guests.
- Simple Ingredients: No hunting down obscure spices or specialty items. You probably have most of this in your pantry right now, minus the cream cheese and pumpkin.
- Perfect for Hosting: These bars slice cleanly, look gorgeous on a platter, and feed a crowd without needing plates and forks for everyone. They are the ultimate potluck or dinner party dessert.
- Crowd-Pleaser: I’ve served these to kids, grandparents, and my picky brother-in-law. Every single person asked for the recipe. It’s a universal win.
- Unbelievably Delicious: The combination of spicy gingersnap crust and creamy pumpkin cheesecake is next-level comfort food. It’s like fall in a single bite.
What makes these bars different from every other pumpkin dessert out there? It’s the crust, hands down. Most recipes use a boring graham cracker base. The gingersnap crust adds a warm, peppery kick that cuts through the sweetness of the cheesecake. It’s a small change that makes a huge difference. This isn’t just another pumpkin bar—it’s the version you will make every single year.
What Ingredients You Will Need
This recipe uses simple, wholesome ingredients to deliver bold flavor and satisfying texture without the fuss. Most of these are pantry staples, which makes last-minute baking a total breeze.
For the Gingersnap Crust
- 2 cups (240g) gingersnap cookie crumbs – I recommend Nabisco or Mi-Del for a consistent texture. You can crush them in a food processor or by hand in a bag.
- 6 tablespoons (85g) unsalted butter, melted – Use real butter here, not margarine. It binds the crust better and adds richness.
- 2 tablespoons (25g) granulated sugar – Just a touch to balance the spice from the cookies.
- 1/4 teaspoon salt – This enhances all the flavors and prevents the crust from tasting flat.
For the Pumpkin Cheesecake Filling
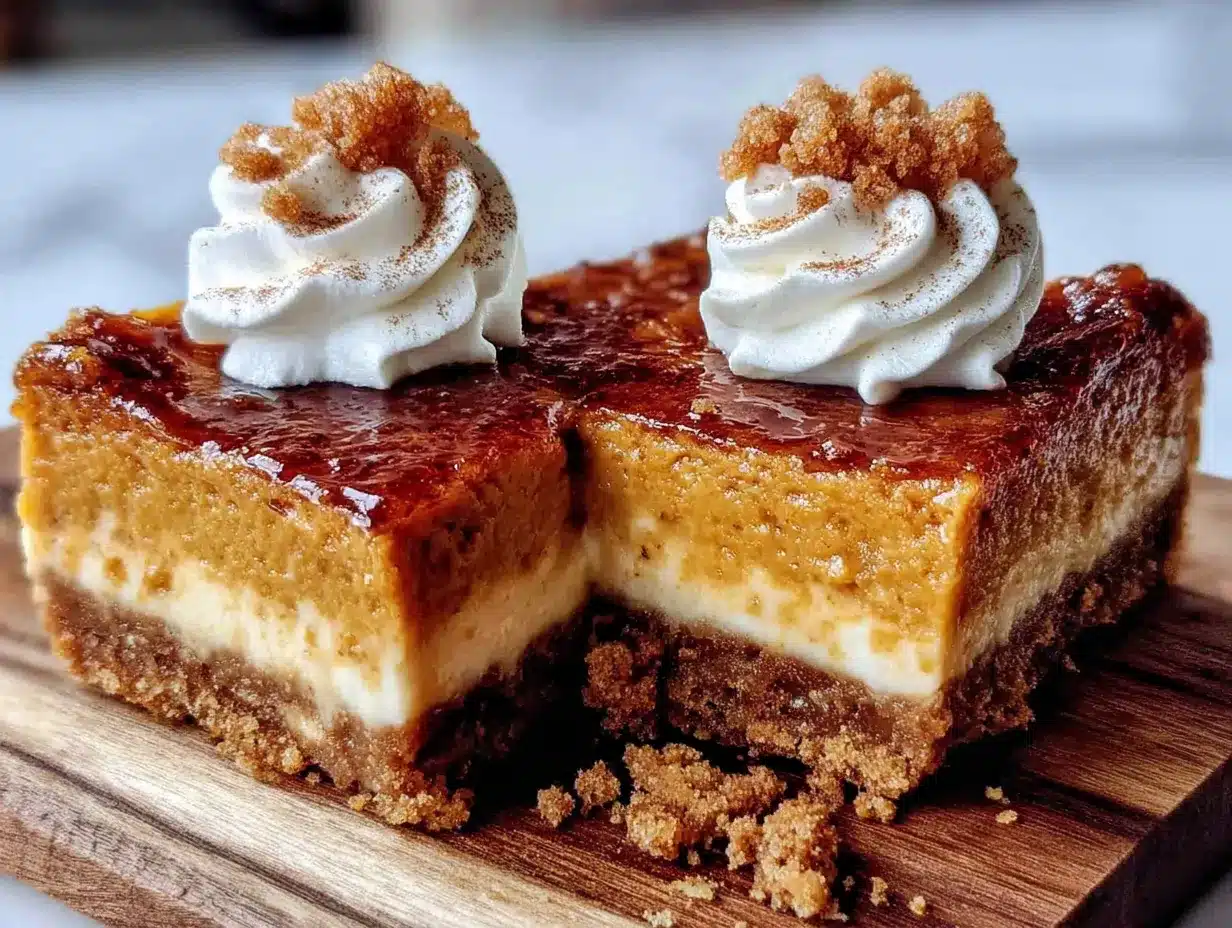
- 16 ounces (452g) cream cheese, softened – Full-fat is best for that luscious, creamy texture. Let it sit out for an hour before you start.
- 1 cup (200g) granulated sugar – Standard white sugar works perfectly.
- 1 cup (245g) canned pumpkin puree – Not pumpkin pie filling! Make sure it’s 100% pure pumpkin. Libby’s is my go-to brand.
- 3 large eggs, room temperature – Cold eggs can make the filling lumpy. Let them sit in warm water for 5 minutes if you forget.
- 1 teaspoon vanilla extract – Pure vanilla extract adds a deeper flavor than imitation.
- 1 1/2 teaspoons pumpkin pie spice – You can buy it pre-mixed or make your own with cinnamon, nutmeg, ginger, and cloves.
- 1/2 teaspoon ground cinnamon – For an extra layer of warmth.
- 1/4 teaspoon salt – Balances the sweetness and brings out the pumpkin flavor.
For the Topping (Optional but Recommended)
- 1 cup (240ml) heavy cream – For whipping into a soft cloud of goodness.
- 2 tablespoons powdered sugar – Sweetens the cream without making it grainy.
- 1/2 teaspoon vanilla extract – Because vanilla makes everything better.
- Caramel sauce, for drizzling – Store-bought is totally fine. I use Hershey’s in a pinch.
Pro tip: If you want a gluten-free option, look for gluten-free gingersnap cookies. They work perfectly and nobody will notice the difference. For a dairy-free version, use vegan cream cheese and coconut oil instead of butter in the crust.
Equipment Needed
You don’t need a professional kitchen to make these pumpkin cheesecake bars. Here is what you will need:
- 9×13-inch baking pan – This size is perfect for feeding a crowd. A metal pan gives a crisper crust than glass.
- Parchment paper – Trust me on this. It makes lifting the bars out so much easier. Leave an overhang on two sides.
- Food processor or Ziploc bag and rolling pin – For crushing the gingersnaps. I’ve used both methods. The bag method is oddly satisfying and requires less cleanup.
- Medium mixing bowl – For the crust ingredients.
- Large mixing bowl – For the cheesecake filling. A glass or stainless steel bowl works best.
- Electric hand mixer or stand mixer – You can mix by hand, but a mixer gives you a smoother, creamier filling without lumps. I use my trusty KitchenAid.
- Rubber spatula – For scraping every last bit of filling into the pan. Waste not, want not.
- Measuring cups and spoons – Accuracy matters in baking, especially with the spices.
- Sharp knife – For slicing clean bars. Run it under hot water between cuts for perfect edges.
If you don’t own a food processor, don’t sweat it. Place the cookies in a Ziploc bag, seal it tight, and go to town with a rolling pin. It’s a great way to release some pre-party stress.
Preparation Method
Okay, let’s get baking. These steps are straightforward, but I’ve added some notes from my own trials so you don’t make the same mistakes I did.
- Preheat your oven to 350°F (175°C). Line your 9×13-inch pan with parchment paper, leaving a 2-inch overhang on the long sides. This will be your lifeline later.
- Make the crust. In a medium bowl, combine 2 cups gingersnap crumbs, 6 tablespoons melted butter, 2 tablespoons sugar, and 1/4 teaspoon salt. Stir until the mixture looks like wet sand and holds together when squeezed. Press it firmly into the bottom of your prepared pan. Use the bottom of a measuring cup to really pack it down. Bake for 10 minutes, then set aside to cool slightly. The crust will firm up as it bakes.
- Beat the cream cheese. In a large bowl, beat 16 ounces of softened cream cheese with an electric mixer on medium speed until smooth and fluffy—about 2 minutes. Scrape down the sides of the bowl with your spatula. This step is crucial for avoiding lumps later.
- Add the sugar and pumpkin. Add 1 cup sugar and beat until combined. Then add 1 cup pumpkin puree and mix on low speed until incorporated. The mixture will turn a beautiful burnt orange color. Don’t overmix here, or you’ll incorporate too much air, which can cause cracks.
- Add eggs one at a time. Crack 3 eggs into the bowl one at a time, beating on low after each addition until just combined. Overbeating the eggs can make the cheesecake puff up and then sink, leaving you with a cratered surface. I learned this the hard way.
- Add the flavorings. Mix in 1 teaspoon vanilla, 1 1/2 teaspoons pumpkin pie spice, 1/2 teaspoon cinnamon, and 1/4 teaspoon salt. Beat on low until smooth. Give the bowl a final scrape to make sure everything is even.
- Pour the filling over the crust. Use your spatula to spread it evenly. Give the pan a gentle tap on the counter to release any air bubbles. This also helps level the top.
- Bake for 35-40 minutes. The edges should look set, but the center will still jiggle slightly when you shake the pan. That’s perfect. Overbaking leads to dry, crumbly cheesecake. If the top starts browning too fast, tent it loosely with foil after 25 minutes.
- Cool completely at room temperature. This takes about 1 to 1.5 hours. Then transfer the pan to the refrigerator and chill for at least 4 hours, preferably overnight. This is the hardest part, I know, but it’s non-negotiable for clean slices.
- Slice and serve. Lift the bars out using the parchment overhang. Use a sharp knife to cut into squares. For the cleanest cuts, wipe the knife clean between slices. Top with whipped cream and a drizzle of caramel sauce if you’re feeling fancy.
Sensory cue: When the bars are done, your kitchen will smell like a cozy autumn candle—warm spices, toasted sugar, and butter. The crust will be golden and firm, and the filling will be a deep, glossy orange.
Cooking Tips & Techniques
I’ve made these pumpkin cheesecake bars more times than I can count, and I’ve definitely had my share of mishaps. Here are the lessons I learned so you don’t have to repeat them.
Don’t skip the parchment paper. The first time I made these, I greased the pan with butter and hoped for the best. Let’s just say the bars came out in jagged, broken pieces. Parchment paper with overhang is your best friend for lifting the entire slab out in one piece.
Room temperature ingredients matter. Cold cream cheese creates lumps that are nearly impossible to beat out. Cold eggs can cause the batter to curdle. Set everything out on the counter an hour before you start. If you’re short on time, cut the cream cheese into cubes and microwave it for 10-second bursts until soft but not melted.
Watch the baking time. Every oven runs a little differently. Start checking at the 30-minute mark. The center should still have a slight wobble—like Jell-O, not soup. If it’s completely firm, it’s already overbaked. I once left mine in for 45 minutes because I was setting the table, and the texture turned out dry and mealy. Don’t be me.
Crush the cookies evenly. If you have large chunks of cookie in the crust, it won’t hold together well. Aim for fine, uniform crumbs. I use my food processor for this, but a Ziploc bag and a heavy pan work just as well.
Chill overnight for best results. I know it’s tempting to dig in after a few hours, but the bars need time to fully set. Overnight chilling gives you that perfect, creamy texture that slices cleanly. Plus, it’s one less thing to do on party day.
Variations & Adaptations
One of the best things about this recipe is how flexible it is. Here are some ways to make it your own.
Gluten-Free Version: Use gluten-free gingersnap cookies for the crust. The texture will be slightly more crumbly, but the flavor is spot on. I’ve used Kinnikinnick brand with great results.
Dairy-Free Version: Swap the cream cheese for a high-quality vegan cream cheese, like Violife or Tofutti. Use melted coconut oil or vegan butter in the crust. The filling will be a little softer, so chill it for at least 6 hours.
Spice It Up: If you love heat, add 1/4 teaspoon of cayenne pepper or ground ginger to the filling. It sounds weird, but the warmth plays beautifully with the pumpkin and spices. My friend Sarah tried this and now refuses to make the original version.
Chocolate Lover’s Twist: Melt 1/2 cup of semi-sweet chocolate chips and swirl it into the filling before baking. The chocolate and pumpkin combination is seriously underrated. I like to use Ghirardelli chips for a rich flavor.
Mini Bar Version: Use a muffin tin lined with paper liners for individual servings. Press a tablespoon of crust into each liner, fill with cheesecake batter, and bake for 18-20 minutes. They’re perfect for parties where people want to grab and go.
Serving & Storage Suggestions
These pumpkin cheesecake bars are incredibly versatile when it comes to serving. Here’s how to make them shine at your next gathering.
Serving Temperature: Serve them chilled straight from the fridge. Cold bars slice cleaner and have a firmer, creamier texture. If you prefer a softer bite, let them sit at room temperature for 10 minutes before serving.
Presentation Tips: Arrange the bars on a large white platter for a clean, elegant look. Add a dollop of whipped cream on each bar and a drizzle of caramel sauce. Sprinkle a pinch of cinnamon or a few crushed gingersnap crumbs on top for texture. Fresh mint leaves add a pop of color.
What to Serve Alongside: These bars pair beautifully with a hot cup of coffee, spiced chai, or a glass of cold milk. For a full dessert spread, serve them alongside apple crisp or a simple vanilla panna cotta.
Storage Instructions: Store leftover bars in an airtight container in the refrigerator for up to 5 days. Layer them with parchment paper between each bar to prevent sticking. The flavors actually deepen after a day or two, so they’re even better the next day.
Freezing Instructions: These bars freeze like a dream. Wrap individual bars tightly in plastic wrap, then place them in a freezer-safe bag. They’ll keep for up to 3 months. Thaw overnight in the refrigerator before serving. I always keep a stash in my freezer for unexpected guests.
Reheating: I don’t recommend reheating these bars—they’re meant to be served cold. But if you absolutely want a warm dessert, microwave a single bar for 10 seconds. The crust will soften, and the filling will get slightly gooey.
Nutritional Information & Benefits
Let’s be honest—these are a treat, not a health food. But that doesn’t mean they’re devoid of any redeeming qualities. Here’s a rough estimate per bar (based on 16 servings):
- Calories: Approximately 320
- Fat: 20g
- Carbohydrates: 32g
- Protein: 5g
- Fiber: 1g
- Sugar: 24g
Health Benefits: Pumpkin is packed with vitamin A, which supports eye health and immune function. It’s also a good source of fiber and antioxidants. The cream cheese provides calcium and protein, while the ginger in the gingersnaps can aid digestion. So yes, there’s some good stuff in there.
Dietary Considerations: This recipe is vegetarian. For gluten-free and dairy-free options, see the variations section above. It contains dairy, eggs, and gluten in the standard version.
My Personal Perspective: I believe in balance. These bars are a celebration of fall flavors and togetherness. One bar won’t derail your health goals, but it will definitely make your day better. Enjoy them mindfully and share them generously.
Conclusion
These pumpkin cheesecake bars with gingersnap crust are the dessert you didn’t know you needed—until you take that first bite. The spicy, buttery crust combined with the creamy, spiced filling is a match made in autumn heaven. They’re easy enough for a Tuesday night but impressive enough for a Thanksgiving table.
I love this recipe because it’s forgiving. You don’t need to be a pastry chef to nail it. And honestly, the fact that it came from my quiet accountant makes me smile every time I make it. It’s a reminder that great recipes can come from the most unexpected places.
Now I want to hear from you. Have you tried these bars? Did you add your own twist? Drop a comment below and let me know how they turned out. And if you loved them, share this post with a friend who loves pumpkin as much as you do. Happy baking, friends!
Frequently Asked Questions
Can I use fresh pumpkin instead of canned?
Yes, you can use fresh pumpkin puree. Just make sure to roast and puree the pumpkin until smooth, then drain any excess liquid using a cheesecloth or paper towels. Canned pumpkin is more consistent in texture, but fresh works beautifully.
Why did my cheesecake filling crack?
Cracks usually happen from overbaking or sudden temperature changes. Bake just until the edges are set and the center jiggles slightly. Let the bars cool gradually at room temperature before refrigerating. Avoid opening the oven door during baking.
Can I make these bars ahead of time?
Absolutely. In fact, they taste better the next day. You can make them up to 2 days in advance and store them in the refrigerator. They also freeze well for up to 3 months.
What can I substitute for gingersnap cookies?
If you can’t find gingersnaps, use graham crackers with 1/2 teaspoon of ground ginger and 1/4 teaspoon of cinnamon added. You can also use speculoos cookies or shortbread cookies with warm spices.
How do I get clean, neat slices?
Chill the bars for at least 4 hours, preferably overnight. Use a sharp knife and wipe it clean with a damp paper towel between each cut. You can also run the knife under hot water and dry it before slicing.
Pin This Recipe!
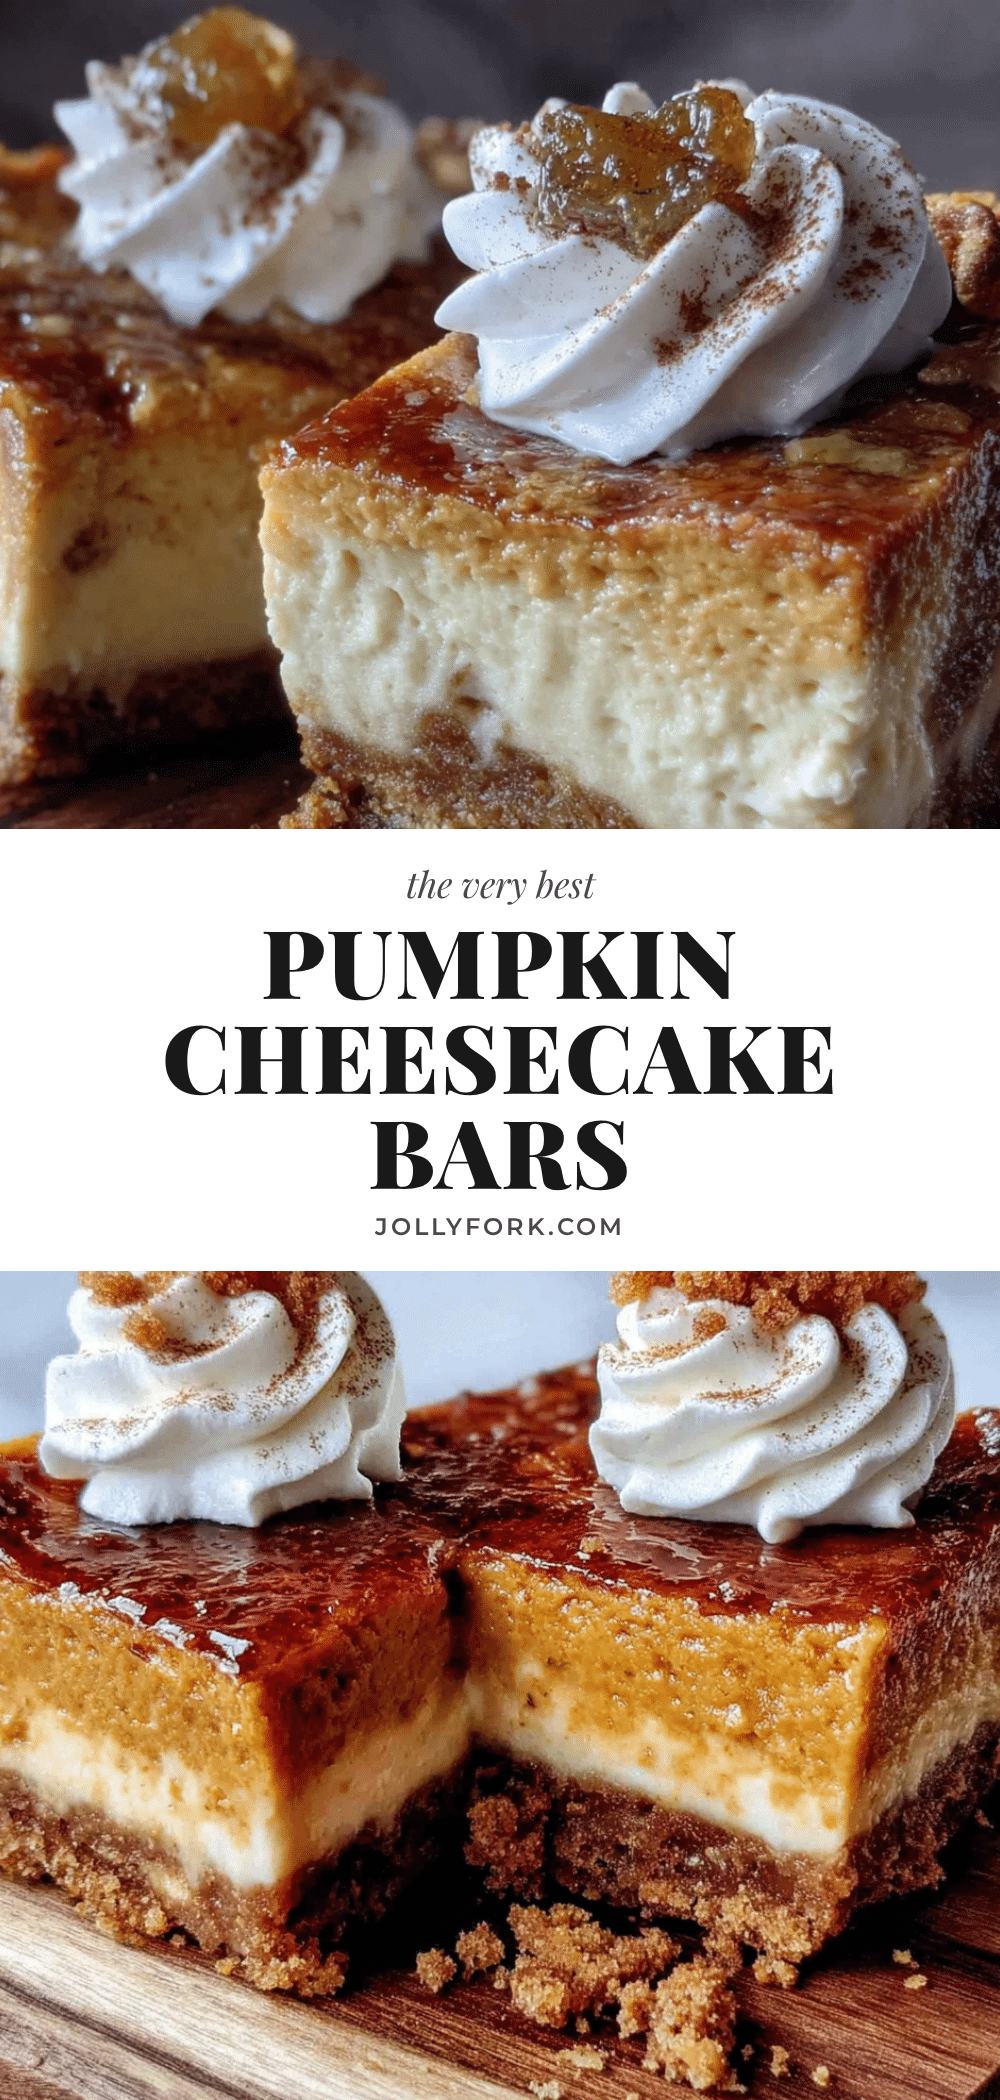
40 Pumpkin Cheesecake Bars with Gingersnap Crust
These pumpkin cheesecake bars feature a spicy gingersnap crust and a creamy pumpkin cheesecake filling. They are easy to make, perfect for hosting, and a crowd-pleaser at any fall gathering.
- Prep Time: 20 minutes
- Cook Time: 35-40 minutes
- Total Time: 4 hours 55 minutes (including chilling)
- Yield: 16 servings 1x
- Category: Dessert
- Cuisine: American
Ingredients
- 2 cups (240g) gingersnap cookie crumbs
- 6 tablespoons (85g) unsalted butter, melted
- 2 tablespoons (25g) granulated sugar
- 1/4 teaspoon salt
- 16 ounces (452g) cream cheese, softened
- 1 cup (200g) granulated sugar
- 1 cup (245g) canned pumpkin puree
- 3 large eggs, room temperature
- 1 teaspoon vanilla extract
- 1 1/2 teaspoons pumpkin pie spice
- 1/2 teaspoon ground cinnamon
- 1/4 teaspoon salt
- 1 cup (240ml) heavy cream
- 2 tablespoons powdered sugar
- 1/2 teaspoon vanilla extract
- Caramel sauce, for drizzling
Instructions
- Preheat your oven to 350°F (175°C). Line your 9×13-inch pan with parchment paper, leaving a 2-inch overhang on the long sides.
- Make the crust: In a medium bowl, combine 2 cups gingersnap crumbs, 6 tablespoons melted butter, 2 tablespoons sugar, and 1/4 teaspoon salt. Stir until the mixture looks like wet sand and holds together when squeezed. Press it firmly into the bottom of your prepared pan. Bake for 10 minutes, then set aside to cool slightly.
- Beat the cream cheese: In a large bowl, beat 16 ounces of softened cream cheese with an electric mixer on medium speed until smooth and fluffy—about 2 minutes. Scrape down the sides of the bowl.
- Add the sugar and pumpkin: Add 1 cup sugar and beat until combined. Then add 1 cup pumpkin puree and mix on low speed until incorporated.
- Add eggs one at a time: Crack 3 eggs into the bowl one at a time, beating on low after each addition until just combined.
- Add the flavorings: Mix in 1 teaspoon vanilla, 1 1/2 teaspoons pumpkin pie spice, 1/2 teaspoon cinnamon, and 1/4 teaspoon salt. Beat on low until smooth.
- Pour the filling over the crust: Use your spatula to spread it evenly. Give the pan a gentle tap on the counter to release any air bubbles.
- Bake for 35-40 minutes: The edges should look set, but the center will still jiggle slightly when you shake the pan. If the top starts browning too fast, tent it loosely with foil after 25 minutes.
- Cool completely at room temperature: This takes about 1 to 1.5 hours. Then transfer the pan to the refrigerator and chill for at least 4 hours, preferably overnight.
- Slice and serve: Lift the bars out using the parchment overhang. Use a sharp knife to cut into squares. Top with whipped cream and a drizzle of caramel sauce if desired.
Notes
Don’t skip the parchment paper for easy removal. Room temperature ingredients are crucial for a smooth filling. Chill overnight for the best texture and clean slices. For gluten-free, use gluten-free gingersnap cookies. For dairy-free, use vegan cream cheese and coconut oil in the crust.
Nutrition
- Serving Size: 1 bar
- Calories: 320
- Sugar: 24
- Fat: 20
- Carbohydrates: 32
- Fiber: 1
- Protein: 5
Keywords: pumpkin cheesecake bars, gingersnap crust, fall dessert, pumpkin dessert, cheesecake bars, easy dessert, potluck dessert


