Stood there staring into the fridge at 7:42 on a Tuesday night, turkey package in one hand and a block of cheddar in the other, wondering how I was going to make lunch exciting for the third week of school. My kid had been coming home with half-eaten sandwiches, the bread soggy from the tomato, the cheese sliding off like it had given up. I needed something that would actually survive a few hours in a lunchbox without turning into a sad, damp situation. Something that looked fun enough to eat but didn’t require me to wake up at dawn to assemble it.
That’s when it hit me—pinwheels. Those little rolled-up spirals you see at parties, the ones everyone grabs first because they look like someone put in actual effort. But here’s the thing: they’re almost laughably simple to make. Lay out a tortilla, spread something creamy on it, layer on the turkey and cheese, roll it tight, slice it up, and boom—you’ve got lunch. It felt like cheating, honestly. Like I’d discovered a loophole in the whole packed-lunch system.
I tested the first batch the next morning, and my kid actually asked for seconds. Seconds of something I packed. That never happens. The turkey cheddar pinwheel lunchbox wraps were officially a thing in our house, and they’ve been on heavy rotation ever since. They’re the kind of recipe that makes you feel like you’ve got your act together, even when you definitely don’t.
Why You’ll Love This Recipe
Let me tell you why these little spirals have basically saved my sanity on busy mornings. First off, they take about ten minutes to throw together. Ten minutes. That’s less time than it takes to convince a kid to put on matching socks. You don’t need any special skills either—if you can spread cream cheese on a tortilla, you’re basically a lunch-packing genius.
- Quick & Easy: Comes together in under 10 minutes, perfect for those mornings when you’re running on coffee and hope.
- Simple Ingredients: You probably already have everything in your fridge right now. No fancy grocery trips required.
- Perfect for Lunchboxes: These hold up beautifully for hours without getting soggy or falling apart. No more sad, squished lunches.
- Crowd-Pleaser: Kids actually eat them. Adults steal them from lunchboxes too, not that I’m speaking from experience.
- Unbelievably Delicious: The creamy filling combined with savory turkey and sharp cheddar creates this perfect bite every single time.
What makes these different from every other wrap recipe out there? It’s the cream cheese situation. Most recipes use plain cream cheese, which is fine, but I mix mine with a little ranch seasoning and some finely chopped veggies. It adds flavor and moisture without making everything slide around. Plus, it’s a sneaky way to get some veggies in there without anyone complaining. This isn’t just another version of a pinwheel—it’s the one that actually works for real life.
Honestly, there’s something about that first bite. The way the creamy filling hits your tongue, followed by the salty turkey and that sharp cheddar. It’s comfort food disguised as a responsible lunch choice. And on days when you’re packing lunches at 10 PM because you forgot, these feel like a genuine win.
What Ingredients You Will Need
This recipe uses simple, everyday ingredients that come together to create something surprisingly satisfying. No weird stuff, no obscure spices you’ll use once and forget about. Just real food that works.
- Large flour tortillas (burrito size) – You want the big ones, about 10 inches across. The smaller taco-size tortillas won’t give you enough room to roll properly, and your pinwheels will end up looking like sad little nubs. I prefer Mission or Guerrero brand for their flexibility, but any large flour tortilla works. Corn tortillas are too brittle for this—don’t even try.
- 8 oz cream cheese, softened – Full-fat is best here, I’m sorry to say. The low-fat versions tend to be a little grainy and don’t spread as smoothly. Let it sit out for about 20 minutes before you start, or give it a quick 10-second zap in the microwave if you’re impatient like me. Philadelphia is my go-to, but store brands work fine too.
- 1/4 cup ranch dressing mix (dry) – This is the secret weapon. A whole packet of Hidden Valley ranch seasoning gives the cream cheese this savory, herby kick that makes these pinwheels addictive. You can use homemade ranch seasoning if you prefer, but honestly, the packet stuff is perfect here.
- 1/4 cup finely shredded cheddar cheese – Sharp cheddar adds the most flavor. Pre-shredded works in a pinch, but freshly shredded melts into the cream cheese better and tastes sharper. I’ve tried mild cheddar and it’s okay, but you lose that punchy flavor that makes these so good.
- 1/2 cup finely chopped bell pepper (any color) – Red or orange adds sweetness and color. Green bell pepper works too but has a slightly bitter edge. Chop them really small—like, tiny dice—so they distribute evenly without creating lumpy spots in your roll.
- 1/4 cup finely chopped green onion – Just the green parts unless you really love onion flavor. These add a mild freshness that cuts through the richness of the cream cheese.
- 8-10 slices deli turkey breast – Oven-roasted or smoked, doesn’t matter much. Go for good quality deli turkey—the thick-sliced stuff from the deli counter holds up better than the pre-packaged wafer-thin slices. Hillshire Farm or Boar’s Head are solid choices. About 6-8 ounces total.
- 8-10 slices sharp cheddar cheese – Thinly sliced, not the thick chunks. You want them to lay flat and cover the turkey without creating bulges. If your cheese slices are too thick, your pinwheels will have awkward gaps.
One thing I learned the hard way—don’t skip softening the cream cheese. Cold cream cheese straight from the fridge will tear your tortilla every single time. I’ve ruined three wraps learning that lesson. Let it sit out, or microwave it in 5-second bursts until it’s spreadable but not warm.
Equipment Needed
You don’t need much for this recipe, which is honestly my favorite part. No fancy gadgets, no specialty tools that take up drawer space. Here’s what you’ll need:
- Cutting board – Any size works, but a large one gives you room to work.
- Sharp knife – A serrated bread knife actually works best for slicing pinwheels cleanly without squishing them. I learned this after using a regular chef’s knife and ending up with flattened, sad-looking spirals. A utility knife works too.
- Small mixing bowl – For combining the cream cheese mixture.
- Spatula or butter knife – For spreading the cream cheese. An offset spatula is nice if you have one, but a regular butter knife does the job.
- Plastic wrap or parchment paper – For wrapping the rolls tightly before chilling. This step isn’t optional, trust me.
- Baking sheet or large plate – To hold the wrapped rolls in the fridge.
- Toothpicks – Optional, but helpful for keeping the pinwheels from unrolling in lunchboxes.
If you don’t have plastic wrap, you can use beeswax wraps or even a clean kitchen towel to help the rolls hold their shape. The key is creating enough tension to keep everything tight while they chill. I’ve used a damp paper towel in a pinch, and it worked fine.
Preparation Method
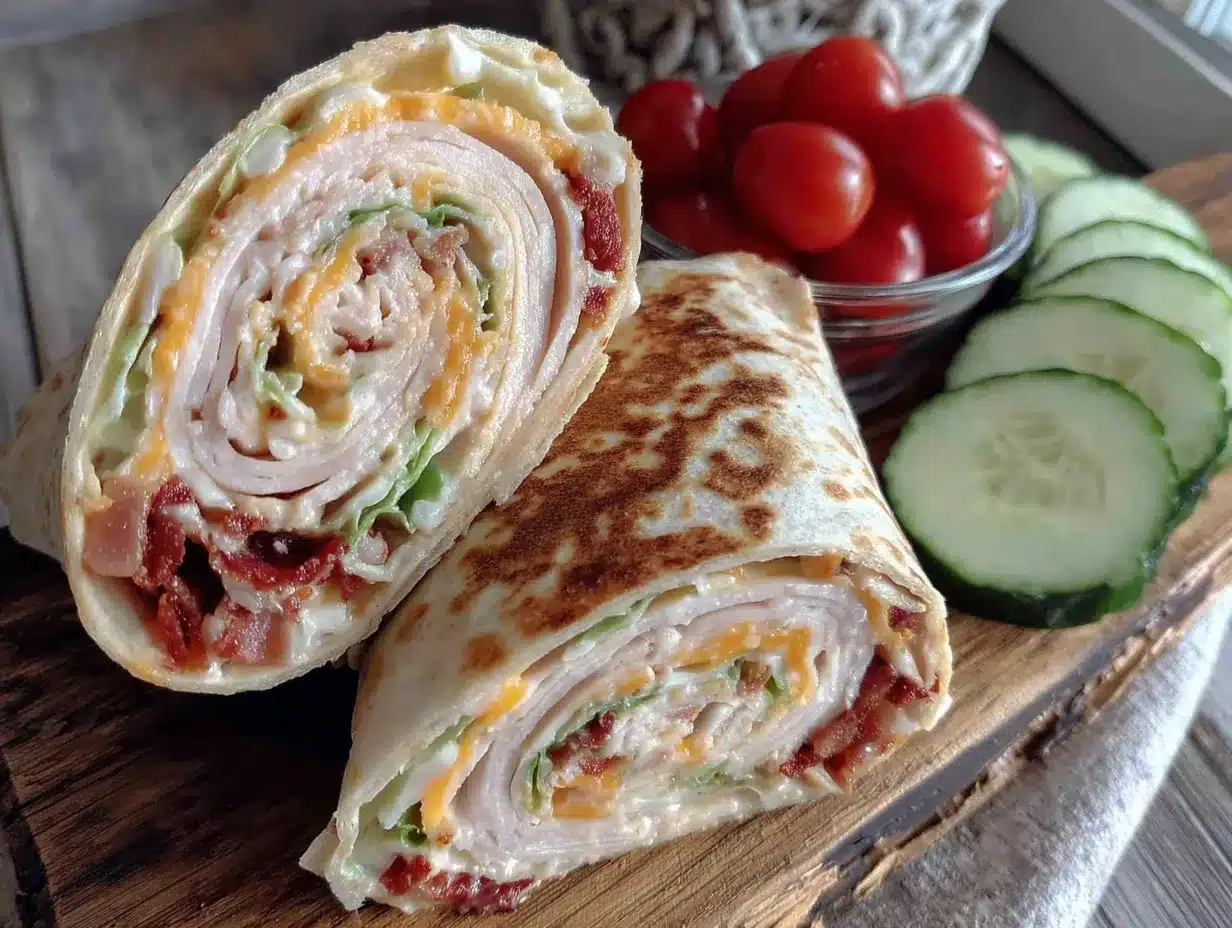
Alright, let’s get into the actual making part. This is where the magic happens, and I promise it’s easier than you think.
- Soften the cream cheese. Take your cream cheese out of the fridge about 20 minutes before you start, or microwave it for 10-15 seconds until it’s soft but not melted. You want it to be spreadable, like room-temperature butter. If it’s too cold, it’ll tear your tortillas.
- Mix the filling. In a small bowl, combine the softened cream cheese, dry ranch seasoning mix, finely shredded cheddar, chopped bell pepper, and green onion. Stir until everything is evenly distributed. Taste it—seriously, do it. You’ll want to eat it with a spoon, and that’s normal.
- Prepare your work surface. Lay a large flour tortilla flat on your cutting board. Make sure it’s at room temperature—cold tortillas crack when you try to roll them. If yours have been in the fridge, let them sit out for a few minutes or microwave them for 10 seconds between damp paper towels.
- Spread the cream cheese mixture. Using your spatula or butter knife, spread a generous, even layer of the cream cheese mixture over the entire surface of the tortilla, going all the way to the edges. Don’t leave a bare border—that bare edge will give you a sad, filling-less end piece. About 2-3 tablespoons per tortilla is the sweet spot.
- Layer the turkey. Place 2-3 slices of deli turkey flat over the cream cheese, overlapping slightly to cover the surface. Don’t pile them too thick, or your pinwheels will be bulky and hard to roll. One even layer is perfect.
- Add the cheese. Lay 2-3 slices of cheddar cheese over the turkey, again overlapping slightly. If your cheese slices are large, you might only need two. The goal is even coverage without double-thick spots.
- Roll it tight. Starting from one edge, roll the tortilla as tightly as you can without tearing it. Use your fingers to keep the filling tucked in as you go. Think of it like rolling a sleeping bag—firm, even pressure, no air pockets. When you reach the end, press down gently to seal the seam.
- Wrap and chill. Wrap the rolled tortilla tightly in plastic wrap or parchment paper, twisting the ends like a candy wrapper to keep it snug. Place it seam-side down on a baking sheet or plate. Repeat with remaining tortillas. Refrigerate for at least 30 minutes, but 1-2 hours is better. This step is crucial—if you skip it, your pinwheels will fall apart when you slice them. I learned this the hard way and ended up with a pile of unraveled tortilla pieces.
- Slice and serve. Unwrap the chilled rolls and place them on a cutting board. Using a sharp serrated knife, slice each roll into 1-inch thick pinwheels. Use a gentle sawing motion rather than pressing straight down—this keeps the shape intact. You should get about 6-8 pinwheels per large tortilla.
- Pack and go. Arrange the pinwheels in your lunchbox container, slightly overlapping or standing on their sides. Add toothpicks if you want to keep them from shifting around. They’re ready to go!
A few things I’ve noticed along the way: if your cream cheese mixture seems too thick, add a splash of milk to thin it out. If it’s too thin, add more shredded cheese. The texture should be spreadable but not runny. And if you’re making these for school lunches, consider packing the cream cheese mixture separately and letting kids assemble their own—it’s a fun lunch activity and keeps the pinwheels fresher.
Cooking Tips & Techniques
I’ve made these pinwheels probably fifty times by now, and I’ve picked up a few tricks that make a real difference. First, the chilling thing. I know it’s tempting to skip it when you’re in a hurry, but don’t. That thirty minutes in the fridge is what transforms a floppy wrap into a neat, sliceable pinwheel. The cream cheese firms up, the tortilla relaxes, and everything holds together beautifully. I once rushed through and sliced immediately, and let me tell you, it was a disaster. Cream cheese everywhere, turkey sliding off, kids crying. Okay, maybe not crying, but definitely disappointed.
Another thing—wet ingredients are the enemy of a good pinwheel. If you add anything watery like fresh tomatoes or cucumbers, your pinwheels will turn into a soggy mess within a few hours. Stick with bell peppers and green onions, or use finely grated carrots that have been patted dry. I’ve also had good results with finely chopped spinach, as long as it’s completely dry.
For the cleanest slices, use a serrated knife and a gentle sawing motion. Don’t press straight down—that squishes the pinwheel and pushes the filling out the sides. And clean your knife between cuts, especially if you’re making a big batch. The cream cheese builds up and makes subsequent cuts messy. I keep a damp paper towel nearby and wipe the blade after every two or three cuts.
One mistake I made early on was overfilling the tortillas. More filling sounds better, but it actually makes the pinwheels harder to roll and more likely to burst. Stick with a thin, even layer of everything. You want the flavors to balance, not overwhelm each other. And if you’re adding extra ingredients like avocado or bacon, go easy—less is more with pinwheels.
Timing-wise, these are perfect for meal prep. I make a batch of four rolls on Sunday evening, wrap them up, and slice one each morning for lunch. They stay fresh in the fridge for up to three days, though the tortillas start to soften a bit by day four. If you’re prepping for the whole week, consider keeping the cream cheese mixture separate and assembling fresh each morning. It only takes two minutes per wrap.
Variations & Adaptations
One of the best things about this recipe is how easy it is to switch things up. Here are some variations I’ve tried and loved:
Southwest Style: Swap the ranch seasoning for taco seasoning, add some canned black beans (rinsed and drained), and use pepper jack cheese instead of cheddar. The result is a spicy, flavorful pinwheel that feels totally different from the original. I made these for a road trip once, and they were gone before we hit the highway.
Veggie Lover’s Version: Skip the turkey entirely and load up on finely chopped veggies—cucumber (seeds removed), shredded carrots, thinly sliced radishes, and fresh herbs like dill or parsley. Use a garlic herb cream cheese as the base. These are great for meatless Mondays or for anyone who prefers a lighter lunch.
Breakfast Pinwheels: Swap the turkey for crispy bacon or breakfast sausage crumbles, use a cheddar-jack cheese blend, and add a thin layer of scrambled eggs if you’re feeling ambitious. These are perfect for brunch or for kids who need a heartier morning meal.
For dietary adaptations, you can use gluten-free tortillas—just be extra gentle when rolling, as they tend to crack more easily. I’ve used Siete brand almond flour tortillas with good results, though they’re smaller, so you’ll get fewer pinwheels per roll. For a dairy-free version, use vegan cream cheese and dairy-free cheddar shreds. The texture is slightly different, but the flavor still works. And if you’re watching sodium, look for low-sodium turkey and reduced-sodium ranch seasoning.
My personal favorite variation involves adding a thin layer of cozy spiced peach butter under the cream cheese. It sounds weird, I know, but the sweet and savory combo is incredible. The peach butter adds this subtle fruity sweetness that cuts through the richness of the cheese and turkey. Try it once, and you’ll be hooked.
Serving & Storage Suggestions
These pinwheels are best served cold or at room temperature, straight from the lunchbox. They don’t need reheating, which is part of their charm. If you’re serving them at home, arrange them on a platter with the cut sides facing up so everyone can see the pretty spiral pattern. Add a small bowl of extra ranch dressing or honey mustard for dipping, and watch them disappear.
For lunchboxes, I like to pack the pinwheels in a small container with a tight-fitting lid, standing them on their sides so they don’t get squished. Add a few cherry tomatoes, some baby carrots, and maybe a handful of grapes for a complete lunch that feels special. If you’re worried about the pinwheels unrolling, secure each one with a toothpick—just remember to warn the eater!
Storage-wise, these keep well in the refrigerator for up to three days. Store them in an airtight container with a paper towel at the bottom to absorb any excess moisture. If you’re making a big batch, I recommend slicing only what you need and keeping the remaining rolls whole. Whole rolls stay fresh longer than sliced ones because there’s less surface area exposed to air.
For freezing, it’s possible but not ideal. The cream cheese can get a little grainy after thawing, and the tortillas tend to become soft. If you do freeze them, wrap each roll tightly in plastic wrap and then foil, and freeze for up to a month. Thaw overnight in the refrigerator and slice just before serving. I’ve done this for camping trips, and they were fine, but fresh is definitely better.
Flavor-wise, these actually improve after a few hours in the fridge. The flavors meld together, and the cream cheese mixture sets up perfectly. I actually prefer them the day after I make them—the ranch seasoning has had time to really soak into everything, and each bite is perfectly balanced.
Nutritional Information & Benefits
Here’s the approximate nutritional breakdown for one pinwheel (based on 6 pinwheels per wrap, using standard ingredients):
| Nutrient | Amount per Pinwheel |
|---|---|
| Calories | 120-140 |
| Protein | 8-10g |
| Carbohydrates | 10-12g |
| Fat | 6-8g |
| Fiber | 1-2g |
| Sodium | 350-400mg |
These pinwheels offer a decent balance of protein from the turkey and cheese, carbohydrates from the tortilla for energy, and healthy fats from the cream cheese. The bell peppers add a good dose of vitamin C, and the green onions provide some vitamin K and antioxidants. If you’re looking to boost the nutritional profile, add some finely chopped spinach or shredded carrots to the cream cheese mixture—they blend right in and add fiber and vitamins without changing the flavor.
For those with dietary concerns, this recipe can be made gluten-free with appropriate tortillas, and dairy-free with vegan alternatives. The turkey provides lean protein, and you can reduce sodium by using low-sodium deli meat and homemade ranch seasoning. It’s not a health food, exactly, but it’s a solid, balanced lunch option that beats a sad sandwich any day.
One thing I appreciate about these pinwheels is that they actually keep you full. The combination of protein, fat, and carbs provides sustained energy without the crash you get from a carb-heavy lunch. My kids don’t come home hangry on pinwheel days, which is a win in my book.
Conclusion
These turkey cheddar pinwheel lunchbox wraps have honestly changed the way I think about packed lunches. They’re not fancy or complicated, but they work. They work for busy mornings, for picky eaters, for meal prep, and for those days when you just need one less thing to stress about. The first time my kid asked for seconds of something I packed, I nearly cried. Okay, not nearly—I definitely teared up a little.
What I love most about this recipe is how forgiving it is. You can swap ingredients, adjust the seasonings, add or subtract fillings, and it still turns out great. It’s a template, not a rigid formula. Use it as a starting point and make it your own. Add some quick sweet and spicy pickled jalapeños for heat, or a smear of honey peach cobbler filling for a sweet-savory twist. The possibilities are endless, and that’s the beauty of it.
I’d love to hear how these turn out for you. Drop a comment below and let me know what variations you tried, or tag me in your lunchbox photos. And if you’re looking for more easy lunch ideas, check out these no-bake peanut butter chocolate energy balls for a perfect lunchbox treat. Happy packing, friends—you’ve got this.
Frequently Asked Questions
Can I make these pinwheels the night before?
Absolutely. In fact, I recommend it. Make the rolls, wrap them tightly, and refrigerate overnight. Slice them in the morning before packing. The flavors meld together beautifully overnight, and the rolls are easier to slice when fully chilled.
How do I keep the pinwheels from getting soggy in a lunchbox?
The key is to avoid watery ingredients. Stick with bell peppers, green onions, and dry veggies. Pat any wet ingredients dry with a paper towel before adding them. Also, make sure your cream cheese mixture isn’t too thin—it should be spreadable but not runny.
Can I use flavored cream cheese instead of plain?
Yes! Garden vegetable cream cheese works great, as does chive and onion or even strawberry for a sweet version. Just skip the ranch seasoning if your cream cheese is already flavored, or adjust to taste. I’ve used whipped cream cheese too, and it spreads more easily but has a slightly different texture.
How long do these pinwheels last in the fridge?
Whole rolls stay fresh for up to 3-4 days in the refrigerator. Sliced pinwheels are best within 2 days. Store them in an airtight container with a paper towel to absorb moisture. If the tortillas start to soften by day three, that’s normal—they’re still safe to eat, just not as pretty.
Can I use other meats besides turkey?
Absolutely. Ham, roast beef, chicken breast, or even salami all work great. Just keep the slices thin and even for easy rolling. If you’re using a stronger-flavored meat like salami, you might want to reduce the amount or pair it with a milder cheese. I’ve made a version with honey ham and Swiss cheese that’s become a family favorite.
Pin This Recipe!
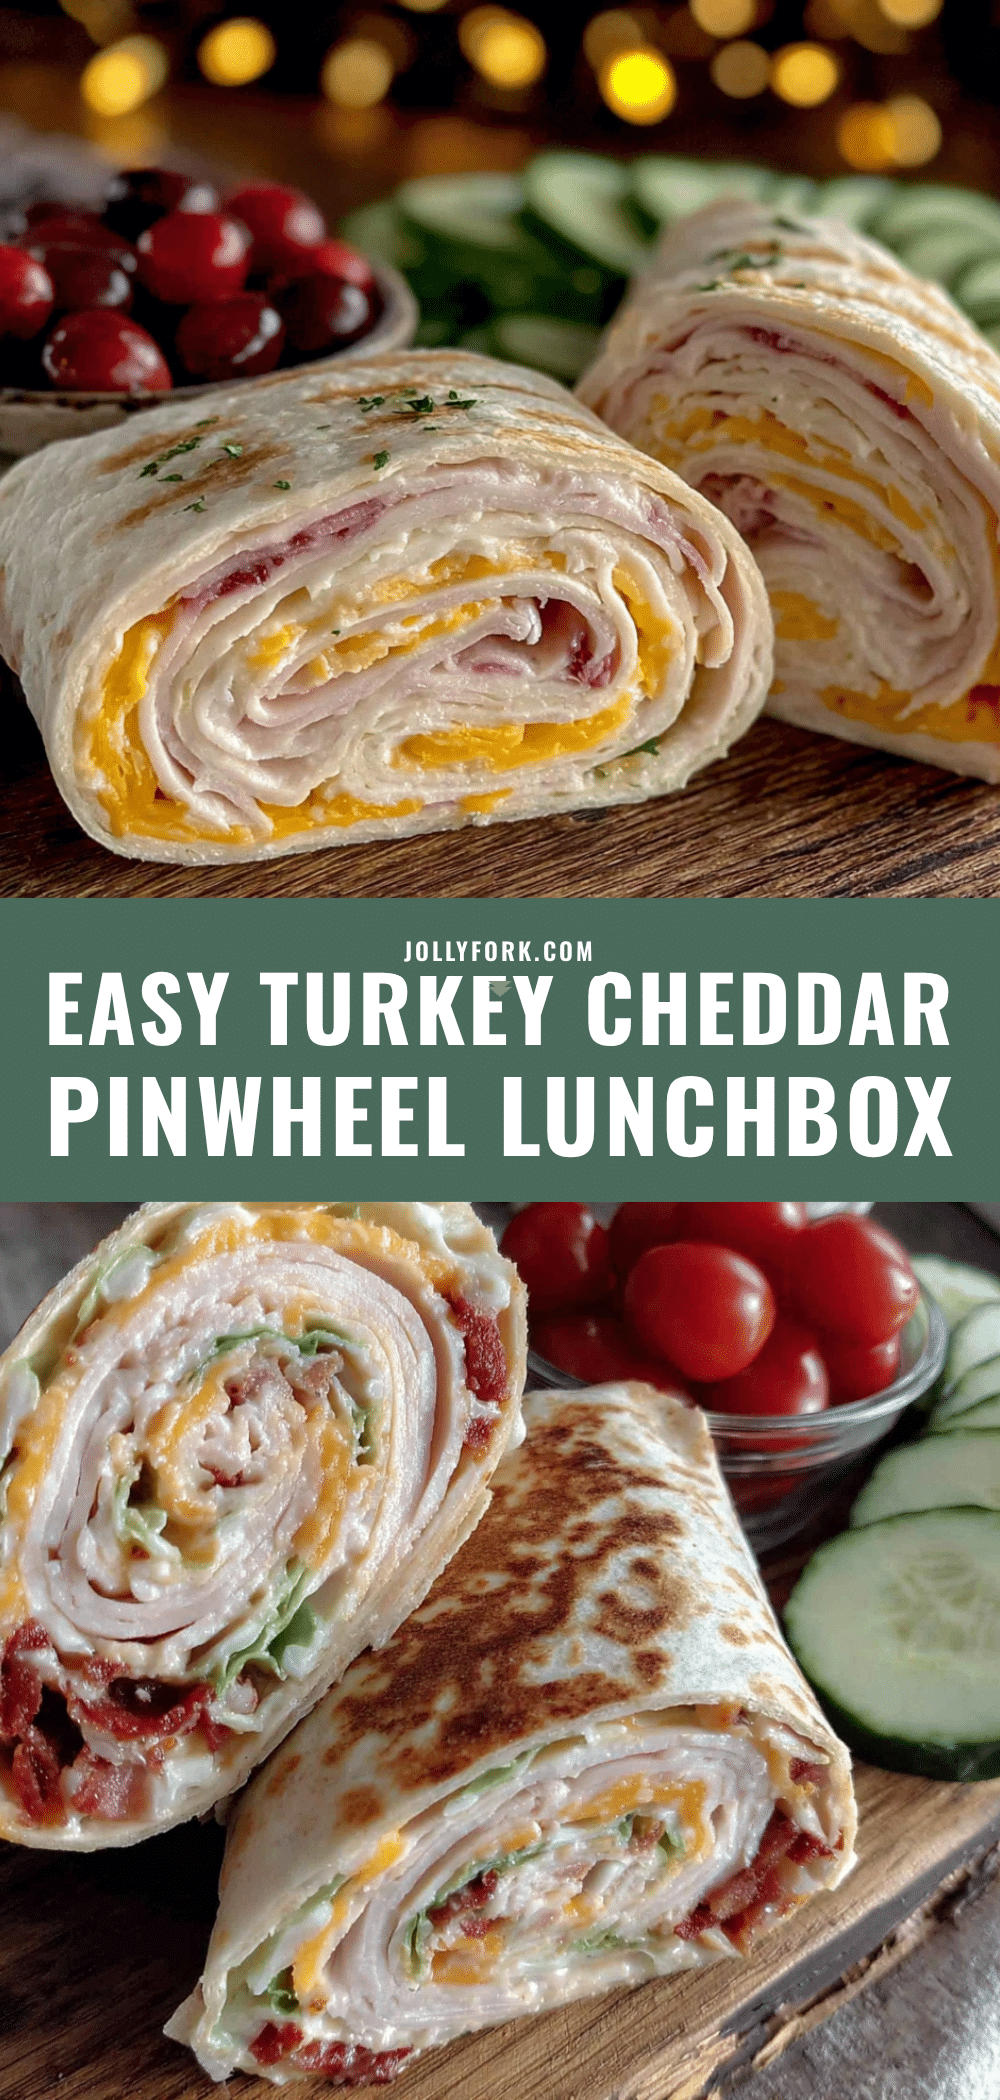
Easy Turkey Cheddar Pinwheel Wraps: Best Lunchbox Idea

These turkey cheddar pinwheel wraps are quick, easy, and perfect for lunchboxes. Made with a creamy ranch-seasoned filling, turkey, and cheddar, they hold up beautifully without getting soggy.
- Prep Time: 10 minutes
- Cook Time: 0 minutes
- Total Time: 40 minutes (including chilling)
- Yield: 4 servings (about 24-32 pinwheels) 1x
- Category: Lunch
- Cuisine: American
Ingredients
- 4 large flour tortillas (burrito size, about 10 inches)
- 8 oz cream cheese, softened
- 1/4 cup dry ranch dressing mix
- 1/4 cup finely shredded sharp cheddar cheese
- 1/2 cup finely chopped bell pepper (any color)
- 1/4 cup finely chopped green onion (green parts only)
- 8–10 slices deli turkey breast (about 6–8 oz)
- 8–10 slices sharp cheddar cheese
Instructions
- Soften the cream cheese by letting it sit at room temperature for 20 minutes or microwaving for 10-15 seconds until spreadable.
- In a small bowl, combine softened cream cheese, dry ranch seasoning, shredded cheddar, chopped bell pepper, and green onion. Stir until evenly distributed.
- Lay a large flour tortilla flat on a cutting board. Ensure it is at room temperature.
- Spread a generous, even layer of the cream cheese mixture over the entire surface of the tortilla, going all the way to the edges.
- Place 2-3 slices of deli turkey flat over the cream cheese, overlapping slightly to cover the surface.
- Lay 2-3 slices of cheddar cheese over the turkey, overlapping slightly.
- Starting from one edge, roll the tortilla as tightly as possible without tearing, keeping the filling tucked in. Press down gently to seal the seam.
- Wrap the rolled tortilla tightly in plastic wrap or parchment paper, twisting the ends like a candy wrapper. Place seam-side down on a baking sheet or plate. Repeat with remaining tortillas.
- Refrigerate for at least 30 minutes, preferably 1-2 hours.
- Unwrap the chilled rolls and place on a cutting board. Using a sharp serrated knife, slice each roll into 1-inch thick pinwheels using a gentle sawing motion.
- Arrange pinwheels in a lunchbox container. Add toothpicks if desired to prevent unrolling.
Notes
Chilling is crucial for clean slices. Avoid watery ingredients like fresh tomatoes to prevent sogginess. For best results, use full-fat cream cheese and let it soften before spreading. These pinwheels keep in the fridge for up to 3 days.
Nutrition
- Serving Size: 6-8 pinwheels
- Calories: 120140
- Sugar: 12
- Sodium: 350400
- Fat: 68
- Saturated Fat: 34
- Carbohydrates: 1012
- Fiber: 12
- Protein: 810
Keywords: turkey cheddar pinwheel wraps, lunchbox ideas, easy lunch, pinwheel sandwiches, meal prep lunch


