Third batch in two weeks, and I finally figured out the maple situation. Not the syrup itself — that part was always easy — but the moment it hits warm dough. That split second where maple stops being just a flavor and becomes something more. A scent that hangs in your kitchen for hours, clinging to dish towels and the inside of your sweater sleeves.
I kept making these maple pumpkin cinnamon rolls because something felt slightly off each time. First attempt: the dough was too sticky, a wet pumpkin blob that refused to roll. Second time: better structure, but the filling slid out like it had somewhere else to be. Third try, I let the dough rest an extra fifteen minutes. That was it. That small, stupid pause changed everything. The perfect maple pumpkin cinnamon rolls with cream cheese icing weren’t about adding more — they were about waiting just long enough.
You know how some recipes feel like they already existed somewhere, and you just stumbled into them? That’s this one. I didn’t invent maple and pumpkin together — that’s practically fall law at this point. But the ratio, the little adjustments, the way the cream cheese icing melts into the swirls instead of sitting on top like a hat? That took repetition. Honest, slightly obsessive repetition. These are the rolls I kept making until my family stopped asking what’s for breakfast and just started watching the oven.
They’re not complicated. They just ask for a little patience and a real pour of maple syrup. Which, honestly, is the least you can do for something this good.
Why You’ll Love This Recipe
I’ve tested this recipe more times than I care to admit — somewhere around seven full batches across three weeks — and every single version taught me something. That’s the kind of experience that turns a good recipe into one you can trust blindfolded. Here’s what makes these rolls worth your time:
- Real maple flavor, not fake : Two forms of maple — syrup in the dough and brown sugar in the filling — create layers of sweetness that don’t hit you all at once.
- Pumpkin that actually works : Pure pumpkin puree keeps the dough tender without making it gummy, as long as you measure correctly (drain any excess water first!).
- No stand mixer required : You can mix this dough by hand. I’ve done it both ways, and hand-kneading builds better texture anyway.
- Make-ahead friendly : Assemble the rolls the night before, refrigerate overnight, and bake fresh in the morning. Your future self will thank you.
- Cream cheese icing that stays creamy : Not too stiff, not too runny — just thick enough to drape over warm rolls without sliding off.
These aren’t your average pumpkin rolls. The texture is lighter, the maple hits deeper, and the whole thing tastes like someone who actually knows what they’re doing made it for you. Because they did. Or, well, you did.
What Ingredients You Will Need
This recipe relies on simple, fall-friendly ingredients that work together to create something genuinely special. Most of these are pantry staples, especially if you’ve been baking through autumn like I have. Let me walk you through what you’ll need and why each one matters.
For the Dough
- Whole milk (1 cup, warmed to 110°F) — Whole milk adds richness that skim milk just can’t match. Warm it gently; too hot kills the yeast, too cold slows it down.
- Active dry yeast (2 ¼ teaspoons, or one standard packet) — I prefer active dry over instant for this dough because the extra proofing time lets the pumpkin flavor settle in.
- Granulated sugar (¼ cup) — Feeds the yeast and adds a touch of sweetness to balance the pumpkin.
- Pumpkin puree (½ cup) — Not pumpkin pie filling! Make sure you grab 100% pure pumpkin puree. Libby’s is my go-to for consistent texture and moisture content.
- Pure maple syrup (¼ cup) — The good stuff. Grade A dark amber works beautifully here. Skip the pancake syrup — it’s not the same.
- Unsalted butter (4 tablespoons, melted and slightly cooled) — Unsalted gives you control over the salt level. Melted butter incorporates more evenly than softened.
- Large egg (1, room temperature) — Room temperature eggs blend into the dough more smoothly and help with rise.
- All-purpose flour (3 to 3 ½ cups) — Start with 3 cups and add more as needed. The dough should be soft but not sticky. King Arthur Flour is my preferred brand for consistent protein content.
- Salt (½ teaspoon) — Don’t skip it. Salt controls yeast activity and enhances every other flavor.
- Pumpkin pie spice (1 teaspoon) — You can make your own blend if you prefer: cinnamon, nutmeg, ginger, and a pinch of cloves.
For the Maple Brown Sugar Filling
- Unsalted butter (4 tablespoons, softened) — Softened butter spreads more easily than melted. Let it sit out for about 30 minutes before starting.
- Brown sugar (¾ cup, packed) — Light or dark brown sugar both work. Dark brown gives a deeper molasses flavor that pairs beautifully with maple.
- Pure maple syrup (2 tablespoons) — This intensifies the maple flavor in the filling without making it runny.
- Ground cinnamon (1 ½ teaspoons) — Cinnamon is non-negotiable here. It’s the bridge between pumpkin and maple.
- Pinch of salt — Balances the sweetness and keeps the filling from tasting one-dimensional.
For the Cream Cheese Icing
- Cream cheese (4 ounces, softened) — Full-fat cream cheese gives the best texture. Low-fat versions can turn the icing runny.
- Unsalted butter (2 tablespoons, softened) — Softened butter blends more smoothly into cream cheese than melted butter does.
- Powdered sugar (1 cup, sifted) — Sifting prevents lumps and keeps the icing silky smooth.
- Pure maple syrup (1 tablespoon) — Just enough to reinforce the maple theme without overpowering the cream cheese tang.
- Vanilla extract (½ teaspoon) — Pure vanilla, not imitation. It makes a real difference in the final flavor.
- Pinch of salt — A tiny pinch brightens the whole icing.
Equipment Needed
You don’t need a bakery-grade kitchen to pull these off. Here’s what I actually used across all those test batches:
- Large mixing bowl — Glass or stainless steel works best. Plastic bowls can retain grease that interferes with yeast.
- Whisk — For combining dry ingredients and mixing the icing.
- Wooden spoon or rubber spatula — For stirring the dough before you get your hands in there.
- 9×13-inch baking dish — Glass or ceramic. Metal pans work too, but glass lets you see the browning on the bottom.
- Rolling pin — A standard rolling pin is fine. If you don’t have one, a wine bottle works in a pinch (clean it first!).
- Sharp knife or bench scraper — For cutting the rolls cleanly. A dull knife squishes the dough.
- Kitchen scale (optional but helpful) — Weighing the flour ensures consistent results. One cup of all-purpose flour weighs about 120 to 125 grams.
- Plastic wrap or a clean kitchen towel — For covering the dough while it rises.
- Parchment paper — Lining the baking dish makes cleanup infinitely easier.
I’ve made these rolls using a $10 rolling pin from a grocery store and a hand-me-down glass baking dish. Special equipment is nice, but it’s not necessary. Your hands and some patience are the real tools here.
Preparation Method
Let me walk you through this step by step. I’ve included all the little details I wish someone had told me the first time I made pumpkin cinnamon rolls.
Step 1: Activate the Yeast
Warm 1 cup of whole milk to about 110°F — it should feel warm to the touch but not hot, like bath water. Pour it into your mixing bowl and sprinkle the active dry yeast over the top. Add 1 tablespoon of the granulated sugar (from the ¼ cup) and stir gently. Let it sit for 5 to 7 minutes until it gets foamy and smells like bread. If it doesn’t foam, your yeast might be dead — start over with fresh yeast.
Step 2: Mix the Wet Ingredients
Once the yeast is active, add the remaining granulated sugar, pumpkin puree, pure maple syrup, melted butter, and the room temperature egg. Whisk everything together until smooth. The mixture will look slightly orange and smell amazing already. Don’t worry if it seems thin — the flour will thicken it up.
Step 3: Add the Dry Ingredients
Add 3 cups of all-purpose flour, salt, and pumpkin pie spice to the bowl. Stir with a wooden spoon until a shaggy dough forms. The dough will be soft and slightly sticky. If it’s too sticky to handle, add the remaining ½ cup of flour, one tablespoon at a time, until it comes together. You want a dough that’s soft but not wet — it should feel like a baby’s earlobe when you poke it.
Step 4: Knead the Dough
Turn the dough out onto a lightly floured surface. Knead for about 8 to 10 minutes, pushing the dough away from you with the heel of your hand, folding it back, and turning it. The dough should become smooth and elastic. If you’re using a stand mixer with a dough hook, knead on medium-low speed for 6 to 7 minutes. I actually prefer hand-kneading for this recipe — it lets you feel when the dough is ready.
Step 5: First Rise
Place the dough in a lightly greased bowl (I use butter or a neutral oil). Cover with plastic wrap or a clean kitchen towel and let it rise in a warm, draft-free spot for about 1 to 1 ½ hours, until doubled in size. My favorite spot is inside the oven with the light on (not the oven itself turned on!). If your kitchen is cold, it might take closer to 2 hours. Be patient — this is where the flavor develops.
Step 6: Make the Filling
While the dough rises, make the filling. In a small bowl, combine the softened butter, packed brown sugar, maple syrup, ground cinnamon, and a pinch of salt. Mix until it forms a smooth, spreadable paste. Set it aside at room temperature.
Step 7: Roll Out the Dough
Once the dough has doubled, punch it down gently to release the air. Turn it onto a lightly floured surface and roll it into a rectangle about 12×18 inches. The dough should be about ¼-inch thick. Try to keep the edges as straight as possible — uneven edges mean uneven rolls. If the dough springs back while rolling, let it rest for 5 minutes and try again.
Step 8: Spread the Filling
Spread the maple brown sugar filling evenly over the entire dough rectangle, leaving a 1-inch border along one long edge (the edge farthest from you). This bare border will help seal the roll. Use an offset spatula or the back of a spoon to spread it gently without tearing the dough.
Step 9: Roll and Cut
Starting from the long edge closest to you, roll the dough tightly into a log. Roll evenly and gently — you want the filling to stay inside, not squish out the sides. Pinch the seam to seal it. Using a sharp knife or bench scraper, cut the log into 12 equal rolls, each about 1 ½ inches thick. A clean cut is key; sawing back and forth squishes the rolls. I like to cut the log in half first, then cut each half into six pieces.
Step 10: Second Rise
Place the rolls in a greased 9×13-inch baking dish lined with parchment paper, spacing them evenly. Cover with plastic wrap and let them rise for another 30 to 45 minutes, until they’re puffy and touching each other. If you’re making these ahead, cover the dish tightly and refrigerate overnight. In the morning, let them sit at room temperature for 30 minutes before baking.
Step 11: Bake
Preheat your oven to 350°F. Bake the rolls for 22 to 28 minutes, until they’re golden brown on top and a toothpick inserted in the center comes out clean. The internal temperature should reach about 190°F. If the tops are browning too quickly, tent loosely with foil for the last 5 to 7 minutes. Let them cool in the pan for about 10 minutes before icing.
Step 12: Make the Icing
While the rolls cool, make the cream cheese icing. Beat the softened cream cheese and butter together until smooth and fluffy. Add the sifted powdered sugar, maple syrup, vanilla extract, and a pinch of salt. Beat until creamy and smooth. If the icing is too thick, add a teaspoon of milk. If it’s too thin, add a little more powdered sugar.
Step 13: Ice and Serve
Spread the cream cheese icing over the warm rolls. The warmth will melt it slightly, letting it seep into every swirl. Serve warm. This is not optional — warm rolls are the whole point.
Cooking Tips & Techniques
I’ve made every mistake you can make with these rolls so you don’t have to. Here’s what I learned the hard way:
- Don’t over-flour the dough. Pumpkin puree varies in moisture content depending on the brand and even the can. Start with 3 cups of flour and add more only if the dough is truly unmanageable. A slightly sticky dough yields softer rolls.
- Let the dough rest if it fights you. If the dough keeps springing back while you’re rolling it, cover it with a towel and let it rest for 10 minutes. The gluten relaxes, and the dough becomes much easier to work with.
- Use dental floss to cut the rolls. This sounds ridiculous, but it works. Slide a piece of unflavored dental floss under the log, cross the ends over the top, and pull. You get clean cuts without squishing the dough. I learned this from a pastry chef friend and haven’t used a knife since.
- Check your oven temperature. Ovens run hot or cold more often than you’d think. An oven thermometer costs five dollars and saves you from under-baked or burnt rolls. Trust me on this one.
- Don’t over-bake. Pull the rolls out when they’re golden brown but still soft. They continue cooking in the pan for a few minutes after you take them out. Over-baked rolls are dry rolls, and dry rolls are sad rolls.
Variations & Adaptations
One of the best things about this recipe is how flexible it is. Here are some variations I’ve tried and loved:
- Gluten-free version: Substitute the all-purpose flour with a 1:1 gluten-free baking flour blend. Add an extra tablespoon of milk to compensate for the drier texture. The rolls will be slightly more delicate, but still delicious.
- Dairy-free version: Use oat milk or almond milk instead of whole milk, and substitute the butter with a high-quality vegan butter. Use dairy-free cream cheese for the icing. The texture changes slightly, but the flavor still shines.
- Add nuts or dried fruit: Sprinkle ½ cup of chopped pecans or walnuts over the filling before rolling. Or add ¼ cup of dried cranberries for a tart pop of flavor. I made a batch with candied pecans once, and it was dangerous.
- Spice it up: Add ¼ teaspoon of ground cardamom or a pinch of cloves to the filling for a more complex spice profile. Cardamom and maple are an underrated combination.
- Make them mini: Cut the log into 18 to 20 smaller rolls and bake in a 9×13-inch dish. Reduce the baking time to 18 to 22 minutes. Perfect for brunch parties or when you want to pretend you’re only having one.
Serving & Storage Suggestions
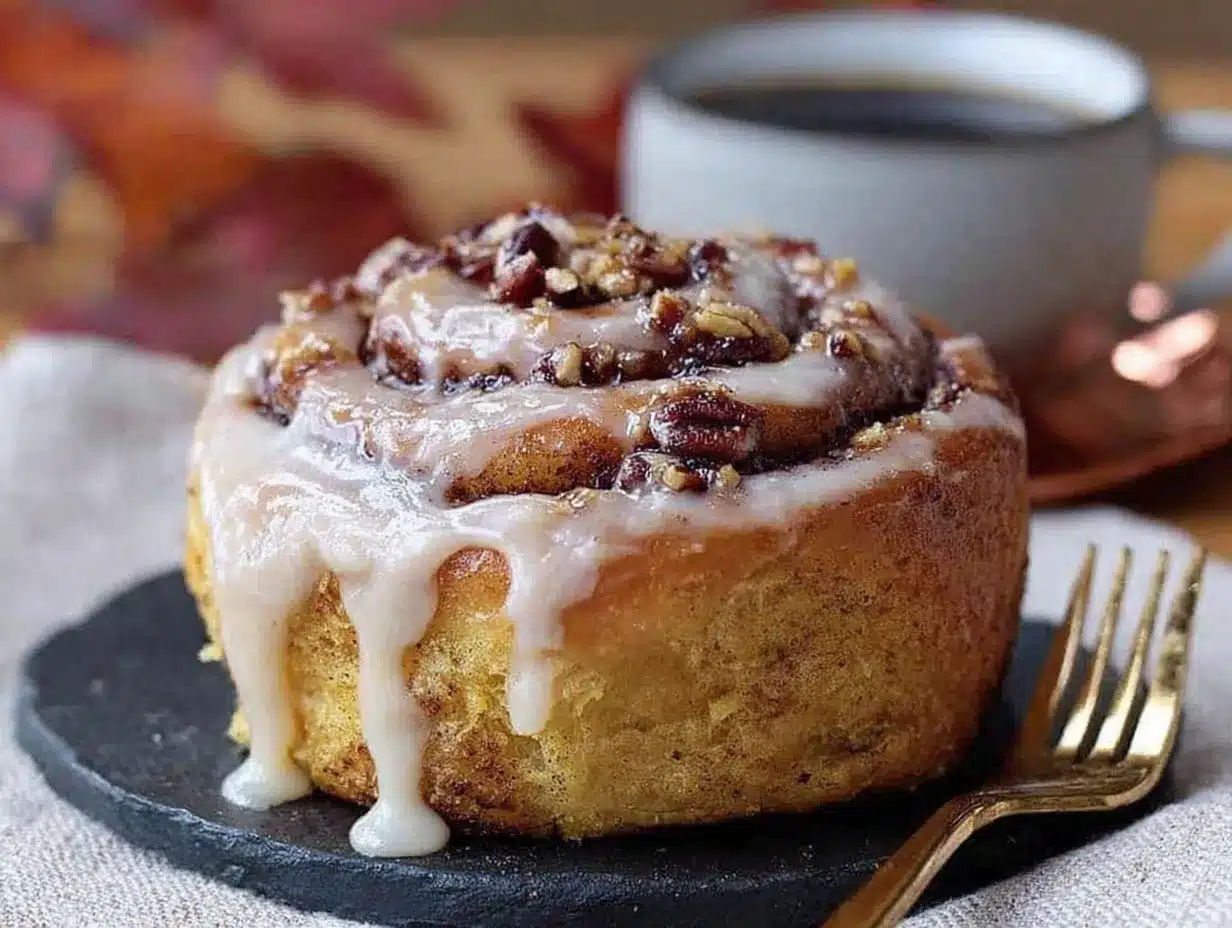
These rolls are best served warm, ideally within 30 minutes of coming out of the oven. The cream cheese icing melts into the nooks and crannies, creating that perfect swirl of sweet, tangy, and spiced. I like to serve them on a large wooden board or a simple white platter — the orange and brown tones against a neutral background look beautiful for photos or just for your own satisfaction.
For a full fall brunch spread, pair these rolls with a warm mug of spiced apple cider or a cozy rustic sourdough pumpkin bread for an extra carb-loaded morning. If you’re feeling savory, a side of crispy bacon or breakfast sausage balances the sweetness perfectly. I’ve also been known to serve them alongside a creamy roasted cherry tomato basil bisque for a lunch that feels like a hug in a bowl.
To store leftovers (if you have any), place them in an airtight container at room temperature for up to 2 days. For longer storage, refrigerate for up to 5 days. Reheat individual rolls in the microwave for 15 to 20 seconds, or warm the whole pan in a 300°F oven for 10 minutes. The rolls also freeze beautifully — wrap them tightly in plastic wrap and foil, then freeze for up to 3 months. Thaw overnight in the refrigerator and reheat before serving.
One note: the cream cheese icing will soak into the rolls more as they sit. Some people prefer this — it makes the rolls almost pudding-like. If you want to keep the icing separate, store it in a covered container in the refrigerator and add it after reheating.
Nutritional Information & Benefits
Let’s be honest — these are not health food. But they do have some redeeming qualities worth mentioning. Each roll (with icing) contains approximately 320 to 350 calories, 12 grams of fat, 50 grams of carbohydrates, and 5 grams of protein. The exact numbers depend on your ingredient choices and portion sizes.
Pumpkin puree is a good source of vitamin A and fiber, which helps keep you full longer. Maple syrup contains antioxidants and minerals like zinc and manganese, though it’s still sugar and should be used in moderation. The cream cheese provides a small amount of calcium and protein. If you’re looking for a lighter option, you can reduce the icing amount or use a lower-fat cream cheese, though I personally think that’s a sad compromise.
These rolls are not gluten-free, dairy-free, or vegan in their standard form, but as I mentioned above, substitutions are possible. If you have specific dietary needs, the variations section has you covered.
Conclusion
These perfect maple pumpkin cinnamon rolls with cream cheese icing are the kind of recipe that becomes a tradition. They’re the thing you make on the first chilly morning of October, the thing your family starts asking about in late September, the thing that makes your kitchen smell like everything good about fall. They’re not complicated — they just ask for a little patience and a real pour of maple syrup.
I’ve made these rolls seven times in three weeks, and I’m still not tired of them. That’s the mark of a recipe worth keeping. I hope you make them, tweak them, spill a little maple syrup on your counter, and eat one while it’s still too hot. That’s how they’re meant to be enjoyed.
If you try these rolls, I’d love to hear about it. Leave a comment below, tag me in your photos, or tell me about your own variations. Did you add pecans? Extra cinnamon? A different icing? The best recipes are the ones we make our own. And if you’re looking for more fall baking inspiration, don’t miss my perfect brown butter pumpkin coffee cake or these tender one-bowl blueberry muffins for when you want something a little simpler.
Happy baking, friends. Your kitchen is about to smell incredible.
Frequently Asked Questions
Can I use canned pumpkin pie filling instead of pumpkin puree?
No, I wouldn’t recommend it. Pumpkin pie filling is pre-sweetened and spiced, which throws off the sugar and spice balance in this recipe. Stick with 100% pure pumpkin puree for the best results. If you only have pumpkin pie filling, reduce the brown sugar in the filling and skip the pumpkin pie spice, but honestly, puree is better.
Can I make these rolls ahead of time?
Absolutely. Assemble the rolls through step 9, place them in the baking dish, cover tightly with plastic wrap, and refrigerate overnight. In the morning, let them sit at room temperature for 30 to 45 minutes while the oven preheats, then bake as directed. The overnight rest actually deepens the flavor — I sometimes prefer the texture of overnight rolls.
Why did my dough not rise?
Several possible reasons. Your yeast might be expired — always check the date on the packet. The milk might have been too hot (above 120°F kills yeast) or too cold (below 100°F slows it down). Your kitchen might be too cold for rising. Or the pumpkin puree might have been too cold straight from the fridge. Let your ingredients come to room temperature before starting.
Can I freeze these rolls?
Yes, and it works beautifully. You can freeze the unbaked rolls after shaping them. Place them in a parchment-lined baking dish, freeze until solid, then transfer to a freezer bag. When you’re ready to bake, thaw overnight in the refrigerator, let them rise at room temperature for about an hour, and bake as directed. You can also freeze baked rolls — wrap them tightly and reheat in a 300°F oven for 10 minutes.
How do I keep the filling from oozing out while baking?
This happens when the rolls are cut too thick or the filling is too wet. Make sure your butter is properly softened (not melted) when you mix the filling. Roll the dough tightly but gently, and pinch the seam firmly. Also, don’t overfill — the recipe calls for ¾ cup of brown sugar, which is plenty. If filling still leaks, it’s okay — it caramelizes in the pan and creates a delicious sticky bottom.
Pin This Recipe!
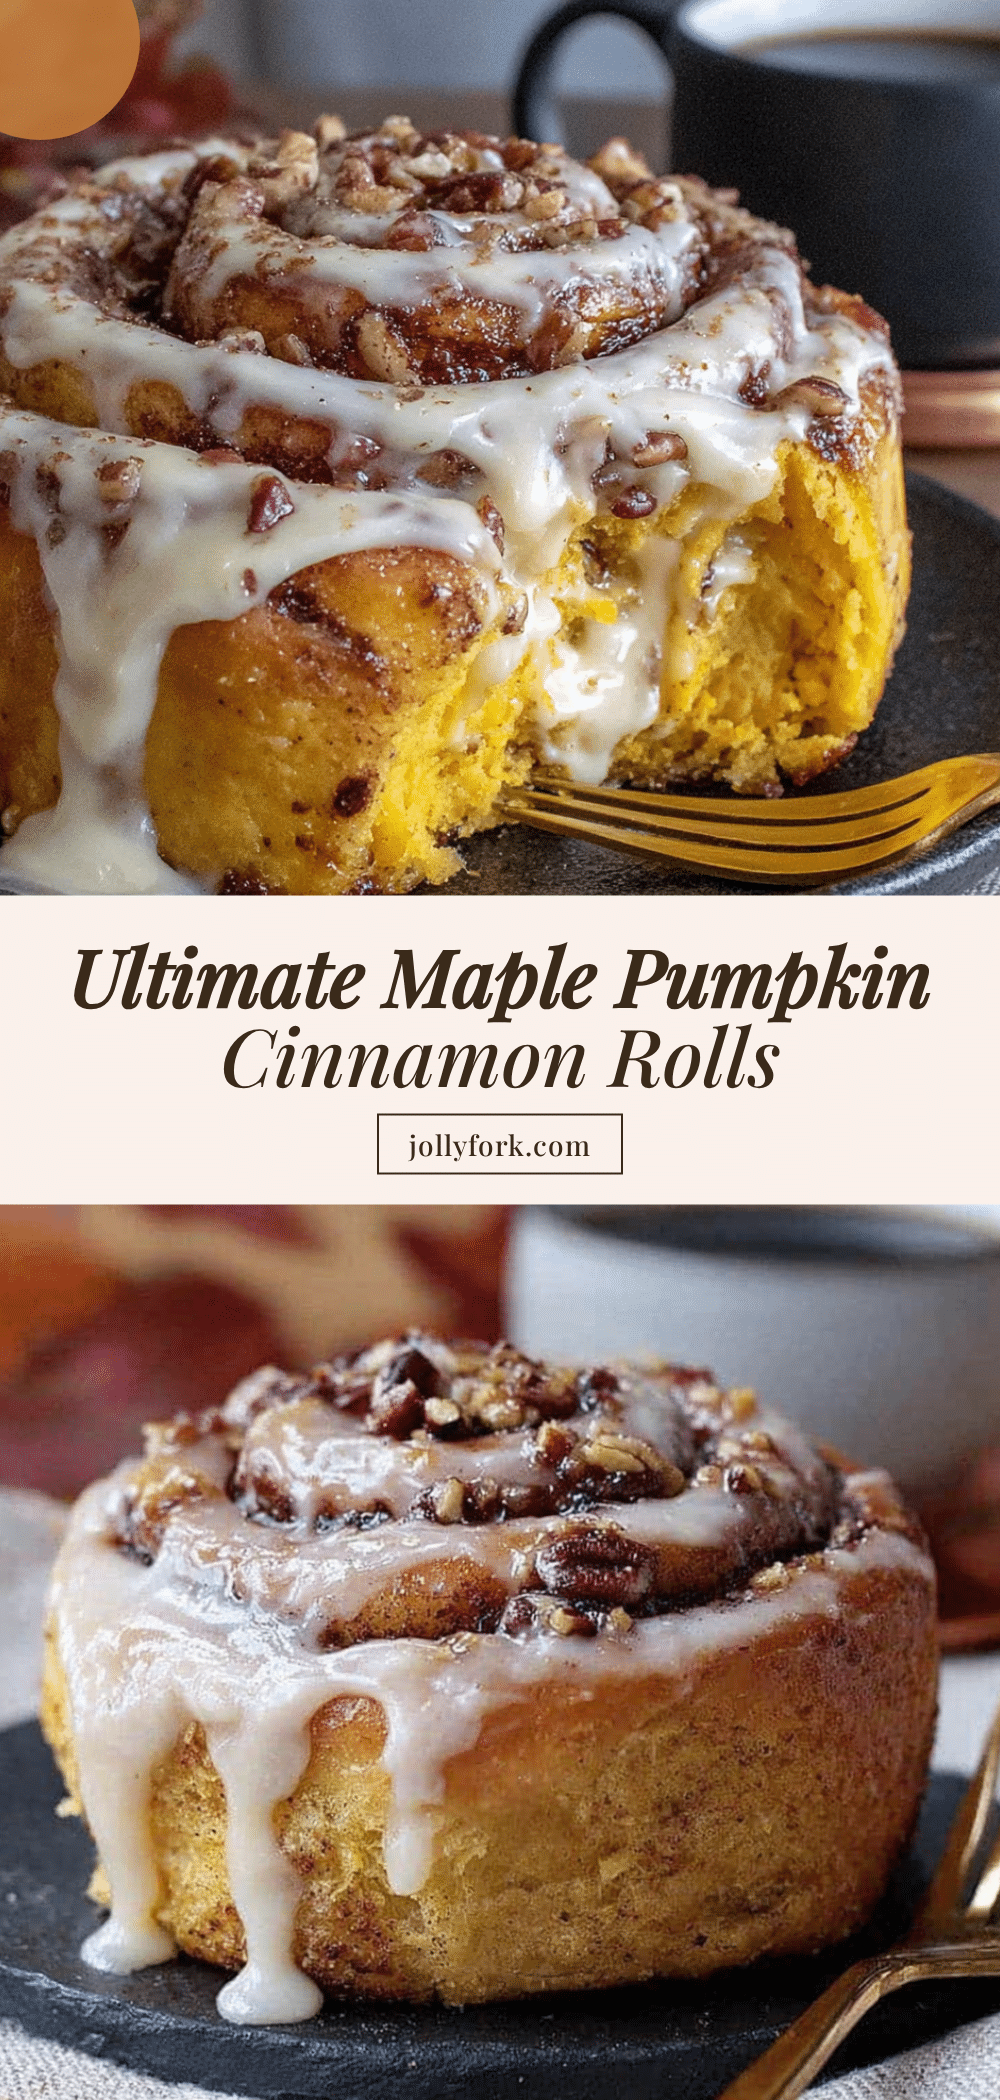
Perfect Maple Pumpkin Cinnamon Rolls with Cream Cheese Icing
These maple pumpkin cinnamon rolls are soft, tender, and filled with a maple brown sugar swirl, topped with a creamy maple cream cheese icing. They’re the ultimate fall breakfast treat, made with real maple syrup and pumpkin puree for deep, layered flavor.
- Prep Time: 30 minutes
- Cook Time: 25 minutes
- Total Time: 2 hours 30 minutes (includes rising time)
- Yield: 12 servings 1x
- Category: Breakfast, Dessert
- Cuisine: American
Ingredients
- 1 cup whole milk, warmed to 110°F
- 2 ¼ teaspoons active dry yeast (1 standard packet)
- ¼ cup granulated sugar, divided
- ½ cup pumpkin puree (100% pure, not pumpkin pie filling)
- ¼ cup pure maple syrup (Grade A dark amber preferred)
- 4 tablespoons unsalted butter, melted and slightly cooled
- 1 large egg, room temperature
- 3 to 3 ½ cups all-purpose flour
- ½ teaspoon salt
- 1 teaspoon pumpkin pie spice
- 4 tablespoons unsalted butter, softened (for filling)
- ¾ cup brown sugar, packed (light or dark)
- 2 tablespoons pure maple syrup (for filling)
- 1 ½ teaspoons ground cinnamon
- Pinch of salt (for filling)
- 4 ounces cream cheese, softened (for icing)
- 2 tablespoons unsalted butter, softened (for icing)
- 1 cup powdered sugar, sifted (for icing)
- 1 tablespoon pure maple syrup (for icing)
- ½ teaspoon vanilla extract (for icing)
- Pinch of salt (for icing)
Instructions
- Activate the yeast: Warm 1 cup of whole milk to about 110°F. Pour into a mixing bowl, sprinkle the active dry yeast over the top, add 1 tablespoon of the granulated sugar, and stir gently. Let sit for 5 to 7 minutes until foamy.
- Mix the wet ingredients: Once the yeast is active, add the remaining granulated sugar, pumpkin puree, pure maple syrup, melted butter, and room temperature egg. Whisk until smooth.
- Add the dry ingredients: Add 3 cups of all-purpose flour, salt, and pumpkin pie spice to the bowl. Stir with a wooden spoon until a shaggy dough forms. If too sticky, add the remaining ½ cup of flour, one tablespoon at a time, until it comes together.
- Knead the dough: Turn the dough out onto a lightly floured surface. Knead for 8 to 10 minutes until smooth and elastic. Alternatively, use a stand mixer with a dough hook on medium-low speed for 6 to 7 minutes.
- First rise: Place the dough in a lightly greased bowl, cover with plastic wrap or a clean kitchen towel, and let rise in a warm, draft-free spot for 1 to 1 ½ hours until doubled in size.
- Make the filling: In a small bowl, combine the softened butter, packed brown sugar, maple syrup, ground cinnamon, and a pinch of salt. Mix until smooth and spreadable. Set aside at room temperature.
- Roll out the dough: Once the dough has doubled, punch it down gently. Turn onto a lightly floured surface and roll into a 12×18-inch rectangle, about ¼-inch thick.
- Spread the filling: Spread the maple brown sugar filling evenly over the dough, leaving a 1-inch border along one long edge.
- Roll and cut: Starting from the long edge closest to you, roll the dough tightly into a log. Pinch the seam to seal. Cut into 12 equal rolls, each about 1 ½ inches thick.
- Second rise: Place the rolls in a greased 9×13-inch baking dish lined with parchment paper. Cover and let rise for 30 to 45 minutes until puffy and touching each other.
- Bake: Preheat oven to 350°F. Bake for 22 to 28 minutes until golden brown and a toothpick inserted in the center comes out clean. Let cool in the pan for 10 minutes.
- Make the icing: Beat the softened cream cheese and butter together until smooth. Add sifted powdered sugar, maple syrup, vanilla extract, and a pinch of salt. Beat until creamy.
- Ice and serve: Spread the cream cheese icing over the warm rolls. Serve warm.
Notes
For make-ahead: Assemble rolls through step 9, cover tightly, and refrigerate overnight. In the morning, let sit at room temperature for 30-45 minutes before baking. For gluten-free: Use a 1:1 gluten-free baking flour blend and add an extra tablespoon of milk. For dairy-free: Use oat or almond milk, vegan butter, and dairy-free cream cheese. To freeze unbaked rolls: Freeze after shaping, then thaw overnight in the refrigerator and let rise before baking. To freeze baked rolls: Wrap tightly and reheat in a 300°F oven for 10 minutes.
Nutrition
- Serving Size: 1 roll
- Calories: 335
- Sugar: 28
- Sodium: 210
- Fat: 12
- Saturated Fat: 7
- Carbohydrates: 50
- Fiber: 2
- Protein: 5
Keywords: maple pumpkin cinnamon rolls, pumpkin cinnamon rolls, maple cinnamon rolls, fall breakfast, pumpkin recipes, cinnamon rolls with cream cheese icing


