My six-year-old looked up from the kitchen counter with candy corn dusted across her chin and said, “Mom, can we make these every single day until Halloween?” and I honestly had to pause. Not because the answer was no—but because I was still processing that she’d eaten three pieces before I even got the pan greased. That moment, right there, is exactly how these Easy Candy Corn Halloween Fudge Bars were born. Not from a fancy test kitchen or a complicated baking syllabus—just a desperate Wednesday afternoon in October when I needed something festive, fast, and foolproof.
Let me be real with you. I’ve tried making elaborate Halloween treats before. The kind that require gel food coloring and candy thermometers and a level of patience I simply do not possess after 3 PM. They looked gorgeous on Pinterest and then sat in my fridge for a week while everyone reached for the store-bought stuff instead. So I went the other direction entirely. Three ingredients. No baking. No special tools. Just layers of color that scream Halloween without screaming at you from the kitchen.
The trick here is letting the ingredients do the work. White chocolate chips (or melting wafers, if you’re in a hurry), sweetened condensed milk, and a bag of candy corn. That’s it. You melt, you layer, you chill, and somehow you end up with something that looks like you spent hours on it. The first time I made these, I actually checked the pan twice because I couldn’t believe something so simple could turn out so polished. My daughter called them “rainbow candy bricks” and asked if she could take them for show-and-tell. I said yes, obviously. These bars have a way of making you look like a Halloween hero with almost zero effort.
Why You’ll Love This Recipe
I’ve tested this recipe about seven times now—because my family refused to let me stop making them—and here’s what keeps me coming back:
- Three Ingredients Only : White chocolate chips, sweetened condensed milk, and candy corn. That’s the whole grocery list. No hunting down obscure baking supplies or spending twenty dollars on specialty items.
- No Oven Required : These bars come together entirely on the stovetop and in the fridge. Perfect for hot October days when you don’t want to heat up the whole house, or for little hands that want to help without getting near a hot oven.
- Ready in Under 30 Minutes : Active prep time is about ten minutes. The rest is just fridge time. You can literally make these while helping with homework and still have dessert ready before bedtime.
- Kid-Friendly and Party-Perfect : My daughter’s entire second-grade class gave these two thumbs up. They’re sweet, colorful, and totally non-intimidating for little eaters. Plus, they slice into neat squares that look amazing on a Halloween dessert table.
- Totally Customizable : Swap the candy corn for seasonal M&Ms, crushed Oreos, or even chopped peanuts. The base recipe is a blank canvas—you just dress it up for whatever holiday or craving strikes.
What really sets these bars apart is the texture. The white chocolate and condensed milk create this dense, fudge-like base that’s almost like a cross between a candy bar and a blondie. Then the candy corn adds that little bit of chew and crunch. It’s not too soft, not too hard—just right. I’ve brought these to Halloween parties and watched them disappear faster than the store-bought cupcakes. Honestly, the only complaint I’ve ever gotten is that there weren’t enough.
What Ingredients You Will Need
This recipe keeps things painfully simple, which is exactly the point. You probably already have two of the three ingredients in your pantry right now. Here’s what you’ll need and why each one matters:
- White Chocolate Chips (2 cups / 340g) : Go for a good-quality brand here—I personally prefer Ghirardelli or Guittard. The better the white chocolate, the creamier your fudge base will be. White chocolate chips melt more evenly than chopped bars, and they have a higher cocoa butter content that gives the fudge that smooth, melt-in-your-mouth texture. If you’re dairy-free, there are some solid vegan white chocolate chips out there (Enjoy Life makes a good one). Just note that dairy-free versions may melt a bit differently, so stir constantly.
- Sweetened Condensed Milk (1 can / 14 oz or 396g) : This is the glue that holds everything together. Don’t confuse it with evaporated milk—they’re not the same thing. Sweetened condensed milk is thick, sugary, and gives the fudge its signature dense, fudgy texture. I’ve tried making this with coconut condensed milk for a dairy-free version, and it works beautifully. Just make sure you’re using the full-fat version for best results; the low-fat stuff can make the fudge grainy.
- Candy Corn (1 ½ cups / about 225g) : The star of the show. Regular candy corn works perfectly, but I’ve also used the autumn mix with the little pumpkins and Indian corn for extra color. You want fresh candy corn here—stale candy corn gets hard and loses that soft, chewy texture. If you’re buying a bag specifically for this recipe, check the expiration date. Trust me, I learned this the hard way when I made a batch with old candy corn and it turned into little pebbles inside the fudge.
- Optional: Flaky Sea Salt : Not technically an ingredient, but I highly recommend a light sprinkle of flaky sea salt (like Maldon) on top right after you spread the fudge. It cuts through the sweetness and makes the whole thing taste more sophisticated. My husband says it’s “mandatory,” but I’ll leave that up to you.
One note about candy corn: if you’re not a candy corn fan (I know, controversial), you can absolutely swap it out. I’ve made this with chopped Reese’s Cups, crushed Butterfingers, and even those little candy eyeballs for a spooky twist. The base fudge recipe is forgiving enough to handle whatever mix-ins you throw at it. Just keep the total volume around 1 ½ cups so the texture stays right.
Equipment Needed
You don’t need a fancy kitchen to pull these off. Here’s what you’ll want to have on hand:
- 8×8-inch Baking Pan : This size gives you nice thick bars. If you only have a 9×9, that works too—your bars will just be a little thinner and might need slightly less chilling time.
- Parchment Paper : Absolutely essential for easy removal. Leave some overhang on two sides so you can lift the whole block of fudge out like a little present. No parchment? Grease the pan well with butter or nonstick spray, but expect a bit more effort getting the bars out.
- Medium Saucepan : For melting the white chocolate and condensed milk together. Use a heavy-bottomed pan to prevent scorching. I’ve ruined a batch by using a thin pan and getting distracted—the bottom burned while the top was still solid.
- Silicone Spatula : For stirring and spreading. A wooden spoon works too, but the silicone spatula gets into the corners better and scrapes every last bit of fudge out of the pan.
- Sharp Knife : For cutting clean squares. A chef’s knife or a long serrated knife works great. Run it under hot water and wipe it clean between cuts for the neatest edges.
That’s it. No mixer, no candy thermometer, no special pans. If you’ve got a stove and a fridge, you’re good to go.
Preparation Method
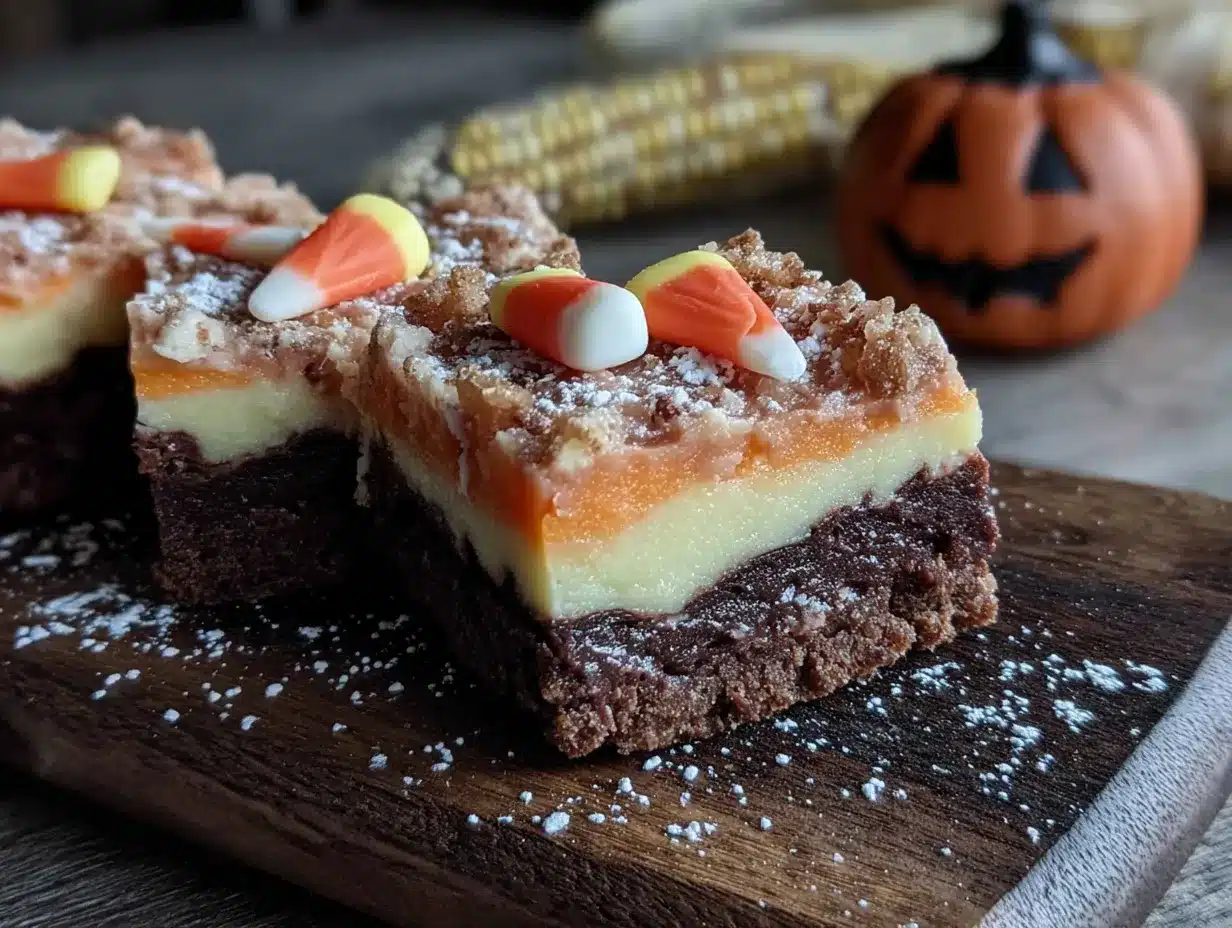
Let me walk you through this step by step. I’ll include all the little details I wish someone had told me the first time I made these.
- Prep Your Pan (2 minutes): Line your 8×8 pan with parchment paper, leaving about 2 inches of overhang on two opposite sides. This creates little handles you can grab later. If your parchment keeps curling up, crumple it into a ball first, then smooth it out—it’ll stay flat in the pan. Set the pan aside.
- Melt the Base (5 minutes): Pour the sweetened condensed milk into your medium saucepan. Add the white chocolate chips. Turn the heat to low—low is crucial here. Medium heat will scorch the chocolate and give you a grainy, separated mess. Stir constantly with your silicone spatula, scraping the bottom and sides. The white chocolate will start to melt after about 2 minutes. Keep stirring until everything is smooth and glossy. It should look like thick, creamy vanilla pudding. If you see any lumps, keep stirring—they’ll melt eventually. Remove from heat immediately once smooth.
- Fold in the Candy Corn (1 minute): Let the fudge base cool for just 1 minute—you don’t want it too hot, or the candy corn will start to melt and bleed its colors. Gently fold in the candy corn with your spatula. Don’t overmix; you want some pieces visible throughout. The fudge will be thick and a little stiff, but that’s normal.
- Spread into the Pan (2 minutes): Scrape the fudge mixture into your prepared pan. Use the spatula to spread it evenly into the corners. It’s going to be thick and sticky—that’s good. If it’s really stubborn, lightly wet the spatula with water to help it glide. Press down gently to eliminate any air pockets. The top doesn’t have to be perfectly smooth; rustic is charming here.
- Chill Until Firm (2-3 hours): Pop the pan into the refrigerator, uncovered, for at least 2 hours. I’ve found that 3 hours gives you the cleanest cuts. If you’re in a rush, you can stick it in the freezer for about 45 minutes, but watch it closely—frozen fudge can be tricky to cut without cracking.
- Slice and Serve (5 minutes): Once the fudge is completely firm, lift it out of the pan using the parchment overhang. Place it on a cutting board. Use a sharp knife to cut into squares—I usually go for 16 bars (4×4 grid). For the cleanest cuts, wipe the knife clean between each slice. If the fudge starts to stick to the knife, run it under hot water and dry it off before continuing.
A few things I’ve learned the hard way: Don’t rush the chilling step. I once tried to cut these after only an hour in the fridge, and they were still too soft—the knife dragged and left me with a messy, goopy situation. Also, if your kitchen is warm, the fudge might soften faster than you expect. Keep leftovers in the fridge until right before serving.
Cooking Tips & Techniques
These bars are forgiving, but a few tricks make the difference between “pretty good” and “people ask for the recipe.”
Low and Slow for the Melt: The biggest mistake I’ve made (more than once) is cranking up the heat to speed things along. White chocolate is temperamental. High heat makes it seize up into a grainy, greasy mess. Keep the burner on low and stir constantly. If you see steam rising from the pan, you’re too hot—pull it off the heat and stir until it cools down slightly.
Room Temperature Ingredients: Your sweetened condensed milk should be at room temperature before you start. Cold milk straight from the fridge can cause the white chocolate to seize. I just set the can on the counter about 20 minutes before I start. Same goes for the candy corn—if it’s been in a cold pantry, let it warm up a bit so it doesn’t chill the fudge unevenly.
Cutting Strategy: For the prettiest bars, chill the fudge for the full 3 hours, then let it sit at room temperature for about 5 minutes before cutting. This softens it just enough that the knife glides through without cracking. I use a chef’s knife and wipe it clean after every single cut. Yes, it’s a little tedious, but the result is those perfect, clean-edged squares that look like they came from a bakery.
Texture Troubleshooting: If your fudge turns out greasy or separated, you probably overheated the white chocolate. Don’t toss it! Try whisking in a tablespoon of warm milk or cream—sometimes that brings it back together. If that doesn’t work, let it cool completely, chop it up, and use it as a topping for ice cream or yogurt. Nobody needs to know it wasn’t supposed to be fudge.
Multitasking Tip: While the fudge is chilling, use that time to clean up your workspace. The saucepan will have a stubborn layer of fudge stuck to it—fill it with hot water and a drop of dish soap and let it soak. By the time you’re done cutting the bars, that pan will scrub clean in about 30 seconds.
Variations & Adaptations
Once you’ve mastered the basic recipe, the possibilities are endless. Here are some of my favorite twists:
- Chocolate Peanut Butter Version: Swap the white chocolate chips for semi-sweet or dark chocolate chips. Add ¼ cup of creamy peanut butter to the melting mixture. Fold in chopped peanut butter cups instead of candy corn. My husband says this version is “dangerous” because he can’t stop eating it.
- Spooky Spider Web Bars: Make the base recipe as written, but before chilling, drizzle melted dark chocolate over the top in concentric circles. Use a toothpick to drag lines from the center outward to create a web pattern. Top with candy eyeballs for maximum Halloween creep factor. I made these for a school party and they were the first thing to disappear.
- Vegan-Friendly Version: Use dairy-free white chocolate chips (Enjoy Life makes a good one) and a can of sweetened condensed coconut milk (Nature’s Charm is my go-to). The texture will be slightly softer, so chill for an extra hour. The flavor is still rich and sweet—nobody will guess it’s vegan.
- Autumn Harvest Mix: Replace the candy corn with a mix of dried cranberries, chopped pecans, and a sprinkle of pumpkin pie spice. This version is less sweet and feels more grown-up. I’ve brought it to Friendsgiving and it was a hit with the adults who claimed they “don’t like candy.”
- Gluten-Free Note: Good news—this recipe is naturally gluten-free as long as your white chocolate chips and candy corn are certified gluten-free. Most mainstream brands are, but double-check the labels if you’re serving someone with celiac disease.
My personal favorite variation is the Spooky Spider Web version. I made it last year for a Halloween movie night, and my daughter insisted we “save the spider one” for her lunchbox the next day. It’s a little extra effort, but the visual payoff is huge.
Serving & Storage Suggestions
These bars are best served cold or at cool room temperature. If you’re serving them at a party, take them out of the fridge about 10 minutes before you put them on the table. That little bit of softening makes them easier to bite into without being messy.
For presentation, I like to arrange the bars on a white platter or a wooden cutting board. A sprinkle of extra candy corn around the edges adds a festive touch. If you’re feeling fancy, drizzle a little melted white chocolate over the top and add a few candy pumpkins for a pop of orange.
These pair beautifully with a warm drink. I love serving them alongside a Witch’s Brew Matcha Cold Foam for a Halloween coffee bar that’s both spooky and sophisticated. Or keep it classic with a glass of cold milk—my daughter’s preferred pairing.
Storage Instructions: Keep the bars in an airtight container in the refrigerator for up to 1 week. Layer them between sheets of parchment paper so they don’t stick together. If you’re stacking them, don’t go more than two layers deep—the weight can squish the bottom ones.
Freezer Instructions: These freeze beautifully. Wrap individual bars in plastic wrap, then place them in a freezer-safe bag or container. They’ll keep for up to 3 months. To thaw, transfer to the fridge overnight or let sit at room temperature for about 20 minutes. I always keep a stash in the freezer for unexpected Halloween visitors or late-night cravings.
Reheating Note: Don’t microwave these. They’ll melt into a puddle. If you want them a little softer, just let them sit at room temperature for 15 minutes. That’s all they need.
One thing I love about this recipe is that the flavors actually get better after a day or two in the fridge. The candy corn softens slightly and melds into the fudge, creating this cohesive, almost caramel-like texture. So don’t be afraid to make these a day ahead—they’ll taste even better.
Nutritional Information & Benefits
Let’s be honest: these are a treat, not a health food. But here’s the breakdown for one bar (based on 16 servings):
- Calories: Approximately 220-250
- Fat: 10-12g
- Carbohydrates: 32-35g
- Sugar: 28-30g
- Protein: 3-4g
These numbers will vary slightly depending on the brands you use and whether you add any extras. The white chocolate provides a small amount of calcium, and the sweetened condensed milk adds a bit of protein. But really, these bars are about joy, not nutrition.
Dietary Considerations: As written, this recipe contains dairy and is not vegan or dairy-free. However, with the substitutions I mentioned earlier (dairy-free white chocolate and coconut condensed milk), you can easily make it vegan. The recipe is naturally gluten-free, but always check your labels to be safe.
Allergen Warning: White chocolate often contains milk solids and soy lecithin. Candy corn is typically made with corn syrup, sugar, and gelatin (which is not vegetarian). If you’re serving someone with allergies, check the specific brands you’re using.
My personal take? I don’t make these every week—they’re a special occasion thing. But when Halloween rolls around, I lean into the indulgence. Life’s too short to skip the candy corn fudge.
Conclusion
These Easy Candy Corn Halloween Fudge Bars are proof that you don’t need a dozen ingredients or a pastry degree to make something that feels special. Three ingredients, ten minutes of active work, and a little patience in the fridge—that’s all it takes to create a treat that looks like it came from a fancy bakery. My daughter still asks for them “every single day until Halloween,” and honestly, I don’t mind one bit.
What I love most about this recipe is how it brings people together. Whether you’re making them with little helpers who “accidentally” eat half the candy corn, or bringing a plate to a Halloween party where they disappear in minutes, these bars have a way of making everyone smile. They’re simple, they’re festive, and they’re absolutely delicious.
I’d love to hear how yours turn out! Did you stick with classic candy corn, or did you try one of the variations? Drop a comment below and let me know—I read every single one. And if you’re looking for more easy Halloween treats, check out my Crispy Spider Web Black Sesame Shortbread Cookies or these Mini Corn Dog Muffins for a savory-sweet combo that’s perfect for parties. Happy Halloween, and happy fudge-making!
Frequently Asked Questions
Can I use white chocolate bars instead of chips?
Yes, absolutely. Just chop the bars into small, even pieces so they melt evenly. About 340g of white chocolate is what you need, regardless of form. Chips are more convenient, but bars often have a higher cocoa butter content and can result in an even creamier fudge.
Why did my fudge turn out grainy?
Grainy fudge usually means the white chocolate got too hot. Always melt on low heat and stir constantly. If it does seize up, try whisking in a tablespoon of warm milk or cream. Sometimes that smooths it out. If not, don’t toss it—chop it up and use it as ice cream topping.
Can I make these without candy corn?
Definitely. Swap the candy corn for an equal volume of your favorite mix-ins. Chopped candy bars, M&Ms, crushed pretzels, dried fruit, or nuts all work beautifully. Just keep the total volume around 1 ½ cups so the fudge texture stays right.
How long do these bars last?
Stored in an airtight container in the fridge, they’ll stay fresh for up to 1 week. In the freezer, they’ll keep for up to 3 months. Just wrap individual bars in plastic wrap before freezing for best results. The texture is best within the first 3-4 days.
Can I double this recipe?
Yes! Double all ingredients and use a 9×13-inch pan. You’ll need to chill it a bit longer—about 3-4 hours—because the thicker layer takes more time to set. I’ve done this for big Halloween parties and it works perfectly. Just make sure you have a large enough saucepan for the melting step.
Pin This Recipe!
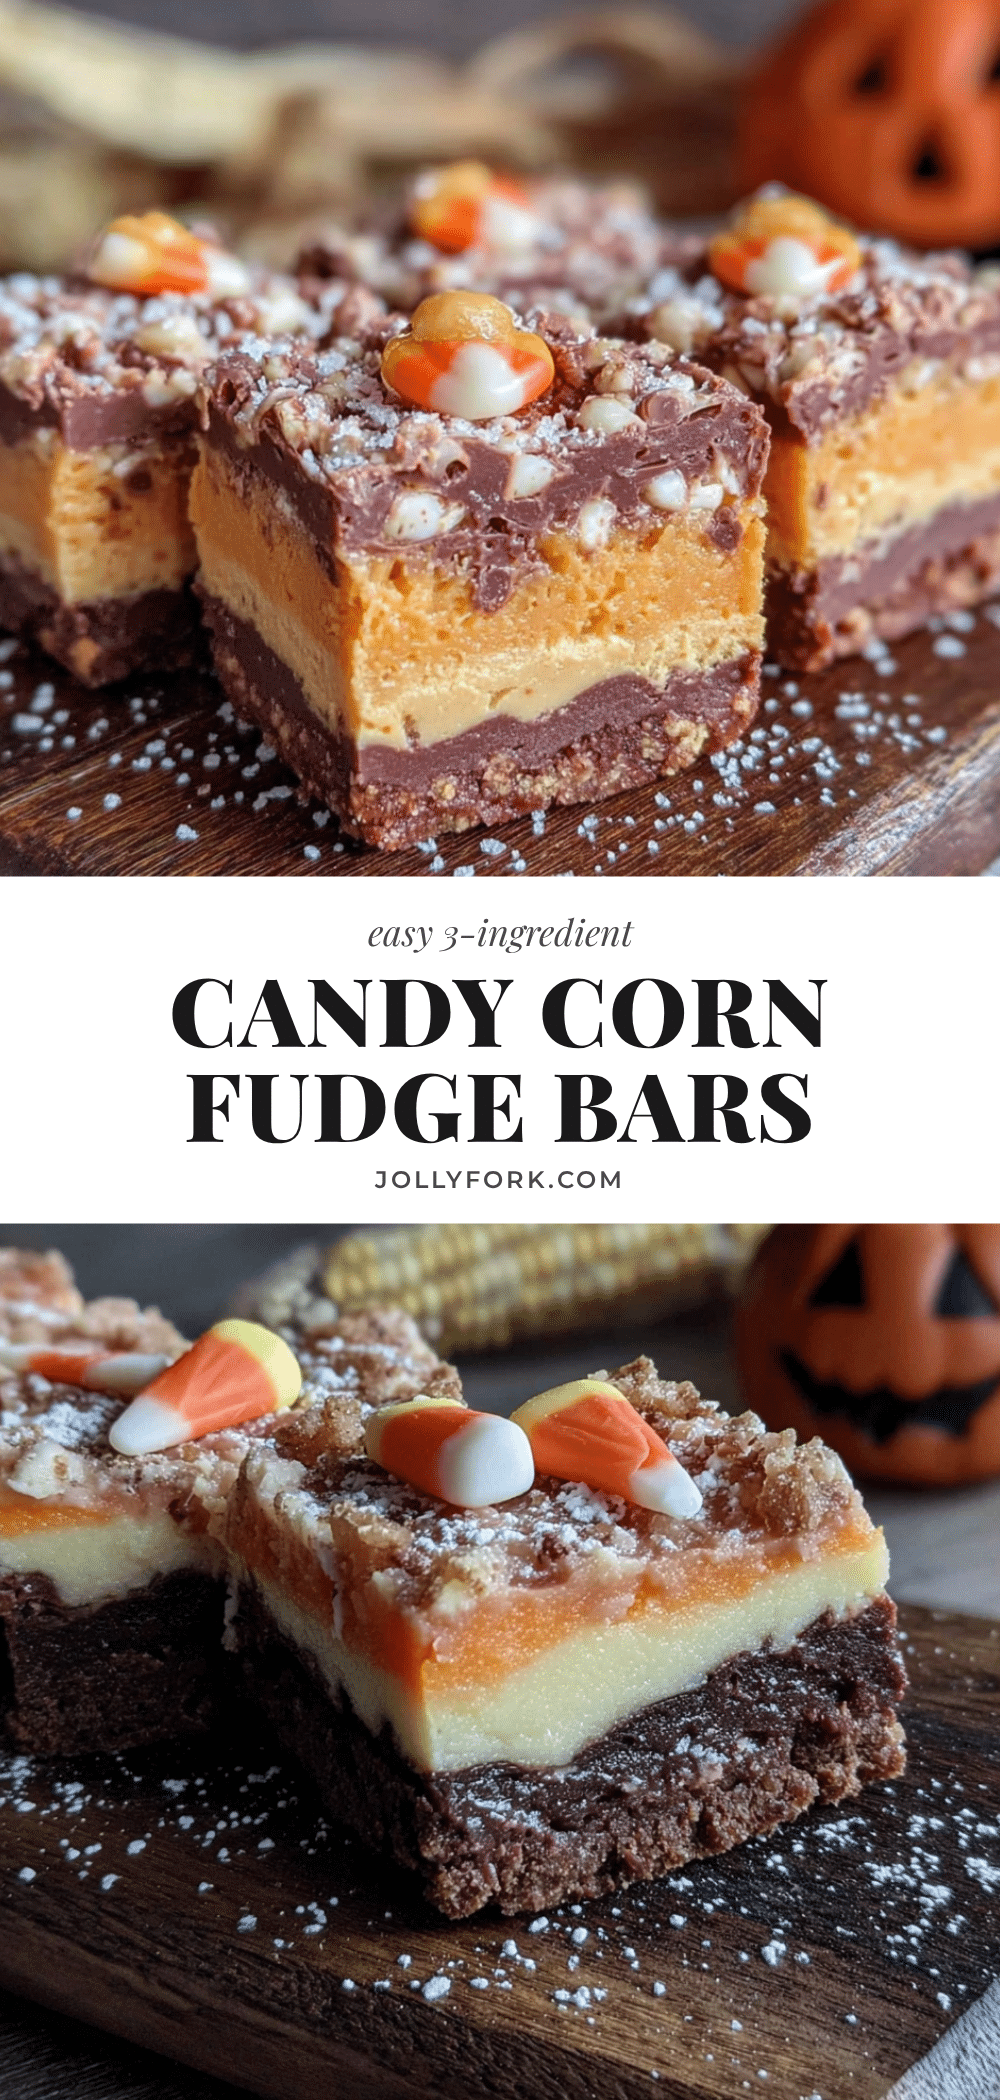
Easy Candy Corn Halloween Fudge Bars: Best 3-Ingredient Treat
These Easy Candy Corn Halloween Fudge Bars are a festive, no-bake treat made with just three ingredients. Perfect for Halloween parties, they come together in under 30 minutes and are kid-friendly and totally customizable.
- Prep Time: 10 minutes
- Cook Time: 5 minutes
- Total Time: 2 hours 15 minutes (includes chilling)
- Yield: 16 bars 1x
- Category: Dessert
- Cuisine: American
Ingredients
- 2 cups (340g) white chocolate chips
- 1 can (14 oz / 396g) sweetened condensed milk
- 1 ½ cups (about 225g) candy corn
- Optional: flaky sea salt for topping
Instructions
- Line an 8×8-inch baking pan with parchment paper, leaving about 2 inches of overhang on two opposite sides. Set aside.
- In a medium saucepan over low heat, combine the sweetened condensed milk and white chocolate chips. Stir constantly with a silicone spatula until smooth and glossy, about 5 minutes. Remove from heat immediately.
- Let the fudge base cool for 1 minute, then gently fold in the candy corn until just combined. Do not overmix.
- Scrape the fudge mixture into the prepared pan and spread evenly into the corners. Lightly wet the spatula if needed to help spread. Press down gently to eliminate air pockets.
- Refrigerate, uncovered, for at least 2 hours (or up to 3 hours for cleanest cuts). For a quicker set, freeze for about 45 minutes.
- Once firm, lift the fudge out of the pan using the parchment overhang. Place on a cutting board and cut into 16 squares (4×4 grid) using a sharp knife. Wipe the knife clean between cuts for neat edges.
- Serve cold or at cool room temperature. Optionally, sprinkle with flaky sea salt before serving.
Notes
For the cleanest cuts, chill the fudge for the full 3 hours, then let it sit at room temperature for about 5 minutes before cutting. If the fudge becomes grainy from overheating, whisk in a tablespoon of warm milk or cream to smooth it out. Store in an airtight container in the refrigerator for up to 1 week, or freeze individual bars wrapped in plastic wrap for up to 3 months.
Nutrition
- Serving Size: 1 bar
- Calories: 235
- Sugar: 29
- Sodium: 80
- Fat: 11
- Saturated Fat: 7
- Carbohydrates: 34
- Protein: 3.5
Keywords: candy corn fudge, Halloween fudge bars, 3-ingredient fudge, no-bake Halloween treat, easy Halloween dessert


