“This is the one,” my husband said, pushing a slice of bread toward me across the counter. He’s not usually one for dramatic food declarations, so I was skeptical. I took a bite of that pumpkin sourdough—still warm, the crust giving way with that perfect crackle—and honestly, I got it. The pepitas on top were toasted just right, the crumb had this soft, almost velvety texture, and the pumpkin flavor was there but not screaming for attention. It was the kind of bread that makes you stop mid-chew and just look at it.
That loaf came from a happy accident, honestly. I had fed my starter the night before, planning to make a classic boule, but then I spotted a can of pumpkin puree in the pantry and thought, why not? I’d seen pumpkin sourdough recipes before but always figured they’d be gimmicky—like the bread would taste more like a muffin than something you’d actually put butter on. But this one worked. The pumpkin added this subtle sweetness and kept the crumb incredibly moist without making it dense. And the pepitas? They add a little crunch and a pretty pop of green against that warm orange-brown crust.
I’ve made this loaf maybe a dozen times since that first try, tweaking the hydration and the fermentation time until it felt just right. It’s become my go-to fall bake, the one I bring to Friendsgiving dinners and weekend brunches. There’s something about slicing into a loaf that smells like autumn and seeing those pepitas scattered across the top—it feels like a small victory. If you’ve been looking for a sourdough recipe that actually tastes like bread, not dessert, but still captures the season, I think this one might become your favorite too.
Why You’ll Love This Recipe
This isn’t just another pumpkin bread that disappears after one slice. This is the one that earns a permanent spot in your baking rotation. Here’s why you’re going to love it as much as I do:
- Real Sourdough Flavor, Not Just Pumpkin Spice : The tangy sourdough starter balances the sweetness of the pumpkin perfectly. You get that signature sourdough complexity with a subtle autumn twist—not a sugar bomb.
- No Special Equipment Needed : If you have a Dutch oven, a bench scraper, and a banneton (or even just a mixing bowl and a kitchen towel), you’re set. This recipe doesn’t require a stand mixer or fancy gadgets.
- Perfect for Thanksgiving Leftovers : That leftover turkey from your perfect herb butter roasted turkey breast? It makes the most incredible sandwich on this bread. Trust me on this one.
- Crowd-Pleasing Texture : The crumb is soft but structured, the crust is crackly and golden, and the pepitas add a nutty crunch that makes every bite interesting. It’s the kind of bread that disappears before you can toast it.
- Simple Ingredients, Big Flavor : No weird stabilizers or artificial pumpkin flavoring here. Just flour, water, starter, pumpkin puree, and a handful of pepitas. You probably have everything already.
What sets this recipe apart is the fermentation technique. Most pumpkin bread recipes rely on baking soda or powder for lift, which gives you that quick-bread texture. By using active sourdough starter, you get a slow-fermented loaf with better digestibility, a deeper flavor profile, and a crust that shatters when you cut into it. Plus, the pumpkin adds natural moisture, so you don’t end up with that dry, crumbly texture some whole wheat sourdoughs have.
Honestly, this bread makes me feel like I’ve got my fall baking game together. It’s impressive enough to bring to a gathering but simple enough to make on a lazy Sunday afternoon. And that first slice, still warm, with a pat of butter melting into the crumb? That’s the moment you’ll know why I keep coming back to this recipe.
What Ingredients You Will Need
This recipe uses simple, everyday ingredients that come together to create something truly special. The pumpkin does double duty here—it adds moisture and a subtle sweetness, while the pepitas provide texture and a pop of color. Here’s what you’ll need:
For the Dough
- Active Sourdough Starter (100g) – Make sure your starter is bubbly and has been fed within the last 4-6 hours. A hungry starter won’t give you the rise you need. I keep my starter at 100% hydration (equal parts flour and water by weight) for consistent results.
- Bread Flour (400g / about 3 cups) – I prefer King Arthur Bread Flour for its higher protein content, which gives the bread structure and a nice chew. All-purpose flour works too, but the crumb will be slightly less airy.
- Whole Wheat Flour (100g / about ¾ cup) – Adds a nutty depth that complements the pumpkin beautifully. You can substitute with more bread flour if you prefer a lighter loaf, but the whole wheat really makes the flavor sing.
- Pumpkin Puree (200g / about ¾ cup) – Not pumpkin pie filling! Make sure you’re using 100% pure pumpkin puree. Libby’s is my go-to brand because it’s consistently thick and not watery. If your puree seems runny, blot it with a paper towel before adding.
- Water (250g / about 1 cup) – Room temperature is fine. You might need to adjust slightly depending on how hydrated your pumpkin puree is. Start with 250g and add a tablespoon more if the dough feels too stiff.
- Salt (10g / about 1½ teaspoons) – I use fine sea salt. If you’re using kosher salt, you’ll need a bit more—closer to 12g.
For the Topping
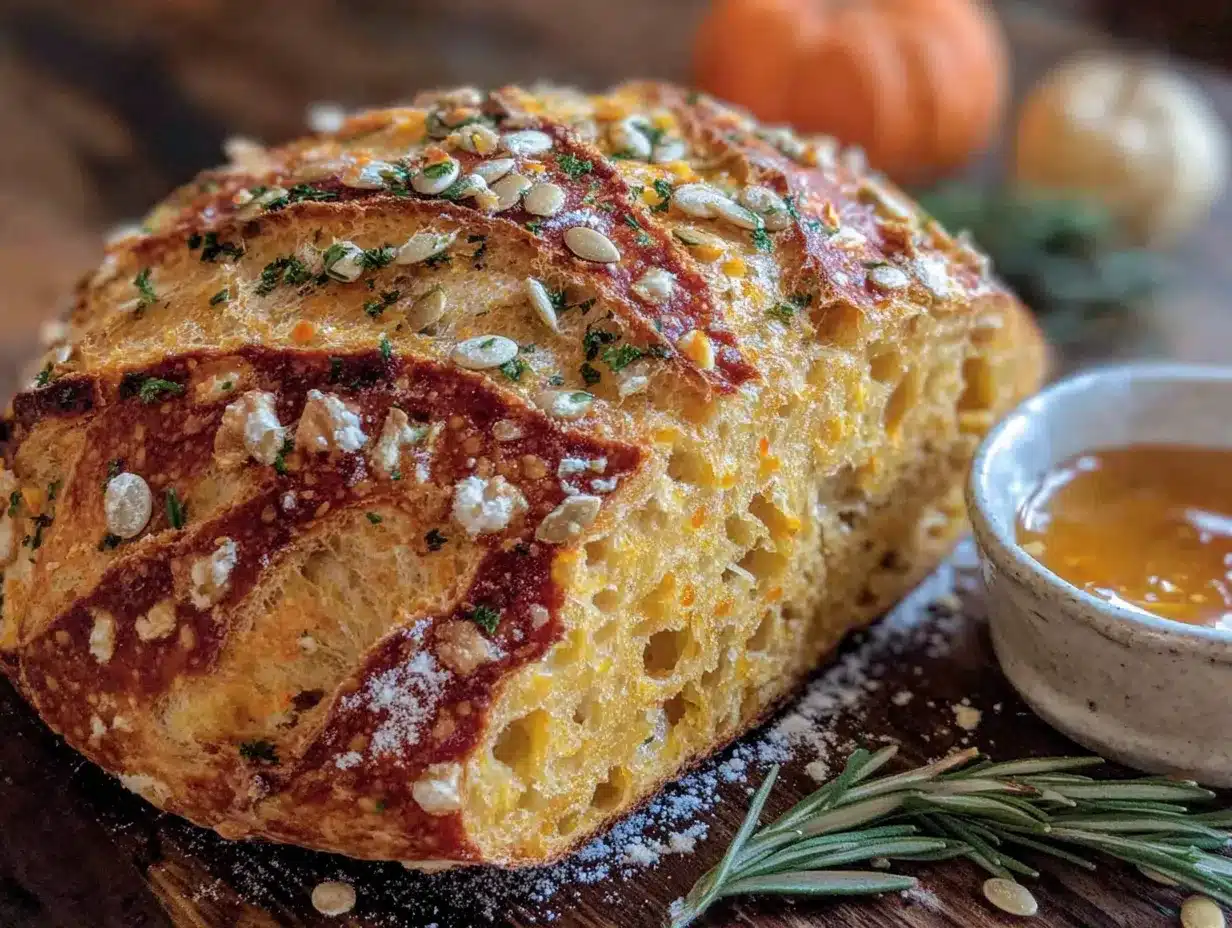
- Pepitas (50g / about ⅓ cup) – Raw, shelled pumpkin seeds. I buy mine from the bulk bin at my local co-op. They toast beautifully on the crust and add that gorgeous green color.
- Olive Oil (1 tablespoon) – For brushing the top of the loaf before adding the pepitas. This helps them stick and gives the crust a beautiful sheen.
- Flaky Sea Salt (optional) – A sprinkle of Maldon salt right before baking takes this to another level. The salty crunch against the sweet pumpkin bread is addictive.
Ingredient Tips & Substitutions
- Gluten-Free Option : You can substitute a 1:1 gluten-free flour blend for the bread flour, but the texture will be denser and more cake-like. Add an extra 25g of water since gluten-free flours absorb more liquid.
- Dairy-Free : This recipe is naturally dairy-free! Just make sure your pepitas are raw and not roasted in butter.
- Pepita Alternatives : If you don’t have pepitas, try sunflower seeds, chopped pecans, or even sesame seeds. Each gives a different texture but works beautifully.
- Pumpkin Puree Substitute : Roasted butternut squash or sweet potato puree works perfectly here. Just make sure it’s smooth and not too watery.
One thing I’ve learned the hard way—don’t skip the pepitas. The first time I made this, I thought, “Eh, I’ll just leave them off.” Big mistake. The crust was fine, but it lacked that visual pop and textural contrast. The pepitas are what make this loaf feel special, like something you’d find at a fancy bakery. Plus, they’re a great source of magnesium and zinc, so you can feel good about that extra crunch.
Equipment Needed
You don’t need a professional bakery setup to make this bread, but a few key tools will make your life much easier. Here’s what I recommend:
- Dutch Oven (5-6 quart) – This is non-negotiable for getting that crackly, bakery-style crust. The steam trapped inside the pot mimics a professional steam-injected oven. I use a Lodge cast iron Dutch oven, and it’s never let me down. If you don’t have one, you can use a heavy oven-safe pot with a lid.
- Digital Kitchen Scale – Please, please use a scale for this recipe. Baking by volume with sourdough is a recipe for disaster. A $15 scale from Amazon will save you from endless frustration. I’ve been using my OXO scale for years, and it’s still going strong.
- Banneton or Proofing Basket (9-inch) – This gives the bread its shape and allows the dough to breathe while proofing. If you don’t have one, a medium mixing bowl lined with a floured kitchen towel works perfectly.
- Bench Scraper – Great for dividing dough and cleaning your work surface. A plastic one is fine, but I prefer a metal scraper for cutting through sticky dough.
- Razor Blade or Lame – For scoring the bread before baking. A sharp knife works in a pinch, but a lame gives you those beautiful, clean cuts that open up into “ears.”
- Parchment Paper – Makes transferring the dough into the hot Dutch oven a breeze. Just lift the paper and drop it in—no burned fingers.
- Cooling Rack – Essential for letting the bread cool properly. If you leave it in the pot, the steam will soften the crust.
If you’re just starting out with sourdough, don’t feel like you need to buy everything at once. I made this recipe for months using just a mixing bowl, a Dutch oven, and a kitchen towel. The banneton and lame are nice to have, but they’re not essential. Your bread will still be delicious without them.
Preparation Method
Making sourdough bread is a process, but it’s not complicated. The key is patience and paying attention to your dough, not the clock. Here’s how I make this pumpkin sourdough, step by step:
Step 1: Feed Your Starter (8-12 hours before mixing)
About 8-12 hours before you plan to mix your dough, feed your sourdough starter. I do this the night before I want to bake. Use a 1:1:1 ratio (equal parts starter, flour, and water by weight). For this recipe, you’ll need 100g of active starter, so feed enough to have that much plus a little extra. Your starter should be bubbly, doubled in size, and pass the “float test” (a small spoonful floats in water) before you use it.
Step 2: Mix the Dough (Morning of bake day)
In a large mixing bowl, combine 100g active starter, 250g water, and 200g pumpkin puree. Whisk until the starter is mostly dissolved. Add 400g bread flour and 100g whole wheat flour, then sprinkle 10g salt on top. Mix with your hands or a dough whisk until no dry flour remains. The dough will be shaggy and sticky—that’s normal. Cover the bowl with a damp towel and let it rest for 30 minutes (this is called autolyse).
Step 3: Stretch and Fold (First 2 hours)
After the rest, perform a series of stretch and folds. Wet your hands slightly to prevent sticking. Grab one side of the dough, stretch it up, and fold it over the top. Rotate the bowl 90 degrees and repeat. Do this 4 times total (one full rotation). Cover and rest for 30 minutes. Repeat this process 3 more times, for a total of 4 sets of stretch and folds over 2 hours. By the last set, the dough should feel smoother and more elastic.
Step 4: Bulk Fermentation (4-6 hours at room temperature)
After the stretch and folds, let the dough rest, covered, at room temperature (70-75°F) for the remainder of bulk fermentation. This will take about 4-6 hours total from when you first mixed the dough. The dough should increase in volume by about 50-75%, have bubbles on the surface, and feel puffy and jiggly when you gently shake the bowl. If your kitchen is cold, it might take longer. Don’t rush this step—under-fermented bread is dense and gummy.
Step 5: Pre-Shape and Bench Rest
Lightly flour your work surface. Gently turn the dough out onto the floured surface. Using a bench scraper, shape the dough into a rough round by folding the edges into the center. Let it rest, seam side up, for 20-30 minutes. This relaxes the gluten and makes final shaping easier.
Step 6: Final Shape
Flour your hands and the surface. Flip the dough over so the smooth side is down. Gently stretch the dough into a rectangle, then fold the top third down and the bottom third up (like a letter). Then roll the dough into a tight log, sealing the seam with your fingertips. Place the dough seam-side up in a floured banneton or towel-lined bowl. Cover with a floured towel or plastic wrap.
Step 7: Cold Proof (Overnight, 12-16 hours)
Place the banneton in the refrigerator for a cold proof. This slows down fermentation, develops flavor, and makes the dough easier to score. I usually let it proof overnight, about 12-16 hours. You can go up to 24 hours if you want a more tangy flavor, but any longer and the dough might overproof.
Step 8: Preheat and Prepare (Morning of bake day)
Place your Dutch oven in the oven and preheat to 475°F (245°C) for at least 45 minutes. While the oven heats, take the dough out of the fridge. Flip it onto a piece of parchment paper. Brush the top lightly with olive oil, then press the pepitas into the surface. Don’t be shy—really press them in so they stick during baking.
Step 9: Score and Bake
Using a razor blade or lame, score the dough with a deep slash (about ½ inch deep) along the length of the loaf. You can also do a decorative pattern—I like a simple single slash or a leaf design. Carefully lift the parchment paper and transfer the dough into the hot Dutch oven. Cover with the lid and bake for 25 minutes. Remove the lid and bake for another 20-25 minutes, until the crust is deep golden brown and the loaf sounds hollow when tapped on the bottom.
Step 10: Cool Completely
Transfer the bread to a cooling rack and let it cool completely before slicing. I know it’s tempting to cut into it right away, but cutting warm bread will give you a gummy crumb. Patience pays off here. Let it cool for at least 2 hours—I usually wait 3-4 hours for the best texture.
Cooking Tips & Techniques
After making this recipe more times than I can count, I’ve picked up a few tricks that make a real difference. Here are my top tips for pumpkin sourdough success:
- Watch Your Hydration : Pumpkin puree adds moisture, but not all purees are created equal. If your dough feels too stiff during the first stretch and fold, add a tablespoon of water. If it feels like soup, add a tablespoon of flour. The dough should be tacky but not sticky—it should stick to your hand slightly but release easily.
- Don’t Skip the Cold Proof : I’ve made this bread with a room-temperature proof and a cold proof, and the cold proof wins every time. The flavor is more complex, the crust is crispier, and the dough is much easier to score. Plus, you can bake it whenever you’re ready the next day—no rushing.
- Toast the Pepitas First (Optional) : For an even nuttier flavor, toast the pepitas in a dry skillet over medium heat for 2-3 minutes until they start to pop and smell fragrant. Let them cool completely before pressing into the dough. Just be careful not to burn them—they go from toasted to bitter really fast.
- Use a Thermometer for Doneness : The internal temperature of fully baked sourdough should be around 205-210°F (96-99°C). If you’re unsure whether the bread is done, stick an instant-read thermometer into the center. This is especially helpful if your loaf looks dark on the outside but you’re worried about the inside.
- The Finger Dent Test : During bulk fermentation, gently press a floured finger into the dough. If the indentation springs back slowly and leaves a small dent, it’s ready to shape. If it springs back immediately, it needs more time. If it doesn’t spring back at all, you’ve overproofed it.
One mistake I made early on was over-handling the dough during shaping. Sourdough is forgiving, but it doesn’t like to be manhandled. Be gentle, use light touches, and don’t worry if it’s not perfectly round. The oven spring will hide most imperfections. And honestly, even ugly sourdough tastes amazing.
Variations & Adaptations
This recipe is a great base for experimentation. Here are some of my favorite variations, all tested and approved by my family:
- Cinnamon Swirl Pumpkin Sourdough : After shaping the dough, flatten it into a rectangle and sprinkle a mixture of 2 tablespoons brown sugar and 1 teaspoon cinnamon over the surface. Roll it up tightly and proceed with proofing. The cinnamon swirl adds a lovely sweetness without making it dessert-like. I’ve also made a version with homemade pumpkin sourdough discard bread with cinnamon swirl that uses leftover starter—both are fantastic.
- Savory Pumpkin Sourdough : Omit the pepitas from the top and instead mix ½ cup grated Parmesan cheese, 1 tablespoon fresh rosemary, and ½ teaspoon black pepper into the dough during the stretch and folds. The savory version is incredible with soup or used for grilled cheese sandwiches.
- Gluten-Free Pumpkin Sourdough : Substitute the bread flour and whole wheat flour with 500g of a high-quality gluten-free bread flour blend (I like Cup4Cup). Add 1 teaspoon xanthan gum if your blend doesn’t include it. The dough will be more like a thick batter, so skip the stretch and folds and just mix well. Bake in a loaf pan instead of a Dutch oven for best results.
- Maple Pumpkin Sourdough : Replace 50g of the water with 50g of pure maple syrup. Reduce the water by 25g to compensate for the extra liquid. The maple flavor is subtle but adds a lovely warmth that pairs perfectly with the pumpkin.
- Seeded Crust Variation : Instead of pepitas, mix equal parts sesame seeds, poppy seeds, and sunflower seeds. Press this seed mixture onto the top of the loaf before baking. It gives the bread a beautiful, artisanal look and adds a different kind of crunch.
I once tried adding dried cranberries and orange zest to the dough, thinking it would be amazing. It was… fine. The cranberries added too much moisture and made the dough sticky and hard to shape. Lesson learned: stick to dry add-ins or reduce the water if you’re adding fruit. If you want a fruity twist, try serving this bread with a dollop of homemade vanilla bean pear preserves instead—the flavors are a perfect match.
Serving & Storage Suggestions
This bread is incredibly versatile. Here’s how I like to serve and store it:
Serving Ideas
- Warm with Butter : The classic. Slice the bread, toast it lightly, and spread with salted butter. The contrast between the warm, soft crumb and the cold butter is heaven.
- For Sandwiches : This bread makes incredible turkey and cranberry sandwiches, especially with leftover easy make-ahead cranberry orange sauce. The slight sweetness of the pumpkin pairs beautifully with savory fillings.
- With Soup : Serve thick slices alongside a bowl of creamy tomato basil soup or cozy poor man’s beef stew. The bread is sturdy enough to hold up to dipping without falling apart.
- For Breakfast : Toast a slice and top with ricotta cheese, a drizzle of honey, and a sprinkle of cinnamon. It’s like having pumpkin cheesecake for breakfast, but healthier.
- As a Gift : Wrap a whole loaf in a clean kitchen towel and tie it with twine. Add a small jar of honey or butter, and you’ve got a thoughtful, homemade gift that anyone would appreciate.
Storage Instructions
- Room Temperature : Store the bread cut-side down on a cutting board, or wrap it in a beeswax wrap or bread bag. It will stay fresh for 3-4 days. Avoid storing it in plastic bags, which will soften the crust.
- Refrigerator : I don’t recommend refrigerating bread—it speeds up staling. If you live in a very humid climate, you can refrigerate it, but it’s better to freeze instead.
- Freezer : Slice the bread before freezing so you can pull out individual slices. Wrap each slice in plastic wrap, then place them in a freezer bag. They’ll keep for up to 3 months. To thaw, just pop a slice in the toaster straight from the freezer.
One thing I love about this bread is how the flavor develops over time. Day one, it’s good. Day two, it’s even better—the pumpkin flavor melds with the sourdough tang in a way that’s hard to describe. If you can resist eating the whole loaf on day one, you’re in for a treat on day two.
Nutritional Information & Benefits
While I’m not a nutritionist, I can tell you that this bread is packed with good-for-you ingredients. Here’s a rough estimate per slice (based on 12 slices per loaf):
| Nutrient | Amount Per Slice |
|---|---|
| Calories | 210 |
| Total Fat | 4g |
| Saturated Fat | 0.5g |
| Carbohydrates | 38g |
| Fiber | 3g |
| Sugar | 2g |
| Protein | 7g |
| Sodium | 390mg |
Here are some health highlights:
- Pumpkin is rich in vitamin A (beta-carotene), which supports eye health and immune function. It’s also low in calories and high in fiber, which helps with digestion.
- Pepitas are a great source of magnesium, zinc, and healthy fats. Magnesium supports muscle function and sleep quality, while zinc is important for immune health.
- Sourdough Fermentation breaks down phytic acid, making the minerals in the flour more bioavailable. It also produces beneficial bacteria that support gut health.
- Whole Wheat Flour adds extra fiber, B vitamins, and minerals compared to all-purpose flour alone.
This bread is naturally low in added sugar (only what’s in the pumpkin puree) and contains no preservatives or artificial ingredients. It’s a wholesome, satisfying bread that fits into a balanced diet. If you’re watching your sodium, you can reduce the salt to 8g, but the flavor will be less pronounced.
Conclusion
This pumpkin sourdough bread with pepitas has become my signature fall bake, and I think it’s about to become yours too. It’s the kind of recipe that looks impressive but is actually forgiving enough for beginner bakers. The pumpkin adds moisture and a subtle sweetness, the sourdough gives it that signature tangy depth, and the pepitas on top make it feel special without any extra effort.
What I love most about this recipe is how adaptable it is. You can keep it simple with just the pepitas, or dress it up with cinnamon swirl, cheese, or seeds. It works for breakfast toast, lunch sandwiches, or dinner alongside soup. And honestly, it makes your kitchen smell incredible while it bakes—like autumn in a loaf pan.
I’d love to hear how yours turns out. Did you try a variation? Did you serve it with something unexpected? Drop a comment below and let me know—I read every single one. And if you share a photo on social media, tag me so I can see your beautiful loaf. Happy baking, friends!
Frequently Asked Questions
Can I use sourdough discard instead of active starter?
Yes, but the results will be different. Active starter provides the lift for this bread, while discard is less active and won’t give you the same oven spring. If you want to use discard, add ¼ teaspoon of instant yeast to the dough to help with rising. The flavor will still be great, but the texture will be denser and more like a quick bread. For a dedicated discard recipe, check out my sourdough discard focaccia with rosemary and sea salt.
Why is my dough so sticky?
Pumpkin puree adds a lot of moisture, so sticky dough is normal—especially if you’re using a brand with higher water content. Resist the urge to add too much flour during shaping. Instead, wet your hands slightly before handling the dough, and use a light touch. If the dough is truly unmanageable (sticking to everything), add a tablespoon of flour during the stretch and folds.
Can I make this bread without a Dutch oven?
Absolutely. If you don’t have a Dutch oven, you can bake the bread on a preheated baking sheet or pizza stone. Place a shallow pan of boiling water on the bottom rack of the oven to create steam. Bake at 450°F for 30-35 minutes, then remove the water pan and bake for another 10-15 minutes until the crust is golden brown. The crust won’t be as crackly, but the bread will still be delicious.
How do I know when my starter is ready to use?
Your starter is ready when it has doubled in size, is full of bubbles, and has a pleasant sour smell (like yogurt). It should pass the float test—drop a small spoonful into a glass of water, and if it floats, it’s ready. If it sinks, it needs more time to ferment. I usually feed my starter the night before baking and check it first thing in the morning.
Can I add chocolate chips or nuts to this bread?
Yes! Chocolate chips pair beautifully with the pumpkin flavor. Add 100g (about ½ cup) of dark chocolate chips during the stretch and folds. For nuts, try chopped pecans or walnuts—add them the same way. Just be aware that add-ins can make the dough harder to shape, so handle it gently. I’ve also made a version with pepitas mixed into the dough instead of just on top, and it adds a lovely crunch throughout the loaf.
Pin This Recipe!
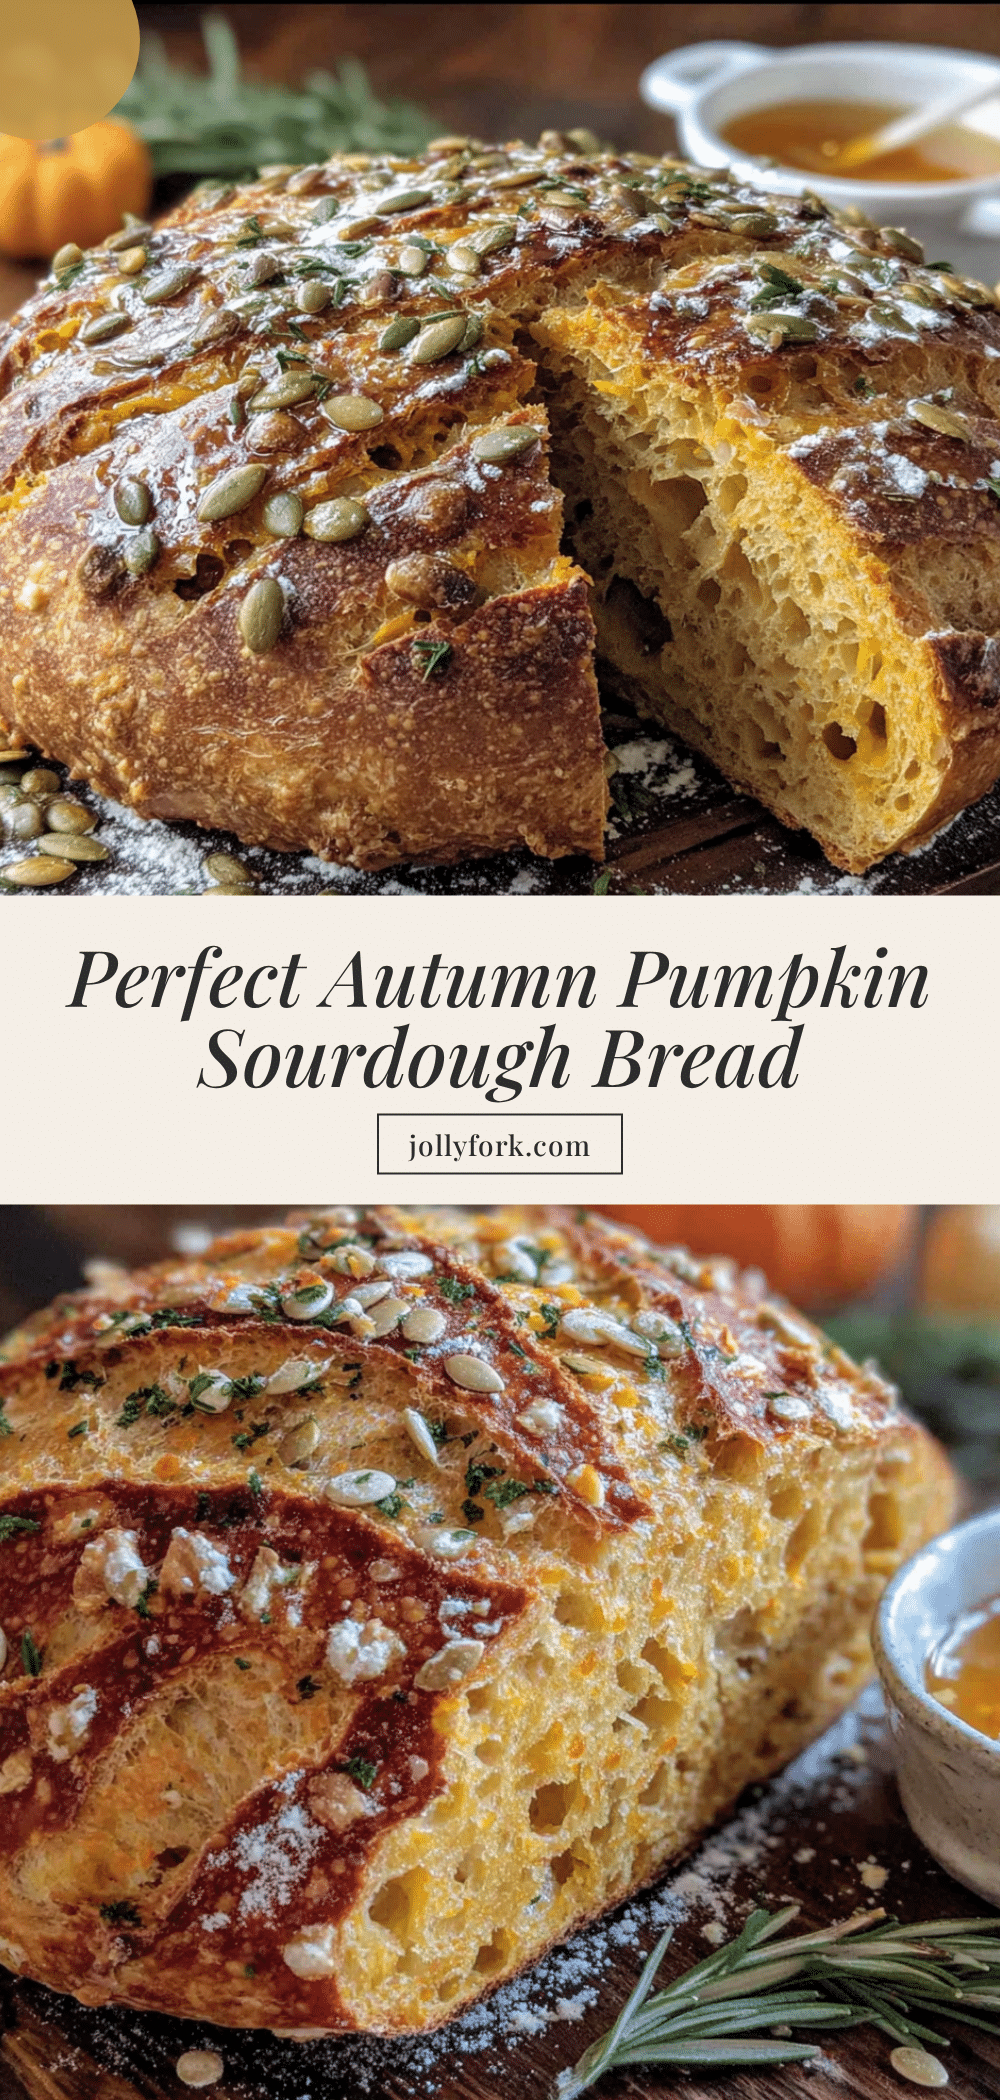
Easy Perfect Pumpkin Sourdough Bread with Pepitas
This pumpkin sourdough bread features a soft, velvety crumb with a subtle pumpkin sweetness and a tangy sourdough flavor, topped with crunchy pepitas for a beautiful finish. It’s the perfect fall bake that’s impressive enough for gatherings but simple enough for a lazy Sunday.
- Prep Time: 30 minutes
- Cook Time: 45 minutes
- Total Time: 14 hours 15 minutes (includes fermentation and proofing)
- Yield: 12 servings 1x
- Category: Bread
- Cuisine: American
Ingredients
- 100g active sourdough starter
- 400g bread flour (about 3 cups)
- 100g whole wheat flour (about ¾ cup)
- 200g pumpkin puree (about ¾ cup)
- 250g water (about 1 cup)
- 10g fine sea salt (about 1½ teaspoons)
- 50g raw pepitas (about ⅓ cup)
- 1 tablespoon olive oil
- Flaky sea salt (optional)
Instructions
- Feed your starter 8-12 hours before mixing: Use a 1:1:1 ratio (starter, flour, water) to have 100g active starter.
- Mix the dough: In a large bowl, combine 100g active starter, 250g water, and 200g pumpkin puree. Whisk until dissolved. Add 400g bread flour, 100g whole wheat flour, and 10g salt. Mix until no dry flour remains. Cover and rest 30 minutes (autolyse).
- Stretch and fold: Wet your hands, then stretch and fold the dough from one side, rotate 90°, repeat 4 times. Cover and rest 30 minutes. Repeat 3 more times (total 4 sets over 2 hours).
- Bulk fermentation: Let the dough rest covered at room temperature (70-75°F) for 4-6 hours total from mixing, until increased by 50-75%, bubbly, and puffy.
- Pre-shape and bench rest: Turn dough onto floured surface, shape into a rough round, fold edges into center. Rest seam-side up for 20-30 minutes.
- Final shape: Flip dough smooth side down, stretch into rectangle, fold top third down and bottom third up, then roll into a tight log. Place seam-side up in floured banneton or towel-lined bowl. Cover.
- Cold proof: Refrigerate banneton for 12-16 hours (up to 24 hours for more tang).
- Preheat and prepare: Place Dutch oven in oven, preheat to 475°F (245°C) for 45 minutes. Remove dough from fridge, flip onto parchment paper. Brush top with olive oil, press pepitas into surface.
- Score and bake: Score dough with a deep slash (½ inch deep). Transfer to hot Dutch oven, cover, bake 25 minutes. Remove lid, bake 20-25 minutes more until deep golden brown and hollow-sounding when tapped.
- Cool completely: Transfer to cooling rack and cool at least 2 hours (preferably 3-4 hours) before slicing.
Notes
For best results, use a digital scale for accuracy. The cold proof develops flavor and makes scoring easier. If dough is too sticky, add a tablespoon of flour during stretch and folds. For a nuttier flavor, toast pepitas in a dry skillet before adding. Internal temperature should reach 205-210°F (96-99°C) when done. Store at room temperature cut-side down for 3-4 days, or freeze sliced for up to 3 months.
Nutrition
- Serving Size: 1 slice
- Calories: 210
- Sugar: 2
- Sodium: 390
- Fat: 4
- Saturated Fat: 0.5
- Carbohydrates: 38
- Fiber: 3
- Protein: 7
Keywords: pumpkin sourdough, sourdough bread, pumpkin bread, pepitas, fall baking, artisan bread, sourdough recipe


