I figured a turkey breast for two people would be a sad, dry little thing. It took about an hour in my friend’s tiny apartment kitchen that Thanksgiving to realize I had it completely backwards.
She pulled this golden-brown bird out of the oven, and the smell—rosemary, sage, garlic, and butter all mingling together—made my stomach actually growl. It was just the two of us, a bottle of good red wine, and a turkey that looked like it belonged on a magazine cover. We ate on her coffee table, using mismatched plates, and it was the best Thanksgiving I’d ever had. That moment taught me something important: a smaller gathering doesn’t mean a smaller celebration. Sometimes, it means a better one.
This Perfect Herb Butter Roasted Turkey Breast recipe was born from that evening. It’s designed for the times when a full bird feels like overkill—a quiet Sunday dinner, a Friendsgiving with three people, or a holiday meal where you want the leftovers but not the drama. The herb butter keeps the meat impossibly juicy, and the skin gets that crackly, golden perfection you usually only get from a whole roasted turkey. Honestly, I’ve started making this even when it’s not a holiday. It’s just that good.
Why You’ll Love This Recipe
Let me tell you why this herb butter roasted turkey breast has become my go-to for small gatherings. It solves every problem I used to have with cooking turkey.
- Quick & Easy : You can have this on the table in under 2 hours. No brining overnight, no wrestling a 20-pound bird, no carving anxiety. It’s weeknight-friendly, I promise.
- Simple Ingredients : Butter, fresh herbs, garlic, salt, pepper, and a bone-in turkey breast. That’s it. You probably have most of this in your kitchen right now.
- Perfect for Small Gatherings : This is your recipe for 2 to 6 people. It’s ideal for Thanksgiving for two, a cozy Sunday roast, or when you want holiday vibes without the massive leftovers situation.
- Crowd-Pleaser : I’ve served this to picky eaters, turkey skeptics, and serious home cooks. Everyone goes back for seconds. The dark meat lovers don’t even miss the legs.
- Unbelievably Delicious : The herb butter creates this incredible crust while keeping the inside tender and juicy. It’s not dry—ever. The first time I made it, I actually checked the temperature three times because I couldn’t believe it was so moist.
What makes this recipe different from the rest? It’s the technique of getting the herb butter under the skin. That little step changes everything. The butter bastes the meat from the inside out, infusing every single bite with flavor. I’ve tested this with different butter-to-herb ratios, different roasting temperatures, and different resting times. This version is the one—the Goldilocks of turkey breasts. It’s not just another roasted turkey recipe. It’s the one you’ll come back to.
This is the kind of meal that makes you slow down. It’s comfort food that feels special but doesn’t require a culinary degree. Perfect for impressing your in-laws without stress, or turning a random Tuesday into something memorable.
What Ingredients You Will Need
This recipe uses simple, wholesome ingredients to deliver bold flavor and satisfying texture without the fuss. Most of these are pantry staples, which is exactly what you want when you’re planning a small gathering.
For the Herb Butter
- 1/2 cup (1 stick) unsalted butter, softened — Make sure it’s really soft, almost room temperature. This makes it spreadable and easy to work with. I prefer unsalted so I can control the salt level.
- 2 tablespoons fresh rosemary, finely chopped — Fresh is non-negotiable here. Dried rosemary is too woody and won’t distribute evenly in the butter.
- 2 tablespoons fresh sage, finely chopped — Sage and turkey are a classic pairing for a reason. It adds that earthy, slightly peppery note.
- 2 tablespoons fresh thyme leaves — Strip the leaves from the stems. The stems are too tough to eat.
- 4 cloves garlic, minced — Fresh garlic, not the jarred stuff. It makes a difference.
- 1 teaspoon salt — I use kosher salt. If you’re using table salt, use a little less.
- 1/2 teaspoon black pepper — Freshly ground is best.
- 1 teaspoon lemon zest — This brightens everything up. Don’t skip it.
For the Turkey
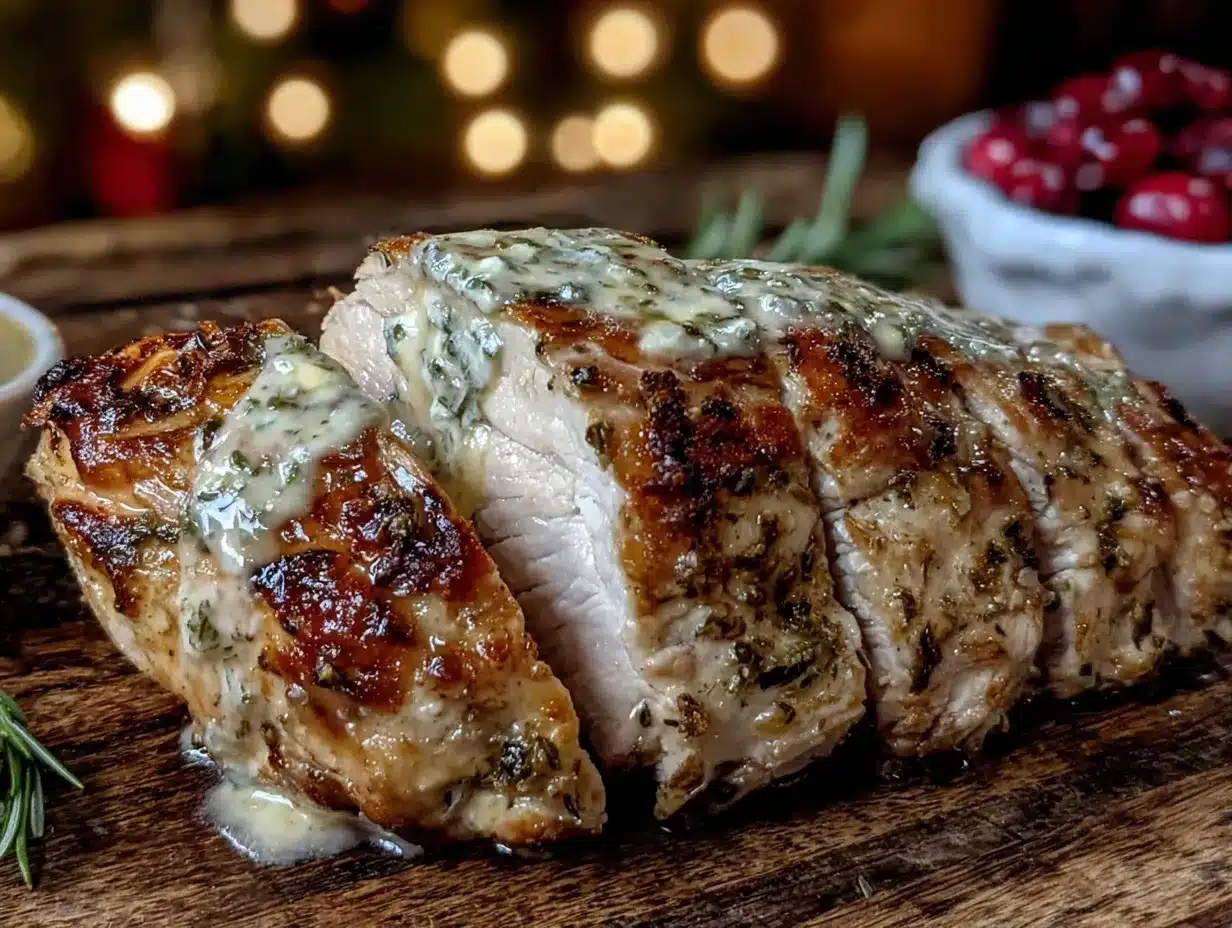
- 1 (3 to 4 pound) bone-in, skin-on turkey breast — Bone-in is key for flavor and moisture. The bone acts as a heat conductor and adds richness to the pan juices. Look for one that’s not pre-brined if you can find it.
- 1 tablespoon olive oil — Just enough to help the seasoning stick to the outside of the skin.
- 1 teaspoon salt — For seasoning the outside.
- 1/2 teaspoon black pepper — For the outside.
- 1/2 cup chicken or turkey broth — For the bottom of the roasting pan. This creates steam and prevents the bottom from burning.
- 1 small onion, quartered — Optional, but it adds flavor to the pan drippings if you want to make gravy.
- 2 carrots, roughly chopped — Also optional, same reason.
Ingredient Selection Tips: I’ve found that buying a turkey breast from a local butcher or a higher-quality brand makes a noticeable difference. The meat is just more flavorful. If you’re using a frozen turkey breast, make sure it’s fully thawed in the refrigerator—it takes about 24 hours per 4-5 pounds. And please, please pat it dry with paper towels before you start. Dry skin equals crispy skin.
Equipment Needed
You don’t need a fancy kitchen for this. Here’s what you’ll need:
- Roasting pan or baking dish — A 9×13 inch baking dish works perfectly. You just need something with sides to catch the juices.
- Wire rack — Optional, but it helps air circulate around the turkey for even cooking. If you don’t have one, you can place the turkey directly on top of the onion and carrot chunks.
- Instant-read meat thermometer — This is non-negotiable. Guessing the temperature is how you get dry turkey. I use a simple digital one and it’s never let me down.
- Small bowl — For mixing the herb butter.
- Chef’s knife and cutting board — For chopping herbs and veggies.
- Kitchen twine — To tie the turkey breast if it’s unevenly shaped. Helps it cook more evenly.
- Aluminum foil — For tenting the turkey if the skin gets too brown before it’s done.
Budget-Friendly Tip: If you don’t have a roasting pan, a disposable aluminum pan from the grocery store works fine. Just put it on a baking sheet for stability. And if you don’t have a wire rack, crumple up a few long strips of aluminum foil into coils and place them in the pan. It’s a hack that works surprisingly well.
Preparation Method
Alright, let’s get cooking. I’ve broken this down into clear steps so you can follow along without any stress.
Step 1: Prep the Herb Butter
In a small bowl, combine the softened butter, chopped rosemary, sage, thyme, minced garlic, 1 teaspoon salt, 1/2 teaspoon pepper, and lemon zest. Mix it all together with a fork until everything is evenly distributed. The mixture should be spreadable but not melted. If your butter is too hard, let it sit out for another 10-15 minutes. Set aside.
Step 2: Prep the Turkey
Preheat your oven to 375°F (190°C). Take the turkey breast out of the fridge and let it sit at room temperature for about 30 minutes. This helps it cook more evenly. Pat the turkey breast completely dry with paper towels—this is crucial for crispy skin. Place it on your cutting board, breast side up.
Step 3: Loosen the Skin
This is the most important step. Using your fingers, gently work your way under the skin of the turkey breast. Start at the top and carefully separate the skin from the meat, being careful not to tear it. You want to create a pocket for the herb butter. Go slowly and use your fingers to loosen it all the way down to the sides. It feels a little weird the first time, but you’ll get the hang of it.
Step 4: Apply the Herb Butter
Take about two-thirds of the herb butter and push it under the loosened skin. Use your fingers to spread it evenly over the meat. Massage it gently from the outside to make sure it’s distributed. Then, take the remaining butter and spread it all over the outside of the skin. Don’t be shy—coat it well.
Step 5: Season the Outside
Drizzle the olive oil over the skin and rub it in. Sprinkle the remaining 1 teaspoon salt and 1/2 teaspoon pepper all over the turkey. If you’re using kitchen twine, tie the breast to create a more uniform shape for even cooking.
Step 6: Set Up the Pan
Place the onion quarters and carrot chunks (if using) in the bottom of your roasting pan. Pour in the chicken broth. Place the wire rack on top, or just set the turkey directly on the vegetables. Place the turkey breast on the rack or vegetables, breast side up.
Step 7: Roast the Turkey
Place the pan in the preheated oven. Roast for about 1 hour to 1 hour 15 minutes, or until the internal temperature reaches 155°F (68°C) when inserted into the thickest part of the breast. Start checking the temperature at the 50-minute mark. Every oven is different, and a larger breast will take longer. If the skin is getting too dark before the meat is done, tent it loosely with aluminum foil.
Step 8: Rest the Turkey
Once the turkey hits 155°F, remove it from the oven. Transfer it to a cutting board and tent it loosely with foil. Let it rest for at least 15-20 minutes. During this time, the internal temperature will continue to rise to a safe 165°F (74°C), and the juices will redistribute throughout the meat. Do not skip this step—it’s the secret to juicy turkey.
Step 9: Carve and Serve
After resting, use a sharp knife to slice the turkey breast against the grain. You can serve it with the pan juices or make a quick gravy using the drippings and the vegetables in the pan. I like to spoon a little of that buttery juice over the sliced meat before serving.
Sensory Cue: When the turkey is done, the skin should be a deep golden brown and feel taut and crispy to the touch. The juices should run clear when you pierce the thickest part. And the smell—oh, the smell—it will fill your whole house with that warm, savory aroma that says “something special is happening.”
Cooking Tips & Techniques
I’ve made this recipe dozens of times, and I’ve made my share of mistakes. Here’s what I’ve learned so you don’t have to learn the hard way.
Don’t skip the resting period. I know it’s tempting to carve right away, especially when everyone is hungry and the kitchen smells amazing. But if you cut into it too soon, all those precious juices will run out onto the cutting board instead of staying in the meat. I learned this the hard way during a Friendsgiving. The turkey was dry, and I was so disappointed. Now I set a timer for 20 minutes and walk away.
Use a thermometer, not the pop-up timer. Those little plastic pop-up timers that come with some turkeys are notoriously unreliable. They often pop when the meat is already overcooked. A good instant-read thermometer is your best friend. Insert it into the thickest part of the breast, away from the bone. Trust the numbers, not the timer.
Let the turkey come to room temperature before roasting. This is a small step that makes a big difference. A cold turkey breast straight from the fridge will cook unevenly—the outside will be done before the center is safe. Giving it 30 minutes on the counter helps everything cook at the same pace.
Don’t overwork the skin. When you’re loosening the skin to apply the butter, be gentle. If you tear the skin, the butter will leak out during cooking, and you’ll lose that beautiful crispy crust. If you do get a small tear, don’t panic—just try to patch it with a little extra butter.
Multitasking tip: While the turkey is roasting, you have plenty of time to make your side dishes. I like to roast some vegetables alongside it—carrots, potatoes, and Brussels sprouts work great. Just toss them in olive oil, salt, and pepper, and add them to the pan around the turkey for the last 30-40 minutes of cooking. It saves time and the veggies soak up those delicious pan juices. If you’re looking for a cozy side, this pairs beautifully with my rustic sourdough pumpkin bread for sopping up the juices.
Variations & Adaptations
This recipe is wonderfully flexible. Here are some ways to make it your own.
Dietary Adaptations
- Dairy-Free: Substitute the butter with a high-quality vegan butter or olive oil. Use 1/2 cup olive oil mixed with the herbs and garlic. It won’t be quite as rich, but it’s still delicious.
- Low-Sodium: Reduce the salt to 1 teaspoon total and rely more heavily on the herbs and garlic for flavor. Use low-sodium broth for the pan.
- Gluten-Free: This recipe is naturally gluten-free. Just make sure your broth is gluten-free if you’re sensitive.
Flavor Variations
- Citrus Herb Butter: Add 1 tablespoon of orange zest along with the lemon zest. It adds a bright, festive flavor that’s perfect for winter gatherings.
- Spicy Herb Butter: Add 1/2 teaspoon of red pepper flakes or a pinch of cayenne pepper to the herb butter. It gives the turkey a subtle warmth without being overwhelming.
- Maple-Dijon Glaze: In the last 15 minutes of roasting, brush the turkey with a mixture of 2 tablespoons maple syrup and 1 tablespoon Dijon mustard. It creates a gorgeous, sweet-savory crust.
Different Cooking Methods
- Air Fryer: This works surprisingly well for a smaller turkey breast (2-3 pounds). Cook at 350°F for about 35-45 minutes, or until the internal temperature reaches 155°F. The skin gets incredibly crispy.
- Slow Cooker: You can make this in a slow cooker, but you won’t get crispy skin. Sear the turkey breast in a hot skillet first to brown it, then place it in the slow cooker with the broth and herbs. Cook on low for 4-5 hours. Finish it under the broiler for a few minutes to crisp up the skin.
Personal Variation I Love: During the fall, I add a tablespoon of finely chopped fresh sage and a teaspoon of dried rubbed sage to the herb butter. It makes the turkey taste like Thanksgiving in a single bite. I also add a splash of apple cider to the pan broth for a subtle sweetness that pairs beautifully with the herbs.
Serving & Storage Suggestions
This herb butter roasted turkey breast is a showstopper on any table. Here’s how to serve and store it like a pro.
Serving Temperature: Serve the turkey warm, right after it has rested. The ideal serving temperature is around 140-145°F. The meat will be warm and juicy, and the skin will still have some of its crispiness. Slice it against the grain for the most tender pieces.
Presentation: Arrange the sliced turkey on a warm platter. Spoon a little of the pan juices over the top to keep it moist and glossy. Garnish with a few fresh sprigs of rosemary and thyme for a beautiful, rustic look. It looks like you spent hours on it—but we know the secret.
Complementary Dishes: This turkey is incredibly versatile. Serve it with classic sides like mashed potatoes, green bean casserole, or a simple creamy dill cucumber and red onion salad for a fresh, tangy contrast. For a complete small gathering meal, I love pairing it with my creamy roasted cherry tomato basil bisque as a starter, and for dessert, a slice of glazed lemon blueberry bundt cake is the perfect finish.
Storage Instructions: Store leftover turkey in an airtight container in the refrigerator for up to 3-4 days. Keep it in the fridge as soon as it has cooled down to room temperature. For longer storage, you can freeze the cooked, sliced turkey for up to 2 months. Wrap it tightly in plastic wrap and then in foil, or use a freezer-safe bag.
Reheating Methods: The key to reheating turkey without drying it out is gentle heat. Here are the best methods:
- Oven: Preheat to 300°F. Place the turkey slices in a baking dish, add a splash of chicken broth or leftover pan juices, cover with foil, and heat for 10-15 minutes.
- Stovetop: Place the turkey slices in a skillet with a little broth or gravy. Cover and heat over low heat for 5-7 minutes.
- Microwave: It works in a pinch, but it will dry out the meat. If you must, cover the turkey with a damp paper towel and microwave in 30-second intervals.
Flavor Development: Honestly, the leftovers might be even better the next day. The flavors have time to meld together, and the meat becomes even more tender. I love making turkey sandwiches with the leftovers—a little mayo, some cranberry sauce, and a pile of turkey on good bread. It’s a gift that keeps on giving.
Nutritional Information & Benefits
Here’s a rough estimate of the nutritional values per serving (based on a 6-ounce serving of cooked turkey breast with skin):
- Calories: Approximately 350-400
- Protein: 40-45 grams
- Fat: 20-25 grams
- Carbohydrates: 1-2 grams
- Sodium: 600-800 mg
Health Benefits: Turkey breast is an excellent source of lean protein, which is essential for muscle repair and maintaining a healthy metabolism. It’s also rich in B vitamins, particularly B6 and B12, which support energy production and brain function. The herbs in this recipe—rosemary, sage, and thyme—are packed with antioxidants and have anti-inflammatory properties.
Dietary Considerations: This recipe is naturally low in carbohydrates and can be part of a keto, paleo, or low-carb diet. It’s also gluten-free. The main source of fat is the butter, which you can adjust based on your dietary needs.
Personal Wellness Perspective: I love that this recipe allows me to enjoy a special, comforting meal without feeling like I’ve derailed my healthy eating habits. It’s real food—whole ingredients, no shortcuts, and it leaves me feeling satisfied, not sluggish. That’s the kind of cooking I believe in.
Conclusion
This Perfect Herb Butter Roasted Turkey Breast is more than just a recipe—it’s a solution. It solves the problem of what to make when you want a special meal but don’t need a whole bird. It solves the anxiety of dry, flavorless turkey. And it solves the question of how to make a small gathering feel truly celebratory.
I love this recipe because it’s forgiving. It doesn’t require perfect technique or expensive equipment. It just requires good ingredients, a little patience, and the willingness to get your hands a bit buttery. Every time I make it, I’m reminded of that evening in my friend’s apartment—how a simple meal shared with one other person can feel like a feast.
I encourage you to make this your own. Adjust the herbs, play with the butter ratio, try a different glaze. The beauty of cooking for a small group is that you have the freedom to experiment without the pressure of feeding a crowd. If something goes wrong, well, you’ve only got a few people to feed anyway.
So go ahead. Grab a turkey breast, some fresh herbs, and a stick of butter. Preheat your oven. And get ready to make something that will have everyone at your table closing their eyes after the first bite. When you do, I’d love to hear about it—leave a comment below, share your photos, and tell me how it turned out. Happy cooking, friends.
Frequently Asked Questions
Can I use a boneless turkey breast for this recipe?
You can, but I don’t recommend it. The bone adds a ton of flavor and helps keep the meat moist during cooking. A boneless breast will cook faster and is more prone to drying out. If you use boneless, reduce the cooking time and start checking the temperature at 40 minutes.
How do I know when the turkey is fully cooked?
Use an instant-read meat thermometer. Insert it into the thickest part of the breast, away from the bone. The turkey is safe to eat at 165°F, but I recommend pulling it out at 155°F and letting it rest. The temperature will rise to 165°F during the rest, and the meat will be much juicier.
Can I make the herb butter ahead of time?
Absolutely! The herb butter can be made up to 3 days in advance. Store it in the refrigerator, tightly wrapped or in an airtight container. Let it come to room temperature for about 30 minutes before using so it’s spreadable. You can also freeze it for up to 3 months.
My turkey skin is getting too dark. What should I do?
This happens sometimes, especially with smaller ovens or if your oven runs hot. Simply tent the turkey loosely with a piece of aluminum foil. This will prevent the skin from burning while the inside continues to cook. I usually check at the 45-minute mark and add the foil if needed.
Can I use dried herbs instead of fresh?
You can, but the flavor won’t be as bright or vibrant. Fresh herbs are really the star of this recipe. If you must use dried, use about 1 teaspoon of each dried herb instead of 2 tablespoons fresh. Dried herbs are more concentrated, so you need less. Just know that the texture and flavor will be different.
Pin This Recipe!
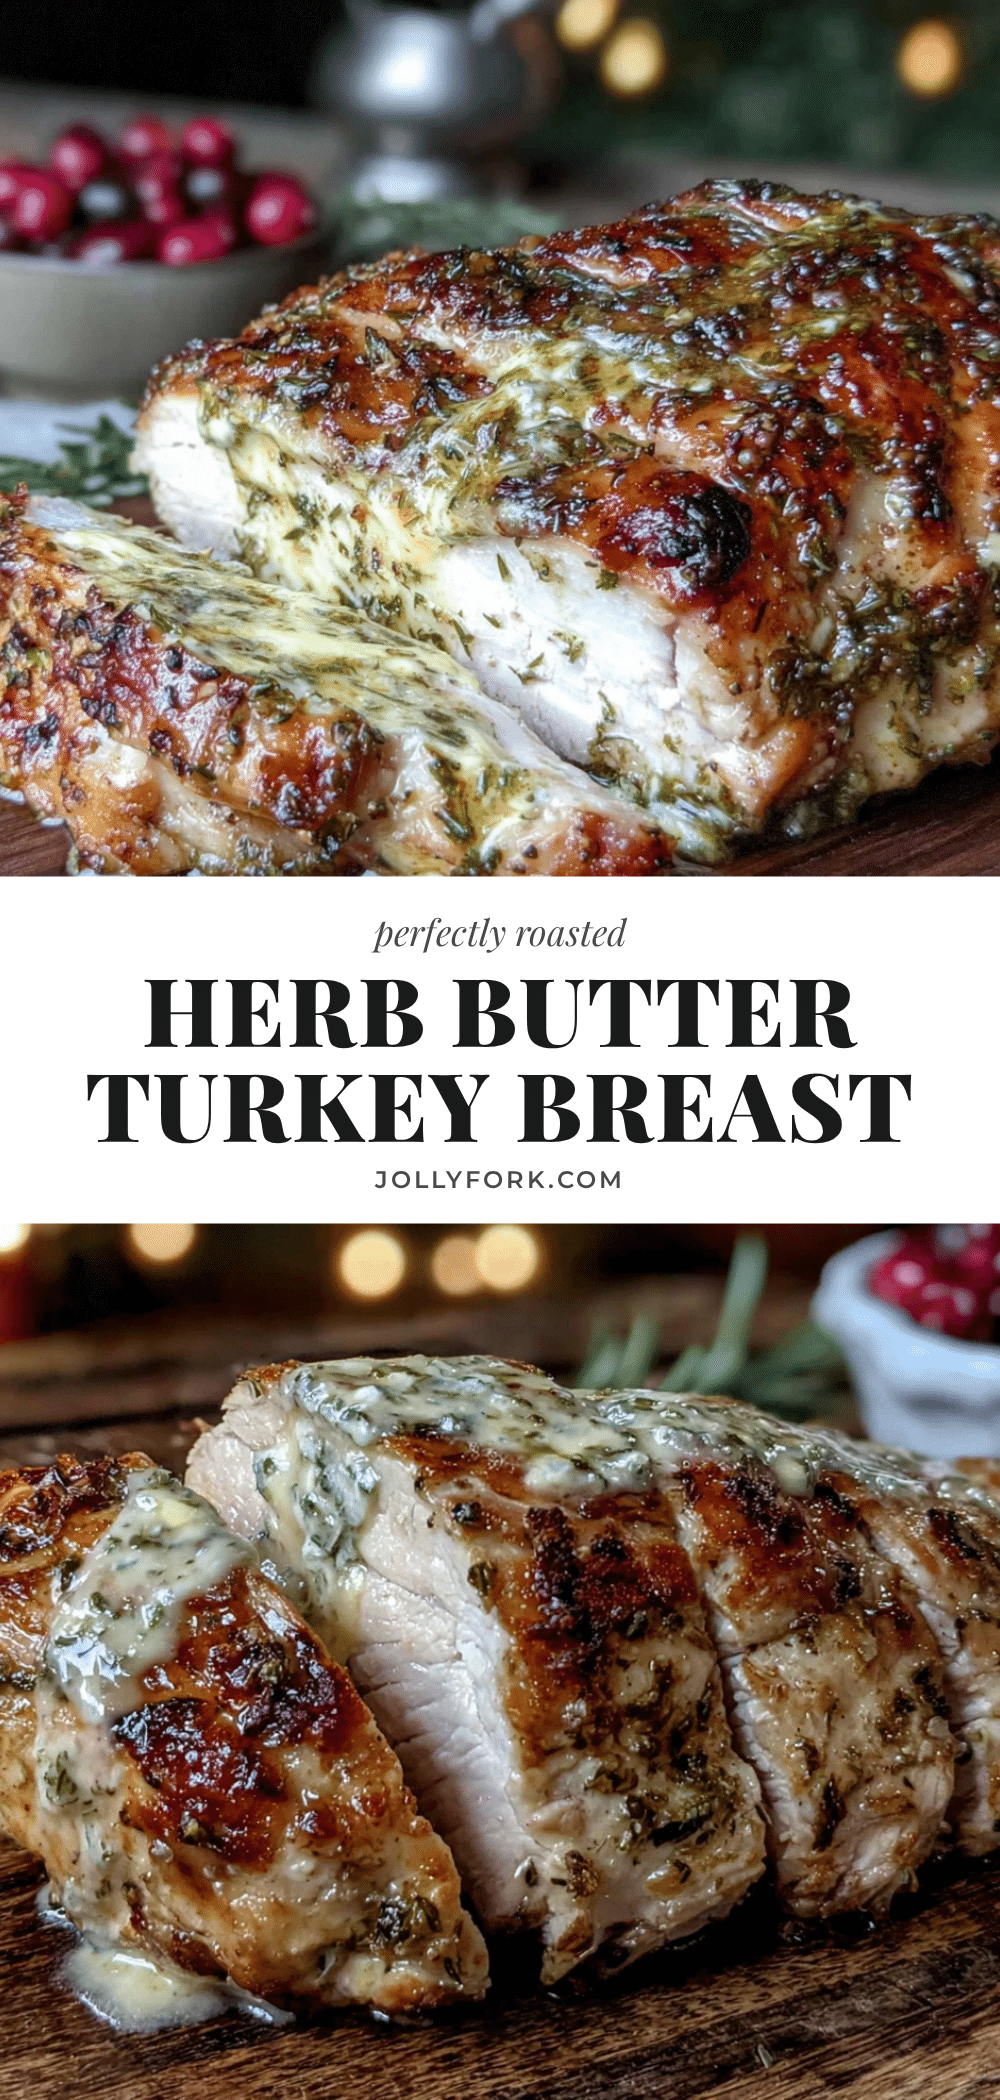
Perfect Herb Butter Roasted Turkey Breast: Easy Small Gathering Meal
This Perfect Herb Butter Roasted Turkey Breast is designed for small gatherings, delivering impossibly juicy meat with crackly, golden skin. It’s a quick and easy solution for a special meal without the need for a full bird.
- Prep Time: 30 minutes
- Cook Time: 1 hour 15 minutes
- Total Time: 1 hour 45 minutes
- Yield: 4 servings 1x
- Category: Main Course
- Cuisine: American
Ingredients
- 1/2 cup (1 stick) unsalted butter, softened
- 2 tablespoons fresh rosemary, finely chopped
- 2 tablespoons fresh sage, finely chopped
- 2 tablespoons fresh thyme leaves
- 4 cloves garlic, minced
- 1 teaspoon salt
- 1/2 teaspoon black pepper
- 1 teaspoon lemon zest
- 1 (3 to 4 pound) bone-in, skin-on turkey breast
- 1 tablespoon olive oil
- 1 teaspoon salt
- 1/2 teaspoon black pepper
- 1/2 cup chicken or turkey broth
- 1 small onion, quartered (optional)
- 2 carrots, roughly chopped (optional)
Instructions
- In a small bowl, combine the softened butter, chopped rosemary, sage, thyme, minced garlic, 1 teaspoon salt, 1/2 teaspoon pepper, and lemon zest. Mix until evenly distributed. Set aside.
- Preheat oven to 375°F (190°C). Remove turkey breast from fridge and let sit at room temperature for 30 minutes. Pat dry with paper towels.
- Gently loosen the skin of the turkey breast using your fingers, creating a pocket for the herb butter. Be careful not to tear the skin.
- Push about two-thirds of the herb butter under the loosened skin, spreading evenly. Spread remaining butter over the outside of the skin.
- Drizzle olive oil over the skin and rub in. Sprinkle remaining 1 teaspoon salt and 1/2 teaspoon pepper all over the turkey. Optionally, tie with kitchen twine.
- Place onion quarters and carrot chunks (if using) in the bottom of a roasting pan. Pour in chicken broth. Place a wire rack on top or set turkey directly on vegetables. Place turkey breast on rack or vegetables, breast side up.
- Roast for 1 hour to 1 hour 15 minutes, or until internal temperature reaches 155°F (68°C) in the thickest part of the breast. Start checking at 50 minutes. Tent with foil if skin gets too dark.
- Remove turkey from oven, transfer to a cutting board, and tent loosely with foil. Let rest for 15-20 minutes. Internal temperature will rise to 165°F (74°C).
- After resting, slice turkey breast against the grain. Serve with pan juices or make a quick gravy using drippings and vegetables.
Notes
Don’t skip the resting period; it’s crucial for juicy turkey. Use a thermometer, not the pop-up timer. Let turkey come to room temperature before roasting. Be gentle when loosening the skin to avoid tearing. For a dairy-free version, substitute butter with high-quality vegan butter or olive oil. For a low-sodium version, reduce salt to 1 teaspoon total. This recipe is naturally gluten-free.
Nutrition
- Serving Size: 6 ounces cooked turk
- Calories: 375
- Sodium: 700
- Fat: 22.5
- Saturated Fat: 12
- Carbohydrates: 1.5
- Protein: 42.5
Keywords: herb butter roasted turkey breast, small gathering turkey, easy turkey recipe, Thanksgiving for two, roasted turkey breast


