I was at my car mechanic’s shop last Tuesday—not exactly where you expect to find recipe inspiration, right? My old sedan was making a noise that sounded expensive, and I was bracing myself for bad news. But while I was sitting there, waiting, this older guy named Frank—the mechanic—started talking about pumpkin seeds while he was wiping grease off his hands. He said, “You know, everyone throws these away, but they’re the best part of the pumpkin if you do ’em right.” I laughed, thinking he was about to give me car advice, but nope. He pulled out his phone and showed me a photo of these bright, speckled seeds he’d made the night before. They looked incredible—all glossy and toasted with flecks of chili and lime. Honestly, I was more excited about that photo than I was about my car bill.
Frank told me he uses his air fryer because it’s faster and he doesn’t have to babysit the oven. And let me tell you, that man knows his seeds. I went home, carved the pumpkin I’d been ignoring on my counter, and tried his method that same night. The result? These quick air fryer chili lime pumpkin seeds that are tangy, spicy, and ridiculously crunchy. I’ve made them four times since then, and each batch disappears faster than the last. Maybe you’ve been there—staring at a pile of pumpkin guts after Halloween and wondering what to do with all those seeds. Well, Frank the mechanic solved that problem for me, and now I’m passing it along to you.
These seeds are the kind of snack you make once and then crave constantly. They’re salty, a little sour from the lime, and have just enough heat to wake up your taste buds. Plus, they come together in under 15 minutes. I mean, what more could you ask for from a conversation with your mechanic?
Why You’ll Love This Recipe
I’ve tested this recipe more times than I care to admit—mostly because I kept eating the test batches before I could write anything down. But honestly, that’s the best kind of recipe testing, right? Here’s why these chili lime pumpkin seeds have become my go-to snack.
- Ready in 15 Minutes: From pumpkin to crunchy snack in less time than it takes to watch a sitcom. The air fryer cuts the cooking time in half compared to the oven.
- Simple Pantry Ingredients: You probably already have chili powder, lime, and salt in your kitchen. No weird spice blends or specialty items needed.
- Perfect for Snacking: Whether it’s game day, a movie night, or just Tuesday afternoon, these seeds hit the spot. They’re also amazing on salads or soups.
- Crowd-Pleaser: I brought a batch to a potluck last week, and three people asked for the recipe before the night ended. Kids and adults both go crazy for them.
- Unbelievably Crunchy: The air fryer gives them this deep, even crunch that oven-roasted seeds just can’t match. No soggy seeds here, I promise.
What makes this recipe different from all those other pumpkin seed recipes out there? It’s the balance. The chili powder gives warmth without overwhelming heat, and the lime zest adds brightness that cuts through the richness of the seeds. I’ve tried versions that were too spicy or too bland, and this one hits that perfect middle ground. It’s the kind of snack that makes you close your eyes after the first bite—and then reach for another handful before you’ve even swallowed.
What Ingredients You Will Need
This recipe uses simple, wholesome ingredients to deliver bold flavor and satisfying crunch without any fuss. Most of these are probably already in your pantry, which makes this perfect for those “I need a snack right now” moments.
For the Pumpkin Seeds
- 1 cup raw pumpkin seeds (from one medium pumpkin, rinsed and patted dry)
- 1 tablespoon olive oil (or avocado oil for a neutral flavor)
- 1 teaspoon chili powder (I prefer the smoky kind for deeper flavor)
- ½ teaspoon garlic powder
- ½ teaspoon salt (plus more to taste)
- Zest of 1 lime (about 1 teaspoon)
- Juice of ½ lime (about 1 tablespoon)
- Pinch of cayenne pepper (optional, for extra heat)
Ingredient Tips and Substitutions
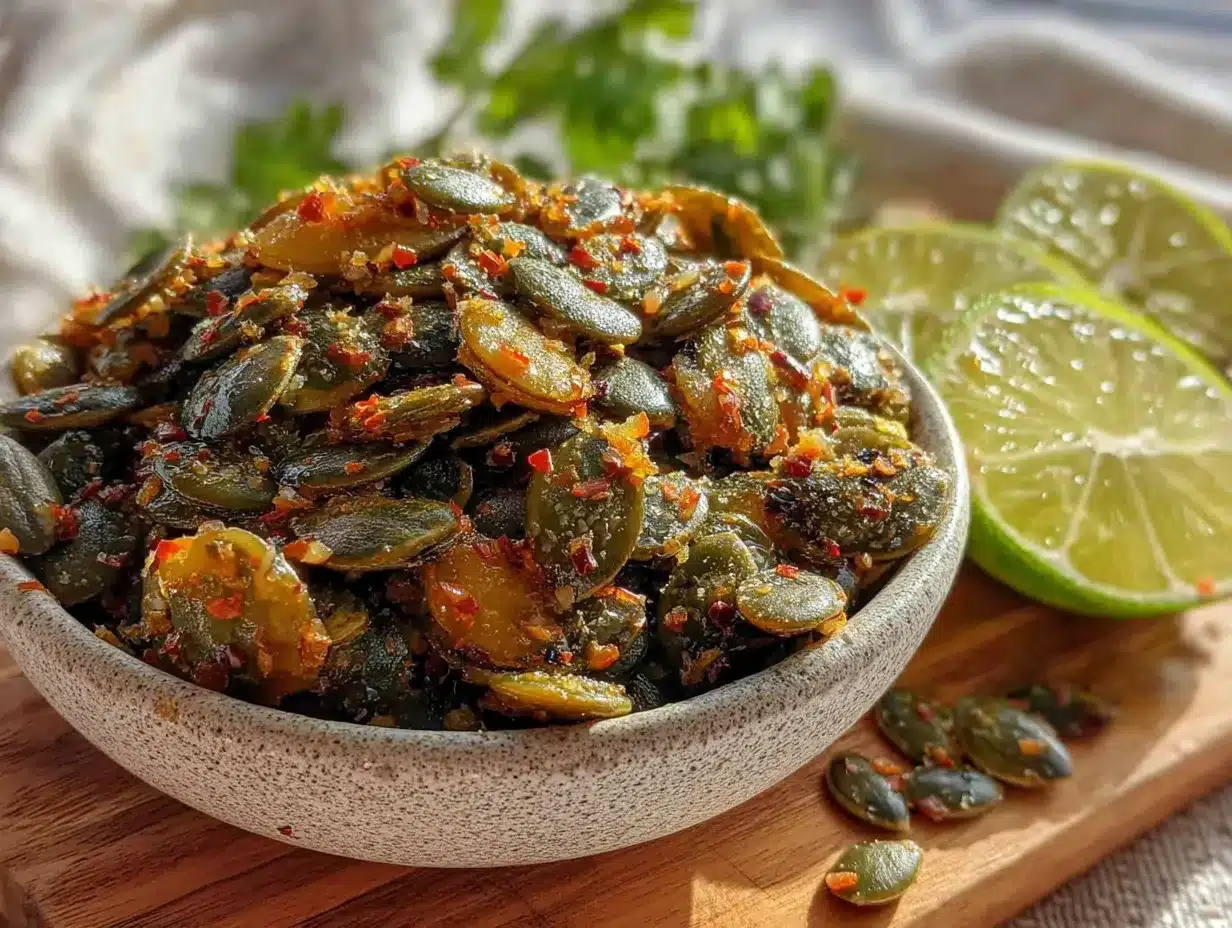
For the pumpkin seeds, you can use store-bought raw seeds if you don’t have a pumpkin to carve. Just make sure they’re raw and unsalted—pre-seasoned seeds will throw off the flavor balance. I’ve tried this with both fresh seeds from a sugar pumpkin and store-bought ones, and honestly, they both work great. The fresh ones might be slightly more tender, but the difference is minimal.
For the chili powder, I recommend using a good-quality blend. My personal favorite is the one from Penzeys, but any brand you trust will work. If you want a milder version, use ancho chili powder instead—it’s smokier and less spicy. For a gluten-free option, double-check your chili powder label, as some blends contain wheat flour as a filler.
If you don’t have fresh lime, you can use bottled lime juice, but the zest really makes a difference here. The zest adds that bright, aromatic quality that juice alone can’t replicate. I’ve made it without zest in a pinch, and it’s still good, but the zest takes it from “good” to “I can’t stop eating these.”
For the oil, any neutral oil works. I’ve used melted coconut oil, and it adds a subtle sweetness that pairs nicely with the lime. Just make sure it’s liquid before mixing.
Equipment Needed
You don’t need much for this recipe, which is part of the beauty. Here’s what you’ll need:
- Air fryer: Any model works. I use a 5.8-quart basket style, but smaller ones work fine—you might just need to cook in batches.
- Mixing bowl: A medium-sized bowl for tossing the seeds with oil and spices.
- Measuring spoons: For accurate seasoning. I’ve eyeballed it before, and it’s not the same.
- Fine-mesh strainer: For rinsing the seeds if you’re using fresh pumpkin seeds. A colander works too, but the mesh catches the smaller bits.
- Paper towels or clean kitchen towel: For drying the seeds thoroughly. This step matters more than you think.
- Microplane or zester: For getting that fine lime zest. A regular grater works but gives you chunkier pieces.
- Spatula or spoon: For stirring the seeds halfway through cooking.
If you don’t have an air fryer, you can make these in the oven at 350°F for 15-20 minutes, stirring halfway. They won’t be quite as crunchy, but they’ll still be delicious. I’ve done it both ways, and the air fryer version is definitely superior for texture.
Preparation Method
Okay, let’s get cooking. These quick air fryer chili lime pumpkin seeds come together fast, so have everything ready before you start.
- Preheat your air fryer to 350°F (175°C). Most air fryers need about 3 minutes to preheat. While that’s happening, get your seeds ready.
- Rinse the pumpkin seeds in a fine-mesh strainer under cold water. Pick out any pumpkin guts or stringy bits that are still attached. This takes about a minute.
- Dry the seeds thoroughly. This is the most important step, honestly. Spread them on a clean kitchen towel or paper towels and pat them completely dry. Any moisture left on the seeds will make them steam instead of crisp up. I once skipped this step because I was in a hurry, and my seeds came out chewy and sad. Learn from my mistake.
- In a medium mixing bowl, combine the dried seeds with olive oil, chili powder, garlic powder, salt, and cayenne if using. Toss everything together with a spatula or your hands until every seed is coated. You want them glistening but not dripping with oil.
- Spread the seasoned seeds in a single layer in the air fryer basket. Don’t overcrowd them—they need space for the hot air to circulate. If you’re making a double batch, cook in two rounds. It’s worth the extra few minutes.
- Cook for 5 minutes, then shake the basket or stir the seeds with a spatula. This ensures even cooking. Some seeds at the bottom might get more heat, so redistributing them is key.
- Cook for another 3-5 minutes, checking frequently after the 3-minute mark. Seeds can go from perfectly golden to burnt in about 30 seconds, so keep an eye on them. They’re done when they’re lightly browned and smell toasty. You’ll hear them start to pop slightly—that’s a good sign.
- Remove the basket and immediately toss the hot seeds with the lime zest and lime juice. Do this while they’re still warm so the flavors stick. The zest will cling to the oil, and the juice will sizzle and evaporate, leaving behind that tangy brightness.
- Let the seeds cool completely in the basket or on a plate. They’ll continue to crisp up as they cool. I know it’s tempting to eat them right away, but waiting 5 minutes makes a huge difference in crunch.
- Taste and adjust seasoning. Add a pinch more salt or chili powder if needed. Everyone’s taste buds are different, so trust your own.
A quick note: if you’re using store-bought raw seeds, they might cook a minute or two faster than fresh ones because they’re already drier. Check them at the 6-minute mark to be safe.
Cooking Tips & Techniques
After making these seeds more times than I can count, I’ve picked up a few tricks that make a real difference. Let me share them so you don’t have to learn the hard way.
Dry your seeds like your life depends on it. I cannot stress this enough. Wet seeds steam instead of crisp, and you’ll end up with chewy, sad snacks. I once rushed through this step because I was hungry, and I regretted it for the next 20 minutes while I chewed through a batch of rubbery seeds. Spread them on a towel and really press down to absorb all that moisture.
Don’t skip the preheat. I know some recipes say you can skip preheating the air fryer, but for seeds, it matters. Starting with a hot basket ensures they start crisping immediately rather than slowly warming up. That initial blast of heat is what creates that crunchy exterior.
Watch the last few minutes like a hawk. Seeds go from perfect to burnt faster than any other snack I’ve made. The oils in the seeds heat up quickly, and before you know it, you’ve got a basket of charcoal. Set a timer for the minimum time and check them early. You can always add more time, but you can’t un-burn them.
Shake the basket halfway through. This isn’t optional. The seeds at the bottom of the basket get more direct heat, and without shaking, you’ll end up with some burnt and some undercooked. Give it a good shake or stir with a spatula.
Let them cool completely. This is the hardest part, I know. But if you eat them while they’re still warm, they’ll seem softer than they actually are. As they cool, the moisture inside evaporates and the structure firms up. Give them 5-10 minutes, and you’ll be rewarded with the crunchiest seeds you’ve ever had.
Variations & Adaptations
One of the best things about this recipe is how easy it is to change up. Here are some variations I’ve tried and loved:
Spicy Honey Lime: Add 1 tablespoon of honey to the oil and spice mixture before tossing. The honey caramelizes in the air fryer, giving the seeds a sweet-and-spicy coating that’s absolutely addictive. Just watch them closely—honey can burn faster than plain oil.
Smoky Chipotle: Swap the chili powder for 1 teaspoon of chipotle powder. It adds a deeper, smokier heat that’s perfect for anyone who loves bold flavors. I made this version for a taco night, and everyone sprinkled them on their tacos like fancy toppings.
Garlic Parmesan: Skip the chili and lime, and instead toss the seeds with 1 teaspoon garlic powder, ½ teaspoon salt, and 2 tablespoons of finely grated Parmesan cheese. Add the cheese after cooking so it doesn’t burn. This version tastes like the best garlic bread you’ve ever had, but in seed form.
Everything Bagel: After cooking, toss the warm seeds with 1 tablespoon of everything bagel seasoning. It’s salty, savory, and incredibly satisfying. I keep a jar of this version on my desk for afternoon snacking.
Maple Cinnamon: For a sweet version, replace the chili and lime with 1 tablespoon of maple syrup and 1 teaspoon of cinnamon. Cook at a slightly lower temperature (330°F) to prevent the sugar from burning. These are amazing on yogurt or oatmeal.
If you’re avoiding oil, you can use a spritz of cooking spray instead. The seeds won’t be quite as crispy, but they’ll still be delicious. I’ve also made these with coconut aminos instead of salt for a slightly umami flavor—it’s weird but good.
Serving & Storage Suggestions
These seeds are incredibly versatile, so let’s talk about how to enjoy them and keep them fresh.
Serving Temperature: These are best at room temperature, right after they’ve cooled. The crunch is at its peak, and the flavors are fully developed. They’re also great warm, straight from the air fryer, if you can’t wait.
Presentation Ideas: Serve them in a simple bowl for snacking, or use them as a topping for soups and salads. I love sprinkling them over a creamy butternut squash soup—the crunch and acidity cut through the richness perfectly. They’re also amazing on avocado toast or mixed into a trail mix with dried cranberries and dark chocolate chips.
Complementary Dishes: These seeds pair beautifully with any Mexican-inspired meal. Try them alongside tacos, enchiladas, or a big bowl of chili. They also work great on a cheese board—the tangy lime and spicy chili contrast nicely with creamy cheeses like brie or goat cheese.
Storage Instructions: Store completely cooled seeds in an airtight container at room temperature. They’ll stay crunchy for up to 2 weeks—if they last that long. I keep mine in a glass jar on the counter, and they’re usually gone within a few days.
Reheating Tips: If your seeds lose their crunch after a few days, spread them on a baking sheet and pop them in a 300°F oven for 3-4 minutes. Let them cool again, and they’ll be almost as good as fresh. You can also reheat them in the air fryer at 300°F for 2 minutes.
Freezer Instructions: These seeds freeze beautifully. Place them in a freezer-safe bag or container and freeze for up to 3 months. Thaw at room temperature for about 15 minutes before serving. They might lose a tiny bit of crunch, but they’re still delicious.
Nutritional Information & Benefits
Pumpkin seeds are a nutritional powerhouse, and this recipe keeps them healthy while adding tons of flavor. Here’s what you’re getting in a ¼-cup serving:
- Calories: 180
- Protein: 8g
- Fat: 15g (mostly healthy unsaturated fats)
- Carbohydrates: 6g
- Fiber: 2g
- Iron: 15% of the Daily Value
- Magnesium: 40% of the Daily Value
- Zinc: 20% of the Daily Value
Pumpkin seeds are packed with magnesium, which is great for sleep and muscle recovery. They’re also high in zinc, which supports your immune system—perfect for snacking during cold season. The healthy fats and protein make them a satisfying snack that keeps you full between meals.
This recipe is naturally gluten-free and dairy-free. If you’re watching your sodium, you can reduce the salt to ¼ teaspoon without sacrificing too much flavor. The lime and chili provide plenty of taste on their own.
Conclusion
So there you have it—quick air fryer chili lime pumpkin seeds that came to me from the most unexpected source. Frank the mechanic probably has no idea how many batches of seeds I’ve made because of him, but I like to think he’d be proud. These seeds are everything I want in a snack: crunchy, tangy, spicy, and satisfying. They come together in minutes, use ingredients I always have on hand, and make me feel like I’m actually using the whole pumpkin instead of just throwing away the best part.
I’d love to hear how these turn out for you. Did you try a variation? Add more heat? Maybe you discovered a new flavor combination I haven’t tried yet. Drop a comment below and let me know—I read every single one, and your ideas might just inspire my next batch. And if you’re feeling generous, share this recipe with someone who needs a new snack in their life. Trust me, they’ll thank you.
Until next time, happy cooking—and happy snacking!
Frequently Asked Questions
Can I use canned pumpkin seeds for this recipe?
Canned pumpkin seeds are usually already cooked and salted, so they won’t work well for this recipe. Stick with raw seeds for the best results. If you only have roasted seeds, skip the air fryer step and just toss them with the seasoning—they’ll still taste great, just not as crunchy.
How do I clean fresh pumpkin seeds easily?
Place the seeds in a large bowl of water and swish them around with your hands. The pumpkin guts will float to the top, and the seeds will sink. Scoop out the floating bits, then drain the seeds in a colander. Rinse them one more time, and you’re good to go. It takes about 5 minutes total.
Why are my pumpkin seeds not crunchy?
Two main reasons: they weren’t dry enough before cooking, or they weren’t cooked long enough. Make sure you pat them completely dry with a towel before adding oil. If they’re still not crunchy after the recommended cooking time, add 2 more minutes and check again. Also, remember they crisp up more as they cool, so don’t judge them straight out of the air fryer.
Can I make these in a regular oven instead of an air fryer?
Absolutely! Spread the seasoned seeds on a baking sheet in a single layer and bake at 350°F for 15-20 minutes, stirring halfway through. They won’t be quite as crunchy as the air fryer version, but they’ll still be delicious. Just watch them closely toward the end—oven times can vary.
How long do these seeds stay fresh?
Stored in an airtight container at room temperature, they’ll stay crunchy for up to 2 weeks. I’ve kept them for 3 weeks before, and they were still good, just slightly less crispy. If they soften, pop them in the air fryer at 300°F for 2 minutes to revive them.
Pin This Recipe!

Easy Air Fryer Chili Lime Pumpkin Seeds Recipe

These quick air fryer chili lime pumpkin seeds are tangy, spicy, and ridiculously crunchy. Ready in under 15 minutes, they make the perfect snack for game day, movie night, or any time you crave something savory.
- Prep Time: 5 minutes
- Cook Time: 10 minutes
- Total Time: 15 minutes
- Yield: 4 servings 1x
- Category: Snack
- Cuisine: Mexican-inspired
Ingredients
- 1 cup raw pumpkin seeds (from one medium pumpkin, rinsed and patted dry)
- 1 tablespoon olive oil (or avocado oil for a neutral flavor)
- 1 teaspoon chili powder (preferably smoky)
- ½ teaspoon garlic powder
- ½ teaspoon salt (plus more to taste)
- Zest of 1 lime (about 1 teaspoon)
- Juice of ½ lime (about 1 tablespoon)
- Pinch of cayenne pepper (optional, for extra heat)
Instructions
- Preheat your air fryer to 350°F (175°C). Most air fryers need about 3 minutes to preheat.
- Rinse the pumpkin seeds in a fine-mesh strainer under cold water. Pick out any pumpkin guts or stringy bits.
- Dry the seeds thoroughly by spreading them on a clean kitchen towel or paper towels and patting them completely dry.
- In a medium mixing bowl, combine the dried seeds with olive oil, chili powder, garlic powder, salt, and cayenne if using. Toss until every seed is coated.
- Spread the seasoned seeds in a single layer in the air fryer basket. Do not overcrowd.
- Cook for 5 minutes, then shake the basket or stir the seeds with a spatula.
- Cook for another 3-5 minutes, checking frequently after the 3-minute mark. Seeds are done when lightly browned and smell toasty.
- Remove the basket and immediately toss the hot seeds with the lime zest and lime juice.
- Let the seeds cool completely in the basket or on a plate. They will continue to crisp up as they cool.
- Taste and adjust seasoning with a pinch more salt or chili powder if needed.
Notes
Dry the seeds thoroughly to ensure maximum crunch. Watch the last few minutes of cooking closely as seeds can burn quickly. Let seeds cool completely before serving for best texture. For oven method, bake at 350°F for 15-20 minutes, stirring halfway.
Nutrition
- Serving Size: ¼ cup
- Calories: 180
- Sugar: 1
- Sodium: 150
- Fat: 15
- Saturated Fat: 2
- Carbohydrates: 6
- Fiber: 2
- Protein: 8
Keywords: air fryer pumpkin seeds, chili lime pumpkin seeds, easy pumpkin seeds, healthy snack, gluten-free snack, dairy-free snack


