My neighbor, Mrs. Kowalski, wasn’t trying to impress anyone. I’d stopped by to return her mail that had been accidentally delivered to my house, and the smell hit me before I even got through her screen door. It was mid-November, the kind of gray afternoon that makes you want to curl up, and there it was—this incredible aroma of sage, thyme, and something rich and buttery that stopped me mid-step. “Oh, that’s just the turkey,” she said when I asked, waving her hand like she’d boiled an egg. “Nothing special.”
Let me tell you, that was a lie. The most beautiful lie I’ve ever smelled. She pulled it out of the oven—this golden, herb-freckled bird with skin so crispy it practically crackled when she set it down—and I honestly forgot why I’d come over. I just stood there, staring at it like a weirdo. She didn’t even season it until that morning, she told me. Just threw some butter and herbs together, shoved it under the skin, and let the oven do the work. No brining, no basting every fifteen minutes, no stress. And it was the best turkey I’d ever had.
I went home that night and couldn’t stop thinking about it. I mean, really—how did something so simple turn out so spectacular? I’ve made dry, sad turkeys before. We all have, right? You know that feeling when you carve into a bird and it’s just… disappointing. But this one? It was juicy all the way through, the skin was like butter-infused crackling, and every bite tasted like Thanksgiving in a single forkful. I called her the next day and begged for the details. She laughed and said, “It’s just butter and herbs, honey. Nothing fancy.” But the way she did it—that was everything.
So here’s the thing: I’ve been making this Perfect Herb Butter Roasted Turkey for Thanksgiving every year since that afternoon. And every single time, someone asks for the recipe. It’s the one dish that gets the “close your eyes and sigh” reaction, and honestly, it’s the easiest thing on the table. No complicated brining, no fussing, no all-day basting. Just a little patience, a lot of butter, and the right herbs. Let me show you how it’s done.
Why You’ll Love This Recipe
This isn’t just another turkey recipe. After years of testing—and yes, a few dry birds along the way—I can tell you this one works every single time. Here’s why it’s become my go-to for Thanksgiving:
- Incredibly Juicy Meat: The herb butter gets worked right under the skin, so every bite is moist and flavorful. No dry white meat here, I promise.
- Crispy, Golden Skin: That butter-and-herb combo creates a crust that’s almost like roasted chicken skin, but better. It’s the part everyone fights over.
- Simple Ingredients: You probably already have butter, garlic, and dried herbs in your kitchen. No weird specialty items or hard-to-find spices.
- Stress-Free Process: No brining overnight. No basting every 30 minutes. Just prep, roast, and rest. Perfect for busy Thanksgiving mornings.
- Crowd-Pleaser Guaranteed: I’ve served this to picky eaters, turkey skeptics, and folks who “don’t really like turkey.” They all went back for seconds.
- Perfect for Thanksgiving: This is the centerpiece dish that makes the whole meal feel special. It’s impressive without being complicated.
What makes this recipe different? It’s the technique. Most people just rub butter on the outside of the turkey, but that’s not enough. You have to get the butter under the skin, right against the breast meat. That’s the secret. The butter melts into the meat as it roasts, keeping it moist and infusing it with herb flavor. Plus, the butter on the outside helps the skin crisp up beautifully. It’s simple, but it’s a game-changer.
This is the kind of recipe that makes you feel like a hero. You’ll set that golden bird on the table, and everyone will gasp. And you’ll just smile, knowing how easy it was. Honestly, it’s the best feeling.
What Ingredients You Will Need
This recipe uses simple, wholesome ingredients that come together to create something truly special. Most of these are pantry staples or easy to find at any grocery store. Here’s what you’ll need:
For the Herb Butter
- 1 cup (2 sticks) unsalted butter, softened — (I prefer Kerrygold or Plugrà for the best flavor, but any good-quality butter works. Make sure it’s truly softened to room temperature so it spreads easily.)
- 4 cloves garlic, minced — (Fresh garlic is non-negotiable here. The jarred stuff just doesn’t have the same punch. You can use a garlic press if you’re short on time.)
- 2 tablespoons fresh sage, finely chopped — (If you can’t find fresh, use 2 teaspoons dried rubbed sage. But fresh really does make a difference in the aroma.)
- 2 tablespoons fresh rosemary, finely chopped — (Again, fresh is best. Dried rosemary can be a bit woody and sharp.)
- 2 tablespoons fresh thyme leaves — (Strip the leaves off the stems—it’s worth the few extra minutes.)
- 1 tablespoon fresh parsley, finely chopped — (Adds a fresh, bright note to the butter.)
- 1 teaspoon salt — (Use kosher salt if you have it. Diamond Crystal is my go-to.)
- 1/2 teaspoon black pepper, freshly ground — (Pre-ground pepper is fine, but fresh is better.)
- 1 teaspoon lemon zest — (From about one lemon. This little addition brightens the whole dish.)
For the Turkey
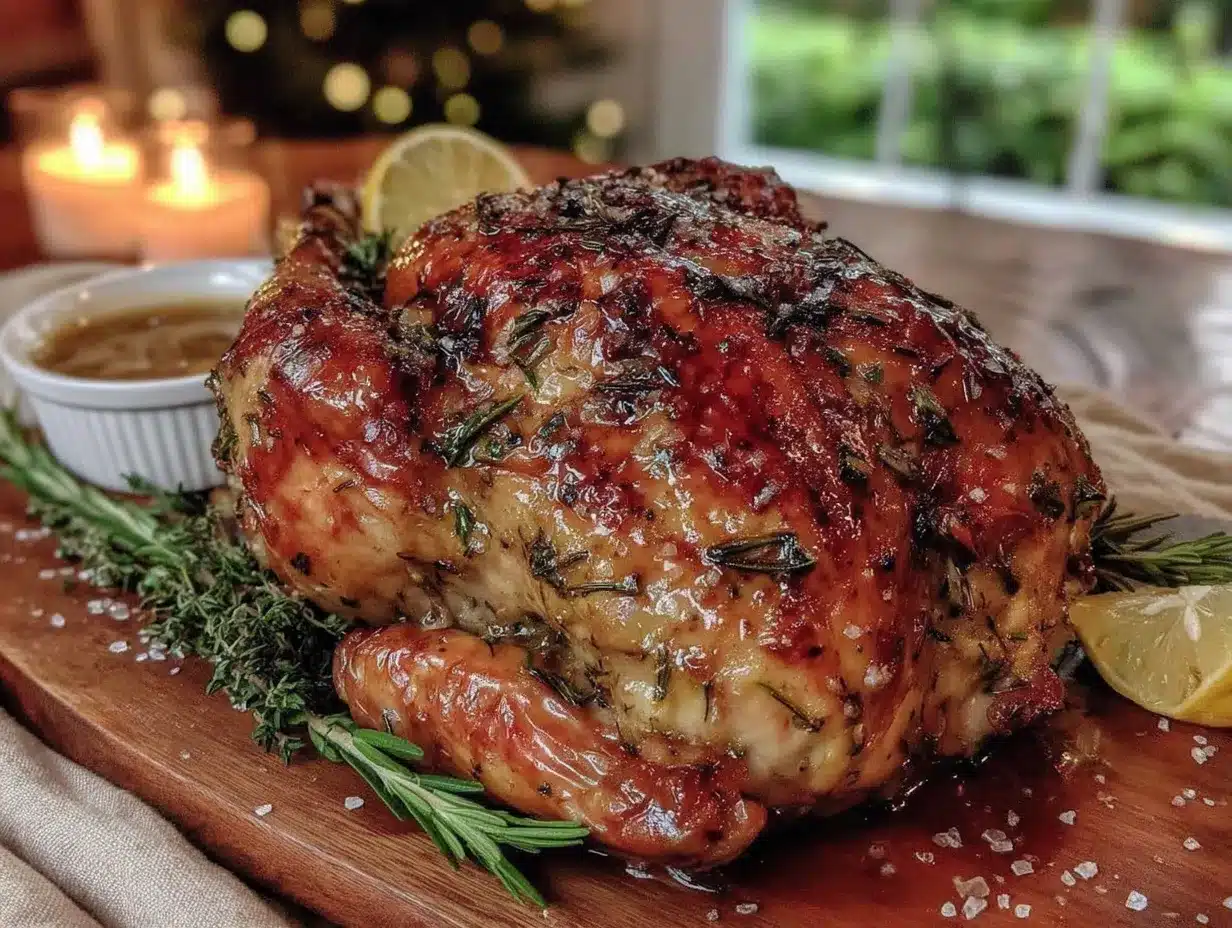
- 1 whole turkey (12-14 pounds), thawed if frozen — (Look for a turkey that’s not pre-brined or injected with solution. You want to control the seasoning yourself. I usually get a fresh, all-natural turkey from the butcher or a high-quality frozen one like Butterball.)
- 1 onion, quartered — (Yellow or sweet onion works great. This goes inside the cavity for flavor.)
- 2 celery stalks, cut into large chunks — (Adds moisture and flavor to the cavity.)
- 1 carrot, cut into large chunks — (Same as the celery—it’s all about building flavor from the inside out.)
- 4 sprigs fresh thyme — (For the cavity. If you have extra herbs, toss them in.)
- 2 sprigs fresh rosemary — (Again, for the cavity. Don’t be shy with the aromatics.)
- 1 cup low-sodium chicken or turkey broth — (For the bottom of the roasting pan. This creates steam and keeps the turkey moist. Plus, it’s the start of your gravy.)
- 2 tablespoons olive oil — (For rubbing on the outside of the turkey before roasting. Helps with browning.)
- Additional salt and pepper for seasoning the cavity and outside
Ingredient Selection Tips: When choosing your turkey, look for one that’s between 12 and 14 pounds. Anything bigger can be tricky to cook evenly. Also, check the label—some turkeys are pre-brined with a salt solution, which can make them too salty if you’re adding your own seasoning. If you can only find a pre-brined turkey, skip the salt in the herb butter and adjust at the end.
Substitution Guidance: If you’re dairy-free, you can use vegan butter in the herb mixture. Just make sure it’s a good-quality brand that softens well. For the herbs, feel free to mix and match based on what you have. Tarragon or marjoram would be lovely additions. And if you don’t have fresh herbs at all, use dried—just reduce the amount by half, since dried herbs are more concentrated.
Equipment Needed
You don’t need a ton of fancy equipment for this recipe, which is part of why I love it. Here’s what you’ll need:
- Roasting Pan with a Rack: A sturdy roasting pan is essential. The rack lifts the turkey off the bottom so it cooks evenly and the skin gets crispy all around. If you don’t have a rack, you can use a bed of chopped vegetables (onions, carrots, celery) to elevate the turkey. I’ve done that in a pinch, and it works beautifully.
- Instant-Read Meat Thermometer: This is non-negotiable. Seriously. Don’t guess—use a thermometer. I’ve had too many dry turkeys from overcooking to trust my instincts alone. A digital instant-read thermometer is best, but any reliable meat thermometer will do. I use a Thermapen, but there are great budget-friendly options too.
- Kitchen Twine: For tying the legs together. This helps the turkey cook evenly and keeps the stuffing (if you’re using any) inside. You can find it at any grocery store for a couple of dollars.
- Mixing Bowl: For combining the herb butter ingredients. Any medium bowl will do.
- Rubber Spatula or Spoon: For mixing the butter and herbs together. A fork works too if you’re in a hurry.
- Basting Brush (Optional): If you want to baste the turkey (which I do recommend for extra moisture), a silicone basting brush is handy. But you can also just use a spoon.
- Aluminum Foil: For tenting the turkey if the skin gets too brown. You’ll also use it to cover the legs and wing tips to prevent burning.
- Cutting Board and Sharp Knife: For carving. A sharp knife makes all the difference. I use a 10-inch chef’s knife, but a carving knife works great too.
Budget-Friendly Options: You don’t need to spend a lot on equipment. A basic roasting pan from a discount store works just as well as an expensive one. And if you don’t have a roasting rack, a wire cooling rack set inside the pan is a great hack. Just make sure it’s oven-safe.
Preparation Method
Alright, let’s get to it. This might look like a lot of steps, but I promise it’s straightforward. Take it one step at a time, and you’ll have a gorgeous turkey on the table.
- Prep the Turkey (Day Before or Morning Of): If your turkey is frozen, thaw it in the refrigerator. Allow 24 hours for every 4-5 pounds. So a 12-pound turkey needs about 3 days in the fridge. Once thawed, remove the turkey from its packaging. Take out the giblets and neck from the cavity (save them for gravy if you like—I always do). Pat the turkey completely dry with paper towels, inside and out. This is crucial for crispy skin. Let it sit on a rimmed baking sheet in the fridge, uncovered, overnight if you can. This dries out the skin even more, which means it gets beautifully crispy. If you don’t have time, just pat it really well and move on.
- Make the Herb Butter: In a medium mixing bowl, combine the softened butter, minced garlic, chopped sage, rosemary, thyme, parsley, salt, pepper, and lemon zest. Mix everything together with a rubber spatula or fork until it’s well combined. Taste a tiny bit (it’s safe—the butter is raw, but it’s just butter and herbs) and adjust the salt or herbs to your liking. Set it aside at room temperature. You want it soft and spreadable.
- Preheat the Oven: About 30 minutes before you’re ready to roast, preheat your oven to 425°F (220°C). Position the rack in the lower third of the oven. You want the turkey to sit in the middle, not too close to the top heating element.
- Season the Cavity: Stuff the turkey cavity with the quartered onion, celery chunks, carrot chunks, and the fresh herb sprigs. Don’t pack it too tight—you want air to circulate. This aromatics mixture will infuse the meat with flavor from the inside. If you’re planning to stuff the turkey with stuffing, don’t. It’s safer to cook stuffing separately. Trust me on this.
- Apply the Herb Butter: This is the most important step. Using your hands (clean hands, obviously), gently loosen the skin over the turkey breast. Start at the neck cavity and work your fingers between the skin and the meat, being careful not to tear the skin. You want to create a pocket. Then, take about half of the herb butter and push it under the skin, spreading it evenly over both sides of the breast. Massage it from the outside to distribute it. Then, rub the remaining herb butter all over the outside of the turkey—the legs, thighs, wings, and back. Don’t forget the underside. Finally, rub the olive oil over the buttered skin. This helps with browning.
- Tie the Legs and Tuck the Wings: Using kitchen twine, tie the turkey legs together at the ankles. This helps the turkey cook evenly. Tuck the wing tips under the body of the turkey so they don’t burn. If they’re still exposed, cover them with small pieces of aluminum foil.
- Place in the Roasting Pan: Set the turkey on the rack in your roasting pan, breast side up. Pour the cup of chicken or turkey broth into the bottom of the pan (not over the turkey). This creates steam that keeps the meat moist. If you don’t have broth, water works too.
- Roast at High Heat (First 30 Minutes): Place the turkey in the preheated oven and roast at 425°F for 30 minutes. This high heat jump-starts the browning and helps crisp the skin. Don’t open the oven during this time—you want to keep the heat in.
- Lower the Heat and Continue Roasting: After 30 minutes, reduce the oven temperature to 350°F (175°C). Continue roasting, uncovered, for about 2 to 2.5 hours for a 12-14 pound turkey. The total cooking time is roughly 13 minutes per pound at 350°F after the initial high-heat blast. So for a 13-pound turkey, that’s about 2 hours and 50 minutes total. But don’t rely on time alone—use your thermometer.
- Baste (Optional but Recommended): About halfway through the cooking time, baste the turkey with the pan juices. Use a basting brush or a spoon to drizzle the juices over the breast and legs. This adds moisture and helps the skin get even more golden. I baste every 30 minutes or so. But don’t stress if you forget—the herb butter does most of the work.
- Check for Doneness: About 30 minutes before the estimated end time, start checking the temperature. Insert an instant-read thermometer into the thickest part of the thigh, avoiding the bone. You’re looking for 165°F (74°C). Also check the breast—it should be at 160°F (71°C) to 165°F (74°C). The thigh might take a little longer than the breast, so check both. If the skin is getting too brown before the turkey is done, tent it loosely with aluminum foil.
- Let It Rest: Once the turkey reaches 165°F in the thigh, remove it from the oven. Transfer it to a cutting board (or leave it in the pan if it’s easier) and let it rest, uncovered, for at least 20-30 minutes. This is crucial. The juices need time to redistribute through the meat. If you carve it right away, all those juices will run out and you’ll have dry turkey. I know it’s hard to wait, but it’s worth it. The turkey will stay warm for at least 30 minutes, so don’t worry.
- Carve and Serve: After resting, carve the turkey. Start by removing the legs and thighs, then slice the breast meat against the grain. Arrange on a platter and spoon some of the pan juices over the top. Serve immediately.
Sensory Cues: During roasting, you should smell the herbs and garlic filling your kitchen—it’s the most wonderful Thanksgiving aroma. The skin will turn a deep golden brown, almost caramelized. When you insert the thermometer, the juices should run clear, not pink. And when you let it rest, you’ll see the juices pooling on the cutting board—that’s a good sign. Don’t pour them away; they’re liquid gold for gravy.
Cooking Tips & Techniques
After making this turkey more times than I can count, I’ve learned a few things the hard way. Here are my best tips to make sure yours turns out perfect:
Don’t Skip the Drying Step. I know it sounds fussy, but patting the turkey dry and letting it sit uncovered in the fridge overnight makes a huge difference. Moisture is the enemy of crispy skin. The drier the skin, the better it crisps. If you’re in a rush, just pat it really, really well with paper towels. I mean, use a whole roll if you have to.
Use a Thermometer, Not a Timer. I cannot stress this enough. Ovens vary, turkey sizes vary, and guessing is a recipe for disaster. A $10 meat thermometer is the best investment you’ll make for Thanksgiving. I once roasted a turkey for what I thought was the right amount of time, and it came out like shoe leather. Never again. Trust the thermometer.
Let the Butter Soften Properly. Cold butter doesn’t spread under the skin. It just sits there in clumps. Take the butter out of the fridge at least an hour before you start. If you forget, you can microwave it in 5-second bursts, but be careful not to melt it. You want it soft, not liquid.
Don’t Overcrowd the Pan. If you’re roasting vegetables around the turkey, make sure they’re in a single layer and not piled up. Too many vegetables will steam instead of roast, and they’ll also block the heat from reaching the turkey evenly. I prefer to roast vegetables separately.
Baste with the Juices, Not the Butter. Some recipes tell you to baste with melted butter, but that can wash off the seasoning. Instead, use the pan juices that accumulate at the bottom. They’re full of flavor from the herbs and turkey drippings. Just spoon them over the breast and thighs.
Watch the Wing Tips and Legs. These thin parts cook faster and can burn. If they start looking too dark, cover them with small pieces of foil. I usually do this about an hour into roasting.
My Biggest Failure: One year, I forgot to take the giblets out of the cavity before roasting. I know, rookie mistake. The turkey was actually fine—the plastic bag didn’t melt, thank goodness—but I felt like an idiot. So, double-check that cavity! And save those giblets for gravy. They add so much flavor.
Timing Strategy: I like to get the turkey in the oven by late morning, around 10 or 11 AM. That way, it’s done by 1 or 2 PM, and I have plenty of time to rest it and make gravy while the sides finish. If you’re serving dinner at 4 or 5 PM, you can start later. Just work backward from your serving time, accounting for resting time.
Variations & Adaptations
This recipe is incredibly versatile. Here are some ways to make it your own:
Citrus Herb Butter
Add the zest of one orange and one lemon to the herb butter, along with a tablespoon of fresh orange juice. It adds a bright, citrusy note that pairs beautifully with the herbs. I tried this one year when I had extra oranges lying around, and it was fantastic. The citrus cuts through the richness of the butter.
Spicy Chipotle Butter
For a smoky, spicy kick, add 1-2 teaspoons of chipotle powder or adobo sauce from a can of chipotles to the butter. Reduce the thyme and add a teaspoon of cumin. This is amazing if you’re serving a crowd that likes heat. I made this for a Friendsgiving once, and it was a hit.
Garlic and Herb Compound Butter with Parmesan
Add 1/4 cup of finely grated Parmesan cheese to the herb butter. It creates an incredibly savory, umami-rich crust. Just be careful not to burn the cheese—tent the turkey with foil if it starts getting too dark. This is my husband’s favorite variation.
Dietary Adaptations
- Dairy-Free: Use a high-quality vegan butter stick (like Miyoko’s or Earth Balance) in place of regular butter. The texture and flavor are remarkably similar.
- Low-Sodium: Use unsalted butter and reduce or omit the added salt. You can always season the gravy later.
- Gluten-Free: This recipe is naturally gluten-free. Just make sure your broth is gluten-free if you’re using it.
Different Cooking Methods
- Spatchcocking: If you want a faster, more evenly cooked turkey, try spatchcocking (butterflying) it. Remove the backbone and flatten the turkey before applying the herb butter. It cooks in about 1.5 hours at 425°F. The skin gets incredibly crispy. I do this when I’m short on time.
- Smoked Turkey: This herb butter is amazing on a smoked turkey. Apply it under the skin and smoke at 225-250°F for about 30 minutes per pound. The smoky flavor combined with the herbs is out of this world.
Serving & Storage Suggestions
Serving Temperature: Serve the turkey warm, not piping hot. After resting, it should be at a comfortable serving temperature. If you need to hold it longer, cover it loosely with foil and keep it in a warm oven (200°F) for up to an hour.
Presentation: Arrange the carved turkey on a large platter. I like to garnish with fresh herb sprigs (sage, rosemary, thyme) and maybe some citrus slices or pomegranate seeds for color. It makes the table look festive without much effort.
Complementary Dishes: This turkey pairs beautifully with classic Thanksgiving sides. Try it with creamy mashed potatoes, green bean casserole, roasted Brussels sprouts, cranberry sauce, and, of course, homemade gravy. For drinks, a crisp white wine like Sauvignon Blanc or a light Pinot Noir works wonderfully.
Storage Instructions: Store leftover turkey in an airtight container in the refrigerator for up to 4 days. Remove the meat from the bones before storing—it stays fresher and is easier to reheat. You can also freeze cooked turkey for up to 3 months. Wrap it tightly in plastic wrap and then foil, or use a freezer-safe bag.
Reheating Methods: The best way to reheat turkey is in a low oven. Place slices in a baking dish, add a splash of broth or water, cover with foil, and warm at 300°F for 15-20 minutes. This keeps it moist. Avoid the microwave if you can—it tends to dry out the meat. For quick lunches, I’ll shred the cold turkey and toss it into a salad or sandwich.
How Flavors Develop: Honestly, leftover turkey often tastes even better the next day. The herbs have had time to meld with the meat, and the flavors become more rounded. Cold turkey sandwiches with leftover cranberry sauce and a smear of mayo? Yes, please.
Nutritional Information & Benefits
Here’s a rough estimate per serving (based on a 6-ounce portion of roasted turkey breast with skin):
- Calories: Approximately 350-400
- Protein: 40-45 grams
- Fat: 20-25 grams (mostly from the butter and skin)
- Carbohydrates: 0-1 gram
- Sodium: 400-500 mg (depends on how much salt you use)
Health Benefits: Turkey is an excellent source of lean protein, which is great for muscle health and keeping you full. It’s also rich in B vitamins (especially B6 and B12), selenium, and zinc. The herbs in this recipe—sage, rosemary, thyme—are packed with antioxidants and have anti-inflammatory properties. So you’re getting a delicious, nutrient-dense meal.
Dietary Considerations: This recipe is naturally gluten-free and low-carb. If you’re watching your sodium, use unsalted butter and go easy on the added salt. The butter adds fat, but you can remove the skin if you’re looking to reduce calories. Personally, I think the skin is the best part, so I keep it on.
My Perspective: Thanksgiving is about indulgence, and that’s okay. One day of rich food isn’t going to derail your health goals. I say enjoy the turkey, savor every bite, and don’t stress about the numbers. Balance is key.
Conclusion
This Perfect Herb Butter Roasted Turkey has become my non-negotiable Thanksgiving centerpiece. It’s the recipe that makes me look like a hero without the stress, and honestly, it’s the one dish that always gets the most compliments. The herb butter keeps the meat incredibly moist, the skin gets beautifully crispy, and the whole process is so simple that you can actually enjoy the holiday instead of being stuck in the kitchen.
I love that this recipe is forgiving. If you forget to baste, it’s fine. If you don’t have fresh herbs, dried work. If the skin gets a little dark, just tent it with foil. The point is to make a beautiful, delicious turkey that brings people together. And this one does that, every single time.
I’d love to hear how yours turns out. Did you try the citrus variation? Did your family fight over the crispy skin? Let me know in the comments below! And if you share a photo on Pinterest or Instagram, tag me—I want to see that golden bird. Happy Thanksgiving, friends. You’ve got this.
Frequently Asked Questions
Can I use dried herbs instead of fresh?
Absolutely. Use about half the amount of dried herbs as you would fresh. So for 2 tablespoons of fresh sage, use 1 tablespoon of dried rubbed sage. Dried herbs are more concentrated, so adjust to taste.
Do I need to brine the turkey first?
Nope. The herb butter does the work of keeping the turkey moist. Brining is an extra step that’s totally optional. If you want to brine, go for it, but this recipe works beautifully without it.
How do I keep the turkey from drying out?
The herb butter under the skin is your best defense. Also, don’t overcook it—use a meat thermometer. And let it rest for at least 20 minutes before carving. Those three things will guarantee a juicy turkey.
Can I make the herb butter ahead of time?
Yes! You can make the herb butter up to 3 days in advance. Keep it covered in the refrigerator, but let it come to room temperature for about an hour before using so it’s spreadable.
What if my turkey is bigger than 14 pounds?
For a larger turkey, increase the roasting time. Estimate about 13 minutes per pound at 350°F after the initial 30-minute blast at 425°F. But always rely on your thermometer, not the clock. And consider covering the bird with foil if the skin starts getting too dark before the meat is done.
Pin This Recipe!
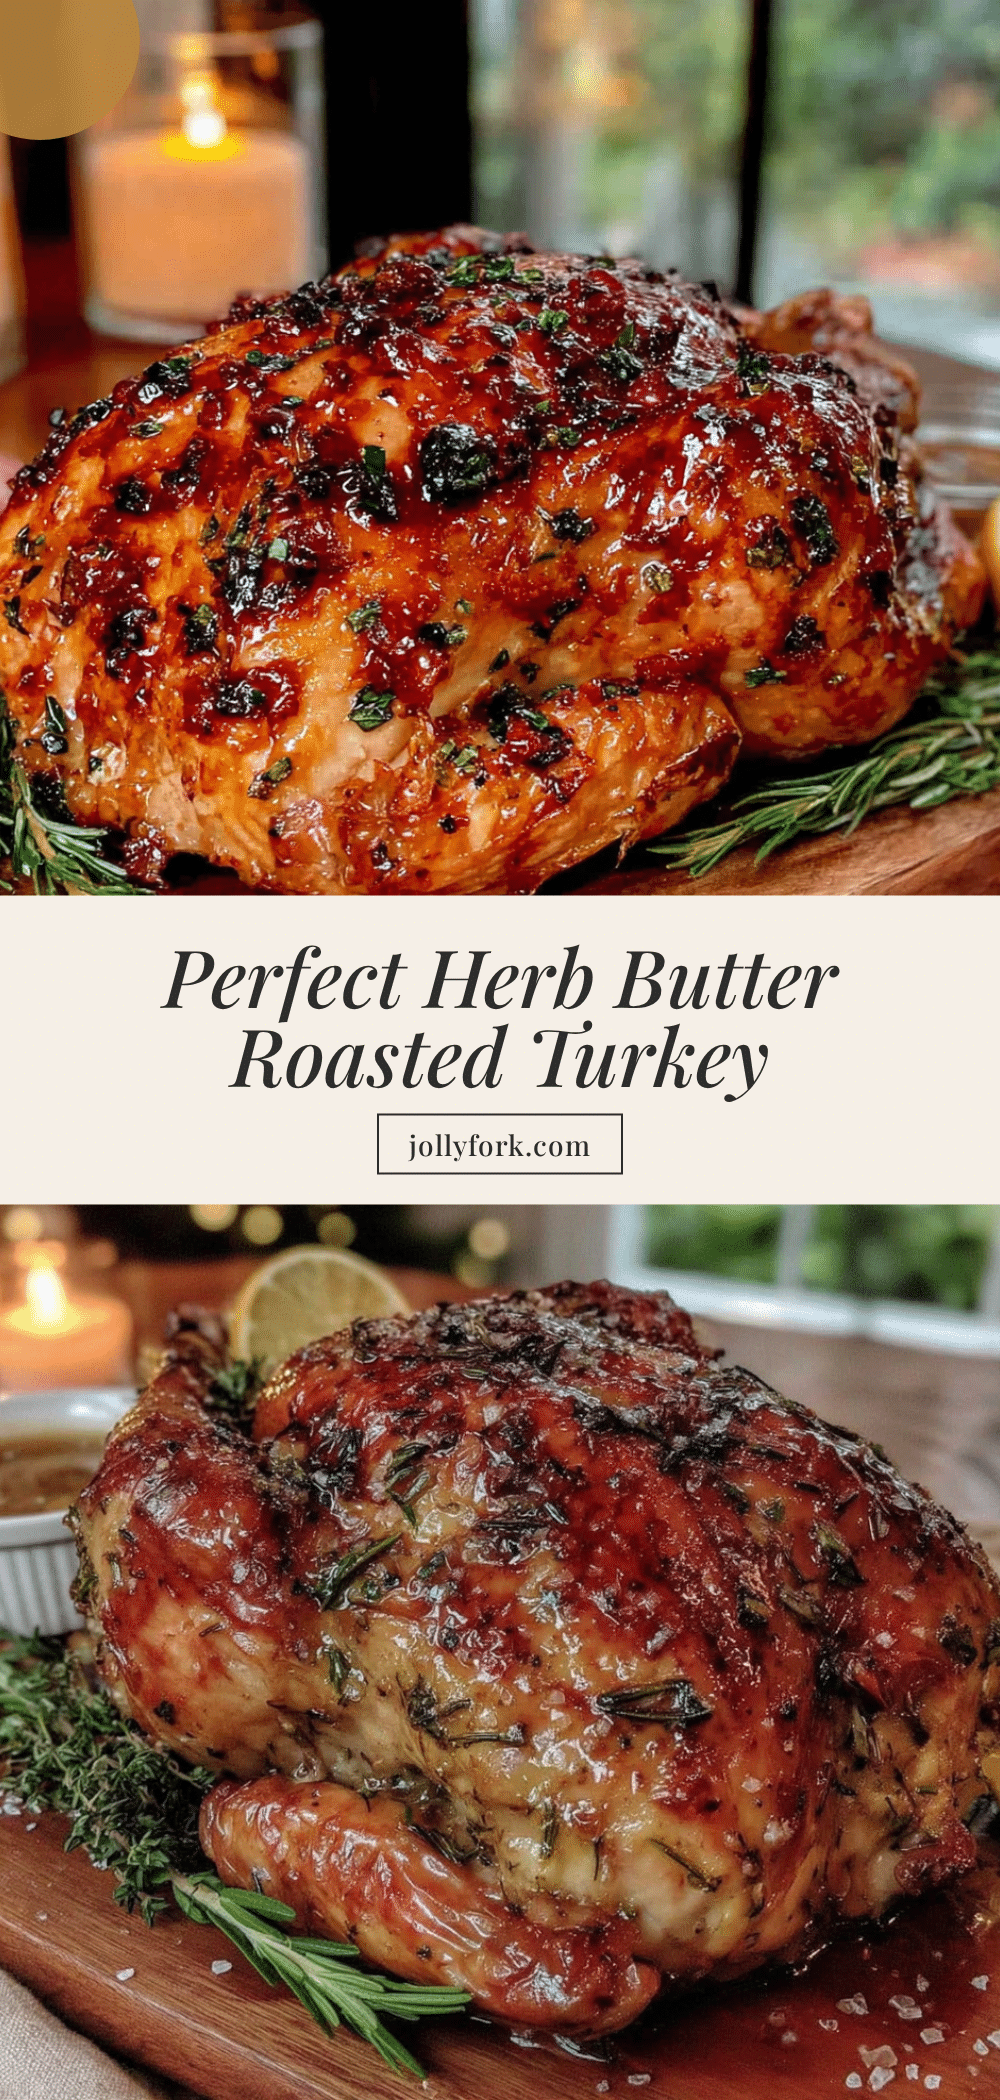
Perfect Herb Butter Roasted Turkey: Best Easy Thanksgiving Recipe
This Perfect Herb Butter Roasted Turkey is incredibly juicy with crispy, golden skin, thanks to a simple herb butter technique. No brining or constant basting required—just a stress-free, crowd-pleasing centerpiece for your Thanksgiving table.
- Prep Time: 30 minutes
- Cook Time: 2 hours 30 minutes
- Total Time: 3 hours 30 minutes
- Yield: 8-10 servings 1x
- Category: Main Course
- Cuisine: American
Ingredients
- 1 cup (2 sticks) unsalted butter, softened
- 4 cloves garlic, minced
- 2 tablespoons fresh sage, finely chopped
- 2 tablespoons fresh rosemary, finely chopped
- 2 tablespoons fresh thyme leaves
- 1 tablespoon fresh parsley, finely chopped
- 1 teaspoon salt
- 1/2 teaspoon black pepper, freshly ground
- 1 teaspoon lemon zest
- 1 whole turkey (12–14 pounds), thawed if frozen
- 1 onion, quartered
- 2 celery stalks, cut into large chunks
- 1 carrot, cut into large chunks
- 4 sprigs fresh thyme
- 2 sprigs fresh rosemary
- 1 cup low-sodium chicken or turkey broth
- 2 tablespoons olive oil
- Additional salt and pepper for seasoning the cavity and outside
Instructions
- Prep the Turkey (Day Before or Morning Of): If frozen, thaw in the refrigerator (24 hours per 4-5 pounds). Remove giblets and neck, pat completely dry with paper towels. For best results, let sit uncovered on a rimmed baking sheet in the fridge overnight to dry the skin.
- Make the Herb Butter: In a medium bowl, combine softened butter, minced garlic, chopped sage, rosemary, thyme, parsley, salt, pepper, and lemon zest. Mix until well combined. Set aside at room temperature.
- Preheat the Oven: About 30 minutes before roasting, preheat oven to 425°F (220°C). Position rack in the lower third of the oven.
- Season the Cavity: Stuff the turkey cavity with quartered onion, celery chunks, carrot chunks, and fresh herb sprigs. Do not pack too tightly.
- Apply the Herb Butter: Gently loosen the skin over the turkey breast from the neck cavity. Push about half the herb butter under the skin, spreading evenly over both breasts. Rub remaining butter all over the outside of the turkey. Then rub olive oil over the buttered skin.
- Tie the Legs and Tuck the Wings: Using kitchen twine, tie the turkey legs together at the ankles. Tuck wing tips under the body. Cover exposed wing tips with small pieces of foil if needed.
- Place in the Roasting Pan: Set turkey on a rack in the roasting pan, breast side up. Pour broth into the bottom of the pan (not over the turkey).
- Roast at High Heat (First 30 Minutes): Roast at 425°F for 30 minutes. Do not open the oven.
- Lower the Heat and Continue Roasting: Reduce oven temperature to 350°F (175°C). Continue roasting uncovered for about 2 to 2.5 hours for a 12-14 pound turkey (roughly 13 minutes per pound at 350°F after initial high heat).
- Baste (Optional but Recommended): About halfway through, baste turkey with pan juices every 30 minutes.
- Check for Doneness: About 30 minutes before estimated end time, start checking temperature. Insert instant-read thermometer into thickest part of thigh (avoiding bone) – should reach 165°F (74°C). Breast should be 160-165°F (71-74°C). Tent with foil if skin gets too brown.
- Let It Rest: Remove from oven and let rest uncovered for at least 20-30 minutes before carving.
- Carve and Serve: Carve turkey, arrange on platter, and spoon pan juices over the top. Serve immediately.
Notes
For best results, pat turkey dry and let sit uncovered in fridge overnight to ensure crispy skin. Use a meat thermometer rather than relying on time alone. Let turkey rest at least 20-30 minutes before carving to allow juices to redistribute. If using a pre-brined turkey, skip the salt in the herb butter. For dairy-free, use vegan butter. Dried herbs can be substituted using half the amount.
Nutrition
- Serving Size: 6 ounces roasted tur
- Calories: 375
- Sodium: 450
- Fat: 22
- Saturated Fat: 12
- Carbohydrates: 1
- Protein: 42
Keywords: Thanksgiving turkey, herb butter turkey, roasted turkey, easy turkey recipe, juicy turkey, crispy skin turkey, holiday turkey


