My neighbor, Mrs. Kowalski, wasn’t trying to impress me. I’d stopped by to return her hedge clippers—the ones she’d lent me two months prior, honestly, I was embarrassed it took me that long—and this smell hit me before I even got to her screen door. It was warm, slightly tangy, and deeply chocolatey, but with something else I couldn’t quite place. She was standing at her counter, piping frosting onto these impossibly dark cupcakes, and she just waved me in like it was nothing. “Oh, those,” she said when I asked, not even looking up from her pastry bag. “Just an old recipe. My mother used to make them for Halloween parties.” She was so nonchalant about something that had literally stopped me in my tracks on her front porch. I stood there, clippers in hand, watching her work, and I knew right then I wasn’t leaving without that recipe. Maybe you’ve been there—that moment when you taste something so unexpectedly perfect that you know it’s going to become a staple in your own kitchen. These Best Black Velvet Cupcakes with Easy Orange Buttercream are that recipe for me. The cake is impossibly moist, with that classic deep cocoa flavor you get from a proper black velvet, but the orange buttercream? That’s the kicker. It’s bright, creamy, and cuts through the richness in a way that makes complete sense the second you try it. Mrs. Kowalski finally handed me a cupcake after she finished piping, and I almost dropped it because I was already planning how to adapt it for my own family. I’ve made these cupcakes at least a dozen times since that afternoon, tweaking the frosting just a touch and perfecting the bake time for my own oven. They are, without a doubt, the best black velvet cupcakes I’ve ever had—and I’m not just saying that because I watched her make them look so easy.
Why You’ll Love This Recipe
Let me tell you, these aren’t just another pretty cupcake. I’ve tested this recipe more times than I care to admit, tweaking the cocoa ratio and the buttercream consistency until it was just right. Here is why these Best Black Velvet Cupcakes with Easy Orange Buttercream will become your new go-to.
- Simple Ingredients: You won’t need to hunt down fancy pastry shops or weird specialty items. Everything here is a pantry staple or a quick trip to the regular grocery store. I mean it—no white chocolate, no expensive extracts.
- Perfect for Family Gatherings: These disappear at birthday parties, potlucks, and even just a random Tuesday. The orange buttercream is such a crowd-pleaser, honestly, even people who swear they don’t like citrus desserts ask for seconds.
- Unbelievably Moist: The secret is in the buttermilk and the oil. This cake stays soft for days, which is a huge win when you’re feeding a family on a budget and want leftovers to actually taste good.
- Easy Orange Buttercream: No complicated techniques here. Just real butter, powdered sugar, a splash of cream, and fresh orange zest. It comes together in minutes and pipes like a dream.
- Budget-Friendly: These cupcakes cost a fraction of what you’d pay at a bakery, and they taste a hundred times better. You can make a full batch for under ten dollars, easy.
What makes this recipe different from the rest? It’s the balance. The cake is deeply chocolatey without being heavy, and the orange buttercream is bright without being tart. It’s comfort food reimagined—a little bit fancy, a little bit familiar, but always satisfying. This is the kind of recipe that makes you close your eyes after the first bite, and honestly, that’s the best compliment I can give.
What Ingredients You Will Need
This recipe uses simple, honest ingredients to deliver that rich black velvet flavor and silky orange frosting. Most of these are things you probably already have in your pantry, which makes these cupcakes perfect for a last-minute craving or a school bake sale.
For the Black Velvet Cupcakes
- 1 ½ cups (190g) all-purpose flour — Spoon and level it for the best texture. Too much flour makes dense cupcakes.
- 1 cup (200g) granulated sugar — Standard white sugar works perfectly here.
- ½ cup (50g) unsweetened cocoa powder — I prefer Dutch-processed for that deeper, darker color. It really makes the “black velvet” name shine.
- 1 teaspoon baking soda — Make sure it’s fresh, or your cupcakes won’t rise properly.
- ½ teaspoon salt — Just regular table salt. It balances the sweetness.
- 1 cup (240ml) buttermilk — This is the secret to a tender crumb. If you don’t have buttermilk, add one tablespoon of lemon juice or white vinegar to a cup of regular milk and let it sit for five minutes.
- ½ cup (120ml) vegetable oil — Keeps the cupcakes moist for days. I use canola or avocado oil.
- 2 large eggs — Room temperature, please. Cold eggs can seize the batter.
- 2 teaspoons vanilla extract — Pure vanilla makes a difference. Save the imitation stuff for other projects.
- 1 tablespoon black food coloring (gel-based) — This is optional but gives that signature dark velvet look. I’ve made them without it, and they’re still delicious, just a deep brown instead of black.
For the Easy Orange Buttercream
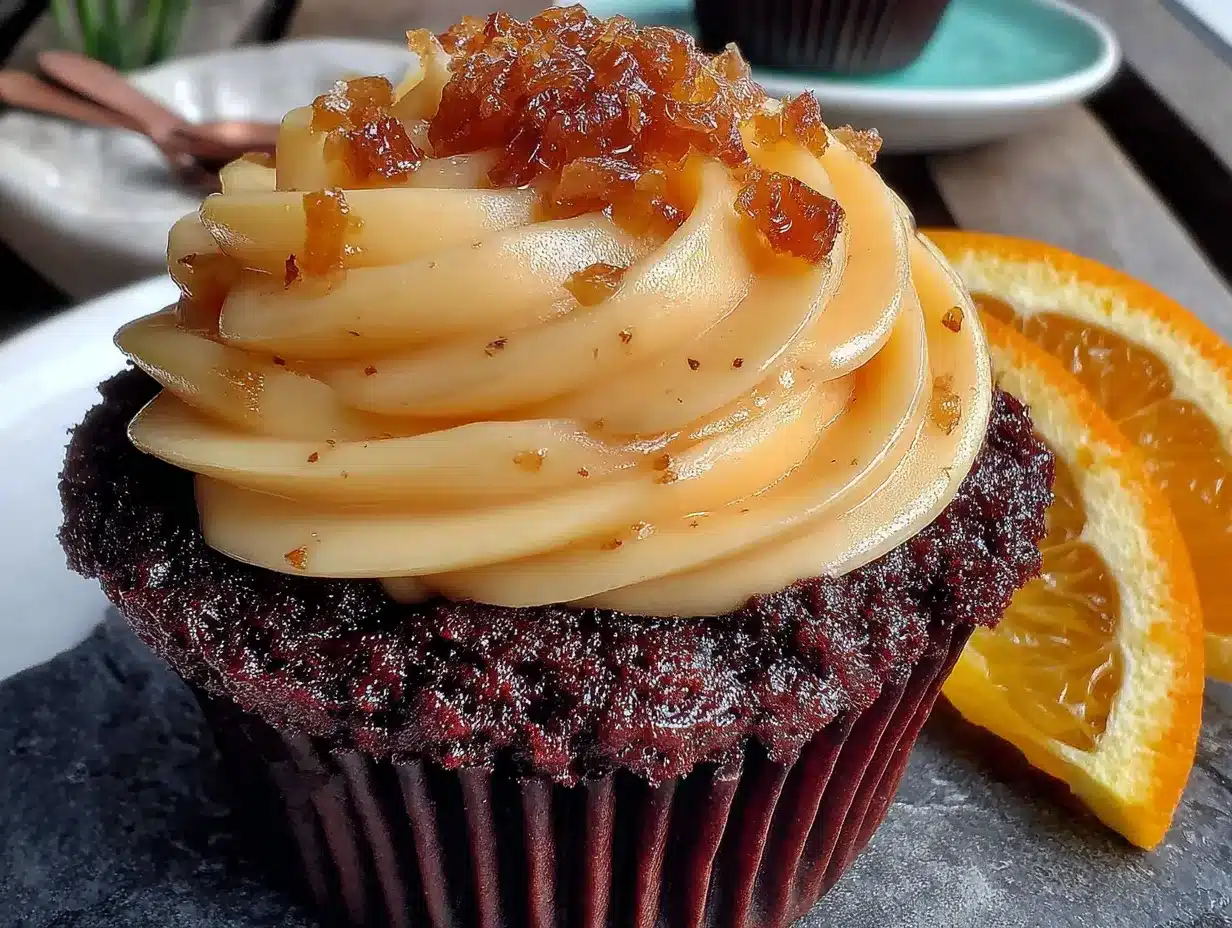
- 1 cup (226g) unsalted butter — Softened to room temperature. Don’t microwave it; just leave it out for an hour.
- 3 ½ cups (440g) powdered sugar — Sifted if it’s lumpy. Nobody wants gritty frosting.
- 2 tablespoons heavy cream — Or whole milk in a pinch. Heavy cream makes it extra luxurious.
- 1 tablespoon fresh orange zest — From about one large orange. Only the orange part, not the white pith.
- 2 tablespoons fresh orange juice — Adds flavor and helps with consistency.
- ½ teaspoon vanilla extract — Just a touch to round everything out.
- Pinch of salt — Trust me on this. It makes the sweetness taste brighter.
I recommend using a good-quality cocoa powder like Hershey’s Special Dark or Droste for the richest flavor. For the orange zest, go with a navel orange—they’re sweet and have plenty of fragrant oils. And if you’re making these for a crowd with dietary needs, you can swap the all-purpose flour with a 1:1 gluten-free baking blend. I’ve done it, and they turned out beautifully.
Equipment Needed
You don’t need a professional bakery setup for these Best Black Velvet Cupcakes with Easy Orange Buttercream. Here is what you’ll need:
- Muffin tin (standard 12-cup) — I’ve had the same non-stick one for years, and it still works great. If yours is older, give it a light spray with baking spray.
- Paper cupcake liners — I like the plain white ones, but foil liners work beautifully for a fancier look.
- Two mixing bowls (medium and large) — One for dry ingredients, one for wet. Nothing fancy needed.
- Whisk — For combining dry ingredients and smoothing out the batter.
- Electric hand mixer or stand mixer — For the buttercream. You can whisk it by hand, but your arm will get a serious workout.
- Piping bag with a star tip (like Wilton 1M) — Or a zip-top bag with the corner snipped off. I’ve done both, and honestly, the zip-top bag works in a pinch.
- Cooling rack — Essential for letting the cupcakes cool completely before frosting. Warm cupcakes will melt your beautiful buttercream.
- Microplane or fine grater — For zesting the orange. A box grater works too, but a microplane gives you that fluffy zest.
If you don’t have a piping bag, don’t stress. You can simply spread the buttercream with an offset spatula or a butter knife. The cupcakes will taste just as amazing.
Preparation Method
Alright, let’s get baking. I’ve broken this down into simple steps so you can follow along without any hiccups. These Best Black Velvet Cupcakes with Easy Orange Buttercream come together faster than you think.
- Preheat your oven to 350°F (175°C). Line your muffin tin with 12 paper liners. This is a non-negotiable step; don’t skip it. The liners help the cupcakes come out clean and keep them moist.
- Whisk the dry ingredients together. In a medium bowl, whisk together the flour, sugar, cocoa powder, baking soda, and salt. Make sure there are no lumps of cocoa. I sometimes sift the cocoa powder if it looks clumpy. Set this bowl aside.
- Mix the wet ingredients. In a large bowl, whisk together the buttermilk, vegetable oil, eggs, vanilla extract, and black food coloring (if using). Whisk until everything is smooth and well combined. The mixture will look a little thin, and that’s perfectly fine.
- Combine wet and dry. Pour the dry ingredients into the wet ingredients. Gently whisk until just combined. Do not overmix! A few small lumps are okay. Overmixing will make your cupcakes tough, and nobody wants that. The batter should be smooth, dark, and slightly runny.
- Fill the liners. Divide the batter evenly among the 12 liners. I use a cookie scoop or a ¼-cup measure for this. Fill each liner about ⅔ full. Don’t overfill, or the cupcakes will spill over the edges.
- Bake. Place the muffin tin in the preheated oven and bake for 18 to 22 minutes. The cupcakes are done when a toothpick inserted into the center comes out clean or with just a few moist crumbs. I start checking at 18 minutes because my oven runs a little hot. The tops should spring back when lightly touched.
- Cool completely. Let the cupcakes cool in the tin for 5 minutes, then transfer them to a wire cooling rack. They must be completely cool before you frost them. I mean it—if they’re even slightly warm, your buttercream will turn into a melty mess. Patience is key here.
- Make the orange buttercream. While the cupcakes are cooling, make the frosting. In a large bowl, beat the softened butter with an electric mixer on medium speed until it’s smooth and creamy, about 2 minutes. Add the powdered sugar one cup at a time, beating on low speed to avoid a sugar cloud. Add the heavy cream, orange zest, orange juice, vanilla extract, and a pinch of salt. Beat on medium-high speed for 3 to 4 minutes until the frosting is light, fluffy, and spreadable. If it’s too thick, add another tablespoon of cream. If it’s too thin, add a little more powdered sugar.
- Frost the cupcakes. Fit your piping bag with a star tip and fill it with the buttercream. Pipe a swirl onto each cooled cupcake. Or, if you’re keeping it simple, just spread the frosting on with a knife. I usually do a generous swirl because it looks so pretty.
- Optional garnish. Top each frosted cupcake with a little extra orange zest or a small candied orange peel, if you have it. It adds a nice pop of color and flavor.
Cooking Tips & Techniques
I’ve made these Best Black Velvet Cupcakes with Easy Orange Buttercream enough times to know where things can go wrong. Here are my hard-earned lessons, so you don’t have to learn them the hard way.
Room temperature ingredients matter. I once used cold eggs straight from the fridge, and the batter seized up a little. It still baked okay, but the texture wasn’t as tender. Let your eggs and buttermilk sit out for about 30 minutes before you start. It makes a real difference in how the batter comes together.
Don’t overmix the batter. I know I said this already, but it’s worth repeating. Mix until the flour just disappears. A few streaks of flour are fine. Overmixing develops the gluten and gives you dense, rubbery cupcakes. We want them light and fluffy.
Check your oven temperature. Ovens lie. I learned this the hard way when my first batch came out with burnt edges and raw centers. An inexpensive oven thermometer is a game-changer. Place it in the center of the oven and adjust your temperature accordingly.
Cooling is not optional. I cannot stress this enough. If you frost warm cupcakes, you’ll end up with a sad, greasy mess. I once rushed it because the kids were hungry, and the buttercream slid right off. Let them cool for at least 30 minutes on the rack. I sometimes pop them in the fridge for 10 minutes if I’m impatient.
For the buttercream, beat it long enough. Don’t stop after a minute. Beat it for a full 3 to 4 minutes on medium-high speed. This incorporates air and makes the frosting light and silky. It also helps the sugar dissolve completely so you don’t get a gritty texture.
Make-ahead tip: You can bake the cupcakes a day ahead and store them in an airtight container at room temperature. Frost them the next day. The buttercream can also be made ahead and stored in the fridge. Just let it come to room temperature and re-whip it for a minute before using.
Variations & Adaptations
One of the best things about these Best Black Velvet Cupcakes with Easy Orange Buttercream is how versatile they are. Here are some ways to switch things up based on what you have or who you’re feeding.
- Dairy-Free Version: Swap the buttermilk with a dairy-free milk (like almond or oat milk) mixed with a tablespoon of lemon juice. Use a plant-based butter stick for the frosting. I’ve tried this with my sister, who is lactose intolerant, and it worked like a charm. The texture was slightly different but still delicious.
- Gluten-Free Option: Use a 1:1 gluten-free all-purpose flour blend. I like the Bob’s Red Mill brand for baking. Make sure your blend contains xanthan gum, or add a teaspoon yourself. The cupcakes will be a touch more delicate, so handle them gently.
- Different Citrus: Not an orange fan? Swap the orange zest and juice for lemon, lime, or even grapefruit. Each one gives a completely different personality to the buttercream. Lemon is bright and classic, while lime feels a little more tropical.
- Chocolate Orange Twist: Add a tablespoon of orange liqueur (like Grand Marnier) to the buttercream for an adult version. Or, fold in a handful of mini chocolate chips into the cupcake batter before baking. The extra chocolate pairs beautifully with the orange.
- Cupcake to Cake: You can easily turn this into a two-layer 8-inch cake. Double the recipe for the cupcakes, bake in two greased and floured pans for 25 to 30 minutes, and double the frosting. It makes a stunning birthday cake.
I once made a batch with blood orange zest in the dead of winter, and the color was just gorgeous. Honestly, playing around with the citrus is half the fun.
Serving & Storage Suggestions
These cupcakes are best served at room temperature. The cake is soft and moist, and the buttercream is perfectly creamy. If you’ve stored them in the fridge, let them sit out for about 20 minutes before serving to let the flavors wake up.
For a pretty presentation, arrange them on a cake stand or a large platter. A sprinkle of fresh orange zest over the top adds a lovely pop of color. They pair beautifully with a hot cup of coffee or a cold glass of milk. Honestly, they’re perfect on their own, but a scoop of vanilla ice cream on the side never hurt anyone.
Storage: Store leftover cupcakes in an airtight container at room temperature for up to 2 days. If your kitchen is warm, pop them in the fridge—the buttercream can get a little soft. They’ll keep in the fridge for up to 5 days. Just bring them to room temperature before serving.
Freezing: You can freeze the unfrosted cupcakes for up to 3 months. Wrap each one tightly in plastic wrap, then place them in a freezer bag. Thaw them at room temperature before frosting. The buttercream can also be frozen in an airtight container for up to 3 months. Thaw it in the fridge overnight and re-whip it before using.
The flavors actually get better after a day or two. The orange zest mellows out and blends with the chocolate in a way that’s just magical. So don’t feel bad if you have leftovers—they’ll still be amazing.
Nutritional Information & Benefits
Let’s be real—these are cupcakes, not health food. But knowing what’s in them helps you make informed choices for your family. Here is an approximate breakdown per cupcake (based on 12 servings):
| Nutrient | Amount |
|---|---|
| Calories | 420 |
| Total Fat | 22g |
| Saturated Fat | 12g |
| Carbohydrates | 55g |
| Sugar | 42g |
| Protein | 4g |
| Fiber | 2g |
| Sodium | 220mg |
On the plus side, the cocoa powder is rich in antioxidants and can help improve mood. The orange zest provides a small amount of vitamin C and adds bright flavor without extra sugar. The buttermilk adds calcium and helps keep the cake tender. These are a treat, meant to be enjoyed in moderation. I always tell my family that a little sweetness makes the everyday moments special.
If you’re watching your sugar intake, you can reduce the sugar in the frosting by a quarter cup, but it will change the texture slightly. The cupcakes themselves are already well-balanced.
Frequently Asked Questions
Can I make these cupcakes without the black food coloring?
Absolutely! The food coloring is purely for that dramatic black velvet look. Without it, the cupcakes will be a deep, dark brown—still delicious and still stunning. The flavor is exactly the same.
Why did my buttercream turn out too runny?
This usually happens if the butter was too soft or if you added too much orange juice. Pop the bowl in the fridge for 10 to 15 minutes, then re-whip it. If it’s still too soft, beat in a little more powdered sugar, one tablespoon at a time.
Can I use store-bought orange juice instead of fresh?
I really recommend fresh oranges here. The bottled stuff has added sugars and preservatives, and it lacks the bright, natural flavor of fresh zest and juice. One large orange gives you plenty of both. Your buttercream will taste noticeably better.
How do I know when the cupcakes are done baking?
Insert a toothpick into the center of a cupcake. If it comes out clean or with just a few moist crumbs, they’re done. Also, the tops should spring back when you gently press them. Start checking at 18 minutes to avoid overbaking.
Can I double this recipe?
Yes, this recipe doubles beautifully. Just use a larger mixing bowl and make sure you have enough muffin tins. You can also bake them in batches. The batter holds up well for about 30 minutes at room temperature before you need to bake it.
Conclusion
These Best Black Velvet Cupcakes with Easy Orange Buttercream are the kind of recipe that becomes a family tradition. They’re simple enough for a weekday treat but special enough for birthdays and holidays. The deep chocolate cake paired with that bright, creamy orange frosting is a combination that just works. I’ve made them for school bake sales, family dinners, and lazy Sunday afternoons, and they never fail to get smiles and requests for the recipe.
I hope you give these a try and make them your own. Maybe you’ll add a little extra zest or swap the orange for lemon. That’s the beauty of a good recipe—it’s a starting point for your own kitchen adventures. Let me know how they turn out! Leave a comment below with your tweaks or tag me in your photos. I love seeing what you create. Happy baking, friend. You’ve got this.
Pin This Recipe!
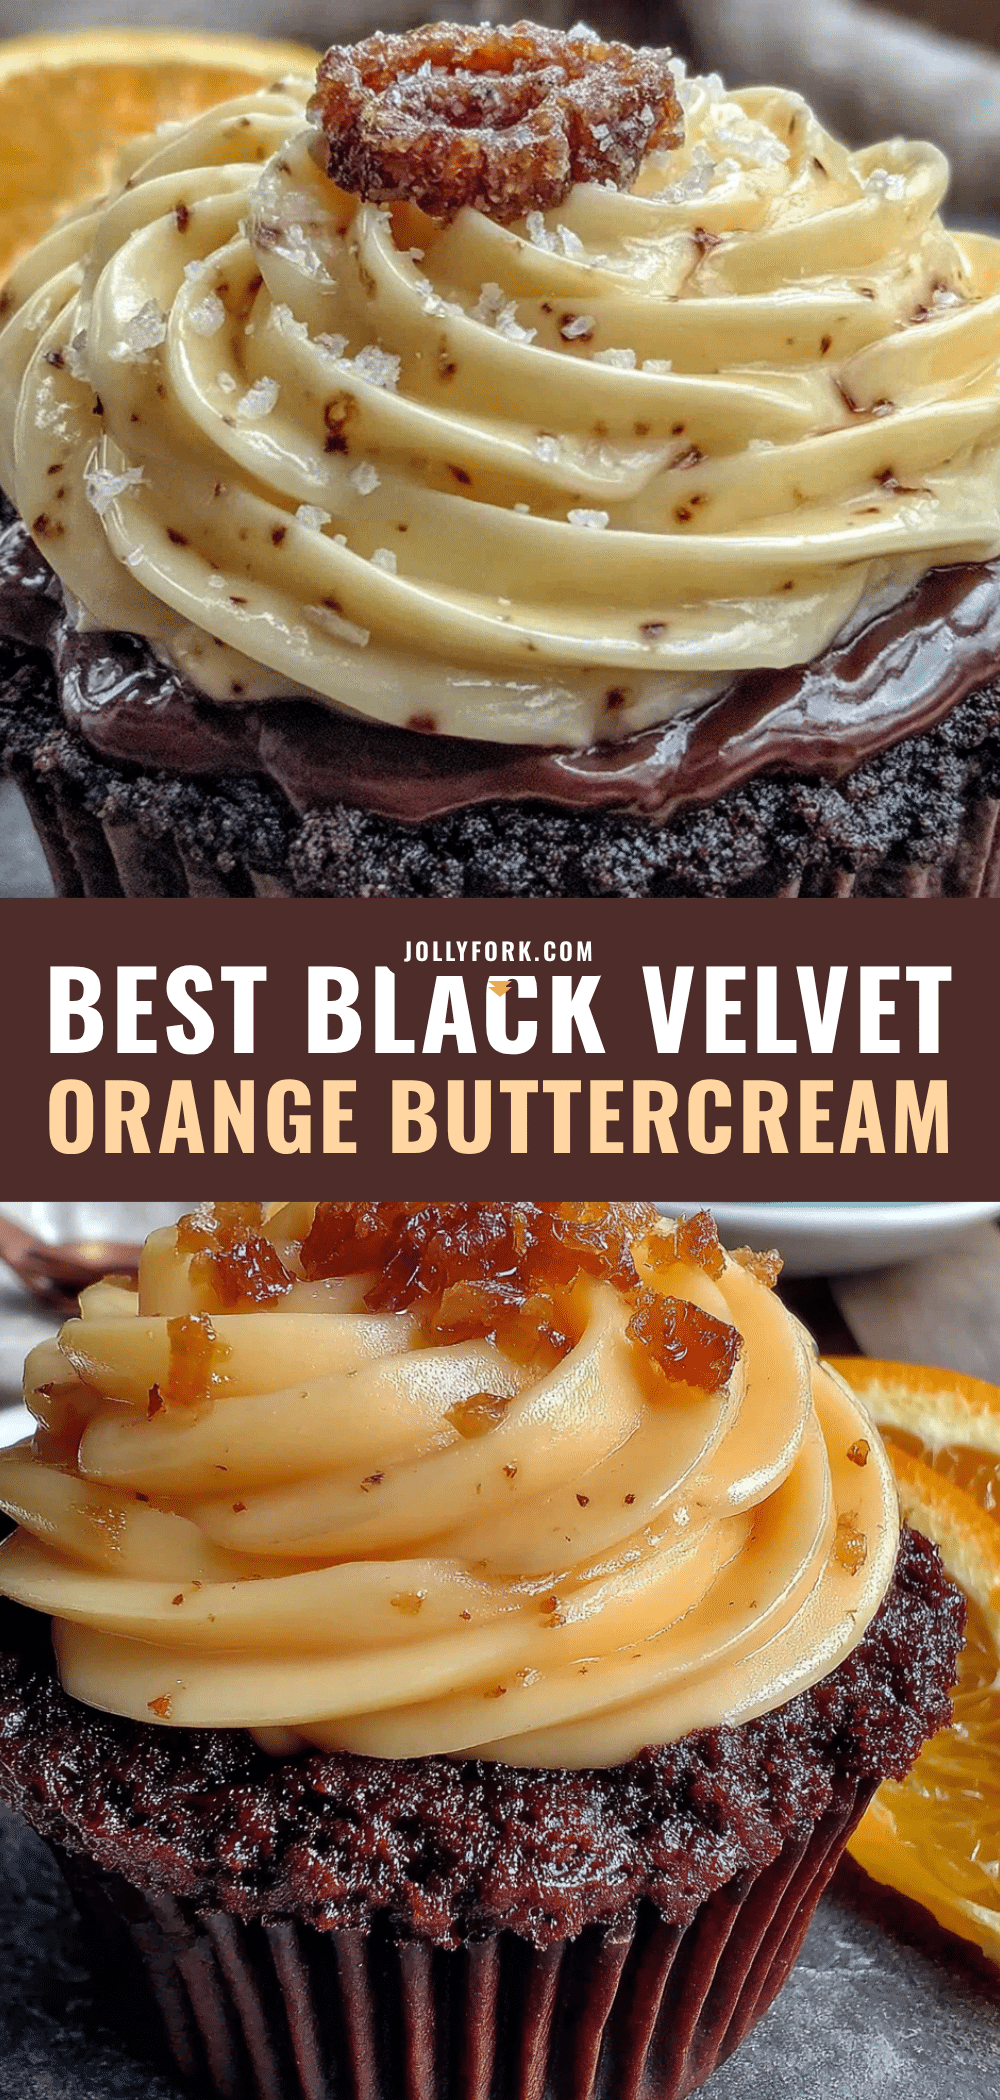
Best Black Velvet Cupcakes with Easy Orange Buttercream
These impossibly moist black velvet cupcakes are paired with a bright, creamy orange buttercream that cuts through the richness perfectly. A simple yet stunning treat that’s perfect for any occasion.
- Prep Time: 20 minutes
- Cook Time: 20 minutes
- Total Time: 40 minutes
- Yield: 12 cupcakes 1x
- Category: Dessert
- Cuisine: American
Ingredients
- 1 ½ cups (190g) all-purpose flour
- 1 cup (200g) granulated sugar
- ½ cup (50g) unsweetened cocoa powder (Dutch-processed preferred)
- 1 teaspoon baking soda
- ½ teaspoon salt
- 1 cup (240ml) buttermilk
- ½ cup (120ml) vegetable oil
- 2 large eggs, room temperature
- 2 teaspoons vanilla extract
- 1 tablespoon black food coloring (gel-based, optional)
- 1 cup (226g) unsalted butter, softened
- 3 ½ cups (440g) powdered sugar, sifted if lumpy
- 2 tablespoons heavy cream
- 1 tablespoon fresh orange zest
- 2 tablespoons fresh orange juice
- ½ teaspoon vanilla extract
- Pinch of salt
Instructions
- Preheat your oven to 350°F (175°C). Line a 12-cup muffin tin with paper liners.
- In a medium bowl, whisk together the flour, sugar, cocoa powder, baking soda, and salt until no lumps remain.
- In a large bowl, whisk together the buttermilk, vegetable oil, eggs, vanilla extract, and black food coloring (if using) until smooth.
- Pour the dry ingredients into the wet ingredients and gently whisk until just combined. Do not overmix; a few small lumps are okay.
- Divide the batter evenly among the 12 liners, filling each about ⅔ full.
- Bake for 18 to 22 minutes, or until a toothpick inserted into the center comes out clean or with a few moist crumbs. Cool in the tin for 5 minutes, then transfer to a wire rack to cool completely.
- While the cupcakes cool, make the buttercream: In a large bowl, beat the softened butter with an electric mixer on medium speed until smooth and creamy, about 2 minutes.
- Add the powdered sugar one cup at a time, beating on low speed. Add the heavy cream, orange zest, orange juice, vanilla extract, and a pinch of salt. Beat on medium-high speed for 3 to 4 minutes until light, fluffy, and spreadable.
- Frost the cooled cupcakes using a piping bag fitted with a star tip, or simply spread the frosting with a knife. Garnish with extra orange zest if desired.
Notes
Room temperature ingredients matter for best texture. Do not overmix the batter. Cool cupcakes completely before frosting to prevent buttercream from melting. For a dairy-free version, use dairy-free milk with lemon juice and plant-based butter. For gluten-free, use a 1:1 gluten-free flour blend with xanthan gum. The black food coloring is optional; without it, cupcakes will be deep brown.
Nutrition
- Serving Size: 1 cupcake
- Calories: 420
- Sugar: 42
- Sodium: 220
- Fat: 22
- Saturated Fat: 12
- Carbohydrates: 55
- Fiber: 2
- Protein: 4
Keywords: black velvet cupcakes, orange buttercream, chocolate cupcakes, easy dessert, homemade cupcakes, Halloween cupcakes


