My neighbor swore she hated squash. For years. “It’s just… orange mush,” she’d say, wrinkling her nose every time I mentioned roasting one. I’d nod and change the subject, because honestly, what do you say to that? Then last October, I made this brown butter honeynut squash on a whim, just for myself, on a quiet Tuesday when the kitchen felt like the only warm place in the world. I pulled it out of the oven, golden and caramelized, the brown butter scent filling every corner of the house. And there she was, standing at my back door, holding her mail, asking what smelled so good.
I didn’t try to convert her. I just handed her a fork. She ate the first piece standing up, then the second one sitting down at my kitchen table. She asked for the recipe before she even finished chewing. That’s the thing about this particular squash—it doesn’t need a sales pitch. The brown butter does all the talking. And let me tell you, I’ve never seen someone change their mind about a vegetable so fast. Maybe you’ve had a similar moment, where a dish you weren’t expecting completely shifted your perspective. That’s what this recipe does. It catches you off guard.
I keep making this brown butter honeynut squash because it’s the kind of side dish that makes everyone at the table feel a little bit spoiled. It’s simple enough for a Tuesday, but special enough for Thanksgiving. And honestly, it’s the only way I’ve found to get my kids to eat squash without a single complaint. The secret is in the brown butter—nutty, rich, and just sweet enough to make the squash taste like a treat. This recipe has stayed with me because it proves that you don’t need complicated techniques to create something memorable. Just good ingredients, a little patience, and a pan that fits in your oven.
Why You’ll Love This Recipe
Let’s be real for a second. Getting a vegetable side dish on the table that everyone actually eats can feel like a small miracle. This brown butter honeynut squash recipe is that miracle. I’ve tested it a dozen times—for my own family, for neighbors, for holiday dinners—and it never fails. Here’s why it’s become my go-to fall side dish:
- Quick & Easy: This comes together in about 35 minutes, with only 5 minutes of active prep. Perfect for those nights when you’re juggling homework and hungry kids.
- Simple Ingredients: You need a honeynut squash, butter, salt, and maybe some sage if you’re feeling fancy. That’s it. No trips to a specialty store required.
- Perfect for Fall Dinners: Whether it’s a cozy weeknight meal or a holiday spread, this squash fits right in. It’s rustic enough for a casual dinner but elegant enough for company.
- Crowd-Pleaser: I’ve served this to picky eaters, squash skeptics, and vegetable lovers alike. The brown butter converts everyone. Seriously.
- Unbelievably Delicious: The natural sweetness of the honeynut squash gets amplified by the nutty brown butter, creating a flavor combo that’s pure comfort food. You’ll want to eat it straight from the pan.
What makes this recipe different from every other roasted squash recipe out there? It’s the technique. Instead of just tossing the squash in oil and hoping for the best, we take the time to brown the butter first. That simple step transforms the entire dish. The butter develops these deep, toasty notes that wrap around the sweet, tender squash in a way that feels almost luxurious. It’s not just another roasted vegetable—it’s the roasted vegetable that steals the show. And honestly, when you’re feeding a family on a budget, finding a side dish that feels this special without breaking the bank is a win.
What Ingredients You Will Need
This recipe uses simple, wholesome ingredients that work together to create something truly special. The beauty of brown butter honeynut squash is that it doesn’t rely on a long list of fancy items—just a few quality ingredients that each play an important role. Most of these are likely already in your kitchen, which makes this an easy last-minute side dish.
- Honeynut squash (2 medium or 1 large): These little guys are sweeter and creamier than butternut squash, with a thinner skin that’s edible once roasted. Look for squash that feel heavy for their size and have a deep orange color. If you can’t find honeynut, butternut squash works too—just peel it first.
- Unsalted butter (4 tablespoons, or 60 grams): This is the star of the show. Use unsalted butter so you can control the salt level. I prefer Kerrygold for its rich flavor, but any good-quality butter works. The browning process is where the magic happens, so don’t skimp here.
- Kosher salt (½ teaspoon, plus more to taste): Salt balances the sweetness of the squash and the richness of the brown butter. I use Diamond Crystal kosher salt—if you’re using a finer salt, reduce the amount slightly.
- Fresh sage leaves (8-10 leaves, optional but recommended): Sage and brown butter are a classic pairing for a reason. The herbaceous, slightly peppery flavor of sage cuts through the richness beautifully. If you don’t have fresh sage, dried sage works in a pinch—use about 1 teaspoon.
- Maple syrup (1 tablespoon, optional): A tiny drizzle adds an extra layer of sweetness that complements the natural sugars in the squash. Use pure maple syrup, not pancake syrup. You can skip this if you prefer a more savory dish.
- Black pepper (¼ teaspoon, freshly ground): A little pepper adds warmth and depth. Freshly ground is always better, but pre-ground works in a pinch.
- Flaky sea salt (for finishing, optional): A sprinkle of flaky salt like Maldon right before serving adds a lovely crunch and a burst of saltiness that makes the flavors pop.
One thing I’ve learned from making this brown butter honeynut squash over and over is that the quality of your squash matters. Honeynut squash are typically available from late summer through early winter, and they’re worth seeking out. They’re smaller than butternut squash, which means they cook faster and have a more concentrated sweetness. If you’re shopping at a farmers’ market, ask the farmer which ones are freshest. And if you’re at a regular grocery store, look for squash that feel firm and heavy, with no soft spots or blemishes.
Equipment Needed
You don’t need a fancy kitchen to make this recipe. In fact, you probably already own everything you need. Here’s what I use:
- Large rimmed baking sheet: A half-sheet pan (18×13 inches) is ideal. The rim is important because it catches any butter that might spill over. I’ve used the same Nordic Ware sheet pan for years, and it’s never let me down.
- Small saucepan: For browning the butter. A light-colored pan is helpful because you can see the butter change color more easily. If you only have dark pans, just keep a close eye on it.
- Sharp chef’s knife: Honeynut squash are small but dense. A sharp knife makes cutting them much safer and easier. I use an 8-inch chef’s knife, but any sharp knife will do.
- Cutting board: A sturdy board that won’t slip. Place a damp paper towel underneath to keep it steady.
- Mixing bowl: For tossing the squash with the brown butter. Any medium-sized bowl works.
- Spatula or wooden spoon: For stirring the butter as it browns. A silicone spatula is great for scraping every last bit of that golden goodness onto the squash.
- Measuring spoons: For the salt, pepper, and maple syrup. Eyeballing works too, but measuring helps with consistency.
If you don’t have a rimmed baking sheet, a 9×13 baking dish will work—just make sure the squash pieces are in a single layer. And if you’re short on time, you can skip the saucepan and brown the butter in the microwave (heat in 30-second bursts, stirring in between, until it turns golden brown and smells nutty).
Preparation Method
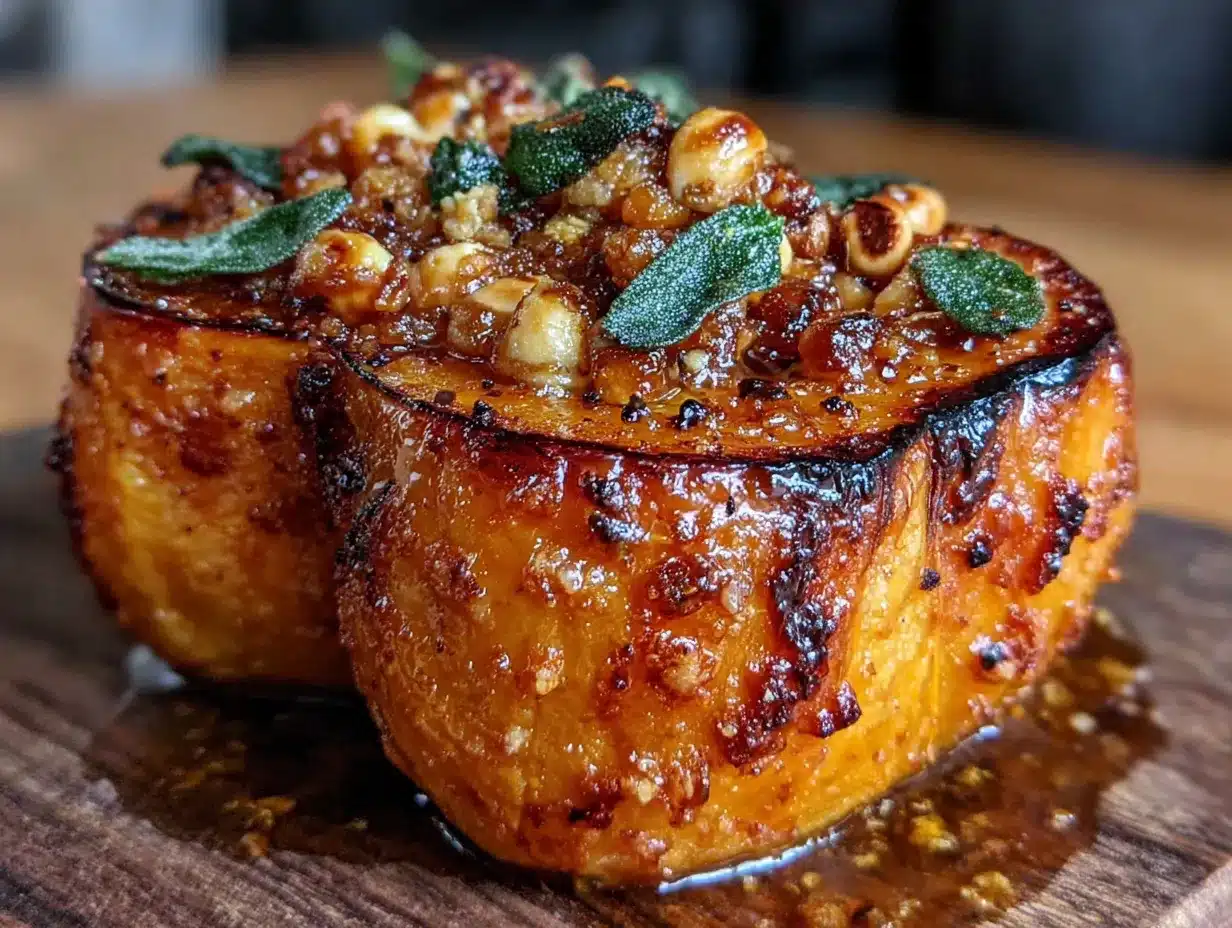
Let’s get cooking. This brown butter honeynut squash comes together quickly, but there are a few key moments where paying attention makes all the difference. Here’s exactly how I do it:
- Preheat your oven to 400°F (200°C). Place a rack in the middle position. While the oven heats, line your baking sheet with parchment paper for easy cleanup—though I’ve skipped this step plenty of times and just greased the pan lightly.
- Prepare the squash. Wash the honeynut squash well—remember, the skin is edible, so you want it clean. Using a sharp chef’s knife, carefully cut each squash in half lengthwise. Scoop out the seeds and stringy bits with a spoon. (Don’t throw the seeds away! Rinse them, toss with a little oil and salt, and roast them alongside the squash for a crunchy snack.) Cut each half into ½-inch thick half-moons. The pieces should be roughly the same size so they cook evenly. I usually get about 8-10 pieces per medium squash.
- Start the brown butter. Place the butter in a small saucepan over medium heat. Let it melt completely, then continue cooking, swirling the pan occasionally. The butter will foam up, then subside. Watch closely—once the foam clears, you’ll see golden brown specks forming at the bottom of the pan. This happens quickly. The butter should smell nutty and toasty. Remove it from the heat immediately. This whole process takes about 4-5 minutes. Don’t walk away; burnt butter is a sad thing.
- Toss the squash. Place the squash pieces in a mixing bowl. Pour the warm brown butter over them, scraping the pan to get all those delicious browned bits. Add the kosher salt, black pepper, and maple syrup if using. Toss gently with your hands or a spatula until every piece is coated. Take a moment to appreciate how good this smells.
- Arrange on the baking sheet. Spread the squash pieces in a single layer on the prepared baking sheet. Make sure they’re not touching—crowding leads to steaming instead of roasting. If you’re using sage, tuck the leaves between the squash pieces. They’ll crisp up beautifully in the oven.
- Roast for 20-25 minutes. Place the pan in the preheated oven. Halfway through, flip each piece with a spatula. The squash is done when it’s tender all the way through and the edges are caramelized and slightly browned. A fork should slide in easily. The sage leaves should be crispy and dark.
- Finish and serve. Remove the pan from the oven. Let the squash rest for 2-3 minutes—this allows the caramelized sugars to set. Transfer to a serving platter, arranging the crispy sage leaves on top. Sprinkle with flaky sea salt if you have it. Serve warm.
One thing I’ve learned the hard way: don’t rush the browning. The first time I made this, I got distracted and ended up with burnt butter. It smelled bitter and sad. Start over if that happens. It’s worth the extra few minutes. And if you’re making this for a crowd, you can double the recipe easily—just use two baking sheets and rotate them halfway through cooking.
Cooking Tips & Techniques
After making this brown butter honeynut squash more times than I can count, I’ve picked up a few tricks that make the process smoother and the results better. Here’s what I wish someone had told me:
Watch the butter like a hawk. Brown butter goes from perfect to burnt in about 30 seconds. The key is to remove it from the heat the moment it turns a warm amber color and smells nutty. I like to pour it into a cool bowl immediately to stop the cooking process. Trust me, I’ve ruined enough butter to know this matters.
Cut the squash evenly. This is the most important step for even cooking. If some pieces are thicker than others, they’ll cook at different rates. I aim for pieces that are about ½ inch thick. If you’re struggling to cut through the squash, try microwaving it for 30 seconds to soften it slightly. And please, use a sharp knife—dull knives are dangerous with hard squash.
Don’t skip the flipping. I know it’s tempting to just let the squash roast without touching it, but flipping halfway through ensures both sides get caramelized. Use a thin spatula to flip each piece gently. If the sage leaves are getting too dark, you can remove them and set them aside while the squash finishes cooking.
Use the parchment paper. The caramelized brown butter can stick to the pan, making cleanup a hassle. Parchment paper makes it effortless. Plus, it helps the squash brown more evenly. If you’re out of parchment, a light coating of butter on the pan works too.
Season in layers. I add salt before roasting and then a sprinkle of flaky salt at the end. This two-step seasoning creates a more complex flavor. The salt that goes on before cooking penetrates the squash, while the finishing salt adds a pop of texture and brightness.
Make extra brown butter. Honestly, I always make a little more than I need. Leftover brown butter is incredible on roasted vegetables, pasta, popcorn, or drizzled over pancakes. Store it in a jar in the fridge for up to a week.
Variations & Adaptations
One of the best things about this brown butter honeynut squash recipe is how easy it is to adapt. Here are some variations I’ve tried and loved:
Savory Herb Version: Skip the maple syrup and add 1 teaspoon of fresh thyme leaves and ½ teaspoon of smoked paprika to the brown butter. The smokiness pairs beautifully with the sweet squash. I made this version for a barbecue last summer, and it was gone in minutes.
Spicy Maple Version: Add ¼ teaspoon of cayenne pepper or red pepper flakes along with the maple syrup. The heat balances the sweetness perfectly. My husband, who loves spicy food, requests this version every time.
Garlic Lovers Version: Add 3-4 crushed garlic cloves to the butter as it browns. The garlic infuses the butter with a mellow, nutty flavor. Just be careful not to burn the garlic—remove the cloves once they turn golden. This version is incredible alongside roast chicken or pork.
Vegan Version: Substitute the butter with 3 tablespoons of coconut oil or vegan butter. Add a splash of maple syrup and a pinch of smoked salt. The flavor is different but still delicious. I’ve made this for vegan friends, and they always ask for the recipe.
Sheet Pan Meal Version: Turn this into a complete meal by adding protein. Toss chicken thighs or brussels sprouts on the same pan with the squash. Everything roasts together, and the brown butter coats everything beautifully. Dinner in one pan—my favorite kind of cooking.
Herb-Infused Oil Version: If you’re out of butter, use 3 tablespoons of olive oil infused with fresh rosemary or sage. Heat the oil gently with the herbs, then proceed with the recipe. It’s not quite the same as brown butter, but it’s still really good.
Serving & Storage Suggestions
This brown butter honeynut squash is versatile enough to pair with almost any main dish. Here’s how I like to serve and store it:
Serving Temperature: Serve this squash warm, straight from the oven. The caramelized edges are at their crispiest right after roasting. If you’re making it ahead, reheat it in a 350°F oven for 5-7 minutes to restore some of that texture.
What to Serve It With: This squash is a natural partner for roasted chicken, turkey, or pork chops. It also works beautifully alongside a simple protein like grilled salmon or baked tofu. For a cozy fall dinner, I love serving it with crispy garlic chicken and a side of steamed green beans. The richness of the brown butter complements the savory chicken perfectly.
Presentation Ideas: Arrange the squash pieces on a white platter in a single layer. Top with the crispy sage leaves and a sprinkle of flaky salt. If you’re feeling fancy, add a drizzle of balsamic glaze or a few pomegranate arils for color. It’s a stunning dish for holiday tables.
Storage: Leftover squash keeps well in an airtight container in the refrigerator for up to 4 days. The texture softens slightly, but the flavor remains delicious. I often make a double batch on Sunday and use the leftovers throughout the week.
Reheating: The best way to reheat is in the oven at 350°F for 5-7 minutes. The microwave works in a pinch, but the squash will be softer. If you’re reheating in the microwave, do it in 30-second bursts and stop before it gets mushy.
Freezing: You can freeze this squash for up to 3 months. Let it cool completely, then transfer to a freezer-safe container. To serve, thaw overnight in the refrigerator and reheat in the oven. The texture won’t be quite as crisp, but the flavor is still wonderful.
Flavor Development: Interestingly, the flavors of this dish meld and deepen overnight. The brown butter soaks into the squash, making it even more flavorful the next day. I’ve been known to make this specifically for leftovers.
Nutritional Information & Benefits
This brown butter honeynut squash isn’t just delicious—it’s also packed with nutrients that make it a smart choice for family meals. Here’s what you’re getting in each serving (based on 4 servings):
| Nutrient | Amount per Serving |
|---|---|
| Calories | 185 |
| Total Fat | 12g |
| Saturated Fat | 7g |
| Carbohydrates | 20g |
| Fiber | 4g |
| Sugar | 8g |
| Protein | 2g |
| Vitamin A | 290% DV |
| Vitamin C | 25% DV |
| Potassium | 12% DV |
Honeynut squash is a nutritional powerhouse. It’s loaded with vitamin A (from beta-carotene), which supports eye health and immune function. The fiber content helps with digestion and keeps everyone feeling full and satisfied. Plus, it’s naturally gluten-free, dairy-free (if you skip the butter), and low in calories for the volume it provides.
From a wellness perspective, I love that this recipe lets me serve a vegetable that feels indulgent without being unhealthy. The brown butter adds richness, but you’re still getting a solid serving of vegetables. It’s a win-win for parents who want their kids to eat more veggies without a fight.
Conclusion
This brown butter honeynut squash has earned a permanent spot in my fall rotation. It’s the kind of recipe that proves simple ingredients, treated with care, can create something truly special. The nutty brown butter, the sweet tender squash, the crispy sage—it all comes together in a dish that feels both humble and luxurious.
I love this recipe because it’s forgiving. You can adjust the seasonings, swap the herbs, or double it for a crowd. It works for busy weeknights and special occasions alike. And honestly, watching someone take that first bite and realize that squash can actually be amazing—that never gets old.
Give this recipe a try, and don’t be afraid to make it your own. Add a pinch of cinnamon, swap in thyme for sage, or drizzle with a little honey. The beauty of this dish is that it welcomes your creativity. And when you make it, I’d love to hear how it went. Leave a comment below and tell me about your experience—did your family love it? Did you try a variation? Your stories inspire me and help other readers discover new ways to enjoy this dish. Happy cooking!
Frequently Asked Questions
Can I use butternut squash instead of honeynut?
Absolutely. Honeynut squash has a thinner skin and sweeter flavor, but butternut squash works beautifully in this recipe. Just peel the butternut squash before cutting it, as the skin is tougher. You may also need to increase the roasting time by 5-10 minutes since butternut pieces are usually larger.
How do I know when the brown butter is ready?
Watch for the butter to turn a warm amber color and develop a nutty, toasty aroma. The butter will foam, then the foam will subside, and you’ll see golden brown specks forming at the bottom of the pan. Remove it from the heat immediately—it goes from perfect to burnt very quickly.
Can I make this recipe ahead of time?
Yes! You can roast the squash up to 2 days ahead and store it in the refrigerator. Reheat it in a 350°F oven for 5-7 minutes before serving. The texture won’t be quite as crisp as fresh, but the flavor will still be delicious. You can also prep the squash by cutting it and storing it in the fridge for up to 2 days before roasting.
Is the skin of honeynut squash edible?
Yes! One of the best things about honeynut squash is that the skin is thin and tender enough to eat once roasted. No peeling required. Just wash the squash thoroughly before cutting. If you’re using a different variety of squash, like butternut, you’ll want to peel it first.
What can I do with leftover brown butter?
Leftover brown butter is a gift. Store it in a jar in the refrigerator for up to a week. Use it to roast other vegetables, toss with pasta, drizzle over popcorn, spread on toast, or add to mashed potatoes. It’s also incredible drizzled over pancakes or waffles for a special breakfast treat.
Pin This Recipe!
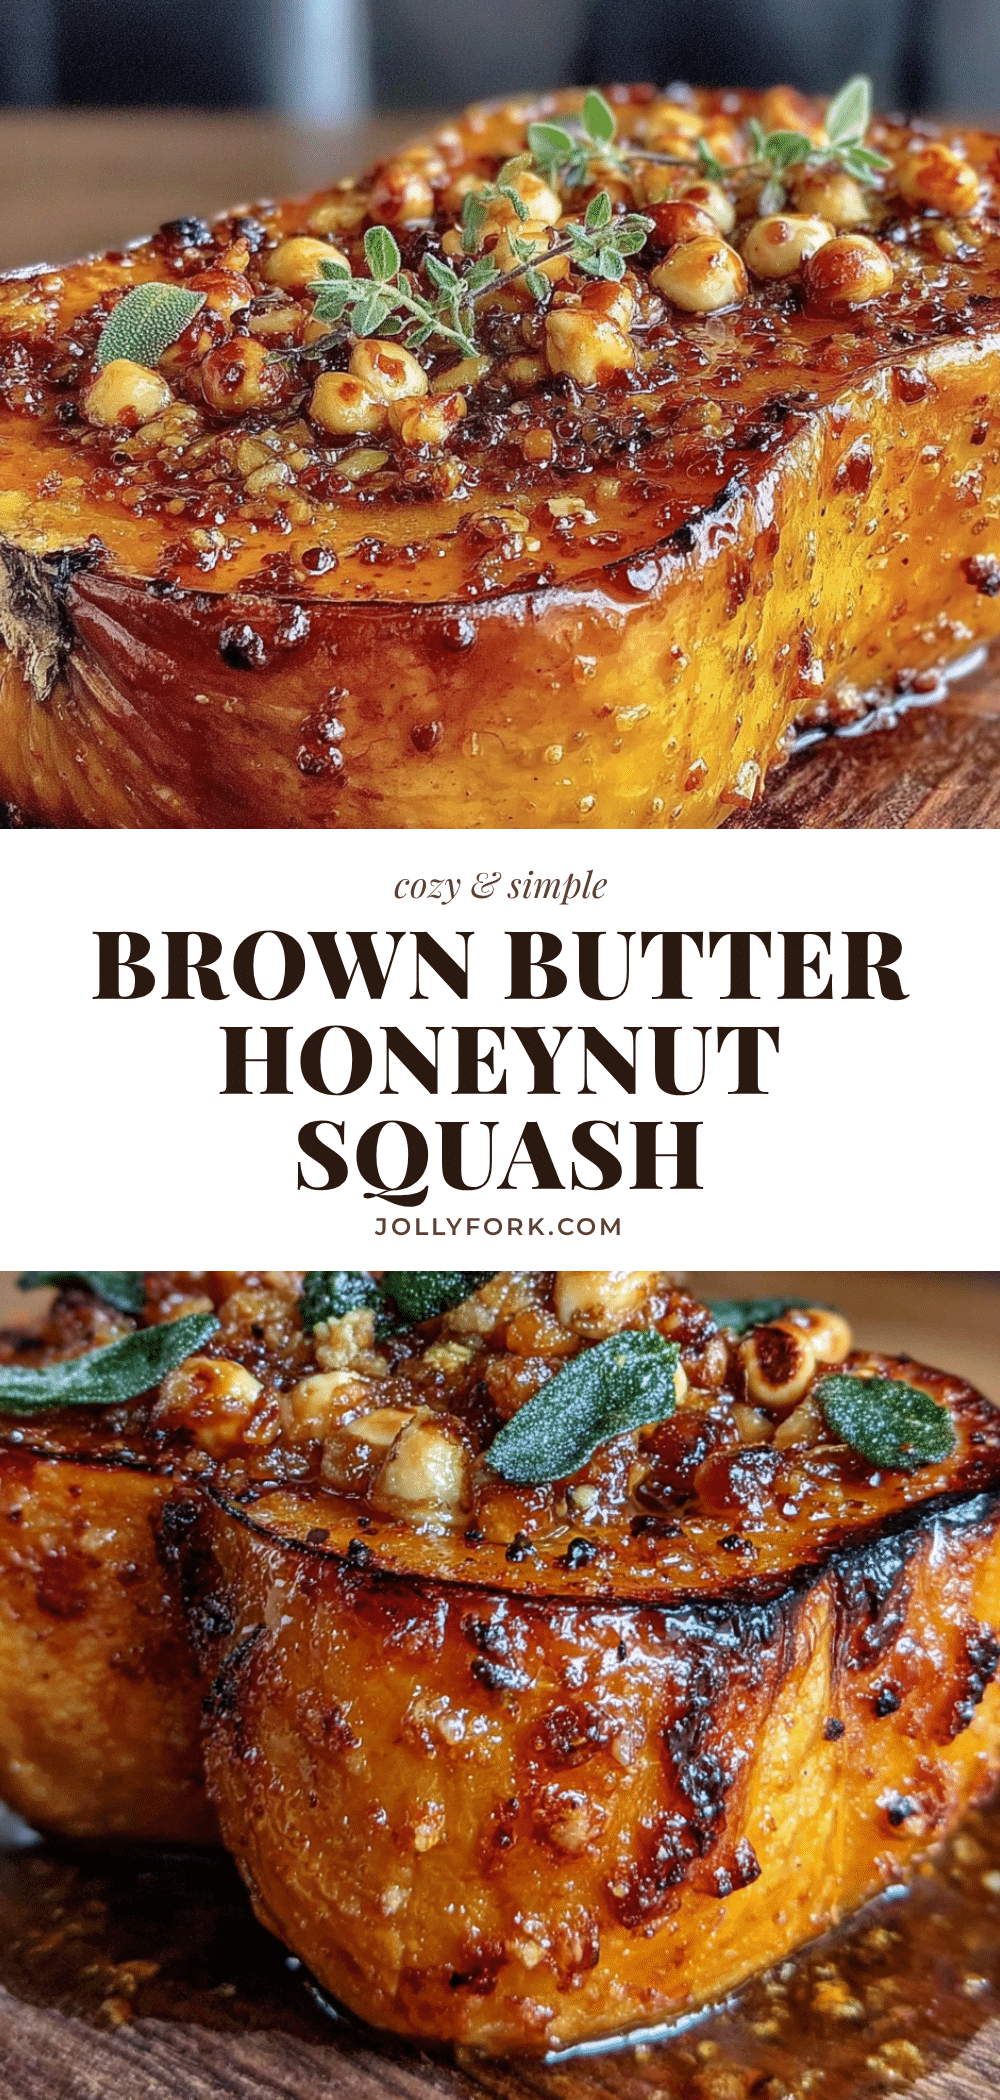
Best Easy Brown Butter Honeynut Squash Recipe for Fall

This brown butter honeynut squash is a simple yet elegant side dish that transforms humble squash into a caramelized, nutty, and sweet treat. Perfect for weeknight dinners or holiday feasts, it’s a crowd-pleaser that converts even the biggest squash skeptics.
- Prep Time: 5 minutes
- Cook Time: 25 minutes
- Total Time: 30 minutes
- Yield: 4 servings 1x
- Category: Side Dish
- Cuisine: American
Ingredients
- 2 medium or 1 large honeynut squash (about 1.5 lbs total)
- 4 tablespoons (60 g) unsalted butter
- ½ teaspoon kosher salt (plus more to taste)
- 8–10 fresh sage leaves (optional but recommended)
- 1 tablespoon maple syrup (optional)
- ¼ teaspoon freshly ground black pepper
- Flaky sea salt for finishing (optional)
Instructions
- Preheat your oven to 400°F (200°C). Line a large rimmed baking sheet with parchment paper.
- Wash the honeynut squash well. Using a sharp chef’s knife, carefully cut each squash in half lengthwise. Scoop out the seeds and stringy bits with a spoon. Cut each half into ½-inch thick half-moons.
- Place the butter in a small saucepan over medium heat. Let it melt completely, then continue cooking, swirling the pan occasionally. The butter will foam, then subside. Once the foam clears and you see golden brown specks at the bottom and the butter smells nutty (about 4-5 minutes), remove from heat immediately.
- Place the squash pieces in a mixing bowl. Pour the warm brown butter over them, scraping the pan to get all the browned bits. Add the kosher salt, black pepper, and maple syrup if using. Toss gently until every piece is coated.
- Spread the squash pieces in a single layer on the prepared baking sheet, making sure they are not touching. Tuck the sage leaves between the pieces if using.
- Roast for 20-25 minutes, flipping each piece halfway through. The squash is done when tender and the edges are caramelized and slightly browned.
- Remove from the oven and let rest for 2-3 minutes. Transfer to a serving platter, arrange crispy sage leaves on top, and sprinkle with flaky sea salt if desired. Serve warm.
Notes
Watch the butter carefully as it browns—it goes from perfect to burnt in about 30 seconds. Cut the squash evenly for even cooking. Don’t skip flipping halfway through for best caramelization. Leftover brown butter can be stored in the fridge for up to a week and used on other vegetables, pasta, or popcorn.
Nutrition
- Serving Size: 1 serving (about 1/4
- Calories: 185
- Sugar: 8
- Sodium: 300
- Fat: 12
- Saturated Fat: 7
- Carbohydrates: 20
- Fiber: 4
- Protein: 2
Keywords: brown butter honeynut squash, roasted honeynut squash, fall side dish, easy squash recipe, brown butter sage squash