The PTA potluck was in six hours and I’d completely forgotten. Everyone else would be bringing slow-cooked brisket, homemade pho, and elaborate layered salads that looked like they belonged on a magazine cover. I had a block of cheddar, some sorry-looking mozzarella, half a box of elbows, and a bag of panko that was probably six months old. Honestly, I almost just grabbed a frozen pizza on the way. But then I remembered this quick make-ahead four-cheese mac and cheese with panko crust I’d thrown together for a frantic weeknight dinner a few weeks back. It had saved me then. Maybe it could save me now.
I started boiling water before I even changed out of my work clothes. Let me tell you, there’s something about cooking under pressure that forces you to focus. I mean, I wasn’t trying to win anything. I was just trying not to show up empty-handed. I grated the cheese, whisked the sauce, and prayed the panko would crisp up instead of just getting soggy. The whole thing came together in about thirty minutes of active time. I slid the dish into the fridge, crossed my fingers, and went to find a clean shirt.
You know that feeling when you bring something simple to a gathering and everyone acts like you’ve performed a miracle? That was this mac and cheese. The panko crust was golden and shattering, the cheese pull was ridiculous, and people kept coming back for “just one more spoonful.” Someone actually asked me for the recipe before the potluck was even over. I had to laugh because I’d literally made it up on a Tuesday night when I had nothing else in the house. Maybe you’ve been there, scrambling to put dinner on the table with zero time and a fridge that looks sad. This is that recipe. The one that saves you when you need it most and somehow steals the show anyway.
Why You’ll Love This Recipe
This isn’t just another mac and cheese recipe. I’ve tested this version more times than I can count, tweaking the cheese ratios and the panko situation until it was absolutely foolproof. Here’s why it works so well for real life:
- Quick & Easy: You only need about 20 minutes of active prep time. The rest is just waiting for the oven. Perfect for those nights when you walk in the door at 5:45 and need dinner by 6:30.
- Simple Ingredients: No chasing down fancy cheese at a specialty store. Everything on this list is available at your regular grocery store. You probably already have most of it.
- Perfect for Weeknights: This is the definition of a make-ahead meal. Assemble it the night before, pop it in the fridge, and bake it when you get home. Dinner is basically handled.
- Crowd-Pleaser: I’ve served this to picky kids, cheese snobs, and people who claim they don’t like mac and cheese. It wins every time. The creamy texture and crispy topping are universally loved.
- Unbelievably Delicious: The combination of four cheeses creates a depth of flavor that one or two cheeses just can’t match. And that panko crust? It adds a buttery crunch that makes every bite interesting.
What makes this recipe different from the dozens of other mac and cheese recipes out there is the technique. Instead of a complicated béchamel that can break or turn grainy, I use a method that’s practically foolproof. The cheese sauce stays silky and smooth because of how the cheeses are added and the temperature control. Plus, the make-ahead aspect actually improves the texture. The pasta absorbs some of the sauce overnight, so everything gets even creamier when you bake it. This isn’t just another version. It’s the version you’ll actually make on a Tuesday night.
What Ingredients You Will Need
This recipe uses simple, straightforward ingredients to deliver big, comforting flavor. Most of these are pantry staples, which is exactly what you want when you’re trying to get dinner on the table fast.
For the Mac and Cheese
- 1 pound elbow macaroni (or cavatappi, shells, or any short pasta you like)
- 4 tablespoons unsalted butter (I prefer Land O’Lakes for consistent quality)
- 1/4 cup all-purpose flour
- 3 cups whole milk (warm, not cold — this prevents lumps)
- 1 cup heavy cream (adds richness and helps the sauce stay creamy when reheated)
- 1 teaspoon salt (plus more for the pasta water)
- 1/2 teaspoon black pepper
- 1/2 teaspoon garlic powder (optional but recommended)
- 1/4 teaspoon smoked paprika (adds a subtle warmth)
- 1 1/2 cups sharp cheddar cheese, shredded (use a block and grate it yourself — pre-shredded has anti-caking agents that affect melting)
- 1 cup Gruyère cheese, shredded (melts beautifully and adds nuttiness)
- 1 cup mozzarella cheese, shredded (for that perfect cheese pull)
- 1/2 cup Parmesan cheese, finely grated (adds salty, savory depth)
For the Panko Crust
- 1 cup panko breadcrumbs (regular breadcrumbs work in a pinch, but panko gives a much crispier crust)
- 2 tablespoons unsalted butter, melted
- 1/4 cup Parmesan cheese, finely grated
- 1/4 teaspoon garlic powder
- 1/4 teaspoon salt
A quick note on cheese selection: I recommend buying blocks of cheese and shredding them yourself. It takes an extra five minutes, but the difference in meltability is night and day. Pre-shredded cheese is coated in cellulose or starch to prevent clumping, which also prevents it from melting smoothly into a creamy sauce. If you’re in a hurry, you can shred the cheese while the pasta water comes to a boil. Multitasking is your friend here.
For the milk and cream, whole milk and heavy cream give the best texture. I’ve tried this with 2% milk, and it works, but the sauce is noticeably thinner. If you want a lighter version, you can use half-and-half instead of heavy cream, but don’t go lower than that. The fat content is what keeps the sauce from breaking when you reheat it.
Equipment Needed
You don’t need a fancy kitchen to make this recipe work. Here’s what you’ll actually use:
- Large pot (for boiling pasta — at least 5 quarts)
- Medium saucepan (for making the cheese sauce)
- Whisk (a good whisk makes lump-free sauce much easier)
- Wooden spoon or spatula
- Box grater (for shredding cheese — faster than a food processor for small amounts)
- 9×13 inch baking dish (a 3-quart dish works perfectly)
- Mixing bowl (for the panko topping)
- Measuring cups and spoons
- Aluminum foil (for covering during the first part of baking)
If you don’t have a 9×13 dish, you can use two 8×8 dishes or even a large cast-iron skillet. Just keep an eye on the baking time, as different dish materials and depths will affect how quickly it cooks. I’ve made this in a disposable aluminum pan for potlucks, and it works great. No need to worry about getting your dish back.
One tip: if you have a microplane grater, use it for the Parmesan. It creates a fine, fluffy texture that melts into the sauce beautifully. A standard box grater works too, but the microplane gives a more consistent result.
Preparation Method
Let me walk you through this step by step. I’ve included all the little details I wish someone had told me the first time I made this.
- Preheat your oven to 375°F (190°C). If you’re making this ahead and baking later, skip this step until you’re ready to bake. Butter your 9×13 baking dish or spray it with non-stick cooking spray.
- Bring a large pot of salted water to a boil. I add about a tablespoon of salt per gallon of water. It should taste like the sea. This is your only chance to season the pasta itself, so don’t skimp. Add the elbow macaroni and cook until al dente, about 7-8 minutes. You want it slightly underdone because it will continue cooking in the oven. Drain the pasta, but do not rinse it. The starch on the surface helps the sauce cling to the noodles.
- While the pasta cooks, start the cheese sauce. In a medium saucepan over medium heat, melt the 4 tablespoons of butter. Once it’s melted and bubbling, whisk in the flour. Cook this mixture, stirring constantly, for about 1-2 minutes. It should smell nutty and look like a thick paste. This is called a roux, and it’s what thickens your sauce. Don’t rush this step. A raw flour taste will ruin the whole dish.
- Slowly pour in the warm milk and heavy cream, whisking constantly. Keep whisking until the mixture is smooth and starts to thicken, about 3-4 minutes. It should be thick enough to coat the back of a spoon. If you see lumps, whisk harder. They usually smooth out with vigorous whisking.
- Reduce the heat to low. Add the salt, pepper, garlic powder, and smoked paprika. Stir to combine. Now, start adding the cheese one handful at a time, stirring constantly. Add the cheddar, Gruyère, mozzarella, and the 1/2 cup of Parmesan. Keep stirring until each addition is fully melted before adding the next. This prevents the sauce from becoming grainy. The sauce should be smooth, creamy, and pale yellow.
- Taste the sauce. Yes, right now. Dip a clean spoon in and let it cool for a second. Does it need more salt? More pepper? Trust your instincts. Remember that the pasta will dilute the seasoning a bit, so the sauce should be slightly more flavorful than you want the final dish to be.
- Combine the pasta and sauce. Pour the drained pasta into the pot with the cheese sauce (or pour the sauce over the pasta in a large bowl). Stir until every piece of pasta is coated. The sauce will seem thin at this point, but it will thicken as it cools and bakes. Don’t worry.
- Transfer the mixture to your prepared baking dish. Spread it into an even layer with a spatula. If you’re making this ahead, stop here, cover the dish tightly with foil, and refrigerate for up to 24 hours. If you’re baking it right away, proceed to the next step.
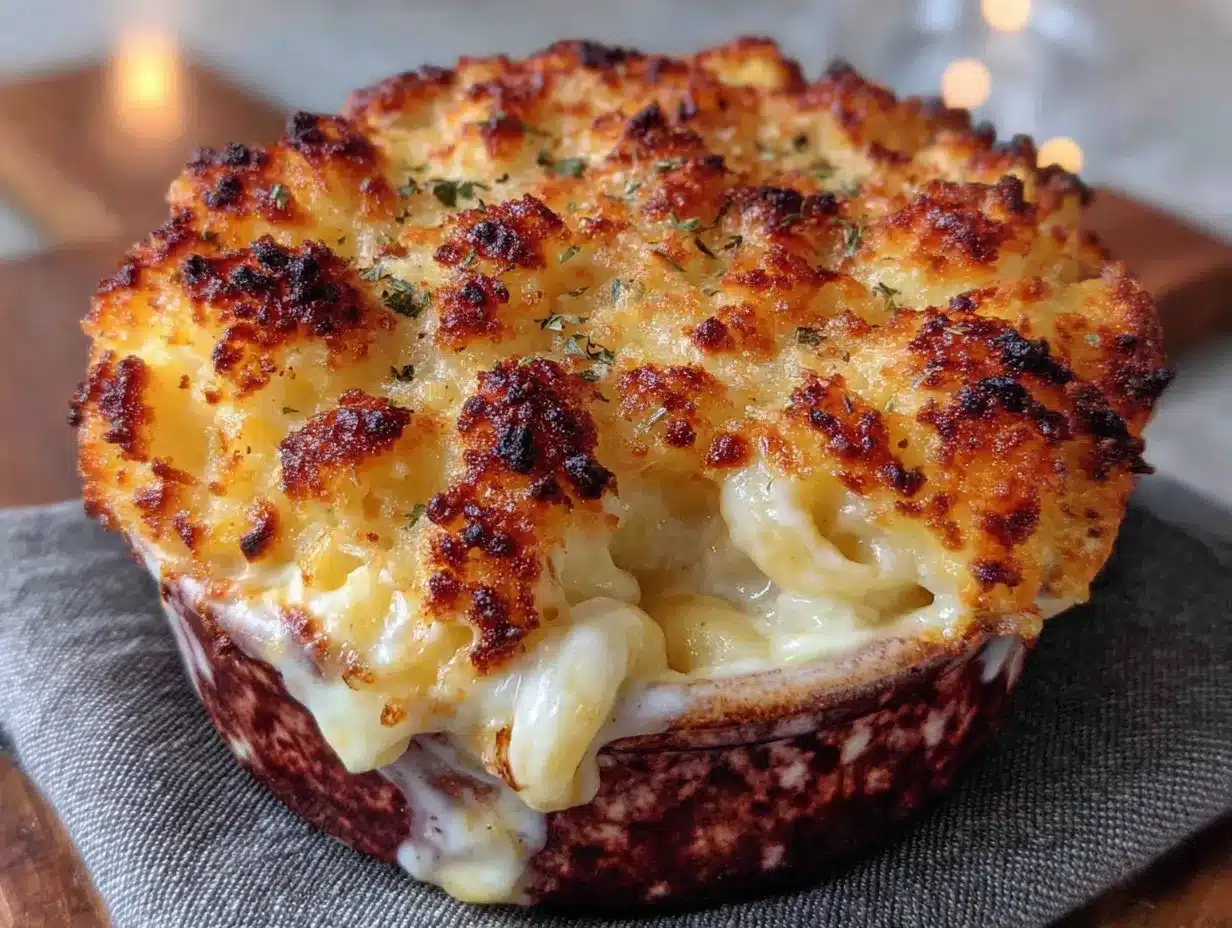
- Make the panko crust. In a small bowl, combine the panko breadcrumbs, melted butter, the remaining 1/4 cup of Parmesan, garlic powder, and salt. Mix with a fork until the breadcrumbs are evenly coated with butter. Sprinkle this mixture evenly over the top of the mac and cheese.
- Bake uncovered for 20-25 minutes if baking immediately. If baking from cold, add 10-15 minutes to the baking time and cover with foil for the first 20 minutes to ensure the center heats through without burning the panko. The top should be golden brown and bubbling around the edges. Let it rest for 5-10 minutes before serving. This rest time is crucial — it lets the sauce set up so you get creamy servings instead of a soupy mess.
Cooking Tips & Techniques
I’ve made every mistake you can imagine with mac and cheese. Here’s what I’ve learned so you don’t have to repeat my failures.
Don’t overcook the pasta. This is probably the most common mistake. If your pasta is fully cooked before it goes in the oven, it will turn into mush by the time the dish is done. Cook it a full minute less than the package directions say. It should have a slight bite to it. Trust me, it will finish cooking in the oven.
Shred your own cheese. I know I said this already, but it’s worth repeating. Pre-shredded cheese has anti-caking agents that prevent it from melting smoothly. Your sauce will be grainy instead of silky. A block of cheese and a box grater take five minutes. It’s worth it.
Warm your milk and cream. Cold liquid added to a hot roux can cause lumps that are nearly impossible to smooth out. I microwave my milk and cream together for about 45 seconds before adding them. It doesn’t need to be hot, just not refrigerator-cold.
Low and slow for the cheese. When you add the cheese to the sauce, keep the heat on low. High heat can cause the cheese to separate and become greasy. Be patient. Let each handful melt fully before adding the next.
Multitasking strategy: Start your pasta water first. While it comes to a boil, shred your cheese. While the pasta cooks, make your roux and start the sauce. By the time the pasta is done, your sauce should be ready to combine. This whole process takes about 25 minutes of active time if you keep moving.
For the crispiest panko crust: Don’t skip the melted butter in the topping. Dry panko will just toast unevenly. The butter helps it brown evenly and adds flavor. Also, don’t press the panko into the mac and cheese. Sprinkle it loosely on top so it stays crunchy.
Variations & Adaptations
This recipe is a great base for experimentation. Here are some variations I’ve tried and loved:
Gluten-Free Version: Use gluten-free pasta (I like the brown rice pasta from Trader Joe’s) and swap the all-purpose flour for a gluten-free all-purpose blend or cornstarch. For the panko, use gluten-free panko breadcrumbs. Everything else stays the same. The texture is slightly different, but it’s still delicious.
Add Some Protein: Stir in 2 cups of cooked, shredded rotisserie chicken or 1 pound of cooked, crumbled bacon before baking. This turns the mac and cheese into a complete meal. I’ve also added leftover pulled pork, and it was incredible. Just make sure your add-ins are fully cooked before mixing them in.
Veggie Boost: Add 1 cup of steamed broccoli florets, sautéed mushrooms, or roasted cherry tomatoes. Fold them in with the pasta and sauce. My kids actually eat broccoli this way because it’s coated in cheese. I consider that a win.
Spicy Kick: Add 1/2 teaspoon of cayenne pepper or a diced jalapeño to the cheese sauce. You can also top the finished dish with sliced pickled jalapeños before adding the panko. The heat cuts through the richness beautifully.
Different Cheese Combos: If you don’t have Gruyère, use gouda or fontina. If you want it extra sharp, use extra-sharp cheddar and skip the mozzarella. I once made this with smoked gouda and cheddar, and it had this incredible smoky flavor that was perfect for a cold night. Feel free to experiment based on what you have.
One personal variation I love: I add a teaspoon of Dijon mustard to the cheese sauce. It doesn’t make it taste like mustard at all. It just adds a subtle tang that brightens up all the rich cheese flavors. Try it once, and you might never go back.
Serving & Storage Suggestions
This mac and cheese is best served hot, straight from the oven. Let it rest for 5-10 minutes after baking so the sauce can set up. Serve it in bowls with a fork and a spoon — you’ll want both for getting every last bit of that crispy panko.
For sides, I love serving this with a simple green salad dressed with lemon vinaigrette. The acidity cuts through the richness of the cheese. Roasted broccoli or green beans also work well. If you’re serving it as a main dish, add a protein like grilled chicken or a simple sausage on the side.
Storage: Leftovers can be stored in an airtight container in the refrigerator for up to 4 days. The panko crust will lose its crunch, but the mac and cheese itself will still be delicious. To reheat, microwave individual portions for 1-2 minutes, stirring halfway through. For the best texture, reheat in the oven at 350°F for 15-20 minutes, covered with foil.
Freezing: This mac and cheese freezes beautifully. Assemble the dish completely but do not bake it. Cover it tightly with foil and then a layer of plastic wrap. Freeze for up to 3 months. To bake from frozen, remove the plastic wrap, cover with foil, and bake at 375°F for 50-60 minutes, removing the foil for the last 10 minutes to crisp the panko. The texture won’t be quite as creamy as fresh, but it’s still a solid weeknight dinner.
One thing I’ve noticed: the flavors actually get better after a day in the fridge. The cheese sauce has time to meld and deepen. So if you can, make this a day ahead. Your future self will thank you.
Nutritional Information & Benefits
Here’s the thing about mac and cheese: it’s comfort food. It’s not health food, and that’s okay. But there are some redeeming qualities to this particular version.
| Nutrient | Per Serving (1/8 of recipe) |
|---|---|
| Calories | 520 |
| Total Fat | 32g |
| Saturated Fat | 19g |
| Cholesterol | 95mg |
| Sodium | 680mg |
| Total Carbohydrates | 38g |
| Dietary Fiber | 2g |
| Sugars | 6g |
| Protein | 22g |
| Calcium | 450mg |
The cheese provides a good amount of calcium and protein. Gruyère is particularly high in calcium and vitamin A. The pasta gives you energy in the form of complex carbohydrates. And honestly, sometimes you need a meal that just feels like a hug. This is that meal.
If you’re watching your sodium, you can use low-sodium cheese and skip the added salt in the sauce. If you need to cut calories, use 2% milk and reduce the butter in the panko topping. But I’ll be honest: this is a recipe for indulgence. I don’t make it every week. I make it when I need something that feels special and satisfying.
Frequently Asked Questions
Can I use a different type of pasta?
Absolutely. While elbows are classic, any short pasta works well. Cavatappi, shells, rotini, or penne are all great choices. Just make sure you cook it al dente, as it will continue cooking in the oven.
Why did my cheese sauce turn out grainy?
Grainy sauce usually happens for one of two reasons: the heat was too high when you added the cheese, or you used pre-shredded cheese. Keep the heat on low and add the cheese gradually. And always shred your own cheese from a block.
Can I make this without the panko crust?
Yes, you can skip the panko topping entirely. The mac and cheese will still be creamy and delicious. If you want a little texture without the breadcrumbs, you can sprinkle extra cheese on top and bake until bubbly.
How do I reheat leftovers without drying them out?
The best method is to add a splash of milk to the leftovers before reheating. This helps restore the creaminess. Reheat in the microwave in 30-second intervals, stirring between each, or in the oven at 350°F covered with foil for about 15 minutes.
Can I double this recipe?
Yes, this recipe doubles easily. Use a larger baking dish or two 9×13 dishes. You may need to increase the baking time by 5-10 minutes. Just keep an eye on it. The panko crust should be golden brown, and the center should be hot and bubbly.
Conclusion
This quick make-ahead four-cheese mac and cheese with panko crust has become my secret weapon for busy weeknights, potlucks, and any time I need dinner to feel special without spending hours in the kitchen. It’s creamy, it’s crunchy, and it’s ridiculously satisfying. The fact that you can assemble it ahead of time and just bake it when you’re ready? That’s the kind of convenience that actually makes a difference on a hectic day.
I love this recipe because it’s forgiving. You can swap cheeses, add vegetables or protein, or double it for a crowd. It works every time, even when you’re rushing. And honestly, that’s the kind of recipe I want in my back pocket. The one that saves dinner and makes everyone happy.
I’d love to hear how yours turns out. Did you add bacon? Swap in a different cheese? Forget to set a timer and bake it a little too long? (Been there.) Drop a comment below and let me know. And if you loved it, share it with a friend who needs a weeknight win. Happy cooking!
Pin This Recipe!
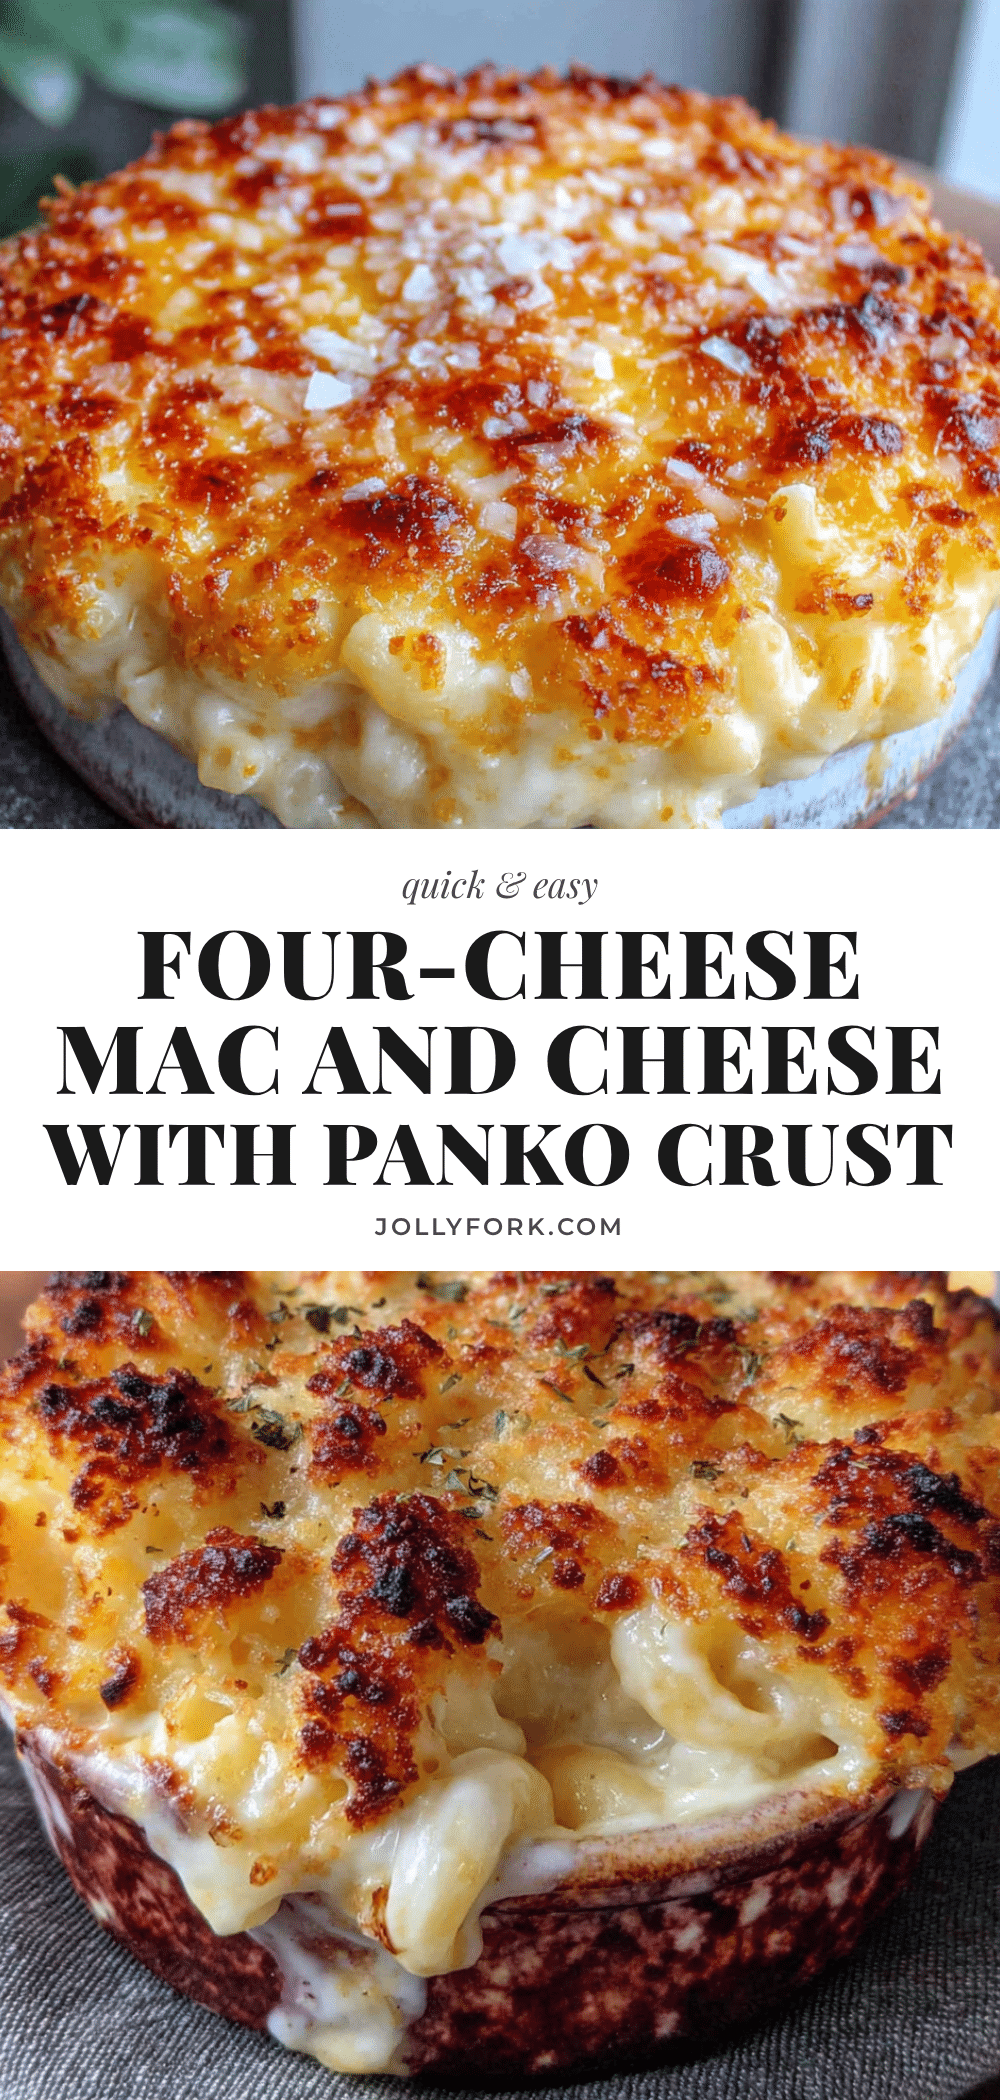
Best Four-Cheese Mac and Cheese with Panko Crust

A quick, make-ahead four-cheese mac and cheese with a crispy panko crust that’s perfect for busy weeknights and potlucks. Creamy, cheesy, and topped with a golden, buttery crunch, this foolproof recipe uses simple ingredients and comes together in about 30 minutes of active time.
- Prep Time: 20 minutes
- Cook Time: 25 minutes
- Total Time: 45 minutes
- Yield: 8 servings 1x
- Category: Main Course
- Cuisine: American
Ingredients
- 1 pound elbow macaroni (or cavatappi, shells, or any short pasta)
- 4 tablespoons unsalted butter
- 1/4 cup all-purpose flour
- 3 cups whole milk, warm
- 1 cup heavy cream
- 1 teaspoon salt (plus more for pasta water)
- 1/2 teaspoon black pepper
- 1/2 teaspoon garlic powder (optional)
- 1/4 teaspoon smoked paprika
- 1 1/2 cups sharp cheddar cheese, shredded
- 1 cup Gruyère cheese, shredded
- 1 cup mozzarella cheese, shredded
- 1/2 cup Parmesan cheese, finely grated
- 1 cup panko breadcrumbs
- 2 tablespoons unsalted butter, melted
- 1/4 cup Parmesan cheese, finely grated
- 1/4 teaspoon garlic powder
- 1/4 teaspoon salt
Instructions
- Preheat oven to 375°F (190°C). Butter a 9×13-inch baking dish.
- Bring a large pot of salted water to a boil. Cook elbow macaroni until al dente, about 7-8 minutes. Drain (do not rinse).
- In a medium saucepan over medium heat, melt 4 tablespoons butter. Whisk in flour and cook for 1-2 minutes until nutty and thick (roux).
- Slowly pour in warm milk and heavy cream, whisking constantly. Cook until thickened, about 3-4 minutes.
- Reduce heat to low. Add salt, pepper, garlic powder, and smoked paprika. Gradually add cheddar, Gruyère, mozzarella, and 1/2 cup Parmesan, stirring until each addition melts completely.
- Taste the sauce and adjust seasoning if needed.
- Combine drained pasta with cheese sauce, stirring until fully coated.
- Transfer mixture to prepared baking dish and spread evenly.
- In a small bowl, mix panko, melted butter, remaining 1/4 cup Parmesan, garlic powder, and salt. Sprinkle evenly over mac and cheese.
- Bake uncovered for 20-25 minutes (if baking immediately) or 30-40 minutes (if baking from cold, covered with foil for first 20 minutes). Top should be golden and edges bubbly.
- Let rest for 5-10 minutes before serving.
Notes
For best results, shred cheese from blocks (pre-shredded has anti-caking agents that affect melting). Warm milk and cream before adding to roux to prevent lumps. Cook pasta 1 minute less than package directions to avoid mushiness. The sauce will thicken as it cools and bakes. For make-ahead, assemble without panko, cover, and refrigerate up to 24 hours; add panko just before baking. Leftovers keep in fridge for 4 days; reheat with a splash of milk. Freezes well for up to 3 months.
Nutrition
- Serving Size: 1/8 of recipe
- Calories: 520
- Sugar: 6
- Sodium: 680
- Fat: 32
- Saturated Fat: 19
- Carbohydrates: 38
- Fiber: 2
- Protein: 22
Keywords: mac and cheese, four-cheese, panko crust, make-ahead, weeknight dinner, potluck, comfort food, cheesy pasta