I was standing in the checkout line at Target last December, completely unprepared for what happened next. Somebody two carts ahead had a peppermint mocha, and the scent drifted back—that sharp, cool hit of mint cutting through the warm chocolate—and suddenly I was seven years old in my Aunt Lena’s tiny kitchen in Portland. She wasn’t actually my aunt, you know. She was my mom’s best friend from college, but she was the kind of person who let you lick the beaters and never once said “don’t make a mess.” I can still see the way her hands moved, flour dusted up to her elbows, a smear of chocolate on her cheek. She was making something I’d never seen before: a chocolate cake with crushed candy canes pressed into the sides, and the whole house smelled like Christmas and magic and possibility. I sat on a wobbly stool and watched her, mesmerized, while she told me stories about her own grandmother who used to make peppermint bark from scratch every holiday season. I didn’t know then that I was filing away a sensory memory I’d spend the next thirty years trying to recreate.
Honestly, I forgot about that afternoon for a long time. Life got busy, I moved cities a few times, and somewhere along the way I stopped making fancy cakes for no reason. But that peppermint mocha smell in the checkout line—it hit me like a wave, and I stood there holding my basket with a bag of frozen peas and a box of pasta, blinking back something I couldn’t quite name. The next day I called my mom and asked if she remembered Aunt Lena’s peppermint chocolate cake. She laughed and said, “Oh honey, that wasn’t a recipe. She just threw things together.” That’s when I knew I had to figure it out myself.
This Best Peppermint Bark Chocolate Bundt Cake is the result of about fourteen attempts over two holiday seasons. The first one was too dry. The third one had the mint flavor so strong it tasted like toothpaste. The seventh one collapsed coming out of the pan, and I may have sat on my kitchen floor eating the crumbs with my fingers while “It’s a Wonderful Life” played in the background. But the twelfth one—that was the one. That was the cake that made me close my eyes after the first bite, because for just a second, I was seven again, sitting on that wobbly stool, watching Aunt Lena’s hands work their magic. Maybe you’ve had that feeling, where a taste brings back a whole person you thought you’d forgotten. That’s what this cake does. It’s not just dessert. It’s a time machine.
Why You’ll Love This Recipe
Let me tell you why this particular Bundt cake has earned a permanent spot in my holiday baking rotation. I’ve tested this recipe more times than I care to admit, and every single time, it delivers that perfect balance of rich chocolate and cool peppermint without overwhelming either flavor. The texture is what gets people every time—moist, tender, with a crumb that holds together beautifully when you slice it.
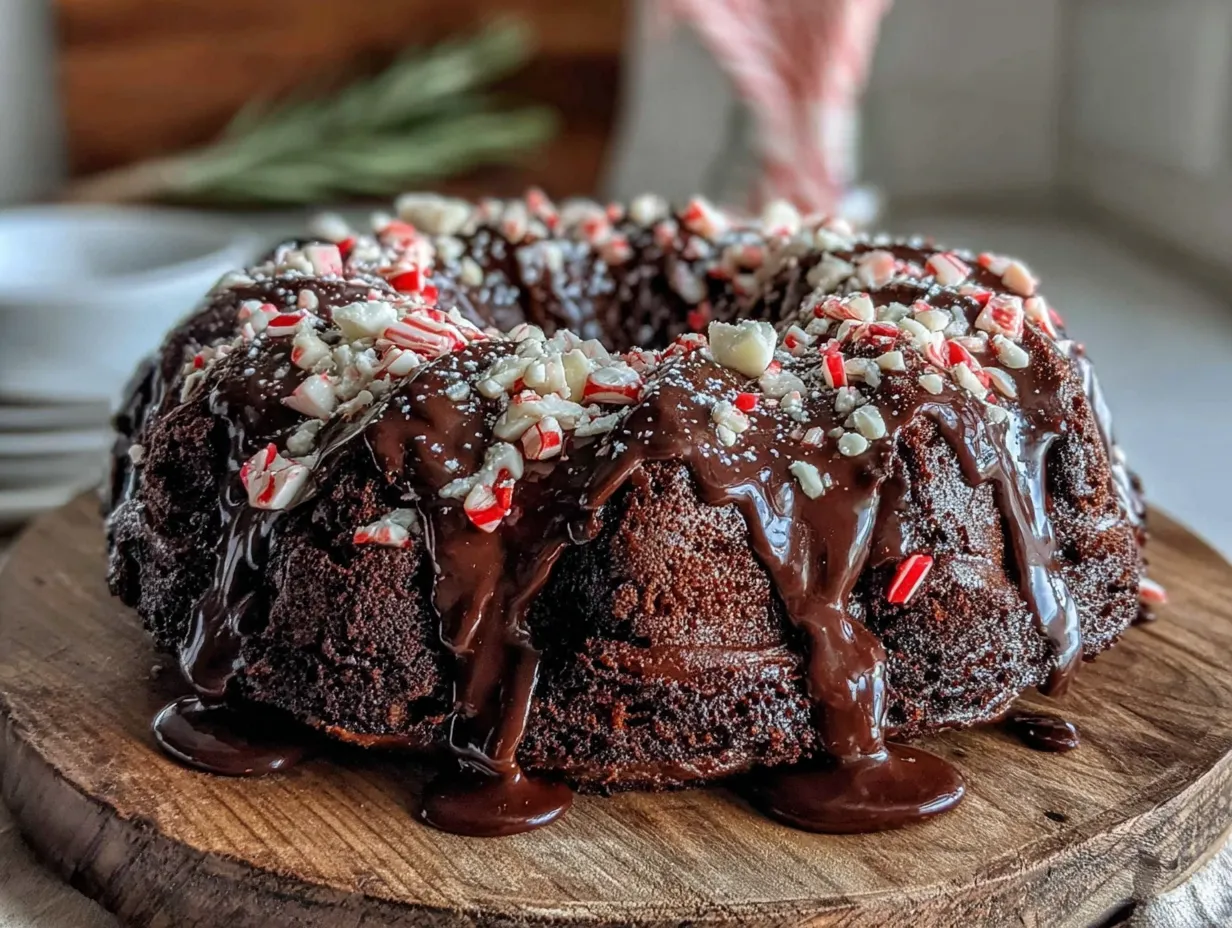
- Show-Stopping Presentation : The crushed candy cane topping and glossy chocolate glaze make this cake look like it belongs on a magazine cover. Your guests will think you spent hours on decorations when really it takes about ten minutes.
- Perfect for Holiday Gatherings : This cake feeds a crowd (12-16 generous slices) and actually tastes better the day after you make it, which means you can bake it ahead and focus on hosting.
- Simple Ingredients : Nothing fancy here—cocoa powder, butter, sugar, eggs, and peppermint extract. You probably already have most of these in your pantry.
- Foolproof Technique : I’ve included all the little tricks I learned the hard way, like how to properly grease a Bundt pan and why you should never skip the room temperature eggs step.
- Crowd-Pleaser Guaranteed : I brought this to three different holiday parties last year and got asked for the recipe every single time. Kids love the candy cane crunch, adults love the sophisticated mint-chocolate combo.
What makes this recipe different from every other chocolate peppermint cake out there is the double hit of peppermint—you get it in the batter and again in the glaze, but it’s balanced so neither flavor dominates. I spent a lot of time figuring out the exact ratio so the mint tastes festive and fresh, not medicinal. Plus, the sour cream in the batter gives it that bakery-level moisture that keeps people coming back for seconds.
This is the kind of cake that makes you look like a hero with minimal effort. It’s perfect for impressing your in-laws, winning the office potluck, or just treating yourself on a snowy December afternoon. Honestly, it’s comfort food dressed up in its holiday best.
What Ingredients You Will Need
This recipe uses simple, pantry-friendly ingredients to create something that tastes anything but ordinary. Each component plays a specific role in building that rich chocolate flavor, tender crumb, and festive peppermint finish.
For the Cake
- 2 cups all-purpose flour (I use King Arthur Flour for consistent results—it gives the cake structure without making it dense)
- 3/4 cup unsweetened cocoa powder (Look for Dutch-process cocoa if you can find it; it gives a deeper, more mellow chocolate flavor. Hershey’s Special Dark works beautifully too)
- 1 1/2 teaspoons baking powder
- 1/2 teaspoon baking soda
- 1 teaspoon salt (Don’t skip this—salt makes the chocolate taste more chocolatey)
- 1 cup unsalted butter, softened to room temperature (I leave mine out for about an hour before starting. Cold butter won’t cream properly and your cake will be dense)
- 2 cups granulated sugar
- 4 large eggs, room temperature (Put them in a bowl of warm water for 5 minutes if you forgot to take them out ahead of time)
- 1 tablespoon vanilla extract (Real vanilla, please—the imitation stuff has an artificial aftertaste that doesn’t play well with mint)
- 1 teaspoon peppermint extract (I recommend Nielsen-Massey or LorAnn brands. Start with less if you’re sensitive to mint flavor—you can always add more)
- 1 cup sour cream, room temperature (Full-fat works best here. The sour cream adds moisture and a slight tang that balances the sweetness)
For the Peppermint Glaze
- 2 cups powdered sugar, sifted (Sifting prevents lumps that’ll make your glaze look speckled)
- 3 tablespoons milk (Whole milk gives a creamier glaze, but 2% works fine)
- 1/2 teaspoon peppermint extract
- 1/2 cup crushed candy canes or peppermint candies (Put them in a zip-top bag and smash with a rolling pin—it’s oddly satisfying)
Ingredient Tips and Substitutions
If you’re dairy-free, you can substitute the butter with a high-quality vegan butter stick (I like Miyoko’s) and use full-fat coconut cream instead of sour cream. The texture will be slightly different but still delicious. For a gluten-free version, swap the all-purpose flour with a 1:1 gluten-free baking blend that contains xanthan gum—I’ve had good luck with Bob’s Red Mill. Just be aware the cake might be a touch more delicate when you flip it out of the pan.
One thing I learned the hard way: don’t use mint extract instead of peppermint extract. Mint extract is usually spearmint, which tastes more like toothpaste or gum. Peppermint extract is the one you want for that classic candy cane flavor. Also, if you’re using candy canes that have been sitting in your pantry since last Christmas, make sure they still smell fresh and minty. Stale candy canes add nothing but crunch.
Equipment Needed
You don’t need a professional bakery setup to pull this off, but having the right tools makes the process so much smoother. Here’s what you’ll need:
- 10-12 cup Bundt pan (I use a Nordic Ware classic Bundt pan—it’s worth the investment because it distributes heat evenly and releases cakes beautifully. If you’re using an older pan, you might need extra greasing love)
- Stand mixer or hand mixer (You can absolutely do this by hand with a whisk and some elbow grease, but a mixer makes creaming the butter and sugar much easier)
- Large mixing bowls (At least two—one for dry ingredients, one for wet)
- Whisk for combining dry ingredients
- Rubber spatula for scraping down the bowl and folding in the final bits of batter
- Cooling rack (A wire rack is essential for letting the cake cool properly before glazing)
- Parchment paper (I line a baking sheet with it to catch glaze drips—saves so much cleanup)
- Rolling pin or meat mallet for crushing candy canes
- Zip-top bag for containing the candy cane chaos
If you don’t have a Bundt pan, you could make this in two 9-inch round cake pans instead—just reduce the baking time to about 25-30 minutes and keep an eye on them. The presentation won’t be as dramatic, but the flavor will still be there. I’ve also made mini Bundt cakes in a 6-cavity pan for gift-giving, and those bake in about 18-22 minutes.
One tip about Bundt pans: don’t use cooking spray with flour in it. I know it seems convenient, but it can leave a gummy residue. Instead, use a pastry brush to coat every nook and cranny with softened butter, then dust with cocoa powder (not flour—cocoa won’t leave white spots on your finished cake). This method has never failed me.
Preparation Method
Alright, let’s get baking. I’ve broken this down into clear steps with all the little details I wish someone had told me the first time I attempted a layered Bundt cake.
- Preheat and prep the pan. Preheat your oven to 350°F (175°C). Generously butter your Bundt pan, making sure you get into all the ridges and crevices. Dust with cocoa powder, tap out the excess, and set aside. This step is non-negotiable—I learned that the hard way when my first Bundt cake left half of itself stuck to the pan.
- Mix the dry ingredients. In a medium bowl, whisk together the flour, cocoa powder, baking powder, baking soda, and salt. Whisking aerates the flour and breaks up any clumps in the cocoa. Set this bowl aside while you work on the wet ingredients.
- Cream the butter and sugar. In your stand mixer fitted with the paddle attachment (or in a large bowl with a hand mixer), beat the softened butter and granulated sugar together on medium speed for 3-4 minutes. You’re looking for a light, fluffy texture—it should look pale and almost doubled in volume. Scrape down the sides and bottom of the bowl once or twice. Don’t rush this step; proper creaming is what gives the cake its tender crumb.
- Add the eggs one at a time. With the mixer on medium-low, add the eggs one at a time, beating well after each addition (about 30 seconds per egg). The batter might look slightly curdled at this point—that’s okay, it’ll come together when you add the dry ingredients. Add the vanilla extract and peppermint extract and beat until combined.
- Alternate the dry ingredients and sour cream. With the mixer on low speed, add about one-third of the flour mixture, then half of the sour cream, then another third of flour, the remaining sour cream, and finally the last third of flour. Mix just until each addition is incorporated—overmixing at this stage develops gluten and makes the cake tough. After the last addition, use your rubber spatula to fold the batter a few times by hand, making sure you scrape the bottom of the bowl where the mixer might have missed.
- Fill the pan. Spoon the batter into your prepared Bundt pan. It should be thick and luscious—almost like a brownie batter. Use your spatula to spread it evenly, and give the pan a gentle tap on the counter to release any air bubbles. Don’t fill the pan more than three-quarters full; this cake rises quite a bit.
- Bake. Place the pan on the middle rack of your preheated oven and bake for 45-55 minutes. Start checking at 45 minutes by inserting a long skewer or toothpick into the thickest part of the cake. If it comes out clean or with just a few moist crumbs, it’s done. The cake should also feel springy when you gently press the top. Every oven runs differently—my old apartment oven took a full 55 minutes, but my current one does it in 48.
- Cool in the pan. This is crucial: let the cake cool in the pan on a wire rack for exactly 15 minutes. Not 10, not 20. Fifteen minutes gives the structure enough time to set without sticking. After 15 minutes, place your cooling rack upside down on top of the pan, then carefully flip the whole thing over. Lift the pan off gently. If any bits stick, just press them back into place—you’ll cover them with glaze anyway.
- Cool completely. Let the cake cool completely on the rack, about 1-2 hours. Don’t even think about adding the glaze while the cake is still warm—it’ll slide right off and pool around the bottom. I speak from sticky experience.
- Make the glaze. While the cake cools, sift the powdered sugar into a medium bowl. Add the milk and peppermint extract and whisk until smooth. The glaze should be thick but pourable—if it’s too thick, add another teaspoon of milk. If it’s too thin, add a bit more powdered sugar.
- Glaze and decorate. Place the cooled cake on a serving plate or cake stand. Pour the glaze slowly over the top, letting it drip down the sides in natural-looking rivulets. While the glaze is still wet, sprinkle the crushed candy canes all over the top. Work quickly—the glaze sets in about 5 minutes. Let the glaze set completely before serving, about 30 minutes.
Cooking Tips & Techniques
After making this cake more times than I care to count, I’ve collected a few tricks that make the difference between a good cake and a spectacular one. Here’s what I’ve learned:
Temperature matters more than you think. I cannot stress this enough—your butter, eggs, and sour cream all need to be at room temperature. Cold ingredients don’t emulsify properly, which means your batter will be lumpy and your cake will have a dense, uneven crumb. If you forgot to take things out of the fridge, here’s my cheat: cut the butter into small cubes and microwave for 5-7 seconds, submerge the eggs (still in their shells) in warm water for 5 minutes, and let the sour cream sit on the counter while you prep your pan. It’s not perfect, but it works in a pinch.
The peppermint extract trap. Peppermint extract is potent stuff. I once added a full teaspoon to a test batch and the cake tasted like a candy cane exploded in my mouth—not in a good way. One teaspoon in the batter is plenty. If you’re nervous, start with 3/4 teaspoon. You can always add more to the glaze, but you can’t take it out of the baked cake.
Don’t overmix the batter. I know it’s tempting to keep beating until everything looks perfectly smooth, but overmixing develops the gluten in the flour and makes your cake tough and rubbery. Mix just until the flour disappears into the batter, then stop. A few small lumps are totally fine—they’ll bake out.
The cooling rack trick. When you flip the cake out of the pan, let it cool completely on a wire rack with the bottom (the flat part) facing up. This lets air circulate around the whole cake and prevents the bottom from getting soggy. Plus, it makes glazing easier because you’re working with a flat surface.
My biggest failure. The time I tried to rush the cooling process by putting the cake in the refrigerator? Don’t do it. The sudden temperature change made the cake shrink unevenly and crack right down the middle. It still tasted fine, but it looked like a geological disaster. Patience, my friends. Patience.
Variations & Adaptations
This recipe is wonderfully adaptable, and I’ve tried several variations over the years. Here are some of my favorites:
White Chocolate Peppermint Version: Melt 4 ounces of white chocolate and drizzle it over the cake before adding the candy canes. The white chocolate adds a creamy sweetness that pairs beautifully with the mint. I did this for a Christmas brunch and people lost their minds.
Dark Chocolate Intense Version: Use dark cocoa powder (like black cocoa) and add 1/2 cup of mini chocolate chips to the batter. The extra chocolate makes this almost brownie-like in richness. This version is perfect for the serious chocolate lovers in your life.
Gluten-Free Adaptation: Substitute the all-purpose flour with a 1:1 gluten-free baking blend. I’ve tested this with King Arthur Measure for Measure and it works beautifully—just add an extra tablespoon of sour cream to compensate for the drier gluten-free flour.
Dairy-Free Version: Use vegan butter sticks, full-fat coconut cream (not coconut milk—it’s too thin), and a plant-based milk in the glaze. The coconut cream adds a subtle tropical note that actually works surprisingly well with the peppermint.
Mocha Twist: Dissolve 1 tablespoon of instant espresso powder in the vanilla extract before adding it to the batter. The coffee doesn’t make the cake taste like coffee—it just deepens the chocolate flavor and adds a grown-up complexity that’s really lovely.
Mini Bundt Cakes: This batter makes about 8 mini Bundt cakes (bake for 18-22 minutes). They’re perfect for gift-giving or for portion control—though I’ve never met a mini Bundt I didn’t eat in one sitting.
Serving & Storage Suggestions
This cake is at its absolute best served at room temperature. I like to slice it with a serrated knife in gentle sawing motions—a regular knife tends to squish the tender crumb. Each slice should be about 1 inch thick, with a generous cascade of glaze and candy cane crunch on top.
For presentation, I place the cake on a white cake stand and surround it with fresh rosemary sprigs and a few extra candy canes. The green against the dark chocolate and red peppermint is just gorgeous for holiday tables. You could also dust the plate with a little powdered sugar for a snowy effect.
This cake pairs beautifully with:
- Hot cocoa or peppermint mocha coffee
- A scoop of vanilla bean ice cream (the contrast of warm cake and cold ice cream is divine)
- Fresh berries—raspberries or strawberries cut through the richness nicely
Storage: Keep the cake in an airtight container at room temperature for up to 4 days. Do not refrigerate—the cold dries out the cake and makes the glaze crack. If you need to keep it longer, wrap the unglazed cake tightly in plastic wrap and freeze for up to 3 months. Thaw overnight at room temperature, then glaze and decorate before serving.
One thing I love about this recipe: the flavors actually deepen and meld together after a day or two. The peppermint becomes more integrated, and the chocolate gets this almost fudge-like quality. So if you can resist eating it immediately, it’s even better on day two. I’ve been known to sneak a slice for breakfast on December 26th—no judgment, please.
Nutritional Information & Benefits
Let’s be honest—this is a treat, not a health food. But here’s the approximate nutritional breakdown per slice (based on 16 servings):
| Nutrient | Amount per Slice |
|---|---|
| Calories | 385 |
| Total Fat | 18g |
| Saturated Fat | 11g |
| Carbohydrates | 54g |
| Sugar | 38g |
| Protein | 5g |
| Fiber | 2g |
On the brighter side, this cake does contain some actual nutritional benefits. The cocoa powder is rich in antioxidants called flavonoids, which have been linked to heart health and reduced inflammation. The eggs provide high-quality protein and essential vitamins like B12 and D. And the sour cream adds calcium and probiotics. So while I wouldn’t call this health food, it’s not empty calories either—it’s a celebration cake made with real, whole ingredients.
If you’re watching your sugar intake, you could reduce the granulated sugar to 1 3/4 cups—the cake will be slightly less sweet but still delicious. I’ve also made a version with coconut sugar, and while it changes the color and flavor profile slightly, it’s a nice option for those who prefer less refined sweeteners.
Conclusion
This Best Peppermint Bark Chocolate Bundt Cake has become my holiday signature, and I hope it becomes yours too. It’s the cake I bring to every Christmas party, the one my friends text me about in November asking “are you making that peppermint thing again?”, the one that makes people close their eyes and smile. And every time I make it, I think about Aunt Lena and her flour-dusted hands and that wobbly stool in her tiny kitchen. I think about how food can carry memories we didn’t even know we were holding.
What I love most about this recipe is how forgiving it is. You don’t need to be a professional baker to pull it off. You just need good ingredients, a little patience, and the willingness to get your hands messy. And honestly, even if your first attempt isn’t perfect—if the glaze runs too thin or a few candy canes fall off—it’s still going to be delicious. Because at the end of the day, it’s chocolate and peppermint together, and that combination has never let anyone down.
I’d love to hear how yours turns out. Did you try a variation? Did your family fight over the last slice? Drop a comment below and let me know—I read every single one, and nothing makes me happier than knowing someone else is making this cake their own. Happy baking, friends. May your kitchen smell like peppermint and your heart feel full.
Frequently Asked Questions
Can I use mint extract instead of peppermint extract?
I wouldn’t recommend it. Mint extract is usually spearmint-based, which has a different flavor profile—it’s greener and more herbal, almost like toothpaste. Peppermint extract gives you that clean, cool, candy cane taste that’s perfect for this cake.
Why did my Bundt cake stick to the pan?
This usually happens for one of three reasons: the pan wasn’t greased thoroughly enough (especially in those decorative ridges), you didn’t let it cool for the full 15 minutes before flipping, or the pan has some wear and tear. I recommend using a pastry brush to get butter into every crevice, then dusting with cocoa powder instead of flour.
Can I make this cake ahead of time?
Absolutely. In fact, the flavor improves after a day. Bake the cake, let it cool completely, wrap it tightly in plastic wrap, and store at room temperature. Make the glaze and add the candy canes the day you plan to serve it—the candy canes will lose their crunch if they sit too long in the glaze.
How do I crush candy canes without making a huge mess?
Put the candy canes in a sturdy zip-top bag, squeeze out all the air, and seal it. Then wrap the bag in a kitchen towel (this muffles the sound and contains any escaping pieces) and go to town with a rolling pin or the bottom of a heavy skillet. You’ll get fine dust and small chunks—perfect for decorating.
Can I freeze this cake?
Yes, but freeze it before glazing. Wrap the completely cooled, unglazed cake in a layer of plastic wrap, then a layer of aluminum foil, and freeze for up to 3 months. When you’re ready to serve, thaw it overnight in the refrigerator, bring it to room temperature, then glaze and decorate. The texture will be just as moist as the day you baked it.
Pin This Recipe!
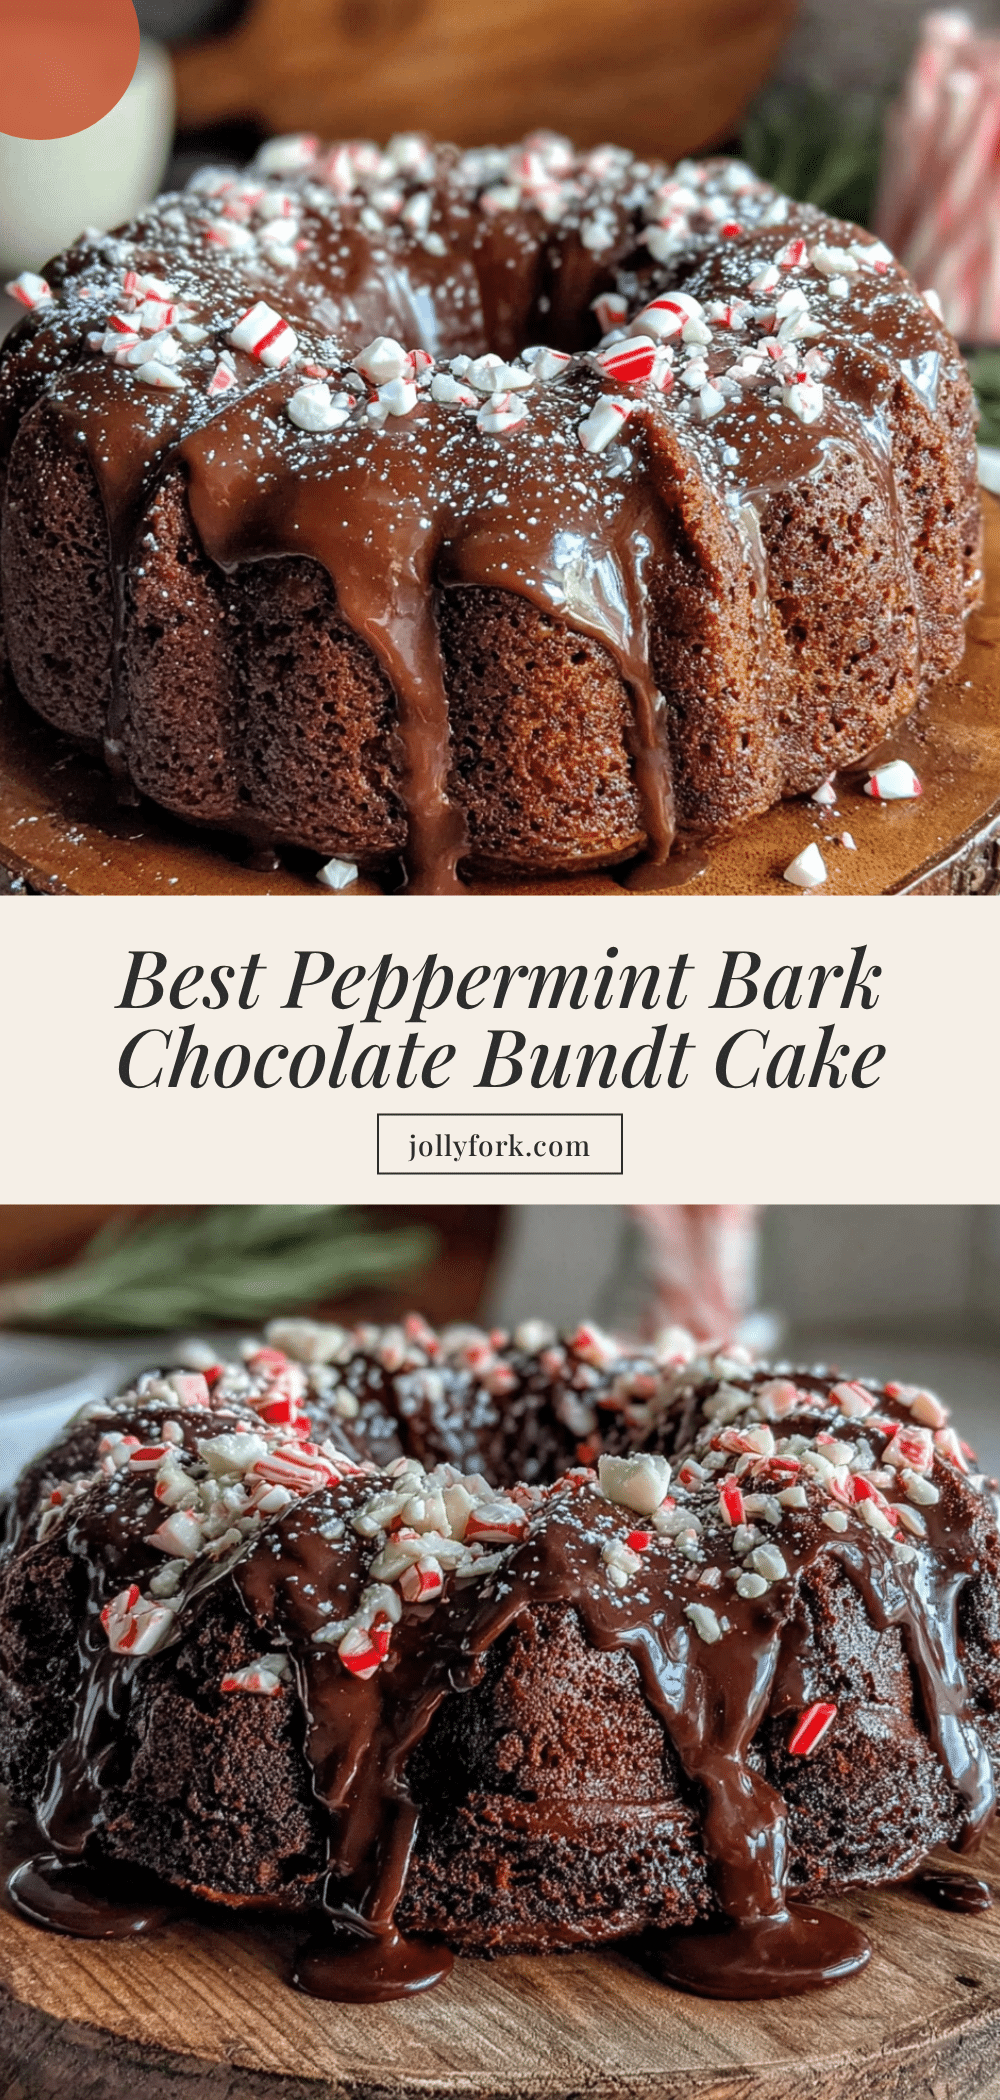
Best Peppermint Bark Chocolate Bundt Cake Recipe
This rich, moist chocolate Bundt cake is infused with cool peppermint and topped with a glossy peppermint glaze and crushed candy canes. It’s a show-stopping holiday dessert that tastes like a time machine to childhood Christmases.
- Prep Time: 20 minutes
- Cook Time: 50 minutes
- Total Time: 1 hour 10 minutes
- Yield: 16 servings 1x
- Category: Dessert
- Cuisine: American
Ingredients
- 2 cups all-purpose flour
- 3/4 cup unsweetened cocoa powder (Dutch-process preferred)
- 1 1/2 teaspoons baking powder
- 1/2 teaspoon baking soda
- 1 teaspoon salt
- 1 cup unsalted butter, softened to room temperature
- 2 cups granulated sugar
- 4 large eggs, room temperature
- 1 tablespoon vanilla extract
- 1 teaspoon peppermint extract
- 1 cup sour cream, room temperature
- 2 cups powdered sugar, sifted
- 3 tablespoons milk (whole milk preferred)
- 1/2 teaspoon peppermint extract (for glaze)
- 1/2 cup crushed candy canes or peppermint candies
Instructions
- Preheat oven to 350°F (175°C). Generously butter a 10-12 cup Bundt pan, dust with cocoa powder, and set aside.
- In a medium bowl, whisk together flour, cocoa powder, baking powder, baking soda, and salt.
- In a stand mixer with paddle attachment, beat butter and sugar on medium speed until light and fluffy, about 3-4 minutes.
- Add eggs one at a time, beating well after each addition. Mix in vanilla and peppermint extract.
- With mixer on low, add dry ingredients and sour cream alternately, beginning and ending with dry ingredients. Mix just until combined. Fold batter a few times by hand.
- Spoon batter into prepared pan, spreading evenly. Tap pan on counter to release air bubbles.
- Bake for 45-55 minutes, until a skewer inserted in center comes out clean or with a few moist crumbs.
- Cool in pan on a wire rack for exactly 15 minutes. Invert onto rack and cool completely, about 1-2 hours.
- For glaze: Sift powdered sugar into a bowl. Add milk and 1/2 teaspoon peppermint extract, whisk until smooth.
- Place cooled cake on serving plate. Pour glaze over top, letting it drip down sides. Immediately sprinkle with crushed candy canes. Let set 30 minutes before serving.
Notes
Use peppermint extract, not mint extract. Room temperature ingredients are crucial for proper emulsification. Let cake cool exactly 15 minutes before inverting. Glaze sets quickly, so add candy canes immediately. Cake tastes even better the next day.
Nutrition
- Serving Size: 1 slice
- Calories: 385
- Sugar: 38
- Sodium: 280
- Fat: 18
- Saturated Fat: 11
- Carbohydrates: 54
- Fiber: 2
- Protein: 5
Keywords: peppermint bark, chocolate bundt cake, holiday cake, peppermint chocolate cake, Christmas cake, bundt cake


