My neighbor Jen wasn’t trying to impress anyone. I’d stopped by to borrow a whisk—mine had gone missing in a kitchen drawer black hole—and something stopped me cold at her front door. The smell. That deep, dark, almost sinful scent of melting chocolate mixed with something warm and buttery. It hit me before I even got inside, and I stood there for a second like a total weirdo, just breathing it in.
Jen opened the door with a dish towel over her shoulder, and there it was on her counter. Two little ramekins, still steaming. She shrugged when I asked what she was making. “Oh, just a quick dessert. The kids are in bed and I wanted something chocolate.” Just a quick dessert. Like she hadn’t just created the most intoxicating aroma I’d smelled in months. Maybe you’ve been there—you walk into someone’s kitchen and they’re casually making something you’ve spent years trying to perfect, and they act like it’s no big deal.
I practically interrogated her while she handed me the whisk (which she’d been using, honestly, it was still wet). She walked me through it in about thirty seconds, half distracted, wiping down the counter. Butter, chocolate, eggs, sugar, flour. That’s it. Five minutes of prep, twelve minutes in the oven. I went home that night and made it myself, and let me tell you—I’ve never looked back. This quick molten chocolate lava cake for two is the kind of recipe that feels like a secret. It’s too easy to be this good, but here we are.
Why You’ll Love This Recipe
Let’s be real for a second. Most lava cake recipes sound amazing but end up being a project. You need a double boiler, precise timing, and a whole lot of patience. This one? Not even close. I’ve tested this version at least a dozen times (poor me, right?) and it works every single time. Here’s why you’ll fall for it:
- Ready in under 20 minutes — From “I need chocolate now” to fork in hand is about 17 minutes flat. That’s faster than ordering delivery.
- Just a handful of ingredients — You probably have everything already. Butter, eggs, sugar, flour, and chocolate chips. No weird extracts or specialty flours.
- Perfect for date night in — Or a Tuesday night when the kids are finally asleep. It’s portioned for two, so no leftovers tempting you at midnight.
- Foolproof method — No water baths, no complicated folding techniques. Just mix, pour, and bake.
- Restaurant-quality results — That first spoonful cracking through the cakey exterior into the warm, flowing center? Pure magic. You’ll feel like a pastry chef.
What makes this version different from all the others? I spent way too long perfecting the ratios so you get that perfect molten center without any guesswork. The batter comes together in one bowl, and I’ve figured out the exact baking time that gives you a set edge with a gooey middle. No more overbaked lava cakes that end up as sad chocolate muffins. This is the real deal, and it’s designed for people who want maximum payoff with minimum effort.
What Ingredients You Will Need
This recipe uses simple, everyday ingredients to create something that tastes anything but ordinary. The magic happens when these basic pantry staples come together in just the right proportions. Here’s what you’ll need:
For the Lava Cakes
- 4 tablespoons unsalted butter — Use good quality butter here since it’s a star ingredient. I prefer Kerrygold or Plugrà for the richness. Salted butter works too, just skip the added salt.
- 1/3 cup semi-sweet chocolate chips — Or chopped chocolate bars. I’ve used Ghirardelli and Nestlé Toll House with great results. Dark chocolate (60-70%) gives a deeper flavor, but milk chocolate works if you prefer it sweeter.
- 1 large egg + 1 egg yolk — Room temperature is ideal. The extra yolk gives that rich, fudgy texture that makes lava cake so indulgent. If you forget to set them out, place the eggs in warm water for 5 minutes.
- 1/4 cup granulated sugar — Regular white sugar works perfectly. You can reduce it to 3 tablespoons if you’re using sweeter chocolate.
- 2 tablespoons all-purpose flour — Just enough to give the cake structure without making it heavy. For gluten-free, use a 1:1 gluten-free flour blend.
- 1/4 teaspoon vanilla extract — Pure vanilla makes a difference, but imitation works in a pinch.
- Pinch of salt — Enhances the chocolate flavor. Skip if using salted butter.
For Serving (Optional but Highly Recommended)
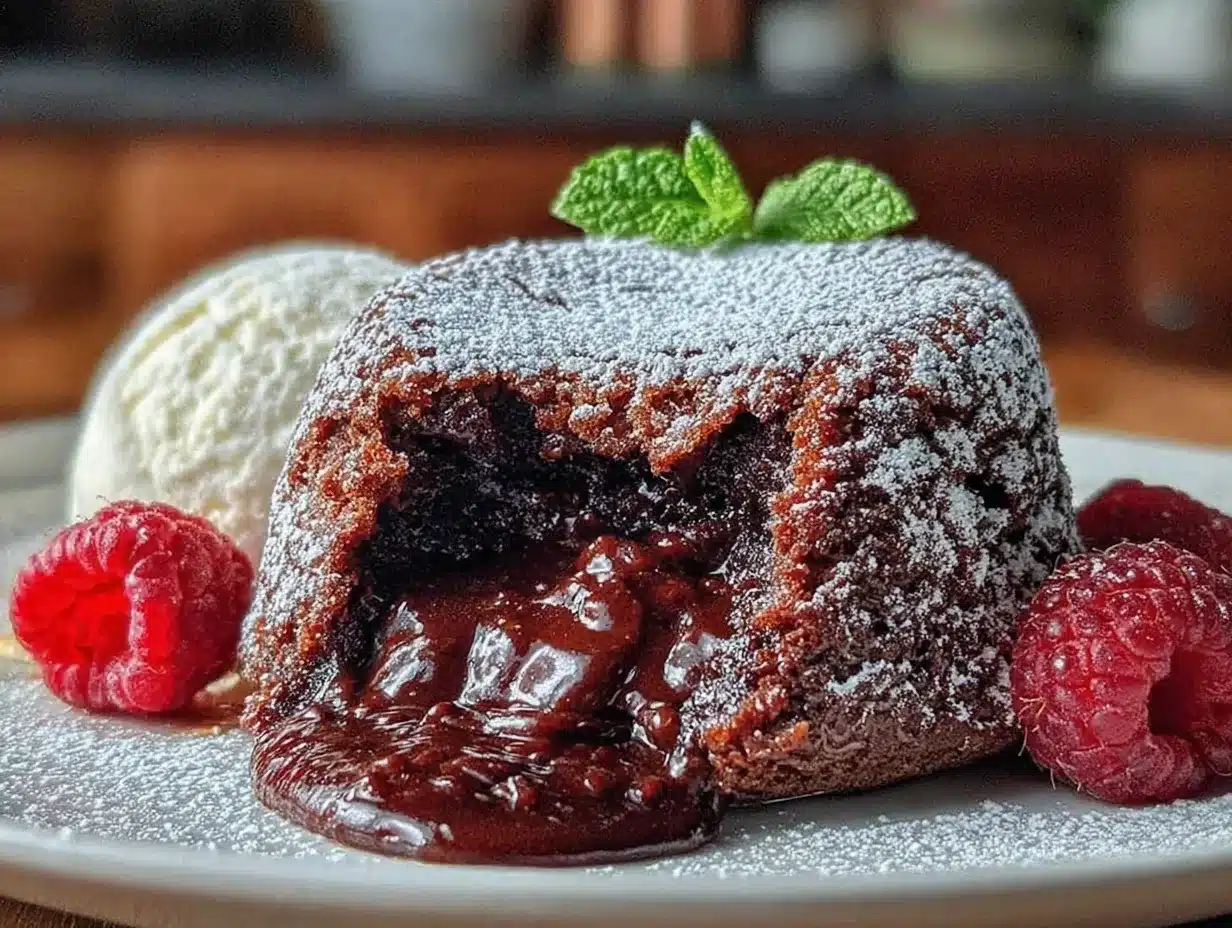
- Powdered sugar — For dusting. Makes it look fancy with zero effort.
- Vanilla ice cream — The cold creaminess against warm chocolate is a match made in heaven.
- Fresh raspberries or strawberries — The tartness cuts through the richness beautifully.
One thing I’ve learned the hard way—don’t skimp on the chocolate quality. I tried this once with generic store-brand chips and the flavor was flat. Spend the extra dollar on a brand you trust. Your taste buds will thank you.
Equipment Needed
The beauty of this recipe is that you don’t need much. Here’s what you’ll want to have on hand:
- Two 6-ounce ramekins — These are the classic lava cake vessel. If you don’t have ramekins, you can use a muffin tin or even small oven-safe bowls. Just adjust the bake time slightly.
- Medium microwave-safe bowl — For melting the butter and chocolate together. A glass measuring cup works great too.
- Small mixing bowl — For whisking the eggs and sugar.
- Whisk — A balloon whisk is ideal, but a fork works in a pinch. I’ve done it both ways.
- Rubber spatula — For scraping every last bit of batter into the ramekins. Waste not, want not.
- Baking sheet — Place the ramekins on a baking sheet for easy handling and to catch any overflow.
- Measuring cups and spoons — Precision matters here, especially with the flour.
If you’re new to lava cakes, I recommend investing in a set of ramekins. They’re cheap (like $10 for a set of four) and suddenly you’re the kind of person who can whip up an impressive dessert anytime. I found mine at a thrift store for two dollars, and they’ve earned their keep a hundred times over.
Preparation Method
Alright, let’s get to it. This is the part where you transform butter, chocolate, and a few other things into something that will make you close your eyes on the first bite. Trust the process, follow these steps, and you’ll be eating lava cake in under 20 minutes.
- Preheat your oven to 425°F (220°C). Get this going first so it’s nice and hot when your batter is ready. Position the rack in the middle of the oven.
- Butter your ramekins generously. Use a little softened butter and coat the entire inside surface, including the bottom. Don’t be shy here—this is what helps the cakes release cleanly. I learned this the hard way after my first lava cake stuck like cement. If you want to be extra sure, dust the buttered ramekins with a teaspoon of cocoa powder or flour, tapping out the excess. Place the ramekins on a small baking sheet.
- Melt the butter and chocolate together. In a medium microwave-safe bowl, combine the 4 tablespoons butter and 1/3 cup chocolate chips. Microwave in 30-second intervals, stirring between each, until smooth and fully melted. This usually takes about 60-90 seconds total. Be careful not to overheat—chocolate burns easily and gets grainy. If you prefer the stovetop method, use a double boiler over simmering water. Set the melted mixture aside to cool slightly while you do the next step.
- Whisk the eggs and sugar. In a separate small bowl, whisk together the egg, egg yolk, and 1/4 cup sugar until thick and pale. This takes about 1-2 minutes of vigorous whisking. You’re looking for a light, ribbony texture that falls off the whisk in a slow drizzle. The color should lighten noticeably. This step is important—it gives the lava cake structure and that delicate crumb.
- Combine the mixtures. Pour the slightly cooled chocolate mixture into the egg mixture. Add the 1/4 teaspoon vanilla and pinch of salt. Fold gently with your spatula until just combined. Don’t overmix or you’ll deflate all that air you just whisked in.
- Add the flour. Sprinkle the 2 tablespoons flour over the batter and fold it in gently. A few streaks of flour are okay—just make sure you don’t see any dry patches. The batter should be thick, glossy, and smell absolutely incredible.
- Divide the batter. Spoon the batter evenly into the two prepared ramekins. It should fill them about 3/4 full. Smooth the tops gently with the back of a spoon. At this point, you can refrigerate the filled ramekins for up to 24 hours if you want to prep ahead. Just add an extra minute to the bake time if baking from cold.
- Bake for exactly 12-14 minutes. Place the baking sheet with ramekins in the preheated oven. Set a timer for 12 minutes and start checking. The cakes are done when the edges are set and puffed up, but the center still jiggles slightly when you gently shake the ramekin. The top should look slightly cracked in places. Every oven runs a little differently—my old oven needed 13 minutes, my current one is perfect at 12. Trust the jiggle test over the timer.
- Let them rest for 1 minute. Remove from the oven and let the ramekins sit on the counter for exactly 60 seconds. This brief rest helps the cakes release from the sides without breaking.
- Unmold and serve immediately. Run a thin knife around the edge of each ramekin to loosen the cake. Place a small plate upside down over the ramekin, then flip it over quickly. Give it a gentle shake—the cake should release cleanly onto the plate. If it sticks, tap the bottom of the ramekin. Dust with powdered sugar, add a scoop of vanilla ice cream, and serve right away. The lava waits for no one!
Cooking Tips & Techniques
I’ve made this quick molten chocolate lava cake for two more times than I can count, and I’ve messed it up plenty along the way. Here’s what I’ve learned so you don’t have to repeat my mistakes.
The jiggle test is your best friend. I cannot stress this enough. The first time I made lava cake, I was so scared of undercooked eggs that I left it in the oven for 16 minutes. What came out was a perfectly baked chocolate muffin—delicious, sure, but not a lava cake. The center should wobble like Jell-O when you gently shake the ramekin. That wobble is your molten center. Trust it.
Don’t overmix the batter. I know it’s tempting to keep stirring until everything is perfectly smooth, but you’ll develop too much gluten and end up with a tough cake. Fold just until the flour disappears. A few lumps are fine—they’ll bake out.
Room temperature eggs matter. Cold eggs can seize the chocolate mixture and give you a lumpy batter. If you forgot to take them out ahead of time, place the eggs in a bowl of warm water for 5 minutes. Problem solved.
Timing is everything. Here’s a pro tip: prep the batter, fill the ramekins, and pop them in the fridge while you eat dinner. Then bake them right before dessert. The cold batter needs about 30 seconds more in the oven, but the contrast between the warm cake and cold ice cream is worth the tiny adjustment.
One batch, two ways. If you want a slightly less molten center (maybe you’re serving someone who’s nervous about “undercooked” cake), bake for 14 minutes instead of 12. You’ll get a cake that’s fully set through the middle but still incredibly moist and fudgy. No judgment here—I’ve made it both ways depending on my mood.
Variations & Adaptations
Once you’ve mastered the basic version, the possibilities are endless. Here are some of my favorite twists:
- Peanut Butter Lava Cake: Add 1 tablespoon of creamy peanut butter to the batter and drop another teaspoon into the center of each ramekin before baking. The peanut butter melts into a second lava layer. Dangerous in the best way.
- Mint Chocolate Version: Add 1/4 teaspoon peppermint extract along with the vanilla. Top with crushed peppermint candies before serving. It’s like a Thin Mint in cake form.
- Gluten-Free Adaptation: Swap the all-purpose flour with a 1:1 gluten-free flour blend. I’ve used Bob’s Red Mill with perfect results. No one will know the difference.
- Vegan Option: Use vegan butter and dairy-free chocolate chips. Replace the eggs with a flax egg (1 tablespoon ground flaxseed mixed with 3 tablespoons water, let sit for 5 minutes). The texture is slightly denser but still deliciously molten.
- Spiced Chocolate: Add 1/4 teaspoon cinnamon and a tiny pinch of cayenne pepper to the dry ingredients. The warmth of the spices plays beautifully with the dark chocolate.
My personal favorite variation? I once added a spoonful of raspberry jam to the center of each ramekin before baking. The tart jam mixed with the molten chocolate was absolutely ridiculous. I’ve made it that way ever since.
Serving & Storage Suggestions
Lava cake is best enjoyed immediately—that’s really the whole point. But let’s talk about how to make the experience even better.
Serving temperature: Serve these warm, straight from the oven. The contrast between the warm cake and cold ice cream is what makes this dessert legendary. If you absolutely must make them ahead, bake them, let them cool completely in the ramekins, then cover and refrigerate. To reheat, microwave each ramekin for about 20 seconds. The center will re-liquify, though it won’t be quite as dramatic as fresh-baked.
What to serve alongside: Vanilla bean ice cream is the classic pairing, but don’t stop there. Try a dollop of whipped cream, a drizzle of salted caramel sauce, or a handful of fresh berries. A dusting of powdered sugar and a sprig of mint makes it look like you tried way harder than you did.
Storage: If you somehow have leftovers (unlikely, but possible), cover the ramekins with plastic wrap and refrigerate for up to 2 days. The cake will firm up completely, but you can reheat it in the microwave for 15-20 seconds to bring back some of the gooeyness. Honestly, I’ve eaten cold lava cake straight from the fridge and it’s still pretty great—like a dense, fudgy brownie.
Make-ahead tip: The unbaked batter can be refrigerated in the ramekins for up to 24 hours. Just cover them with plastic wrap and bake straight from the fridge, adding 1-2 minutes to the baking time. This is a lifesaver when you’re hosting dinner and want dessert to feel effortless.
Nutritional Information & Benefits
Let’s be honest—this is a treat, not a health food. But here’s the breakdown per serving (one lava cake, without ice cream):
- Calories: Approximately 380
- Fat: 24g
- Carbohydrates: 38g
- Protein: 7g
- Sugar: 28g
On the bright side, dark chocolate is rich in antioxidants and flavonoids, which can support heart health. Eggs provide high-quality protein and essential vitamins. And because this recipe is portioned for two, you’re less likely to overindulge compared to a full batch of brownies or a whole cake.
If you’re watching your sugar intake, you can reduce the sugar to 3 tablespoons without compromising the texture too much. For a lower-calorie version, try using a sugar substitute like monk fruit sweetener—I’ve tested it and it works, though the flavor is slightly different.
This recipe is naturally vegetarian and can easily be made gluten-free or vegan with the substitutions mentioned above. It contains dairy, eggs, and gluten in its standard form, so adjust accordingly for allergies.
Conclusion
This quick molten chocolate lava cake for two is the kind of recipe that makes you feel like you’ve gotten away with something. It’s too easy to be this good, too simple to produce something this impressive. But that’s exactly why I keep coming back to it. On nights when I need a little something special—a Tuesday that feels like it’s dragging, a quiet evening that deserves a bit of celebration—this is my go-to.
I love that I can make it without a trip to the store. I love that it takes less time than watching an episode of my favorite show. And I really love that first spoonful, when the warm chocolate lava spills out and mixes with a scoop of melting ice cream. It’s pure comfort, and it’s yours in under 20 minutes.
Give it a try, and don’t be afraid to make it your own. Add a splash of espresso powder, throw in some chocolate chips for extra gooeyness, or just follow the recipe exactly. However you make it, I’d love to hear how it turns out. Drop a comment below and let me know—did the lava flow? Did you sneak a bite before it hit the plate? Tell me everything!
Frequently Asked Questions
Can I make this lava cake in a microwave?
Yes, you can! Divide the batter between two microwave-safe mugs and microwave on high for about 60-90 seconds. The texture won’t be quite as delicate as oven-baked, but it’s perfect when you’re short on time or don’t want to heat up the kitchen.
Why did my lava cake turn out fully cooked inside?
This usually means it baked too long. Every oven runs differently, so start checking at 11 minutes. The cake should jiggle in the center when you shake the ramekin. If it feels firm all the way across, it’s overbaked. Next time, reduce the baking time by 1-2 minutes.
Can I double this recipe?
Absolutely! The recipe scales perfectly for 4, 6, or even 8 servings. Just multiply all ingredients by the number of servings you need. The baking time stays roughly the same—just make sure your ramekins aren’t overcrowded in the oven.
What if I don’t have ramekins?
No problem! Use a standard muffin tin instead. Grease the cups well and fill them about 3/4 full. The bake time will be slightly shorter—start checking at 10 minutes. You can also use small oven-safe bowls or even large coffee mugs.
Can I use milk chocolate instead of semi-sweet?
Yes, but the cake will be significantly sweeter. Reduce the sugar to 2 tablespoons if you make this swap. I personally prefer semi-sweet for a more balanced flavor, but milk chocolate works great if that’s what you have on hand.
Pin This Recipe!
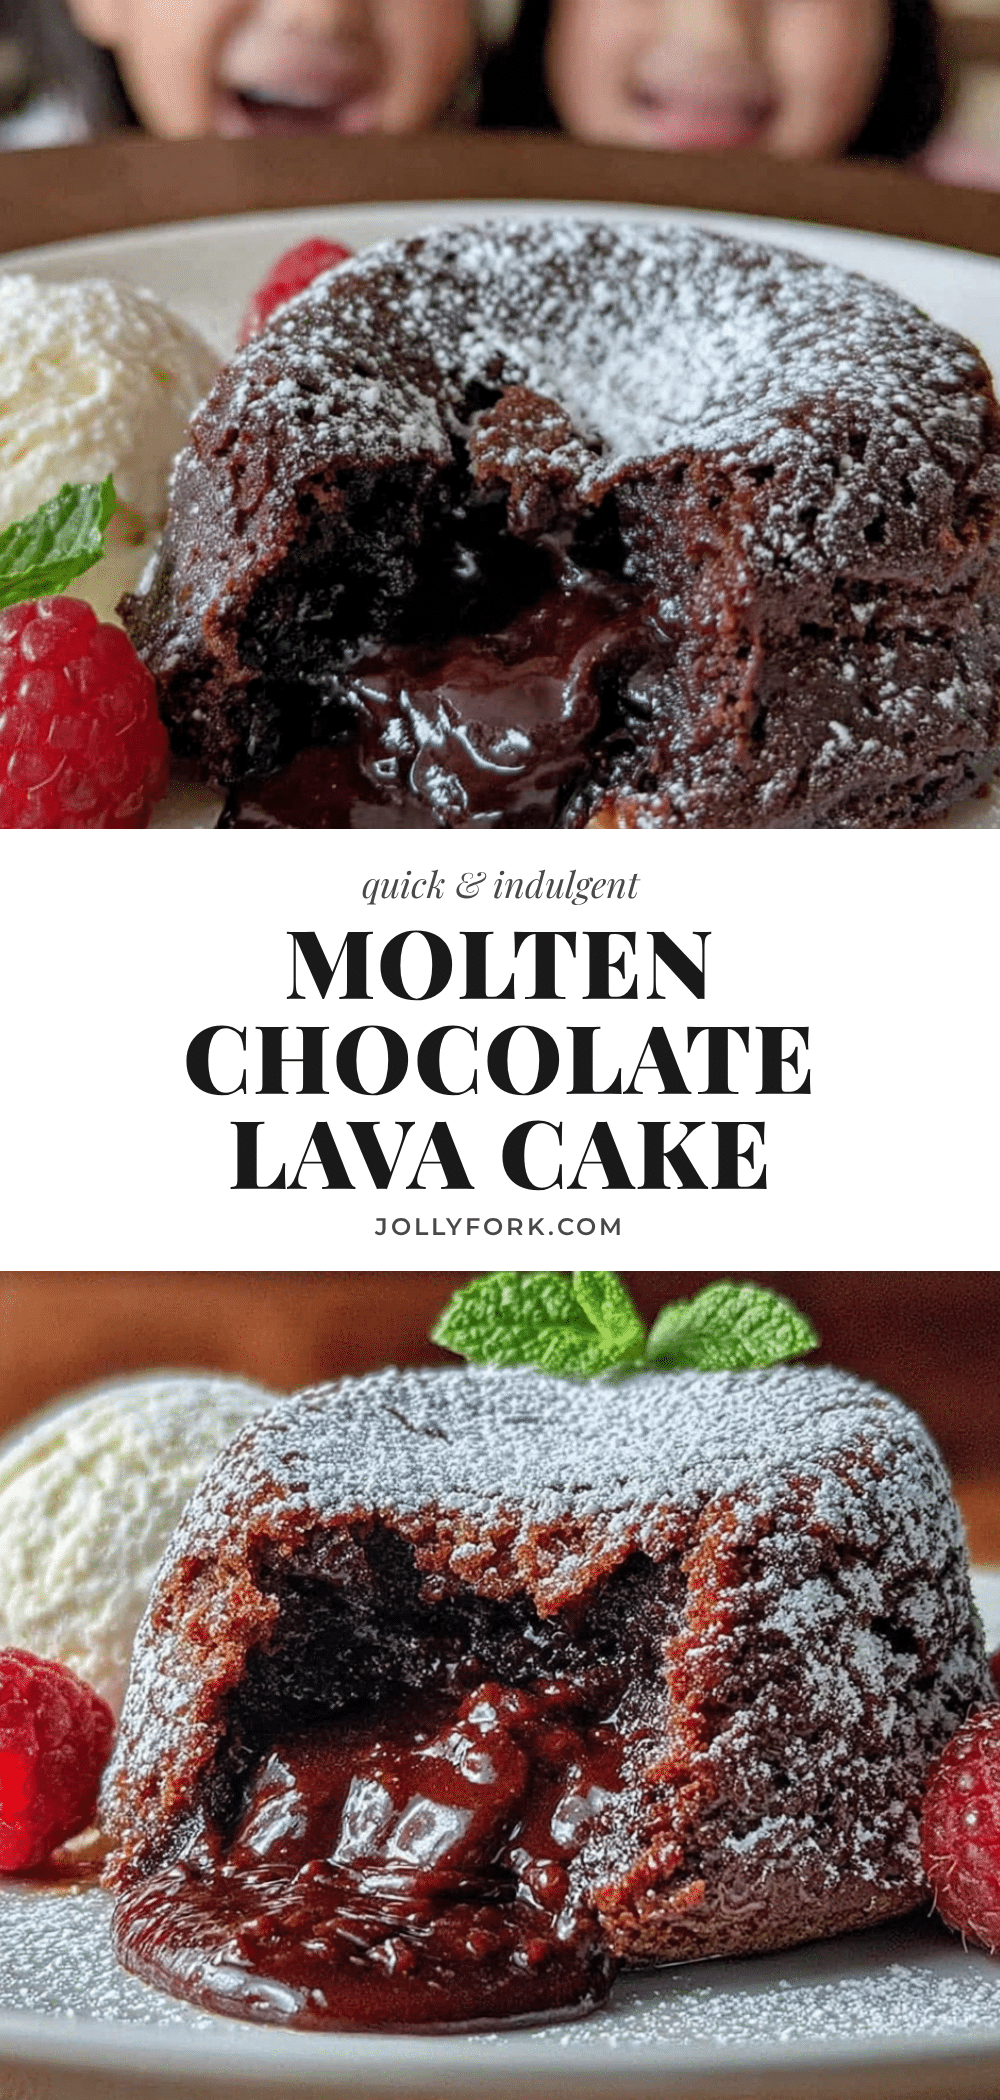
Best Quick Molten Lava Cake for Two
This quick molten chocolate lava cake for two is ready in under 20 minutes with just a handful of ingredients. Perfect for date night or a quiet evening, it delivers a restaurant-quality dessert with minimal effort.
- Prep Time: 5 minutes
- Cook Time: 12 minutes
- Total Time: 17 minutes
- Yield: 2 servings 1x
- Category: Dessert
- Cuisine: American
Ingredients
- 4 tablespoons unsalted butter
- 1/3 cup semi-sweet chocolate chips
- 1 large egg + 1 egg yolk
- 1/4 cup granulated sugar
- 2 tablespoons all-purpose flour
- 1/4 teaspoon vanilla extract
- Pinch of salt
- Powdered sugar (for serving, optional)
- Vanilla ice cream (for serving, optional)
- Fresh raspberries or strawberries (for serving, optional)
Instructions
- Preheat your oven to 425°F (220°C). Position the rack in the middle of the oven.
- Butter your ramekins generously. Coat the entire inside surface, including the bottom. Optionally, dust with cocoa powder or flour. Place the ramekins on a small baking sheet.
- In a medium microwave-safe bowl, combine the 4 tablespoons butter and 1/3 cup chocolate chips. Microwave in 30-second intervals, stirring between each, until smooth and fully melted (about 60-90 seconds total). Set aside to cool slightly.
- In a separate small bowl, whisk together the egg, egg yolk, and 1/4 cup sugar until thick and pale (about 1-2 minutes). The mixture should be light and ribbony.
- Pour the slightly cooled chocolate mixture into the egg mixture. Add the 1/4 teaspoon vanilla and pinch of salt. Fold gently with a spatula until just combined.
- Sprinkle the 2 tablespoons flour over the batter and fold it in gently until no dry patches remain. The batter should be thick and glossy.
- Spoon the batter evenly into the two prepared ramekins, filling them about 3/4 full. Smooth the tops gently.
- Bake for exactly 12-14 minutes. The cakes are done when the edges are set and puffed up, but the center still jiggles slightly when you gently shake the ramekin.
- Remove from the oven and let the ramekins rest on the counter for exactly 60 seconds.
- Run a thin knife around the edge of each ramekin to loosen the cake. Place a small plate upside down over the ramekin, then flip it over quickly. Give it a gentle shake to release the cake. Dust with powdered sugar, add a scoop of vanilla ice cream, and serve immediately.
Notes
The jiggle test is key: the center should wobble like Jell-O when shaken. Don’t overmix the batter. Room temperature eggs are ideal. For make-ahead, refrigerate unbaked batter in ramekins for up to 24 hours, then add 1-2 minutes to bake time. For a less molten center, bake 14 minutes.
Nutrition
- Serving Size: 1 lava cake
- Calories: 380
- Sugar: 28
- Sodium: 150
- Fat: 24
- Saturated Fat: 14
- Carbohydrates: 38
- Fiber: 2
- Protein: 7
Keywords: molten lava cake, chocolate lava cake, quick dessert, easy dessert, lava cake for two, date night dessert


