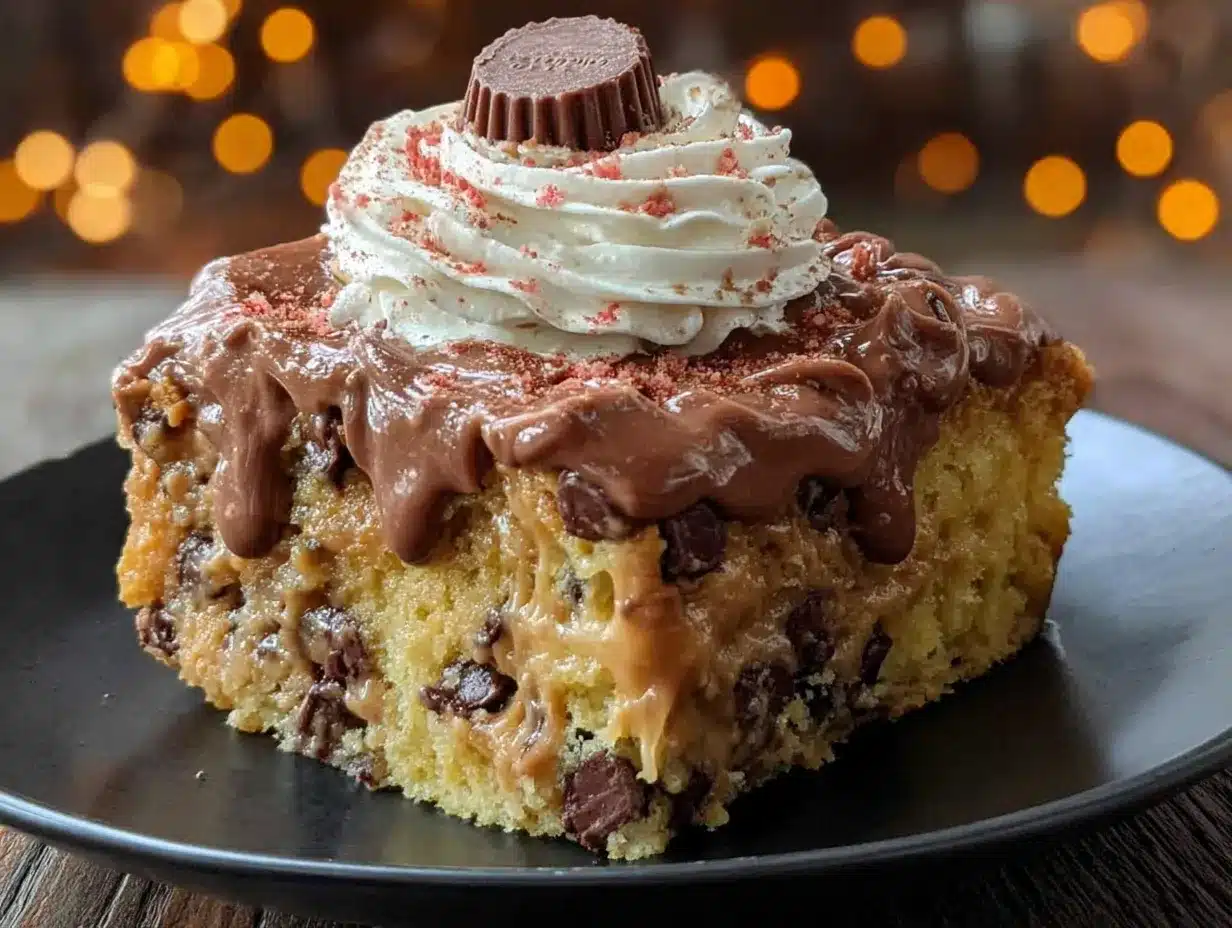
The fork went in clean. Then came that soft crack through the chocolate shell, and the peanut butter filling oozed out the sides. My sister actually stopped mid-sentence, looked down at her plate, and said, “Wait. What is this?” That moment—when a dessert silences a room full of people who were already mid-conversation—that’s the kind of reaction you don’t forget.
I’d been tinkering with poke cakes for a while, but this one felt different. It was a Sunday afternoon, and I had a box of Reese’s cups staring at me from the pantry. You know how that goes—one minute you’re just eating them by the handful, and the next you’re wondering if you could somehow turn them into a cake that tastes like the inside of a peanut butter cup but better. So I grabbed my favorite chocolate cake recipe (the one that always turns out moist, never dry), baked it, and started poking holes. Lots of holes. Then I poured sweetened condensed milk mixed with peanut butter straight into those holes. Let me tell you, watching that silky mixture disappear into the warm cake was honestly a little magical.
I topped it with a simple chocolate ganache and chopped up a few more Reese’s cups for good measure. The cake sat in the fridge overnight because I wanted the flavors to really get cozy together. The next day, when my sister took that first bite, she just closed her eyes. Didn’t say a word for a solid ten seconds. Then she asked for the recipe. And then she asked for another slice. This Ultimate Reese’s Peanut Butter Poke Cake isn’t just another dessert—it’s the one people text you about the next morning, asking when you’re making it again.
Why You’ll Love This Recipe
This cake has earned a permanent spot in my dessert rotation, and here’s why it’ll earn one in yours too.
- Incredibly Moist: The sweetened condensed milk and peanut butter mixture soaks into every single hole, creating a texture that’s almost pudding-like. No dry cake here, ever.
- Two Desserts in One: You get the richness of chocolate cake plus the creamy, salty-sweet magic of a peanut butter cup. It’s like they were meant to be together.
- Simple Ingredients: Nothing fancy. You probably already have most of these in your pantry. No weird extracts or hard-to-find specialty items.
- Perfect for Crowds: This cake feeds a lot of people, and it travels well. I’ve brought it to potlucks, birthday parties, and game day gatherings. It disappears fast every single time.
- Make-Ahead Friendly: Actually, it tastes better the next day. The flavors meld together overnight, and the texture gets even more luscious. You can bake it a day ahead and just add the toppings before serving.
- No Fuss Frosting: The chocolate ganache comes together in minutes with just two ingredients. No waiting for butter to soften, no creaming, no stress.
What sets this recipe apart from other poke cakes is the balance. Most peanut butter chocolate desserts lean way too sweet, but this one has that subtle saltiness from the peanut butter that keeps every bite interesting. Plus, the ratio of cake to filling to topping is just right—you get chocolate, peanut butter, and more chocolate in every forkful. It’s the kind of dessert that makes you close your eyes after the first bite, honestly.
What Ingredients You Will Need
This recipe uses simple, honest ingredients to create something that tastes way more complicated than it actually is. Here’s what you’ll need:
For the Chocolate Cake Base
- 1 box (15.25 oz) chocolate cake mix (I prefer Duncan Hines Devil’s Food or Betty Crocker Super Moist)—the box mix keeps things easy, and honestly, nobody can tell the difference
- 3 large eggs, room temperature
- 1 cup whole milk (instead of water called for on the box—this adds richness)
- ½ cup vegetable oil
- 1 teaspoon vanilla extract (a little extra doesn’t hurt)
For the Peanut Butter Filling
- 1 can (14 oz) sweetened condensed milk
- ¾ cup creamy peanut butter (I use Jif or Skippy—natural peanut butter can separate and get grainy here)
- ½ teaspoon vanilla extract
- Pinch of salt (trust me on this one)
For the Chocolate Ganache Topping
- 1 cup semi-sweet chocolate chips (I like Ghirardelli or Guittard)
- ½ cup heavy cream
For Garnish
- 6-8 full-size Reese’s Peanut Butter Cups, chopped (plus a few extra for snacking, obviously)
- Optional: A drizzle of melted peanut butter and a sprinkle of flaky sea salt
A quick note on peanut butter: stick with the standard processed kind for the filling. Natural peanut butter tends to separate when heated, and the texture can turn grainy or oily. The stabilizers in Jif or Skippy help the filling stay smooth and creamy as it soaks into the cake.
If you’re dairy-free, you can substitute the whole milk with oat milk or almond milk, and use a dairy-free cream for the ganache. Just know the texture will be slightly less rich—still delicious, just different.
Equipment Needed
You don’t need a pastry chef’s kitchen for this one. Here’s what you’ll need:
- 9×13-inch baking pan (metal or glass both work fine; glass may need a few extra minutes of baking time)
- Mixing bowls (one large, one medium, one small)
- Whisk and rubber spatula
- Wooden skewer or the handle of a wooden spoon for poking holes (a fork works too, but the holes are smaller)
- Liquid measuring cup and measuring spoons
- Saucepan (for heating the cream for ganache)
- Cooling rack
- Sharp knife and cutting board (for chopping the Reese’s cups—pop them in the freezer for 10 minutes first, they’ll chop way cleaner)
If you don’t have a saucepan, you can make the ganache in the microwave. Just heat the cream in a microwave-safe bowl for 45 seconds, then pour it over the chocolate chips and let it sit for 2 minutes before stirring.
Preparation Method
Let’s get to the good part. Here’s how to make this cake step by step.
Step 1: Preheat and Prep
Preheat your oven to 350°F (175°C). Grease your 9×13-inch baking pan with butter or non-stick spray. I like to line the bottom with a piece of parchment paper too, just to be safe—this cake is so moist it can stick otherwise.
Step 2: Make the Cake Batter
In a large bowl, combine the chocolate cake mix, eggs, milk, oil, and vanilla extract. Whisk until smooth, about 2 minutes. You want it well combined but don’t overmix—that can make the cake tough. The batter should be thick and glossy. Pour it into your prepared pan and spread it evenly with a spatula.
Step 3: Bake the Cake
Bake for 28-32 minutes, or until a toothpick inserted in the center comes out with just a few moist crumbs. The edges should be pulling away from the pan slightly. Let the cake cool in the pan on a wire rack for 10 minutes. Don’t skip this cooling time—if you poke holes while the cake is too hot, it might fall apart.
Step 4: Poke the Holes
While the cake is still warm (but not scorching hot), use the handle of a wooden spoon or a wooden skewer to poke holes all over the cake. Space them about 1 inch apart. Don’t be shy—poke all the way to the bottom of the pan. The more holes, the more filling gets in there. I usually poke about 40-50 holes. It feels a little aggressive, but that’s the point.
Step 5: Make the Peanut Butter Filling
In a medium bowl, whisk together the sweetened condensed milk, creamy peanut butter, vanilla extract, and a pinch of salt. Microwave for 20-30 seconds if it’s too thick to pour easily—it should be pourable but not hot. Pour the mixture evenly over the warm cake, making sure it fills all those holes. Use a spatula to spread it around gently. You’ll see it sink in and disappear. That’s exactly what you want.
Step 6: Let It Soak
Let the cake sit at room temperature for 20-30 minutes so the filling really soaks in. Then transfer it to the refrigerator to chill for at least 2 hours, or overnight if you have the time. This step is crucial—the filling needs time to set and get all cozy inside the cake.
Step 7: Make the Chocolate Ganache
When the cake is fully chilled, make the ganache. Place the chocolate chips in a small heatproof bowl. Heat the heavy cream in a small saucepan over medium heat until it just starts to simmer—small bubbles around the edges, not a rolling boil. Pour the hot cream over the chocolate chips and let it sit for 2 minutes without stirring. Then gently whisk until smooth and glossy. If it looks separated or grainy, keep whisking—it will come together.
Step 8: Top and Garnish
Pour the ganache over the chilled cake and spread it evenly. While the ganache is still wet, sprinkle the chopped Reese’s cups all over the top. If you want to get fancy, drizzle a little melted peanut butter on top and add a pinch of flaky sea salt. The salt really makes the chocolate and peanut butter pop.
Step 9: Chill Again (Optional but Recommended)
Pop the cake back in the fridge for another 30 minutes to let the ganache set. Then slice, serve, and watch people lose their minds.
Cooking Tips & Techniques
After making this cake about a dozen times (for research purposes, obviously), here are the things I’ve learned the hard way.
Don’t skip the room temperature eggs. Cold eggs can make the batter seize up, leading to a denser cake. Just set them on the counter 30 minutes before you start. If you forget, place them in a bowl of warm water for 5 minutes.
The poke technique matters. I used a fork the first time I made this, and the holes were too small. The filling didn’t soak in properly, and I ended up with pools of peanut butter mixture on top instead of it being distributed throughout the cake. Use a wooden spoon handle or a thick skewer. You want holes that are about ¼ inch wide.
Temperature is everything for the filling. If the cake is too hot when you pour the filling, it’ll just run off the sides. Too cold, and the filling won’t soak in. That 10-minute cooling window is your sweet spot.
Chill time is non-negotiable. I know it’s tempting to skip ahead, but this cake really needs that fridge time. The filling thickens as it chills, and the flavors meld together. I’ve made the mistake of serving it after only an hour, and it was good—but not that good. Overnight is best.
Ganache consistency check. If your ganache is too thick to pour, add a tablespoon more warm cream. If it’s too thin, add a handful more chocolate chips. You want it to be pourable but not runny—like thick melted chocolate.
One more thing—if you’re bringing this to a party, make it the day before. It actually tastes better on day two. The cake gets even more moist, and the flavors deepen. Plus, you’ll be way less stressed on the day of the event.
Variations & Adaptations
This recipe is super forgiving, so feel free to play around with it.
Peanut Butter Lovers’ Version: Add ½ cup of peanut butter chips to the cake batter before baking. They’ll melt into little pockets of peanut butter goodness throughout the cake. I tried this once and honestly, it was almost too much—in the best way possible.
Chocolate Overload: Use a dark chocolate cake mix instead of milk chocolate. Top with dark chocolate ganache and shaved dark chocolate instead of milk chocolate Reese’s cups. The bitterness balances the sweetness beautifully.
Gluten-Free Option: Use a gluten-free chocolate cake mix. I’ve tested this with King Arthur’s gluten-free mix, and it works perfectly. Just follow the package instructions for the batter. Everything else stays the same.
No-Bake Twist: If you don’t want to turn on the oven, use a store-bought chocolate loaf cake or even brownies as the base. Poke holes in them, pour the filling, and proceed as usual. It’s not quite the same, but it works in a pinch.
Holiday Edition: For Christmas, add a teaspoon of peppermint extract to the ganache and top with crushed candy canes along with the Reese’s cups. For Easter, use pastel-colored Reese’s eggs instead of the regular cups.
Serving & Storage Suggestions
This cake is best served cold or at room temperature. I actually prefer it straight from the fridge—the filling firms up and the ganache gets this amazing fudge-like texture. If you’re serving it at a party, let it sit out for about 15 minutes before slicing. It’ll be easier to cut clean slices.
For presentation, I like to wipe the knife clean between each cut. It makes the slices look professional and keeps the ganache from smearing everywhere. Serve each slice with a dollop of whipped cream or a scoop of vanilla ice cream if you’re feeling extra.
This cake pairs beautifully with a cold glass of milk, a hot cup of coffee, or even a glass of red wine (trust me, a bold Zinfandel works with the chocolate). If you’re serving it after a big meal, keep the portions small—this cake is rich.
Storage: Cover the cake tightly with plastic wrap or aluminum foil and store it in the refrigerator for up to 5 days. The cake actually gets more moist as it sits, so day three is often better than day one. Just keep it covered so it doesn’t absorb any fridge odors.
Freezing: This cake freezes beautifully. Wrap the entire cake (or individual slices) tightly in plastic wrap, then in foil, and freeze for up to 3 months. Thaw overnight in the refrigerator before serving. The ganache might lose a little of its shine, but the flavor stays spot-on.
Nutritional Information & Benefits
Let’s be real—this is a dessert, not a health food. But here’s the breakdown if you’re curious.
Per serving (1 slice, based on 12 servings):
- Calories: 480
- Fat: 26g
- Carbohydrates: 58g
- Protein: 9g
- Sugar: 42g
- Fiber: 3g
On the bright side, peanut butter does provide some protein and healthy fats. The chocolate contains antioxidants, and the eggs add a bit of protein too. But honestly, this cake is about indulgence, not nutrition. It’s the kind of dessert you make for special occasions when you want something that feels like a celebration.
If you’re watching your sugar intake, you can reduce the sugar by using a sugar-free cake mix and sugar-free chocolate chips. The sweetened condensed milk is harder to replace, but there are dairy-free, lower-sugar versions available. Just know that the texture and flavor will change.
This recipe contains dairy, gluten, eggs, and peanuts. For a nut-free version, substitute the peanut butter with sunflower seed butter (like SunButter) and use nut-free chocolate. The flavor will be different, but still delicious.
Conclusion
This Ultimate Reese’s Peanut Butter Poke Cake is the kind of dessert that makes people remember you as “the one who brought that amazing cake.” It’s rich, it’s indulgent, and it’s surprisingly easy to make. The combination of moist chocolate cake, creamy peanut butter filling, and silky chocolate ganache is honestly unbeatable.
I love this recipe because it feels special without being complicated. You don’t need to be a pastry chef or own a stand mixer. You just need a box of cake mix, some peanut butter, and a little patience while it chills. The result is a dessert that tastes like you spent all day in the kitchen—when really, most of the work is just waiting.
If you make this cake, I’d love to hear about it. Leave a comment below and let me know how it turned out. Did you add any fun variations? Did your family fight over the last slice? Share your photos on Pinterest and tag me—I love seeing your creations. And if you’re looking for more easy, crowd-pleasing desserts, check out my cozy cinnamon apple cake with caramel drizzle or these pumpkin dump cake with pecan streusel for more fall-inspired sweetness.
Happy baking, friends. Go make something that makes people close their eyes.
Frequently Asked Questions
Can I use homemade chocolate cake instead of a box mix?
Absolutely. If you have a favorite homemade chocolate cake recipe, use it. Just make sure it’s a sturdy cake that can handle being poked and soaked—something like a classic devil’s food cake works great. Avoid anything too delicate or airy, like angel food cake.
Can I make this cake in advance?
Yes, and I actually recommend it. The cake tastes better after it sits overnight in the fridge. You can bake it, poke it, and add the filling a day ahead. Just wait to add the ganache and toppings until a few hours before serving so they stay fresh and pretty.
Why did my ganache turn out grainy?
Grainy ganache usually happens when the cream is too hot or when water gets into the chocolate. Make sure your bowl and utensils are completely dry. If your ganache does seize up, try adding a tablespoon of warm cream and whisking vigorously—sometimes it can be saved.
Can I use crunchy peanut butter instead of creamy?
You can, but the texture will be different. The crunchy bits might not soak into the cake as well, and the filling won’t be as smooth. If you want a little crunch, I’d recommend sticking with creamy peanut butter for the filling and adding chopped peanuts on top instead.
How do I get clean slices?
Use a long, sharp knife and wipe it clean between each cut. Run the knife under hot water, dry it off, then slice. The heat helps the knife glide through the ganache without dragging it. Also, make sure the cake is fully chilled before slicing—warm cake will fall apart.
Pin This Recipe!
Best Ultimate Reese’s Peanut Butter Poke Cake Recipe

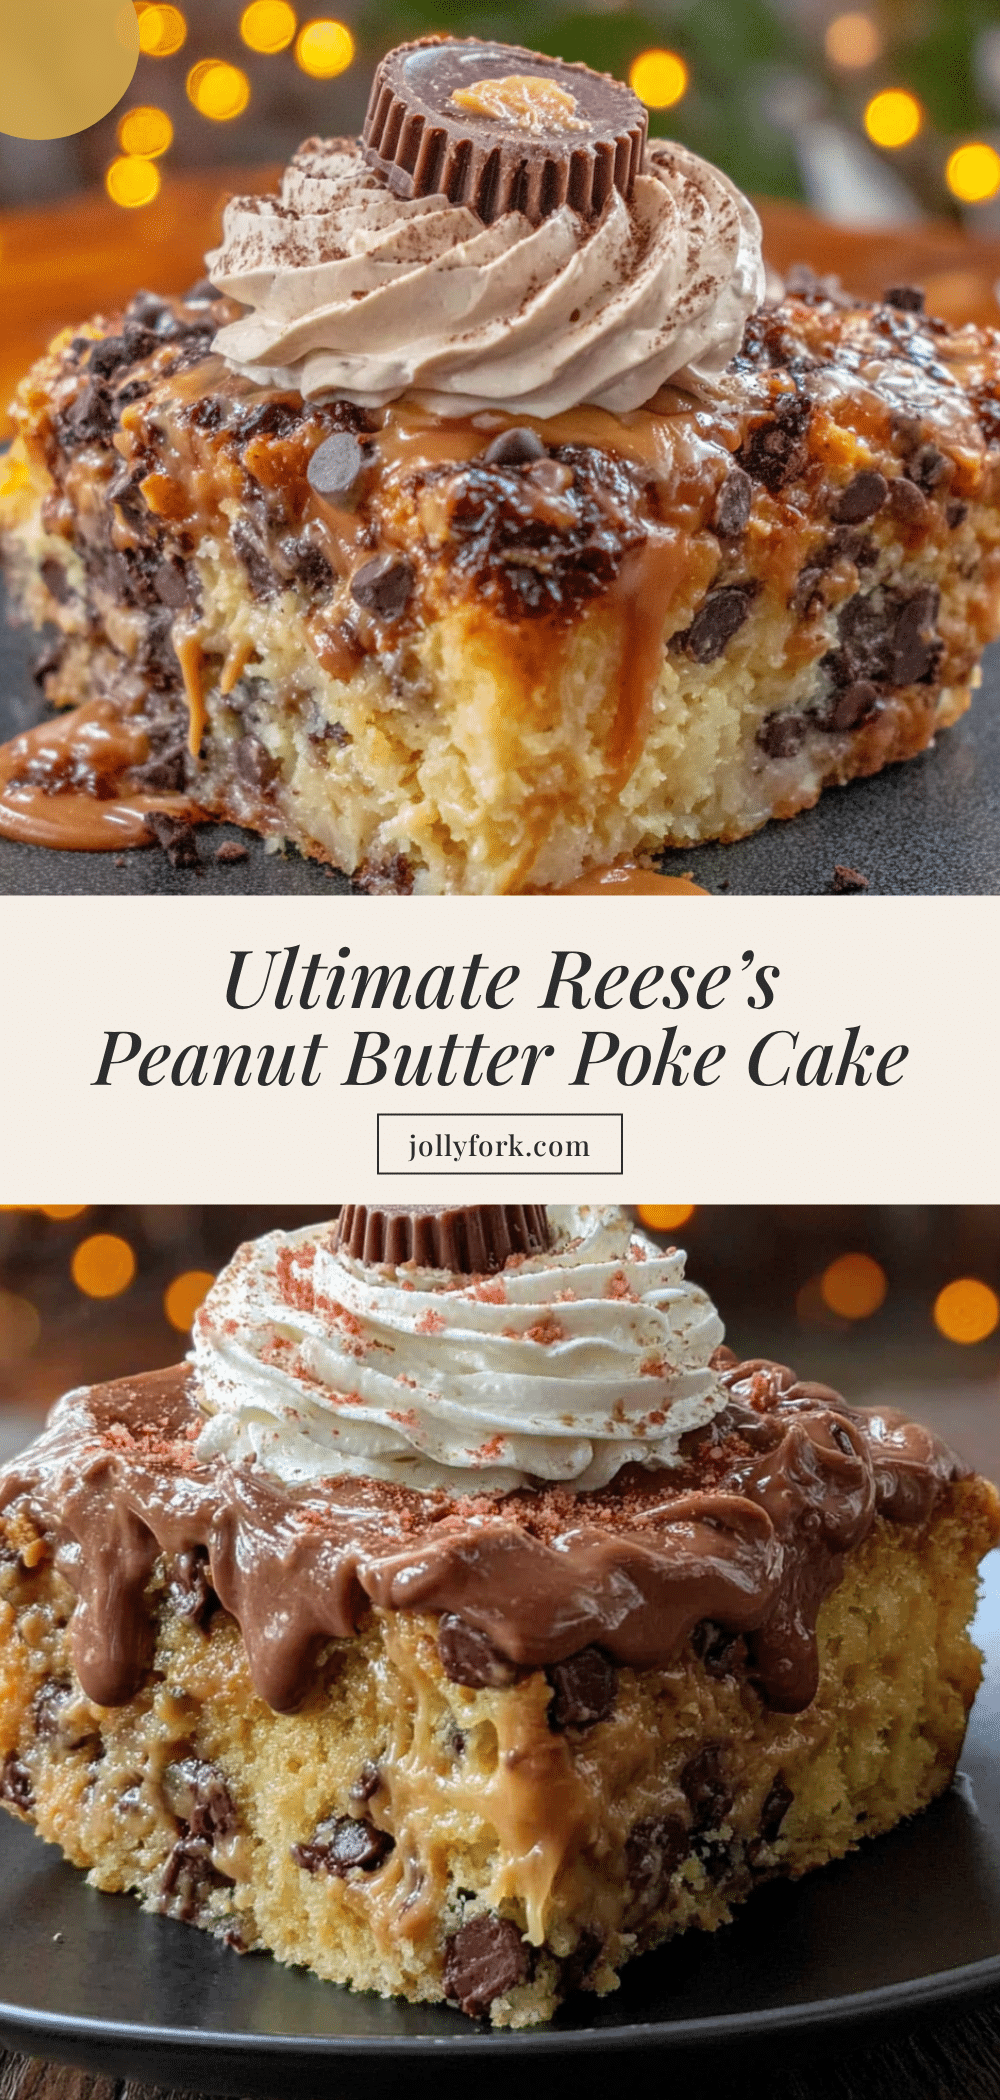
This Ultimate Reese’s Peanut Butter Poke Cake is a rich, indulgent dessert featuring moist chocolate cake soaked with a creamy peanut butter filling and topped with silky chocolate ganache and chopped Reese’s cups. It’s the kind of dessert that silences a room and has people texting you the next morning for the recipe.
- Prep Time: 20 minutes
- Cook Time: 30 minutes
- Total Time: 3 hours (includes chilling time)
- Yield: 12 servings 1x
- Category: Dessert
- Cuisine: American
Ingredients
- 1 box (15.25 oz) chocolate cake mix (Duncan Hines Devil’s Food or Betty Crocker Super Moist)
- 3 large eggs, room temperature
- 1 cup whole milk
- ½ cup vegetable oil
- 1 teaspoon vanilla extract
- 1 can (14 oz) sweetened condensed milk
- ¾ cup creamy peanut butter (Jif or Skippy recommended)
- ½ teaspoon vanilla extract
- Pinch of salt
- 1 cup semi-sweet chocolate chips (Ghirardelli or Guittard)
- ½ cup heavy cream
- 6–8 full-size Reese’s Peanut Butter Cups, chopped
- Optional: melted peanut butter and flaky sea salt for garnish
Instructions
- Preheat oven to 350°F (175°C). Grease a 9×13-inch baking pan with butter or non-stick spray; optionally line with parchment paper.
- In a large bowl, combine chocolate cake mix, eggs, milk, oil, and vanilla extract. Whisk until smooth, about 2 minutes. Do not overmix.
- Pour batter into prepared pan and spread evenly. Bake for 28-32 minutes, until a toothpick inserted in the center comes out with moist crumbs. Cool in pan on a wire rack for 10 minutes.
- While cake is still warm, use the handle of a wooden spoon or a wooden skewer to poke holes all over the cake, spacing them about 1 inch apart and poking all the way to the bottom.
- In a medium bowl, whisk together sweetened condensed milk, creamy peanut butter, vanilla extract, and a pinch of salt. Microwave for 20-30 seconds if too thick to pour. Pour mixture evenly over warm cake, ensuring it fills all holes.
- Let cake sit at room temperature for 20-30 minutes, then refrigerate for at least 2 hours or overnight.
- When cake is fully chilled, make ganache: Place chocolate chips in a small heatproof bowl. Heat heavy cream in a small saucepan over medium heat until it just simmers. Pour hot cream over chocolate chips, let sit 2 minutes, then whisk until smooth and glossy.
- Pour ganache over chilled cake and spread evenly. While ganache is still wet, sprinkle chopped Reese’s cups on top. Optionally drizzle melted peanut butter and add flaky sea salt.
- Refrigerate for another 30 minutes to let ganache set. Slice and serve cold or at room temperature.
Notes
For best results, use standard processed peanut butter (like Jif or Skippy) for the filling, as natural peanut butter can separate and become grainy. The cake tastes even better the next day after the flavors meld overnight. For clean slices, use a sharp knife wiped clean between cuts, and ensure the cake is fully chilled.
Nutrition
- Serving Size: 1 slice
- Calories: 480
- Sugar: 42
- Sodium: 380
- Fat: 26
- Saturated Fat: 10
- Carbohydrates: 58
- Fiber: 3
- Protein: 9
Keywords: Reese's peanut butter poke cake, chocolate peanut butter cake, poke cake recipe, easy dessert, chocolate cake with peanut butter filling


