I wasn’t expecting cooking advice from my accountant, but there I was, standing in line at the post office, listening to Mr. Henderson describe exactly how to make the green bean casserole his wife had been making for forty Thanksgivings. He was holding a package of tax documents and a bag of frozen green beans. It was the most unexpected recipe handoff I’ve ever experienced—right between “How’s business?” and “Don’t forget to file quarterly.”
Honestly, I almost didn’t write it down. I mean, green bean casserole? It’s the dish everyone picks at but nobody raves about, right? But Mr. Henderson was so specific. “You gotta use the crispy shallots,” he said, tapping my notebook. “And make it the day before. That’s the secret.” I nodded politely, shoved the scribbled notes into my bag, and forgot about them for three weeks.
Then Thanksgiving week hit, and I was staring at my grocery list, feeling that familiar pre-holiday panic. You know the feeling—when you realize you have to cook six dishes in four hours and the turkey still isn’t thawed? That’s when I remembered the accountant’s casserole. I dug the crumpled paper out of my purse, and let me tell you, it changed my holiday game forever. This classic make-ahead green bean casserole with crispy shallots isn’t just good—it’s the kind of dish that makes people ask for the recipe before they’ve finished their first helping.
Why You’ll Love This Recipe
This isn’t your grandma’s green bean casserole—well, actually, it might be, but with a few smart upgrades that make it absolutely unforgettable. I’ve tested this recipe at four different family gatherings, two potlucks, and one very rainy Tuesday when I just needed comfort food. Here’s why it’s become my go-to:
- Make-Ahead Magic: Assemble it the day before, pop it in the fridge, and bake it when you’re ready. No last-minute scrambling or burnt fingers.
- Crispy Shallot Perfection: Those golden, crunchy shallots on top? They stay crisp even after reheating. I’m not kidding—I tested it.
- Simple Ingredients: Nothing fancy here. Fresh green beans, cream of mushroom soup (homemade or canned—I won’t judge), and shallots. That’s it.
- Crowd-Pleaser Status: I’ve watched picky eaters go back for seconds and vegetable-skeptics ask for the recipe. It’s almost embarrassing how popular this dish is.
- Perfect for Fall Gatherings: Thanksgiving, Christmas, potlucks, or cozy Sunday dinners—this casserole fits every seasonal moment.
What makes this recipe different from every other green bean casserole out there? It’s the texture. Most versions turn into a soggy, mushy mess. But by making it ahead and using a specific technique with the shallots, you get that creamy interior with a crunchy, savory topping that actually stays crunchy. I mean, honestly, isn’t that what we all want from a casserole?
What Ingredients You Will Need
This recipe uses simple, wholesome ingredients that come together to create something truly special. Most of these are pantry staples or easy to find at any grocery store. Let’s break it down:
For the Casserole Base
- Fresh green beans, trimmed and halved (1½ pounds) — Look for bright, crisp beans without brown spots. I prefer fresh over frozen here because they hold their texture better during the make-ahead process. Trust me on this one.
- Cream of mushroom soup (2 cans, 10.5 ounces each) — I know, I know, canned soup feels like cheating. But honestly? It works perfectly. If you want to go homemade, you absolutely can, but the classic version has a certain nostalgic charm that’s hard to beat.
- Whole milk (1 cup) — Adds richness without making the sauce too heavy. You can use 2% if that’s what you have, but avoid skim—it gets watery.
- Soy sauce (1 tablespoon) — This is the secret ingredient that adds depth and umami. Don’t skip it, even if you think it sounds weird. It doesn’t taste like soy sauce in the final dish.
- Black pepper (½ teaspoon, freshly ground) — Freshly ground makes a difference here.
- Garlic powder (½ teaspoon) — Optional, but I’ve found it rounds out the flavor nicely.
For the Crispy Shallot Topping
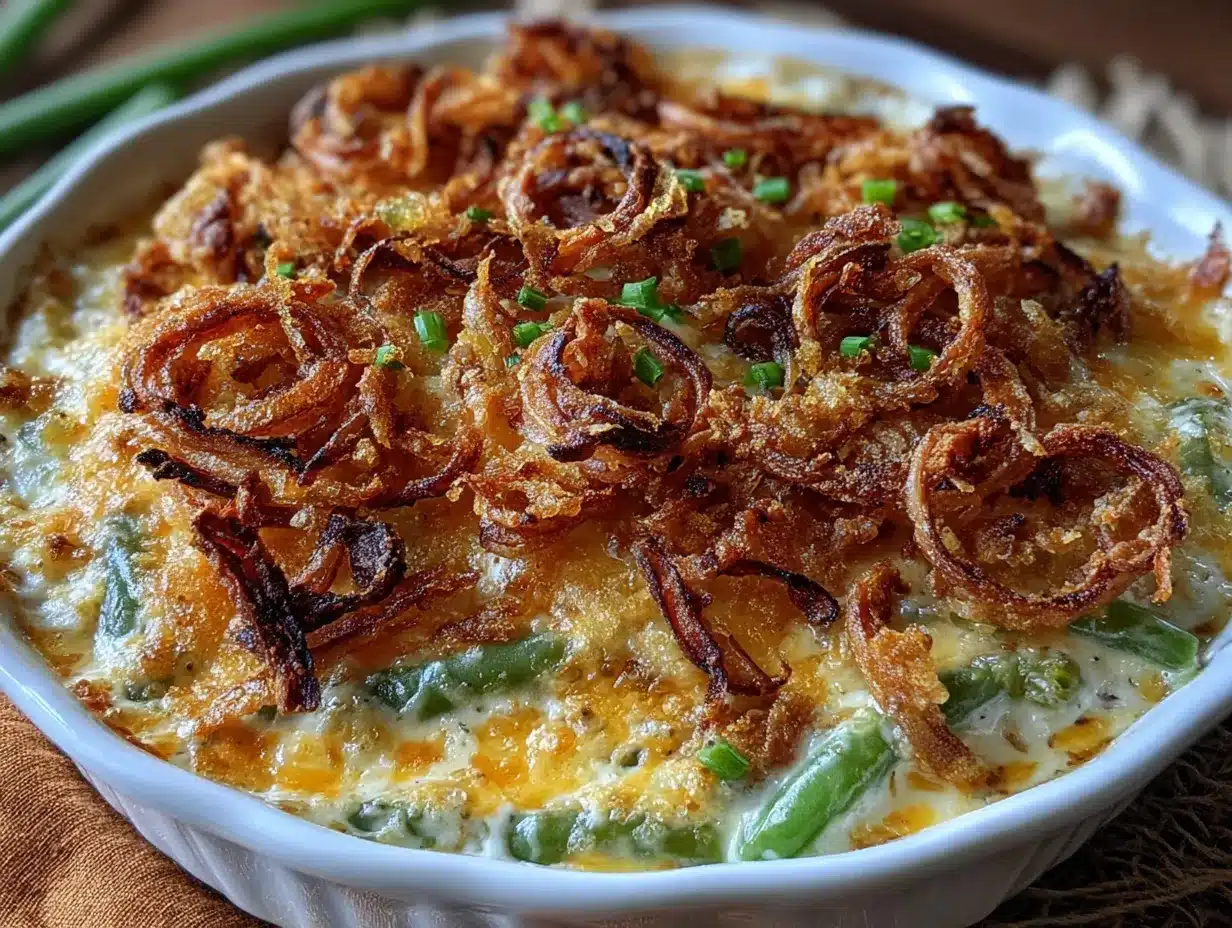
- Large shallots (4-5, thinly sliced into rings) — Shallots are milder than onions and get incredibly crispy when fried. I recommend using a mandoline for uniform slices, but a sharp knife works too.
- All-purpose flour (½ cup) — For coating the shallots before frying. Rice flour works great for a gluten-free option.
- Salt (½ teaspoon) — For seasoning the shallots.
- Vegetable or canola oil (1 cup, for frying) — You need enough oil to submerge the shallots partially. Peanut oil works well too.
I’ve tried this recipe with frozen green beans, and honestly, they work in a pinch. But if you’re making it ahead, fresh beans hold up much better. The texture difference is noticeable—fresh beans stay slightly firm, while frozen can get a bit mushy after sitting in the sauce overnight.
For the cream of mushroom soup, I’ve tested Campbell’s and store brands. Campbell’s gives that classic flavor most people expect, but if you’re feeling fancy, Pacific Foods makes a good organic version. Just don’t use the low-fat kind—the texture gets weird after refrigeration.
Equipment Needed
You don’t need a professional kitchen to pull this off. Here’s what you’ll need:
- 9×13-inch baking dish — Glass or ceramic works best. Metal can react with the sauce and leave a metallic taste if stored overnight.
- Large pot — For blanching the green beans. A stockpot works great.
- Large bowl of ice water — For shocking the beans after blanching. This stops the cooking process and keeps them bright green.
- Medium skillet or saucepan — For frying the shallots. A heavy-bottomed pan works best for even heat distribution.
- Slotted spoon or spider strainer — For removing shallots from the oil. A regular spoon works, but you’ll get oil everywhere.
- Paper towels — For draining the crispy shallots.
- Mixing bowls — For combining the sauce ingredients.
- Sharp knife or mandoline — For slicing shallots thinly. A mandoline gives more consistent results, but watch your fingers!
- Aluminum foil — For covering the casserole during initial baking and storage.
If you don’t have a mandoline, a sharp chef’s knife works fine. Just take your time slicing the shallots as evenly as possible. Uneven slices mean some burn while others stay raw—I learned that the hard way during my first attempt.
Preparation Method
Let’s get cooking! This recipe has a few steps, but they’re all straightforward. I’ll walk you through it step by step.
- Blanch the green beans (10 minutes): Bring a large pot of salted water to a boil. Add the trimmed green beans and cook for 3-4 minutes until they’re bright green and slightly tender but still crisp. Drain immediately and transfer to a bowl of ice water to stop the cooking process. Let them sit for 2-3 minutes, then drain well and pat dry with a clean kitchen towel. This step is crucial—don’t skip it. The ice water shock locks in that beautiful green color and keeps the beans from turning mushy later.
- Make the crispy shallots (15 minutes): While the beans are cooling, slice your shallots into thin rings. Toss them in a bowl with the flour and salt until evenly coated. Heat the oil in a medium skillet over medium-high heat until shimmering (about 350°F if you have a thermometer). Working in batches, fry the shallots for 2-3 minutes, stirring occasionally, until golden brown and crispy. They’ll darken slightly after you remove them, so pull them out when they’re just golden. Transfer to paper towels to drain and season with a pinch of salt while still warm. Let them cool completely before storing—they’ll stay crispy for days if stored in an airtight container.
- Prepare the sauce (5 minutes): In a large mixing bowl, whisk together the cream of mushroom soup, milk, soy sauce, black pepper, and garlic powder until smooth. Don’t overmix—just combine until everything is incorporated. The sauce should be creamy but pourable. If it seems too thick, add an extra splash of milk.
- Assemble the casserole (5 minutes): Spread the blanched green beans evenly in your 9×13-inch baking dish. Pour the sauce over the top, using a spatula to make sure all the beans are coated. Gently stir to combine, then spread everything into an even layer. Cover tightly with aluminum foil and refrigerate for at least 4 hours or overnight. This is where the magic happens—the flavors meld together and the sauce thickens beautifully.
- Bake the casserole (30-35 minutes): When you’re ready to bake, preheat your oven to 350°F. Remove the casserole from the fridge and let it sit on the counter for 15 minutes while the oven heats (this prevents the glass dish from cracking). Bake covered for 25 minutes, then remove the foil and bake for another 10-15 minutes until bubbly and hot throughout. The edges should be slightly golden.
- Add the crispy shallots (2 minutes): Sprinkle the crispy shallots evenly over the top of the hot casserole right before serving. This is non-negotiable—adding them too early makes them soggy. That crunchy topping is the star of the show, so don’t hide it.
One thing I learned the hard way: don’t over-blanch the beans. I once left them in the boiling water for six minutes while I answered a phone call, and they turned into sad, limp noodles. Three minutes is plenty. You want them to still have a little resistance when you bite into them.
Cooking Tips & Techniques
After making this casserole more times than I care to count, I’ve picked up a few tricks that make a real difference. Here are my hard-earned lessons:
Dry your beans thoroughly. After blanching and shocking, pat those green beans completely dry. Any excess water will thin out your sauce and make the casserole watery. I use a clean kitchen towel and actually roll the beans up in it to absorb moisture. It sounds extra, but it works.
Don’t overcrowd the shallots. When frying, work in small batches. If you dump all the shallots in at once, the oil temperature drops, and they’ll steam instead of fry. You’ll end up with sad, greasy shallots instead of crispy, golden ones. I usually do three batches for four shallots.
Let the casserole rest after baking. I know it’s tempting to dig in immediately, but letting it sit for 5-10 minutes allows the sauce to set up a bit. It’ll be easier to serve and won’t turn into a soupy mess on the plate.
Double the crispy shallots. Seriously. Make extra. They’re addictive, and you’ll want some for snacking. I’ve caught myself eating them straight from the paper towel more times than I’ll admit. They’re also amazing on salads, soups, and mac and cheese.
Watch your oven temperature. Every oven runs differently. If your casserole is browning too quickly on top but still cold in the middle, cover it with foil and reduce the temperature to 325°F. Better to bake low and slow than to burn the edges.
One of my biggest failures? I once tried to skip the blanching step to save time. The beans were still raw in some spots and overcooked in others. Don’t do it. Blanching is non-negotiable for even cooking and that perfect texture.
Variations & Adaptations
This recipe is wonderfully adaptable. Here are some variations I’ve tried and loved:
Gluten-Free Version: Use gluten-free cream of mushroom soup (Pacific Foods makes a good one) and swap the all-purpose flour for rice flour or cornstarch when coating the shallots. The texture is slightly different, but still delicious. I tested this for a friend with celiac disease, and she couldn’t tell the difference.
Vegan Adaptation: Use a plant-based cream of mushroom soup (or make your own with cashew cream), swap the milk for unsweetened oat milk, and use coconut oil for frying the shallots. The soy sauce is already vegan-friendly. It’s not quite as creamy, but it’s still really satisfying.
Extra-Crunchy Version: Add ½ cup of panko breadcrumbs mixed with 2 tablespoons of melted butter to the topping along with the shallots. Bake for an extra 5 minutes uncovered. The panko adds another layer of crunch that’s absolutely ridiculous.
Mushroom Lover’s Version: Sauté 8 ounces of sliced cremini mushrooms with 2 cloves of garlic and fold them into the sauce before assembling. It adds earthiness and makes the dish feel more substantial. I did this for a mushroom-obsessed friend, and he asked for the recipe three times.
Spicy Kick: Add ½ teaspoon of red pepper flakes to the sauce or a dash of hot sauce. It doesn’t make the dish spicy, but it adds a subtle warmth that complements the creamy sauce beautifully.
For a lighter version, you can use low-fat milk and reduce the oil for the shallots by baking them instead of frying. Toss the floured shallots with a tablespoon of oil and spread them on a baking sheet. Bake at 375°F for 12-15 minutes, flipping halfway. They won’t be quite as crispy, but they’re still good.
Serving & Storage Suggestions
This casserole is best served hot, straight from the oven, with those crispy shallots gleaming on top. It’s the perfect side dish for Thanksgiving, Christmas, Easter, or any fall or winter gathering. Here’s how to make the most of it:
Serving Temperature: Serve hot, but not piping boiling hot. Let it rest for 5-10 minutes after baking so the sauce sets up. It should be steaming and bubbly around the edges.
Complementary Dishes: This casserole pairs beautifully with roast turkey, mashed potatoes, stuffing, and cranberry sauce. For a non-holiday meal, try it alongside roasted chicken, meatloaf, or even a simple grilled steak. It’s also fantastic with a crusty loaf of bread to soak up the extra sauce.
Storage: Leftovers can be stored in an airtight container in the refrigerator for up to 4 days. The crispy shallots will soften, but the flavor will actually deepen overnight. To reheat, place individual portions in the microwave for 1-2 minutes, or reheat the entire casserole in a 350°F oven for 15-20 minutes.
Freezing: You can freeze the assembled casserole (without the crispy shallots) for up to 3 months. Wrap the dish tightly in plastic wrap, then aluminum foil. Thaw overnight in the refrigerator before baking as directed. Add fresh crispy shallots after baking. I’ve done this for emergency holiday prep, and it works like a charm.
Make-Ahead Timeline: For the best results, assemble the casserole up to 24 hours in advance. The flavors really meld together beautifully overnight. Just don’t add the shallots until right before serving—they’re the finishing touch that makes this dish sing.
Nutritional Information & Benefits
Here’s a rough estimate per serving (based on 8 servings):
- Calories: 220
- Total Fat: 12g
- Saturated Fat: 3g
- Cholesterol: 5mg
- Sodium: 680mg
- Total Carbohydrates: 24g
- Dietary Fiber: 3g
- Sugars: 6g
- Protein: 5g
Green beans are a good source of vitamin C, vitamin K, and fiber. Shallots contain antioxidants and compounds that may support heart health. While this isn’t a low-calorie dish, it’s a vegetable-forward side that fits well into a balanced holiday meal.
If you’re watching your sodium, use low-sodium cream of mushroom soup and reduce the added salt. You can also make your own soup from scratch to control the salt content entirely.
This recipe contains dairy (milk) and gluten (flour), but as mentioned in the variations section, both can be adapted for dietary restrictions.
Conclusion
Honestly, I never thought I’d be this passionate about green bean casserole. But here I am, telling you that this make-ahead version with crispy shallots is the one you need in your life. It’s the dish that surprised me—the one I almost ignored because it came from an accountant at the post office instead of a famous chef or a beloved grandmother.
But sometimes the best recipes come from the most unexpected places, right? Mr. Henderson’s wife’s casserole has become a staple in my kitchen, and I hope it becomes one in yours too. Whether you’re prepping for Thanksgiving, feeding a crowd at a potluck, or just want a comforting side dish on a chilly evening, this recipe delivers.
I’d love to hear how it turns out for you! Did you add any twists? Did your family love it as much as mine does? Drop a comment below and let me know. And if you’re looking for more holiday side dishes, check out my creamy mashed potatoes or this homemade stuffing that’s been a family favorite for years. Happy cooking!
Frequently Asked Questions
Can I use frozen green beans instead of fresh?
Yes, you can, but fresh green beans give you a much better texture. If you’re using frozen, thaw them completely and pat them dry before assembling. Reduce the blanching time to 1-2 minutes since frozen beans are already partially cooked.
How far in advance can I make this casserole?
You can assemble the casserole up to 24 hours in advance and keep it covered in the refrigerator. For longer storage, freeze it (without the crispy shallots) for up to 3 months. Just thaw overnight in the fridge before baking.
Why did my crispy shallots turn soggy?
Soggy shallots usually mean they weren’t fried long enough, or they were added to the casserole too early. Always fry them until deep golden brown, drain them well on paper towels, and only add them to the casserole right before serving.
Can I make this dairy-free?
Absolutely! Use a dairy-free cream of mushroom soup (or make your own), unsweetened oat or almond milk, and a plant-based butter alternative. The texture will be slightly different, but the flavor is still delicious.
What if I don’t have a mandoline for slicing shallots?
A sharp chef’s knife works perfectly fine. Just take your time and try to slice the shallots as evenly as possible. Uniform slices ensure even cooking—some thin, some thick means some will burn while others stay raw.
Pin This Recipe!
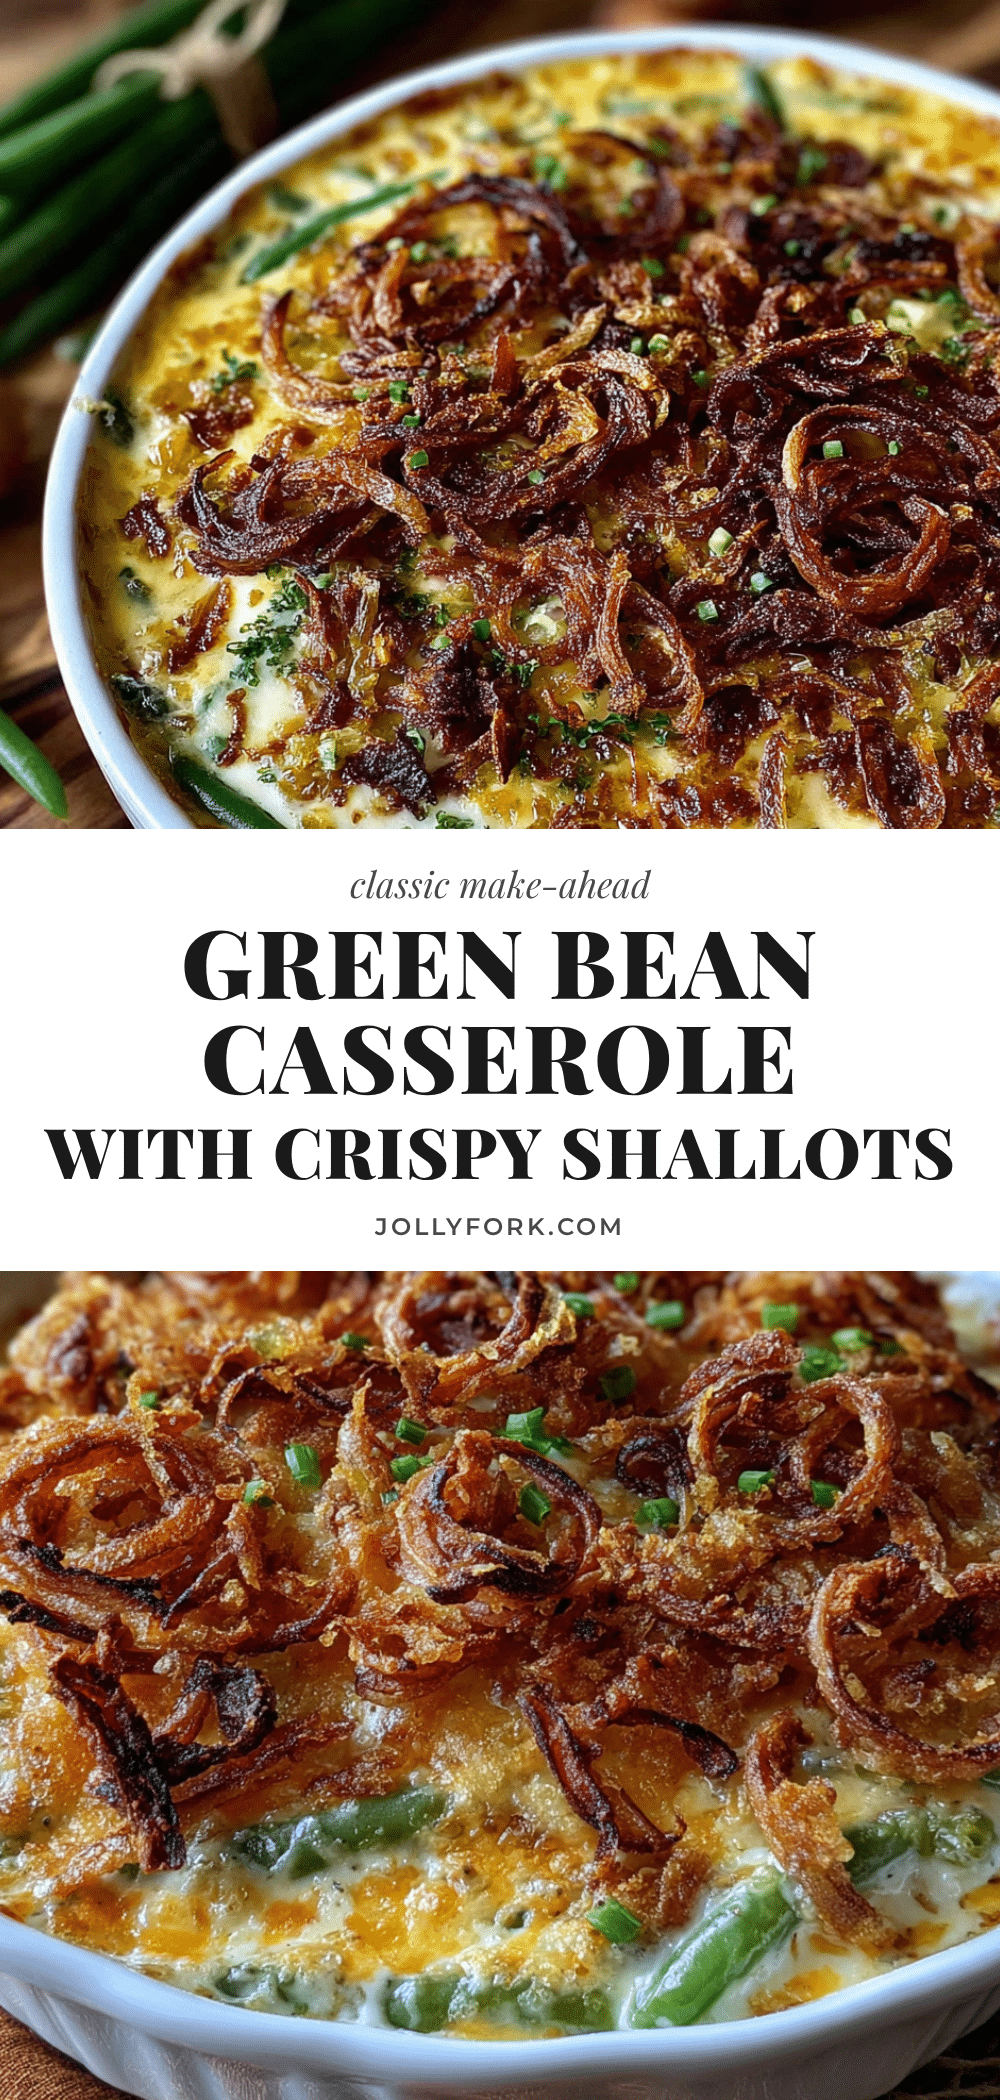
Classic Make-Ahead Green Bean Casserole with Crispy Shallots

This classic make-ahead green bean casserole with crispy shallots is the perfect side dish for Thanksgiving, Christmas, or any fall gathering. It features a creamy mushroom sauce, tender green beans, and a crunchy shallot topping that stays crisp even after reheating.
- Prep Time: 20 minutes
- Cook Time: 35 minutes
- Total Time: 55 minutes (plus at least 4 hours chilling time)
- Yield: 8 servings 1x
- Category: Side Dish
- Cuisine: American
Ingredients
- 1½ pounds fresh green beans, trimmed and halved
- 2 cans (10.5 ounces each) cream of mushroom soup
- 1 cup whole milk
- 1 tablespoon soy sauce
- ½ teaspoon freshly ground black pepper
- ½ teaspoon garlic powder (optional)
- 4–5 large shallots, thinly sliced into rings
- ½ cup all-purpose flour
- ½ teaspoon salt
- 1 cup vegetable or canola oil (for frying)
Instructions
- Blanch the green beans: Bring a large pot of salted water to a boil. Add the trimmed green beans and cook for 3-4 minutes until bright green and slightly tender but still crisp. Drain immediately and transfer to a bowl of ice water to stop the cooking process. Let sit for 2-3 minutes, then drain well and pat dry with a clean kitchen towel.
- Make the crispy shallots: While the beans are cooling, slice shallots into thin rings. Toss them in a bowl with the flour and salt until evenly coated. Heat the oil in a medium skillet over medium-high heat until shimmering (about 350°F). Working in batches, fry the shallots for 2-3 minutes, stirring occasionally, until golden brown and crispy. Transfer to paper towels to drain and season with a pinch of salt while still warm. Let cool completely.
- Prepare the sauce: In a large mixing bowl, whisk together the cream of mushroom soup, milk, soy sauce, black pepper, and garlic powder until smooth.
- Assemble the casserole: Spread the blanched green beans evenly in a 9×13-inch baking dish. Pour the sauce over the top, using a spatula to make sure all the beans are coated. Gently stir to combine, then spread into an even layer. Cover tightly with aluminum foil and refrigerate for at least 4 hours or overnight.
- Bake the casserole: When ready to bake, preheat oven to 350°F. Remove the casserole from the fridge and let it sit on the counter for 15 minutes. Bake covered for 25 minutes, then remove the foil and bake for another 10-15 minutes until bubbly and hot throughout.
- Add the crispy shallots: Sprinkle the crispy shallots evenly over the top of the hot casserole right before serving.
Notes
For best results, assemble the casserole up to 24 hours in advance. The flavors meld together beautifully overnight. Do not add the crispy shallots until right before serving to keep them crunchy. If you don’t have a mandoline, a sharp chef’s knife works fine for slicing shallots. For a gluten-free version, use gluten-free cream of mushroom soup and rice flour or cornstarch for the shallots. For a vegan adaptation, use plant-based cream of mushroom soup, unsweetened oat milk, and coconut oil for frying.
Nutrition
- Serving Size: 1 serving (about 1 c
- Calories: 220
- Sugar: 6
- Sodium: 680
- Fat: 12
- Saturated Fat: 3
- Carbohydrates: 24
- Fiber: 3
- Protein: 5
Keywords: green bean casserole, make-ahead, crispy shallots, Thanksgiving side dish, holiday side dish, classic casserole