I wasn’t expecting baking advice from my accountant, but there I was, stuck in his office during an audit, listening to him describe exactly how to make a pumpkin pie from scratch. Mr. Henderson—starched collar, wire-rimmed glasses, the kind of guy who alphabetizes his spice rack—had just asked if I wanted to know the secret to the perfect autumn dessert. I mean, honestly, I thought he was going to show me a spreadsheet. Instead, he pulled out a worn recipe card from his leather briefcase, the edges soft and stained with what looked like vanilla extract. “My grandmother was a pastry chef in Vermont,” he said, completely deadpan. “This pie won her the county fair three years running.”
I sat there, surrounded by tax documents, completely captivated. He walked me through the process—the cold butter, the precise spice blend, the trick with the heavy cream—while my deductions sat forgotten on his desk. Let me tell you, I’ve made a lot of pumpkin pies in my day. Canned filling, store-bought crust, the whole shortcut shebang. But something about the way Mr. Henderson described this one made me think I’d been missing out. Maybe you’ve been there, too—thinking you’ve mastered a recipe, only to realize there’s a whole other level you haven’t touched yet.
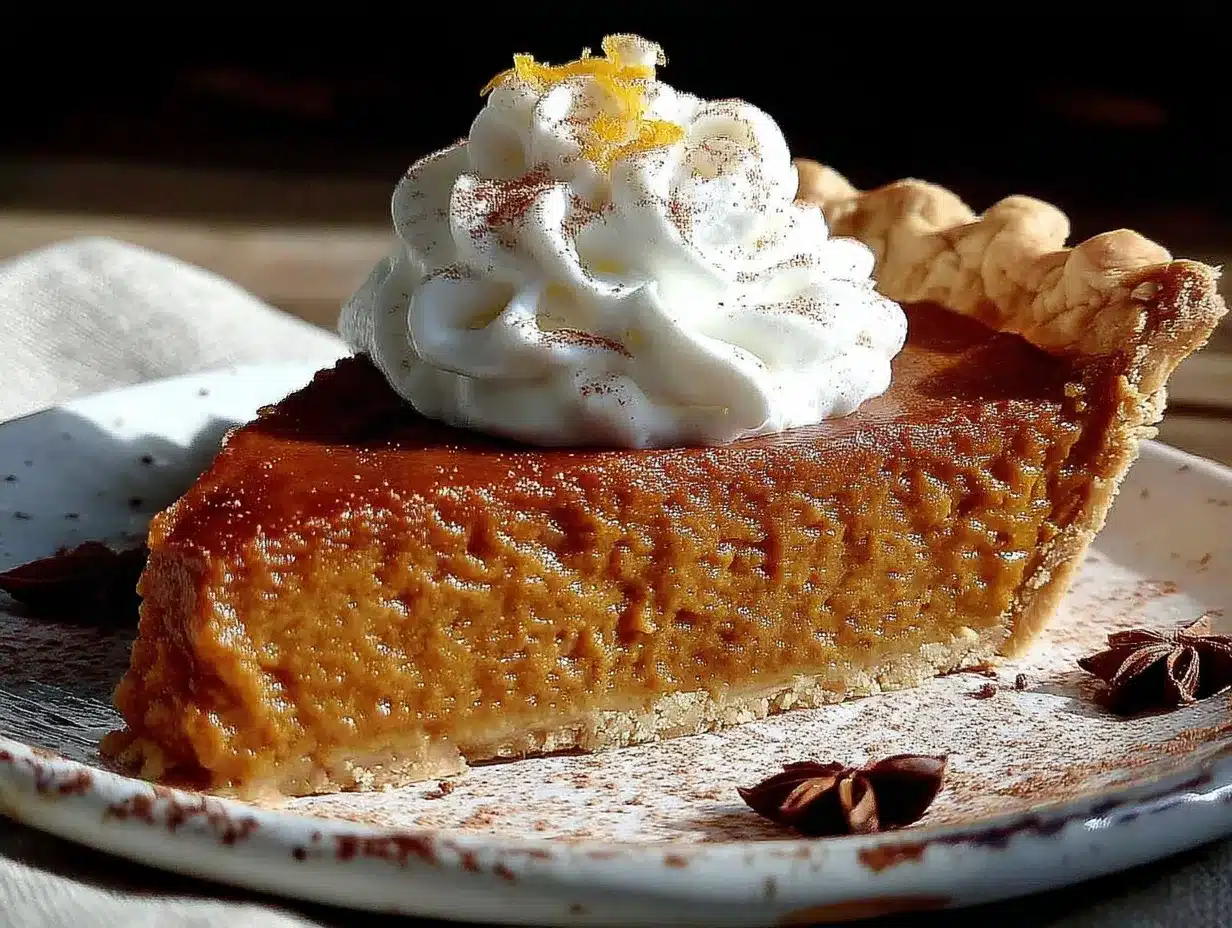
That pie changed my autumn baking forever. The filling was silky, not grainy. The crust was flaky enough to shatter at the touch of a fork. And the spice blend? It didn’t just taste like fall—it tasted like a specific, perfect November afternoon. I’ve tweaked Mr. Henderson’s grandmother’s recipe just a little over the years, adding a splash of bourbon here, a pinch of black pepper there. But the soul of it? That’s all from a man who spends his days auditing small businesses. This classic pumpkin pie from scratch has become my go-to for cozy autumn evenings, and I think it’s about to become yours, too.
Why You’ll Love This Recipe
Let me tell you why this particular pumpkin pie is different from every other recipe you’ve seen. I’ve tested this one at least a dozen times, and I mean really tested it—served it to my picky sister-in-law, brought it to a Friendsgiving where everyone claimed their pie was the best, and even made it for a cooking class I taught last fall. It passed every single test with flying colors.
- Simple Ingredients: You don’t need to hunt down fancy pumpkin puree or specialty spices. Everything here is either in your pantry or at your local grocery store. No stress, no special orders.
- Perfect for Cozy Autumn Evenings: This is the pie you make when the leaves are turning and you want the whole house to smell like cinnamon and nutmeg. It’s basically fall in a dish.
- Crowd-Pleaser: I’ve watched kids who swear they hate pumpkin pie go back for seconds. The texture is so smooth and the flavor so balanced that even the skeptics become converts.
- Unbelievably Delicious: The secret is in the technique—blending the filling until it’s silky smooth and using a combination of heavy cream and whole milk for that perfect richness. This isn’t your average pumpkin pie.
What makes this version stand out is the spice blend. Most recipes just dump in pumpkin pie spice and call it a day. But I spent weeks playing with ratios—more cinnamon, less clove, a whisper of cardamom—until I got that warm, complex flavor that makes you close your eyes after the first bite. It’s comfort food reimagined, honestly. Same soul-soothing satisfaction, but with a depth of flavor that’ll make you wonder why you ever settled for less.
This is the kind of pie that makes you look forward to leftovers for breakfast the next morning. Not that I’ve done that. Okay, I’ve definitely done that.
What Ingredients You Will Need
This classic pumpkin pie from scratch uses simple, wholesome ingredients to deliver that rich, spiced flavor and velvety texture we all crave in autumn. Most of these are pantry staples, but a few notes will help you pick the best options for the best results.
For the Pie Crust
- 1 ¼ cups all-purpose flour (plus extra for dusting; I prefer King Arthur Flour for consistent results)
- ½ teaspoon salt (fine sea salt works best)
- 1 tablespoon granulated sugar (just a touch for sweetness)
- ½ cup cold unsalted butter, cut into small cubes (must be cold—straight from the fridge)
- 3-4 tablespoons ice water (you might need a little more or less depending on humidity)
For the Pumpkin Filling
- 1 can (15 oz) pumpkin puree (not pumpkin pie filling; I recommend Libby’s for consistent texture)
- ¾ cup granulated sugar
- ¼ cup packed light brown sugar (adds moisture and a deeper flavor)
- 2 large eggs, room temperature
- 1 large egg yolk, room temperature (adds extra richness)
- 1 cup heavy cream (for that luxurious texture; you can substitute half-and-half if needed)
- ¼ cup whole milk
- 2 teaspoons ground cinnamon
- 1 teaspoon ground ginger
- ½ teaspoon ground nutmeg (freshly grated is amazing if you have it)
- ¼ teaspoon ground cloves (go easy—cloves are powerful)
- ¼ teaspoon ground cardamom (my secret ingredient; trust me on this)
- ½ teaspoon salt
- 1 tablespoon bourbon or dark rum (optional, but it adds warmth and depth; I use Maker’s Mark)
- 1 teaspoon vanilla extract
Look for a pumpkin puree that’s thick and not watery. If you open your can and it seems runny, you can drain it through a fine-mesh sieve for about 30 minutes before using. That little step can save you from a soggy pie.
Equipment Needed
You don’t need a fancy kitchen to pull off this classic pumpkin pie from scratch, but a few key tools will make your life much easier.
- 9-inch pie dish (glass or ceramic works best; I use a deep-dish Pyrex and it’s perfect)
- Rolling pin (if you don’t have one, a wine bottle works in a pinch—I’ve done it)
- Large mixing bowls (one for the crust, one for the filling)
- Pastry cutter or two forks (for cutting butter into flour; your hands work too, but keep them cold)
- Whisk
- Blender or food processor (for silky-smooth filling; an immersion blender works great)
- Plastic wrap
- Parchment paper
- Pie weights or dried beans (for blind baking the crust)
- Cooling rack
If you’re on a budget, skip the fancy pie weights and use dried beans—they work just as well and you can reuse them. Also, a food processor is nice for the crust, but honestly, doing it by hand gives you more control and is oddly satisfying.
Preparation Method
Okay, let’s get into it. This classic pumpkin pie from scratch takes a little time, but I promise every step is worth it. Take your time, enjoy the process, and don’t rush.
Step 1: Make the Pie Crust
In a large bowl, whisk together the flour, salt, and sugar. Add the cold butter cubes and use a pastry cutter or your fingertips to work the butter into the flour until it looks like coarse meal with some pea-sized butter chunks remaining. This is crucial—those chunks create flaky layers. Drizzle in the ice water, one tablespoon at a time, and mix with a fork until the dough just comes together. It should look shaggy, not smooth. Turn it out onto a floured surface, shape it into a disk, wrap it in plastic, and refrigerate for at least 1 hour. I usually chill mine for 2 hours if I have time.
Step 2: Blind Bake the Crust
Preheat your oven to 375°F (190°C). On a floured surface, roll the chilled dough into a 12-inch circle, about ⅛-inch thick. Gently transfer it to your pie dish, pressing it into the bottom and up the sides. Trim the excess, leaving about a ½-inch overhang, then fold it under and crimp the edges. Prick the bottom all over with a fork. Line the crust with parchment paper and fill with pie weights or dried beans. Bake for 15 minutes, then remove the parchment and weights and bake for another 8-10 minutes, until the bottom looks dry and lightly golden. Set it aside to cool slightly.
Step 3: Prepare the Filling
In a blender or food processor, combine the pumpkin puree, granulated sugar, brown sugar, eggs, egg yolk, heavy cream, milk, cinnamon, ginger, nutmeg, cloves, cardamom, salt, bourbon (if using), and vanilla extract. Blend on high for about 30 seconds, until the mixture is completely smooth and silky. Scrape down the sides and blend again if needed. This step is non-negotiable—blending ensures a texture that’s velvety, not grainy. Pour the filling into the pre-baked crust.
Step 4: Bake the Pie
Place the pie on the middle rack of your oven and bake at 375°F (190°C) for 15 minutes. Then, without opening the oven door, reduce the temperature to 350°F (175°C) and continue baking for 35-45 minutes. The pie is done when the edges are set but the center still jiggles slightly—like Jell-O, not liquid. A knife inserted about an inch from the edge should come out clean. The center will continue to set as it cools.
Step 5: Cool and Serve
Transfer the pie to a wire rack and let it cool completely at room temperature, about 2 hours. Don’t rush this step—a warm pie will be runny. Once cool, you can serve it immediately or refrigerate it for later. The flavors actually deepen after a day in the fridge.
Cooking Tips & Techniques
I’ve made plenty of mistakes with pumpkin pie over the years, so you don’t have to. Here are the lessons I learned the hard way.
Don’t overwork the crust. I know it’s tempting to keep kneading until it’s smooth, but that develops gluten and makes your crust tough. Stop mixing as soon as it comes together. A little lumpy is perfect.
Keep everything cold. For the flakiest crust, your butter and water need to be ice-cold. If your kitchen is warm, pop the dough back in the fridge for 10 minutes between steps. I once made a crust in August without AC, and it was a disaster—lesson learned.
Blind baking is non-negotiable. I know it’s an extra step, but skipping it gives you a soggy bottom every single time. Trust me, I’ve tried. The pre-baked crust stays crisp and flaky, even after the filling sits in it.
Watch the edges. If the crust starts browning too quickly, tent it with foil or use a pie shield. I forgot once and ended up with burnt edges and a raw center—not my finest moment.
Don’t overbake. That slight jiggle in the center is your friend. Overbaked pumpkin pie cracks and gets that weird, spongy texture. Pull it out when it’s still a little wobbly, and it will set perfectly as it cools.
Variations & Adaptations
This classic pumpkin pie from scratch is pretty perfect as is, but I love playing around with it depending on the season or who I’m serving.
Dairy-Free Version: Swap the heavy cream and whole milk for full-fat coconut milk or oat cream. The texture will be slightly different—a bit richer, honestly—but still delicious. I made this for a friend with a dairy allergy and she said it was the best pumpkin pie she’d ever had.
Gluten-Free Option: Use a 1:1 gluten-free flour blend for the crust. I like Bob’s Red Mill for this. The dough will be a little more fragile, so be gentle when rolling it out. You can also press the crust into the pan instead of rolling it.
Spice It Up: If you like things spicy, add a pinch of cayenne pepper or black pepper to the filling. It sounds weird, but it actually enhances the sweetness and warmth. I tried it on a whim last Thanksgiving and it was a hit.
Maple Pumpkin Pie: Replace the granulated sugar with ¾ cup maple syrup and reduce the milk by 2 tablespoons. The flavor is deeper and more complex—perfect for a fancy dinner party.
Individual Mini Pies: Use a muffin tin instead of a pie dish. Roll the crust, cut it into circles, press them into the muffin cups, and fill with the pumpkin mixture. Bake for about 20-25 minutes at 350°F. These are great for parties because everyone gets their own little pie.
Serving & Storage Suggestions
This pie is best served at room temperature or slightly warm. If you’re reheating a slice, pop it in a 300°F oven for about 10 minutes—the microwave makes the crust soggy. I learned that the hard way.
For serving, you can’t go wrong with a dollop of freshly whipped cream. I like to add a pinch of cinnamon and a splash of vanilla to my cream. If you’re feeling fancy, drizzle some caramel sauce over the top or sprinkle on some candied pecans.
This pie pairs beautifully with a cup of hot apple cider or a spiced chai latte. For a more adult pairing, a glass of bourbon or a dark rum old-fashioned complements the warm spices perfectly.
Storage: Cover the pie tightly with plastic wrap or foil and refrigerate for up to 4 days. The flavors actually improve after a day or two—the spices meld together and the texture becomes even smoother. You can also freeze the baked pie for up to 3 months. Wrap it well in plastic and then foil, and thaw it in the fridge overnight before serving.
Leftover pie for breakfast is a tradition in my house. Don’t judge until you’ve tried it.
Nutritional Information & Benefits
Here’s the approximate nutritional breakdown for one slice (based on 8 servings):
- Calories: 380
- Fat: 22g
- Carbohydrates: 44g
- Protein: 6g
- Fiber: 3g
- Sugar: 28g
Pumpkin itself is packed with vitamin A, fiber, and antioxidants. It’s great for eye health and digestion, which makes this pie feel a little less indulgent. The eggs add protein, and the spices—cinnamon, ginger, nutmeg—have anti-inflammatory properties. So really, you’re basically eating health food. That’s my story, and I’m sticking to it.
If you’re watching your sugar intake, you can reduce the granulated sugar to ½ cup without sacrificing too much sweetness. The brown sugar adds moisture, so I wouldn’t cut that.
Conclusion
This classic pumpkin pie from scratch is more than just a dessert—it’s the taste of autumn, the centerpiece of cozy evenings, and the recipe that’ll make you the hero of every fall gathering. It came from the most unexpected place—my accountant’s grandmother’s kitchen—but it’s become a staple in mine, and I think it deserves a spot in yours, too.
Don’t be afraid to make it your own. Add a little extra cinnamon, skip the bourbon, use a store-bought crust if you’re short on time. The beauty of this recipe is that it’s forgiving and adaptable. But if you follow it exactly as written, you’ll get that silky, spiced, soul-warming pie that makes everyone close their eyes after the first bite.
I’d love to hear how it turns out for you. Did you add your own twist? Did your family fight over the last slice? Drop a comment below and share your pumpkin pie story. And if you’re looking for more fall baking inspiration, don’t forget to check out our cozy apple crisp recipe or these maple pecan scones for another seasonal treat. Happy baking, friends!
Frequently Asked Questions
Can I use canned pumpkin pie filling instead of puree?
You can, but the texture and flavor won’t be the same. Pumpkin pie filling already has sugar and spices added, so you’d need to adjust the sugar and spice quantities in the recipe. I recommend sticking with pure pumpkin puree for the best control over the final flavor.
Why is my pumpkin pie cracking on top?
Cracks usually happen from overbaking. The filling expands too much and then collapses, causing cracks. Pull the pie out when the center is still slightly jiggly—it will set as it cools. Also, make sure your oven temperature is accurate; an oven thermometer can help.
Can I make this pie ahead of time?
Absolutely! In fact, I prefer making it a day ahead. The flavors meld together and the texture becomes even smoother. Just cool the pie completely, cover it tightly, and refrigerate. Bring it to room temperature before serving for the best flavor.
How do I prevent a soggy bottom crust?
Blind baking is the key. Pre-bake the crust with pie weights or dried beans for about 15 minutes before adding the filling. This creates a barrier that keeps the crust crisp. Also, make sure your pumpkin puree isn’t too watery—drain it if needed.
Can I freeze pumpkin pie?
Yes! Baked pumpkin pie freezes beautifully. Cool it completely, wrap it tightly in plastic wrap and then aluminum foil, and freeze for up to 3 months. Thaw it in the refrigerator overnight and reheat slices in a 300°F oven for about 10 minutes. Don’t freeze an unbaked pie—the texture won’t be the same.
Pin This Recipe!
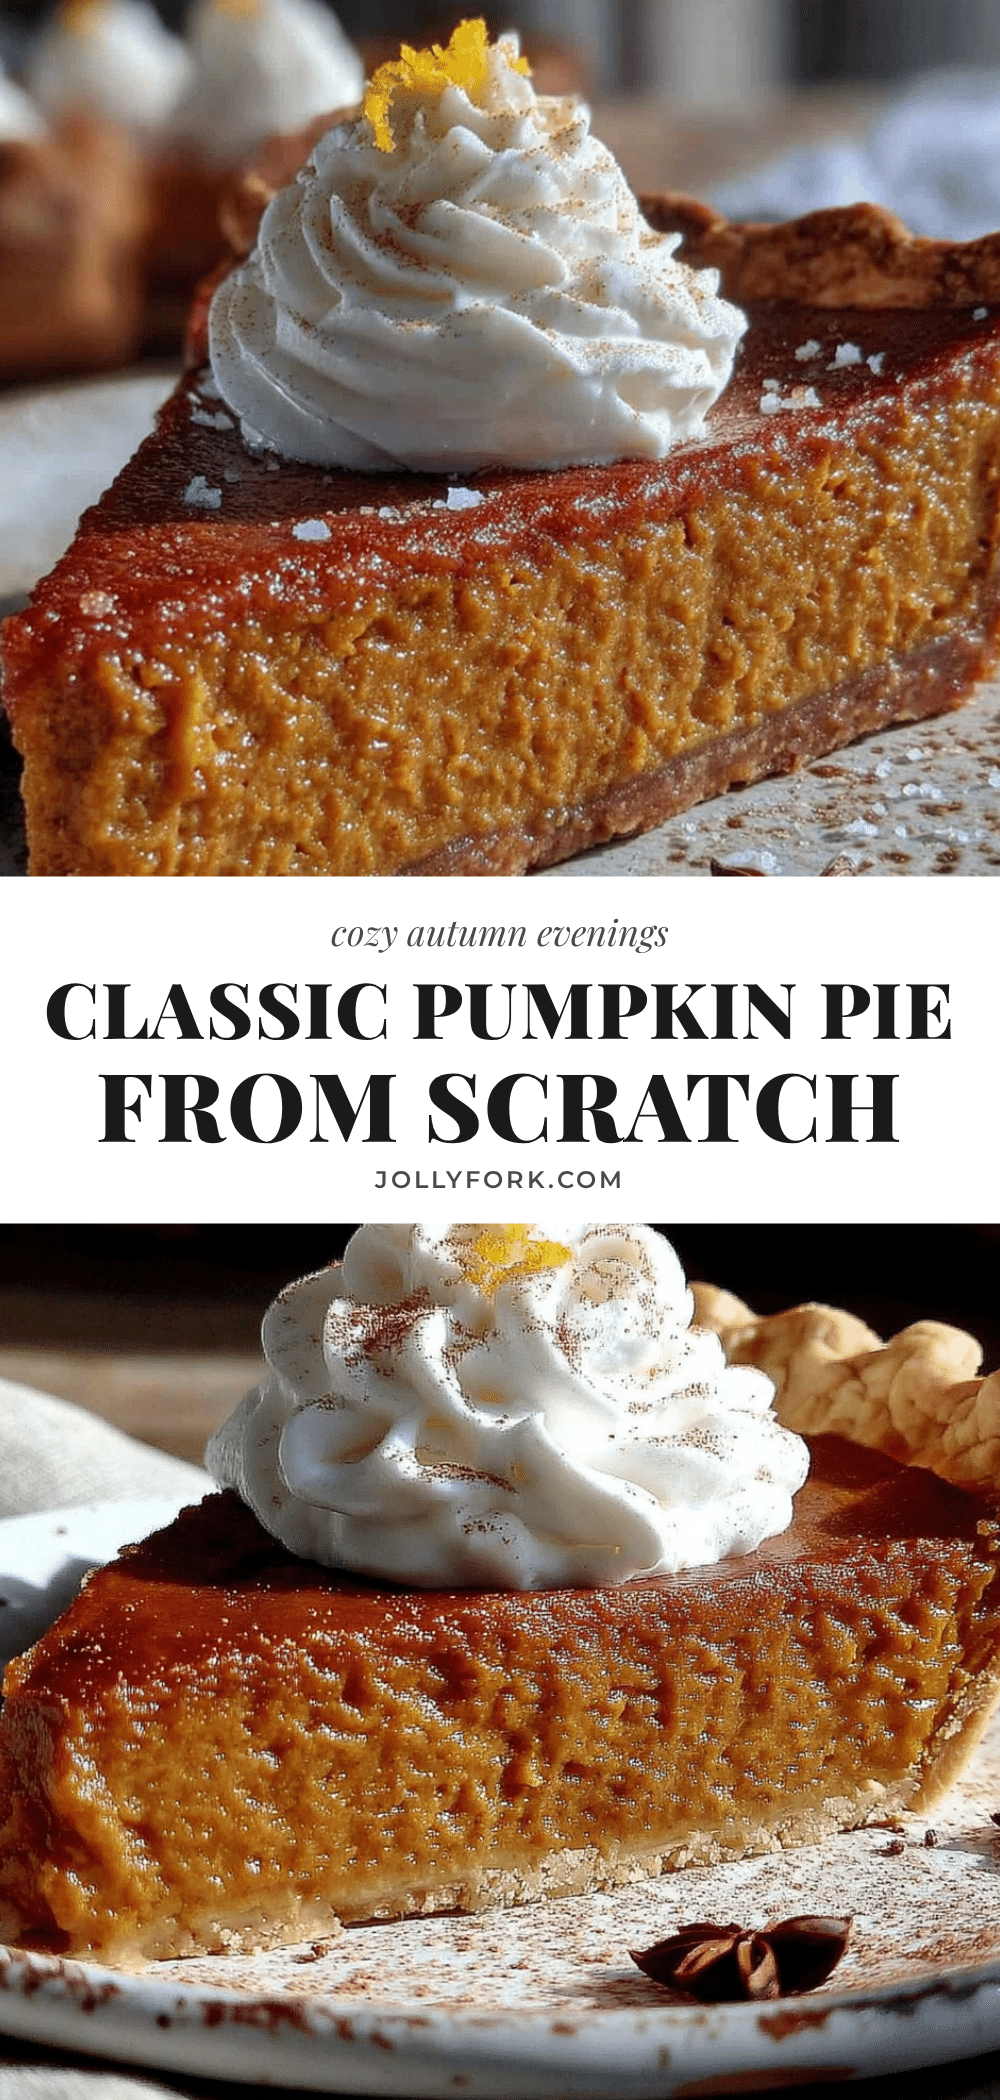
Classic Pumpkin Pie from Scratch – Best Fall Dessert
This classic pumpkin pie from scratch features a silky, spiced filling and a flaky, buttery crust. It’s the perfect autumn dessert that will make you the hero of any fall gathering.
- Prep Time: 30 minutes
- Cook Time: 50 minutes
- Total Time: 2 hours 50 minutes (includes chilling and cooling)
- Yield: 8 servings 1x
- Category: Dessert
- Cuisine: American
Ingredients
- 1 ¼ cups all-purpose flour (plus extra for dusting)
- ½ teaspoon fine sea salt
- 1 tablespoon granulated sugar
- ½ cup cold unsalted butter, cut into small cubes
- 3–4 tablespoons ice water
- 1 can (15 oz) pumpkin puree (not pumpkin pie filling)
- ¾ cup granulated sugar
- ¼ cup packed light brown sugar
- 2 large eggs, room temperature
- 1 large egg yolk, room temperature
- 1 cup heavy cream
- ¼ cup whole milk
- 2 teaspoons ground cinnamon
- 1 teaspoon ground ginger
- ½ teaspoon ground nutmeg (freshly grated if possible)
- ¼ teaspoon ground cloves
- ¼ teaspoon ground cardamom
- ½ teaspoon salt
- 1 tablespoon bourbon or dark rum (optional)
- 1 teaspoon vanilla extract
Instructions
- Make the pie crust: In a large bowl, whisk together flour, salt, and sugar. Add cold butter cubes and cut in with a pastry cutter or fingertips until mixture resembles coarse meal with some pea-sized butter chunks. Drizzle in ice water, one tablespoon at a time, mixing with a fork until dough just comes together. Shape into a disk, wrap in plastic, and refrigerate for at least 1 hour.
- Blind bake the crust: Preheat oven to 375°F (190°C). Roll chilled dough into a 12-inch circle on a floured surface. Transfer to a 9-inch pie dish, trim and crimp edges. Prick bottom with a fork. Line with parchment paper and fill with pie weights or dried beans. Bake for 15 minutes, then remove parchment and weights and bake for another 8-10 minutes until lightly golden. Cool slightly.
- Prepare the filling: In a blender or food processor, combine pumpkin puree, granulated sugar, brown sugar, eggs, egg yolk, heavy cream, milk, cinnamon, ginger, nutmeg, cloves, cardamom, salt, bourbon (if using), and vanilla extract. Blend on high for about 30 seconds until completely smooth. Pour into pre-baked crust.
- Bake the pie: Place pie on middle rack of oven at 375°F (190°C) for 15 minutes. Without opening oven, reduce temperature to 350°F (175°C) and continue baking for 35-45 minutes, until edges are set but center still jiggles slightly.
- Cool and serve: Transfer pie to a wire rack and cool completely at room temperature, about 2 hours. Serve at room temperature or slightly warm.
Notes
For the flakiest crust, keep butter and water ice-cold. Blind baking is essential to prevent a soggy bottom. Don’t overbake; the center should still jiggle slightly when done. The flavors deepen after a day in the fridge. For a dairy-free version, substitute full-fat coconut milk or oat cream. For a gluten-free option, use a 1:1 gluten-free flour blend.
Nutrition
- Serving Size: 1 slice
- Calories: 380
- Sugar: 28
- Sodium: 380
- Fat: 22
- Saturated Fat: 13
- Carbohydrates: 44
- Fiber: 3
- Protein: 6
Keywords: pumpkin pie, classic pumpkin pie, fall dessert, Thanksgiving pie, homemade pumpkin pie, from scratch