There used to be a little bakery tucked between a vintage bookstore and a laundromat on the corner of Elm and 4th Street that made the most incredible pumpkin cheesecake bar I had ever tasted. When they closed suddenly two autumns ago—a “For Lease” sign taped in the window one Tuesday morning—I honestly felt a little pang of grief. That sounds dramatic, I know, but those bars were my October ritual. Every time the air got that crisp, smoky smell, I’d find myself walking over, ordering one with a black coffee, and sitting on the bench outside watching the leaves tumble down. After six failed attempts—one that turned into pumpkin soup, another that looked like a crime scene—I finally cracked the code. Let me tell you, the victory dance in my kitchen was not pretty, but it was worth it.
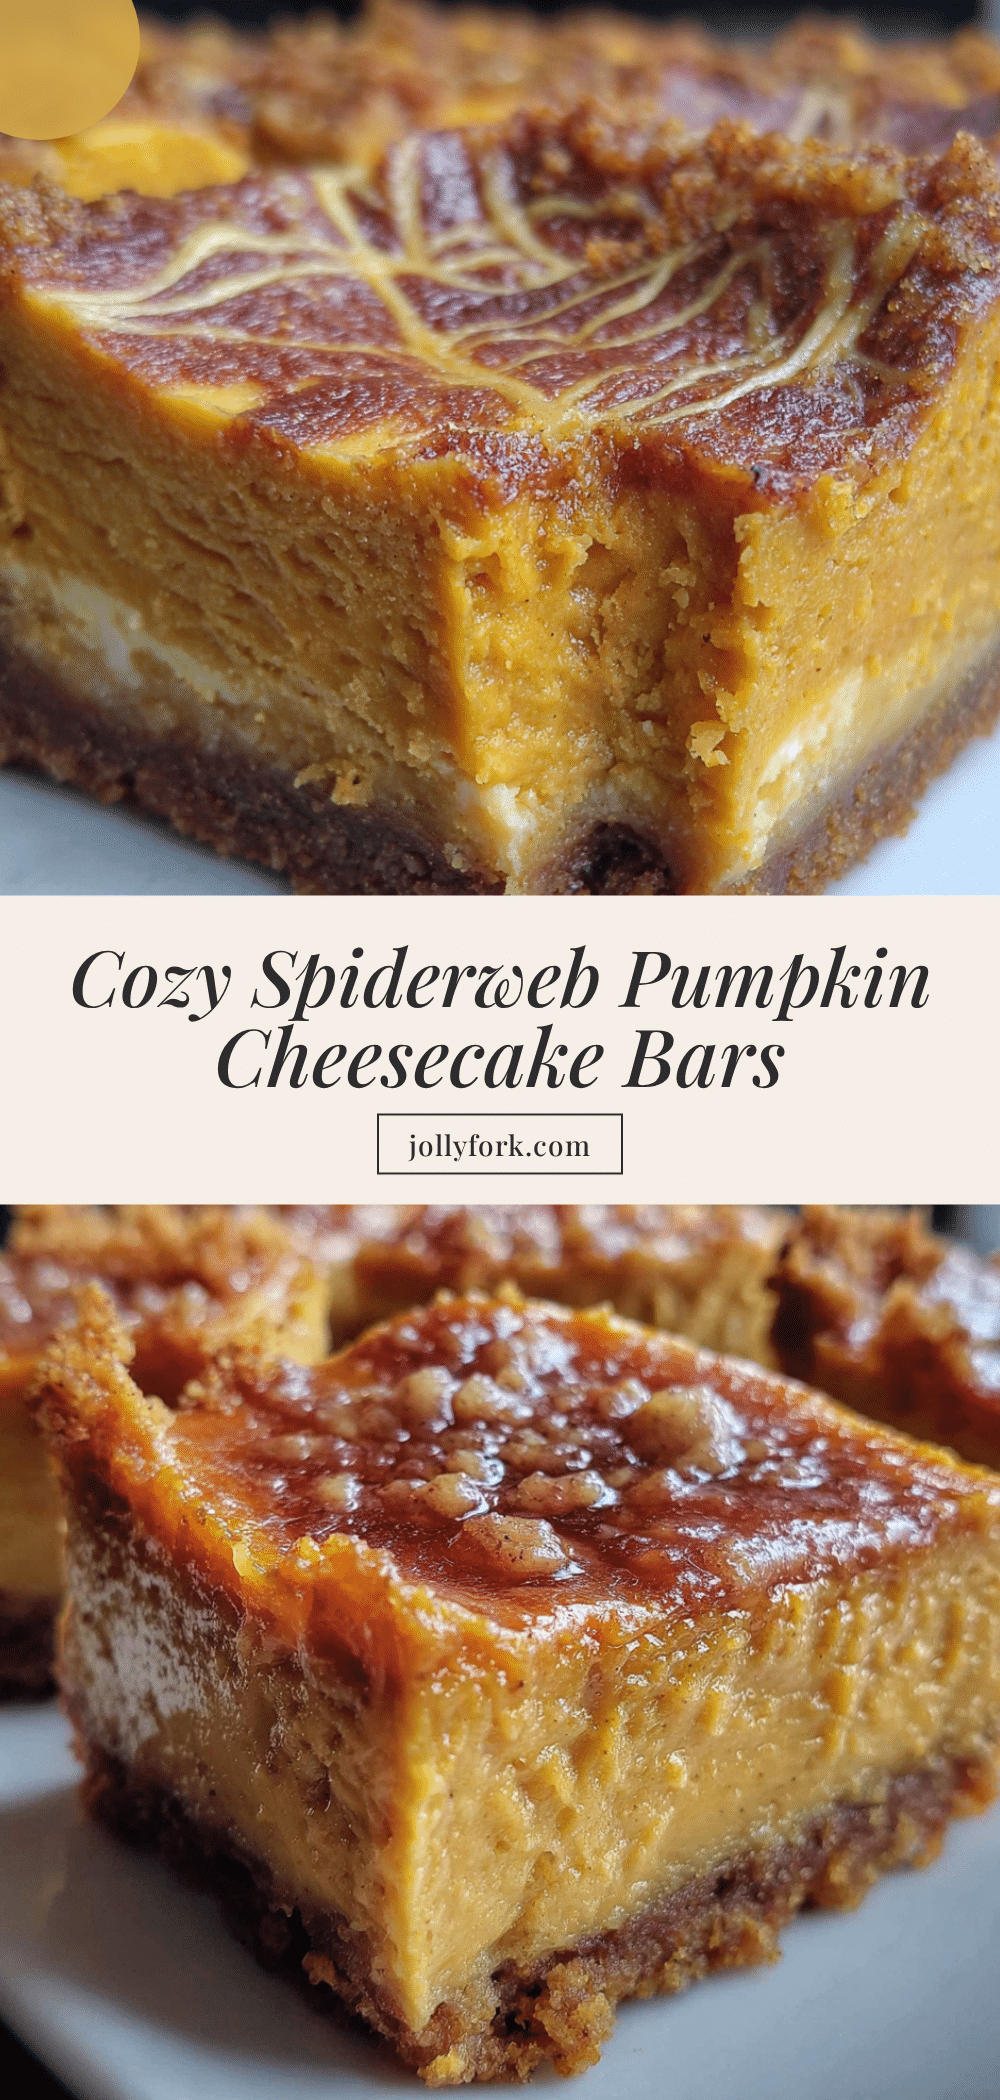
These Cozy Spiderweb Pumpkin Cheesecake Bars are my love letter to that lost bakery. They have that same perfect ratio of buttery, spiced shortbread crust to silky, tangy cheesecake, all topped with a swoop of dramatic chocolate spiderweb that makes them look like you spent hours fussing. Spoiler: you didn’t. The web is embarrassingly easy, and that’s the beautiful secret here. You get a showstopper dessert that tastes like a professional pastry chef made it, but you’re done and dusted with the dishes before your favorite spooky movie even hits the first jump scare.
Maybe you’ve been there—chasing the ghost of a perfect dessert from a place that no longer exists. Or maybe you just need a killer recipe for your Halloween gathering that doesn’t involve carving anything. Either way, these bars are it. They’re cozy, they’re creepy-cute, and they taste like autumn in a baking dish. I’ve been making them every October since that bakery closed, and honestly, I think I like my version better now. Don’t tell the ghost of that little shop, okay?
Why You’ll Love This Recipe
Let me be real with you—I tested this recipe seven times before I got it exactly right. The first batch was too wet. The second had a crust that crumbled like sand. But by batch number four, my neighbor actually knocked on the door to ask what smelled so good. That’s when I knew I had something special. Here is why these bars are going to become your new fall obsession:
- Quick & Easy: The whole thing comes together in about 45 minutes of active time. The oven does the rest of the work while you get ready for your costume party or curl up with a blanket and a book.
- Simple Ingredients: No weird specialty items here. Pumpkin puree, cream cheese, butter, sugar, and a few pantry spices. You probably have 90% of this already.
- Perfect for Halloween & Fall Gatherings: These are the dessert that disappears first at every party. The spiderweb design makes them instantly festive without being tacky.
- Crowd-Pleaser: I have served these to kids, grandparents, and my picky brother-in-law who “doesn’t like pumpkin.” All of them asked for seconds.
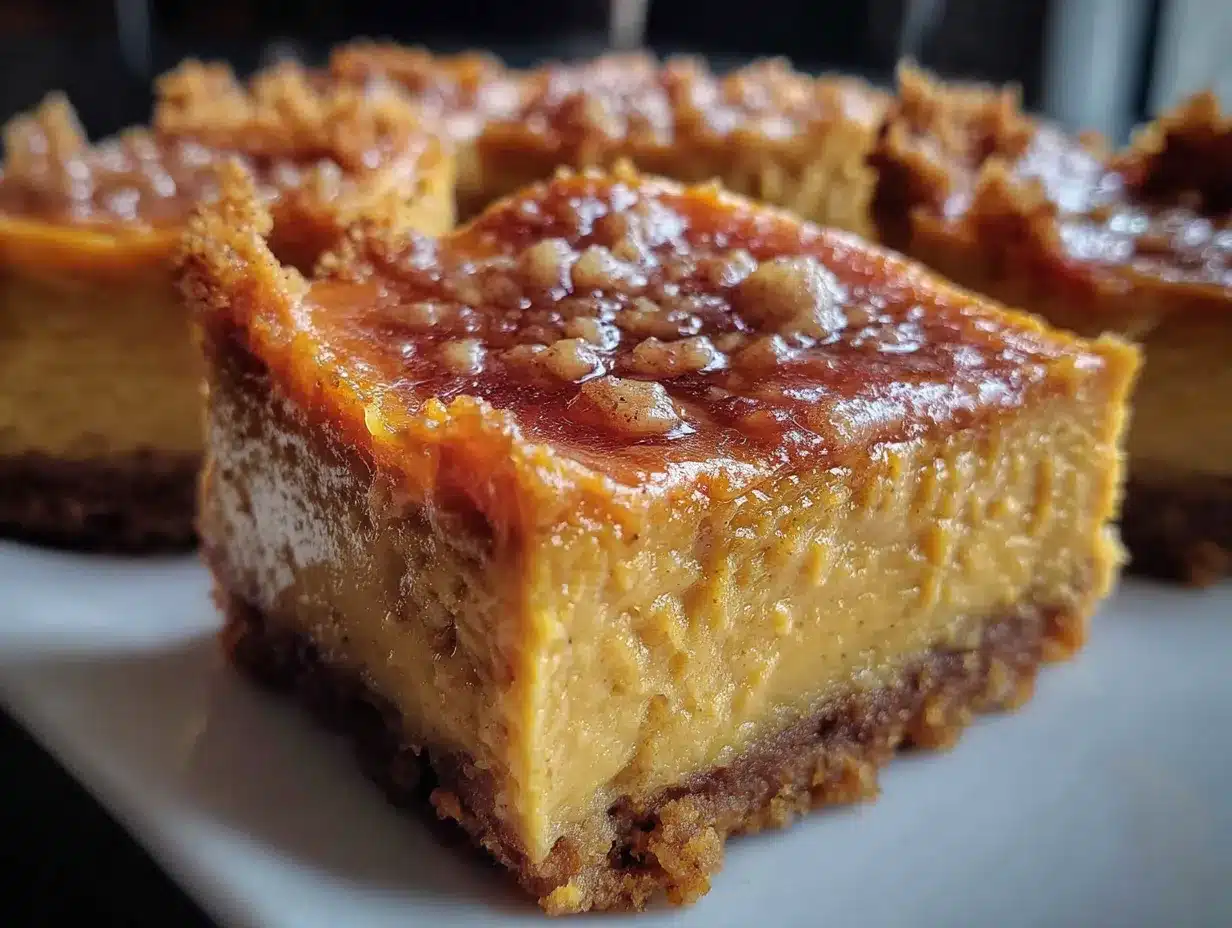
- Unbelievably Delicious: The texture is what gets everyone. The crust stays buttery and crisp, the pumpkin layer is velvety with just the right spice warmth, and the cheesecake is so smooth it almost melts on your tongue.
What makes this version different from every other pumpkin cheesecake bar out there? Two things. First, I use a shortbread-style crust that I pre-bake for exactly 12 minutes—this is non-negotiable, people—so it stays crunchy even after the wet filling goes on top. Second, I blend the cream cheese and pumpkin separately before combining them. It sounds like an extra step, but it prevents that annoying graininess you sometimes get with pumpkin cheesecake. The result is a bar that tastes luxurious but feels totally doable on a Tuesday night.
This recipe isn’t just good—it is the kind that makes you close your eyes after the first bite. It’s comfort food with a Halloween twist, rich and creamy and spiced like your grandmother’s kitchen. Perfect for impressing guests without breaking a sweat, or turning a regular October evening into something special.
What Ingredients You Will Need
This recipe uses simple, wholesome ingredients to deliver that perfect balance of creamy, spiced, and buttery. Most of these are pantry staples, especially if you do any fall baking at all. Here is what you need, grouped by layer for clarity.
For the Crust
- 1 ½ cups all-purpose flour (spooned and leveled—don’t scoop straight from the bag or you’ll get too much)
- ½ cup granulated sugar
- ½ cup unsalted butter, cold and cut into small cubes (I use Kerrygold, but any good unsalted butter works)
- ¼ teaspoon salt
- ½ teaspoon vanilla extract
For the Pumpkin Layer
- 1 cup pumpkin puree (NOT pumpkin pie filling—make sure it’s 100% pure pumpkin. Libby’s is my go-to)
- ¼ cup brown sugar, packed (light or dark both work; dark gives a deeper molasses flavor)
- 1 large egg
- 1 teaspoon pumpkin pie spice (or make your own: ½ tsp cinnamon, ¼ tsp ginger, ⅛ tsp nutmeg, ⅛ tsp cloves)
- ½ teaspoon cinnamon
- 1 tablespoon heavy cream (adds richness—you can use whole milk in a pinch)
For the Cheesecake Layer
- 16 oz cream cheese, softened to room temperature (full-fat is best here; low-fat can make the texture grainy)
- ½ cup granulated sugar
- 2 large eggs, room temperature
- 1 teaspoon vanilla extract
- 2 tablespoons sour cream (adds tang and makes it extra creamy—I recommend full-fat Daisy brand)
For the Spiderweb Topping
- ¼ cup semi-sweet chocolate chips (or dark chocolate if you prefer less sweetness)
- 1 tablespoon heavy cream
Ingredient Tips: Make sure your cream cheese is truly at room temperature—leave it out for at least an hour. Cold cream cheese creates lumps that are nearly impossible to get smooth. For the pumpkin puree, I always blot it with a paper towel to remove excess moisture. This prevents the filling from being watery. And if you want to go gluten-free, substitute the all-purpose flour with a 1:1 gluten-free baking blend. I’ve tested it with Bob’s Red Mill and it works beautifully.
Equipment Needed
You don’t need a fancy bakery setup for these bars. Here is what you will need:
- 9×9-inch square baking pan (an 8×8 works too, but your bars will be slightly thicker and need a few extra minutes of baking time)
- Parchment paper (for easy lifting—trust me, don’t skip this or you’ll be digging bars out with a spatula and crying)
- Electric hand mixer or stand mixer (you can do this by hand with a whisk, but your arm will get a workout, especially with the cream cheese)
- Large mixing bowls (at least two—one for the crust, one for the fillings)
- Medium mixing bowl (for the pumpkin layer)
- Small microwave-safe bowl (for melting the chocolate)
- Rubber spatula
- Toothpick or skewer (for creating the spiderweb design)
- Measuring cups and spoons
- Cooling rack
If you don’t have a hand mixer, a good old-fashioned whisk and some elbow grease will work—just make sure your cream cheese is extra soft. I actually broke my first hand mixer mid-batch once (RIP, Betty) and finished by hand. It was fine, but my forearm was sore the next day. So maybe borrow one from a neighbor if you need to.
Preparation Method
Alright, let’s get baking. I promise this is easier than it looks. Take your time with the first step—it sets everything up for success.
- Preheat and Prep: Preheat your oven to 350°F (175°C). Line your 9×9-inch baking pan with parchment paper, leaving a 2-inch overhang on two opposite sides. This creates handles so you can lift the whole block of bars out later. Lightly grease the parchment with butter or non-stick spray.
- Make the Crust: In a medium bowl, whisk together the flour, sugar, and salt. Add the cold butter cubes and vanilla extract. Use a pastry cutter, two forks, or your fingertips to work the butter into the flour mixture until it looks like coarse crumbs with some pea-sized butter pieces still visible. Don’t overwork it—you want the crust to be tender, not tough. Press the mixture evenly into the bottom of the prepared pan. I use the bottom of a measuring cup to really pack it down firmly. Bake for 12 minutes, until the edges are just barely golden. Set aside to cool slightly while you make the fillings.
- Make the Pumpkin Layer: In a small bowl, whisk together the pumpkin puree, brown sugar, egg, pumpkin pie spice, cinnamon, and heavy cream until smooth. Set aside. (Pro tip: If your pumpkin puree looks watery, spread it on a paper towel-lined plate for a few minutes to blot excess moisture. This step changed my life.)
- Make the Cheesecake Layer: In a large bowl, beat the softened cream cheese with an electric mixer on medium speed until completely smooth—about 2 minutes. Scrape down the sides and the bottom of the bowl with a rubber spatula. Add the sugar and beat for another minute. Add the eggs one at a time, beating on low speed after each addition just until combined. Overbeating at this stage adds too much air and can cause cracks. Finally, mix in the vanilla extract and sour cream until just incorporated. The mixture should be silky and smooth.
- Assemble the Layers: Pour the cheesecake mixture over the pre-baked crust and spread it evenly. Drop spoonfuls of the pumpkin mixture randomly over the top of the cheesecake. Use a butter knife or a skewer to gently swirl the pumpkin into the cheesecake—just a few figure-eight motions. You want a marbled effect, not a fully blended mixture. Don’t overswirl or you’ll lose the distinct layers.
- Bake: Place the pan in the preheated oven and bake for 35-40 minutes, or until the edges are set and the center is just slightly jiggly—like a firm Jell-O. It will continue to set as it cools. Turn the oven off, crack the door open, and let the bars sit inside for 10 minutes. This gentle cooling helps prevent cracks.
- Cool Completely: Remove the pan from the oven and place it on a cooling rack. Let the bars cool to room temperature, about 1 hour. Then cover with plastic wrap and refrigerate for at least 4 hours, preferably overnight. This step is crucial—the bars need time to fully set so you get clean slices.
- Make the Spiderweb: Once the bars are fully chilled and set, make the spiderweb topping. Combine the chocolate chips and heavy cream in a small microwave-safe bowl. Microwave in 20-second intervals, stirring between each, until smooth and glossy. Let it cool for 2 minutes so it thickens slightly. Transfer the melted chocolate to a small piping bag or a zip-top bag with a tiny corner snipped off.
- Create the Web Design: Pipe a small circle of chocolate in the center of the cheesecake. Pipe a larger circle around it, then another, and another, working your way outward until you have 4-5 concentric circles. Starting from the center, drag a toothpick or skewer through the circles outward toward the edge—like drawing spokes on a wheel. Then, drag the toothpick from the edge back toward the center in between each spoke. This creates the classic spiderweb pattern. Wipe the toothpick clean between each stroke for crisp lines.
- Slice and Serve: Use the parchment overhang to lift the entire block of bars out of the pan. Place on a cutting board. Use a sharp knife to slice into 9 or 16 squares, wiping the knife clean between cuts for neat edges. Serve chilled or at room temperature.
Cooking Tips & Techniques
I have made every mistake in the book with this recipe so you don’t have to. Here are the things I wish someone had told me before I started.
Don’t skip the pre-bake on the crust. I know it’s tempting to just press it in and pour everything on top, but that 12-minute pre-bake is what keeps the bottom from turning into a soggy mess. The first time I made these, I was in a hurry and skipped it. The result was a crust that had the texture of wet sand. Never again.
Room temperature ingredients are not optional. Cold eggs and cold cream cheese will give you a lumpy, curdled-looking batter. I learned this the hard way when I made a batch for a Halloween party and my cheesecake layer looked like cottage cheese. Set everything out on the counter an hour before you start. If you forget, place the eggs in a bowl of warm water for 5 minutes and microwave the cream cheese in 10-second bursts until it’s soft but not melted.
The jiggle test is your friend. Don’t rely solely on baking times. Every oven runs differently. When you gently shake the pan, the center should wobble like firm gelatin, not slosh like liquid. If it’s still soupy in the middle, give it another 5 minutes. If the edges are pulling away from the pan and the center is barely jiggly, it’s done.
Patience with cooling pays off. I know you want to eat these immediately—I have been there, staring into the fridge like a sad raccoon. But cutting into them before they are fully chilled will give you a goopy, messy slice. The overnight chill is what gives you those clean, Instagram-worthy squares. Trust the process.
For the cleanest spiderweb lines, let the chocolate cool until it’s thick but still pipeable. If it’s too thin, the lines will bleed into each other. If it’s too thick, they won’t come out smoothly. Test a small line on a plate first to check the consistency.
Variations & Adaptations
One of the best things about this recipe is how flexible it is. Here are some ways to make it your own.
Gluten-Free Version: Substitute the all-purpose flour in the crust with a 1:1 gluten-free baking blend. I’ve tested this with both Bob’s Red Mill and King Arthur Measure for Measure, and both work perfectly. The texture is slightly more crumbly, but just as delicious.
Dairy-Free Adaptation: Use dairy-free cream cheese (Kite Hill or Violife are my favorites), vegan butter, and coconut cream instead of heavy cream. The texture will be a tiny bit softer, so I recommend chilling for a full 8 hours before slicing. The flavor is still incredible—my dairy-free friend actually cried when she tried these.
Spice It Up: If you like a more intense pumpkin spice flavor, add an extra ½ teaspoon of ginger and a pinch of black pepper to the pumpkin layer. The pepper sounds weird, I know, but it actually enhances the warmth of the other spices. I tried this on a whim last year and now I do it every time.
Chocolate Crust Twist: Replace ¼ cup of the flour with cocoa powder for a chocolate shortbread crust. This turns the whole thing into a pumpkin-chocolate dream situation. Just reduce the sugar in the crust by 2 tablespoons since cocoa powder is bitter and you don’t want it to be too sweet.
Mini Spiderweb Bites: Use a 24-cup mini muffin tin lined with paper liners. Press a small amount of crust into each cup, then fill with the cheesecake and pumpkin mixture. Bake for 15-18 minutes. These are perfect for parties where people want to grab and go without committing to a full bar.
No-Bake Option: If you don’t want to turn on the oven, use a store-bought graham cracker crust (or make your own with crushed graham crackers and melted butter). Skip the eggs in the cheesecake layer and use a no-bake cheesecake recipe instead. The texture is lighter and fluffier, but the flavor is still spot-on.
Serving & Storage Suggestions
These bars are incredibly versatile when it comes to serving. Here is how to get the most out of them.
Serving Temperature: I prefer these bars straight from the fridge—cold and firm with that creamy texture that just melts on your tongue. But they are also lovely at room temperature, especially if you want the cheesecake to be extra soft and luscious. Let them sit on the counter for 15 minutes before serving if you go that route.
Presentation Ideas: For Halloween parties, arrange the bars on a black platter or a dark wooden board. Sprinkle some edible glitter or a dusting of powdered sugar around the edges for a spooky-chic look. You can also top each bar with a tiny plastic spider (just remind people to remove it before eating!). For a more elegant fall presentation, serve with a dollop of whipped cream and a sprinkle of cinnamon.
What to Serve With Them: A hot cup of spiced apple cider or a pumpkin spice latte is the perfect companion. For a dessert spread, pair with vanilla ice cream or a drizzle of caramel sauce. If you are feeling extra indulgent, warm up some salted caramel and drizzle it over the top before serving.
Storage Instructions: Store the bars in an airtight container in the refrigerator for up to 5 days. Place a sheet of parchment paper between layers if stacking them to prevent the spiderweb from smudging. I have also frozen these with great success—wrap individual bars tightly in plastic wrap, then place them in a freezer-safe bag. They keep for up to 3 months. Thaw overnight in the refrigerator before serving.
Reheating Tips: These are best enjoyed cold or at room temperature, but if you want a warm dessert, microwave a single bar for 10-15 seconds. The cheesecake gets a little soft and gooey, which is honestly delicious. Just don’t overdo it or the chocolate web will melt into a puddle.
Flavor Development: Here is a secret—these bars actually taste better on day two. The flavors meld together overnight, and the spices mellow into something deeper and more complex. So if you can resist eating them all on day one, you are in for a real treat.
Nutritional Information & Benefits
I am not a nutritionist, but I do care about what goes into my body. Here is the approximate nutritional breakdown for one bar (based on 9 servings).
| Nutrient | Amount Per Serving |
|---|---|
| Calories | 385 |
| Total Fat | 24g |
| Saturated Fat | 14g |
| Cholesterol | 105mg |
| Sodium | 280mg |
| Total Carbohydrates | 38g |
| Dietary Fiber | 1g |
| Sugars | 25g |
| Protein | 6g |
| Vitamin A | 45% DV |
| Calcium | 6% DV |
| Iron | 4% DV |
Health Benefits: Pumpkin is packed with vitamin A, which supports eye health and immune function. It’s also a good source of fiber and antioxidants. Cream cheese provides calcium and protein, though yes, it’s also high in fat. The spices—cinnamon, ginger, nutmeg—have anti-inflammatory properties. So while these bars are definitely a treat, they aren’t totally empty calories. Everything in moderation, right?
Dietary Considerations: This recipe contains gluten, dairy, and eggs. For gluten-free, dairy-free, or vegan versions, see the variations section above. The bars are naturally nut-free, making them safe for school parties and gatherings where allergies are a concern.
Conclusion
These Cozy Spiderweb Pumpkin Cheesecake Bars are more than just a Halloween dessert—they are a little piece of comfort that you can make in your own kitchen, no matter what the season. They remind me that some of the best things in life are worth recreating, even if it takes a few failed batches to get there. That little bakery on Elm Street may be gone, but every time I pull a pan of these out of the oven, I feel like I am keeping a tiny piece of it alive.
I really hope you give these a try. Whether you are making them for a Halloween party, a cozy night in, or just because you have a can of pumpkin and a craving for something special, I think you are going to love them. And hey, if you come up with your own twist—maybe a white chocolate web or a gingersnap crust—I would love to hear about it. Drop a comment below and tell me how yours turned out. Or tag me in your photos—I live for seeing your creations.
Happy baking, friends. May your crust be buttery, your cheesecake be silky, and your spiderweb be perfectly spooky. 🕷️🎃
Frequently Asked Questions
Can I use a different size pan?
Yes, but the baking time will change. An 8×8 pan will give you thicker bars that need about 5-8 extra minutes in the oven. A 9×13 pan will give you thinner bars that bake faster—check them at 25 minutes. Just keep an eye on the jiggle test.
Why did my cheesecake crack on top?
Cracks usually happen from overbaking or sudden temperature changes. Make sure you don’t overmix the batter (too much air creates cracks) and let the bars cool gradually in the oven with the door cracked open. Also, room temperature ingredients help prevent cracks.
Can I make these ahead of time?
Absolutely! In fact, I recommend it. These bars need at least 4 hours to set in the fridge, and they actually taste better on day two. You can make them up to 3 days in advance and keep them covered in the refrigerator. Just add the spiderweb design on the day you plan to serve them for the cleanest look.
Can I use canned pumpkin pie filling instead of pure pumpkin?
I don’t recommend it. Pumpkin pie filling is already sweetened and spiced, so it will throw off the balance of the recipe. You will end up with a much sweeter, denser filling. Stick with 100% pure pumpkin puree and add your own spices—you will have much more control over the flavor.
How do I get clean slices without smudging the spiderweb?
Use a sharp knife and wipe it clean with a damp paper towel between each cut. For the cleanest slices, chill the bars for at least 4 hours (overnight is best) and cut them while they are still cold. A bench scraper also works beautifully for cutting through the layers without dragging the chocolate.
Pin This Recipe!
Cozy Spiderweb Pumpkin Cheesecake Bars: Best Easy Recipe
These Cozy Spiderweb Pumpkin Cheesecake Bars are a love letter to a lost bakery, featuring a buttery shortbread crust, silky pumpkin cheesecake, and a dramatic chocolate spiderweb topping. They’re easy to make and perfect for Halloween or fall gatherings.
- Prep Time: 45 minutes
- Cook Time: 35-40 minutes
- Total Time: 5 hours 20 minutes (includes cooling and chilling)
- Yield: 9-16 servings 1x
- Category: Dessert
- Cuisine: American
Ingredients
- 1 ½ cups all-purpose flour
- ½ cup granulated sugar
- ½ cup unsalted butter, cold and cut into small cubes
- ¼ teaspoon salt
- ½ teaspoon vanilla extract
- 1 cup pumpkin puree (100% pure pumpkin, not pie filling)
- ¼ cup brown sugar, packed
- 1 large egg
- 1 teaspoon pumpkin pie spice
- ½ teaspoon cinnamon
- 1 tablespoon heavy cream
- 16 oz cream cheese, softened to room temperature
- ½ cup granulated sugar
- 2 large eggs, room temperature
- 1 teaspoon vanilla extract
- 2 tablespoons sour cream
- ¼ cup semi-sweet chocolate chips
- 1 tablespoon heavy cream
Instructions
- Preheat oven to 350°F (175°C). Line a 9×9-inch baking pan with parchment paper, leaving a 2-inch overhang on two opposite sides. Lightly grease the parchment.
- Make the crust: In a medium bowl, whisk together flour, sugar, and salt. Add cold butter cubes and vanilla extract. Use a pastry cutter, forks, or fingertips to work the butter into the flour until coarse crumbs form with some pea-sized butter pieces. Press evenly into the prepared pan. Bake for 12 minutes until edges are just golden. Set aside to cool slightly.
- Make the pumpkin layer: In a small bowl, whisk together pumpkin puree, brown sugar, egg, pumpkin pie spice, cinnamon, and heavy cream until smooth. Set aside.
- Make the cheesecake layer: In a large bowl, beat softened cream cheese with an electric mixer on medium speed until smooth, about 2 minutes. Scrape down sides. Add sugar and beat for 1 minute. Add eggs one at a time, beating on low after each addition. Mix in vanilla extract and sour cream until just incorporated.
- Assemble: Pour cheesecake mixture over pre-baked crust and spread evenly. Drop spoonfuls of pumpkin mixture randomly on top. Use a butter knife or skewer to gently swirl the pumpkin into the cheesecake with a few figure-eight motions, creating a marbled effect.
- Bake for 35-40 minutes, until edges are set and center is slightly jiggly (like firm Jell-O). Turn off oven, crack door open, and let bars sit inside for 10 minutes.
- Remove from oven and cool on a rack to room temperature, about 1 hour. Cover with plastic wrap and refrigerate for at least 4 hours, preferably overnight.
- Make the spiderweb: Combine chocolate chips and 1 tablespoon heavy cream in a small microwave-safe bowl. Microwave in 20-second intervals, stirring between each, until smooth. Let cool for 2 minutes. Transfer to a small piping bag or zip-top bag with a tiny corner snipped off.
- Pipe a small circle of chocolate in the center of the cheesecake. Pipe larger concentric circles around it, working outward. Starting from the center, drag a toothpick or skewer through the circles outward to the edge, like spokes. Then drag from the edge back toward the center between each spoke. Wipe toothpick clean between strokes.
- Use parchment overhang to lift the block of bars out of the pan. Slice into 9 or 16 squares with a sharp knife, wiping the knife clean between cuts. Serve chilled or at room temperature.
Notes
Make sure cream cheese is at room temperature for at least 1 hour to avoid lumps. Blot pumpkin puree with a paper towel to remove excess moisture. Pre-bake the crust for 12 minutes to prevent sogginess. For clean slices, chill bars for at least 4 hours (overnight is best) and wipe knife between cuts. Bars taste even better on day two.
Nutrition
- Serving Size: 1 bar (based on 9 se
- Calories: 385
- Sugar: 25
- Sodium: 280
- Fat: 24
- Saturated Fat: 14
- Carbohydrates: 38
- Fiber: 1
- Protein: 6
Keywords: pumpkin cheesecake bars, spiderweb, Halloween dessert, fall dessert, pumpkin dessert, cheesecake bars, easy recipe


