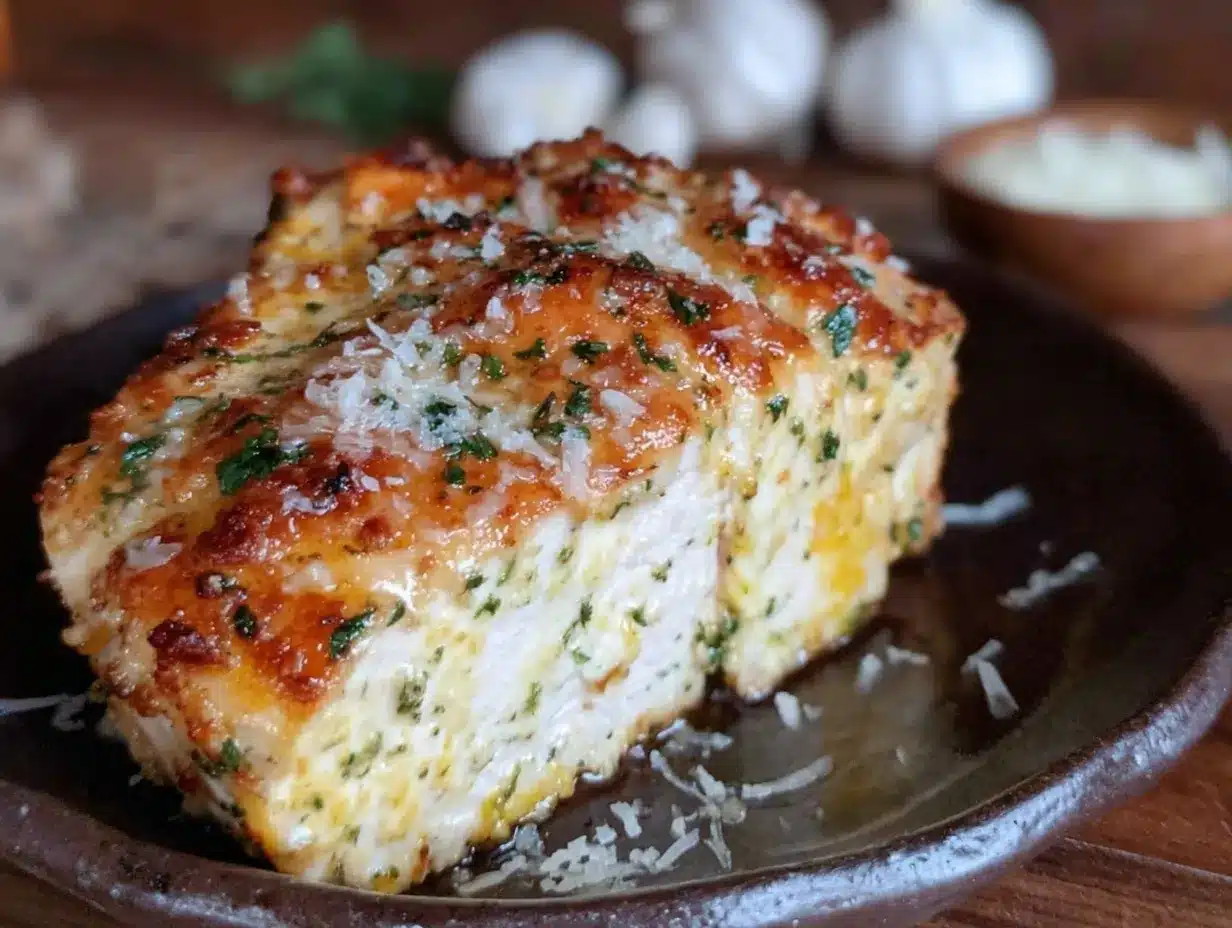
I want crispy chicken right now. Not the kind that requires a deep fryer and a grease-splattered stovetop, but that perfect golden crust that shatters when you bite into it. And I have everything except patience. The chicken breasts are thawed, the Parmesan is grated (store-bought pre-shredded won’t do, I know this from experience), and the garlic is waiting. But here’s the thing about baked chicken breast — it has a reputation for being dry, boring, and pale. The kind of meal you eat because you should, not because you want to.
This isn’t that chicken.
I spent a solid month testing this recipe (my family is still recovering from the “experimental phase”) because I needed a baked chicken breast that actually delivered on the crispy promise. Not sort-of-crispy. Not the top is crispy but the bottom is soggy. Full-on, oven-baked, crunchy-on-the-outside, juicy-on-the-inside chicken that makes you forget you’re eating something relatively healthy.
The trick? A combination of things I already had in my pantry, plus one technique I accidentally discovered when I was rushing one Tuesday night. I forgot to flip the chicken halfway through baking — and that mistake turned into my best batch yet. Sometimes the best recipes come from our mess-ups, you know?
This Crispy Garlic Parmesan Baked Chicken Breast has become my go-to for busy weeknights when I need something reliable. It works for meal prep, it impresses guests, and honestly? It makes me feel like I actually know what I’m doing in the kitchen. Let me show you how it’s done.
Why You’ll Love This Recipe
I’ve tested this recipe more times than I care to admit (let’s just say my neighbors have benefited from the overflow), and here’s what makes it stand out from every other baked chicken recipe you’ve tried:
- Actually Crispy Without Frying : The Parmesan-panko coating creates a golden crust that stays crunchy even after baking. No soggy bottoms here.
- Ready in Under 30 Minutes : From fridge to table in about 25 minutes. Perfect for those nights when you’re starving and the takeout menu is tempting.
- Pantry-Friendly Ingredients : You probably have most of these already. No fancy trips to specialty stores required.
- Juicy Every Single Time : The coating locks in moisture, so you get tender chicken underneath that crispy exterior. No more dry, sad chicken breasts.
- Meal Prep Hero : This chicken reheats beautifully and stays crispy (yes, really). Make a batch on Sunday and thank yourself all week.
- Kid-Approved and Adult-Loved : The garlic Parmesan flavor is universally appealing. My picky eater niece asks for this by name.
What makes this recipe different from the dozens of similar ones online? It’s the method. Most recipes tell you to flip the chicken halfway through — I don’t. Leaving it undisturbed creates a better crust on the bottom that doesn’t peel off when you flip it. Small change, huge difference. Plus, the garlic isn’t just sprinkled on top; it’s mixed into the coating and the butter baste, so every bite has that savory punch.
This is the kind of recipe that makes you close your eyes after the first bite. It’s comfort food that doesn’t weigh you down, and it’s impressive enough for company but simple enough for a Tuesday. Trust me on this one.
What Ingredients You Will Need
This recipe uses simple, everyday ingredients to create something genuinely special. Most of these are probably in your kitchen right now, which is exactly how I like my recipes.
For the Chicken
- Boneless, skinless chicken breasts (2 large or 3 medium, about 1.5 pounds total) — Look for even thickness so they cook at the same rate. If they’re uneven, butterfly them or pound to even thickness.
- Olive oil (2 tablespoons) — Helps the coating stick and promotes browning. Avocado oil works too.
- Unsalted butter (2 tablespoons, melted) — Adds richness and helps the garlic flavor cling to the chicken.
- Fresh garlic (4 cloves, minced) — Please don’t use the jarred stuff here. Fresh garlic makes a noticeable difference in flavor intensity.
- Salt (1 teaspoon) — I use fine sea salt. Adjust based on your preference.
- Black pepper (½ teaspoon, freshly ground) — Freshly ground makes a difference here.
For the Crispy Coating
- Panko breadcrumbs (1 cup) — These are crucial for that extra-crispy texture. Regular breadcrumbs won’t give you the same crunch. I prefer the Japanese-style panko from Kikkoman or Ian’s.
- Freshly grated Parmesan cheese (½ cup) — Pre-shredded Parmesan won’t melt and crisp the same way. Grate it yourself from a wedge — it takes two minutes and makes a huge difference.
- Garlic powder (1 teaspoon) — Not the same as fresh garlic. This adds a deeper, roasted garlic note to the coating.
- Onion powder (½ teaspoon) — Optional but adds nice depth.
- Dried Italian seasoning (1 teaspoon) — Or a mix of dried oregano, basil, and thyme if you don’t have the blend.
- Paprika (½ teaspoon) — Adds color and a subtle sweetness. Smoked paprika works great here too.
For Serving (Optional)
- Fresh parsley (chopped, for garnish) — Adds color and freshness.
- Lemon wedges — A squeeze of lemon right before eating brightens everything up.
- Extra Parmesan — Because more cheese is never a bad idea.
Ingredient swap note: For a gluten-free version, use gluten-free panko or crushed pork rinds (trust me on this — they get incredibly crispy). You can also swap the Parmesan for nutritional yeast if you’re dairy-free, though the texture will be slightly different.
Equipment Needed
You don’t need a fancy kitchen for this recipe, which is one of the reasons I love it. Here’s what you’ll need:
- Baking sheet (rimmed, 13×18 inch) — A rimmed sheet prevents butter from dripping onto your oven floor. My go-to is the Nordic Ware half-sheet pan — it’s affordable and doesn’t warp.
- Wire rack (fits inside your baking sheet) — This is the secret to crispy-bottomed chicken. It elevates the chicken so air circulates underneath. If you don’t have one, you can still make this (see tips below), but the rack makes a noticeable difference.
- Parchment paper or aluminum foil — For easy cleanup. Line your baking sheet even if you’re using a wire rack.
- Three shallow bowls — For the coating station. Pie plates or wide soup bowls work perfectly.
- Tongs — For handling the chicken without getting your hands covered in coating.
- Meat thermometer — Not optional. This is how you guarantee juicy chicken every time. I use a simple instant-read thermometer from ThermoPro (under $15 and worth every penny).
- Chef’s knife and cutting board — For prepping the chicken and mincing garlic.
- Small saucepan or microwave-safe bowl — For melting the butter.
Budget tip: If you don’t have a wire rack, you can place the chicken directly on a parchment-lined baking sheet. The bottom won’t be as crispy, but it’ll still be delicious. Just make sure to flip the chicken carefully halfway through — and accept that some coating might stick to the paper.
Preparation Method
Let me walk you through this step by step. I’ve included every little detail I wish someone had told me when I first started making this.
Step 1: Prep Your Chicken (5 minutes)
Preheat your oven to 425°F (220°C). Place a wire rack on a rimmed baking sheet lined with parchment paper or foil.
Pat your chicken breasts dry with paper towels. This is important — excess moisture is the enemy of crispy coating. If your chicken breasts are uneven in thickness (one end thick, one end thin), place them between two pieces of plastic wrap and gently pound them to an even ¾-inch thickness using a rolling pin or the bottom of a heavy skillet. This ensures even cooking.
Season both sides of the chicken with salt and pepper. Don’t be shy with the salt — it seasons the chicken itself, not just the coating.
Step 2: Set Up Your Coating Station (5 minutes)
In a shallow bowl, combine the panko breadcrumbs, grated Parmesan, garlic powder, onion powder, Italian seasoning, and paprika. Stir with a fork until everything is evenly distributed.
In a second shallow bowl, whisk together the olive oil, melted butter, and minced fresh garlic. The mixture should look slightly emulsified — if it separates, just whisk it again right before using.
Here’s a trick I learned the hard way: taste your coating mixture before you start. The Parmesan adds salt, so you want to make sure it’s seasoned enough. If it tastes bland, add another pinch of salt or garlic powder.
Step 3: Coat the Chicken (5 minutes)
Working with one piece of chicken at a time, dip it into the butter-garlic mixture, turning to coat both sides. Let any excess drip off — you don’t want it pooling in the coating.
Transfer the chicken to the panko-Parmesan mixture. Press the coating firmly onto both sides, making sure it sticks. Don’t just drop it in and roll — actually press the coating into the chicken with your fingers. This creates a thicker, more adherent crust that won’t fall off during baking.
Place the coated chicken on the wire rack. Repeat with remaining pieces. If you have extra coating mixture, you can press more onto the tops of the chicken breasts.
Step 4: Bake (18-22 minutes)
Here’s the part that goes against conventional wisdom: do not flip the chicken. Place the baking sheet on the middle rack of your preheated oven and bake for 18-22 minutes, depending on the thickness of your chicken.
The chicken is done when it reaches an internal temperature of 165°F (74°C) in the thickest part. Start checking at 18 minutes — insert your meat thermometer into the thickest part of the largest breast. If you don’t have a thermometer, cut into the thickest part; the juices should run clear and there should be no pink remaining.
If you want extra-crispy tops, switch the oven to broil for the last 1-2 minutes. Watch it carefully — it can go from golden to burnt very quickly.
Step 5: Rest and Serve (5 minutes)
Remove the chicken from the oven and let it rest on the wire rack for 5 minutes. This allows the juices to redistribute throughout the meat, keeping it moist. If you cut into it immediately, all those juices will run out onto your cutting board instead of staying in the chicken.
Garnish with fresh parsley and serve with lemon wedges if desired. The lemon really brightens up the rich, savory flavors.
Cooking Tips & Techniques
After making this recipe probably two dozen times (I stopped counting after I lost track), here are the things I wish I’d known from the start:
The Wire Rack Is Non-Negotiable
I know I mentioned this already, but it deserves repeating. The wire rack allows hot air to circulate underneath the chicken, which means the bottom gets crispy too. Without it, the chicken sits in its own juices and the coating becomes soggy. If you don’t have a wire rack, you can flip the chicken halfway through baking, but the top coating will stick to the pan and you’ll lose some of that beautiful crust.
Don’t Skip the Resting Time
I get it — you’re hungry, the kitchen smells amazing, and you want to eat right now. But cutting into hot chicken immediately is the fastest way to dry it out. Those five minutes of resting are crucial. The internal temperature will also rise a few degrees during resting (called carryover cooking), so you can pull the chicken at 160°F and it’ll reach 165°F while resting.
Panko vs. Regular Breadcrumbs
Panko breadcrumbs are larger and flakier than regular breadcrumbs, which means they create a lighter, crunchier coating. Regular breadcrumbs will give you a denser, more compact crust that’s still tasty but not as crispy. If you only have regular breadcrumbs, try toasting them in a dry skillet for a few minutes first to improve their texture.
My Biggest Failure
The first time I made this, I used pre-shredded Parmesan (the kind in the green can). The coating was clumpy, didn’t stick well, and the cheese burned before the chicken was cooked through. Freshly grated Parmesan melts more evenly and creates a smoother, more cohesive crust. Learn from my mistakes, friends.
Timing Strategy
If you’re making a full meal, start the chicken first since it takes the longest. While it’s baking, you can make a quick side dish like roasted vegetables, a simple salad, or some creamy garlic Parmesan alfredo sauce to drizzle over the top. The chicken and sauce actually share the same flavor profile, so they pair beautifully together.
Variations & Adaptations
One of the best things about this recipe is how adaptable it is. Here are some variations I’ve tried and loved:
Spicy Buffalo Version
Add 2 tablespoons of buffalo sauce to the butter-garlic mixture and reduce the olive oil by 1 tablespoon. Mix ½ teaspoon of cayenne pepper into the panko coating. Serve with ranch or blue cheese dressing for dipping. This version is dangerously addictive.
Lemon Herb Version
Add the zest of one lemon to the panko mixture and replace the Italian seasoning with fresh thyme and rosemary (about 1 tablespoon each, finely chopped). Squeeze fresh lemon juice over the finished chicken. This is my go-to summer version when I want something lighter.
Gluten-Free Version
Use gluten-free panko (available at most grocery stores) or crushed pork rinds. The pork rind version is actually incredibly crispy — almost like fried chicken. Just make sure your other ingredients (like the Parmesan) are certified gluten-free if needed.
Dairy-Free Version
Replace the butter with vegan butter or additional olive oil, and use nutritional yeast instead of Parmesan. The nutritional yeast won’t get as crispy, so I recommend adding an extra ¼ cup of panko to compensate. The flavor will be different but still delicious.
Air Fryer Method
Preheat your air fryer to 375°F (190°C). Cook the coated chicken breasts for 12-15 minutes, flipping halfway through, until the internal temperature reaches 165°F. The air fryer creates an even crispier crust than the oven — it’s my preferred method when I’m only cooking for one or two people.
If you’re looking for another crispy chicken option, try my honey garlic baked chicken thighs for a different flavor profile that’s equally satisfying.
Serving & Storage Suggestions
How to Serve
This chicken is best served hot, right after resting. The crispy coating is at its peak within the first 15 minutes after baking. Serve it alongside:
- Roasted vegetables (asparagus, broccoli, or Brussels sprouts work great)
- A simple green salad with a tangy vinaigrette to cut through the richness
- Mashed potatoes or roasted potatoes for a comforting meal
- Rice or quinoa to soak up any juices
- Pasta tossed with olive oil and garlic — I sometimes make a batch of creamy lemon garlic butter shrimp pasta and serve the chicken alongside for a surf-and-turf twist
Storage
Leftover chicken can be stored in an airtight container in the refrigerator for up to 4 days. The coating will soften over time, but it’ll still taste great.
To reheat and restore crispiness: Place the chicken on a wire rack over a baking sheet and reheat in a 375°F oven for 8-10 minutes. The microwave will make the coating soggy — avoid it if you can. An air fryer works beautifully for reheating too (3-4 minutes at 375°F).
Freezing
You can freeze the baked chicken for up to 3 months. Let it cool completely, then wrap each piece individually in plastic wrap and place in a freezer bag. To reheat, thaw in the refrigerator overnight and follow the reheating instructions above.
For meal prep, I sometimes double the recipe and freeze half. It’s a lifesaver on busy weeks when I don’t have time to cook but still want something homemade.
Nutritional Information & Benefits
Here’s the approximate nutritional breakdown for one serving (one large chicken breast with coating):
- Calories: 385
- Protein: 42g
- Fat: 18g
- Carbohydrates: 12g
- Fiber: 1g
- Sugar: 1g
- Sodium: 680mg
This recipe is naturally low-carb and keto-friendly if you use almond flour or pork rinds instead of panko. It’s also high in protein, making it great for post-workout meals or anyone looking to increase their protein intake.
The chicken provides lean protein that supports muscle health and keeps you full longer. The garlic offers anti-inflammatory benefits (plus it’s great for your immune system), and the Parmesan adds calcium and a good dose of umami flavor.
Allergen note: This recipe contains dairy (butter, Parmesan) and gluten (panko). See the variations section for dairy-free and gluten-free adaptations.
Conclusion
This Crispy Garlic Parmesan Baked Chicken Breast has become a staple in my kitchen for good reason. It’s reliable, it’s delicious, and it makes me feel like I’ve got my act together even on chaotic weeknights. The crispy coating, the juicy interior, the punch of garlic and Parmesan — it’s simple food done right.
I love that this recipe doesn’t require any special skills or fancy equipment. It’s the kind of dish that builds confidence in the kitchen because it works every single time. And honestly? That’s what I need from a recipe most nights.
I’d love to hear how this turns out for you. Did you try one of the variations? Did you discover a new trick? Drop a comment below and let me know — your experience might help someone else who’s about to make this for the first time. And if you’re looking for more easy dinner inspiration, check out my easy sheet pan caprese chicken for another one-pan wonder that’ll make your weeknight cooking a breeze.
Until next time, happy cooking!
Frequently Asked Questions
Can I use chicken thighs instead of chicken breasts?
Absolutely! Boneless, skinless chicken thighs work great with this recipe. They’ll need about 20-25 minutes of baking time (slightly longer than breasts) and they’re even more forgiving since they have more fat and stay juicy. Just make sure they reach 165°F internal temperature.
Why did my coating fall off?
This usually happens for one of three reasons: the chicken wasn’t patted dry before coating, the coating wasn’t pressed firmly enough, or the chicken was moved too early during baking. Let the coating set for a few minutes on the wire rack before putting it in the oven, and don’t flip the chicken during baking.
Can I prepare this ahead of time?
You can coat the chicken up to 4 hours ahead and keep it in the refrigerator on the wire rack. Let it sit at room temperature for 15 minutes before baking. I don’t recommend coating it the night before — the panko will absorb moisture and become less crispy.
How do I know when the chicken is done without a thermometer?
Cut into the thickest part of the largest breast. The juices should run clear (not pink), and there should be no pinkness in the meat. The chicken should feel firm to the touch but not hard. A meat thermometer is more reliable, but this method works in a pinch.
Can I make this in an air fryer instead of the oven?
Yes! Preheat your air fryer to 375°F and cook the coated chicken for 12-15 minutes, flipping halfway through. No need to use a wire rack in the air fryer — the basket provides enough air circulation. The air fryer version is actually my favorite for the extra-crispy results.
Pin This Recipe!
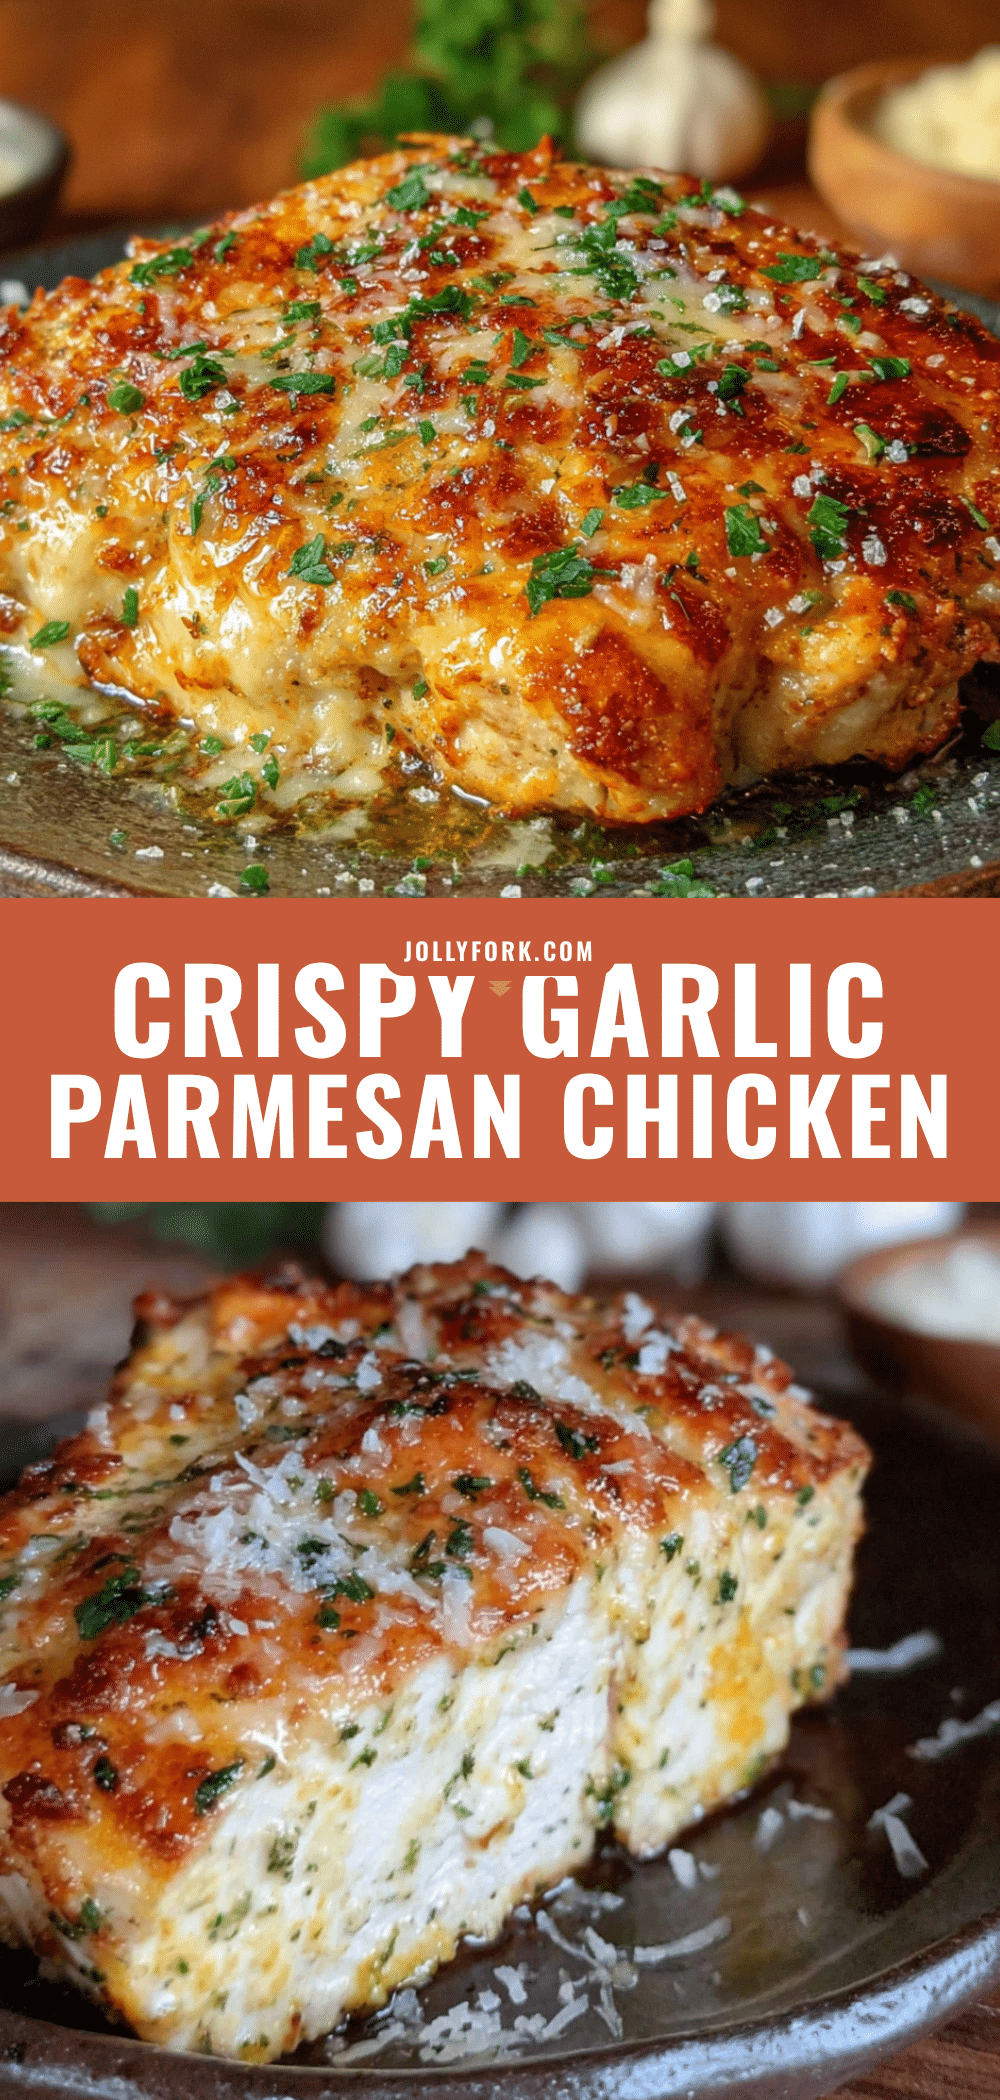
Crispy Garlic Parmesan Baked Chicken Breast (Easy Recipe)

This baked chicken breast delivers a perfectly crispy, golden crust without frying, with a juicy interior and savory garlic Parmesan flavor. Ready in under 30 minutes, it’s a reliable weeknight dinner that’s both kid-approved and adult-loved.
- Prep Time: 15 minutes
- Cook Time: 20 minutes
- Total Time: 35 minutes
- Yield: 4 servings 1x
- Category: Main Course
- Cuisine: American
Ingredients
- 2 large or 3 medium boneless, skinless chicken breasts (about 1.5 pounds total)
- 2 tablespoons olive oil
- 2 tablespoons unsalted butter, melted
- 4 cloves fresh garlic, minced
- 1 teaspoon fine sea salt
- ½ teaspoon freshly ground black pepper
- 1 cup panko breadcrumbs
- ½ cup freshly grated Parmesan cheese
- 1 teaspoon garlic powder
- ½ teaspoon onion powder
- 1 teaspoon dried Italian seasoning
- ½ teaspoon paprika
- Fresh parsley, chopped (for garnish, optional)
- Lemon wedges (for serving, optional)
- Extra Parmesan (for serving, optional)
Instructions
- Preheat oven to 425°F (220°C). Place a wire rack on a rimmed baking sheet lined with parchment paper or foil.
- Pat chicken breasts dry with paper towels. If uneven in thickness, pound to an even ¾-inch thickness. Season both sides with salt and pepper.
- In a shallow bowl, combine panko breadcrumbs, grated Parmesan, garlic powder, onion powder, Italian seasoning, and paprika. Stir to combine.
- In a second shallow bowl, whisk together olive oil, melted butter, and minced fresh garlic.
- Working one piece at a time, dip chicken into the butter-garlic mixture, turning to coat both sides. Let excess drip off.
- Transfer chicken to the panko-Parmesan mixture. Press coating firmly onto both sides to adhere. Place coated chicken on the wire rack.
- Bake for 18-22 minutes, without flipping, until internal temperature reaches 165°F (74°C) in the thickest part. For extra-crispy tops, broil for the last 1-2 minutes, watching carefully.
- Remove from oven and let rest on the wire rack for 5 minutes before serving. Garnish with fresh parsley and serve with lemon wedges if desired.
Notes
Do not flip the chicken during baking for a better crust. The wire rack is key for crispy bottoms. Freshly grated Parmesan is essential; pre-shredded won’t melt properly. Let chicken rest 5 minutes before cutting to keep it juicy. For gluten-free, use gluten-free panko or crushed pork rinds. For dairy-free, use vegan butter and nutritional yeast.
Nutrition
- Serving Size: 1 large chicken brea
- Calories: 385
- Sugar: 1
- Sodium: 680
- Fat: 18
- Saturated Fat: 7
- Carbohydrates: 12
- Fiber: 1
- Protein: 42
Keywords: crispy chicken, baked chicken breast, garlic parmesan chicken, easy chicken recipe, weeknight dinner, healthy chicken, gluten-free option, keto-friendly