My neighbor Sarah asked why I couldn’t just skip the flour dredge and use straight Parmesan as the crust. I started to explain why that wouldn’t work — something about moisture barriers and browning science. Then I stopped. Honestly, I had no good reason except that’s how I’d always done it.
The summer I turned thirty, I decided to actually try her suggestion. I crushed the Parmesan a little finer, pressed it into the skin, and crossed my fingers. The result was so ridiculously good that I felt a little embarrassed for all those years of flour-dredging. That first bite had this unexpected crunch — lighter than breadcrumbs, saltier than flour, with those crispy edges that make you close your eyes without meaning to.
Maybe you’ve been there — stuck in a cooking rut, doing something a certain way just because that’s how Grandma did it, never questioning whether there might be an even better way. I mean, I love tradition as much as the next person, but sometimes the best discoveries happen when you let someone talk you out of your own stubbornness.
These crispy garlic Parmesan chicken thighs have become my go-to comfort dinner. Not just because they’re easy (though they are), but because that first crunch followed by juicy, tender meat feels like a small victory at the end of a long day. The garlic butter that pools in the pan, the way the cheese browns into little crispy lace around the edges — it’s the kind of meal that makes you forget everything else for a few minutes.
I keep making it because it reminds me that cooking doesn’t have to be complicated to be spectacular. Sometimes the best recipes come from someone saying, “Why don’t you just try it this way?”
Why You’ll Love This Recipe
After testing this recipe at least a dozen times — with different cheese grinds, various oven temperatures, and even a few disastrous attempts at pan-frying — I can confidently say this version is the one. It’s been approved by my picky-eater nephew, my chef friend who never compliments anything, and my own late-night cravings more times than I can count.
- Quick & Easy: From fridge to table in about 40 minutes, with just 10 minutes of active prep. Perfect for those evenings when you need dinner on the table without a production.
- Simple Ingredients: You probably have everything except the chicken thighs. No weird specialty items, no trips to three different stores.
- Perfect for Cozy Nights: This is cold-weather comfort food at its finest. Rainy evenings, snowy days, or just one of those weeks — this dish delivers.
- Crowd-Pleaser: The crispy Parmesan coating appeals to kids who love “chicken nuggets” and adults who appreciate real flavor. Everyone wins.
- Unbelievably Delicious: The texture contrast between the crunchy, cheesy crust and the tender, juicy meat is next-level. It’s simple food that tastes anything but.
What makes this recipe different from all the other crispy chicken recipes out there? It’s the technique. By skipping the flour and using finely grated Parmesan as the primary crust, you get a lighter, more flavorful crunch that doesn’t get soggy. The garlic butter basting at the end takes it over the top — adding richness without making the crust heavy. It’s not just another version; it’s the version I’d serve to anyone who thinks chicken thighs can’t be special.
This is the kind of recipe that makes you close your eyes after the first bite. It’s comfort food reimagined — faster, simpler, but with the same soul-soothing satisfaction that makes you want to curl up on the couch and forget about the rest of the world.
What Ingredients You Will Need
This recipe relies on a handful of simple, high-quality ingredients to deliver maximum flavor with minimum fuss. Most of these are pantry staples, which makes this perfect for those nights when you need dinner inspiration without a grocery run.
- Bone-in, skin-on chicken thighs (4-6 pieces, about 2 pounds): The bone keeps the meat juicy during cooking, and the skin provides the perfect canvas for that crispy Parmesan crust. Look for thighs that are roughly the same size for even cooking.
- Finely grated Parmesan cheese (1 cup, about 3 ounces): Not the pre-shredded stuff in bags — it doesn’t melt the same way. Grab a block of real Parmigiano-Reggiano and grate it yourself on the fine side of a box grater. The difference is night and day. I personally prefer the texture of BelGioioso or Parmigiano-Reggiano from Trader Joe’s for this recipe.
- Garlic (4-5 cloves, minced): Fresh garlic is non-negotiable here. The pre-minced stuff in jars has a sharp, almost chemical taste that won’t do this dish justice. You want that sweet, aromatic garlic that perfumes the whole kitchen.
- Unsalted butter (3 tablespoons, melted): Butter adds richness and helps the Parmesan crust brown beautifully. Using unsalted lets you control the salt level since Parmesan is already quite salty.
- Olive oil (1 tablespoon): A little oil mixed with the butter raises the smoke point and helps everything crisp up without burning.
- Salt (1 teaspoon, plus more for seasoning): I use fine sea salt for even distribution. Go easy — remember the Parmesan brings plenty of saltiness.
- Black pepper (½ teaspoon, freshly ground): Freshly ground pepper adds a subtle warmth that complements the garlic and cheese.
- Paprika (1 teaspoon): Adds color and a mild sweetness. Smoked paprika works beautifully here if you want a deeper flavor.
- Garlic powder (½ teaspoon): Not the same as fresh garlic — this adds a different layer of savory depth that rounds out the flavor.
- Fresh parsley (2 tablespoons, chopped, for garnish): Optional but highly recommended. The fresh green color and bright flavor balance the richness of the dish.
- Lemon wedges (for serving): A squeeze of fresh lemon juice right before eating cuts through the richness and makes everything pop.
Substitution Guidance: If you need a dairy-free option, try using nutritional yeast mixed with almond flour in place of the Parmesan, and use vegan butter. For a gluten-free version, this recipe is naturally gluten-free as written — just double-check your paprika and garlic powder labels. If you can’t find bone-in thighs, boneless skinless thighs will work, but reduce cooking time by about 10 minutes and expect a slightly less crispy result.
Equipment Needed
You don’t need a fancy kitchen to make these crispy garlic Parmesan chicken thighs. Here’s what you’ll need:
- Baking sheet or oven-safe skillet: A rimmed baking sheet works perfectly. I prefer using a cast-iron skillet because it holds heat beautifully and gives you even browning. My 12-inch Lodge skillet is my go-to for this recipe.
- Wire rack: Placing a wire rack inside your baking sheet allows air to circulate underneath the chicken, ensuring the bottom gets crispy too. If you don’t have one, just flip the chicken halfway through cooking.
- Box grater or microplane: For grating that Parmesan cheese finely. A microplane is faster and gives you that powdery texture that sticks best to the chicken.
- Small bowl: For mixing the garlic butter mixture.
- Pastry brush or spoon: For brushing the garlic butter onto the chicken. A silicone pastry brush is ideal, but a regular spoon works fine.
- Meat thermometer: This is crucial for perfectly cooked chicken. I’ve ruined too many batches by guessing. An instant-read thermometer takes the guesswork out and costs under $15.
- Paper towels: For patting the chicken dry — this step is more important than you think.
If you don’t have a wire rack, don’t stress. Simply flip the chicken thighs halfway through baking and they’ll still get plenty crispy. I’ve done it both ways and the difference is minimal.
Preparation Method
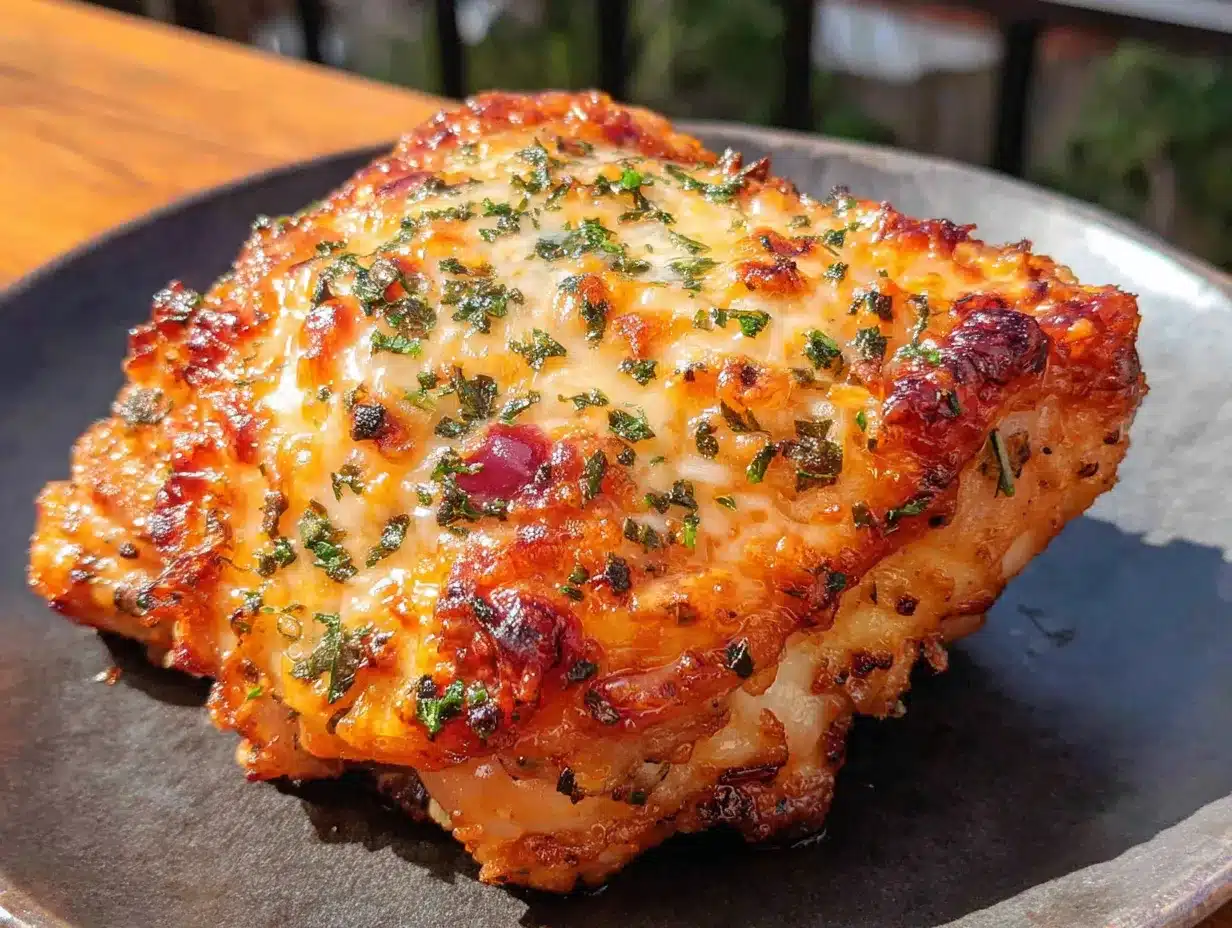
- Preheat your oven to 400°F (200°C). Position the rack in the upper third of the oven — this helps the tops brown beautifully without the bottoms burning. While the oven heats, take your chicken thighs out of the fridge and let them sit at room temperature for about 15 minutes. Cold chicken cooks unevenly, and we want every bite to be perfect.
- Pat the chicken thighs completely dry with paper towels. This is the single most important step for crispy skin. I mean really dry — press firmly and use multiple paper towels if needed. Any moisture on the skin will steam instead of crisp, and nobody wants soggy chicken skin. Season both sides generously with salt, pepper, paprika, and garlic powder. Don’t be shy — the seasoning is what builds flavor from the inside out.
- Grate your Parmesan cheese finely — you want it almost powdery, not in little shreds. A microplane works best here, but the fine side of a box grater will do. Place the grated Parmesan in a shallow dish or on a plate. The finer the grate, the better it adheres to the chicken skin.
- Press the seasoned chicken thighs, skin-side down, into the grated Parmesan. Press firmly so the cheese sticks — don’t just gently dip it. You want a nice, even coating. Shake off any excess, but don’t brush it off. That extra cheese will create those crispy, lacy edges that are honestly the best part.
- Place the chicken thighs, skin-side up, on a wire rack set inside a baking sheet. If you don’t have a wire rack, place them directly on the baking sheet skin-side down for the first 15 minutes, then flip. The wire rack method is better because it allows hot air to circulate all around the chicken, but flipping works in a pinch.
- Bake for 25 minutes without opening the oven door. I know it’s tempting to peek, but every time you open that door, heat escapes and your crispy crust suffers. Set a timer and walk away. During this time, the Parmesan will melt, brown, and form that beautiful golden crust we’re after.
- While the chicken bakes, prepare the garlic butter. In a small bowl, combine the melted butter, olive oil, and minced fresh garlic. Stir until well combined. Let it sit while the chicken cooks — this allows the garlic to infuse the butter with its flavor. The smell at this point is absolutely intoxicating.
- After 25 minutes, remove the chicken from the oven. Brush the garlic butter mixture generously over each thigh, making sure to coat the crispy Parmesan crust. Don’t pour it on all at once or you’ll wash away the crust — gentle brushing is key. Return the chicken to the oven and bake for another 10-15 minutes.
- Check for doneness using your meat thermometer. The internal temperature should reach 165°F (74°C) at the thickest part, away from the bone. If you don’t have a thermometer, pierce the thickest part with a knife — the juices should run clear, not pink. But honestly, get a thermometer. It’s the only way to guarantee perfectly cooked chicken every time.
- For extra crispy skin, turn on the broiler for the last 1-2 minutes. Watch it carefully — broilers vary wildly in intensity, and you’re going for golden brown, not burnt. I learned this the hard way when I walked away for “just a second” and ended up with charcoal chicken. Keep the oven door slightly ajar and watch it like a hawk.
- Let the chicken rest for 5 minutes before serving. This allows the juices to redistribute throughout the meat. If you cut into it immediately, all those delicious juices will run out onto the plate, leaving you with dry chicken. Patience pays off here.
- Garnish with fresh chopped parsley and serve with lemon wedges. The bright, fresh flavors cut through the richness of the Parmesan and garlic butter. Squeeze a little lemon over each thigh right before eating — it makes a surprising difference.
Cooking Tips & Techniques
After making these crispy garlic Parmesan chicken thighs more times than I care to count, I’ve collected a few hard-earned lessons. Let me save you some trouble.
The moisture trap: I once made the mistake of rinsing my chicken and not drying it thoroughly. The result was a sad, steaming mess that took twice as long to crisp up. Patting the chicken dry isn’t optional — it’s the foundation of everything crispy. Also, don’t crowd the pan. If the thighs are too close together, they steam instead of roast. Give them breathing room.
The cheese grind matters: The first few times I made this, I used pre-shredded Parmesan from a bag. It didn’t melt properly, it burned in spots, and the texture was all wrong. Finely grating fresh Parmesan creates a delicate, lacy crust that browns evenly. The anti-caking agents in pre-shredded cheese prevent proper melting. Trust me on this one.
Temperature is everything: I used to think “hot oven” meant 425°F, but that was too hot — the cheese burned before the chicken cooked through. At 375°F, the chicken was juicy but the skin wasn’t crispy enough. 400°F is the sweet spot. It gives you enough heat to crisp the skin without burning the cheese, and enough time to cook the chicken through without drying it out.
Don’t skip the rest: I know, I know — you’re hungry, the kitchen smells amazing, and you want to eat right now. But those 5 minutes of resting time are crucial. The juices need time to settle back into the meat fibers. If you cut into the chicken too soon, you’ll lose all that moisture and end up with dry meat. Set a timer if you have to.
Multitasking strategy: While the chicken bakes, prep your side dishes. The 40-minute cooking time is perfect for steaming some broccoli, roasting asparagus, or making a quick salad. I usually start a batch of roasted potatoes at the same time — they bake at the same temperature and finish around the same time.
Variations & Adaptations
One of the best things about this recipe is how adaptable it is. Here are some variations I’ve tried and loved:
Spicy Cajun Version: Replace the paprika with Cajun seasoning and add a pinch of cayenne pepper to the seasoning mix. The heat pairs beautifully with the rich Parmesan and garlic butter. I made this version for a game day gathering and it disappeared in minutes.
Herb and Lemon Version: Add 1 teaspoon of dried thyme and 1 teaspoon of dried rosemary to the Parmesan coating. Replace the garlic butter with a mixture of melted butter, lemon zest, and fresh herbs. The bright, aromatic flavors make this version perfect for spring dinners.
Air Fryer Adaptation: Preheat your air fryer to 375°F (190°C). Cook the chicken thighs in a single layer for 18-20 minutes, flipping halfway through. Brush with garlic butter during the last 5 minutes. The air fryer gives you an even crispier crust in less time — just don’t overcrowd the basket.
Cheese Variation: Try mixing the Parmesan with equal parts Pecorino Romano for a saltier, more pungent crust. Or use Asiago for a nuttier flavor. I’ve even tried it with a blend of Parmesan and Gruyère — it was rich and decadent, perfect for a special occasion.
Keto-Friendly Version: This recipe is naturally low-carb as written. Just skip any starchy sides and serve with roasted vegetables or a big green salad. The fat content from the butter and cheese makes it perfectly keto-friendly.
My personal favorite variation? The one where I add a tablespoon of Dijon mustard to the garlic butter mixture. It adds a subtle tanginess that cuts through the richness and makes the flavors pop. I discovered this by accident when I ran out of lemon and needed something acidic — now I do it on purpose every time.
Serving & Storage Suggestions
These crispy garlic Parmesan chicken thighs are best served hot, straight from the oven, when the crust is at its crispiest and the garlic butter is still sizzling. But they’re pretty fantastic at room temperature too — I’ve been known to pick at leftovers straight from the fridge.
Serving Suggestions: I love serving these with simple sides that let the chicken shine. Creamy mashed potatoes are a classic choice — the buttery potatoes soak up the garlic butter from the pan. Roasted asparagus or green beans add a fresh, bright contrast. A simple arugula salad with lemon vinaigrette cuts through the richness beautifully. For a truly cozy meal, serve with crusty bread to mop up every last bit of that garlic butter.
Wine Pairing: A crisp white wine like Sauvignon Blanc or Pinot Grigio complements the garlic and Parmesan without overwhelming the dish. If you prefer red, go for a light-bodied Pinot Noir — the earthy notes pair nicely with the roasted chicken flavors.
Storage: Store leftover chicken thighs in an airtight container in the refrigerator for up to 4 days. The crust will soften slightly, but the flavor remains excellent. To reheat, place the chicken on a wire rack in a 350°F (175°C) oven for 10-15 minutes. This helps restore some of the crispiness. Avoid the microwave — it will turn your beautiful crispy crust into sad, rubbery skin.
Freezer Instructions: These chicken thighs freeze beautifully. Let them cool completely, then wrap each thigh individually in plastic wrap and place in a freezer-safe bag. They’ll keep for up to 3 months. To reheat, thaw overnight in the refrigerator, then reheat in a 350°F oven until warmed through and crispy.
Flavor Development: Interestingly, the flavors actually deepen after a day in the fridge. The garlic and Parmesan meld together, creating an even more complex taste. I sometimes make a double batch just for the leftovers — cold chicken thigh sandwiches the next day are a whole different kind of delicious.
Nutritional Information & Benefits
While I wouldn’t call these crispy garlic Parmesan chicken thighs health food, they do offer some surprising nutritional benefits. Here’s the breakdown for one serving (one thigh with skin):
| Nutrient | Amount |
|---|---|
| Calories | 380-420 |
| Protein | 32g |
| Fat | 28g |
| Saturated Fat | 12g |
| Carbohydrates | 2g |
| Fiber | 0g |
| Sugar | 0g |
| Sodium | 680mg |
| Calcium | 180mg (18% DV) |
Health Benefits: Chicken thighs are an excellent source of high-quality protein, which supports muscle maintenance and repair. They’re also rich in B vitamins, particularly B6 and B12, which help with energy metabolism and brain function. The Parmesan cheese adds calcium for bone health, while garlic provides allicin, a compound known for its immune-boosting properties.
Dietary Considerations: This recipe is naturally gluten-free and low-carb, making it suitable for keto and paleo diets. It’s also nut-free and egg-free. However, it contains dairy from the butter and cheese. For a dairy-free version, use vegan butter and nutritional yeast in place of Parmesan.
My Perspective: I believe in balance. This isn’t an everyday meal, but it’s a wonderful treat that nourishes both body and soul. The protein keeps you full and satisfied, while the rich flavors satisfy those comfort food cravings without needing to reach for processed alternatives. Plus, cooking at home means you control the quality of every ingredient.
Conclusion
These crispy garlic Parmesan chicken thighs have become my secret weapon for busy weeknights, cozy Sunday dinners, and everything in between. They’re proof that simple ingredients, treated with a little care and attention, can create something truly special. The contrast between that crunchy, cheesy crust and the tender, juicy meat underneath — it’s the kind of comfort food that makes you slow down and actually taste what you’re eating.
I love this recipe because it’s forgiving. It doesn’t demand perfection. If your Parmesan crust isn’t perfectly even, it’ll still be delicious. If you forget to brush on the garlic butter, it’ll still be good (though not quite as amazing). It’s the kind of recipe that builds confidence in the kitchen — simple enough for a beginner, satisfying enough for an experienced cook.
I’d love to hear how these turn out for you. Did you try a variation? Did your family love them? Drop a comment below and let me know — your feedback helps me create better recipes, and your stories inspire others to get in the kitchen. And if you’re looking for more cozy comfort food inspiration, you might enjoy my garlic butter roasted chicken or these crispy baked chicken tenders.
Until next time, happy cooking — and don’t forget the lemon wedges!
Frequently Asked Questions
Can I use boneless, skinless chicken thighs for this recipe?
Yes, but reduce the cooking time by about 10 minutes and expect a slightly less crispy result since you’re missing the skin. Check for doneness at 165°F (74°C) internal temperature. The Parmesan crust will still be delicious, just not quite as crunchy.
Why is my Parmesan crust burning before the chicken is cooked?
This usually happens if your oven runs hot or the rack is too close to the heating element. Try lowering the temperature to 375°F (190°C) and extending the cooking time by 5-10 minutes. Also, make sure you’re not using pre-shredded Parmesan, which can burn unevenly.
Can I make this recipe dairy-free?
Absolutely! Use vegan butter and replace the Parmesan with a mixture of nutritional yeast (2 tablespoons) and almond flour (¼ cup). The texture won’t be exactly the same, but it will still be crispy and flavorful. I’ve tested this version and it works surprisingly well.
How do I get the chicken skin extra crispy?
Three secrets: First, pat the chicken completely dry before seasoning. Second, use a wire rack so air circulates underneath. Third, broil for the last 1-2 minutes, watching carefully. Also, don’t skip the resting time — it allows the crust to set properly.
Can I prepare these chicken thighs ahead of time?
You can season and coat the chicken with Parmesan up to 24 hours in advance. Store it uncovered in the refrigerator to keep the coating dry. When ready to cook, let it sit at room temperature for 15 minutes, then bake as directed. The coating will stick even better after resting in the fridge.
Pin This Recipe!
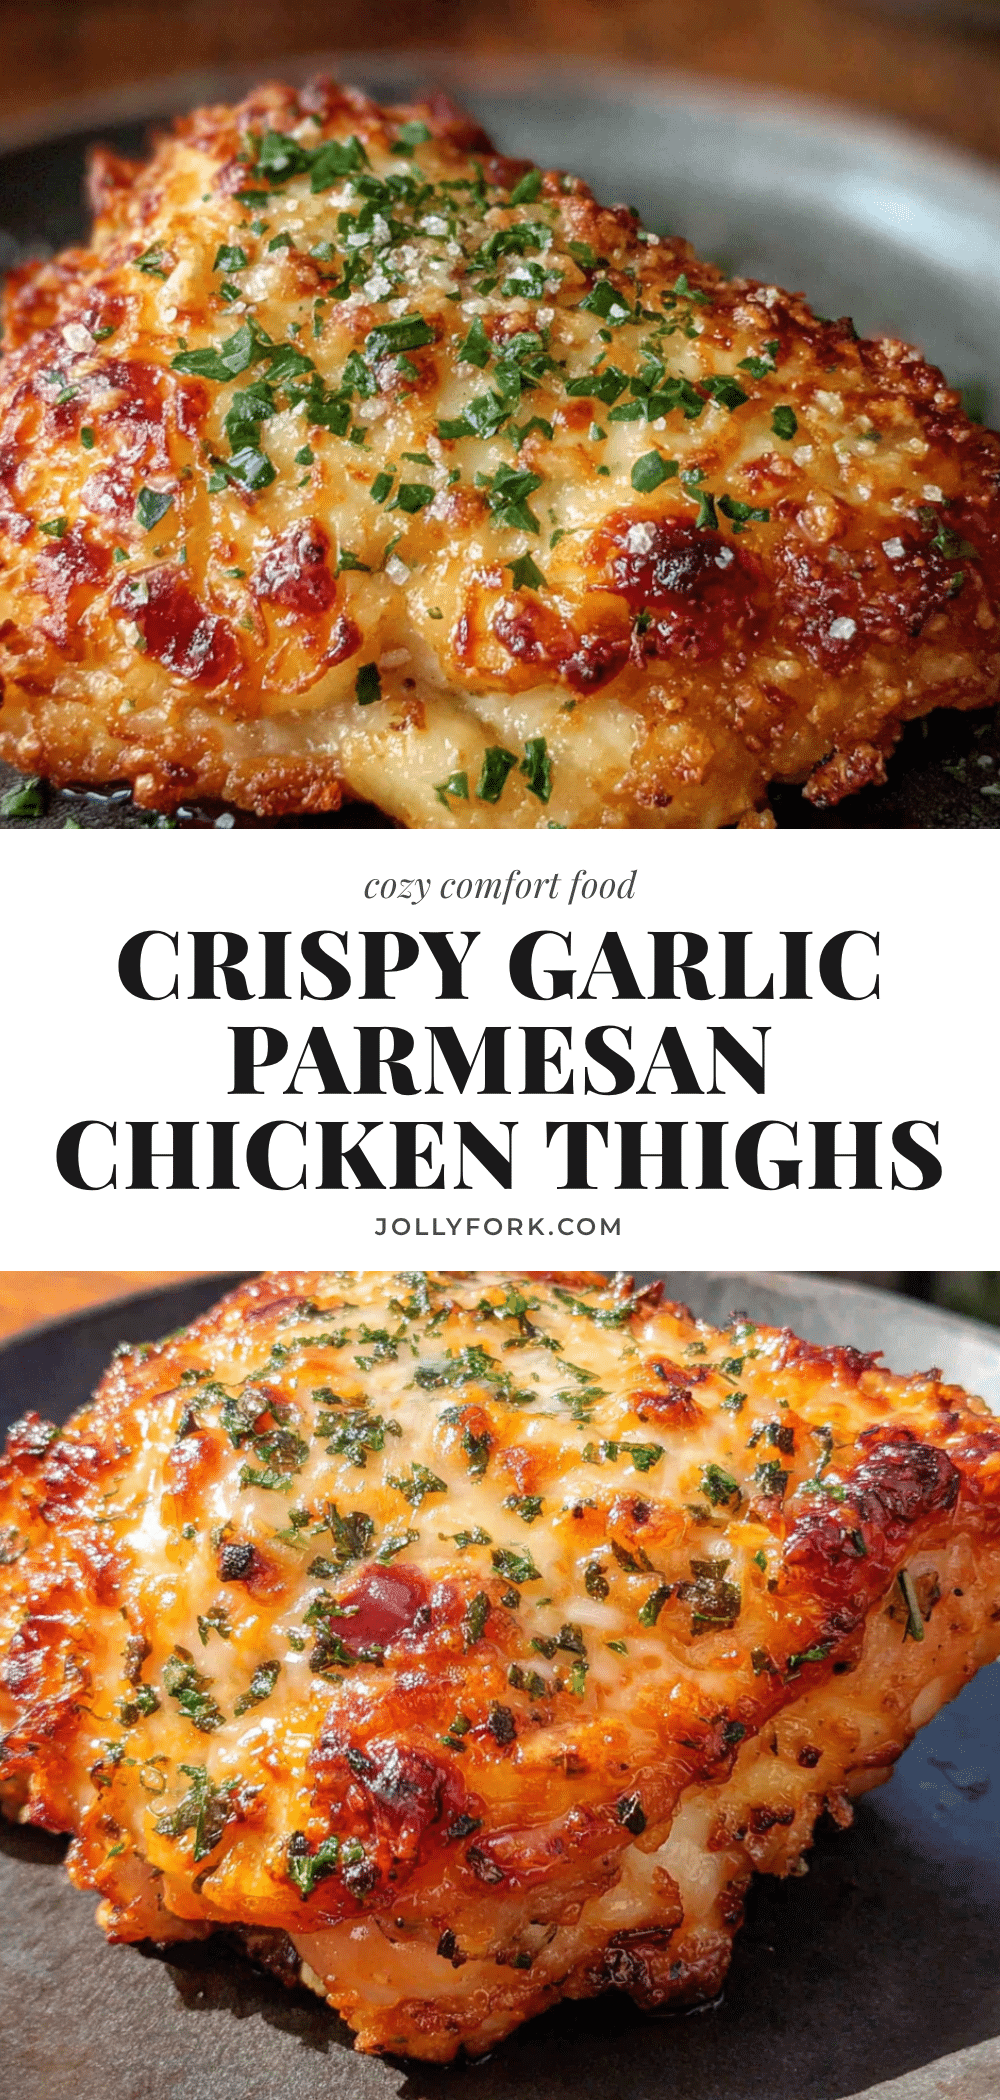
Crispy Garlic Parmesan Chicken Thighs – Easy Comfort Food Recipe

These crispy garlic Parmesan chicken thighs are the ultimate comfort food, featuring a crunchy, cheesy crust and tender, juicy meat. Ready in about 40 minutes, this simple yet spectacular recipe is perfect for busy weeknights or cozy dinners.
- Prep Time: 10 minutes
- Cook Time: 35-40 minutes
- Total Time: 45-50 minutes
- Yield: 4-6 servings 1x
- Category: Main Course
- Cuisine: American
Ingredients
- 4–6 bone-in, skin-on chicken thighs (about 2 pounds)
- 1 cup finely grated Parmesan cheese (about 3 ounces)
- 4–5 cloves garlic, minced
- 3 tablespoons unsalted butter, melted
- 1 tablespoon olive oil
- 1 teaspoon salt, plus more for seasoning
- ½ teaspoon freshly ground black pepper
- 1 teaspoon paprika
- ½ teaspoon garlic powder
- 2 tablespoons fresh parsley, chopped (for garnish)
- Lemon wedges (for serving)
Instructions
- Preheat your oven to 400°F (200°C). Position the rack in the upper third of the oven. Take the chicken thighs out of the fridge and let them sit at room temperature for about 15 minutes.
- Pat the chicken thighs completely dry with paper towels. Season both sides generously with salt, pepper, paprika, and garlic powder.
- Finely grate the Parmesan cheese using a microplane or the fine side of a box grater. Place the grated Parmesan in a shallow dish.
- Press the seasoned chicken thighs, skin-side down, into the grated Parmesan. Press firmly so the cheese sticks, then shake off any excess.
- Place the chicken thighs, skin-side up, on a wire rack set inside a baking sheet. If you don’t have a wire rack, place them directly on the baking sheet skin-side down for the first 15 minutes, then flip.
- Bake for 25 minutes without opening the oven door.
- While the chicken bakes, prepare the garlic butter: In a small bowl, combine the melted butter, olive oil, and minced fresh garlic. Stir until well combined.
- After 25 minutes, remove the chicken from the oven. Brush the garlic butter mixture generously over each thigh. Return the chicken to the oven and bake for another 10-15 minutes.
- Check for doneness using a meat thermometer. The internal temperature should reach 165°F (74°C) at the thickest part, away from the bone.
- For extra crispy skin, turn on the broiler for the last 1-2 minutes. Watch carefully to prevent burning.
- Let the chicken rest for 5 minutes before serving.
- Garnish with fresh chopped parsley and serve with lemon wedges.
Notes
Pat the chicken completely dry for the crispiest skin. Use freshly grated Parmesan, not pre-shredded, for the best texture. Let the chicken rest for 5 minutes before serving to keep it juicy. For a dairy-free version, use vegan butter and nutritional yeast mixed with almond flour.
Nutrition
- Serving Size: 1 chicken thigh with
- Calories: 400
- Sodium: 680
- Fat: 28
- Saturated Fat: 12
- Carbohydrates: 2
- Protein: 32
Keywords: crispy chicken thighs, garlic parmesan chicken, baked chicken thighs, comfort food, easy chicken recipe, gluten-free chicken, keto chicken