My nephew Leo asked why I couldn’t just wrap the whole stuffed pepper in crescent dough instead of slicing it into strips. I started to explain why that wouldn’t work—something about even cooking and the filling staying intact. Then I stopped. Honestly, I had no good reason. I just assumed it would be a mess. So I let him try it his way, figuring we’d have a funny story about a kitchen fail to tell at dinner. Three hours later, I was staring at a tray of the most ridiculous, brilliant, crowd-pleasing Halloween dinner I’d ever made. The mummy wraps were perfect. The filling stayed put. And I had to admit, out loud, that a ten-year-old had out-cooked me.
That moment of being wrong stuck with me. Not because I’m precious about my kitchen authority—let’s face it, I’ve had plenty of failures. But because it reminded me that sometimes the best ideas come from someone who hasn’t learned all the reasons something “shouldn’t” work. Leo didn’t know that stuffed peppers are supposed to be served with the filling exposed, topped with cheese. He just thought a mummy pepper would look cooler if you couldn’t see its face. And he was right. These Crowd-Pleasing Mummy-Wrapped Stuffed Peppers are now my go-to for Halloween gatherings, potlucks, and any night I want to serve something that makes people stop and grin. Maybe you’ve been there—stuck in your own cooking rules, convinced there’s only one right way. Let me tell you, letting go of that is worth it, especially when the result is this good.
Why You’ll Love This Recipe
I’ve tested this recipe six times now, tweaking the filling, adjusting the dough, and figuring out the exact baking time so the bottom doesn’t get soggy. What I ended up with is a dish that delivers on every level. Here’s why it works:
- Show-Stopping Presentation: The crescent dough wraps look exactly like mummy bandages, especially with little olive eyes peeking through. Your guests will actually gasp when you bring this to the table.
- Surprisingly Simple: Despite the dramatic look, this comes together with pre-made dough and pantry staples. No fancy techniques required.
- Perfect for a Crowd: You can easily double or triple this recipe for a party. They hold up well on a buffet table and look just as good at room temperature.
- Make-Ahead Friendly: Assemble these in the morning, refrigerate, and bake just before guests arrive. Your stress level stays low while your host cred stays high.
- Customizable Filling: The base recipe is a classic beef and rice mixture, but you can swap in turkey, quinoa, or a vegetarian blend without losing the magic.
What makes this different from other stuffed pepper recipes is the technique. Wrapping the peppers completely in dough traps steam, keeping the pepper tender while the outside gets golden and flaky. It’s a texture contrast that works beautifully—soft, savory filling inside a crisp shell. Plus, the mummy look is genuinely fun. I’ve served these at three different Halloween parties, and every time, someone asks for the recipe before they’ve even finished eating. It’s the kind of dish that makes you look like a genius without actually working that hard.
What Ingredients You Will Need
This recipe uses simple, everyday ingredients to create something that feels special. Most of these are probably in your kitchen right now, which makes this perfect for last-minute Halloween planning.
- 4 large bell peppers (any color works, but red and orange look most festive for Halloween)
- 1 pound ground beef (80/20 works best for flavor; drain excess fat after browning)
- 1 cup cooked rice (white, brown, or cauliflower rice for a lighter option)
- 1 small onion, finely diced (about 1/2 cup)
- 2 cloves garlic, minced
- 1 can (15 ounces) tomato sauce (I prefer Hunt’s for its balanced flavor)
- 1 teaspoon dried oregano
- 1 teaspoon dried basil
- 1/2 teaspoon salt
- 1/4 teaspoon black pepper
- 1 cup shredded mozzarella cheese (plus extra for sprinkling on top)
- 2 cans (8 ounces each) refrigerated crescent roll dough (Pillsbury is my go-to for consistent results)
- 12 black olive slices (for the mummy eyes)
- Optional: 1 tablespoon olive oil (for sautéing the onion and garlic)
When selecting bell peppers, look for ones that are squat and wide rather than tall and narrow. They’ll sit more stably on the baking sheet and hold the filling better. If you’re using green peppers, know they have a slightly bitter edge that mellows during baking. Red and orange peppers are sweeter and look more dramatic against the pale dough.
For the ground beef, I’ve used both 90/10 and 80/20 blends. The leaner meat requires a splash of olive oil when browning to keep it from drying out. The 80/20 gives you more flavor and moisture, which matters since the peppers will bake for a while. Just drain the excess fat after cooking so the filling isn’t greasy.
If you’re feeding vegetarians, substitute the beef with a mixture of cooked lentils and finely chopped mushrooms. Sauté them with the same onions and garlic, and add an extra tablespoon of tomato sauce to keep things moist. I tested this version for a friend’s potluck, and honestly, I couldn’t tell the difference.
Equipment Needed
You don’t need anything special for this recipe, which is part of the appeal. Here’s what you’ll need:
- Large skillet (for browning the beef and sautéing aromatics)
- Medium mixing bowl (for combining the filling)
- Baking sheet (a rimmed half-sheet pan works best to catch any drips)
- Parchment paper (highly recommended for easy cleanup and preventing sticking)
- Sharp knife (for cutting the peppers and slicing the dough strips)
- Cutting board
- Measuring cups and spoons
- Small spoon (for scooping out pepper seeds and membranes)
If you don’t have parchment paper, you can grease the baking sheet lightly with cooking spray. I’ve done it both ways, and parchment makes the bottoms of the peppers come out more evenly browned. Also, a bench scraper helps if you’re cutting the crescent dough into strips—it keeps the lines clean and prevents the dough from sticking to your counter. But a pizza cutter works just as well if that’s what you have.
Preparation Method
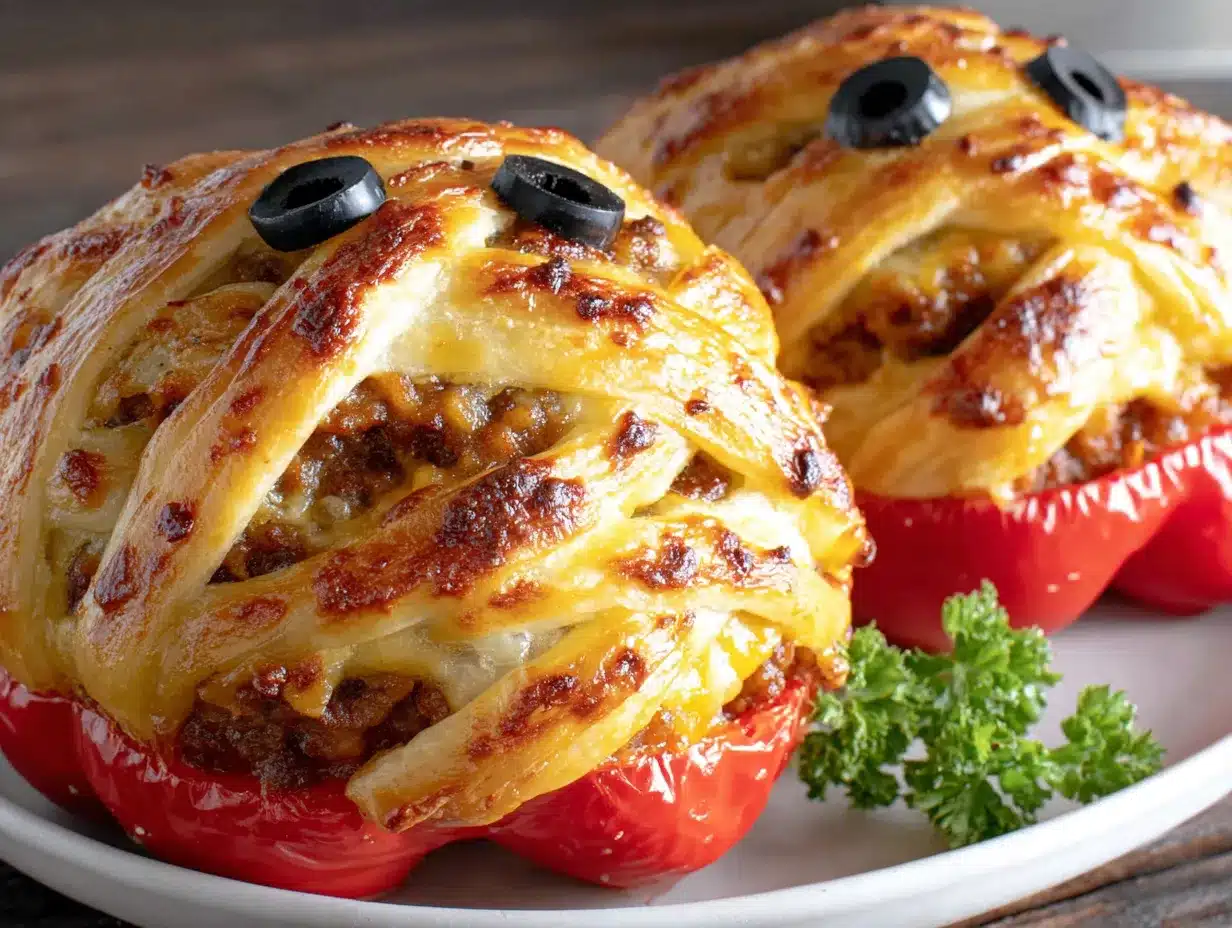
This recipe takes about 45 minutes of active prep time and 30 minutes of baking. Here’s how to put it all together:
- Preheat your oven to 375°F (190°C). Line a baking sheet with parchment paper and set it aside.
- Cook the rice. If you don’t have leftover rice, start 1/2 cup of uncooked rice with 1 cup of water. Bring to a boil, cover, reduce heat to low, and simmer for 15-18 minutes. Fluff with a fork and set aside to cool slightly.
- Prepare the peppers. Cut the tops off each bell pepper (about 1/2 inch from the top) and remove the seeds and white membranes. Rinse the peppers inside and out. If they don’t sit flat, trim a thin slice off the bottom—but be careful not to cut through. Set them upside down on paper towels to drain any excess water.
- Brown the beef. Heat a large skillet over medium-high heat. Add the ground beef and cook, breaking it apart with a spoon, until browned—about 6-8 minutes. Use a slotted spoon to transfer the beef to a plate, leaving about 1 tablespoon of drippings in the pan. If your beef is very lean, add the olive oil here.
- Sauté the aromatics. Reduce the heat to medium. Add the diced onion to the skillet and cook until softened, about 3-4 minutes. Add the minced garlic and cook for another 30 seconds until fragrant. The smell at this point is amazing—earthy and sweet.
- Combine the filling. Return the browned beef to the skillet. Add the cooked rice, tomato sauce, oregano, basil, salt, and pepper. Stir everything together and let it simmer for 2-3 minutes, allowing the flavors to meld. Remove from heat and stir in 1/2 cup of the shredded mozzarella. Taste and adjust seasoning—I usually add a pinch more salt here.
- Stuff the peppers. Spoon the filling into each pepper, packing it gently but firmly. Don’t overstuff—you want the filling to be level with the top of the pepper, not mounded. Place the stuffed peppers upright on the prepared baking sheet.
- Prepare the dough. Open the crescent roll cans and unroll the dough. Separate the dough along the perforated lines into triangles. Using a sharp knife or pizza cutter, cut each triangle lengthwise into 3-4 thin strips. You want them about 1/2 inch wide—think bandage width, not ribbon width.
- Wrap the mummies. Starting at the bottom of each pepper, wrap a strip of dough around the pepper, slightly overlapping as you go. Leave a small gap near the top where the “face” will be. Continue wrapping with additional strips until the pepper is covered like a mummy. Tuck the end of the last strip underneath to secure it. Repeat with the remaining peppers.
- Add the eyes. Press two olive slices into the dough near the top of each pepper to create the mummy’s eyes. The olives should be visible through the gaps in the dough. If the gap is too small, gently stretch the dough with your fingers.
- Bake. Place the baking sheet in the preheated oven and bake for 25-30 minutes, until the dough is golden brown and the filling is bubbling. About 5 minutes before they’re done, sprinkle the remaining mozzarella cheese over the top of each pepper (between the dough strips) and return to the oven to melt.
- Rest and serve. Let the peppers cool on the baking sheet for 5 minutes before serving. This allows the filling to set and prevents burns—trust me, that filling stays hot.
A note on timing: If you’re making these for a party, you can assemble the peppers through step 10, cover them with plastic wrap, and refrigerate for up to 8 hours. Add 5-7 minutes to the baking time if starting from cold. This is my favorite way to handle Halloween dinner—everything’s ready before the chaos starts.
Cooking Tips & Techniques
I’ve made this recipe enough times to know where things can go wrong. Here’s what I’ve learned:
Don’t overwork the dough. Crescent roll dough is delicate. When you’re cutting strips, use a sharp tool and a gentle hand. If the dough gets warm and sticky, pop it in the fridge for 5 minutes. Stretched or torn dough won’t hold its shape during baking, and your mummies will look more like accident victims than Halloween decorations.
Watch the moisture. The first time I made these, the bottoms came out soggy. The fix was simple: drain the tomato sauce a little before adding it to the filling, and don’t rinse the peppers right before stuffing them. If you rinse them, dry them thoroughly with paper towels. Excess moisture is the enemy of crisp dough.
Space them out. Give each pepper at least 2 inches of space on the baking sheet. Crowding them traps steam, which makes the dough soft instead of flaky. I learned this the hard way when I tried to fit six peppers on one sheet. They baked unevenly and the dough on the inner peppers never crisped up.
Use the right cheese. Pre-shredded cheese has anti-caking agents that prevent it from melting smoothly. Grate your own mozzarella for the best texture and flavor. It takes an extra two minutes and makes a noticeable difference in the final dish.
Test for doneness. The dough should be deep golden brown, not pale. If the tops are browning too quickly while the bottoms are still pale, tent the peppers loosely with foil for the last 10 minutes of baking. Every oven runs differently—mine runs hot, so I check at 22 minutes instead of 25.
One more thing: if you’re making these for a crowd, consider par-baking the peppers for 5 minutes before stuffing them. This softens them slightly and reduces the baking time, which helps the dough stay crisp. I do this when I’m in a hurry, and it works like a charm.
Variations & Adaptations
This recipe is flexible enough to handle all kinds of tweaks. Here are some of my favorites:
Vegetarian Version
Swap the ground beef for a mixture of cooked lentils and finely chopped mushrooms. Use 1 cup cooked brown lentils and 1 cup finely diced cremini mushrooms. Sauté the mushrooms first until they release their liquid, then add the lentils and proceed with the recipe. The texture is surprisingly meaty, and the flavor is deep and savory.
Spicy Southwest Twist
Add 1 teaspoon of chili powder and 1/2 teaspoon of cumin to the filling. Swap the mozzarella for pepper jack cheese, and use a can of diced tomatoes with green chilies instead of plain tomato sauce. Top the finished peppers with a dollop of sour cream and fresh cilantro. I made this version for a game-day party, and it disappeared faster than the regular ones.
Low-Carb Adaptation
Replace the rice with riced cauliflower (fresh or frozen). Sauté the cauliflower in the skillet after cooking the onions to remove excess moisture before adding it to the filling. Use a low-carb tortilla or cheese wrap instead of crescent dough—just cut it into strips and proceed as directed. The cheese wrap version is especially good if you crisp it in the oven first.
Breakfast Mummies
This is a fun twist I tried for a brunch party. Fill the peppers with scrambled eggs, cooked breakfast sausage, and shredded cheddar. Wrap with dough and bake as directed. Serve with salsa on the side. The eggs stay soft and fluffy inside the pepper, and the dough soaks up just enough flavor to be irresistible.
Serving & Storage Suggestions
These peppers are best served warm, straight from the oven, when the dough is at its crispiest. Arrange them on a platter with the mummy eyes facing your guests. If you want to get extra festive, serve them on a dark plate or a black platter to make the golden dough pop. A small bowl of marinara sauce on the side for dipping is always a hit.
For a complete Halloween dinner, pair these with a simple green salad dressed with vinaigrette (the acidity cuts through the richness) and some roasted potato wedges. If you’re hosting a party, set them out on a buffet with other finger foods. They hold their shape well and don’t get messy, which makes them perfect for mingling.
Storage: Leftover peppers will keep in an airtight container in the refrigerator for up to 3 days. The dough will soften as they sit, but the flavor actually improves overnight as the filling melds together. To reheat, place them on a baking sheet in a 350°F oven for 10-12 minutes. The microwave works in a pinch, but the dough will be quite soft.
Freezing: You can freeze the assembled, unbaked peppers for up to 2 months. Wrap each pepper individually in plastic wrap, then place them in a freezer bag. To bake, thaw overnight in the refrigerator, then bake as directed, adding 5-7 minutes to the cooking time. I’ve done this twice now, and the results are nearly identical to fresh.
Nutritional Information & Benefits
Each serving (one stuffed pepper) contains approximately 420 calories, 22 grams of fat, 35 grams of carbohydrates, and 24 grams of protein. These numbers will vary based on the specific ingredients and substitutions you use.
Bell peppers are an excellent source of vitamin C—one pepper provides more than 150% of your daily needs. They also contain vitamin A, fiber, and antioxidants. The beef provides iron and B vitamins, while the rice offers energy-sustaining carbohydrates. This is a balanced meal that satisfies without being heavy.
If you’re watching your sodium, use low-sodium tomato sauce and reduce the added salt. The cheese and crescent dough already contain enough salt to keep the flavors balanced. For a lower-calorie option, use ground turkey and reduce the cheese by half. The dish still works beautifully—I’ve tested it both ways.
Potential allergens: This recipe contains dairy (cheese) and gluten (crescent dough). For a dairy-free version, use vegan cheese shreds and ensure your crescent dough is dairy-free (most are). For gluten-free, use a gluten-free pizza dough or biscuit mix, rolled thin and cut into strips.
Conclusion
These Crowd-Pleasing Mummy-Wrapped Stuffed Peppers have become my signature Halloween dish, and they started with a kid who didn’t know any better. That’s the thing about cooking—sometimes the best discoveries happen when you stop following the rules and start listening to the people around you. Whether you’re making these for a costume party, a family dinner, or just because you want to eat something that looks amazing, I hope you give them a try.
Don’t be afraid to play with the filling or adjust the wrapping style. Maybe your mummies have three eyes instead of two. Maybe you use green peppers and call them zombie peppers. The point is to have fun with it. Food should be joyful, and this recipe delivers that in spades. If you make these, drop a comment below and let me know how they turned out. I’d love to hear about your own kitchen surprises—the moments when you were wrong and it turned out to be the best thing that could have happened.
Frequently Asked Questions
Can I use pre-cooked rice from the freezer?
Absolutely. Frozen pre-cooked rice works perfectly. Just thaw it completely and drain any excess moisture before adding it to the filling. This is actually my preferred method because it saves time and the rice is already the right texture.
Can I make these in a slow cooker?
I don’t recommend it. The crescent dough needs dry heat to become crisp and golden, and a slow cooker creates too much steam. You’d end up with soggy dough. Stick with the oven for the best results.
How do I keep the dough from burning on the bottom?
Make sure your baking sheet isn’t too dark—dark pans absorb more heat and can burn the bottom of the dough. If you only have dark pans, place a second baking sheet underneath to diffuse the heat. Also, parchment paper helps create a barrier.
My dough strips keep tearing. What am I doing wrong?
The dough is likely too warm. Crescent roll dough needs to be cold to handle well. If your kitchen is warm or your hands are hot, work quickly and pop the dough back in the fridge for a few minutes if it starts getting sticky. Cold dough cuts cleanly and wraps without tearing.
Can I use homemade pizza dough instead of crescent rolls?
Yes, but you’ll need to roll it very thin—about 1/8 inch thick. Homemade dough will be chewier and less flaky than crescent dough, but it works in a pinch. Brush the strips with a little melted butter before baking to help them brown.
Pin This Recipe!
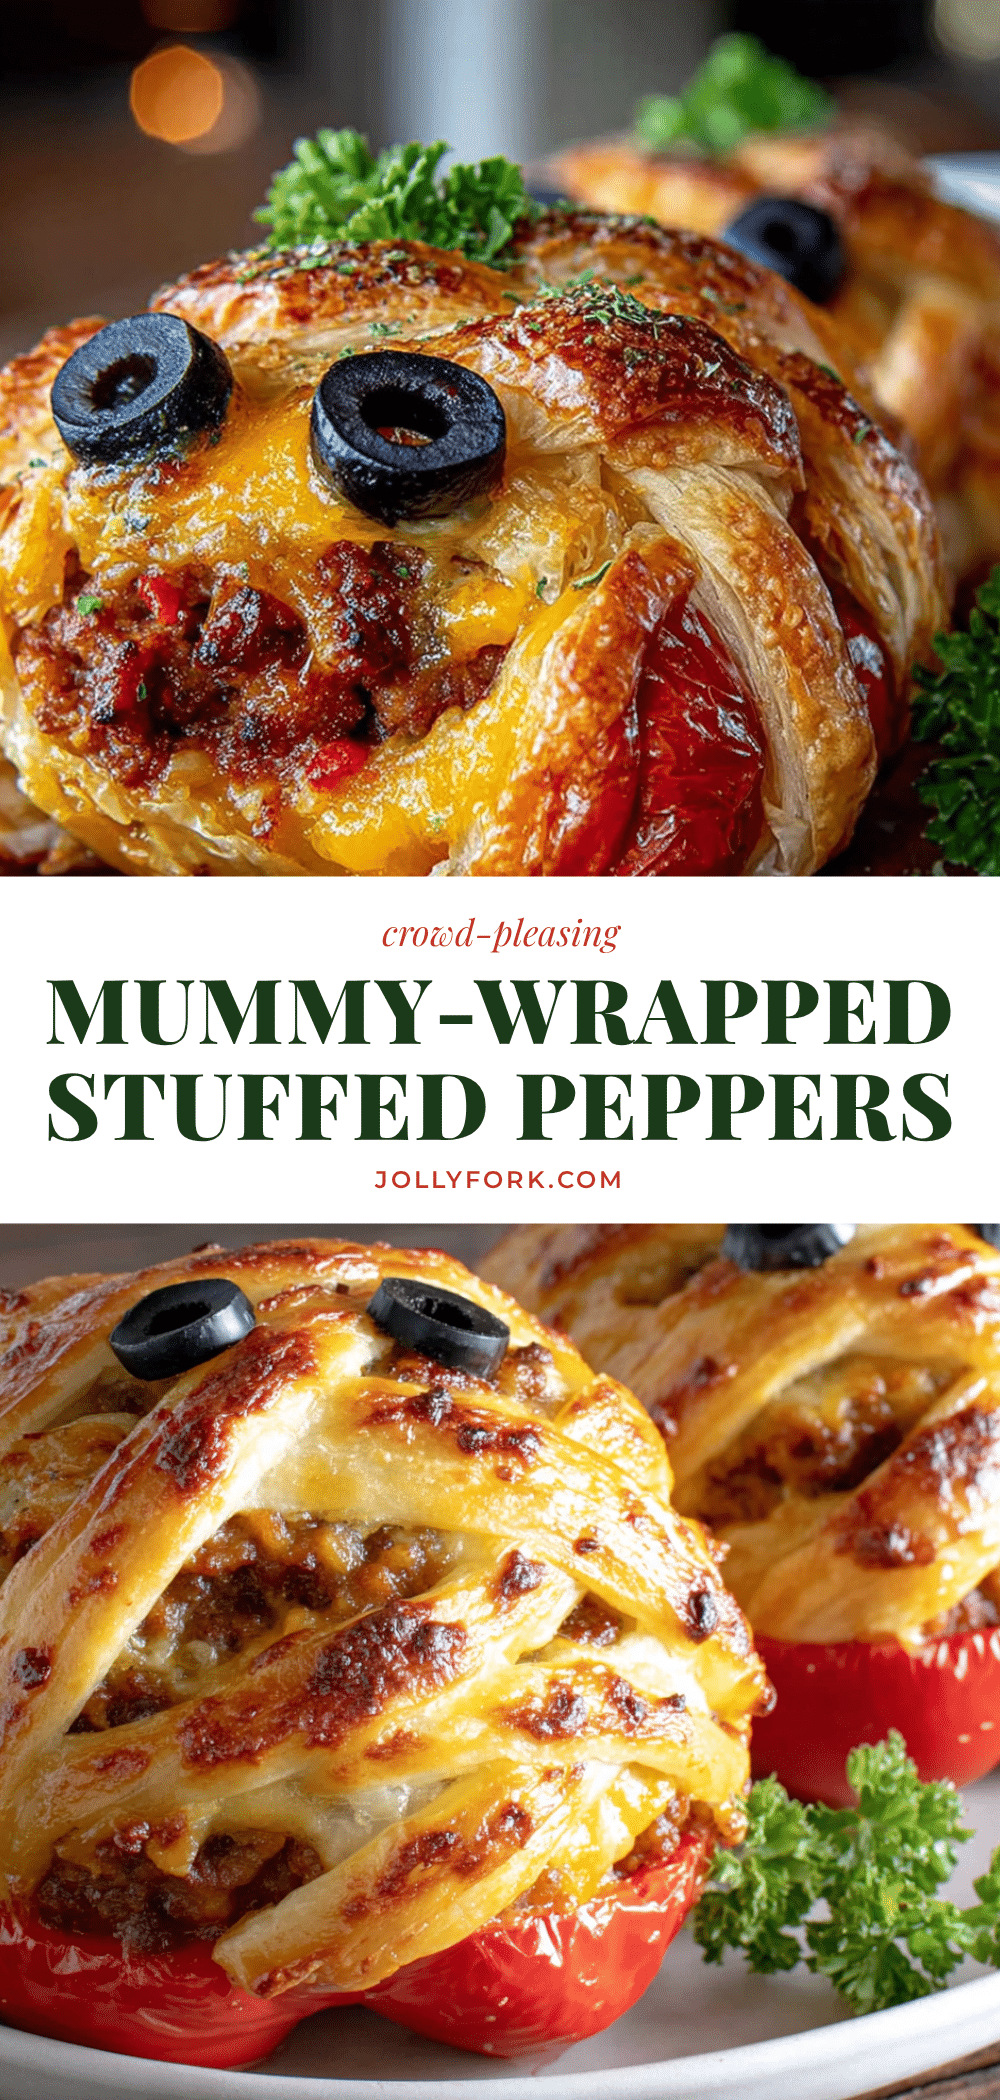
Crowd-Pleasing Mummy-Stuffed Peppers: Easy Halloween Dinner

These mummy-wrapped stuffed peppers are a show-stopping Halloween dinner that’s surprisingly simple to make. Bell peppers are filled with a savory beef and rice mixture, wrapped in crescent dough strips to look like mummies, and baked until golden and flaky.
- Prep Time: 45 minutes
- Cook Time: 30 minutes
- Total Time: 1 hour 15 minutes
- Yield: 4 servings 1x
- Category: Main Course
- Cuisine: American
Ingredients
- 4 large bell peppers (any color, red or orange recommended)
- 1 pound ground beef (80/20 recommended)
- 1 cup cooked rice (white, brown, or cauliflower rice)
- 1 small onion, finely diced (about 1/2 cup)
- 2 cloves garlic, minced
- 1 can (15 ounces) tomato sauce
- 1 teaspoon dried oregano
- 1 teaspoon dried basil
- 1/2 teaspoon salt
- 1/4 teaspoon black pepper
- 1 cup shredded mozzarella cheese (plus extra for sprinkling)
- 2 cans (8 ounces each) refrigerated crescent roll dough
- 12 black olive slices
- Optional: 1 tablespoon olive oil
Instructions
- Preheat oven to 375°F (190°C). Line a baking sheet with parchment paper.
- Cook rice if not using leftover: bring 1/2 cup uncooked rice with 1 cup water to a boil, cover, reduce heat to low, simmer 15-18 minutes. Fluff and set aside.
- Cut tops off bell peppers (about 1/2 inch from top), remove seeds and membranes. Rinse and drain upside down on paper towels. Trim bottom if needed so they sit flat.
- Brown ground beef in a large skillet over medium-high heat for 6-8 minutes. Transfer to a plate, leaving 1 tablespoon drippings in pan.
- Reduce heat to medium. Sauté diced onion in skillet until softened, about 3-4 minutes. Add minced garlic and cook 30 seconds until fragrant.
- Return beef to skillet. Add cooked rice, tomato sauce, oregano, basil, salt, and pepper. Simmer 2-3 minutes. Remove from heat and stir in 1/2 cup mozzarella. Adjust seasoning.
- Stuff each pepper with filling, packing gently but firmly. Place upright on prepared baking sheet.
- Unroll crescent dough and separate into triangles. Cut each triangle lengthwise into 3-4 thin strips (about 1/2 inch wide).
- Wrap dough strips around each pepper starting at the bottom, slightly overlapping, leaving a small gap near the top for the face. Tuck ends underneath to secure.
- Press two olive slices into the dough near the top of each pepper for eyes.
- Bake for 25-30 minutes until dough is golden brown and filling is bubbling. About 5 minutes before done, sprinkle remaining mozzarella over tops and return to oven to melt.
- Let cool on baking sheet for 5 minutes before serving.
Notes
Don’t overwork the dough; keep it cold. Drain tomato sauce slightly to avoid soggy bottoms. Space peppers at least 2 inches apart on baking sheet. Grate your own mozzarella for best melting. For make-ahead, assemble through step 10, cover, and refrigerate up to 8 hours; add 5-7 minutes to baking time. For par-baking, bake peppers 5 minutes before stuffing to reduce overall baking time.
Nutrition
- Serving Size: 1 stuffed pepper
- Calories: 420
- Sugar: 8
- Sodium: 780
- Fat: 22
- Saturated Fat: 8
- Carbohydrates: 35
- Fiber: 4
- Protein: 24
Keywords: Halloween dinner, stuffed peppers, mummy peppers, crescent dough, ground beef, easy dinner, party food, festive