Three layers of graham crackers, a cloud of fluffy whipped cream, and a pile of fresh berries sitting in my fridge, and I was still frantically searching for a dessert that didn’t require turning on the oven. It was the Fourth of July weekend, and somehow I’d volunteered to bring dessert to the neighborhood cookout without actually thinking through the logistics. You know that moment when you realize you’re out of butter, the eggs are from last week, and the last thing you want to do is stand over a hot stove in ninety-degree weather? That was me, staring at my pantry like it owed me something.
Honestly, the Easy Red White and Blue Berry Icebox Cake was born from pure desperation and a vague memory of my grandmother’s no-bake desserts from the seventies. She used to stack cookies and pudding in a dish and call it company-worthy. I figured if she could do it with instant pudding and margarine, I could do it with real cream and fresh fruit. And you know what? It worked. Better than worked. It became the thing everyone asked for at the next cookout, and the one after that, and the one after that.
This isn’t one of those fussy layered cakes that requires a pastry bag and a calm demeanor. This is the dessert you make when you want to show up with something gorgeous without having a breakdown in the kitchen. It’s the kind of recipe that makes you look like you planned ahead when really you just threw it together between laundry loads. And honestly? That’s my favorite kind of recipe.
Why You’ll Love This Recipe
Let me tell you why this particular no-bake cake has earned a permanent spot in my summer rotation. I’ve tested it at backyard barbecues, pool parties, and even a fancy little Memorial Day get-together where everyone pretended they were food critics. It passed every single test.
- Only 3 Ingredients — Graham crackers, whipped cream (or Cool Whip if you’re in a hurry), and fresh berries. That’s it. No hidden ingredients, no specialty items from the fancy grocery store.
- No Oven Required — When it’s ninety-five degrees outside and your kitchen feels like a sauna, this cake is your best friend. The hardest thing you’ll do is whip some cream.
- Make-Ahead Magic — This cake actually gets better after sitting in the fridge overnight. The graham crackers soften into a cake-like texture, and the flavors meld together beautifully.
- Perfect for Patriotic Holidays — Red strawberries, white cream, and blueberries. It’s a flag you can eat. Fourth of July, Memorial Day, Labor Day — this cake fits right in.
- Naturally Crowd-Pleasing — I’ve watched kids who swear they don’t like fruit go back for seconds. There’s something about the creamy, crunchy, juicy combination that just works.
What makes this different from the other icebox cakes floating around the internet? It’s the ratio, honestly. I’ve tweaked this thing about seven times to get the perfect balance of creamy to crunchy to fruity. Too many graham crackers and it’s dry. Too much cream and it’s a mess. This version hits that sweet spot where every bite has a little bit of everything.
This is the kind of dessert that makes people close their eyes when they take a bite. It’s simple, sure, but it’s also genuinely delicious. And in a world of complicated recipes with twenty ingredients, sometimes simple is exactly what we need.
What Ingredients You Will Need
This recipe uses three simple ingredients to create something that tastes way more complicated than it actually is. Here’s what you need and why each one matters.
For the Cake Base:
- Graham crackers — 2 full boxes (about 24-30 full sheets). You’ll use these to create the layers. I prefer the classic honey-flavored graham crackers, but cinnamon works if you want a little extra warmth. Don’t use the low-fat version — they get too soggy and fall apart.
- Heavy whipping cream — 3 cups (720 ml). This gets whipped into a stable, fluffy cream that holds the whole thing together. You can substitute with 2 (8-ounce) containers of Cool Whip if you’re short on time, but homemade whipped cream tastes noticeably better. Make sure the cream is really cold — pop it in the freezer for ten minutes before whipping.
- Powdered sugar — ¼ cup (30 grams). Just enough to sweeten the cream without making it cloying. You can skip this if you’re using Cool Whip, but I like the little bit of sweetness it adds.
- Vanilla extract — 1 teaspoon. Optional but recommended. It rounds out the flavor and makes the cream taste like something special.
For the Berry Layer:
- Fresh strawberries — 1 pound (450 grams), hulled and sliced. Look for berries that are bright red and fragrant. Avoid ones with white shoulders — they’re underripe and won’t be as sweet.
- Fresh blueberries — 6 ounces (170 grams). Look for firm, plump berries with a silvery bloom on the skin. That bloom is a sign of freshness.
- Optional garnish — Extra berries, mint leaves, or a dusting of powdered sugar for presentation.
Ingredient Tips from My Kitchen:
I’ve made this cake with both store-brand graham crackers and name-brand (like Honey Maid), and honestly, the name-brand holds up better. The store brands tend to be thinner and get mushy faster. If you’re using a store brand, consider using three layers instead of four so it doesn’t turn into pudding.
For the cream, I really recommend splurging on a good-quality heavy cream. I like Horizon Organic or Organic Valley — they whip up beautifully and taste clean and sweet. Cheap cream sometimes has a weird aftertaste that you don’t want in your dessert.
The berries are where you can get creative. If strawberries aren’t in season, you can use raspberries for the red layer. They’re a little more tart, which actually balances the sweetness of the cream nicely. Just be gentle with them — they bruise easily.
Equipment Needed
You don’t need a fancy kitchen to make this cake. Here’s what you’ll actually use:
- 9×13-inch baking dish — This is the perfect size for the proportions in this recipe. A glass dish works great because you can see the layers through the sides.
- Electric mixer — Either a stand mixer with the whisk attachment or a hand mixer. You can whip cream by hand with a whisk, but your arm will hate you for it.
- Large mixing bowl — Make sure it’s clean and dry. Any grease residue will prevent your cream from whipping properly.
- Spatula — For spreading the cream evenly. A rubber spatula works best.
- Sharp knife and cutting board — For hulling and slicing strawberries.
- Measuring cups and spoons — For the cream and sugar.
If you don’t have a 9×13 dish, you can use a similar-sized baking pan or even a deep casserole dish. Just keep in mind that the number of layers might change depending on the surface area. I once made this in a round springform pan and it turned out gorgeous — like a tall, fancy cake.
One pro tip: chill your mixing bowl and beaters in the freezer for about fifteen minutes before whipping the cream. It makes the cream whip up faster and hold its shape better. I learned this after a few sad, soupy batches of whipped cream that refused to stiffen.
Preparation Method
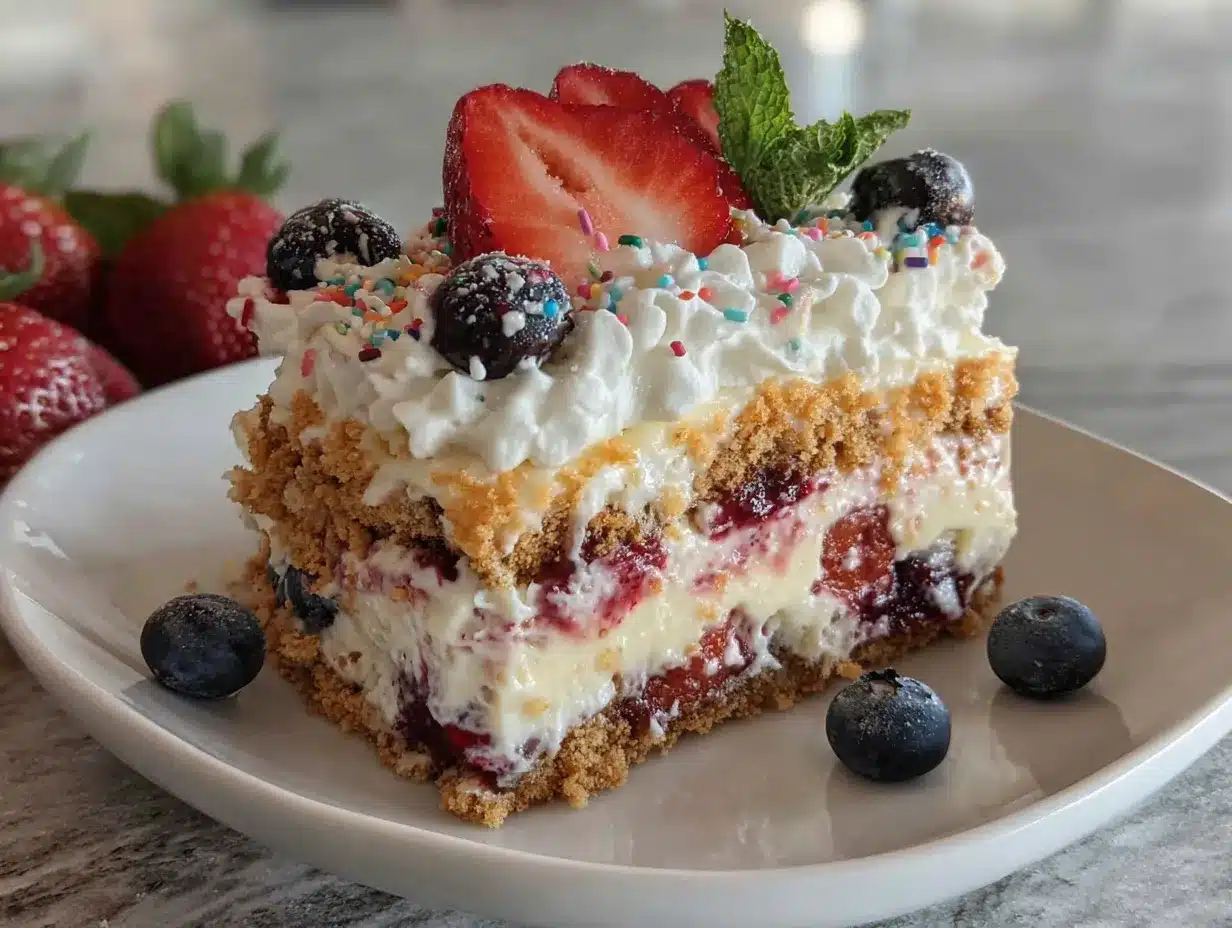
Alright, let’s get to the good part. This is one of those recipes where the technique matters more than the ingredients, but don’t worry — it’s still incredibly forgiving.
- Whip the cream. Pour the cold heavy cream, powdered sugar, and vanilla extract into your chilled mixing bowl. Start beating on low speed (you don’t want cream splattering everywhere), then gradually increase to medium-high. Beat until soft peaks form — that’s when the cream holds a gentle peak that flops over when you lift the beater. Then keep going for another thirty seconds until you have stiff peaks that stand up straight. Be careful not to overbeat, or you’ll end up with butter. Trust me, I’ve done it. It’s sad.
- Prepare your berries. While the cream is whipping, rinse the strawberries and blueberries and pat them dry with paper towels. Wet berries will make the cake soggy. Hull the strawberries and slice them into even pieces — about ¼-inch thick. Set the blueberries aside. If any of your strawberries are particularly large, cut them into quarters instead of slices.
- Start layering. Spread a thin layer of whipped cream on the bottom of your 9×13 dish. This helps the first layer of graham crackers stick and prevents them from sliding around. Arrange a single layer of graham crackers on top, breaking pieces as needed to fill gaps. Don’t stress about perfection — you’ll never see the bottom layer anyway.
- Add the first cream layer. Spread about one-third of the remaining whipped cream evenly over the graham crackers. Use your spatula to smooth it out to the edges. Don’t press too hard or you’ll break the crackers.
- Add the berries. Scatter about half of your sliced strawberries and half of your blueberries over the cream layer. Try to distribute them evenly so every slice gets a good mix of both.
- Repeat the layers. Place another layer of graham crackers on top of the berries. Gently press them down so they make contact with the cream. Add another third of the cream, then the remaining berries. Add a third layer of graham crackers, then the final third of cream on top.
- Finish with garnish. Arrange any remaining berries on top of the final cream layer in a decorative pattern. For a patriotic look, I like to create stripes of strawberries and blueberries across the white cream. It looks so festive!
- Chill, chill, chill. Cover the dish with plastic wrap and refrigerate for at least 6 hours, but overnight is best. The graham crackers need time to absorb the moisture from the cream and soften into that cake-like texture. If you try to cut it too soon, you’ll get crunchy crackers and runny cream. Patience, my friend.
A note on timing: This cake needs at least 6 hours to set properly. I usually make it the night before I plan to serve it. It’s one of those desserts that actually improves with time, so don’t rush it.
One thing I learned the hard way — if you’re using a glass dish, don’t put it in the fridge uncovered. The cream will absorb odors from whatever else is in there. I once had a strawberry cake that tasted faintly of leftover garlic bread. Not my finest moment.
Cooking Tips & Techniques
After making this cake approximately seventeen times (I stopped counting after the first summer), I’ve collected some tips that make the process smoother and the results better.
Keep everything cold. This is the number one rule of working with whipped cream. Cold cream whips better. Cold cake holds its shape better. If your kitchen is warm, pop the assembled cake in the fridge for twenty minutes between layers. It sounds fussy, but it makes a difference.
Don’t skip the bottom cream layer. I know it seems like an extra step, but that thin layer of cream on the bottom of the dish prevents the first graham crackers from sticking and breaking. It also helps the cake release cleaner when you’re serving it.
Break the graham crackers strategically. You’re going to have gaps no matter what, so don’t stress. I like to break crackers into thirds and use the pieces to fill in the weird spaces. The cream fills everything in anyway, so perfection is overrated here.
Watch for over-softening. If you let the cake sit in the fridge for more than 48 hours, the graham crackers can get a little too soft — almost mushy. It’s still edible, but the texture loses that nice contrast. I find the sweet spot is somewhere between 12 and 24 hours.
My biggest failure: I once tried to speed this up by using the freezer instead of the fridge. Big mistake. The cream froze unevenly, the berries turned into icy little pellets, and the graham crackers stayed crunchy in some spots and soggy in others. Just use the fridge. There’s no shortcut here.
If you’re making this for a crowd and want to double the recipe, use two separate 9×13 dishes instead of one giant pan. The layering gets unwieldy in a bigger dish, and the proportions get thrown off.
Variations & Adaptations
One of the best things about this recipe is how easy it is to adapt. Here are some variations I’ve tried and loved:
Berry Swap: Not a fan of strawberries? Use raspberries instead. They’re tarter and smaller, which means you get more berry pieces in every bite. For a tropical twist, try sliced mango and kiwi instead of the red and blue. It won’t be patriotic, but it’ll be delicious.
Dairy-Free Version: Swap the heavy cream for full-fat coconut cream. Chill two cans of full-fat coconut milk overnight, scoop out the solid cream, and whip it with a little powdered sugar. It works surprisingly well. The coconut flavor is subtle and actually complements the berries nicely.
Chocolate Lover’s Twist: Use chocolate graham crackers instead of honey ones. The chocolate pairs beautifully with strawberries. I made this for Valentine’s Day once and it was a hit. You could also add a thin layer of melted dark chocolate between the cream layers for extra decadence.
Lemon Version: Add the zest of one lemon to the whipped cream before layering. The citrus brightens everything up and cuts through the richness. This version is especially good with blueberries — lemon and blueberry is a classic combination for a reason.
Individual Servings: Make these in small mason jars or clear plastic cups for a grab-and-go dessert. Layer the ingredients the same way, but use smaller portions. They’re perfect for picnics or potlucks where you don’t want to deal with slicing and serving.
I tried a version last summer where I used crushed vanilla wafers instead of graham crackers. It was good — different, but good. The wafers stay a little crunchier than graham crackers, so the texture was more varied. If you’re feeling adventurous, give it a shot.
Serving & Storage Suggestions
This cake is best served cold, straight from the fridge. Let it sit at room temperature for about five minutes before slicing — it makes cutting through the layers easier without the cream smearing everywhere.
How to slice cleanly: Use a sharp chef’s knife and wipe it clean between cuts. Dip the knife in hot water and dry it off before each slice for the cleanest edges. I learned this trick from a pastry chef friend, and it makes a huge difference.
For presentation, I like to garnish with fresh mint leaves and a light dusting of powdered sugar just before serving. It adds a pop of green that makes the red, white, and blue really stand out. If you’re feeling fancy, add a few extra whole strawberries and a drizzle of honey.
Storage: Cover the dish tightly with plastic wrap or transfer individual slices to airtight containers. The cake will keep in the refrigerator for up to 3 days. After that, the texture starts to decline. I don’t recommend freezing this cake — the cream gets grainy and the berries turn mushy when thawed.
Leftover ideas: If you have leftover cake that’s gotten a bit soft, crumble it into a bowl and eat it like a parfait. Or scoop it into a blender with some milk for a quick milkshake. Both options are delicious and waste nothing.
The flavors actually develop overnight, so day-old cake often tastes better than fresh. The berries release their juices into the cream, and everything melds together into this harmonious, creamy, fruity bliss. It’s one of those rare desserts that rewards patience.
This cake pairs beautifully with a cold glass of lemonade or a scoop of vanilla ice cream on the side. If you’re serving it at a barbecue, it goes great with grilled meats and fresh salads. For a full holiday spread, consider pairing it with a fresh grilled corn and black bean salad for a sweet and savory balance.
Nutritional Information & Benefits
Let’s be real — this is a dessert, not a health food. But it does have some redeeming qualities worth mentioning.
Estimated nutrition per serving (based on 12 servings):
- Calories: 285
- Fat: 18g
- Carbohydrates: 30g
- Protein: 3g
- Fiber: 2g
- Sugar: 18g
Health highlights: The berries are loaded with antioxidants, particularly anthocyanins in blueberries and vitamin C in strawberries. The graham crackers provide a little bit of whole grain fiber, and the cream — well, cream has calcium. We’re reaching here, but it counts!
Dietary considerations: This recipe is vegetarian. It can be made dairy-free using coconut cream (as mentioned above). It’s naturally nut-free, which makes it a safe option for school functions or parties where allergies might be a concern. It does contain gluten from the graham crackers, but you can find gluten-free graham crackers at most grocery stores.
I’m not going to pretend this is a healthy dessert. It’s a treat, and treats are meant to be enjoyed. But compared to a heavy, butter-laden cake or a fried dessert, this one feels lighter and fresher. You don’t get that heavy, weighed-down feeling after eating it. It’s refreshing in a way that most desserts aren’t.
Conclusion
Look, I’ve made a lot of desserts in my time. Some were complicated showstoppers that took all day. Others were simple weeknight treats that my family devoured in minutes. This Easy Red White and Blue Berry Icebox Cake falls firmly into the second category, and honestly? That’s where the magic is.
This cake has saved me more times than I can count. It’s the dessert I make when I’m stressed, when I’m in a hurry, when I forgot I was supposed to bring something to the party. It never fails. It always looks beautiful, tastes delicious, and makes people happy. That’s a pretty special combination for a recipe with only three ingredients.
I’d love to hear how yours turns out! Did you try a variation? Did your kids help you layer it? Did you serve it at a barbecue and watch it disappear? Drop a comment below and let me know. And if you’re looking for another no-bake dessert to add to your summer rotation, check out my easy no-bake berry icebox cake for Labor Day — it’s a slightly different take that’s perfect for the end of summer.
Happy cooking, friends. Or, you know, happy assembling. Either way, enjoy every cold, creamy, berry-filled bite.
Frequently Asked Questions
Can I use frozen berries instead of fresh?
You can, but I don’t recommend it. Frozen berries release a lot of liquid as they thaw, which will make your cake watery and sad. If you’re in a pinch and frozen is all you have, thaw them first, drain off the excess liquid, and pat them dry before using. The texture won’t be as good, but it’ll still taste fine.
How far in advance can I make this cake?
I’ve made this up to two days ahead and it was perfect. The sweet spot is 12 to 24 hours in the fridge. After 48 hours, the graham crackers start to get a little too soft for my taste. If you need to make it further ahead, keep the components separate and assemble the day before serving.
Can I use Cool Whip instead of homemade whipped cream?
Absolutely. Use two 8-ounce containers of Cool Whip, thawed. The texture will be slightly different — Cool Whip is more stable and less rich — but it works perfectly. I’ve done it plenty of times when I was in a hurry or didn’t have heavy cream on hand.
Why did my graham crackers stay crunchy?
They probably didn’t have enough time to soften. This cake needs at least 6 hours in the fridge, and overnight is better. If you’re still having trouble, try spreading a slightly thicker layer of cream between the crackers. More moisture means softer crackers. Also, make sure your dish is covered tightly so the cream doesn’t dry out.
Can I make this in a different size pan?
Sure! Just adjust the number of layers based on your pan’s surface area. A smaller, deeper pan will give you more layers. A larger, shallower pan will give you fewer. The key is keeping the ratios roughly the same — equal parts graham crackers, cream, and berries. If you’re using a round pan, check out my one bowl banana walnut bread for another easy dessert option.
Pin This Recipe!
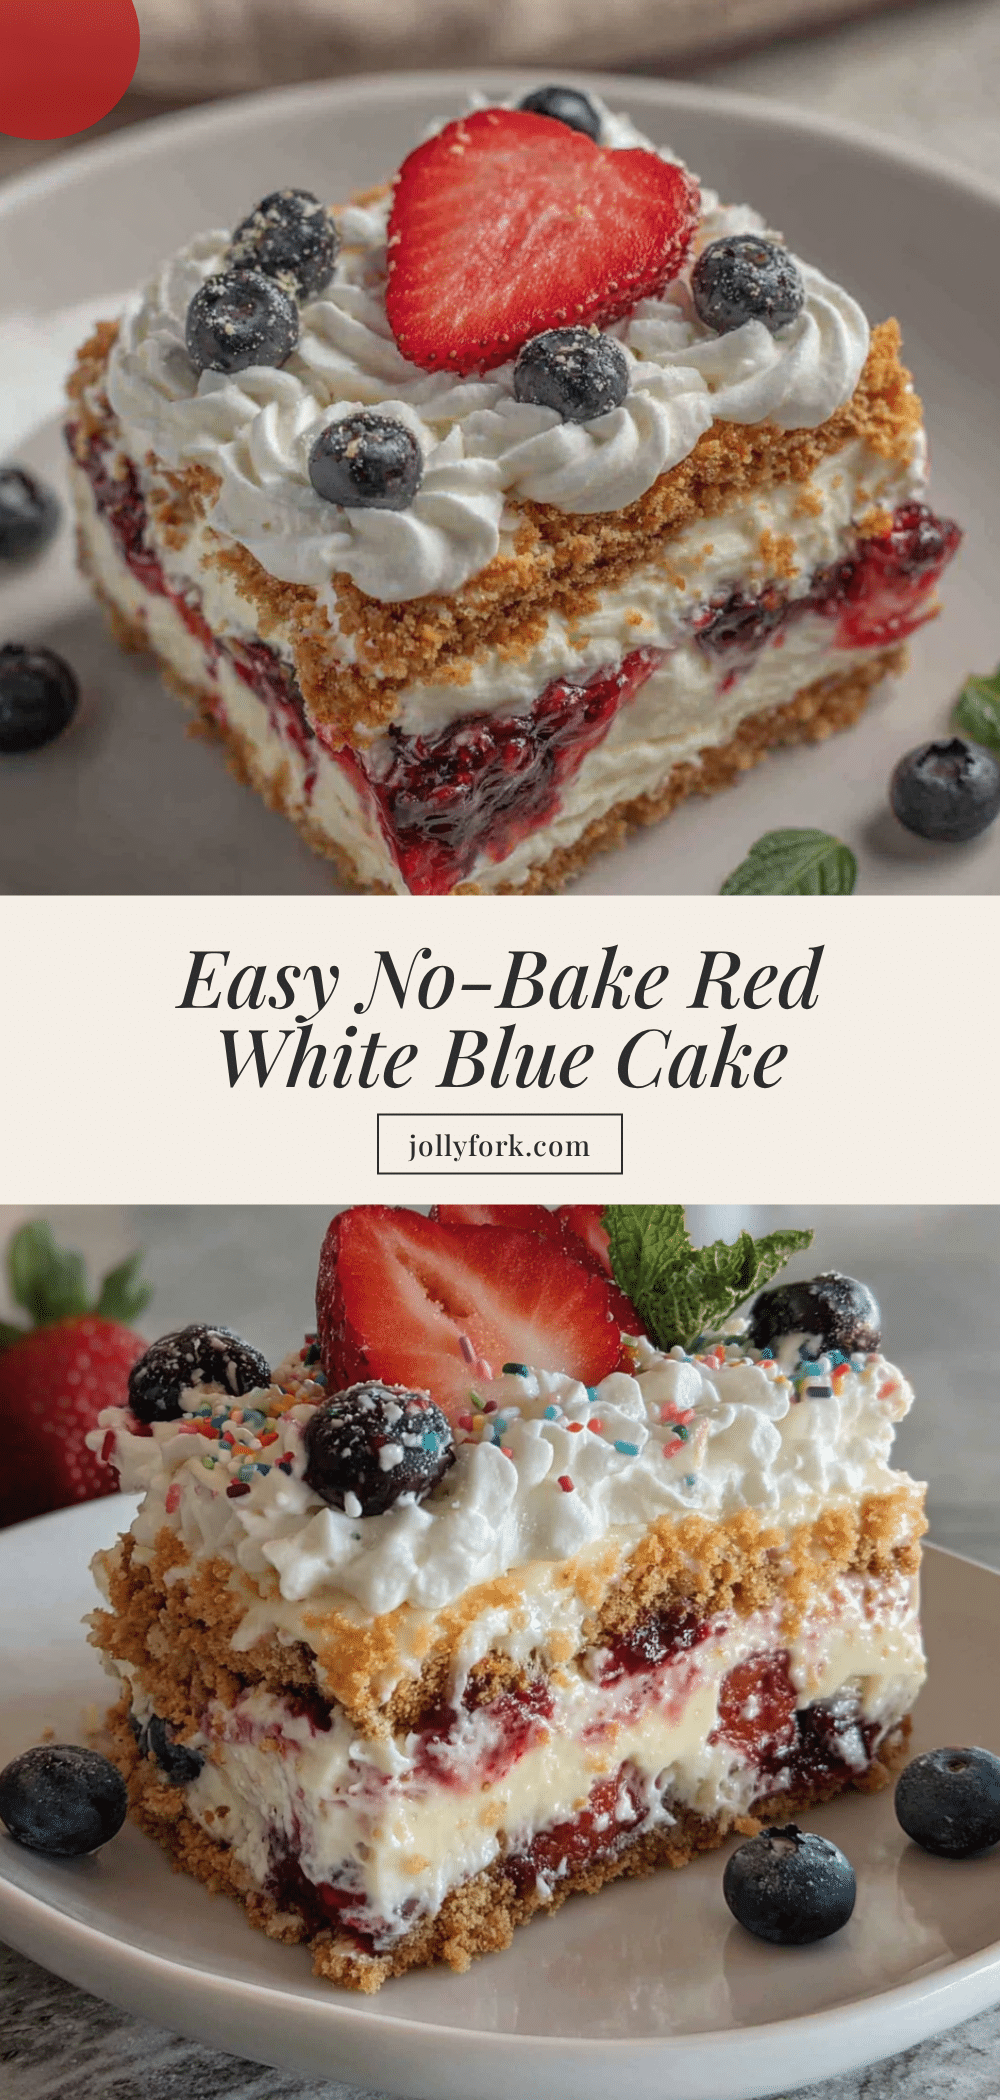
Easy 3-Ingredient Red White and Blue Berry Icebox Cake
A no-bake dessert made with graham crackers, whipped cream, and fresh berries. Perfect for patriotic holidays like the Fourth of July, Memorial Day, and Labor Day.
- Prep Time: 20 minutes
- Cook Time: 0 minutes
- Total Time: 6 hours 20 minutes (includes chilling)
- Yield: 12 servings 1x
- Category: Dessert
- Cuisine: American
Ingredients
- 2 full boxes graham crackers (about 24–30 full sheets)
- 3 cups (720 ml) heavy whipping cream
- 1/4 cup (30 g) powdered sugar
- 1 teaspoon vanilla extract (optional)
- 1 pound (450 g) fresh strawberries, hulled and sliced
- 6 ounces (170 g) fresh blueberries
- Optional garnish: extra berries, mint leaves, or powdered sugar
Instructions
- Whip the cream: Pour cold heavy cream, powdered sugar, and vanilla extract into a chilled mixing bowl. Beat on low speed, then increase to medium-high until stiff peaks form.
- Prepare the berries: Rinse strawberries and blueberries, pat dry. Hull and slice strawberries into 1/4-inch pieces.
- Start layering: Spread a thin layer of whipped cream on the bottom of a 9×13-inch baking dish. Arrange a single layer of graham crackers on top, breaking pieces to fill gaps.
- Add the first cream layer: Spread about one-third of the remaining whipped cream evenly over the graham crackers.
- Add the berries: Scatter half of the sliced strawberries and half of the blueberries over the cream layer.
- Repeat the layers: Place another layer of graham crackers, then another third of cream, then the remaining berries. Add a third layer of graham crackers and the final third of cream on top.
- Finish with garnish: Arrange any remaining berries on top in a decorative pattern.
- Chill: Cover with plastic wrap and refrigerate for at least 6 hours, preferably overnight, until the graham crackers soften into a cake-like texture.
Notes
For best results, chill the mixing bowl and beaters in the freezer for 15 minutes before whipping cream. The cake improves with time; make it the night before serving. Avoid using frozen berries as they release too much liquid. If using Cool Whip, substitute 2 (8-ounce) containers thawed. Store covered in the refrigerator for up to 3 days.
Nutrition
- Serving Size: 1 slice (1/12 of cak
- Calories: 285
- Sugar: 18
- Sodium: 180
- Fat: 18
- Saturated Fat: 11
- Carbohydrates: 30
- Fiber: 2
- Protein: 3
Keywords: icebox cake, no-bake dessert, berry cake, Fourth of July dessert, Memorial Day dessert, Labor Day dessert, easy dessert, 3-ingredient dessert


