That first crackle of the sauce hitting a hot pan — the way soy and mirin instantly caramelize into something sticky and glossy — still takes me straight to my friend Mika’s tiny Tokyo kitchen. I was twenty-three, broke, and living on instant ramen when she pulled out a bento box that changed everything. She didn’t measure a thing. Just splashed soy sauce, mirin, and sake into a pan, let it bubble, and tossed in some chicken thighs she’d sliced thin while telling me about her grandmother’s rules for teriyaki. “Not too sweet,” she said, wagging a chopstick at me. “It should taste like the ocean kissed the sugar.” I remember thinking how effortlessly beautiful that little lunch box looked — rice tucked into one corner, chicken glistening in another, a few snap peas and a tiny pile of pickled radish making it feel like art.
Back then, I assumed bento boxes were complicated. All those compartments, the perfect arrangement, the pressure to make something that looked as good as it tasted. But watching Mika work, I realized the secret was simpler than I thought. Teriyaki chicken, done right, doesn’t need fuss. It needs confidence — and a sauce that knows what it’s doing. Over the years, I’ve tweaked and tested and burned my fair share of chicken, but this easy bento-style chicken teriyaki lunch box recipe is the one I keep coming back to. It’s the one that works on busy mornings, lazy Sundays, and those nights when you need something comforting but don’t have the energy for a production.
Honestly, this recipe taught me that the best lunch boxes aren’t about perfection. They’re about putting something you love into a container and carrying it with you. This chicken teriyaki? It’s that recipe. The one that makes you look forward to lunch.
Why You’ll Love This Recipe
Let me tell you why this one sticks. I’ve made teriyaki chicken a hundred different ways, and this version is the one I trust when it really counts. It’s not just fast — it’s forgiving. And in my book, that’s the mark of a great recipe.
- Ready in 15 Minutes: From fridge to bento box in a quarter of an hour. No marinating, no complicated steps, no waiting around. Perfect for those mornings when you hit snooze one too many times.
- Pantry-Friendly Ingredients: Soy sauce, mirin, sake, sugar, and chicken. That’s it. You probably have most of this stuff already, and if you don’t, a quick trip to any grocery store will sort you out.
- Perfect for Meal Prep: This chicken actually tastes better the next day. The sauce seeps into the meat overnight, making it even more flavorful. Make a batch on Sunday, and you’ve got lunches sorted for the week.
- Crowd-Pleaser Status: I’ve packed this for picky kids, skeptical colleagues, and my dad who “doesn’t do Japanese food.” Every single one of them asked for the recipe. It’s that universally good.
- Better Than Takeout: No weird additives, no excessive sugar, and you control the salt. Plus, it’s way cheaper than ordering delivery. Your wallet and your taste buds will thank you.
What makes this recipe different from all the other teriyaki recipes out there? It’s the technique. Most recipes tell you to simmer the sauce forever or use cornstarch to thicken it. I skip all that. I use a hot pan and let the natural sugars in the mirin do the work. The result is a sauce that clings to the chicken like a glaze, not a gravy. It’s cleaner, brighter, and tastes more like the teriyaki I remember from Mika’s kitchen. No fuss, no extra dishes, just honest flavor.
This is comfort food reimagined — faster, simpler, but with the same soul-soothing satisfaction. It’s the kind of meal that makes you close your eyes after the first bite, even if you’re eating it at your desk.
What Ingredients You Will Need
This recipe uses simple, everyday ingredients to create something genuinely special. The magic is in the balance — salty, sweet, savory, and a tiny hint of acidity that makes everything sing. Here’s what you’ll need:
For the Chicken Teriyaki
- 1 lb boneless, skinless chicken thighs (about 450g) — I prefer thighs over breasts here. They’re more forgiving, stay juicy, and have that rich flavor that stands up to the sauce. Look for thighs that are evenly thick so they cook uniformly.
- 1/4 cup soy sauce (60ml) — Use a good-quality soy sauce. I like Kikkoman or San-J for their balanced saltiness. Low-sodium works fine if you’re watching your salt intake.
- 1/4 cup mirin (60ml) — This sweet rice wine is non-negotiable for authentic flavor. Don’t substitute with rice vinegar; they’re completely different. Mirin adds sweetness and that signature shine.
- 2 tablespoons sake (30ml) — Adds depth and helps tenderize the meat. If you don’t have sake, dry sherry is an acceptable substitute, but sake is worth seeking out.
- 1 tablespoon sugar (12g) — Just a touch to balance the salt. I use regular white sugar, but brown sugar works and adds a slightly deeper flavor.
- 1 teaspoon grated fresh ginger (optional but recommended) — Adds a warm, peppery note that cuts through the richness. Grate it on a microplane for the best texture.
For the Bento Box Assembly
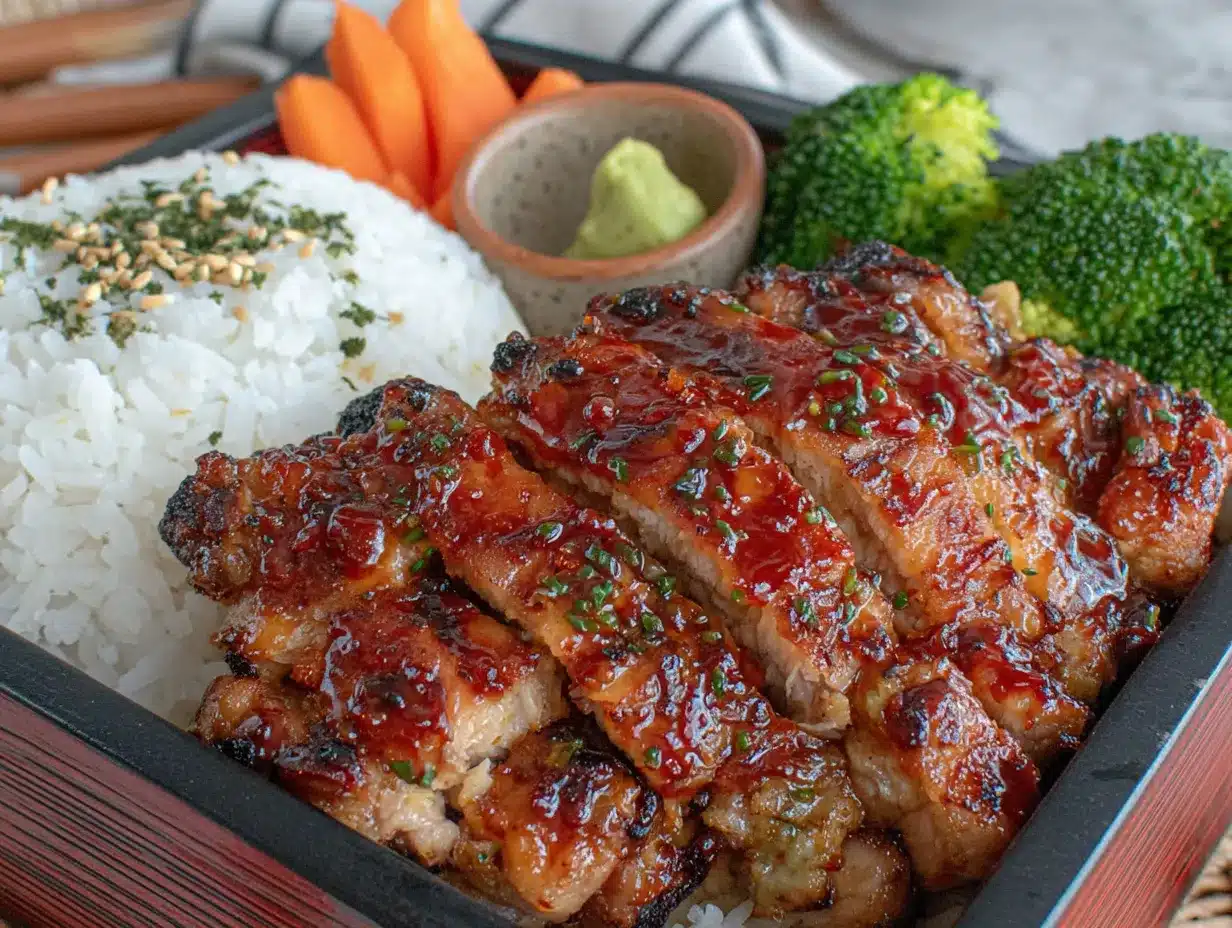
- 1 cup cooked short-grain white rice (about 180g) — Sushi rice or Calrose rice works beautifully. The slightly sticky texture is perfect for picking up with chopsticks.
- 1/2 cup steamed snap peas or green beans (about 75g) — Adds color and crunch. Broccoli florets work great too.
- 2 tablespoons pickled radish or cucumber — That bright, tangy pop balances the rich chicken. Store-bought is fine, or make your own quick pickles.
- 1 teaspoon sesame seeds (for garnish) — Toasted white or black sesame seeds add a nutty finish and visual appeal.
- Optional: A few cherry tomatoes or edamame — For extra color and nutrition. Bento boxes are as much about visual balance as flavor.
Ingredient Tip: If you can find it, use hon-mirin (real mirin) instead of the seasoned stuff. It has a cleaner flavor and less added sugar. Look for it in the international aisle or at an Asian grocery store. And please, don’t skip the sake — it’s what gives the sauce that restaurant-quality depth.
Equipment Needed
You don’t need a lot of fancy gear for this recipe. In fact, you probably already have everything you need. But here’s what I use and why:
- A large non-stick skillet or frying pan (10-12 inches) — Non-stick is your friend here. The sauce gets sticky, and a non-stick surface makes cleanup a breeze. Cast iron works too, but you’ll need to be more vigilant about sticking.
- A sharp chef’s knife — For slicing the chicken into even pieces. A dull knife will tear the meat and make uneven slices that cook at different rates.
- A microplane or fine grater — For grating fresh ginger. You can use a regular grater, but a microplane gives you that fine, almost paste-like texture that dissolves into the sauce.
- A bento box or meal prep container — Any container with compartments works. I use a simple two-tier bento box from a Japanese grocery store, but even a standard lunch container with dividers does the job. If you don’t have one, use silicone baking cups to separate components in a regular container.
- Measuring spoons and a liquid measuring cup — Precision matters here, especially with the sauce. Eyeballing it can lead to too-salty or too-sweet results.
- Tongs or a spatula — For flipping the chicken. Tongs give you better control, but a silicone spatula works too.
Budget-Friendly Tip: Don’t run out and buy a fancy bento box. A regular lunch container with a few small silicone muffin cups works perfectly to keep components separate. I used a repurposed takeout container for months before I invested in a proper bento box.
Preparation Method
Alright, let’s get cooking. This comes together fast, so I recommend having everything prepped and measured before you turn on the heat. Trust me — once that chicken hits the pan, you won’t have time to search for the soy sauce.
- Prep the chicken (2 minutes): Place your chicken thighs on a cutting board. If they’re uneven in thickness, use a sharp knife to butterfly them or pound them gently to about 1/2-inch thickness. Pat them dry with paper towels — this is crucial for getting that beautiful golden sear. Slice each thigh into bite-sized pieces, about 1-inch wide. Season lightly with a pinch of salt and pepper.
- Mix the sauce (1 minute): In a small bowl or liquid measuring cup, combine the soy sauce, mirin, sake, and sugar. Stir until the sugar is mostly dissolved. If you’re using ginger, grate it directly into the sauce and stir. Set this aside. Give it a taste — it should be salty-sweet with a pleasant sharpness from the sake.
- Heat the pan (1 minute): Place your skillet over medium-high heat and add a drizzle of neutral oil (vegetable, canola, or avocado oil work well). Swirl to coat the bottom. Wait until the oil shimmers — that’s your signal that it’s hot enough. You should see tiny ripples on the surface, but not smoke.
- Sear the chicken (4-5 minutes): Add the chicken pieces to the pan in a single layer. Don’t overcrowd — work in batches if needed. Let them cook undisturbed for 2 minutes. You want a deep golden-brown crust. Flip each piece and cook for another 2 minutes. The chicken should be cooked through but still juicy. If you’re unsure, cut into the thickest piece; it should be white all the way through with no pink.
- Add the sauce (2 minutes): Pour the sauce mixture into the pan around the chicken. It will sizzle and bubble immediately — that’s good. Let it cook for about 1 minute, then flip the chicken pieces to coat them evenly. The sauce will start to thicken and become glossy. Keep an eye on it; you want it to reduce until it coats the back of a spoon, about 2 minutes total. If it gets too thick, add a splash of water.
- Finish and rest (1 minute): Remove the pan from heat. The sauce will continue to thicken as it cools. Let the chicken rest in the pan for 30 seconds — this allows the glaze to set. Don’t skip this step; it’s what gives that beautiful, shiny finish.
- Assemble your bento box (3 minutes): While the chicken rests, prepare your bento box. Place the cooked rice in one compartment, pressing it gently into the corner. Arrange the chicken pieces in another compartment, spooning any remaining sauce over the top. Add the steamed snap peas or green beans in a third compartment. Tuck the pickled radish or cucumber into any remaining space. Sprinkle sesame seeds over the chicken. If you’re using cherry tomatoes or edamame, add them for a pop of color.
Sensory Cue: When you add the sauce to the pan, you should hear a loud sizzle followed by a sweet, savory aroma that fills your kitchen. The sauce will go from thin and watery to thick and syrupy in about 90 seconds. Watch for those big, slow bubbles — that’s how you know it’s ready.
Personal Tip: I always make a little extra sauce. Sometimes I double the batch and keep it in a jar in the fridge. It lasts for weeks and is amazing on grilled vegetables, tofu, or even drizzled over crispy egg fried rice for an extra flavor boost.
Cooking Tips & Techniques
I’ve burned more chicken than I care to admit while figuring out teriyaki. Here’s what I learned the hard way so you don’t have to:
Don’t crowd the pan. This is the number one mistake I see. If you add too much chicken at once, the pan temperature drops, and the chicken steams instead of searing. You’ll end up with gray, sad chicken instead of golden, glorious chicken. Cook in batches if you need to. It adds two minutes but makes all the difference.
The sauce will stick. That sticky, caramelized sauce is the whole point, but it can also be a pain to clean up. Here’s my trick: as soon as you transfer the chicken to your bento box, fill the hot pan with water. Let it sit while you eat. The water will loosen the caramelized bits, and by the time you’re done, a quick scrub is all it needs. No soaking, no elbow grease.
Watch the sugar. Teriyaki sauce has sugar, and sugar burns fast. Keep the heat at medium-high, not high. If you see the sauce turning dark brown too quickly, reduce the heat immediately. Burnt teriyaki tastes bitter and acrid — trust me, I’ve made that mistake more than once.
Slice against the grain. After cooking, if you want to slice your chicken into even thinner pieces (which I love for bento boxes), let it rest for a minute, then slice against the grain. This gives you tender, easy-to-eat pieces that look beautiful arranged in a row.
Timing is everything. The entire cooking process takes about 10 minutes. I like to start the rice before I begin the chicken, so everything finishes at the same time. If you’re using leftover rice, microwave it while the chicken cooks. Multitasking makes this a true 15-minute meal.
Variations & Adaptations
One of the best things about this recipe is how flexible it is. Here are some ways I’ve adapted it over the years:
Dietary Swaps: For a gluten-free version, use tamari or coconut aminos instead of soy sauce. Both work beautifully. Just note that coconut aminos are slightly sweeter, so you might want to reduce the sugar by half. For a lower-carb option, serve the chicken over cauliflower rice or a bed of shredded cabbage. The sauce is still amazing without the rice.
Protein Variations: This sauce isn’t just for chicken. I’ve used it with salmon (cook for 3-4 minutes per side), tofu (press and pan-fry until golden, then add sauce), and even thinly sliced beef. Each protein brings something different to the table. The salmon version is particularly gorgeous in a bento box — the pink against the dark glaze is stunning.
Flavor Twists: Add a teaspoon of gochujang (Korean chili paste) to the sauce for a spicy kick. Or squeeze in half a lime at the end for a bright, citrusy finish. My personal favorite variation is adding a pinch of shichimi togarashi (Japanese seven-spice) on top — it adds warmth and a tiny bit of heat that complements the sweet-savory sauce perfectly.
Vegetable Additions: Don’t limit yourself to snap peas. Broccoli, bell peppers, carrots, and even asparagus work beautifully. I love adding roasted sweet potato wedges in the fall — they soak up any extra sauce and become almost candy-like. For a quick veggie side, try tossing some crispy brown sugar roasted sweet potato wedges into the mix for a sweet and savory combo.
Allergen-Friendly: Nut-free as written. For a soy-free version, use coconut aminos. For a low-sodium option, use low-sodium soy sauce and reduce the amount slightly. The flavor will be a bit milder, but still delicious.
Serving & Storage Suggestions
This chicken teriyaki is at its best when served warm, but honestly, it’s almost as good cold. That’s the beauty of bento-style food — it’s designed to be eaten at room temperature.
Serving Temperature: If you’re packing this for lunch, let the chicken cool slightly before sealing the container. Hot food trapped in a closed container creates steam, which can make the chicken soggy and the sauce watery. Aim for lukewarm before you close the lid. If you’re eating it right away, serve it hot over rice with a side of pickled vegetables and maybe a light Mediterranean chickpea and cucumber salad for a refreshing contrast.
Storage: Store the chicken and rice in separate containers in the refrigerator. The chicken stays good for up to 4 days. The rice is best within 2 days. Do not freeze the assembled bento box — the vegetables will get mushy. However, the chicken freezes beautifully on its own. Place it in a freezer-safe bag, press out the air, and freeze for up to 3 months. Thaw overnight in the fridge before using.
Reheating: The best way to reheat is in a skillet over medium heat with a splash of water. This revives the sauce and keeps the chicken juicy. Microwave works in a pinch — cover with a damp paper towel and heat in 30-second bursts. The sauce might get a bit watery in the microwave, but it’s still tasty.
Flavor Development: Here’s a secret — this chicken tastes even better the next day. The sauce continues to penetrate the meat overnight, making it more flavorful and tender. I often make a double batch on Sunday just for Monday’s lunch. It’s one of those rare recipes that gets better with time.
Nutritional Information & Benefits
Per serving (approximately 1/4 of the recipe, including rice and vegetables):
- Calories: 420-450
- Protein: 32g
- Fat: 14g
- Carbohydrates: 42g
- Fiber: 3g
- Sugar: 12g
- Sodium: 780mg
Health Benefits: Chicken thighs are an excellent source of lean protein, which helps keep you full and supports muscle health. Ginger is known for its anti-inflammatory properties and can aid digestion. Snap peas provide vitamin C, fiber, and a satisfying crunch. The pickled radish adds probiotics, which are great for gut health. While this isn’t a low-sodium meal, using low-sodium soy sauce can cut the salt content significantly.
Dietary Considerations: This recipe is dairy-free and nut-free. For gluten-free, use tamari. For lower sodium, use reduced-sodium soy sauce and reduce the added salt. It’s not suitable for a low-sugar diet due to the mirin and sugar, but the sugar is minimal compared to most takeout versions.
Conclusion
This easy bento-style chicken teriyaki lunch box is more than just a quick meal — it’s a little gift you give yourself on a busy day. It’s the kind of lunch that makes you feel like you’ve got your life together, even when everything else is chaos. The sauce is glossy, the chicken is juicy, and the whole thing comes together in the time it takes to decide what to order for delivery.
I’ve made this recipe on frantic Monday mornings, lazy Sunday afternoons, and everything in between. It never fails. And honestly? It makes me feel connected to that tiny Tokyo kitchen and the friend who taught me that good food doesn’t need to be complicated. It just needs to be made with care.
Now I want to hear from you. Have you tried making teriyaki at home? Did you add your own twist? Drop a comment below and let me know how it turned out. And if you loved this recipe, share it with a friend who needs a little bento magic in their life. Happy cooking!
Frequently Asked Questions
Can I use chicken breast instead of thighs?
Yes, but be careful not to overcook it. Chicken breast cooks faster and can dry out quickly. Slice it into even pieces and cook just until it’s no longer pink in the center, about 3-4 minutes total. The sauce will help keep it moist, but thighs are more forgiving.
What can I substitute for mirin?
If you don’t have mirin, you can make a quick substitute by combining 2 tablespoons of dry sherry or white wine with 1 tablespoon of sugar. It won’t be exactly the same, but it will give you a similar sweet-savory balance. Avoid rice vinegar — it’s too acidic and will throw off the flavor.
How do I prevent the sauce from burning?
Keep the heat at medium-high, not high, and watch the sauce closely. Once it starts bubbling, it can go from perfect to burnt in about 30 seconds. If you see it getting too dark too quickly, add a splash of water and reduce the heat immediately.
Can I make this ahead for meal prep?
Absolutely. In fact, I recommend it. Cook the chicken, let it cool completely, and store it in an airtight container in the fridge for up to 4 days. The sauce will thicken as it sits, so add a tiny splash of water when reheating to loosen it up.
What other sides work well in a bento box?
The possibilities are endless. I love adding a small serving of tangy buttermilk coleslaw for crunch, some no-bake peanut butter chocolate energy balls for a sweet finish, or a handful of cherry tomatoes for a burst of freshness. The key is balance — something savory, something crunchy, something sweet, and something pickled.
Pin This Recipe!
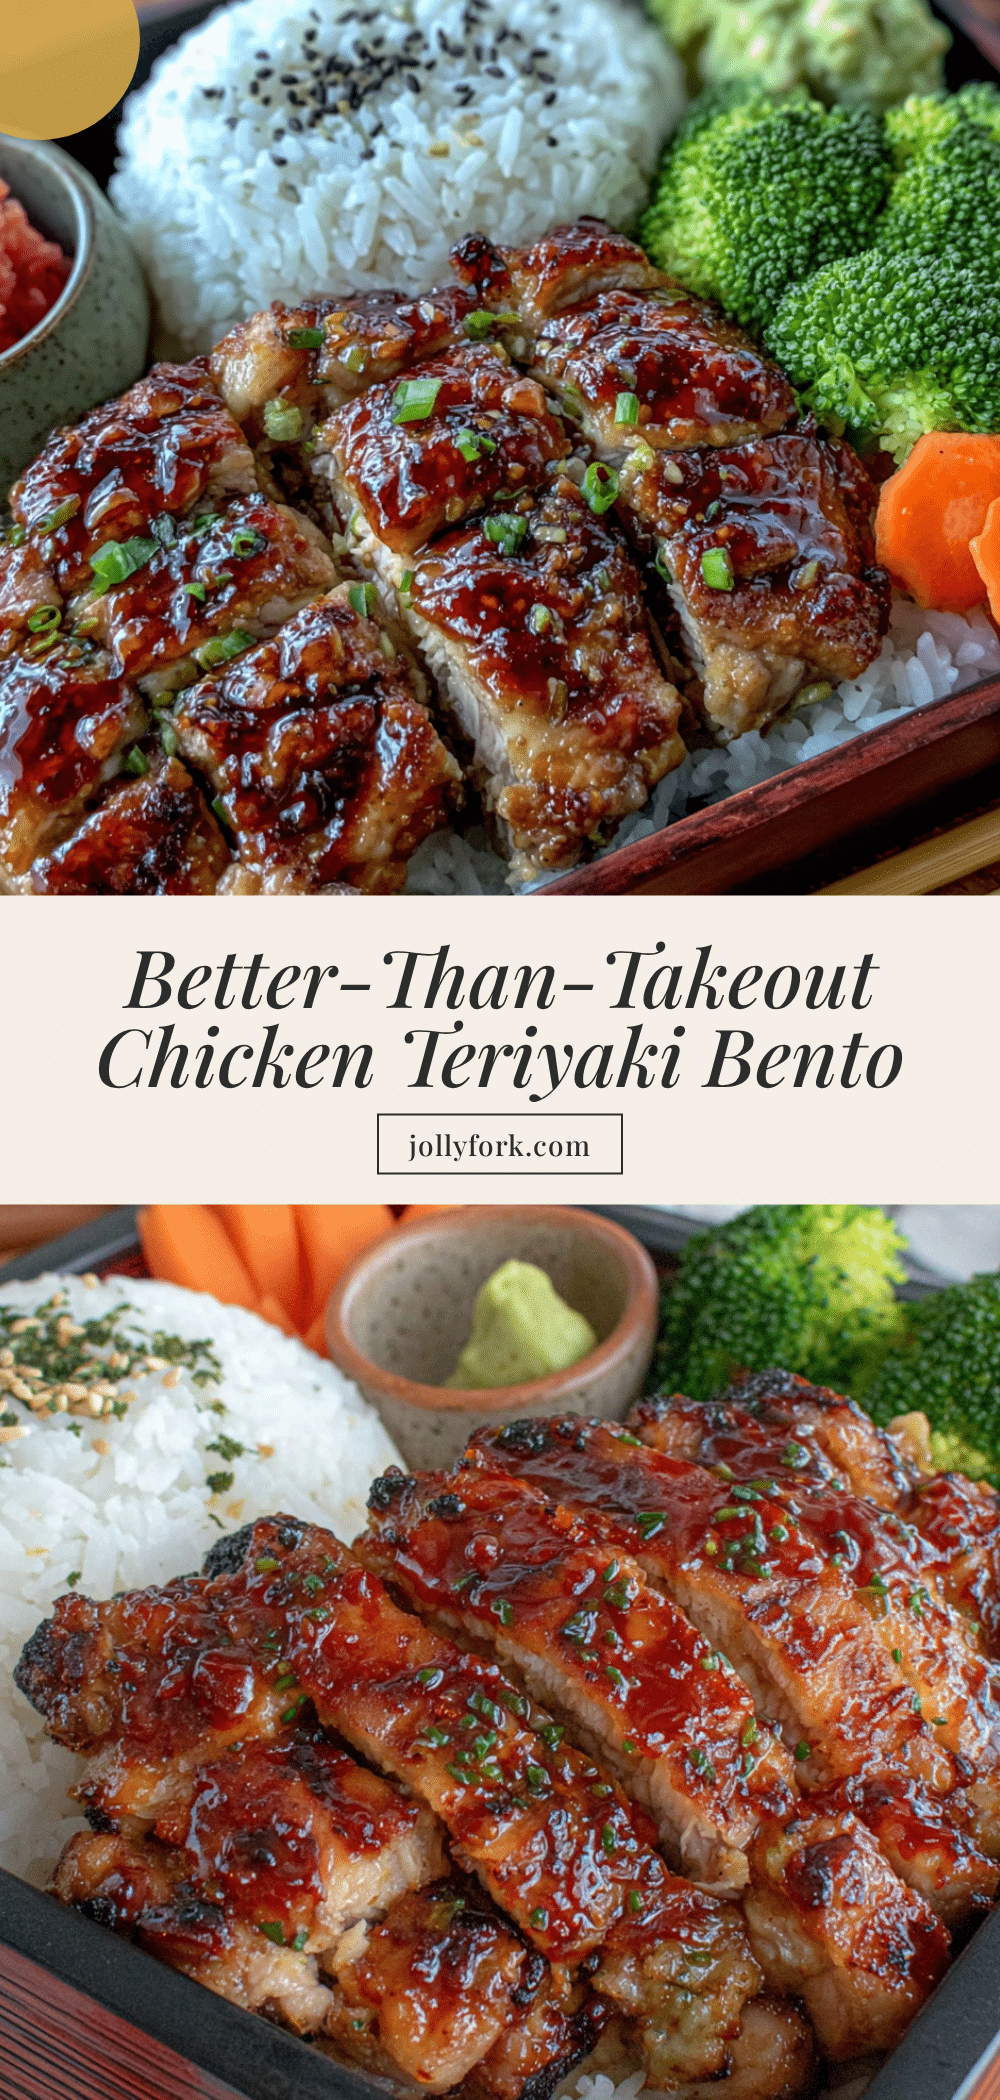
Easy Bento-Style Chicken Teriyaki Lunch Box: Best 15-Min Recipe
A quick and forgiving chicken teriyaki recipe that comes together in 15 minutes, perfect for bento boxes or meal prep. The sauce is glossy and flavorful, made with pantry-friendly ingredients, and the chicken stays juicy and delicious.
- Prep Time: 5 minutes
- Cook Time: 10 minutes
- Total Time: 15 minutes
- Yield: 4 servings 1x
- Category: Main Course
- Cuisine: Japanese
Ingredients
- 1 lb boneless, skinless chicken thighs (about 450g)
- 1/4 cup soy sauce (60ml)
- 1/4 cup mirin (60ml)
- 2 tablespoons sake (30ml)
- 1 tablespoon sugar (12g)
- 1 teaspoon grated fresh ginger (optional)
- 1 cup cooked short-grain white rice (about 180g)
- 1/2 cup steamed snap peas or green beans (about 75g)
- 2 tablespoons pickled radish or cucumber
- 1 teaspoon sesame seeds (for garnish)
- Optional: a few cherry tomatoes or edamame
Instructions
- Prep the chicken: Place chicken thighs on a cutting board. If uneven, butterfly or pound to 1/2-inch thickness. Pat dry with paper towels. Slice into bite-sized pieces, about 1-inch wide. Season lightly with salt and pepper.
- Mix the sauce: In a small bowl, combine soy sauce, mirin, sake, and sugar. Stir until sugar is mostly dissolved. If using ginger, grate it directly into the sauce and stir.
- Heat the pan: Place a large non-stick skillet over medium-high heat and add a drizzle of neutral oil. Swirl to coat. Wait until the oil shimmers.
- Sear the chicken: Add chicken pieces in a single layer (work in batches if needed). Cook undisturbed for 2 minutes until deep golden-brown. Flip and cook another 2 minutes until cooked through.
- Add the sauce: Pour sauce mixture into the pan around the chicken. It will sizzle and bubble. Cook for 1 minute, then flip chicken to coat. Let sauce reduce until it coats the back of a spoon, about 2 minutes total. If too thick, add a splash of water.
- Finish and rest: Remove pan from heat. Let chicken rest in pan for 30 seconds to allow glaze to set.
- Assemble bento box: Place cooked rice in one compartment. Arrange chicken in another, spooning remaining sauce over top. Add snap peas or green beans in a third compartment. Tuck pickled radish or cucumber into remaining space. Sprinkle sesame seeds over chicken. Add optional cherry tomatoes or edamame.
Notes
For best results, don’t crowd the pan; cook chicken in batches if needed. To prevent sauce from burning, keep heat at medium-high and watch closely. The chicken tastes even better the next day as the sauce penetrates the meat. For gluten-free, use tamari instead of soy sauce. For a lower-carb option, serve over cauliflower rice.
Nutrition
- Serving Size: 1/4 of recipe
- Calories: 420450
- Sugar: 12
- Sodium: 780
- Fat: 14
- Saturated Fat: 4
- Carbohydrates: 42
- Fiber: 3
- Protein: 32
Keywords: chicken teriyaki, bento box, lunch box, 15-minute recipe, easy teriyaki, meal prep, Japanese lunch