I was standing in the middle of a grocery store parking lot last October when the smell of someone’s burning candle—something with apple and cinnamon—hit me. And suddenly I was nine years old, sitting on a cracked vinyl stool in my Aunt Lou’s kitchen, watching her peel apples over a newspaper spread across the table. She wasn’t a fancy cook. She didn’t own a single spice blend that wasn’t from the dollar store. But every fall, she made this apple cake that filled her whole tiny house with a warmth you could almost taste. I haven’t had a slice of that cake in almost twenty years. She passed away the summer I turned fifteen, and I never thought to ask for the recipe. Honestly, I didn’t even know I remembered the smell until that parking lot moment. I stood there, keys in hand, trying to pin down exactly what I was feeling. It wasn’t sadness, exactly. It was more like a hungry ache—a need to recreate something I could almost, but not quite, hold onto. So I went home and started testing. This brown butter apple cider cake with maple glaze is my attempt to capture that exact feeling. It’s not a copy of her cake—I don’t think I could do that if I tried. But it has that same soulful, fall-apart tenderness, that same way of making a kitchen feel like a hug. The brown butter adds this nutty depth her version didn’t have, and the apple cider keeps every bite ridiculously moist. The maple glaze? That’s pure indulgence. I’ve made this cake for three different dinner parties this season, and every single time, someone asks for the recipe. Maybe you’ve had that moment, too—where a taste or a smell yanks you right back to someone you miss. This cake is for that.
Why You’ll Love This Recipe
Let me tell you—this isn’t just another apple cake. I’ve tested versions with oil, with butter, with yogurt, with applesauce. I’ve burned brown butter more times than I care to admit (and yes, I’ll share how to avoid that). This version is the one I keep coming back to, and here’s why it stands out:
- Unbelievably Moist: The combination of apple cider and brown butter creates a crumb that’s tender and rich without being greasy. It stays moist for days—if it lasts that long.
- Simple Ingredients: You likely have most of these in your pantry right now. No weird extracts or hard-to-find flours. Just real, honest ingredients.
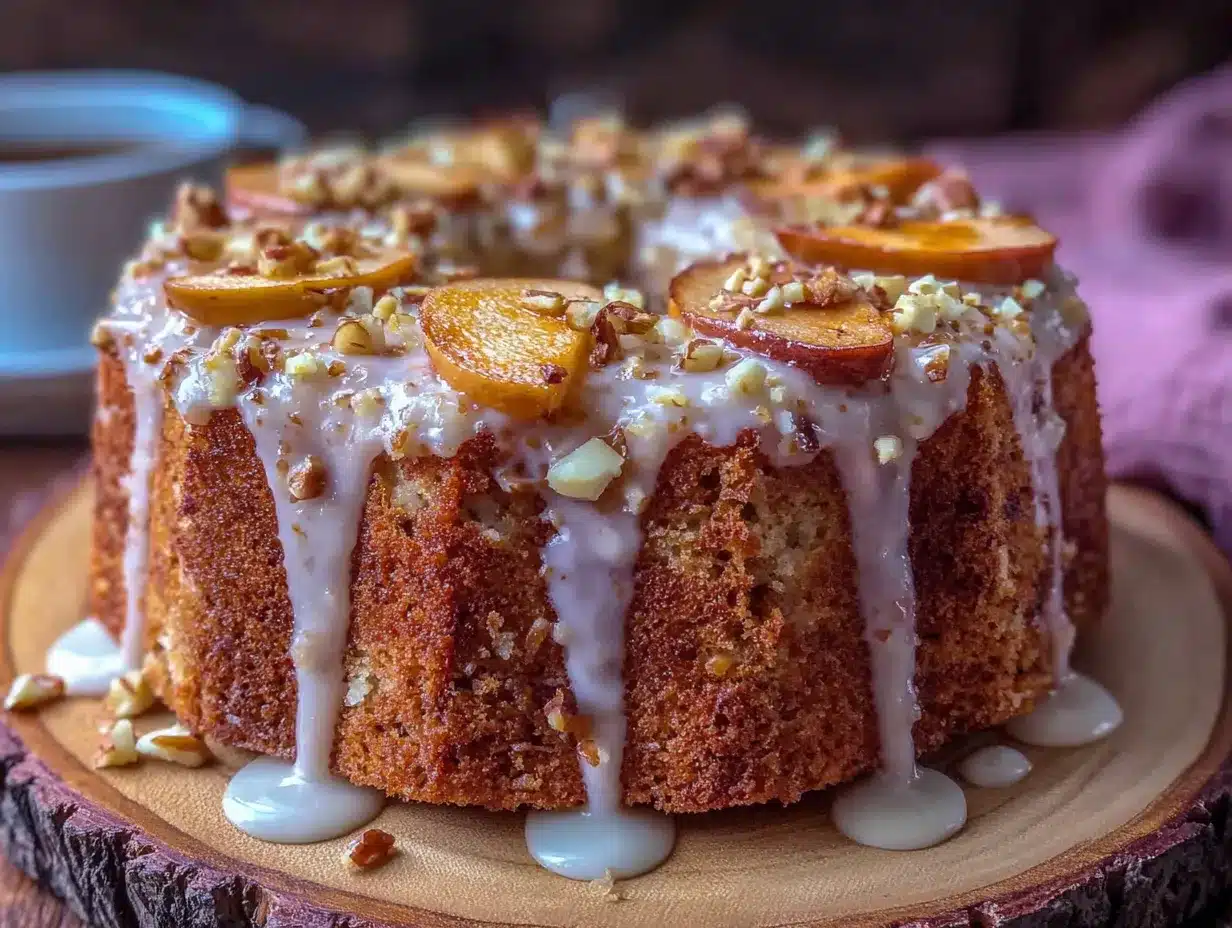
- Perfect for Hosting: This cake is a showstopper on a dessert table. It slices beautifully, pairs with coffee or a scoop of vanilla ice cream, and looks impressive with minimal effort.
- Crowd-Pleaser: I’ve served this to kids, to adults, to my picky father-in-law who “doesn’t like sweet things.” All of them went back for seconds.
- That Maple Glaze: Honestly, the glaze is what pushes this over the top. It’s not too sweet, it’s not too thin—it’s just right. Drizzle it thick or thin; either way, it’s magic.
What makes this recipe different from the rest? The brown butter. It adds a toasty, almost caramel-like flavor that regular butter just can’t touch. And the apple cider isn’t just for show—it’s the liquid that keeps the cake from drying out, even after a day or two on the counter. This is the kind of cake that makes you close your eyes after the first bite. It’s comfort food reimagined—familiar, but with a little something extra that says, “I put thought into this.”
What Ingredients You Will Need
This recipe uses simple, wholesome ingredients to deliver bold flavor and a satisfyingly tender crumb. Most of these are pantry staples, especially if you bake during the fall. Let’s walk through what you need and why each one matters.
For the Cake
- 2 ½ cups (315g) all-purpose flour — I prefer Gold Medal or King Arthur for consistent results. Spoon and level your flour; don’t scoop straight from the bag.
- 1 ½ teaspoons baking powder — Make sure it’s fresh. If it doesn’t fizz in water, toss it.
- 1 teaspoon baking soda — Same rule applies. Old baking soda = flat cake.
- 1 teaspoon ground cinnamon — The backbone of fall baking. I use McCormick, but any good brand works.
- ½ teaspoon ground nutmeg — Freshly grated is best, but pre-ground is fine. (Honestly, I use pre-ground most of the time.)
- ½ teaspoon salt — Don’t skip it. Salt balances sweetness and enhances flavor.
- 1 cup (226g) unsalted butter — This gets browned, so start with a full stick plus a bit more. I use Land O Lakes.
- 1 ¼ cups (250g) granulated sugar — Regular white sugar works perfectly here.
- ½ cup (100g) packed light brown sugar — Adds moisture and a hint of molasses.
- 3 large eggs — Room temperature, please. Cold eggs can seize the batter.
- 1 teaspoon vanilla extract — Pure, not imitation, if you can swing it.
- 1 cup (240ml) apple cider — Not apple juice. Cider has more flavor and body. I like Martinelli’s or a local orchard brand.
- 1 medium apple, peeled and finely chopped — Honeycrisp, Fuji, or Granny Smith all work. The apple adds little pockets of tenderness.
For the Maple Glaze
- 1 ½ cups (180g) powdered sugar — Sift it if it’s lumpy. Nobody wants lumpy glaze.
- 3 tablespoons pure maple syrup — Not pancake syrup. Real maple syrup makes a difference here. I use Grade A dark amber.
- 2 tablespoons unsalted butter, melted — Adds richness and helps the glaze set.
- 1–2 tablespoons milk or heavy cream — Use cream for a thicker, richer glaze. Milk for a thinner drizzle.
- Pinch of salt — Trust me on this. It cuts the sweetness perfectly.
Equipment Needed
Nothing too fancy here. You probably have most of this already. But let me share a few thoughts from my own kitchen:
- 10-inch bundt pan — This is my go-to for this cake. The ridges catch the glaze beautifully. If you don’t have one, a 9-inch tube pan works, too. Just make sure it’s well-greased.
- Light-colored saucepan — For browning the butter. A dark pan makes it hard to see when the butter changes color. I use a stainless steel one.
- Large mixing bowls — One for dry ingredients, one for wet. I prefer glass or stainless steel.
- Whisk and rubber spatula — A whisk for the dry ingredients, a spatula for folding. Simple.
- Cooling rack — Essential for letting the cake cool evenly before glazing. A wire rack is best.
- Parchment paper or non-stick spray — I use Baker’s Joy spray for bundt pans. It has flour in it, which helps the cake release cleanly.
If you don’t have a bundt pan, you can bake this in a 9×13-inch pan. Just reduce the baking time to 35–40 minutes and keep an eye on it. I’ve done it. It works.
Preparation Method
Alright, let’s get to it. I’ll walk you through each step like we’re in the kitchen together. Take your time—baking is supposed to be relaxing, not stressful.
- Brown the butter. Place the butter in a light-colored saucepan over medium heat. Stir occasionally with a rubber spatula. After about 5–7 minutes, the butter will start to foam and turn golden. Tiny brown specks will appear at the bottom. That’s the milk solids toasting—and that’s where the magic happens. The moment it smells nutty and looks amber, pull it off the heat. Pour it into a heatproof bowl (including all those brown bits) and let it cool for 10–15 minutes. Don’t skip the cooling step—hot butter can scramble your eggs.
- Preheat and prep. Preheat your oven to 350°F (175°C). Grease your bundt pan thoroughly. I mean really get in there—every nook and cranny. I use a pastry brush to spread the spray evenly. Set the pan aside.
- Mix dry ingredients. In a large bowl, whisk together the flour, baking powder, baking soda, cinnamon, nutmeg, and salt. Set aside.
- Combine wet ingredients. In another large bowl, whisk together the browned butter (it should be warm but not hot), granulated sugar, and brown sugar until smooth. It will look a bit grainy—that’s normal. Add the eggs one at a time, whisking well after each. Stir in the vanilla extract.
- Alternate additions. Add about one-third of the dry ingredients to the wet mixture and stir until just combined. Pour in half the apple cider and stir again. Repeat with another third of the dry, the remaining cider, and finally the last of the dry. Stir until no streaks of flour remain. Do not overmix—overmixing makes the cake tough. A few small lumps are okay.
- Fold in the apple. Gently fold the chopped apple into the batter. Use a rubber spatula and take your time. You want the apple distributed evenly throughout the batter.
- Bake. Pour the batter into the prepared bundt pan and spread it even. Bake for 45–55 minutes, or until a wooden skewer inserted into the center comes out clean or with just a few moist crumbs. The top should be golden brown and spring back when lightly pressed. My oven runs hot, so I start checking at 45 minutes.
- Cool. Let the cake cool in the pan for 15 minutes. Then invert it onto a cooling rack and let it cool completely—at least 1 hour. Do not glaze a warm cake. The glaze will melt and slide right off. I learned this the hard way.
Cooking Tips & Techniques
I’ve made this cake more times than I can count, and I’ve messed it up plenty. Here’s what I’ve learned so you don’t have to:
- Don’t walk away from the brown butter. It goes from perfect to burnt in about 30 seconds. Keep your eyes on it. The smell is your best clue—when it smells like toasted nuts, it’s done.
- Room temperature eggs matter. Cold eggs can make the browned butter seize up, leaving you with a lumpy batter. Set your eggs out 30 minutes before you start, or place them in a bowl of warm water for 5 minutes.
- Measure your flour correctly. Spoon it into your measuring cup and level it off with a knife. Scooping directly from the bag can pack in up to 25% more flour, which will make your cake dry. I’ve done it. It’s sad.
- Let the cake cool completely. I know it’s tempting to glaze it while it’s still warm, but patience pays off. A warm cake will absorb the glaze like a sponge, leaving you with a sticky mess instead of a beautiful drizzle.
- Use a toothpick to check for doneness. Insert it into the thickest part of the cake. If it comes out clean, it’s done. If it has wet batter, give it another 5 minutes.
Variations & Adaptations
This cake is flexible. Here are a few ways to make it your own:
- Gluten-Free: Swap the all-purpose flour with a 1:1 gluten-free baking blend. I’ve used Bob’s Red Mill with good results. The texture will be slightly denser, but still delicious.
- Dairy-Free: Use vegan butter for browning. Miyoko’s or Earth Balance work well. The brown butter flavor won’t be as intense, but it’s still tasty.
- Nutty Twist: Add ½ cup of toasted pecans or walnuts to the batter along with the apple. The crunch is lovely against the tender crumb.
- Spice It Up: Add ¼ teaspoon of ground ginger or cardamom to the dry ingredients for a warmer, more complex flavor.
- Apple Cider Substitute: No cider? Use apple juice plus 1 tablespoon of apple cider vinegar. It won’t have the same depth, but it works in a pinch.
I once made this cake with a mix of Granny Smith and Honeycrisp apples because that’s what I had. The tartness of the Granny Smith balanced the sweetness beautifully. Sometimes mistakes turn into happy accidents.
Serving & Storage Suggestions
This cake is best served at room temperature. Let it sit out for about 30 minutes before slicing if it’s been in the fridge. The flavors really open up as it warms.
For presentation, I like to place the cake on a simple white stand and drizzle the glaze in thick, uneven ribbons. A sprinkle of flaky sea salt on top of the glaze? Yes, please. It cuts the sweetness and looks gorgeous.
This cake pairs beautifully with a cup of hot coffee, a chai latte, or a glass of cold milk. For a dessert spread, serve it alongside a scoop of vanilla bean ice cream or a dollop of lightly sweetened whipped cream. I’ve also been known to sneak a slice for breakfast—no regrets.
Storage: Store the cake in an airtight container at room temperature for up to 3 days. If you’ve already glazed it, place a piece of parchment paper between the cake and the lid to prevent sticking. The cake also freezes beautifully. Wrap it tightly in plastic wrap, then foil, and freeze for up to 3 months. Thaw overnight in the fridge, then bring to room temperature before glazing.
One note: The flavors actually get better after a day. The apple cider and brown butter meld together, creating an even deeper, more comforting taste. So don’t be afraid to make this a day ahead. Your future self will thank you.
Nutritional Information & Benefits
Here’s an approximate breakdown per slice (based on 12 servings):
- Calories: 410
- Fat: 18g
- Carbohydrates: 58g
- Fiber: 2g
- Sugar: 38g
- Protein: 5g
This cake isn’t health food, and it doesn’t pretend to be. But there are a few bright spots: the apples provide a small dose of fiber and vitamin C, and the cinnamon has anti-inflammatory properties. The brown butter, while indulgent, adds a richness that means a smaller slice can feel satisfying. I’m a firm believer in balance—enjoy a slice, savor every bite, and don’t feel guilty about it.
If you’re looking to lighten it up, you can reduce the sugar in the glaze by using less maple syrup, or swap half the all-purpose flour with whole wheat pastry flour. I’ve tried both, and while the texture changes slightly, it’s still delicious.
Conclusion
This brown butter apple cider cake with maple glaze is more than just a recipe—it’s a way to capture a feeling. For me, it’s the memory of Aunt Lou’s kitchen. For you, maybe it’s the smell of fall, the joy of hosting, or the simple pleasure of a really good slice of cake. Whatever it is, I hope this cake brings you a little bit of warmth and a whole lot of flavor.
I’d love to hear how it turns out for you. Did you add nuts? Try a different glaze? Forget to set out your eggs and panic? (Been there.) Drop a comment below and let me know. And if you share it on Pinterest, tag me—I want to see your beautiful bundt pan creations.
Now go preheat that oven. Your kitchen is about to smell incredible.
Frequently Asked Questions
Can I use apple juice instead of apple cider?
Yes, but the flavor won’t be as robust. Apple cider has a deeper, more complex taste. If you use juice, add a teaspoon of apple cider vinegar to mimic some of that tang.
How do I know when the brown butter is done?
Watch for the butter to turn a golden amber color and smell nutty. You’ll also see tiny brown specks at the bottom of the pan. Remove it from heat immediately—it can burn quickly.
Can I make this cake ahead of time?
Absolutely. Bake the cake a day ahead, cool it completely, and store it tightly wrapped at room temperature. Glaze it just before serving for the best presentation.
Why did my cake stick to the pan?
Bundt pans can be tricky. Make sure you grease every crevice thoroughly. I use a pastry brush to apply a baking spray with flour. Let the cake cool for exactly 15 minutes before inverting—too long and it can steam and stick.
Can I freeze the glazed cake?
I recommend freezing the cake unglazed. Wrap it tightly in plastic wrap and foil, then freeze for up to 3 months. Thaw overnight in the fridge, bring to room temperature, and then glaze.
Pin This Recipe!
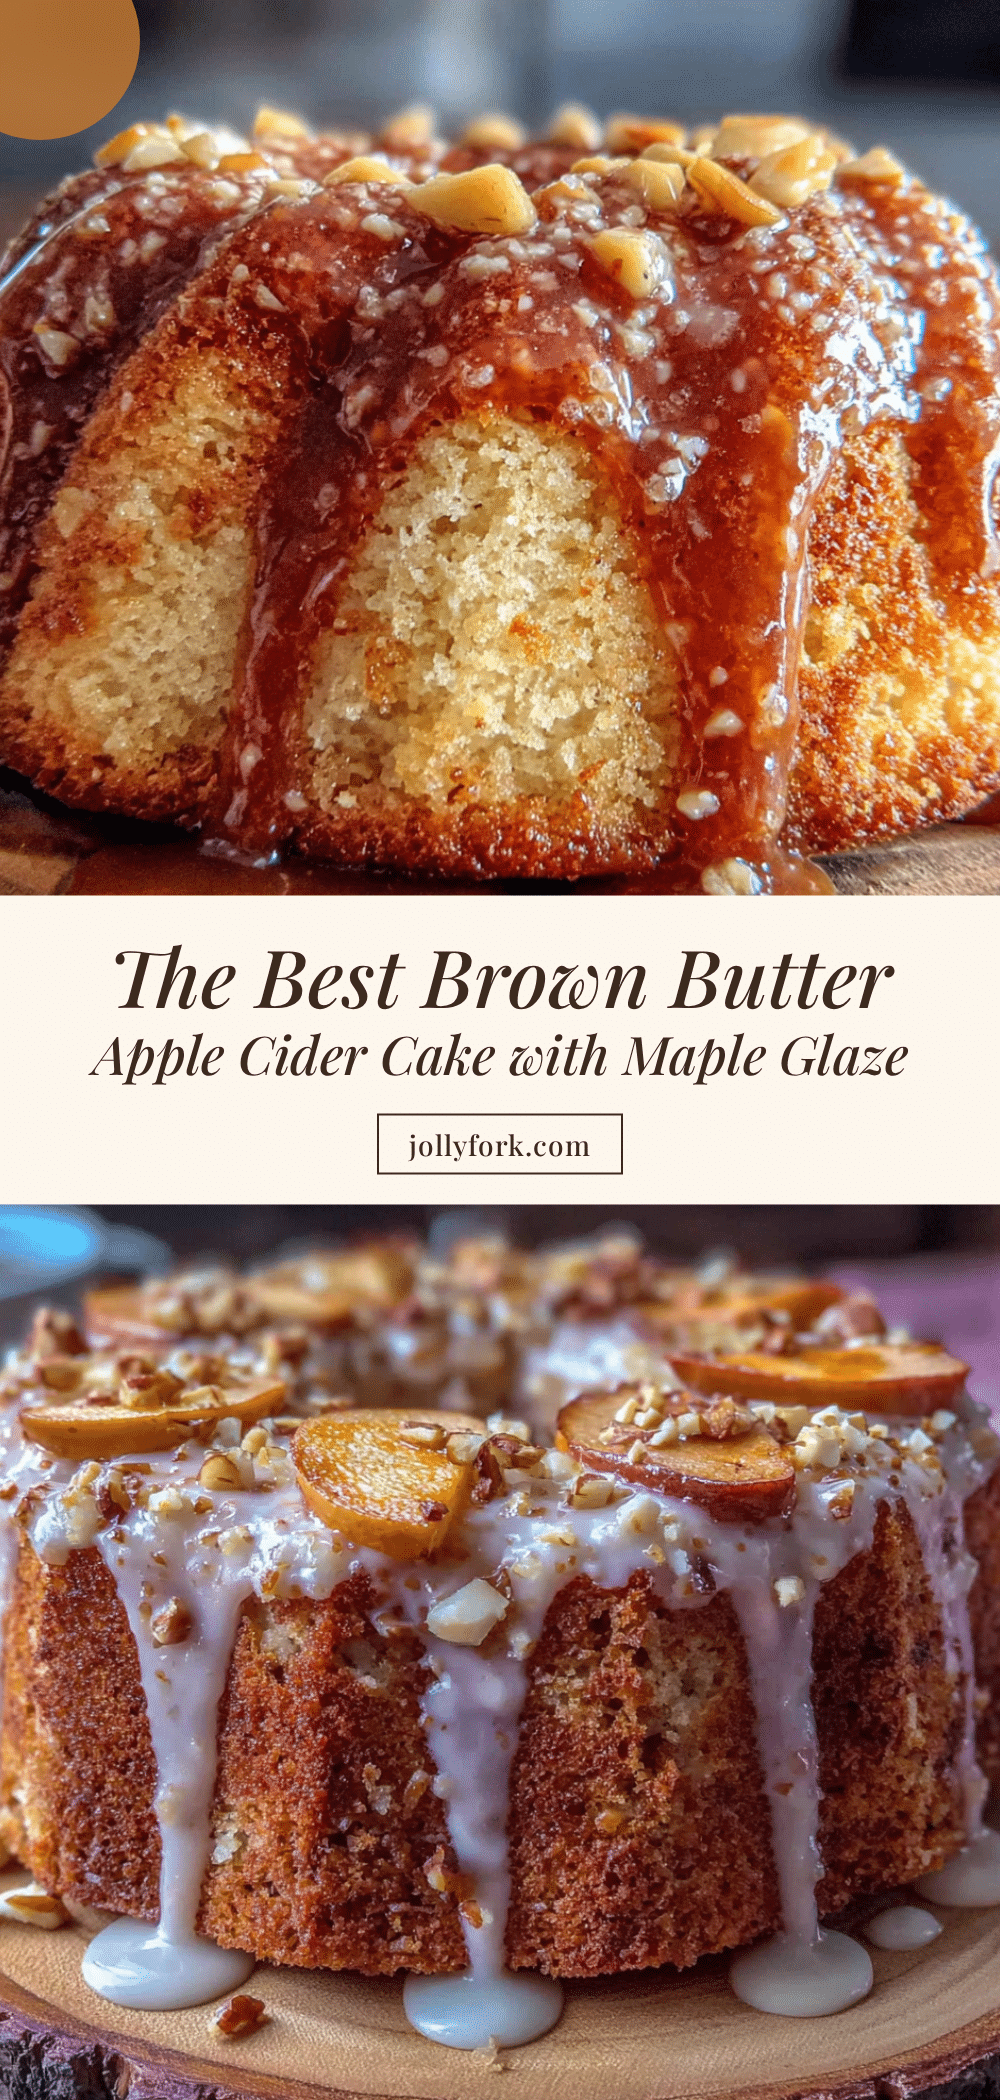
Easy Brown Butter Apple Cider Cake with Maple Glaze
This brown butter apple cider cake with maple glaze is a tender, moist fall dessert that captures the warmth of autumn. The nutty brown butter and rich apple cider create a deeply flavorful crumb, topped with a luscious maple glaze.
- Prep Time: 20 minutes
- Cook Time: 50 minutes
- Total Time: 1 hour 10 minutes
- Yield: 12 servings 1x
- Category: Dessert
- Cuisine: American
Ingredients
- 2 ½ cups (315g) all-purpose flour
- 1 ½ teaspoons baking powder
- 1 teaspoon baking soda
- 1 teaspoon ground cinnamon
- ½ teaspoon ground nutmeg
- ½ teaspoon salt
- 1 cup (226g) unsalted butter
- 1 ¼ cups (250g) granulated sugar
- ½ cup (100g) packed light brown sugar
- 3 large eggs, room temperature
- 1 teaspoon vanilla extract
- 1 cup (240ml) apple cider
- 1 medium apple, peeled and finely chopped
- 1 ½ cups (180g) powdered sugar
- 3 tablespoons pure maple syrup
- 2 tablespoons unsalted butter, melted
- 1–2 tablespoons milk or heavy cream
- Pinch of salt
Instructions
- Brown the butter: Place butter in a light-colored saucepan over medium heat. Stir occasionally until it foams, turns golden, and smells nutty (about 5–7 minutes). Pour into a heatproof bowl and let cool for 10–15 minutes.
- Preheat oven to 350°F (175°C). Grease a 10-inch bundt pan thoroughly.
- In a large bowl, whisk together flour, baking powder, baking soda, cinnamon, nutmeg, and salt.
- In another large bowl, whisk together browned butter, granulated sugar, and brown sugar until smooth. Add eggs one at a time, whisking well after each. Stir in vanilla.
- Add one-third of the dry ingredients to the wet mixture and stir until just combined. Pour in half the apple cider and stir. Repeat with another third of dry ingredients, remaining cider, and final dry ingredients. Do not overmix.
- Gently fold the chopped apple into the batter.
- Pour batter into prepared bundt pan. Bake for 45–55 minutes, until a skewer inserted into the center comes out clean. Cool in pan for 15 minutes, then invert onto a cooling rack and cool completely (at least 1 hour).
- For the glaze: Whisk together powdered sugar, maple syrup, melted butter, 1 tablespoon milk or cream, and a pinch of salt. Add more liquid if needed for desired consistency. Drizzle over cooled cake.
Notes
Don’t walk away from the brown butter; it burns quickly. Use room temperature eggs to prevent the butter from seizing. Measure flour correctly by spooning and leveling. Let the cake cool completely before glazing. The flavors improve after a day.
Nutrition
- Serving Size: 1 slice
- Calories: 410
- Sugar: 38
- Sodium: 280
- Fat: 18
- Saturated Fat: 11
- Carbohydrates: 58
- Fiber: 2
- Protein: 5
Keywords: brown butter, apple cider cake, maple glaze, fall dessert, bundt cake, apple cake


