It was 10:47 PM on a random Wednesday in October, and I had a very specific, slightly embarrassing craving. I wanted something sweet, crunchy, and undeniably festive—but I didn’t want to bake a whole cake or spend an hour in the kitchen. I was tired, honestly. My brain was half-checked out, but my sweet tooth was wide awake. I opened the pantry, hoping for a miracle, and found a lonely bag of candy corn from a party I’d hosted weeks ago, a bar of white chocolate I’d stashed for “emergencies,” and a vague memory of a sprinkle of something orange. I didn’t have any fancy melting wafers or a double boiler situation going on. But I had a microwave, a baking sheet, and a wild idea.
So I just went for it. I chopped the chocolate bar with a slightly dull knife—it cracked in a few places, which I told myself added “rustic charm”—and melted it in a bowl in 30-second bursts. The first batch, I’ll admit, I got distracted scrolling my phone and the chocolate seized up a little. It got grainy and weird. I almost gave up and just ate the candy corn straight from the bag. But something about the late hour and the quiet kitchen made me stubborn. I started over, stirred more gently, and this time, it worked. I spread the silky white chocolate, pressed in the candy corn, and added a few orange sprinkles I found hiding behind the baking soda.
I stuck the pan in the fridge and paced around my kitchen for 15 minutes, which is basically an eternity when you’re this tired and this invested. When I pulled it out and cracked off a piece, the snap was perfect. The white chocolate was creamy, the candy corn was chewy and sweet, and honestly? It was better than anything I could have bought at a store. Maybe you’ve been there—wanting something festive but not wanting to make a whole production out of it. This bark became my little late-night victory. And now, I keep making it every fall, because sometimes the best recipes come from a tired brain and a pantry that’s just barely stocked enough.
Why You’ll Love This Recipe
This Easy Candy Corn White Chocolate Bark isn’t just another holiday treat—it’s the kind of recipe that makes you look like a kitchen hero with almost zero effort. I’ve tested this about six times now (suffering for my art, clearly), and I can confidently say it’s foolproof if you follow a few simple steps. Here’s why this one stands out from the crowd:
- Only 3 Ingredients: White chocolate, candy corn, and a little oil. That’s it. No weird extracts, no complicated candy thermometers, no trips to three different stores.
- Ready in 20 Minutes: From start to finish—including chilling time—you can have this bark ready to serve. Perfect for those last-minute Halloween parties or when a sugar craving hits at 10 PM.
- No Baking Required: You don’t even need to turn on the oven. Just a microwave and a fridge. Your kitchen stays cool, and you stay sane.
- Perfect for Gifting: This bark cracks into beautiful, irregular pieces that look gorgeous in a little cellophane bag tied with a ribbon. I’ve given these to neighbors and coworkers, and they always disappear fast.
- Endlessly Customizable: Don’t like candy corn? Swap it for pretzels or dried cranberries. Want it extra festive? Add sprinkles or a drizzle of dark chocolate. The base recipe is a blank canvas.
What makes this recipe different from every other bark you’ve seen is the texture. Most recipes just melt chocolate and dump candy on top. But I’ve figured out the trick to keeping the white chocolate silky smooth and the candy corn perfectly chewy—not rock hard. It’s a small detail, but it makes a huge difference. And honestly, this bark is the kind of treat that makes you close your eyes after the first bite. It’s sweet, it’s nostalgic, and it feels like a little celebration without any of the stress.
What Ingredients You Will Need
This recipe uses three simple, pantry-friendly ingredients to deliver a treat that’s way more than the sum of its parts. The magic is in how they come together, not in a long shopping list. Let me walk you through each one, so you know exactly what to grab.
- White Chocolate (12 ounces / 340 grams): This is the backbone of your bark. I recommend using a good quality white chocolate bar or melting wafers, not white chocolate chips. Chips often contain stabilizers that prevent them from melting into a smooth, fluid consistency. Ghirardelli or Baker’s brand white chocolate bars work beautifully. If you’re using a bar, chop it into small, even pieces so it melts uniformly. For a dairy-free version, look for a high-quality vegan white chocolate alternative—it works just as well.
- Candy Corn (1 cup / about 200 grams): The star of the show! You can use classic candy corn or seasonal variations like autumn mix (which has those little pumpkins). I personally prefer the classic Brach’s brand—they have a nice soft chew that doesn’t get rock hard when chilled. If you’re feeling fancy, you can even use the “harvest corn” with the chocolate tips, but stick with the orange and yellow for that classic look. Pro tip: if your candy corn is a little stale (it happens), it’ll still work perfectly in this bark.
- Coconut Oil or Vegetable Oil (1 teaspoon): This tiny addition is the secret to a perfectly smooth, snappy bark. It helps thin out the white chocolate just enough so it spreads easily and gives that beautiful shine. Refined coconut oil is my go-to because it has no coconut flavor. But any neutral vegetable oil—like canola or grapeseed—works in a pinch. Don’t skip this! I learned the hard way that without it, the chocolate can be too thick to spread evenly.
- Optional: Orange Sprinkles or Sea Salt (for garnish): While not strictly one of the three ingredients, a pinch of flaky sea salt on top before it sets balances the sweetness beautifully. Orange or fall-colored sprinkles add a festive touch and make it look extra special for gifting.
That’s it. Seriously. You probably already have the oil in your pantry, and the other two are easy to find at any grocery store during the fall season. I love recipes that don’t require a special trip to a specialty baking shop—this one is as straightforward as it gets.
Equipment Needed
You don’t need a fancy kitchen setup for this recipe. In fact, you probably already own everything you need. Here’s the short list:
- Microwave-Safe Mixing Bowl: A medium-sized glass or ceramic bowl works best. Avoid metal bowls if you’re using the microwave.
- Rubber Spatula: For stirring and spreading the melted chocolate. A silicone spatula is ideal because it won’t scratch your bowl and you can scrape every last bit.
- Baking Sheet or Small Sheet Pan: Line it with parchment paper or a silicone baking mat. A standard half-sheet pan works great, but even a small baking dish will do in a pinch.
- Parchment Paper: Essential for easy removal. If you don’t have parchment, you can use wax paper, but parchment is more reliable for a clean release.
- Measuring Cups and Spoons: For the candy corn and oil. Nothing fancy needed.
- Knife and Cutting Board: To chop the white chocolate bar into even pieces. A sharp chef’s knife makes quick work of this.
- Refrigerator Space: You’ll need a flat spot in your fridge for the baking sheet to chill undisturbed for about 15-20 minutes.
That’s really it. I’ve made this in a tiny apartment kitchen with a janky microwave and a baking sheet that was way too small—it still turned out great. Don’t let a lack of fancy equipment hold you back.
Preparation Method
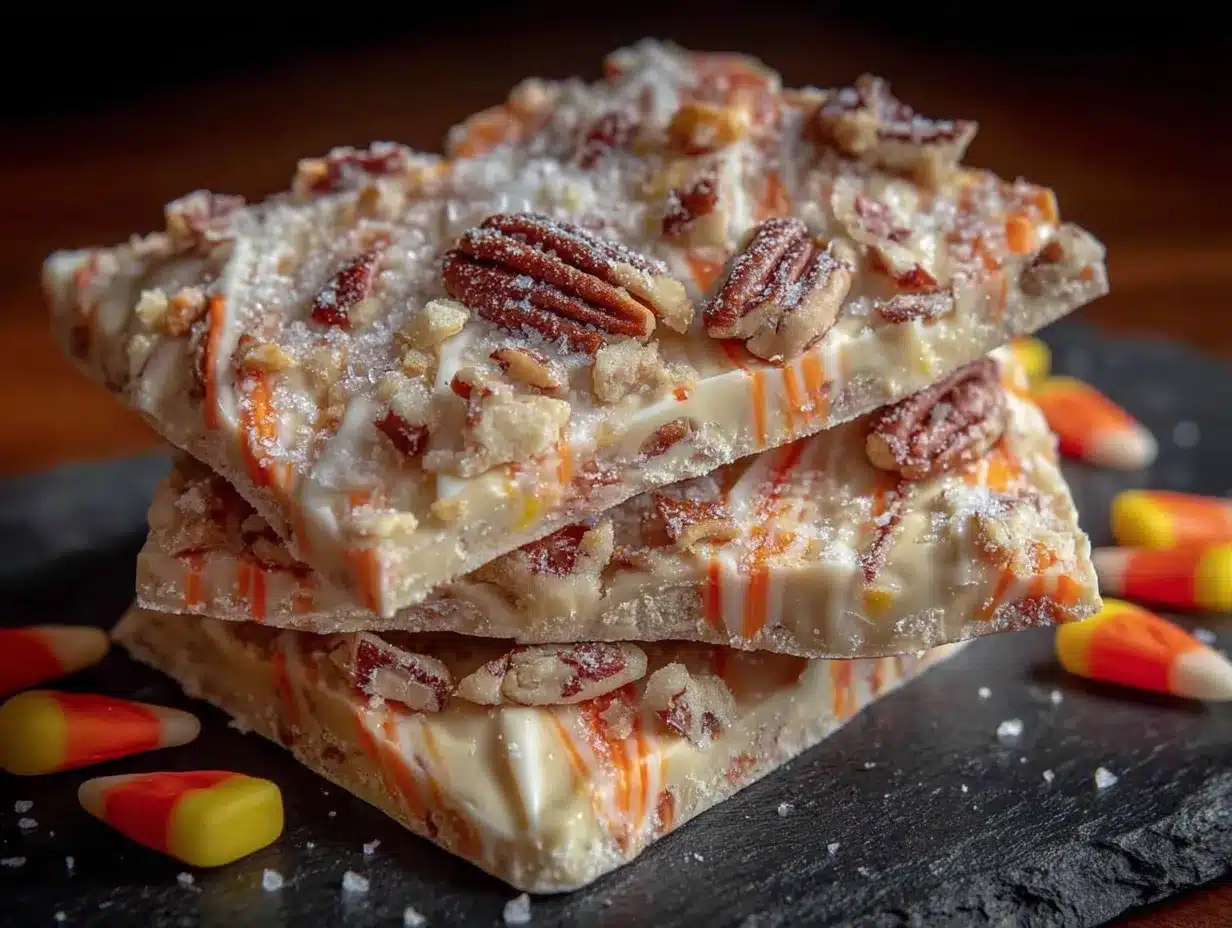
Okay, let’s get to the fun part. Follow these steps, and you’ll have a gorgeous batch of candy corn white chocolate bark in less than half an hour. I’ve included all the little details I wish someone had told me the first time.
- Prep Your Pan: Line a small baking sheet (about 9×13 inches works perfectly) with a sheet of parchment paper. Make sure the paper extends up the sides a little—this will make lifting the bark out so much easier later. Set the pan aside.
- Chop the Chocolate: Take your 12-ounce white chocolate bar and chop it into small, uniform pieces. Aim for pieces about the size of a pea. Even pieces mean even melting. I usually put the bar on a cutting board, steady it with my hand, and use a sharp chef’s knife to chop it all at once. It takes about two minutes.
- Melt the Chocolate: Place the chopped white chocolate in a microwave-safe bowl. Add 1 teaspoon of coconut oil (or vegetable oil). Microwave in 30-second intervals on medium power (50-70% power is ideal). After each interval, take the bowl out and stir vigorously with a rubber spatula. It will look like nothing is happening for the first two rounds—that’s normal. Around the third or fourth interval, you’ll see it start to melt. Keep stirring until it’s completely smooth and glossy. Warning: White chocolate burns easily. If you see any lumps or it starts looking grainy, you’ve overheated it. Lower your power level next time.
- Check the Temperature: The melted chocolate should feel warm but not hot to the touch—like a warm bath, not a hot cup of coffee. If it’s too hot, let it sit for a minute before proceeding. This step matters because hot chocolate can make the candy corn start to melt or bleed its color.
- Spread the Chocolate: Pour the melted white chocolate onto the center of your prepared baking sheet. Use the back of your spatula to spread it into an even rectangle, about 1/4-inch thick. Don’t worry about making it perfect—rustic edges are part of the charm. Work quickly, because white chocolate sets fast.
- Add the Candy Corn: Sprinkle 1 cup of candy corn evenly over the melted chocolate. Press each piece gently into the chocolate with your fingertips or the back of a spoon. Make sure they’re slightly submerged so they stick once the bark sets. If you want, you can add a pinch of flaky sea salt or a sprinkle of orange jimmies at this stage.
- Chill: Carefully transfer the baking sheet to the refrigerator. Place it on a flat, level shelf where it won’t be disturbed. Let it chill for at least 15-20 minutes, or until the chocolate is completely firm and no longer tacky to the touch. If you’re in a hurry, you can pop it in the freezer for 10 minutes, but keep an eye on it.
- Break Into Pieces: Once set, lift the parchment paper out of the pan and place the bark on a cutting board. Use your hands to break it into irregular pieces—this is the most satisfying part. You can also use a sharp knife to cut clean squares if you prefer a neater look for gifting.
- Serve or Store: Arrange the pieces on a serving plate, or transfer them to an airtight container. That’s it—you’re done!
A few notes from my trials: If your kitchen is warm or humid, the chocolate might take a little longer to set. Don’t rush it. And if you accidentally get a little water in the chocolate (it happens), it will seize up into a thick, grainy mess. Just start over with fresh chocolate—it’s not salvageable. Trust me, I’ve tried.
Cooking Tips & Techniques
After making this bark more times than I care to admit (let’s just say my coworkers have been very happy test subjects), I’ve picked up a few tricks that make a real difference. Here are my best tips for perfect results every time.
Don’t Overheat the Chocolate: This is the number one mistake people make. White chocolate has a lower melting point than milk or dark chocolate, and it goes from smooth to scorched in seconds. Always use medium power in the microwave and stir frequently. If you see any steam rising from the bowl, you’ve gone too far. Take it out immediately and stir vigorously—sometimes the residual heat will finish the job without additional microwaving.
Room Temperature Ingredients Matter: Make sure your candy corn is at room temperature before you add it to the warm chocolate. If it’s straight from a cold pantry, it can cause the chocolate to seize or develop a dull, streaky appearance. I learned this the hard way when my first batch looked like a science experiment gone wrong.
Press, Don’t Stir: When adding the candy corn, gently press it into the chocolate rather than stirring it in. Stirring can create air bubbles and cause the candy corn to bleed its orange color into the white chocolate, giving it a muddy look. Pressing keeps everything clean and pretty.
Work in a Cool Room: If your kitchen is warm (above 75°F), the chocolate will take longer to set and might not get that nice snap. On hot days, I sometimes chill the baking sheet for a few minutes before spreading the chocolate, or I work near an open window. A cool environment is your friend here.
Use Parchment Paper, Not Wax Paper: Wax paper can melt or stick to the chocolate if it gets warm. Parchment paper is non-stick and heat-resistant, making it the safer choice. I keep a roll specifically for candy-making projects.
Storage Tip: This bark keeps beautifully in an airtight container at room temperature for up to a week—if it lasts that long. But if you live in a warm climate, store it in the fridge to prevent the chocolate from softening. Just let it sit at room temperature for 5 minutes before serving so the texture softens slightly.
Variations & Adaptations
One of the best things about this recipe is how easy it is to tweak. I’ve played around with quite a few variations, and here are my favorites. Feel free to mix and match based on what you have or what you’re craving.
Chocolate Lover’s Bark: Swap half the white chocolate for dark or milk chocolate. Melt them separately, then drizzle one over the other before adding the candy corn. The contrast between the dark chocolate’s bitterness and the candy corn’s sweetness is incredible. I made this version for a friend who “doesn’t like white chocolate,” and she ate half the batch in one sitting.
Salty-Sweet Version: Before the chocolate sets, sprinkle a generous pinch of flaky sea salt or crushed pretzels over the top. The salt cuts through the sweetness and adds a satisfying crunch. This is my personal favorite—I love that salty-sweet combo more than almost anything.
Fall Harvest Bark: Replace half the candy corn with dried cranberries, chopped pecans, or pumpkin seeds. It adds a lovely tartness and makes the bark feel a little more sophisticated. I made this for a Thanksgiving potluck, and it was gone before the main course.
Vegan-Friendly Version: Use a high-quality vegan white chocolate alternative (many are made with cocoa butter and rice milk) and skip the candy corn if it contains gelatin—some brands do. Look for gelatin-free candy corn, or swap in a mix of dried fruit and vegan-friendly candies.
Spiced Up Bark: Add a pinch of cinnamon, nutmeg, or pumpkin pie spice to the melted chocolate before spreading. It gives the bark a warm, cozy flavor that pairs beautifully with the candy corn. I tried this on a whim one rainy afternoon, and it’s been a staple ever since.
Holiday Twist: Swap the candy corn for red and green M&Ms or crushed peppermint for Christmas. The base recipe works year-round—just change the mix-ins to match the season. I’ve made a Valentine’s version with pink sprinkles and a Fourth of July version with red, white, and blue candies.
Serving & Storage Suggestions
This bark is incredibly versatile when it comes to serving. I love to break it into rustic, uneven pieces and pile them high on a small wooden board or a festive plate. It looks so inviting that way, like something from a cozy bakery display. For Halloween parties, I arrange the pieces in a glass jar tied with a ribbon—it’s an easy, grab-and-go treat that guests love.
Serving Temperature: This bark is best served at room temperature. The white chocolate softens slightly, and the candy corn becomes perfectly chewy. If you’ve stored it in the fridge, let it sit out for about 5-10 minutes before serving. Cold bark can be a little too hard and might not have that lovely melt-in-your-mouth texture.
What to Serve With It: A cup of hot coffee or a glass of cold milk is the perfect companion. The bitterness of coffee balances the sweetness beautifully. For a dessert board, pair it with fresh apple slices, popcorn, and a few squares of dark chocolate. It’s also fantastic crumbled over vanilla ice cream or stirred into a bowl of plain yogurt for a quick dessert.
Storage Instructions: Store the bark in an airtight container at room temperature for up to one week. If your kitchen is warm or humid, keep it in the refrigerator instead—it will last up to two weeks. Layer the pieces between sheets of parchment paper to prevent them from sticking together. I don’t recommend freezing this bark, as the candy corn can become hard and lose its chewy texture when thawed.
Flavor Development: Honestly, this bark tastes best the day it’s made, when the white chocolate is at its snappiest and the candy corn is soft. But it’s still delicious for several days afterward. The candy corn will gradually absorb a bit of moisture from the chocolate and become slightly softer, which some people actually prefer.
Nutritional Information & Benefits
Let’s be real—this is a treat, not a health food. But I believe in enjoying sweets in moderation, and knowing what’s in them helps. Here’s a rough estimate for a 1-ounce serving (about one medium piece of bark).
| Nutrient | Amount Per Serving (approx.) |
|---|---|
| Calories | 140 |
| Total Fat | 8g |
| Saturated Fat | 5g |
| Carbohydrates | 18g |
| Sugar | 16g |
| Protein | 1g |
Health Notes: White chocolate contains cocoa butter, which has some antioxidants, but it’s mostly sugar and fat—so enjoy it as an occasional indulgence. Candy corn is essentially sugar, corn syrup, and coloring, so it’s pure fun. If you’re looking for a slightly more balanced version, try the variation with dried cranberries and nuts, which adds fiber, healthy fats, and a little protein.
Dietary Considerations: This recipe is vegetarian. For a vegan version, use dairy-free white chocolate and gelatin-free candy corn. It contains dairy and may contain traces of soy or nuts depending on the brands you choose. Always check labels if you’re serving someone with allergies.
My Take: I’m a big believer in not demonizing sugar. A piece of this bark with a cup of tea after dinner is a small joy. It’s about balance—enjoying something sweet without guilt, and knowing that one piece is enough to satisfy that craving. That’s what eating well looks like to me.
Conclusion
This Easy Candy Corn White Chocolate Bark is proof that you don’t need a dozen ingredients or hours in the kitchen to make something truly special. It’s quick, it’s forgiving, and it’s absolutely delicious. Whether you’re making it for a Halloween party, a cozy night in, or just because you have a bag of candy corn that needs using up, this recipe delivers every time.
I love that this bark lets me be creative without pressure. Some batches are neat and orderly, with candy corn lined up in perfect rows. Others are wild and chaotic, with candy corn scattered every which way. Both are wonderful. That’s the beauty of a recipe like this—it adapts to your mood and your style. So go ahead, make a mess, have fun, and enjoy every single piece.
I’d love to hear how yours turns out! Did you add any fun mix-ins? Did you make it for a party? Drop a comment below and let me know. And if you’re looking for another easy no-bake treat, you might enjoy my no-bake pumpkin cheesecake bites—they’re just as simple and perfect for fall. Happy snacking!
Frequently Asked Questions
Can I use white chocolate chips instead of a bar?
You can, but the texture won’t be as smooth. White chocolate chips contain stabilizers that help them hold their shape, which means they don’t melt into a fluid consistency. If you only have chips, add an extra teaspoon of oil to help them spread. The bark will still taste great, but it might look a little more rustic.
Why did my white chocolate seize up?
Seizing happens when a tiny amount of water gets into the chocolate—even a drop from a wet spoon or steam from the microwave can cause it. The chocolate turns into a thick, grainy paste. Unfortunately, it’s not salvageable. To prevent this, make sure your bowl and spatula are completely dry, and avoid microwaving for too long.
Can I make this bark in advance?
Absolutely! You can make it up to a week ahead. Store it in an airtight container at room temperature or in the fridge. If you’re making it for a party, I recommend making it the day before so it has plenty of time to set fully. Just remember to let it sit at room temperature for a few minutes before serving.
How do I get clean, square pieces instead of rustic broken pieces?
If you want neat squares, let the bark set completely in the fridge, then use a sharp chef’s knife to cut it into squares while it’s still cold. Warm the knife under hot water, dry it, and make one clean cut at a time. Wipe the blade clean between cuts for the neatest edges.
Can I use other types of chocolate?
Yes! Milk chocolate, dark chocolate, or even ruby chocolate all work beautifully. Just keep in mind that darker chocolates have a higher melting point, so you might need to microwave them a little longer. And the flavor combo will change—dark chocolate with candy corn is less sweet and more sophisticated, while milk chocolate is a crowd-pleasing middle ground.
Pin This Recipe!
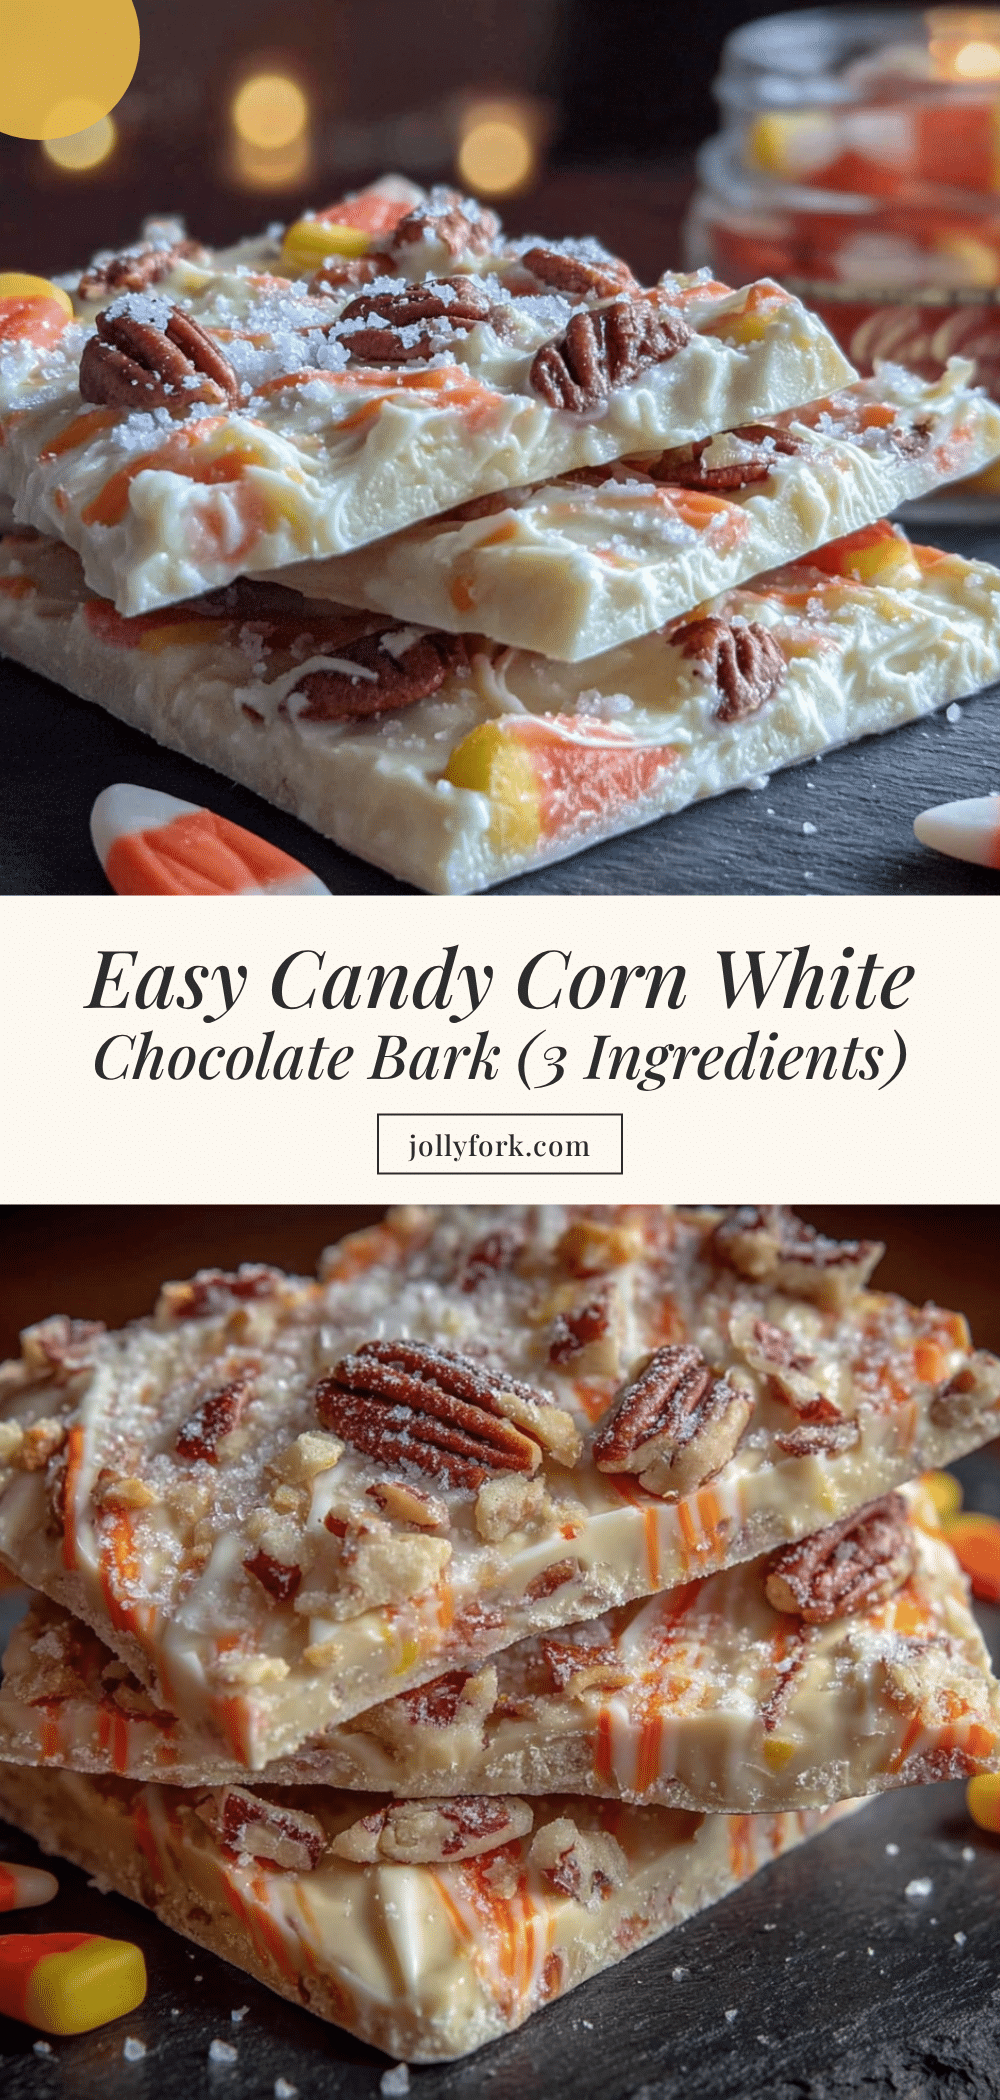
Easy Candy Corn White Chocolate Bark 3 Ingredient Recipe
This Easy Candy Corn White Chocolate Bark is a quick, no-bake treat made with just three ingredients. Perfect for Halloween parties or a late-night sugar craving, it’s ready in 20 minutes and endlessly customizable.
- Prep Time: 5 minutes
- Cook Time: 5 minutes
- Total Time: 20 minutes
- Yield: 12 servings 1x
- Category: Dessert
- Cuisine: American
Ingredients
- 12 ounces (340 grams) white chocolate bar or melting wafers
- 1 cup (about 200 grams) candy corn
- 1 teaspoon coconut oil or vegetable oil
- Optional: orange sprinkles or flaky sea salt for garnish
Instructions
- Line a small baking sheet (about 9×13 inches) with parchment paper, letting it extend up the sides for easy removal.
- Chop the 12-ounce white chocolate bar into small, uniform pieces (about pea-sized).
- Place the chopped white chocolate in a microwave-safe bowl. Add 1 teaspoon of coconut oil or vegetable oil.
- Microwave in 30-second intervals on medium power (50-70%), stirring vigorously with a rubber spatula after each interval, until completely smooth and glossy. Be careful not to overheat.
- Check the temperature: the melted chocolate should feel warm but not hot to the touch.
- Pour the melted white chocolate onto the center of the prepared baking sheet. Use the back of a spatula to spread it into an even rectangle, about 1/4-inch thick.
- Sprinkle 1 cup of candy corn evenly over the melted chocolate. Gently press each piece into the chocolate with your fingertips or the back of a spoon so they are slightly submerged.
- If desired, add a pinch of flaky sea salt or orange sprinkles at this stage.
- Transfer the baking sheet to the refrigerator and chill for at least 15-20 minutes, or until the chocolate is completely firm and no longer tacky.
- Once set, lift the parchment paper out of the pan and place the bark on a cutting board. Break into irregular pieces with your hands or cut into clean squares with a sharp knife.
- Serve immediately or store in an airtight container.
Notes
Don’t overheat the white chocolate; it burns easily. Use room temperature candy corn to prevent the chocolate from seizing. Press candy corn into the chocolate rather than stirring to avoid air bubbles and color bleeding. Store in an airtight container at room temperature for up to a week, or in the fridge for up to two weeks. For best texture, let refrigerated bark sit at room temperature for 5-10 minutes before serving.
Nutrition
- Serving Size: 1 ounce (about one m
- Calories: 140
- Sugar: 16
- Sodium: 20
- Fat: 8
- Saturated Fat: 5
- Carbohydrates: 18
- Protein: 1
Keywords: candy corn, white chocolate bark, Halloween treat, no-bake dessert, 3-ingredient recipe, easy candy recipe


