This was supposed to be a batch of chocolate shortbread. I had the whole thing planned out in my head—a simple, buttery slice-and-bake situation with cocoa powder and a dusting of powdered sugar. Elegant. Understated. The kind of cookie that sits quietly on a plate and lets everyone else be the star.
But then I realized I was out of vanilla extract. And my butter was way too soft because I’d left it on the counter while I took a phone call from my mom. And honestly? I was already kind of in a mood. It was one of those afternoons where nothing was going right, and I was this close to just ordering takeout and calling it a day.
I grabbed the jar of raspberry jam from the fridge without thinking. I don’t know why—maybe because it was right there, and I needed something to salvage the situation. I rolled the dough into little balls (it was too sticky to slice anyway), pressed a thumbprint into each one, and filled the divots with jam. I figured I’d bake them, they’d be mediocre, and I’d learn my lesson about cooking when I’m distracted.
What came out of the oven was nothing like the plan. The edges were slightly cracked, the jam had bubbled into little ruby pools, and the chocolate smell filling my kitchen was so deep and rich it made me stop mid-sigh. I bit into one while it was still warm—probably burned my tongue—and honestly, I just stood there in my messy kitchen, staring at the tray. These were better than anything I’d been trying to make. Maybe that’s the thing about cooking when you’re not trying so hard. You end up with something real.
These easy dark chocolate raspberry thumbprint cookies are that happy accident I keep coming back to. Maybe you’ve had one of those kitchen moments where everything goes sideways and then somehow lands exactly right. That’s this recipe.
Why You’ll Love This Recipe
Let me tell you why these cookies have earned a permanent spot in my rotation, especially on those weeknights when I need something sweet without a whole production.
- Quick & Easy: From start to finish, these come together in about 30 minutes. No chilling the dough, no complicated steps. You can have warm cookies in your hand before your dinner dishes are even done.
- Simple Ingredients: You probably already have butter, sugar, flour, and cocoa powder in your pantry. The raspberry jam is the only specialty item, and honestly, you can use any jam you have sitting in your fridge door.
- Perfect for Weeknights: These aren’t the kind of cookies you need to plan ahead for. They’re the “I need something sweet right now and I’m not going to the store” kind of recipe.
- Crowd-Pleaser: I’ve brought these to three different gatherings now, and every single time, someone asks for the recipe. Kids love the jammy center, adults love the dark chocolate richness.
- Unbelievably Delicious: The combination of dark, fudgy chocolate with that bright, tart raspberry jam is just next-level. It’s like a fancy bakery cookie but made in your own kitchen with zero stress.
What makes this recipe different from all the other thumbprint cookies out there? It’s the texture. The dough is almost brownie-like—rich and slightly fudgy—so the cookies stay soft even after they cool. Plus, I use a trick of rolling the dough balls in a little granulated sugar before baking, which gives them this delicate, crackly exterior that contrasts perfectly with the soft center. It’s not just another cookie. It’s the cookie you’ll make when you want something that feels special but takes almost no effort.
What Ingredients You Will Need
This recipe uses simple, everyday ingredients to create something that tastes way more complicated than it is. Here’s what you’ll need and why each one matters.
For the Cookie Dough
- Unsalted butter, softened (1/2 cup, 1 stick) — I always use unsalted so I can control the salt level. Let it sit out for about 30 minutes before you start, but don’t let it get too soft or the dough will be greasy.
- Granulated sugar (1/2 cup, 100g) — This is for sweetness and that slightly crackly texture on the outside. I’ve tried this with coconut sugar, and it works but gives a deeper, almost molasses-like flavor.
- Large egg yolk (1) — Just the yolk, not the whole egg. The yolk adds richness and helps the cookies stay tender. Save the white for an omelet or scramble the next morning.
- Vanilla extract (1 teaspoon) — Even though I forgot it the first time, I do recommend using it. It rounds out the chocolate flavor beautifully.
- All-purpose flour (1 cup, 120g) — Standard flour works perfectly here. No need for bread flour or cake flour.
- Unsweetened cocoa powder (1/3 cup, 30g) — Use a good quality cocoa powder. I really like Hershey’s Special Dark for this recipe because it gives a deep, almost black cocoa flavor without being bitter. If you use natural cocoa, the cookies will be a bit lighter in color but still delicious.
- Salt (1/4 teaspoon) — Don’t skip this. Salt makes the chocolate taste more chocolatey.
- Optional: turbinado or coarse sugar (for rolling) — This adds a lovely crunch on the outside. Regular granulated sugar works fine too.
For the Filling
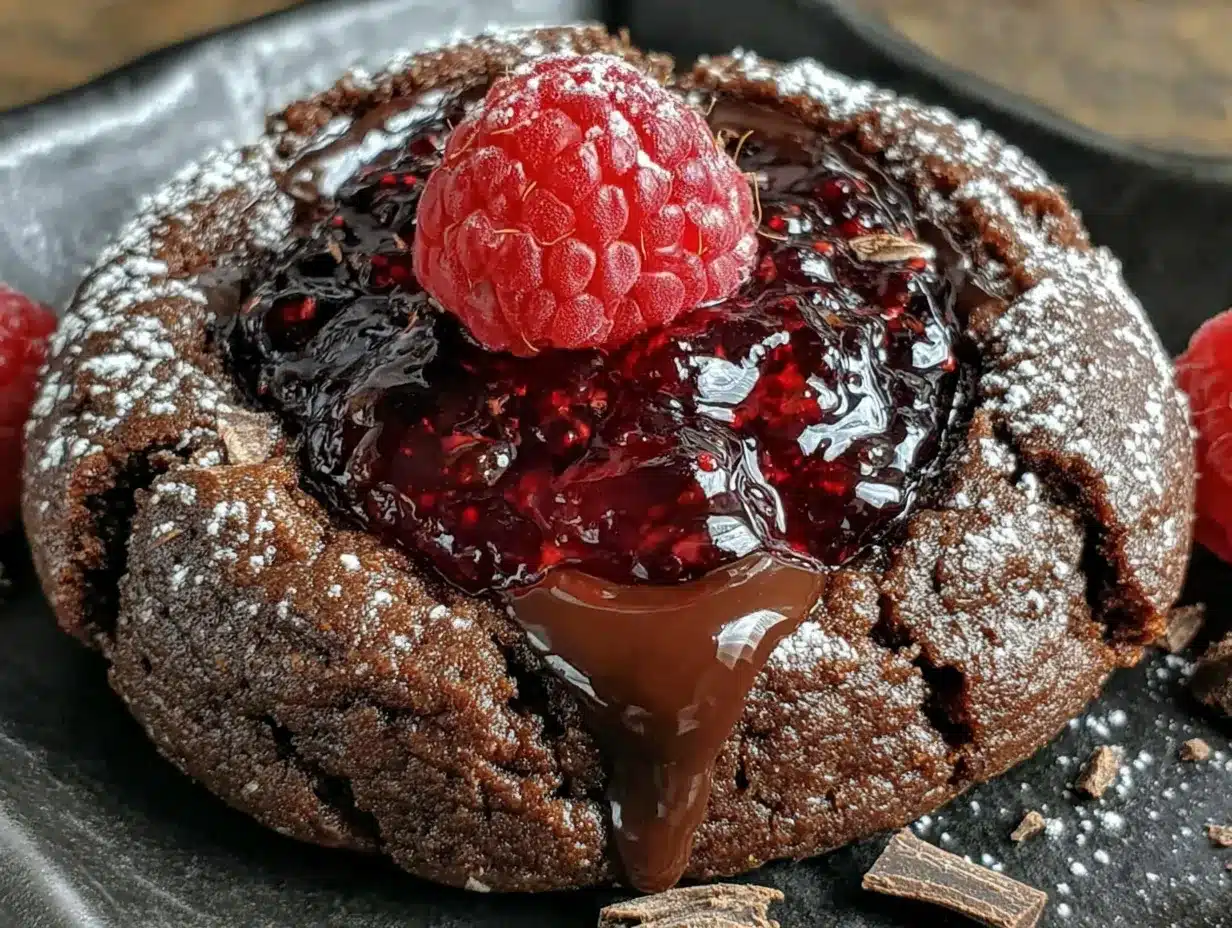
- Raspberry jam or preserves (about 1/3 cup) — Seedless jam gives a smoother look, but I actually prefer preserves with seeds because they look more rustic and homemade. Bonne Maman is my go-to brand for flavor.
That’s it. Seven ingredients for the cookies, plus the jam. If you’ve got a well-stocked pantry, you might already have everything you need.
Equipment Needed
You don’t need any fancy equipment for these cookies, which is part of why I love them on a busy weeknight.
- Mixing bowls — One medium bowl for the dry ingredients, one large bowl for creaming the butter and sugar. Nothing fancy needed.
- Electric hand mixer or stand mixer — A hand mixer works perfectly. If you’re feeling strong, you can cream the butter and sugar by hand with a wooden spoon, but your arm will thank you for using a mixer.
- Baking sheet — A standard half-sheet pan works great. Line it with parchment paper for easy cleanup.
- Small cookie scoop or tablespoon — For portioning the dough into even balls. I use a 1-tablespoon scoop and get exactly 18 cookies every time.
- Measuring cups and spoons — For accuracy. Baking is a science, even if these cookies are forgiving.
- Cooling rack — Optional but helpful for letting the cookies cool evenly.
If you don’t have a cookie scoop, just use two spoons to portion the dough. It’s a little messier but works fine. And if you don’t have parchment paper, you can grease the baking sheet lightly with butter or cooking spray.
Preparation Method
- Preheat your oven to 350°F (175°C). Line a baking sheet with parchment paper. This is one of those steps you don’t want to skip because the cookies can stick if the pan isn’t lined.
- Cream the butter and sugar. In a large mixing bowl, beat the softened butter and granulated sugar together until light and fluffy, about 2-3 minutes. You’re looking for a pale, creamy texture. Scrape down the sides of the bowl with a spatula once or twice.
- Add the egg yolk and vanilla. Beat in the egg yolk and vanilla extract until just combined. Don’t overmix here—you just want everything incorporated.
- Mix the dry ingredients. In a separate medium bowl, whisk together the flour, cocoa powder, and salt. This step ensures the cocoa powder is evenly distributed so you don’t get pockets of bitter cocoa in your cookies.
- Combine wet and dry. Gradually add the dry ingredients to the wet mixture, mixing on low speed or stirring with a spatula until a soft dough forms. The dough will be slightly sticky but should hold together when pressed. If it feels too sticky to handle, refrigerate it for 10 minutes.
- Portion the dough. Using a small cookie scoop or a tablespoon, scoop out rounded balls of dough (about 1.5 tablespoons each). Roll each ball between your palms until smooth. If you want that crackly exterior, roll each ball in a small bowl of granulated or turbinado sugar before placing it on the prepared baking sheet.
- Make the indentations. Place the dough balls about 2 inches apart on the baking sheet. Use your thumb or the back of a teaspoon to press a deep well into the center of each cookie. Don’t be shy—press down almost to the bottom of the dough. The indentations will puff up slightly during baking, so you want them deep.
- Fill with jam. Spoon about 1/2 teaspoon of raspberry jam into each indentation. Don’t overfill, or the jam will bubble over and spread across the cookie. A little goes a long way.
- Bake. Bake for 10-12 minutes. The cookies are done when the edges look set and the tops are slightly cracked. The centers will still look soft—that’s okay. They’ll firm up as they cool. Warning: The jam will be extremely hot when the cookies come out of the oven. Let them cool on the baking sheet for 5 minutes before transferring to a wire rack.
- Cool completely. Transfer the cookies to a wire rack and let them cool completely. The jam will set as they cool, making them easier to handle. If you try to eat one right away (and I know you will), just be careful of the hot jam.
Cooking Tips & Techniques
I’ve made these cookies at least a dozen times now, and I’ve learned a few things the hard way so you don’t have to.
Don’t overmix the dough. This is the number one mistake I see people make with chocolate cookies. Overmixing develops the gluten in the flour, which makes the cookies tough and dense instead of tender and fudgy. Mix just until the flour disappears into the dough, then stop.
Make the indentations deep enough. The first time I made these, I pressed a shallow little divot into each cookie, thinking that was enough. By the time they came out of the oven, the jam had puffed up and spilled over the edges, and I had sticky, jam-covered cookies. Press your thumb in firmly, almost all the way to the bottom of the dough ball. The well will shrink a bit during baking.
Use room temperature ingredients. Cold butter won’t cream properly with the sugar, and cold egg yolk can seize the dough. Let your butter sit out for 30 minutes and your egg come to room temperature by placing it in a bowl of warm water for 5 minutes.
Watch the baking time carefully. Every oven runs differently. My old oven would bake these in exactly 11 minutes. My new one takes 12. Start checking at the 10-minute mark. The cookies should look set at the edges but still soft in the center. They continue to bake on the hot baking sheet after you pull them out.
Let them cool on the pan. I learned this one the messy way. If you try to move the cookies right out of the oven, the jam is still liquid and will slide right off. Give them a solid 5 minutes on the baking sheet before transferring them anywhere.
Variations & Adaptations
One of the best things about this recipe is how easy it is to change up. Here are some variations I’ve tried and loved.
Different jam flavors. Raspberry is classic, but strawberry, apricot, or even orange marmalade work beautifully. I made a batch with fig jam last fall, and it tasted like a fancy holiday cookie. Use whatever you have in your fridge.
Gluten-free option. Substitute the all-purpose flour with a 1:1 gluten-free baking flour blend. I’ve used King Arthur Measure for Measure with great results. The texture is slightly more delicate, but the flavor is spot on.
Add-ins. Fold in 1/4 cup of mini chocolate chips or chopped dark chocolate to the dough for extra chocolatey goodness. You can also add a pinch of cinnamon or espresso powder to deepen the chocolate flavor.
Vegan version. Use vegan butter and replace the egg yolk with 1 tablespoon of ground flaxseed mixed with 3 tablespoons of water (let it sit for 5 minutes to thicken). The cookies will be a bit less tender but still delicious.
White chocolate drizzle. Once the cookies are completely cool, drizzle melted white chocolate over the top for a bakery-style finish. It adds sweetness and looks gorgeous on a cookie platter.
I once made a batch with blackberry jam and a pinch of black pepper in the dough. Sounds weird, I know, but the pepper brought out this warmth in the chocolate that was honestly incredible. Don’t be afraid to experiment—that’s how happy accidents happen.
Serving & Storage Suggestions
These cookies are best served at room temperature, but honestly, I love them slightly warm when the jam is still a little gooey. If you’re serving them at a party or holiday gathering, arrange them on a plate with a light dusting of powdered sugar for a pretty presentation.
They pair beautifully with a cup of coffee or a glass of cold milk. For a more grown-up pairing, try them with a glass of red wine or a cup of hot tea—the raspberry and chocolate combo is classic for a reason.
Storage: Store the cookies in an airtight container at room temperature for up to 5 days. Layer them between sheets of parchment paper to prevent the jam from sticking to the lid. They actually get better on day two as the flavors meld together.
Freezing: You can freeze the baked cookies for up to 3 months. Place them in a single layer on a baking sheet, freeze until solid, then transfer to a freezer-safe bag or container. Thaw at room temperature for about 30 minutes before serving.
Make-ahead tip: You can prepare the dough up to 2 days in advance and keep it covered in the refrigerator. When you’re ready to bake, let the dough sit at room temperature for 10 minutes to soften slightly, then roll, indent, fill, and bake as directed. This is a lifesaver during the holiday season.
Nutritional Information & Benefits
Let’s be real—these are cookies, not health food. But they do have a few redeeming qualities worth mentioning.
Per cookie (based on 18 cookies): approximately 120 calories, 6g fat, 16g carbohydrates, 1g fiber, 2g protein. These numbers will vary depending on the exact ingredients you use and the size of your cookies.
Dark chocolate is rich in antioxidants called flavonoids, which have been linked to heart health benefits. The cocoa powder in these cookies provides a small dose of iron and magnesium too. And raspberries are packed with vitamin C and fiber, even in jam form.
If you’re watching your sugar intake, you can reduce the sugar in the dough to 1/3 cup and use a low-sugar jam. The cookies won’t be as sweet, but the chocolate flavor will shine through more.
These cookies are naturally nut-free (always check your ingredient labels), making them a safe option for school bake sales or parties. They are also vegetarian.
I’m not a nutritionist, and I don’t pretend these are a health food. But I do believe that a small, satisfying treat made with real ingredients is part of a balanced life. These cookies are that treat.
Conclusion
These easy dark chocolate raspberry thumbprint cookies are proof that sometimes the best things in the kitchen come from happy accidents. They’re quick enough for a weeknight, simple enough for beginner bakers, and impressive enough to bring to any gathering. The combination of rich, fudgy chocolate and bright, tart raspberry jam is just unforgettable.
I’ve made these for cookie exchanges, holiday parties, and random Tuesday afternoons when I needed something sweet. Every single time, they disappear faster than I expect. There’s something about that little thumbprint of jam in the center that feels special, like you put in more effort than you actually did. And honestly? That’s my favorite kind of recipe.
I’d love to hear how these turn out for you. Did you try a different jam flavor? Add chocolate chips? Burn your tongue on hot jam like I did? Drop a comment below and let me know. And if you share a photo on Pinterest, tag me—I want to see your happy accidents.
Go make some cookies. You deserve them.
Frequently Asked Questions
Can I use a different type of jam?
Absolutely. Strawberry, apricot, blackberry, or even cherry jam all work beautifully. Just avoid jams with large fruit chunks, as they can be hard to spoon into the small indentations.
Why did my cookies spread too much?
This usually happens if the butter was too soft or the dough wasn’t chilled enough. If your kitchen is warm, pop the dough balls in the fridge for 10 minutes before baking. Also, make sure you’re measuring your flour correctly—scoop it into the measuring cup and level it off, don’t pack it down.
Can I make these cookies ahead of time?
Yes! You can prepare the dough up to 2 days ahead and keep it in the fridge. You can also bake the cookies, cool them completely, and store them in an airtight container for up to 5 days. They freeze beautifully too.
Do I have to use dark chocolate cocoa powder?
Not at all. Regular unsweetened cocoa powder works perfectly. The cookies will just be a lighter color and have a slightly milder chocolate flavor. I personally love the depth that dark cocoa powder adds, but use what you have.
My jam bubbled over during baking. What did I do wrong?
You probably overfilled the indentations or didn’t press the wells deep enough. Next time, use about 1/2 teaspoon of jam per cookie and press your thumb firmly into the center of each dough ball. The wells should be deep enough that the jam sits below the rim of the cookie.
Pin This Recipe!

Easy Dark Chocolate Raspberry Thumbprint Cookies Recipe

These easy dark chocolate raspberry thumbprint cookies are a happy accident that turned into a favorite. Rich, fudgy chocolate cookies with a bright raspberry jam center, ready in about 30 minutes with simple ingredients.
- Prep Time: 15 minutes
- Cook Time: 12 minutes
- Total Time: 27 minutes
- Yield: 18 cookies 1x
- Category: Dessert
- Cuisine: American
Ingredients
- 1/2 cup (1 stick) unsalted butter, softened
- 1/2 cup (100g) granulated sugar
- 1 large egg yolk
- 1 teaspoon vanilla extract
- 1 cup (120g) all-purpose flour
- 1/3 cup (30g) unsweetened cocoa powder (preferably Hershey’s Special Dark)
- 1/4 teaspoon salt
- Optional: turbinado or coarse sugar for rolling
- 1/3 cup raspberry jam or preserves (preferably seedless or with seeds for rustic look)
Instructions
- Preheat your oven to 350°F (175°C). Line a baking sheet with parchment paper.
- In a large mixing bowl, beat the softened butter and granulated sugar together until light and fluffy, about 2-3 minutes. Scrape down the sides of the bowl with a spatula once or twice.
- Beat in the egg yolk and vanilla extract until just combined. Do not overmix.
- In a separate medium bowl, whisk together the flour, cocoa powder, and salt.
- Gradually add the dry ingredients to the wet mixture, mixing on low speed or stirring with a spatula until a soft dough forms. The dough will be slightly sticky but should hold together when pressed. If too sticky, refrigerate for 10 minutes.
- Using a small cookie scoop or a tablespoon, scoop out rounded balls of dough (about 1.5 tablespoons each). Roll each ball between your palms until smooth. If desired, roll each ball in a small bowl of granulated or turbinado sugar before placing on the prepared baking sheet.
- Place the dough balls about 2 inches apart on the baking sheet. Use your thumb or the back of a teaspoon to press a deep well into the center of each cookie, pressing almost to the bottom.
- Spoon about 1/2 teaspoon of raspberry jam into each indentation. Do not overfill.
- Bake for 10-12 minutes. The cookies are done when the edges look set and the tops are slightly cracked. The centers will still look soft.
- Let the cookies cool on the baking sheet for 5 minutes, then transfer to a wire rack to cool completely. The jam will set as they cool.
Notes
Don’t overmix the dough to keep cookies tender. Press indentations deep enough to prevent jam from spilling over. Use room temperature ingredients for best results. Start checking cookies at 10 minutes as oven times vary. Let cookies cool on the pan for 5 minutes before moving to avoid hot jam sliding off.
Nutrition
- Serving Size: 1 cookie
- Calories: 120
- Sugar: 10
- Sodium: 50
- Fat: 6
- Saturated Fat: 3.5
- Carbohydrates: 16
- Fiber: 1
- Protein: 2
Keywords: chocolate thumbprint cookies, raspberry thumbprint cookies, easy cookie recipe, dark chocolate cookies, raspberry jam cookies, weeknight cookies, no-chill cookies


