The woman at the farmers market watched me fumbling with a bag of apples, my toddler squirming in one arm, and I must have looked like I was about to drop everything. She didn’t say anything at first. Then she reached into her basket and handed me a single, perfect ghost meringue cookie wrapped in wax paper. “For later,” she said with a wink. “When the chaos settles.”
I didn’t know her name, but I remembered that cookie. It was impossibly light, sweet without being cloying, and shaped like a little ghost that seemed to float right off my tongue. I asked her how she made them, and she shrugged like it was nothing—just egg whites and sugar and a steady hand. But the way she talked about it, you could tell this was her quiet ritual, her way of turning a regular October evening into something a little magical.
Honestly, I tried her method a dozen times before I got it right. The first batch collapsed into sad little puddles. The second batch browned too much and looked less like ghosts and more like toasted marshmallows that had seen better days. But that third batch? Let me tell you, when I pulled those perfect little ghost meringue cookies out of the oven, I actually laughed out loud. They were so cute it felt ridiculous.
These ghost meringue cookies have become my go-to for a cozy night in when the weather turns cold and the world feels a bit heavy. Maybe you’ve been there—you just want to curl up with something warm, watch a silly movie, and create something that feels a little bit special without spending hours in the kitchen. That’s exactly what these are for. They’re not complicated, they’re not fancy, and that’s the whole point. They’re a little moment of sweetness that makes an ordinary evening feel like a small celebration.
So here’s that recipe, passed from a stranger at a market to my kitchen to yours. I hope they bring you the same quiet joy they’ve brought me.
Why You’ll Love This Recipe
I’ve tested this recipe more times than I care to admit, and I can tell you with confidence—these ghost meringue cookies are the real deal. They’re not just another sugar cookie dressed up for Halloween. They have a personality all their own.
- Quick & Easy : From start to finish, you’re looking at about 2 hours total—but most of that is hands-off baking time. The actual prep takes maybe 15 minutes. Perfect for a last-minute craving or when the kids suddenly announce they want to make Halloween treats at 8 PM on a Tuesday.
- Simple Ingredients : You need exactly four ingredients. Four. Egg whites, sugar, cream of tartar, and vanilla extract. That’s it. No fancy grocery trips, no specialty baking supplies.
- Perfect for a Cozy Night In : These ghost meringue cookies are made for those evenings when you want to do something creative but low-pressure. Light a candle, put on a playlist, and pipe little ghosts while the rain taps against the window. It’s therapy in cookie form.
- Crowd-Pleaser : I’ve brought these to Halloween parties and watched grown adults squeal with delight. Kids adore them, but honestly? Adults go just as crazy. There’s something about a tiny ghost cookie that brings out the kid in everyone.
- Unbelievably Delicious : The texture is what gets you. They’re crisp on the outside, airy on the inside, and they dissolve on your tongue like a sweet little cloud. The vanilla gives them a warmth that feels like a hug.
What makes these different from every other ghost cookie recipe out there? It’s the technique. I spent weeks perfecting the oven temperature and drying time so these ghosts hold their shape perfectly—no spreading, no cracking, no browning. They come out pure white, perfectly shaped, and absolutely adorable. This isn’t just another version of a Halloween cookie. It’s the one you’ll come back to year after year.
And listen—this recipe is comfort food reimagined. It’s lighter than a traditional cookie, lower in fat, and yet somehow it satisfies that deep craving for something sweet and special. It’s the kind of cookie that makes you close your eyes after the first bite. I’m not kidding.
What Ingredients You Will Need
This recipe uses simple, humble ingredients to create something that feels almost magical. The beauty of ghost meringue cookies is that they don’t hide behind complicated flavors or exotic additions. Every ingredient has a job, and they work together in perfect harmony.
- Egg whites, 3 large, at room temperature — This is non-negotiable. Cold egg whites won’t whip up properly, and you’ll end up with flat, sad meringue. Separate your eggs when they’re cold (it’s easier), then let the whites sit on the counter for about 30 minutes before you start. I’ve used both farm-fresh eggs and store-bought, and honestly, they both work fine. Just make sure no yolk sneaks in—any fat will ruin your meringue.
- Granulated sugar, ¾ cup (150g) — Regular white sugar is what you want. Don’t use powdered sugar or brown sugar. The granules need to dissolve completely into the egg whites, and granulated sugar does this job best. I’ve tried superfine sugar before, and it works beautifully if you have it on hand, but it’s not necessary.
- Cream of tartar, ¼ teaspoon — This is your stabilizer. It helps the egg whites hold their structure and gives the meringue that lovely, glossy stability. If you don’t have cream of tartar, you can substitute with ½ teaspoon of lemon juice or white vinegar. But honestly? Just buy cream of tartar. It’s cheap and lasts forever in your pantry.
- Vanilla extract, 1 teaspoon — Pure vanilla extract makes a difference here. The flavor is warm and aromatic, and it compliments the sweetness perfectly. I’ve used imitation vanilla in a pinch, and it works, but the flavor isn’t as rich. My personal favorite is Nielsen-Massey, but any good quality extract will do.
- Mini chocolate chips, optional, for eyes — About ¼ cup (45g). This is optional but highly recommended. The little chocolate eyes are what turn these from plain meringue cookies into actual ghosts. I like using mini chips because they’re proportionate to the cookie size. Regular chocolate chips work too, but they look a bit cartoonish.
One thing I’ve learned through trial and error—humidity is the enemy of meringue. If you live in a humid climate, you might need to bake these a little longer to ensure they dry out completely. I learned this the hard way during a rainy spring when my ghost meringue cookies turned out chewy instead of crisp. Not a disaster, but not the texture I was going for.
Also, a quick note on sugar: if you’re using a kitchen scale, ¾ cup of granulated sugar weighs about 150 grams. I always weigh my ingredients for meringue because the volume can vary depending on how tightly packed the sugar is. But if you don’t have a scale, just scoop and level like you normally would.
Equipment Needed
You don’t need a professional bakery setup for these ghost meringue cookies, but a few key tools will make your life much easier.
- Stand mixer or hand mixer — A stand mixer with the whisk attachment is ideal because you can walk away while it does the work. But a hand mixer works perfectly fine too. I’ve made these with both, and honestly, the hand mixer just means you have to stand there longer. Either way works.
- Large mixing bowl — Make sure it’s spotless and completely dry. Any grease residue will prevent your egg whites from whipping up properly. Glass or metal bowls work best—plastic bowls can retain oils even after washing.
- Piping bag with a round tip — A piping bag gives you control over the shape. I use a Wilton #12 round tip, but any medium round tip will do. If you don’t have a piping bag, you can use a sturdy zip-top bag with the corner snipped off. It won’t be as precise, but it’ll work in a pinch.
- Baking sheets — Line them with parchment paper. Silpat mats work too, but I prefer parchment because the meringue releases more easily.
- Rubber spatula — For scraping down the bowl and folding in any unmixed sugar.
- Oven thermometer — This is optional but highly recommended. Oven temperatures can be wildly inaccurate, and meringue is sensitive to heat. An oven thermometer ensures you’re actually baking at 200°F and not 250°F.
I bought my piping bag set for about $10 at a kitchen supply store, and it’s lasted me years. If you’re just starting out, don’t feel pressured to buy expensive equipment. A zip-top bag and a pair of scissors will get the job done.
Preparation Method
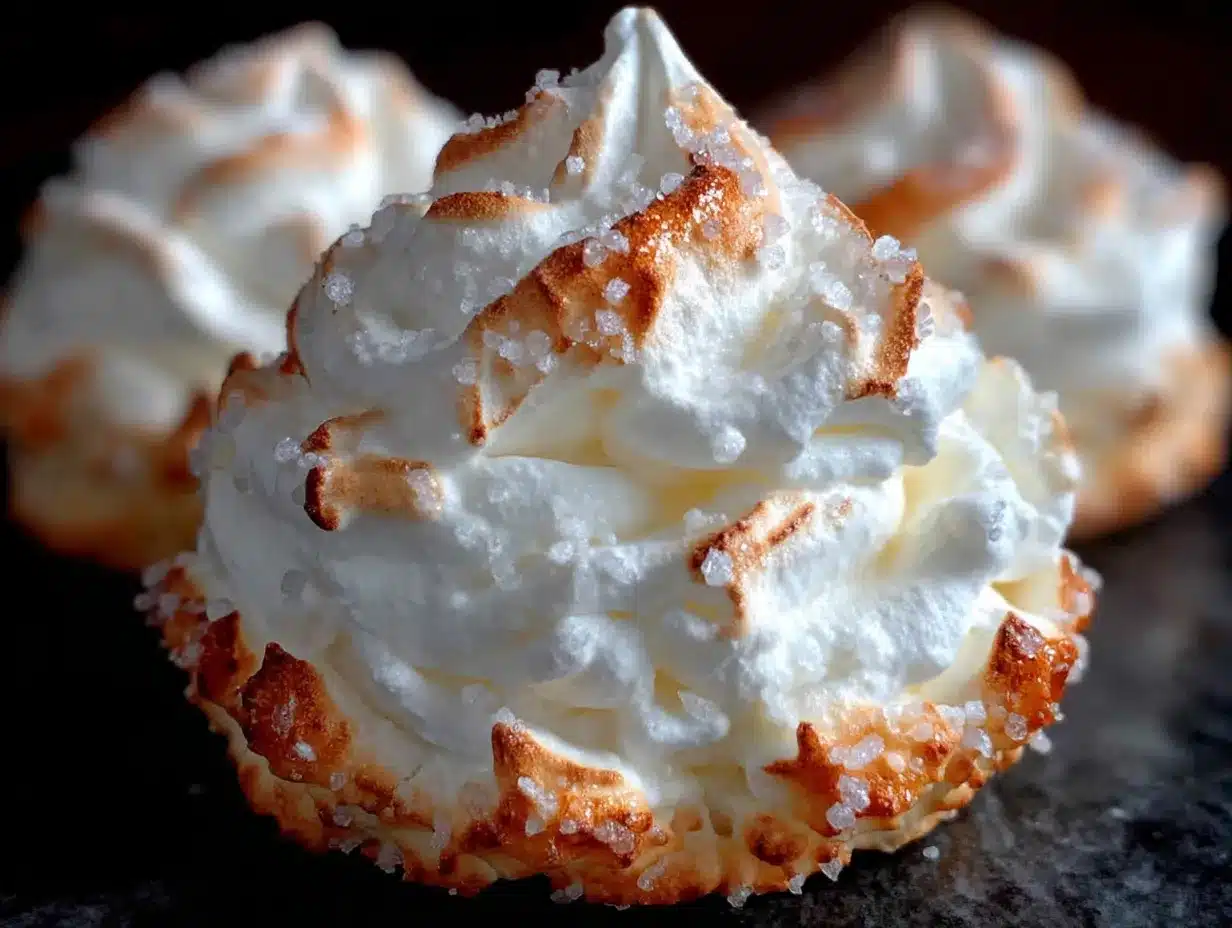
Let me walk you through this step by step. I’ve made these ghost meringue cookies more times than I can count, and I’ve learned a few tricks along the way that will save you from my early mistakes.
- Preheat your oven to 200°F (93°C). Line two baking sheets with parchment paper. Set them aside. The low temperature is crucial—we’re not really baking these cookies, we’re drying them out. If your oven runs hot, those cute little ghosts will turn brown and sad.
- Prepare your egg whites. Place 3 room-temperature egg whites in a clean, dry mixing bowl. Add ¼ teaspoon of cream of tartar. Start mixing on medium speed until the egg whites become frothy and bubbly, about 1-2 minutes. You’ll see tiny bubbles forming, and the mixture will look like a light foam.
- Gradually add the sugar. With the mixer running on medium-high speed, add the ¾ cup of granulated sugar one tablespoon at a time. I know it’s tempting to dump it all in at once, but don’t. Adding it slowly helps the sugar dissolve properly. Take your time—about 30 seconds between each addition.
- Whip to stiff peaks. Once all the sugar is added, increase the speed to high and whip for about 5-7 minutes. You’re looking for stiff, glossy peaks that hold their shape when you lift the whisk. The mixture should be thick and marshmallow-like. Here’s a test: stop the mixer, lift the whisk, and turn it upside down. If the peak stands straight up without drooping, you’re there. If it flops over, keep whipping.
- Add the vanilla. With the mixer on low, add 1 teaspoon of vanilla extract. Mix just until combined—about 10 seconds. Don’t overmix at this stage or you’ll deflate all that beautiful air you just whipped in.
- Transfer to a piping bag. Fit your piping bag with a round tip and fill it with the meringue. If you’re using a zip-top bag, snip about ½ inch off one corner. Don’t cut too much off, or you’ll lose control of the shape.
- Pipe the ghosts. Hold the piping bag straight up and down, about ½ inch above the baking sheet. Squeeze gently to create a round base, then slowly pull upward while releasing pressure to create the ghost’s head. The shape should look like a teardrop or a little ghost—wider at the bottom and tapered at the top. Leave about 1 inch between each ghost because they don’t spread much, but you want airflow around each one.
- Add the eyes. If you’re using mini chocolate chips, gently press two into each ghost for eyes. Do this immediately after piping, before the meringue starts to set. Press them in gently—if you push too hard, you’ll squish the ghost shape.
- Bake. Place the baking sheets in the preheated oven and bake for 1 hour. Do not open the oven door during this time. I know it’s tempting, but the rush of cool air can cause the meringue to crack or collapse.
- Turn off the oven and let them dry. After 1 hour, turn off the oven but leave the cookies inside. Let them cool completely in the closed oven—this takes about 1-2 hours. The residual heat continues to dry them out, giving you that perfect crisp texture. I usually make these before bed and leave them in the oven overnight.
- Check for doneness. A properly baked ghost meringue cookie should lift easily off the parchment paper. The bottom should be dry and not sticky. If they stick, they need more drying time. Return them to the turned-off oven for another 30 minutes.
One thing I want to warn you about—if you open the oven too early, you might hear a faint cracking sound. That’s the meringue breaking. It’s not the end of the world, and they’ll still taste delicious, but they won’t have that perfect smooth surface. So resist the urge to peek!
Cooking Tips & Techniques
After making these ghost meringue cookies more times than I’d like to admit, I’ve gathered a few tricks that make the process smoother and the results more reliable.
Humidity is your enemy. I cannot stress this enough. Meringue is basically sugar and egg whites, and sugar attracts moisture like crazy. If you’re making these on a rainy day, expect them to take longer to dry out. On humid days, I add an extra 30 minutes to the oven-drying time. On dry, cool days, they come out perfectly in the standard time.
Room temperature eggs matter. I learned this the hard way when I tried to rush the process with cold eggs. The meringue never reached stiff peaks, and I ended up with a runny mess. If you forgot to take your eggs out ahead of time, place them in a bowl of warm water for 5 minutes. It’s not quite as good as natural warming, but it works in a pinch.
Don’t overbake. The goal is to dry the meringue, not brown it. If your oven runs hot, your ghost meringue cookies will turn a pale tan color instead of staying pure white. They’ll still taste good, but they won’t look as ghostly. If you notice browning after 30 minutes, reduce the temperature to 180°F and continue baking.
Storage is key. These cookies are best eaten within 2-3 days. Store them in an airtight container at room temperature. Do not refrigerate them—the moisture in the fridge will make them sticky and soft. If you live in a humid climate, add a silica gel packet to the container to absorb excess moisture.
Practice your piping. Your first few ghosts might look a bit… abstract. That’s okay. I’ve made ghosts that looked more like blobs, and they still tasted amazing. If you want to practice, pipe a few test ghosts on a separate piece of parchment and scrape them back into the bowl to reuse the meringue. No waste, just practice.
Timing strategy. I like to make these in the evening. I pipe them, pop them in the oven, and let them dry overnight. In the morning, I have perfect ghost meringue cookies waiting for me. It feels like magic.
Variations & Adaptations
One of the best things about ghost meringue cookies is how easy they are to customize. Here are a few variations I’ve tried and loved.
Chocolate Ghosts. Replace 2 tablespoons of the granulated sugar with unsweetened cocoa powder. Sift it together with the sugar before adding to the egg whites. The result is a pale brown ghost with a subtle chocolate flavor. I made these for a Halloween party, and they disappeared faster than the white ones.
Peppermint Ghosts. Substitute the vanilla extract with ½ teaspoon of peppermint extract. The minty flavor is so refreshing, and it pairs beautifully with hot cocoa. I made these for a Christmas movie night, and they felt perfectly festive. Just be careful—peppermint extract is strong, so don’t use more than ½ teaspoon.
Lemon Ghosts. Replace the vanilla with 1 teaspoon of lemon extract and add 1 teaspoon of finely grated lemon zest. The citrus brightens the sweetness and makes these feel lighter and more refreshing. These are my go-to for spring celebrations.
Vegan Option. You can make these with aquafaba—the liquid from a can of chickpeas. Use ½ cup of aquafaba in place of the 3 egg whites. The process is the same, though aquafaba takes a bit longer to whip to stiff peaks. The flavor is slightly different, but the texture is remarkably similar. I’ve served these to vegans and non-vegans alike, and no one could tell the difference.
Flavor Extracts. Experiment with different extracts. Almond extract gives a marzipan-like flavor. Coconut extract makes them taste tropical. Maple extract adds a warm, autumnal note. Just remember that extracts vary in strength, so start with ½ teaspoon and adjust to taste.
Color Variations. Add a drop of gel food coloring to the meringue before piping. Gel coloring works better than liquid because it doesn’t add extra moisture. Pastel colors work beautifully—think soft pink, pale blue, or lavender. I made a batch of rainbow ghosts for a birthday party once, and they were a huge hit.
Serving & Storage Suggestions
These ghost meringue cookies are best served at room temperature. The texture is perfectly crisp and airy, and the flavor is clean and sweet. I like to arrange them on a platter with a sprinkle of powdered sugar to make them look like they’re floating in snow.
For a cozy night in, serve them alongside a warm beverage. Hot cocoa is the obvious choice, and the combination of rich chocolate and airy meringue is divine. But they’re also wonderful with a cup of chai tea, a mug of spiced cider, or even a simple cup of black coffee. The sweetness of the cookies balances beautifully with the bitterness of coffee or the warmth of spiced tea.
If you’re hosting a Halloween party, these cookies make a stunning centerpiece. Arrange them on a cake stand with some candy corn and chocolate-covered pretzels. They’re also wonderful as edible decorations—tuck them into gift bags or use them as cake toppers.
Storage: Store your ghost meringue cookies in an airtight container at room temperature. They’ll stay fresh for about 3-4 days. Do not refrigerate them, as the moisture will make them sticky. If you need to store them longer, you can freeze them for up to 2 months. Place them in a single layer in a freezer-safe container with parchment paper between layers. Thaw at room temperature for about 15 minutes before serving.
Reheating: These cookies don’t need reheating, but if they’ve softened slightly due to humidity, you can crisp them up by placing them in a 200°F oven for 10-15 minutes. Let them cool completely before serving.
One thing I love about these cookies is how the flavor develops over time. On day one, they’re sweet and airy. By day three, the vanilla flavor has deepened, and the texture is even more delicate. They rarely last that long in my house, but when they do, they’re even better.
Nutritional Information & Benefits
Let’s be honest—these ghost meringue cookies are a treat, not a health food. But compared to most cookies, they’re surprisingly light. Each cookie (without chocolate chips) contains about 25 calories, 0 grams of fat, and 6 grams of sugar. That’s pretty impressive for something that tastes this indulgent.
The main ingredient is egg whites, which are pure protein. So while these cookies are sweet, they’re not completely empty calories. The sugar provides quick energy, and the egg whites offer a small protein boost. It’s not a health food by any stretch, but it’s a treat you can feel pretty good about.
Dietary Considerations:
- Gluten-free: Yes, these cookies are naturally gluten-free.
- Dairy-free: Yes, as long as you use dairy-free chocolate chips or skip them entirely.
- Nut-free: Yes, these cookies are naturally nut-free.
- Low-fat: Yes, these cookies contain virtually no fat.
- Vegan: Only if you use aquafaba instead of egg whites.
Potential Allergens: Eggs are the primary allergen in this recipe. If you’re serving these at a party, make sure to label them clearly for anyone with egg allergies. The vegan aquafaba version is a great alternative for those with egg sensitivities.
From a wellness perspective, I love that these cookies allow for a little indulgence without the heavy feeling you get from butter-based cookies. They’re light, they’re satisfying, and they don’t leave you feeling sluggish. That’s a win in my book.
Conclusion
These ghost meringue cookies have become a staple in my kitchen for good reason. They’re simple enough for a weeknight baking session, special enough for a Halloween party, and comforting enough for a quiet evening at home. The recipe came to me through a chance encounter at a farmers market, and it’s been bringing me joy ever since.
I hope you’ll give them a try. Don’t worry if your first batch isn’t perfect—mine wasn’t either. The beauty of these cookies is that even the imperfect ones taste amazing. And honestly, there’s something charming about a ghost that’s a little lopsided or has slightly crooked eyes. It gives them personality.
If you make these, I’d love to hear about it. Leave a comment below and tell me how they turned out. Did you add chocolate eyes? Did you try a flavor variation? Did your kids help pipe the ghosts? I want to know all about it. And if you share them on social media, tag me so I can see your creations. There’s nothing that makes me happier than seeing these little ghosts floating through kitchens around the world.
So go ahead—preheat that oven, whip up some meringue, and create a little magic in your own kitchen. You deserve it. Happy baking!
Frequently Asked Questions
Why did my meringue cookies turn out chewy instead of crisp?
This usually happens when they haven’t dried out completely. Make sure you’re baking at the correct temperature (200°F) and leaving them in the turned-off oven long enough to dry out. Humidity can also cause chewy meringue—try making these on a dry day.
Can I use liquid egg whites from a carton?
I don’t recommend it. Carton egg whites are pasteurized and often contain stabilizers that prevent them from whipping up properly. Fresh egg whites give you the best volume and texture.
How do I know when stiff peaks are reached?
Lift the whisk attachment out of the meringue and turn it upside down. If the peak stands straight up without drooping, you’re there. If it flops over, keep whipping. The meringue should also look glossy and hold its shape when you spoon it.
Can I make these without a piping bag?
Absolutely. Use a sturdy zip-top bag with the corner snipped off. You can also use two spoons to drop dollops of meringue onto the baking sheet. The shapes won’t be as precise, but they’ll still taste delicious.
How far in advance can I make these cookies?
You can make them up to 5 days ahead of time. Store them in an airtight container at room temperature. If they soften, crisp them up in a 200°F oven for 10 minutes before serving.
Pin This Recipe!
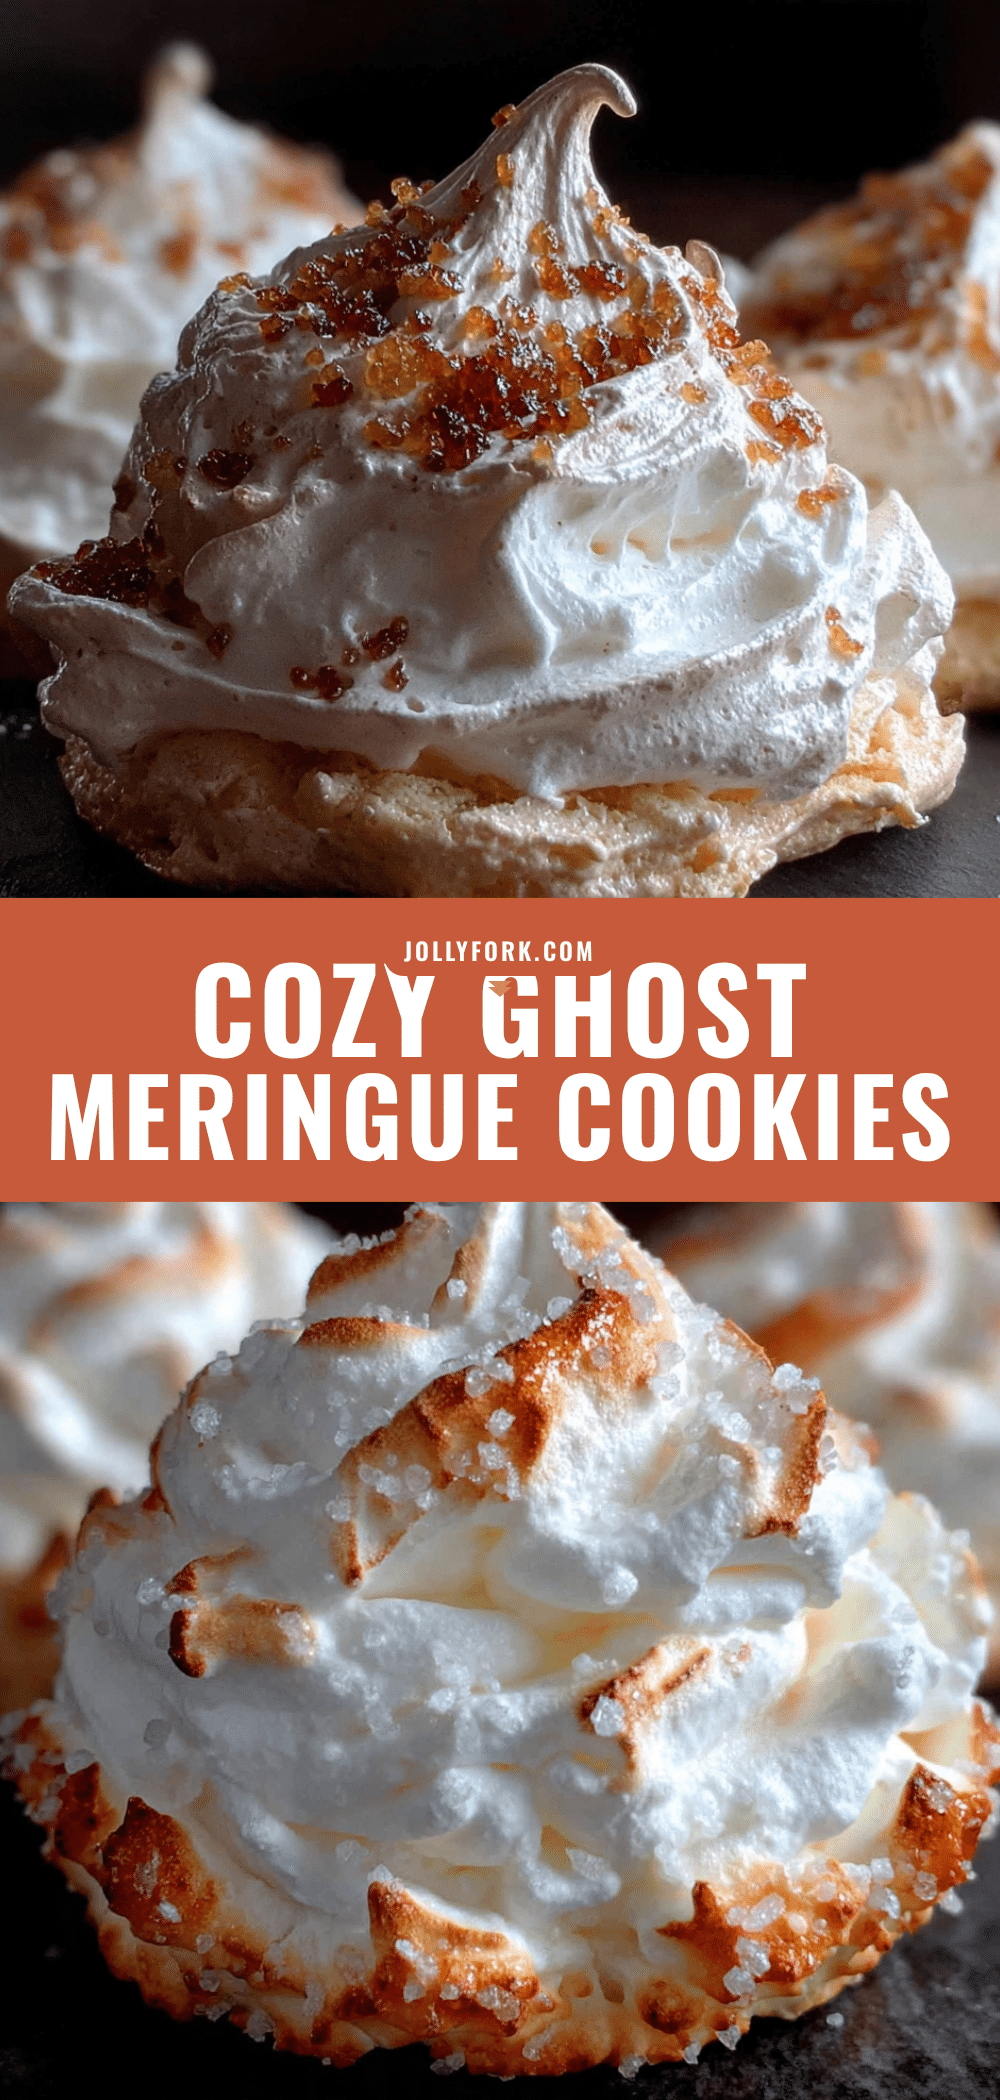
Easy Ghost Meringue Cookies for a Spooky Night
These ghost meringue cookies are light, airy, and perfectly sweet, made with just four simple ingredients. They’re a fun and easy Halloween treat that’s perfect for a cozy night in.
- Prep Time: 15 minutes
- Cook Time: 1 hour
- Total Time: 2 hours 15 minutes
- Yield: 24 servings 1x
- Category: Dessert
- Cuisine: American
Ingredients
- 3 large egg whites, at room temperature
- ¾ cup (150g) granulated sugar
- ¼ teaspoon cream of tartar
- 1 teaspoon vanilla extract
- ¼ cup (45g) mini chocolate chips (optional, for eyes)
Instructions
- Preheat your oven to 200°F (93°C). Line two baking sheets with parchment paper.
- Place 3 room-temperature egg whites in a clean, dry mixing bowl. Add ¼ teaspoon of cream of tartar. Start mixing on medium speed until the egg whites become frothy and bubbly, about 1-2 minutes.
- With the mixer running on medium-high speed, add the ¾ cup of granulated sugar one tablespoon at a time, about 30 seconds between each addition.
- Once all the sugar is added, increase the speed to high and whip for about 5-7 minutes until stiff, glossy peaks form. The mixture should be thick and marshmallow-like.
- With the mixer on low, add 1 teaspoon of vanilla extract. Mix just until combined, about 10 seconds.
- Fit a piping bag with a round tip and fill it with the meringue. Alternatively, use a sturdy zip-top bag with the corner snipped off.
- Pipe the ghosts onto the prepared baking sheets: hold the piping bag straight up and down, about ½ inch above the sheet. Squeeze gently to create a round base, then slowly pull upward while releasing pressure to create the ghost’s head. Leave about 1 inch between each ghost.
- If using mini chocolate chips, gently press two into each ghost for eyes immediately after piping.
- Bake for 1 hour. Do not open the oven door during this time.
- After 1 hour, turn off the oven but leave the cookies inside. Let them cool completely in the closed oven, about 1-2 hours.
- Check for doneness: a properly baked ghost meringue cookie should lift easily off the parchment paper. If they stick, return them to the turned-off oven for another 30 minutes.
Notes
Humidity is the enemy of meringue. On humid days, add an extra 30 minutes to the oven-drying time. Store in an airtight container at room temperature for up to 3-4 days. Do not refrigerate. For vegan option, use ½ cup aquafaba instead of egg whites.
Nutrition
- Serving Size: 1 cookie
- Calories: 25
- Sugar: 6
- Sodium: 10
- Carbohydrates: 6
- Protein: 0.5
Keywords: ghost meringue cookies, Halloween cookies, meringue cookies, easy Halloween treats, ghost cookies, meringue ghosts


