I had this whole plan for our annual Halloween get-together. Fancy themed cocktails, a spooky punch bowl with dry ice, maybe even those little meat pies shaped like tombstones. Then life happened—work ran late, the store was out of dry ice, and I found myself staring at a clock with exactly two hours before guests arrived. That’s when I grabbed a pack of flour tortillas, some string cheese, and decided to stop overthinking it. The Easy Mummy Charcuterie Board for Halloween Parties was born out of pure desperation, and honestly? It was the best party decision I ever made.
You know that moment when something looks so complicated that guests assume you spent hours on it, but really you just threw things together? That’s this board. The mummies—those little cheese sticks wrapped in tortilla strips with tiny olive eyes—became the star of the night. People couldn’t stop grabbing them. Kids loved them, adults thought they were clever, and I got to enjoy my own party instead of sweating over a hot stove. Sometimes the best recipes come from the place of “I have no idea what I’m doing, but let’s try anyway.”
So here it is. A Halloween charcuterie board that looks like a graveyard scene, complete with mummy snacks, creepy crawly toppings, and all the dippable goodness you could want. No fancy skills required. Just a cutting board, some snacks, and a willingness to have fun with your food.
Why You’ll Love This Recipe
Let me tell you why this board became my go-to Halloween trick. First off, it’s practically no-cook. You’re assembling, not cooking. That means no hot ovens, no burnt fingers, and no last-minute kitchen disasters when you’re trying to get your costume on.
- Comes Together in Under 20 Minutes: Seriously. Once you have your ingredients, this board takes less time to assemble than it does to pick out a Halloween playlist. I timed myself last year—18 minutes flat.
- No Special Equipment Needed: You don’t need a fancy charcuterie board (though it helps). A large cutting board, a baking sheet, or even a clean countertop works fine. We’re not being fancy here.
- Perfect for Parties of All Sizes: Whether you’re hosting a crowd or just having a spooky movie night for two, this board scales beautifully. Double it, halve it, whatever works.
- Crowd-Pleaser for All Ages: Kids go wild for the mummy cheese sticks. Adults appreciate the savory-snack spread. Even picky eaters find something to munch on.
- Endlessly Customizable: Don’t like olives? Use chocolate chips for eyes. Want it healthier? Load up on veggies. This board bends to your will.
What makes this board different from every other Halloween snack platter out there? It’s the mummies. Those little cheese-wrapped cuties with their beady little eyes are just… fun. They make people smile. And in a world of serious cooking, sometimes you just need food that makes you giggle.
What Ingredients You Will Need
This recipe uses simple, mostly store-bought ingredients to create a spread that looks way more impressive than it actually is. You likely already have most of these in your fridge and pantry.
For the Mummy Cheese Sticks
- String cheese sticks (about 10-12 sticks, or 1 standard package) — these are your mummy bodies
- Flour tortillas (3-4 large tortillas, cut into thin strips) — the wrappings
- Black olives (sliced, about 1/4 cup) — for the eyes (pimento-stuffed green olives work too)
- Cream cheese (2 tablespoons, softened) — acts as glue to hold the eyes in place
For the Charcuterie Board Base
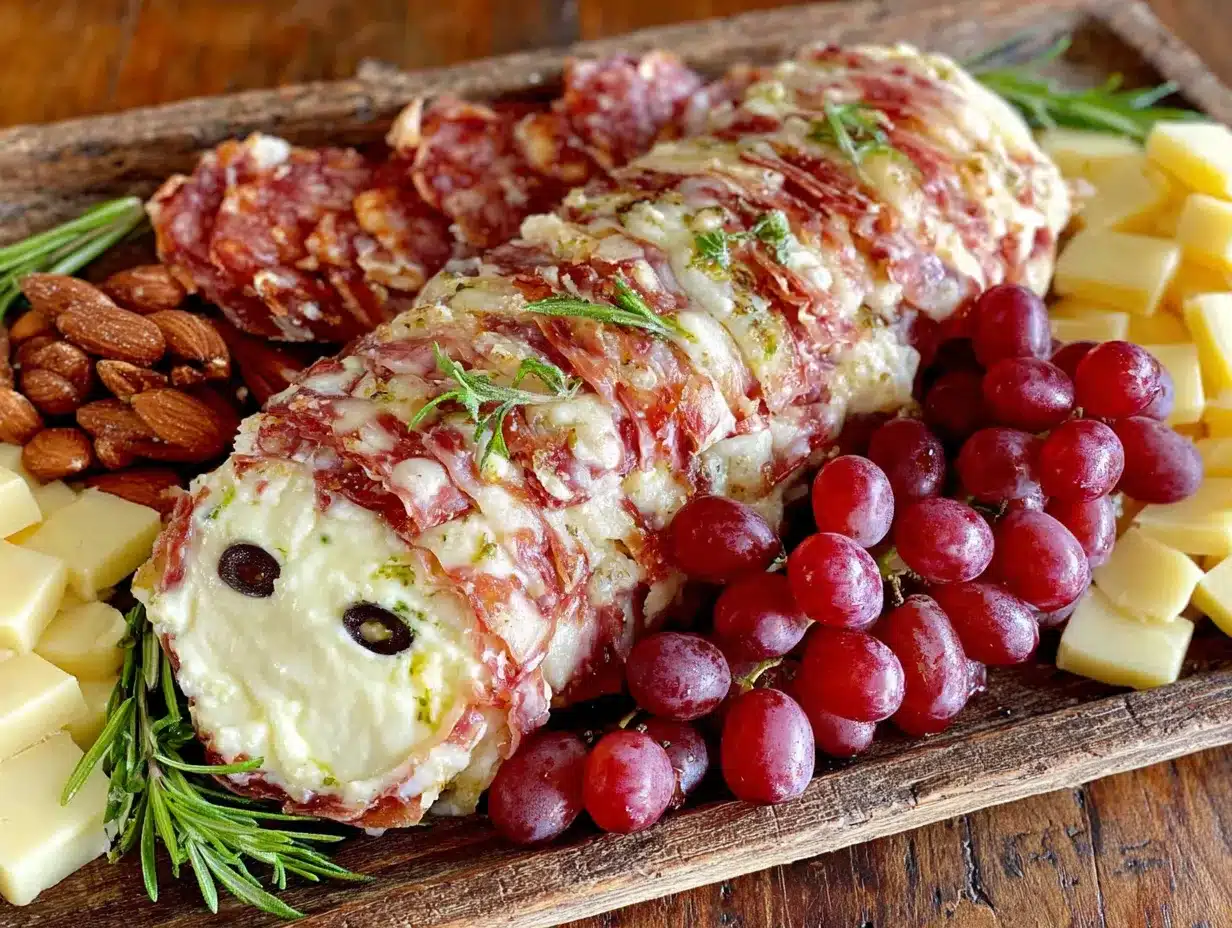
- Salami or pepperoni slices (about 6 ounces) — roll them up or fold them for texture
- Assorted crackers (your choice — I like a mix of buttery rounds and whole wheat squares)
- Grapes (red and green, about 1 cup) — adds sweetness and color
- Cherry tomatoes (1 cup) — looks like little Halloween eyeballs, honestly
- Baby carrots (1 cup) — for crunch and color contrast
- Pretzel sticks (1 cup) — they look like little bones, perfect for the theme
For Dipping
- Ranch dressing (1/2 cup, store-bought or homemade)
- Honey mustard (1/4 cup)
- Hummus (1/2 cup, plain or roasted red pepper)
I personally recommend using Boar’s Head salami for its clean flavor and Kraft string cheese because it pulls apart nicely. But honestly, any brand works. The key is getting your tortilla strips thin enough to look like bandages—about half an inch wide is perfect.
Equipment Needed
You don’t need much for this one, which is part of the beauty.
- Large wooden cutting board or serving platter (at least 12×18 inches for a full spread)
- Sharp knife (for cutting tortillas and olives)
- Small bowls (3-4 for dips and olives)
- Butter knife or small spatula (for spreading cream cheese)
- Cutting board (for prep work)
If you don’t have a large wooden board, a baking sheet lined with parchment paper works beautifully. I’ve even used a clean plastic cutting board in a pinch. The presentation is about the food, not the platter.
Preparation Method
Here’s how to build your Halloween masterpiece. Take your time, have fun, and don’t stress about perfection—mummies are supposed to look a little messy.
- Prep the mummy cheese sticks (10 minutes): Cut your flour tortillas into thin strips, about 1/2 inch wide and 3-4 inches long. You’ll need about 3-4 strips per cheese stick. Unwrap all your string cheese sticks and set them aside.
- Wrap the mummies (5 minutes): Take one tortilla strip and wrap it around a cheese stick, starting at one end and working your way down. Leave a small gap near the top where the eyes will go. Don’t wrap too tightly—you want it to look loose and bandage-like. Repeat with remaining cheese sticks. The ends of the tortilla strips can tuck under or just hang loose; it adds to the mummy look.
- Add the eyes (3 minutes): Take a small dab of cream cheese on your finger or a butter knife and place it where you want each eye. Press a sliced olive half onto each dab of cream cheese. The cream cheese acts as glue and keeps the eyes in place. For a cuter look, use whole black olives. For a creepier vibe, use sliced green olives with pimentos.
- Arrange the board (10 minutes): Place your small bowls of dip on the board first—spread them out so they create natural sections. Arrange the mummy cheese sticks in a cluster near the center or along one edge. They should be the focal point.
- Fill in the gaps: Start placing your crackers, salami rolls, grapes, cherry tomatoes, baby carrots, and pretzel sticks around the mummies. Create little groupings of similar items. Don’t overcrowd—leave some negative space so the board looks intentional, not chaotic.
- Add final touches: Sprinkle a few extra olive slices around for drama. If you have fresh rosemary sprigs, tuck them in here and there for a creepy “graveyard” vibe. A few whole almonds scattered around look like little bones.
- Serve immediately or refrigerate: This board can sit out at room temperature for up to 2 hours. If you’re making it ahead, cover with plastic wrap and refrigerate for up to 4 hours. Take it out 20 minutes before serving to let the cheese soften slightly.
Pro tip from my first attempt: I wrapped my mummies too tight the first time, and they looked more like sad burritos than mummies. Looser is better. Let those tortilla ends flap around a bit. It gives them personality.
Cooking Tips & Techniques
I learned a few things the hard way so you don’t have to. Here’s what I wish someone had told me before my first mummy board.
Don’t overthink the wrapping. I spent way too long trying to make every mummy look identical. They don’t need to match. In fact, the ones that look a little messy are the most charming. Think of them as individual characters at your party.
Use room temperature cream cheese for the eyes. Cold cream cheese doesn’t spread well and won’t hold the olives in place. Let it sit out for 15 minutes before you start. Trust me on this—I lost several olive eyes to cold cream cheese rebellion.
Toast the tortilla strips lightly if you want extra crunch. Lay them on a baking sheet at 350°F for 3-4 minutes before wrapping. This gives the mummies a slightly crispy texture that contrasts nicely with the soft cheese. I skip this step when I’m in a hurry, but it’s a nice touch.
Arrange dips first, then build around them. This is a charcuterie board trick I picked up from food styling blogs. Placing your dip bowls first creates natural anchors for the rest of the arrangement. It prevents that awkward “where do I put the ranch?” scramble at the end.
Don’t forget the salt. Tortillas and string cheese are both relatively mild. A light sprinkle of flaky sea salt over the mummies right before serving makes a surprising difference. It’s one of those little touches that makes people go “hmm, what’s different about this?”
Variations & Adaptations
This board is endlessly flexible. Here are some ways to make it your own.
Gluten-Free Version: Use gluten-free tortillas or large lettuce leaves for the mummy wrappings. Corn tortillas work too, though they’re smaller and stiffer. Just warm them slightly so they’re pliable. For crackers, choose your favorite gluten-free variety.
Dairy-Free Version: Swap the string cheese for dairy-free cheese sticks (they do exist—look for brands like Daiya or Follow Your Heart). Use dairy-free cream cheese for the eye glue. The dips can be dairy-free as well—hummus and dairy-free ranch are easy finds.
Vegetarian Option: Skip the salami and load up on extra veggies, nuts, and cheese. Marinated artichoke hearts, roasted red peppers, and pickled okra add great texture and flavor. You can also add some marinated tofu cubes for protein.
Sweet Tooth Twist: Turn this into a dessert board! Use chocolate-dipped pretzels, marshmallow mummies (wrap marshmallows in fruit roll-up strips), and candy eyeballs. Add fresh strawberries, brownie bites, and a bowl of chocolate dip. It’s a completely different vibe but just as fun.
Spicy Upgrade: Add pickled jalapeños, spicy salami, and a sriracha ranch dip. The heat contrasts beautifully with the cool, mild cheese. I tried this variation for a grown-up Halloween party and it was a hit.
My personal favorite variation: I once made a breakfast version for a Halloween morning playdate. I used pancake strips as the mummy wrappings, cream cheese as the base, and chocolate chips for eyes. Served it alongside a bowl of maple syrup for dipping. The kids lost their minds.
Serving & Storage Suggestions
This board is best served at room temperature, so if you’ve refrigerated it, let it sit out for about 20 minutes before unveiling. The cheese softens slightly, the tortillas relax, and everything just tastes better.
Presentation tips: Arrange your mummies so they’re looking in different directions. It sounds silly, but it gives the board a playful, animated feel. If you have small Halloween-themed picks or flags, tuck them in for extra flair. A few fake spider rings scattered around never hurt anyone.
What to serve alongside: This board pairs beautifully with a warm bowl of creamy New England-style clam chowder for a cozy Halloween dinner. Or keep it light with a fresh Mediterranean chickpea and cucumber salad to balance all the savory snacks. For drinks, apple cider (hot or cold) is a natural fit, but a bold red wine works too.
Storage: Leftover mummy cheese sticks can be stored in an airtight container in the fridge for up to 2 days. The tortillas will soften, but they’re still tasty. Separate the dips from the crackers and veggies to keep everything crisp. The dips themselves last about a week in the fridge.
Reheating: If you want to revive leftover mummies, pop them in a 350°F oven for 3-4 minutes. The tortillas crisp up slightly, and the cheese gets warm and gooey. It’s a different experience but still delicious.
Flavor development note: Honestly, this board is best fresh. The textures are at their peak, the dips are cold and creamy, and the mummies look their cutest. Don’t make it more than a few hours ahead unless you absolutely have to.
Nutritional Information & Benefits
Let’s be real—this is a party snack board, not a health food. But it does have some redeeming qualities.
Estimated values per serving (assuming 6 servings): Approximately 380-420 calories, 22g fat, 35g carbohydrates, 16g protein, 3g fiber, 8g sugar, 780mg sodium. These numbers vary based on your exact ingredients and portions.
Health highlights: String cheese is a good source of calcium and protein. Grapes and cherry tomatoes provide vitamin C and antioxidants. Hummus adds fiber and healthy fats. Even the pretzels offer some iron and B vitamins.
Dietary considerations: This recipe is naturally nut-free if you skip the almonds. It can be made gluten-free and dairy-free with simple substitutions (see variations above). Watch out for added sugars in some crackers and dips.
My personal take: I don’t stress about nutrition at parties. The joy of sharing food with people you care about has its own health benefits. That said, I always include plenty of veggies and fruit on my boards so there’s something for everyone, including those who want lighter options.
Conclusion
Look, I know Halloween entertaining can feel like a lot of pressure. Between costumes, decorations, and trying to keep the kids from eating all the candy before the doorbell rings, the last thing you need is a complicated recipe. This Easy Mummy Charcuterie Board for Halloween Parties is your permission slip to keep it simple.
It’s fun without being fussy. It’s impressive without being stressful. And honestly? It’s the kind of food that makes people happy. Those little mummies with their beady olive eyes—they’re just pure joy on a plate. I’ve made this board for three Halloweens now, and it’s become my party signature. People actually ask me if I’m bringing “the mummy board” again.
So go ahead and make it your own. Swap in your favorite snacks, get creative with the eyes, and don’t worry if your mummies look a little wonky. That’s the whole point. If you make this board, I’d love to hear about it. Drop a comment below and tell me how your mummies turned out—or better yet, tag me in your photos. Happy Halloween, and happy snacking!
Frequently Asked Questions
Can I make the mummy cheese sticks ahead of time?
Yes! You can wrap the cheese sticks in tortilla strips up to 24 hours in advance. Store them in an airtight container in the refrigerator. Add the olive eyes just before serving, as the cream cheese can make the tortillas soggy if left too long.
What can I use instead of olives for the eyes?
Lots of options! Chocolate chips (mini or regular), capers, small pieces of black bean, or even candy eyeballs from the baking aisle all work great. For a sweeter board, use M&M’s or mini chocolate candies.
How many people does this board serve?
This recipe as written serves about 6-8 people as a snack or appetizer. If you’re serving it as a main course for a casual party, figure 4-6 people. It’s easy to double or halve depending on your crowd.
Can I use other types of cheese for the mummies?
Absolutely! Mozzarella string cheese is the classic choice, but cheddar sticks, Colby jack, or even pepper jack (for a spicy kick) work well. Just make sure the cheese is firm enough to hold its shape when wrapped.
What if I don’t have a large serving board?
No problem! Use a baking sheet, a large cutting board, or even a clean countertop lined with parchment paper. You can also arrange everything on multiple smaller plates and cluster them together on the table. The presentation is about the food, not the platter.
Pin This Recipe!
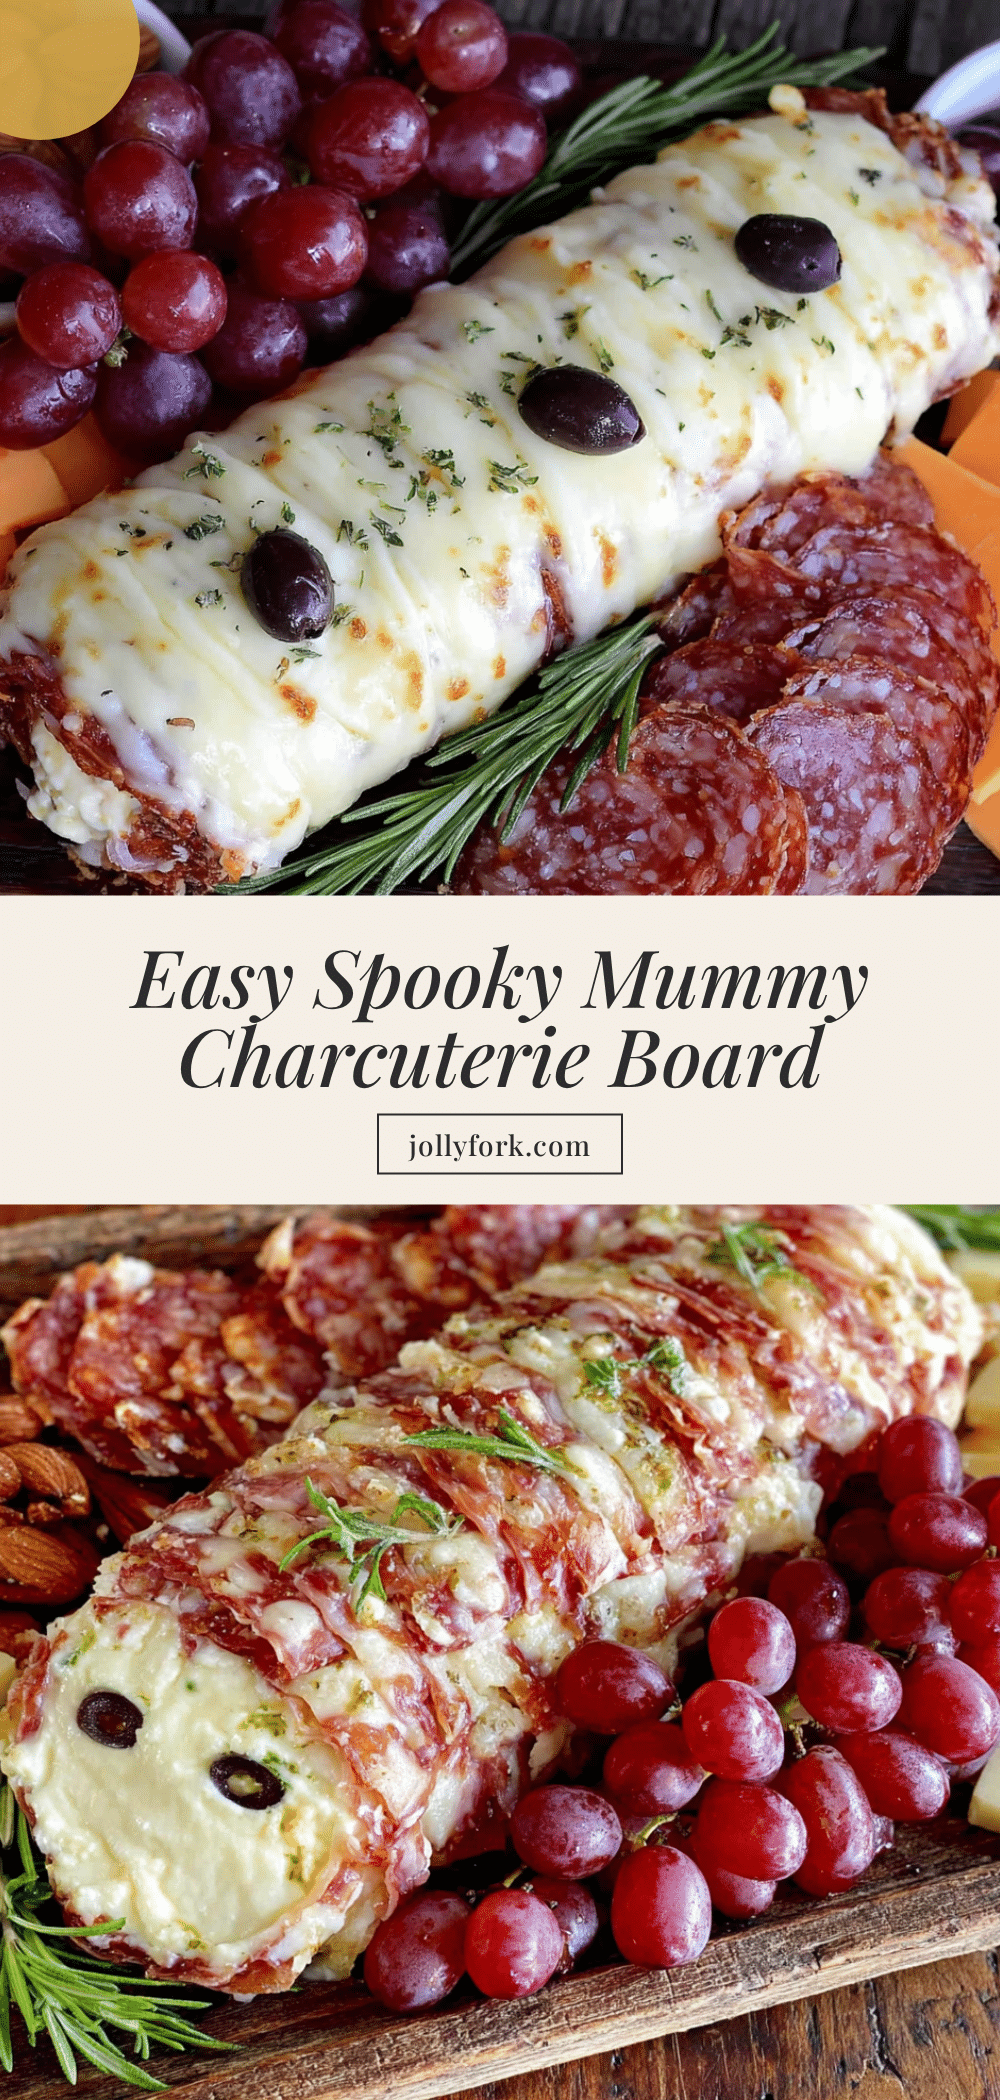
Easy Mummy Charcuterie Board for Halloween Parties
A no-cook Halloween charcuterie board featuring adorable mummy cheese sticks wrapped in tortilla strips with olive eyes, surrounded by savory snacks and dips. Perfect for parties, this board comes together in under 20 minutes and is endlessly customizable.
- Prep Time: 18 minutes
- Cook Time: 0 minutes
- Total Time: 18 minutes
- Yield: 6-8 servings 1x
- Category: Appetizer
- Cuisine: American
Ingredients
- 10–12 string cheese sticks
- 3–4 large flour tortillas, cut into thin strips
- 1/4 cup sliced black olives
- 2 tablespoons cream cheese, softened
- 6 ounces salami or pepperoni slices
- Assorted crackers (buttery rounds and whole wheat squares)
- 1 cup red and green grapes
- 1 cup cherry tomatoes
- 1 cup baby carrots
- 1 cup pretzel sticks
- 1/2 cup ranch dressing
- 1/4 cup honey mustard
- 1/2 cup hummus (plain or roasted red pepper)
Instructions
- Prep the mummy cheese sticks: Cut flour tortillas into thin strips, about 1/2 inch wide and 3-4 inches long. Unwrap all string cheese sticks.
- Wrap the mummies: Take one tortilla strip and wrap it around a cheese stick, starting at one end and working your way down. Leave a small gap near the top for eyes. Wrap loosely for a bandage-like look. Repeat with remaining cheese sticks.
- Add the eyes: Dab a small amount of cream cheese where each eye should go. Press a sliced olive half onto each dab of cream cheese to secure.
- Arrange the board: Place small bowls of dip on the board first to create natural sections. Arrange mummy cheese sticks in a cluster near the center or along one edge as the focal point.
- Fill in the gaps: Place crackers, salami rolls, grapes, cherry tomatoes, baby carrots, and pretzel sticks around the mummies in small groupings. Leave some negative space.
- Add final touches: Sprinkle extra olive slices around. Optionally tuck in fresh rosemary sprigs for a graveyard vibe or scatter whole almonds like little bones.
- Serve immediately or refrigerate: Board can sit at room temperature for up to 2 hours. If making ahead, cover with plastic wrap and refrigerate for up to 4 hours. Remove 20 minutes before serving.
Notes
Wrap mummies loosely for best appearance—tight wrapping makes them look like burritos. Use room temperature cream cheese for the eyes to prevent olives from falling off. For extra crunch, lightly toast tortilla strips at 350°F for 3-4 minutes before wrapping. Arrange dip bowls first to anchor the board layout. Leftover mummy cheese sticks can be stored in an airtight container in the fridge for up to 2 days; tortillas will soften. Reheat in a 350°F oven for 3-4 minutes to crisp up.
Nutrition
- Serving Size: 1 serving (based on
- Calories: 400
- Sugar: 8
- Sodium: 780
- Fat: 22
- Saturated Fat: 8
- Carbohydrates: 35
- Fiber: 3
- Protein: 16
Keywords: Halloween charcuterie board, mummy cheese sticks, Halloween appetizer, easy Halloween snack, no-cook Halloween recipe, party platter, spooky snack board


