The smoke detector went off at 3:47 PM. My seven-year-old stood in the kitchen doorway, still in her mermaid costume from the school parade, holding a bag of hot dog buns like a trophy. The living room looked like a craft store had exploded, and I had exactly twenty minutes before the first trick-or-treaters showed up. That’s when I remembered the crescent roll dough in the fridge, the hot dogs in the freezer, and the tiny candy eyes I’d bought for cupcakes I never made.
These easy mummy-wrapped Halloween hot dogs were born from that beautiful chaos. They weren’t planned, they weren’t Pinterest-perfect, but honestly? They ended up being the thing everyone remembered. Not the store-bought cookies or the candy bowls, but these silly little mummies with their crooked eyes and uneven bandages.
What I love most about this recipe is how it turned a frantic afternoon into something genuinely fun. My daughter stood on a step stool, pressing those tiny eyes into dough, and for fifteen minutes, there was no rushing, no stress, just the two of us making mummies. That’s the thing about this snack—it’s not just food, it’s a moment.
If you’re looking for a Halloween snack that doesn’t require culinary school, patience, or even a clean kitchen, these mummy hot dogs are it. They’re ridiculous in the best way, and I promise, the first time someone takes a bite and sees that hot dog peeking out from under the dough, they’ll smile.
Why You’ll Love This Recipe
I’ve tested this recipe more times than I care to admit. The first batch? The dough unraveled into a sad pile of cooked crescent strips. The second batch burned on the bottom. But by round three, I had it dialed in, and now I’m sharing everything I learned so you skip the trial and error.
- Ready in 20 Minutes: From fridge to table in the time it takes to hand out candy to a few early visitors. No marinating, no chilling, no complicated prep.
- Just 3 Main Ingredients: Hot dogs, crescent roll dough, and candy eyes. That’s it. You probably already have everything except the eyes, and those are at any grocery store right now.
- Perfect Halloween Party Food: These disappear fast at parties, and they’re easy to grab with napkins. No forks needed, no mess, just pure snack satisfaction.
- Kid-Approved and Adult-Friendly: My husband ate six of them standing over the counter. My daughter’s friends asked for the recipe. Even my mom, who claims she’s too old for Halloween, had two.
- Customizable and Foolproof: You can swap in turkey dogs, use gluten-free dough, add cheese, or go wild with dipping sauces. The base recipe works every time.
What sets these apart from other Halloween snacks is the texture. The crescent dough gets golden and flaky on the outside while staying soft around the hot dog. The candy eyes add this ridiculous charm that makes everyone laugh. And the best part? They actually taste good. Not just cute, not just fun, but genuinely delicious.
This is the kind of recipe that makes you look like a Halloween hero without actually trying that hard. And honestly, isn’t that what we all want?
What Ingredients You Will Need
This recipe uses simple, everyday ingredients, which is exactly why it works so well for busy Halloween nights. No specialty items, no hunting down obscure products, just stuff you can grab at any grocery store.
- Hot Dogs: Standard-sized beef or pork hot dogs work best. I prefer all-beef for better flavor, but any brand will do. Avoid jumbo-sized or extra-long hot dogs because they throw off the dough-to-meat ratio. If you want to go healthier, turkey or chicken hot dogs work fine, though they’re slightly less juicy. (I’ve used these mini corn dog muffins approach with cocktail sausages too, and it’s adorable.)
- Crescent Roll Dough: One 8-ounce can of refrigerated crescent roll dough gives you eight triangles. For a full batch of eight mummies, you’ll need two cans. I recommend Pillsbury for consistency, but store brands work too. The key is keeping the dough cold until you’re ready to work with it, warm dough gets sticky and hard to cut.
- Candy Eyes: Those little white and black frosting eyes you find in the baking aisle. They come in packs of about 50 and cost around two dollars. You’ll use two per mummy, so one pack is plenty. If you can’t find them, use small dots of mustard or ketchup, or even black sesame seeds for a less sugary option.
- Egg Wash: One large egg beaten with a tablespoon of water. This gives the dough that gorgeous golden-brown shine. If you don’t want to use eggs, brush with milk or melted butter instead, it won’t be as shiny, but it’ll still look good.
- Optional Toppings: Everything bagel seasoning adds a savory crunch. Poppy seeds or sesame seeds work too. For dipping, I love ketchup, mustard, and this simple cheese sauce I make by melting cheddar with a splash of milk.
Ingredient Selection Tips: Look for hot dogs that are uniform in size so they cook evenly. If you’re using frozen hot dogs, thaw them completely and pat them dry before wrapping. Wet hot dogs make the dough soggy, and nobody wants a sad, damp mummy.
Substitution Guidance: For a gluten-free version, use gluten-free crescent dough or puff pastry sheets cut into strips. For a vegetarian option, use plant-based hot dogs or cheese sticks wrapped the same way. I’ve even made these with mozzarella string cheese for a gooey, melty version that my kids called “cheese mummies.”
Equipment Needed
You don’t need fancy equipment for this recipe. That’s the beauty of it. But having the right tools makes the process smoother, especially when you’re juggling hungry kids and a doorbell that won’t stop ringing.
- Baking Sheet: A standard half-sheet pan works perfectly. Line it with parchment paper or a silicone baking mat for easy cleanup. Trust me, you don’t want to scrape baked-on dough off a greasy pan.
- Sharp Knife or Pizza Cutter: A pizza cutter makes slicing the crescent dough into strips incredibly easy. A sharp chef’s knife works too, but a pizza cutter is faster and gives cleaner edges. I learned this the hard way after using a butter knife and ending up with ragged strips.
- Pastry Brush: For applying the egg wash. A silicone brush is easy to clean, but a regular bristle brush works fine. In a pinch, you can use a folded paper towel, though it won’t be as even.
- Small Bowl: For the egg wash. Nothing fancy, just something to whisk it in.
- Tongs: For moving the hot mummies from the baking sheet to a serving platter without burning your fingers. I speak from experience, those little guys hold heat.
Budget-Friendly Options: If you don’t have a pizza cutter, use kitchen scissors. They actually work really well for cutting dough strips. No pastry brush? Use a clean paintbrush from your kid’s art supplies (just make sure it’s never been used with paint). No parchment paper? Grease the baking sheet with butter or cooking spray, though cleanup will be a bit more work.
Preparation Method
Let’s get to the fun part. This recipe moves fast, so read through everything once before you start. Trust me, you don’t want to be hunting for candy eyes while your dough strips are turning into a sticky mess on the counter.
- Preheat the oven to 375°F (190°C). Line a baking sheet with parchment paper. This is non-negotiable, the parchment makes cleanup so much easier, and it prevents the bottoms from burning.
- Prepare the hot dogs. Pat each hot dog dry with a paper towel. This helps the dough stick better. If your hot dogs are curved, don’t worry about it, mummies don’t have to be perfectly straight. In fact, slightly crooked ones look more authentic.
- Unroll the crescent dough. Open the can carefully (you know the pop sound, brace for it). Unroll the dough and separate it along the perforated lines into eight triangles. Press the seams together gently to seal any gaps.
- Cut the dough into strips. Using a pizza cutter or sharp knife, cut each triangle lengthwise into three long strips. You want them about half an inch wide. Don’t worry if they’re not perfectly even, uneven bandages look more mummy-like anyway. You should have 24 strips total from one can.
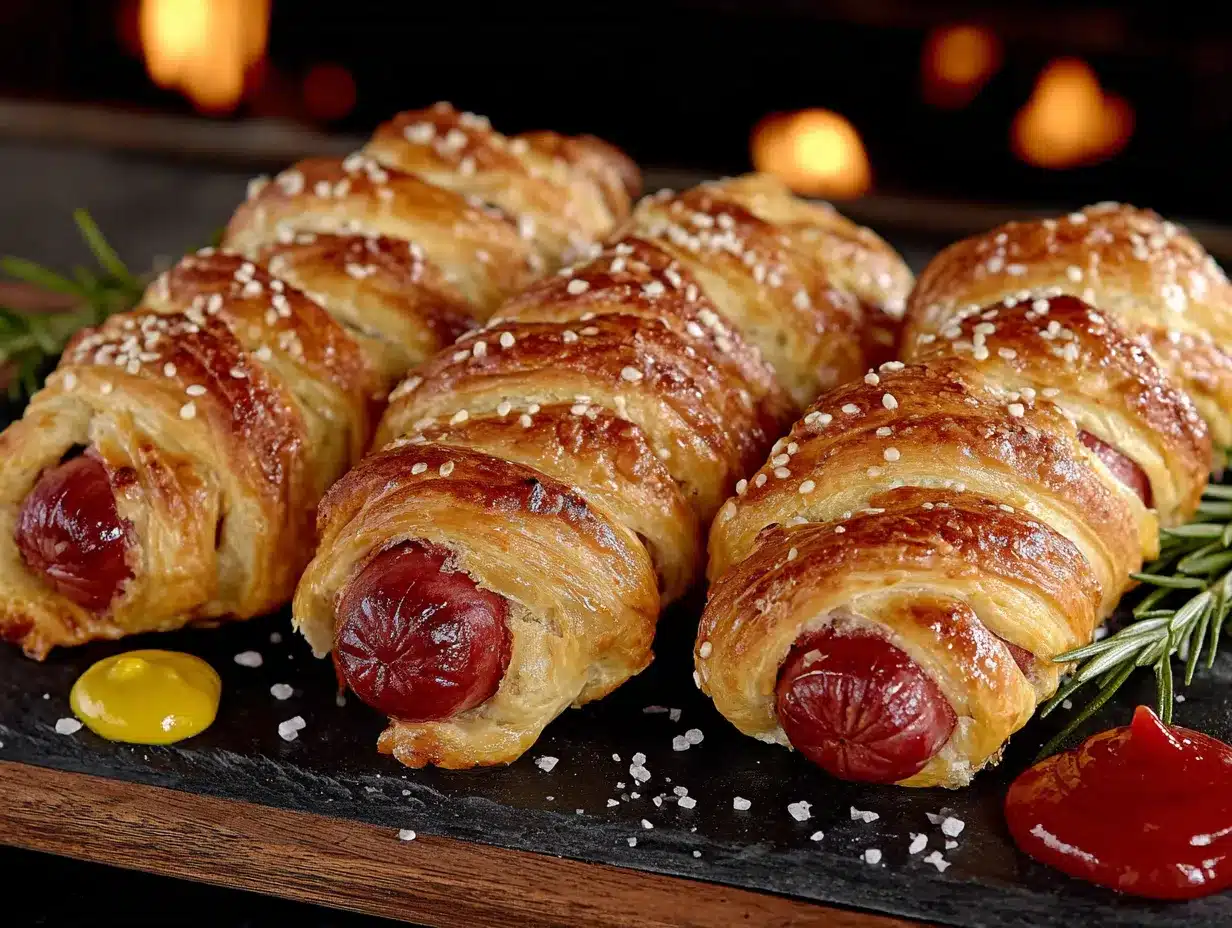
- Wrap the mummies. Take a hot dog and start wrapping a strip of dough around it, starting at one end and working your way to the other. Leave a small gap at the top for the face. Overlap the strips slightly as you go, this creates the bandaged look. Don’t wrap too tightly, the dough needs room to expand as it bakes. Repeat with all eight hot dogs from one pack.
- Place on the baking sheet. Arrange the wrapped hot dogs on the prepared sheet, leaving about an inch of space between each one. They won’t spread much, but they need a little breathing room for even browning.
- Apply the egg wash. In a small bowl, beat the egg with a tablespoon of water until smooth. Brush this mixture lightly over the exposed dough on each mummy. Don’t soak it, just a thin, even coat. This gives them that beautiful golden color.
- Bake for 12-15 minutes. Place the sheet in the preheated oven and bake until the dough is golden brown and the hot dogs are heated through. At 12 minutes, check them. You’re looking for a light golden color, not deep brown. The dough should look flaky and puffed.
- Add the eyes. Remove the baking sheet from the oven and let the mummies cool for about 2 minutes. While they’re still warm but not hot, press two candy eyes into the exposed hot dog at the top of each mummy. The warmth helps them stick. If you wait until they’re completely cool, the eyes might fall off.
- Serve immediately. Transfer the mummies to a serving platter and watch them disappear. They’re best eaten within 15 minutes of coming out of the oven while the dough is still flaky and the hot dog is warm and juicy.
Sensory Cues: When the dough is properly baked, it should be golden brown on the surface and puffed up slightly. If you tap the top, it should sound hollow. The hot dog inside should be steaming when you bite into it. If the dough looks pale or feels soft, give it another minute or two in the oven.
Troubleshooting Tip: If the dough starts unraveling during baking, you wrapped it too loosely. Next time, press the end of each strip gently against the dough beneath it to seal it. A little dab of water helps the dough stick to itself.
Cooking Tips & Techniques
I’ve made these mummy hot dogs at least a dozen times now, and I’ve collected a few tricks that make the process smoother and the results better.
Keep the dough cold. This is the most important tip I can give you. Crescent dough gets sticky and hard to work with when it warms up. If your kitchen is warm, pop the dough in the fridge for 10 minutes before you start cutting strips. If the dough starts sticking to your fingers while you’re wrapping, put it back in the fridge for a few minutes.
Don’t overwork the dough. The more you handle crescent dough, the tougher it gets. Cut your strips quickly and wrap with a light touch. The goal is flaky, tender bandages, not tough, chewy ones.
Space the strips evenly. When you’re wrapping, try to keep the gaps between strips roughly the same size. This isn’t about perfection, it’s about even cooking. Thin spots in the dough will brown faster, thick spots might stay pale.
Watch the oven closely. Every oven runs differently. My friend’s oven bakes these in exactly 11 minutes, mine takes 14. Start checking at the 10-minute mark. The difference between perfectly golden and burnt is about 60 seconds with these little guys.
My biggest failure: The first time I made these, I used jumbo hot dogs and tried to stretch the dough to cover them. The dough tore, the hot dogs stuck out in weird places, and the whole thing looked like a horror movie version of a mummy. Stick with standard-sized hot dogs, it’s not worth the hassle.
If you’re making a big batch for a party, you can assemble the mummies ahead of time and keep them in the fridge for up to 4 hours before baking. Just cover them loosely with plastic wrap so the dough doesn’t dry out. Add the eyes after baking, not before, or they’ll melt and look like sad, blurry faces.
Variations & Adaptations
One of the best things about this recipe is how easy it is to change up. Here are some variations I’ve tried and loved.
Cheese-Stuffed Mummies: Before wrapping, cut a slit lengthwise into each hot dog and stuff it with a strip of cheddar or mozzarella cheese. The cheese melts inside as the mummy bakes, and you get this amazing gooey center. My kids went absolutely crazy for this version.
Spicy Mummies: Brush the hot dogs with sriracha or hot sauce before wrapping. You can also sprinkle red pepper flakes over the egg wash before baking. This version is great for adults who want a little heat with their Halloween snack.
Vegetarian Mummies: Use plant-based hot dogs or even carrot dogs (carrots marinated in soy sauce and liquid smoke, then roasted). The wrapping technique is exactly the same, and the result is surprisingly convincing.
Breakfast Mummies: Swap the hot dogs for breakfast sausages and use the same wrapping technique. Serve with maple syrup for dipping. I made these for a Halloween morning breakfast, and they were a huge hit with the kids.
Dessert Mummies: This is a weird one, but trust me. Use cinnamon roll dough instead of crescent dough, wrap it around bananas or apple slices, and bake as directed. Drizzle with the included icing after baking and add candy eyes. It’s ridiculous and delicious.
Air Fryer Version: Cook at 350°F (175°C) for 8-10 minutes, flipping halfway through. The air fryer gives the dough an extra-crispy texture that’s honestly better than the oven version. Just don’t crowd the basket, work in batches if needed.
For a fun Halloween party spread, serve these alongside some spider web black sesame shortbread cookies for a spooky sweet-and-savory combo that everyone will love.
Serving & Storage Suggestions
These mummy hot dogs are best served warm, right after the eyes go on. The contrast between the hot, flaky dough and the cool candy eyes is part of the fun. Arrange them on a platter with a bowl of ketchup in the center and mustard drizzled in a zigzag pattern around the edges.
What to serve with them: These pair perfectly with a bowl of creamy roasted cherry tomato basil bisque for dipping, or a side of crispy potato wedges. For a full Halloween spread, add some savory giant skillet queso fundido with chips on the side.
Storage: If you have leftovers (unlikely, but possible), store them in an airtight container in the refrigerator for up to 3 days. The dough will soften as it sits, so they won’t be as crispy as fresh ones.
Reheating: The best way to reheat these is in the oven at 350°F (175°C) for 5-7 minutes. The air fryer works too, 3 minutes at 350°F. Skip the microwave unless you’re desperate, it makes the dough rubbery and the hot dog soggy.
Freezer instructions: You can freeze the unbaked mummies on a baking sheet until solid, then transfer them to a freezer bag. Bake from frozen, adding 3-5 minutes to the baking time. Add the eyes after baking. This is a great make-ahead option for Halloween parties.
One thing I’ve noticed is that these actually taste better after they’ve sat for about 5 minutes. The flavors settle, the dough relaxes, and the hot dog steams itself perfectly inside the wrapper. So don’t stress if you need to let them rest before serving.
Nutritional Information & Benefits
Let’s be real, these are not health food. They’re Halloween party snacks, and they’re meant to be fun. But if you’re curious about what’s in them, here’s the breakdown.
Per serving (one mummy hot dog):
- Calories: 220-260 (depends on hot dog brand)
- Protein: 8-10 grams
- Carbohydrates: 18-22 grams
- Fat: 12-16 grams
- Sodium: 500-700 mg
Health benefits (yes, there are some): Hot dogs are a decent source of protein, and if you choose turkey or chicken dogs, you’ll cut the fat and calories significantly. The crescent dough provides carbohydrates for quick energy, which is perfect for kids running around on Halloween night.
Dietary considerations: This recipe contains gluten (from the crescent dough), dairy (if you use the egg wash), and is not suitable for vegans. For gluten-free, use gluten-free crescent dough. For dairy-free, skip the egg wash and brush with olive oil instead. For lower sodium, choose reduced-sodium hot dogs.
Potential allergens: Wheat, eggs, milk (if using egg wash), and soy (often in hot dogs). Check your hot dog labels carefully if allergies are a concern.
I’m not going to pretend these are a health food, but I do believe in balance. On Halloween, a couple of these mummy dogs are part of the fun. Pair them with some apple slices or carrot sticks if you want to feel better about it, or just enjoy them as they are. Life’s too short to stress about a once-a-year treat.
Conclusion
These easy mummy-wrapped Halloween hot dogs are the kind of recipe that makes you feel like a kitchen hero without actually working that hard. They’re fun, they’re fast, and they taste genuinely good. Not just “cute for Halloween” good, but actually, legitimately delicious.
I love that this recipe brings people together. Whether it’s kids helping wrap the dough or adults laughing at the crooked-eyed mummies on the platter, there’s something about these little guys that makes everyone smile. And honestly, that’s what Halloween is really about, isn’t it? Not the perfect costumes or the elaborate decorations, but the simple moments of joy shared with the people you love.
So go ahead, grab some hot dogs and crescent dough, and make a batch of mummies. Don’t worry if they’re not perfect, the wonky ones are always the most charming. And when someone takes that first bite and grins at you with dough flakes on their chin, you’ll know exactly why this recipe is worth making.
If you try these, I’d love to hear about it. Drop a comment below and tell me how your mummies turned out, what variations you tried, or how many your kids managed to eat before the sugar crash hit. Happy Halloween, and happy snacking!
Frequently Asked Questions
Can I make these mummy hot dogs ahead of time?
Yes! Assemble the mummies completely (without the eyes) and store them in the fridge for up to 4 hours before baking. Add the eyes after they come out of the oven. You can also freeze the unbaked mummies for up to 3 months.
What if I can’t find candy eyes?
No problem! Use small dots of mustard or ketchup for eyes. You can also use black sesame seeds, tiny pieces of olive, or even draw eyes on with a food-safe marker. The mummies will still look adorable.
Can I use puff pastry instead of crescent dough?
Absolutely. Thaw the puff pastry, cut it into strips, and wrap the same way. Puff pastry gives a flakier, more buttery result. Just note that it might take an extra minute or two in the oven to get fully golden.
How do I keep the dough from unraveling?
Press the end of each dough strip gently against the layer beneath it to seal. A tiny dab of water helps the dough stick to itself. Also, make sure you’re not wrapping too tightly, tight wrapping causes the dough to pull apart as it bakes.
Can I make these in an air fryer?
Yes! Cook at 350°F (175°C) for 8-10 minutes, flipping halfway through. The air fryer gives an extra-crispy exterior. Just don’t overcrowd the basket, leave space between each mummy for proper air circulation.
Pin This Recipe!

Easy Mummy Hot Dogs: Best Halloween Snack in 20 Minutes

These easy mummy-wrapped Halloween hot dogs are a fun, fast, and delicious snack made with just 3 main ingredients. Perfect for busy Halloween nights, they’re kid-approved and adult-friendly, ready in 20 minutes from fridge to table.
- Prep Time: 10 minutes
- Cook Time: 12-15 minutes
- Total Time: 20-25 minutes
- Yield: 8 servings 1x
- Category: Appetizer
- Cuisine: American
Ingredients
- 8 standard-sized beef or pork hot dogs (or turkey/chicken hot dogs)
- 2 cans (8 ounces each) refrigerated crescent roll dough (e.g., Pillsbury)
- 16 candy eyes (or small dots of mustard/ketchup, black sesame seeds)
- 1 large egg (for egg wash)
- 1 tablespoon water (for egg wash)
- Optional: Everything bagel seasoning, poppy seeds, sesame seeds, ketchup, mustard, cheese sauce for dipping
Instructions
- Preheat the oven to 375°F (190°C). Line a baking sheet with parchment paper.
- Pat each hot dog dry with a paper towel to help the dough stick.
- Unroll the crescent dough and separate along perforated lines into eight triangles. Press seams gently to seal.
- Using a pizza cutter or sharp knife, cut each triangle lengthwise into three long strips (about 1/2 inch wide). You should have 24 strips total from one can.
- Take a hot dog and start wrapping a strip of dough around it, starting at one end and working to the other. Leave a small gap at the top for the face. Overlap strips slightly for a bandaged look. Don’t wrap too tightly. Repeat with all hot dogs.
- Place wrapped hot dogs on the prepared baking sheet, about 1 inch apart.
- In a small bowl, beat the egg with 1 tablespoon of water until smooth. Brush a thin, even coat over the exposed dough on each mummy.
- Bake for 12-15 minutes, until the dough is golden brown and puffed, and hot dogs are heated through. Check at 12 minutes.
- Remove from oven and let cool for about 2 minutes. While still warm, press two candy eyes into the exposed hot dog at the top of each mummy.
- Serve immediately. Best eaten within 15 minutes of baking.
Notes
Keep dough cold for easier handling. If dough starts sticking, refrigerate for 10 minutes. For even cooking, space strips evenly. Start checking oven at 10 minutes to prevent burning. Add eyes after baking, not before, or they will melt. Assemble ahead and refrigerate up to 4 hours before baking. Freeze unbaked mummies for up to 3 months.
Nutrition
- Serving Size: 1 mummy hot dog
- Calories: 240
- Sugar: 4
- Sodium: 600
- Fat: 14
- Saturated Fat: 5
- Carbohydrates: 20
- Protein: 9
Keywords: Halloween snack, mummy hot dogs, easy Halloween recipe, kid-friendly, party food, crescent roll hot dogs, 20-minute recipe


